Category: Bread

Flat Bread (not Flatbread)

February 4, 2010

IMG_4576

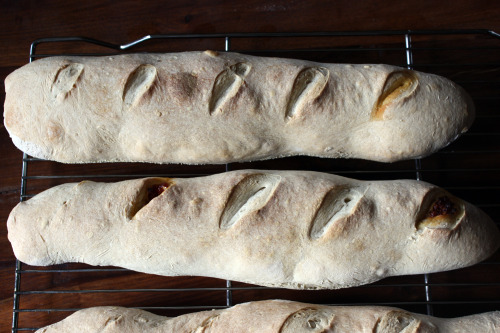
If I happened upon this blog and saw this photo, I would assume it was biscotti.  You know, when you take the log from the oven to start slicing it into cookies.  It is not biscotti; it is bread.  Bread that did very little rising.  Why?  I’m really not sure.  This is why people are afraid to work with yeast.  Yeast can be mysterious.  I have a feeling that it just wasn’t warm enough in my kitchen for it to do its thing.  Usually when I am baking bread, I turn on my oven to a very low heat and then turn it off and prop the door open for a minute or two.  That nice little warm haven is perfect for rising dough.  I skipped that step this time.

Why am I sharing a recipe for flat bread that is not supposed to be flat?  Simple.  It tasted really good.  Like if it had risen appropriately, I might have found my perfect bread.  I am a total sucker for olives and absolutely love them in bread.  For this particular recipe, you make a Biga starter which is nothing more than some flour, yeast, and water.  You will have more starter than you need for one loaf, so why not double the bread recipe and make two?  Put one in the freezer and one on your table.  And if yours rises, send me a photo.

IMG_4579

One Year Ago: Roasted Orange Pepper Soup

Olivetta Loaf

Macrina Bakery and Café Cookbook
Makes 1 oval loaf

The recipe originally suggests you bake this bread on a pizza stone.  I found the dough so wet and sticky that I would have been unable to get it onto the stone.  It also suggests you do a final shaping step that I was also unable to do due to stickiness.  Just keep your flour handy, do what I did, and the bread will taste great.

5 ounces Traditional Biga Starter (recipe follows)
1 cup water, at room temperature
¼ tsp. dried yeast
2¾ cups all-purpose flour
1/3 cup olive oil
1 tsp. chopped fresh rosemary
1 tsp. chopped fresh oregano
2 tsp. kosher salt
¾ cup green olives, pitted and halved

Combine starter, water, and yeast in the bowl of a stand mixer.  Using the paddle attachment, mix on low speed for 1 minute.  Add flour, ¼ cup of the olive oil, herbs, and salt, and mix on low speed until ingredients are combined.  Switch to the dough hook attachment and mix on medium speed for about 10 minutes.  Dough will start forming a ball around the hook.

This dough is quite wet, so give your hands a generous dusting of flour before working with it.  Pull dough from bowl on to a floured surface and form into a 6 x 10-inch rectangle, positioning dough so that a short end is facing you.  Sprinkle olives over entire surface of dough.  Starting with the closest end, roll dough away from you into a log.  Make sure log is resting on its seam, then fold the ends underneath to form a loosely shaped ball.  Place ball of dough in an oiled medium bowl and cover with plastic wrap.  Let proof in a warm room, 70 to 75°, for 2 to 2½ hours.  Dough should double in size.

Pull dough from bowl onto a floured surface and gently flatten it with your hands to release excess air.  Form flattened dough into an oval shape by folding the left and right sides onto the top.  Place loaf, seam side up, on a very well floured floured rimmed baking sheet.  Sprinkle top of loaf with flour and cover with a dish towel to keep it from drying out.  Let proof in a warm room for about 1½ hours.  Loaf will rise slightly and be soft to the touch.

While loaf is proofing, preheat oven to 385°F.

Uncover dough dimple lightly with your fingers, and place baking sheet in oven.  Bake for about 45 minutes.  The finished loaf will have a reddish brown color and will sound hollow when tapped on the bottom.  Let loaf cool on a wire rack for about 20 minutes, then brush top with more olive oil.

Traditional Biga Starter
Makes approximately 2½ pounds of starter

2 cups water, at room temperature
1½ tsp. dried yeast
2½ cups flour

Pour water into a medium bowl and sprinkle yeast on top.  Mix with a whisk until all lumps are dissolved.  Add flour and mix with whisk until smooth, about 3 mintues.  Place uncovered bowl in a warm room, 70 to 75°, and let sit for 2 to 3 hours.  Bubbles will appear on the surface of the biga.

Cover the bowl with plastic wrap and transfer to the refrigerator for at least 6 hours.  It is during this time that the starter will truly develop its flavor.  Bigas can be stored in the refrigerator for up to 4 days.  So it does not taste too sour, it is best to use it within 2 days.


Yogurt Flatbread (Naan)

November 19, 2009

IMG_3860

If you don’t own Deborah Madison’s Vegetarian Cooking for Everyone, I would highly recommend you put it on your holiday list.  The book is ten years old but it has recently been re-issued for its’ anniversary.  Whether you are vegetarian, vegan, meat-eating, or gluten-free, you will find untold treasures in this book.  It’s the one book I would bring to a desert island without question.

I’ve used it countless times in the past but seeing as it houses about 1,400 recipes, there are so many amazing recipes still waiting to be discovered.  A few months ago Ele posted about Ms. Madison’s Naan recipe and somewhere in my clouded foggy mommy brain, I filed it away for the next time I made a curry.  It is a testament to her post (and to her lovely blog in general) that I actually only remembered it.  I received some collard greens in our CSA box last week and decided to make a favorite – Peanut Curry.

As is often the case when I am about to make bread, I took a look at the recipe and almost punted.  I don’t know what it is about bread baking that sometimes seems so onerous to me.  I certainly cook and bake things that take a lot more work.  If I hadn’t been bringing dinner to a friend in need, I probably would never had made this naan and that would have been a shame.  Friends, this is sooo good.  And sooo easy.

A few notes.  Ele said she always grills hers.  I neglected to file away that fact in my clouded foggy mommy brain and now can’t wait to make it again so I can try it grilled.  Instead I followed Madison’s instructions and used a pizza stone.  Still awesome.  I bought both the wheat bran and ghee called for in the recipe because I have a grocery store nearby where those things are easily found.  I’m sure you could substitute butter (I would melt it and cool it slightly – or you can make your own ghee) and whole wheat flour for the wheat bran.  Finally, you must brush each bread with a little melted butter and sprinkle it with sea salt when it comes out of the oven.  Sublime.

IMG_3858

One Year Ago:  Giant Chocolate-Toffee Cookies

Yogurt Flatbread (Naan)
Adapted from Vegetarian Cooking for Everyone
Makes 8 to 10 small breads

1/4 cup warm water
2 1/4 tsp. (1 envelope) active dry yeast
3/4 cup hot water
3/4 cup yogurt, preferably whole milk (DT: I used low fat)
1/4 cup or clarified butter
1 1/2 tsp. salt
1 cup whole-wheat flour
1/4 cup wheat bran
3 cups all-purpose or bread flour
1/2 stick butter, melted
Sea salt

Sprinkle the yeast over 1/4 cup warm water in a small bowl and set aside until foamy, about 10 minutes.  Meanwhile, combine 3/4 cup hot water, the yogurt, ghee, and salt in a bowl , then stir in the yeast, whole-wheat flour, and bran.  Work in enough white flour to form a heavy smooth dough, then turn it out and knead, adding more flour if needed, until smooth but slightly tacky.  Put the dough in a n oiled bowl, turn it to coat the top, then cover and put in a warm place until doubled in bulk, about 1 hour.

Preheat the oven to 450°F with a pizza stone or a sheet pan on the bottom rack of the oven.  Turn out the dough onto a lightly floured counter and divide into 8 or 10 pieces.  Roll them into balls, cover wtih a towel, and let rest for 10 minutes.

Here are two options for shaping the dough:

1.  Pat the dough into a circle using your fingertips to dimple it all over.  Then gently pull it in opposite directions to make a dimpled oblong.  The texture will be uneven, providing crisp and bready parts.  Place right on the baking stone or hot sheet pan and bake until browned on top, 12 to 15 minutes.

2.  Pat or roll the dough into a circle about 1/4 inch thick.  Make five short knife cuts, radiating from the center like a sand dollar, then transfer to the baking stone and bake until browned.

(DT: I shaped my breads using option #2.  I was able to bake two at a time on my stone.  As each pair came out of the oven, I brushed the tops with melted butter and sprinkled them liberally with sea salt.)


Some of the Best Bread You Will Ever Eat

October 27, 2009

IMG_3590

Everyone who is afraid of making bread, please raise your hand.

Well, I wish I could see you and then I wish I could come into your kitchen, hold your hand, and make this bread with you.  There are a few reasons for this.  One, after my experience last week, I’d love to meet more people who read this blog.  Two, I would like to help dispel the myth that bread is scary and hard to make.  Three, I would love to share the joy and wonder that is bread baking.  And four, maybe you would let me take some of the bread home because mine is all gone.

IMG_3589

I know – yeast.  Eeeek!  But it does. not. have. to. be. so!  I have made this bread countless times and it always turns out perfectly.  It has nothing to do with my experience or any kind of “magic” – it’s just a terrific recipe and it’s easy.  Really.

The one thing you will need here is time.  This bread has four rising times, the longest being two hours and the shortest being ten minutes. The process will take five hours from beginning to end but almost all of that is rising time.  Your hands-on time (like with most bread) is maybe half an hour and even that is split into small increments.  Take advantage of one of those rainy days where you are just home and take the leap.  Maybe you are also making a big pot of soup or a lasagna or something that is going to keep you in the kitchen for a few hours.  The dough will keep you company while you work.

IMG_3653

And at the end of it all you get two gigantic loaves of the most fragrant, soft yet dense, and slightly sweet bread you can imagine.  It freezes incredibly well so you can enjoy one loaf and save the other for another time.  My very favorite way to eat it is completely plain – it’s that good.  But it also makes terrific french toast, bread pudding and grilled goat cheese sandwiches which you then serve with homemade Tomato and Leek soup.  Recipe for that one coming soon.

A couple of notes.  I use my Kitchen Aid mixer to make this dough.  I use the paddle attachment to mix everything together, and about halfway through adding the flour, I switch to the dough hook.  Once all the flour is added (and I think 6 cups is just about spot-on), I let it mix for about 5 minutes.  Dough that is sufficiently kneaded should feel like your ear lobe. A perfect place to let your dough rise is in the oven.  Turn it on to it’s lowest setting and then turn it off after just a few minutes.  Just that little bit of heat (plus no draft) will make it nice and cozy in there.  When you need to heat the oven to bake the bread, place the loaves on the stovetop where they will still get residual heat.

IMG_3598

Braided Challah
Adapted from Food and Wine
Makes 2 large loaves

2 packages active dry yeast
1/2 cup lukewarm water (about 110°)
1/3 cup sugar, plus a pinch
1 stick (4 ounces) unsalted butter, thinly sliced, plus 2 tablespoons, melted
1 cup milk
1 tbsp. honey
2 1/2 tsp. salt
4 large eggs, at room temperature
About 6 cups bread flour
1 large egg plus 1 large egg yolk and 1 tbsp. water

1.  In a small bowl, dissolve the yeast in the lukewarm water with the pinch of sugar and let stand until creamy and starting to bubble.  In a medium saucepan, combine the sliced butter and the milk.  Warm over low heat just until the butter melts. Stir in the remaining 1/3 cup of sugar and the honey and slat.  Pour the milk mixture into a large bowl and stir in the dissolved yeast and the 4 eggs.

2.  Stir in just enough of the flour, 1/2 cup at a time, to form a dense dough that doesn’t stick to the side of the bowl.  Turn the dough out onto a lightly floured surface and knead until smooth and elastic, adding only as much flour as necessary to keep the dough from sticking.

3.  Brush a large bowl with 1 1/2 tablespoons of the melted butter.  Transfer the dough to the buttered bowl and brush the top with the remaining 1/2 tablespoon of melted butter.  Cover the bowl with plastic wrap and a kitchen towel and let rise in a warm, draft-free spot until the dough is doubled in bulk, about 2 hours.

4.  Punch down the dough, then cover and let rise again until doubled in bulk again, about 1 1/4 hours.

5.  Line 2 large rimmed baking sheets with parchment paper.  On a lightly floured surface, divide the dough in half.  Cover one half with plastic wrap and divide the other half into  3 equal pieces.  Using lightly floured hands, roll each piece into a 10-inch long rope with tapered ends.

6.  Arrange the 3 ropes side by side pointing toward you and just touching.  Starting in the middle and working toward your body, braid the ropes together, bringing the outside ropes over the center one.  Pinch the ends to seal and tuck them under.  Turn the loaf around and repeat with the other half, this time braiding the outer ropes under the center one.  Seal the ends, tuck them under and transfer the loaf to a prepared baking sheet; gently plump the loaf with your hands.  Repeat with the remaining dough.  Cover the loaves with kitchen towels and let rise for 35 minutes.

7.  Preheat the oven to 375°F.  Mix the remaining egg, egg yolk, and tablespoon of water together to make a glaze.  Brush the loaves with the egg glaze.  Let stand uncovered for 10 minutes, then brush again with the glaze.  Bake the loaves in the upper and lower thirds of the oven, switching the pans halfway through baking, for 35-45 minutes, or until they are golden, feel light when lifted and sound hollow when tapped on the bottom.  Loosely cover the loaves with foil if they become too brown during baking.  Transfer to a rack and let cool thoroughly before slicing.


Holly B’s French Bread

September 8, 2009

img_3191

Today is Tuesday and for the foreseeable future, that means it’s Holly B’s day.  If you didn’t read this post, Tuesdays are the days I will be baking a treat from the Holly B’s bakery on Lopez Island.  And this week, it’s bread.

img_3195

The only reason I have even tried Holly B’s bread is because I have been there literally countless times.  I have sampled at least one of just about everything and in the case of the cinnamon rolls, I have sampled at least 100 of those.  So there comes a time when maybe you are feeling a little virtuous so instead of making a lunch out of four different kinds of cookies, you decide to pick up some cheese from the grocery store across the street and figure a loaf of the olive bread sounds good.  Then you take that olive bread and cheese to the beach and proceed to completely ignore the cheese because the bread is some of the best you have ever tasted.  And when all is said and done, you might as well have eaten the four cookies because the loaf of bread is almost gone and your husband only had a few bites.  I wouldn’t know anything about this, it’s an imaginary scenario.

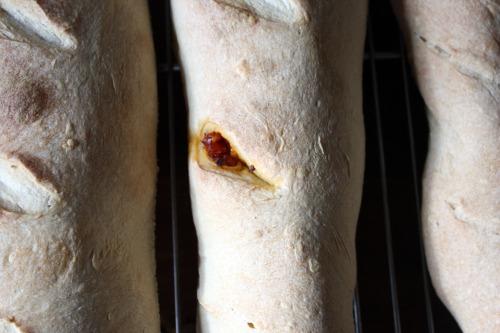
Last week I invited a fellow food blogger and her fiance to dinner.  I always like to make good food when we have guests but there was definitely added pressure – it was like inviting a chef to dinner.  I decided to go all out and make bread to accompany our meal.  There was never a doubt as to which one I would make. https://luxlifemiamiblog.com/   But because olives figured prominently in something else on the table, I went with the sun-dried tomato filling instead of the olive.img_3197

The basic premise is this.  You make a biga which is nothing more than flour, yeast, and water which is then allowed to sit out at room temperature for at least 2 hours.  The beauty of it is that you can put it in the refrigerator for up to 2 weeks so this bread and another in the book can be made quite easily.  The biga is mixed together with other ingredients and left to rise to double it’s size.

bread-collage

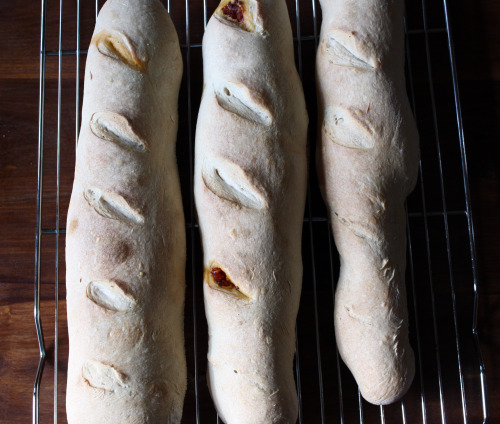
The dough is then rolled out to a rectangle, the filling is spread down the middle, the dough is folded in half and then rolled into a snake, seam side down.  A glaze is brushed on the breads, their tops are slashed 5 times and into the oven they go.  No second rising time necessary.

This bread has what you might call a fine crumb.  In other words, it’s dense and soft.  There are no large air pockets like you find in traditional baguettes.  I’m not sure I would flip over the plain version of this bread, but flip I did for the sundried tomato version and flip I will when I make the olive version.  One of these loaves was plain (the recipe makes three) and I used it to make delicious croutons for this salad.

img_32111

Purchase Holly B’s cookbook by visiting this site.
One Year Ago:  Pomodori al Forno – a greatest hits appetizer

French Bread
With Love and Butter
Makes 3 loaves

Biga
1/2 cup water
1/8 tsp. quick-rise yeast
7/8 cup unbleached flour

Dough
2 3/4 cup warm water
1/4 cup biga (stir down before measuring)
1 3/4 tsp. quick-rise yeast
7 cups unbleached flour
4 tsp. salt
Cornmeal for baking sheet

Cornstarch Glaze
1/2 cold water
1 1/2 tsp. cornstarch

Note:  You will need to prepare the biga for the French Bread at least 2 hours in advance.  I recommend doing this step the night before.  Also note that this dough does not rise a second time.

At least 2 hours before you wish to start your French Bread, mix together the water, yeast and flour for the biga.  The biga should have the consistency of thick pancake batter.  If too stiff or loose, adjust by adding a touch more water or flour.  Mix until smooth.  Scrape into a lidded container at least twice the volume of the batter.  Let the biga stand to room temperature at least 2 hours and up to overnight.  The biga can now be used for French Bread or stored up to 2 weeks in the refrigerator.

Place the water, 1/4 cup biga, yeast, 4 cups of flour, and salt, in that order, in a big bowl.  Stir with a wooden spoon until well blended.  Add the remaining 3 cups of flour and continue mixing until stiff, then continue with your floured hands to mix and knead the dough into a ball.  Continue kneading for 5 to 10 minutes adding flour as needed until the dough forms a smooth ball.  (HB: I always try to do this within the big bowl to cut down on cleanup, but you can turn everything onto a clean counter and do your kneading there.  DT: I used the dough hook of my stand mixer.)  You should end up with a smooth round ball about the firmness of a baby’s bottom (or anyone’s bottom who isn’t very thin).  If the dough is too stiff, work in some water; if too sticky, work in some extra flour.

Lightly oil the bowl and place the dough back inside.  Cover with plastic wrap or a dishtowel and let rise in a warm place until doubled in size.

Preheat the oven to 425°F with the oven rack in the middle position, and sprinkle a large baking sheet with cornmeal.  Prepare the glaze by whisking water and cornstarch together in a small saucepan and heating on medium-high heat until the mixture thickens and comes to a boil.  Remove from the heat and set aside.

Punch the dough down and turn onto a lightly floured surface.  Using floured hands, divide the dough into 3 pieces.  Don’t work the dough – leave it puffy.

Place one of the pieces of dough before you on your lightly floured work surface.  using the heel of your hands, flatten the dough into a rectangle with the long side running left to right.  Now fold the dough lengthwise and seal the seam with the heels of your hands.  Roll and snake out the loaf to fit the length of the pan, and place seam-down on the cornmealed baking sheet.  Slash each loaf five times with a sharp knife and brush the tops with the cornstarch glaze.  (No, this dough does not rise again before baking!)

Bake the loaves 10 minutes, then rotate the pan and bake another 10 minutes.  When done the leaves will be golden brown and crisp.  If blond and limp, bake an additional 5 minutes.  Remove from pan and cool on a rack.

Greek Olive or Sun-Dried Tomato Tapenade
Makes 1 1/2 cups

1 cup pitted Greek Kalamata olives or sun-dried tomato halves (not packed in oil)
Salt (Sun-Dried Tomato Tapenade only)
2 tbsp. olive oil
2 tbsp. lemon juice
1 tbsp. minced garlic
1 1/2 tsp. brandy
1/4 tsp. ground black pepper

If using sun-dried tomatoes, put them in a small bowl and cover with boiling water.  After 5 minutes, drain off the water and pat the tomatoes dry with paper towels.  Sprinkle with salt and proceed with the recipe.

Place the olives or tomatoes and all the ramaining ingredients into a food processor fitted with the steel knife blade.  Pulse until chopped and combined, but leave the tapenade somewhat chunky.  You want some texture, not a smooth paste.  Tapenade will keep several week in the refrigerator or several months in the freezer.

Using in the bread:
Before folding and sealing your loaves, smear 3 tablespoons of tapenade down the center of the rectangle of flattened-out dough.  Then fold over the dough, pinch together, and snake out the loaf to the appropriate length.

Before folding and sealing


Spreading Scone Love

April 26, 2009

img_1988

Scones.  They are almost everywhere coffee is sold (in Seattle, that is everywhere), and most of them are terrible.  It seems to me that each year, they get a little bigger and a little less flavorful.  At this point in history, they just taste like flour, sugar, and air.

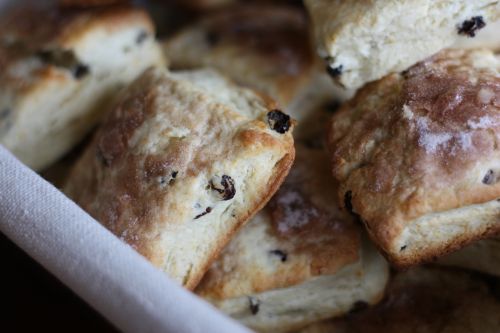
This is the only scone I have ever made and, aside from a pumpkin one I remember seeing on Eggs on Sunday, the only one I will probably ever make.  Everyone who eats them loves them.  Our brunch guests each had several and my own four year old had two all to himself.  I think it’s because they are simple.  No 100 ingredients thrown in to mask the taste of nothing, just a few really good things.

I got this recipe from The Joy of Cooking.  It’s a book I turn to when I just want the essence of a dish.  Do you ever feel like no, I don’t want to make a pasta salad with heirloom beans and $75 balsamic vinegar, I just want to make a pasta salad?  The Joy of Cooking is your friend.  One day, long ago, I found myself wanting to make scones and all the recipes I was seeing had enough ingredients in them to make my mouth tired just thinking about eating them.  I turned to this book and it did not disappoint.

img_1992

Classic Currant Scones
Adapted from The Joy of Cooking
Makes 8-12 scones

Do yourself a favor and double this recipe.  It takes no extra effort and they freeze beautifully.  I used square biscuit cutters for these but I have also used round and have formed the dough into a round and cut them into wedges as described below.  All wonderful!

2 cups all-purpose flour
1/3 cup sugar
1 tbsp. baking powder
1/2 tsp. salt
6 tbsp. (3/4 stick) cold unsalted butter, cut into 1/2 inch pieces
1/2 cup dried currants or raisins
1 large egg
1/2 cup heavy cream
1 tsp. grated orange zest (optional)
2-3  tsp. heavy cream or milk
Cinnamon and sugar

Position a rack in the middle of the oven.  Preheat to 425 degrees.  Have ready a large ungreased baking sheet. Whisk together the flour, sugar, baking powder, and salt in a large mixing bowl.  Drop in the butter and cut it in with 2 knives or a pastry blender, tossing the pieces with the lour mixture to coat and separate them as you work, until the largest pieces are the size of peas and the rest resembles breadcrumbs.  Stir in the currants.

In a liquid measuring cup, whisk together the egg, cream, and zest.  Add to the flour mixture.  Mix with a rubber spatula, wooden spoon, or fork just until the dry ingredients are moistened.  (DT: I usually find it necessary to add a little extra cream here, maybe 1-2 tbsp.)  Gather the dough into a ball and knead it gently against the sides and bottom of the  bowl 5-10 times, turning and pressing any loose pieces into the dough each time until they adhere and the bowl is fairly clean.  Transfer to a lightly floured surface and pat the dough into an 8-inch round about 3/4 inch thick.  Cut into 8 or 12 wedges and place at least 1/2 inch apart on the baking sheet.  Brush the tops with the cream or milk and sprinkle with the sugar and cinnamon.

Bake until the tops are golden brown, 12-15 minutes.  Let cool on a rack or serve warm.


« Older Posts Newer Posts »