Archive for January, 2011

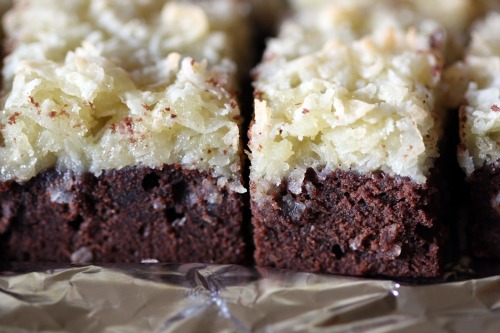
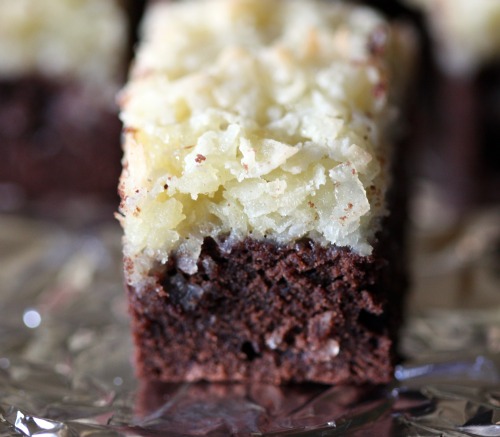
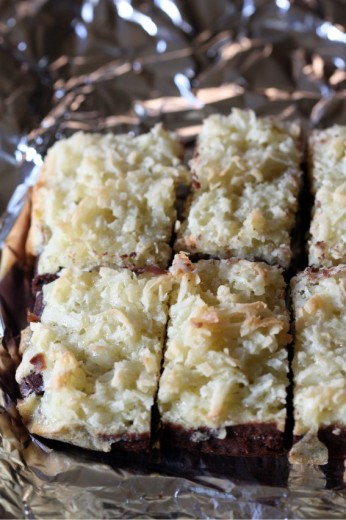
Macaroon Brownie Bars

January 31, 2011

I went to a college where we had self-scheduled exams.  After classes were over, there was a 10 day period when exams were held at three different times of day.  When you were ready to take your European History exam for example, you showed up to the appointed place in the morning, afternoon, or evening and took the test.  If you decided you weren’t quite ready, you could wait until you were.  Whenever I tell people about this phenomenon, they always ask if people cheated.  Of course they did.  But we all signed an honor code at the beginning of our freshman year saying we wouldn’t.

For me, exam week was a very interesting exercise in time management.  Because I went to college 3,000 miles away from home, I always had a plane ticket limiting my time.  I would get to the end of the semester, look at all the papers I still had to write, all the studying I had to do, and the exams I had to take, I would panic, and then I would realize that I just simply had to get it all done.  Regardless of how overwhelming the work, how many all-nighters I was going to have to pull, I had a deadline with wings.

I am reminded of that time in my life because I have a lot to get done in the next couple of weeks.  I am teaching two Seasonal Feast classes, a private class, cooking a yoga retreat dinner for 24 people, and making a birthday cake for my younger son.  All before February 12th.  And classes aren’t just teaching, there is tons of prep involved and recipe testing, shopping, and typing up of recipes.

This would be the time to ask for a hall pass on the weekly treat idea.  But I can’t.  I went to Randy’s new office for the first time last week and there was a white board outside his cube.  On that board was written, “More cookies please” and it was signed the Cookie Monster.  I mean, I can’t let the cookie monster down, right?  No matter how busy I am.

So this week it is Coconut Brownie Bars.  I’m actually surprised this recipe spoke to me.  The two candy bars that were always left in my Halloween bag were Almond Joy (because of the nuts) and Mounds (because of the dark chocolate).  And both of them were also left in there because of the coconut.  My parents were thrilled about this fact because they are both huge coconut fans.  Nuts I still don’t like in my sweets but dark chocolate and I are much better friends.  Coconut – hmmmm.  I’m still on the fence.  Sometimes I like it and sometimes I don’t.  This  bar is a nice mix of a brownie and a macaroon and I actually really liked the contrast of tastes and textures.

Chocolate and Coconut Previously on Dana Treat: Coconut Bars
One Year Ago: Baked White Bean Purée
Two Years Ago: Lentils with Capers, Walnuts, and Mint

Macaroon Brownie Bars
The Greyston Bakery Cookbook
Makes 16

For the Brownie Base
2/3 cup flour
1/3 cup unsweetened cocoa powder
¼ tsp. salt
½ cup (1 stick) unsalted butter, softened to room temperature
2/3 cup sugar
3 eggs
1 tsp. pure vanilla extract
½ tsp. pure almond extract
4 ounces good quality bittersweet chocolate, chopped into chunks

For the Coconut Topping
2 eggs
2/3 cup sugar
¼ tsp. pure almond extract
1/3 cup flour
2 ¼ cups (7 ounces) sweetened flaked coconut

Prepare the brownie base
Place a rack in the center of the oven and preheat the oven to 350ºF.  Grease a 9-inch baking pan and line it with parchment paper, leaving about 1 inch of paper overhanging the two long sides.

In a bowl, whisk together the flour, cocoa powder, and salt until well blended.

In the bowl of a stand mixer, cream the butter and sugar on medium speed.  Add the eggs, one at a time, mixing well after each addition.  Stir in the vanilla and almond extracts.  Gradually mix in the dry ingredients until well combined.  Stir in the chocolate.

Spread the batter evenly in the prepared pan.  Bake for 20 minutes, or until the sides begin to set but the center is still soft.  Remove the pan from the oven and set on a wire rack to cool slightly.

Prepare the coconut topping
In a bowl, whisk together the eggs and sugar.  Stir in the almond extract.  Gradually stir in the flour, mixing thoroughly.  Stir in the coconut.

Using two spoons, gently place spoonfuls of the mixture over the partially baked brownie base and spread evenly with the back of a spoon for a rubber spatula.

Return the pan to the oven and bake for 30 minutes, or until the topping is golden brown and a wooden skewer inserted in the middle come out almost clean.  (Some crumbs will still be attached.  Do not overbake.)  Remove the pan from the oven and set it on a wire rack to cool completely.  Remove the brownies by grasping and lifting the edges of the parchment paper.  Cut into bars.


A Restaurant Dish

January 27, 2011

I’ve discovered the most amazing thing.  Did you know there is this place called a library?  And they let you borrow books for free?

I’m kidding, of course.  Sort of.  I mean, I know about the library – my kids are big fans.  I hear people talking about how they take cookbooks out of the library and I just, well, I never had until last week.  For reasons too boring to explain, I found myself post-yoga at a small neighborhood library with some time to kill.  I headed straight for the cookbook section and was delighted to find some really interesting books.  One in particular was The Zuni Café Cookbook.  If you like to cook, you probably have that book.  Maybe you are surprised that I don’t.  It is a book I have picked up time and time again and have almost bought on many occasions.  Something always stops me.  This, I figured, was a perfect solution.  I would borrow it for three weeks and if I loved it, I would buy it.

It became clear pretty quickly that I will not be buying this book.  Oh, it is lovely and the food all sounds homey and comforting and amazing.  The recipes are thorough, clearly written, and it is clearly a person – a lover of food – writing them.  It is also incredibly heavy on the meat and there are anchovies in fully half of the more veg dishes.  Plus gallons and gallons of olive oil.  I know that restaurants tend to have a heavy hand with the olive oil.  I have nothing against olive oil and I use it all the time.  But sparingly.  Yes, it’s heart healthy but it is still a fat.

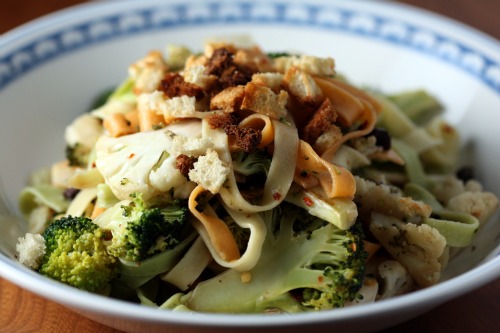
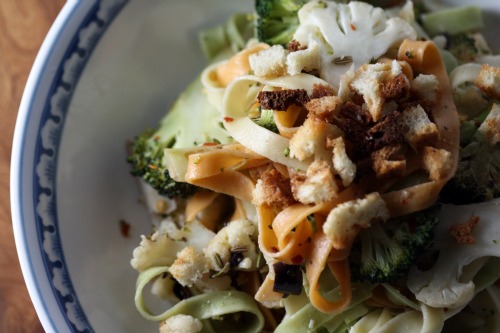
I wanted to make something from the book before returning it and this pasta spoke to me.  I liked that she suggested you use between 4 and 8 pinches of crushed red pepper flakes.  Yes, I love my spice!  But at its heart, this is a restaurant dish.  The kind that looks great and different on the menu, the kind that comes and the first few bites are absolutely delicious, and then you notice the puddle of olive oil under your noodles and you realize that you are not going to feel super well that night.

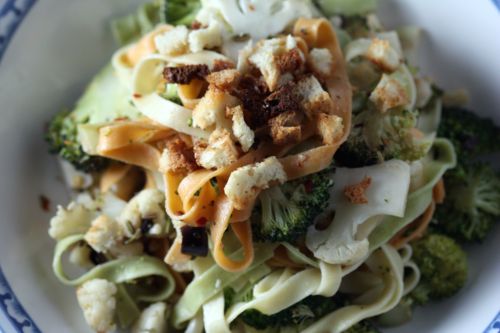
I tried to lighten this up and did a decent job.  Rather than add tablespoons of olive oil three separate times (she suggests ¾ of a cup all together), I added it only in the beginning and then used water to keep the vegetables from sticking too much.  I tossed the whole thing together with pasta water, lots of it – probably a full cup when all was said and done – which kept things moist.  Maybe I should have been a tad less stingy and added a bit at the end.  Anyway, what I took away from this dish is that the tri-color homemade fettucine at my farmers’ market is delicious, it is worth hauling out the food processor to grind up your bread crumbs so you have crumbs rather than croutons garnishing your dish, and I think I’ll make just the vegetables as a side dish soon.  And back to the library I go!

One Year Ago: Soba Noodles with Vegetables, Crispy Tofu, and Sesame Seeds
Two Years Ago: My tried and true Guacamole

Pasta with Spicy Broccoli and Cauliflower
Adapted from The Zuni Café Cookbook
Serves 6

I’m writing out the recipe with the changes I made.  Even though I did not make them this way, I am including Rogers’ instructions for making the bread crumbs.

About 1 cup fresh, soft bread crumbs (optional)
Olive oil
12 ounces broccoli, trimmed with a few inches of stem intact
12 ounces cauliflower, stem end trimmed flush
Salt
1 generous tablespoon capers, rinsed, dried and roughly chopped
1 pound penne or fettucine
6 small garlic cloves, minced
1 tsp. fennel seeds
4 to 8 pinches dried chili flakes
¼ cup Kalamata olives, seeded and roughly chopped

If using bread crumbs, preheat the oven to 425ºF.

Toss the bread crumbs with 2 teaspoons of olive oil, spread on a baking sheet and bake for about 5 minutes, until golden.  Set aside.

Slice the broccoli and cauliflower about 1/8 inch thick, and generally lengthwise.  Most of the slices will break apart as you cut them, yielding a pile of smooth stem pieces, tiny green  broccoli buds, loose cauliflower crumbs, and a few deliciate slabs with stem and flower both.  Don’t worry if the slices are of uneven thickness.

Set a large skillet over medium heat.  Add just enough olive oil to coat the bottom and add most of the sliced broccoli and cauliflower, leaving behind the smallest bits on the cutting board (they will burn if you add them too soon).  Cook the vegetables until you see the edges starting to brown, about 3 minutes.  Salt very lightly, add the left behind bits to the pan, and toss and fold gently.  If things are sticking too much to the pan, add a bit of water.  Add the capers and mix gently.  Continue cooking over medium heat for another few minutes, allowing the vegetable to brown gently, stirring occasionally.

Meanwhile, drop the pasta into 6 quarts of rapidly boiling salted water.  Stir, and cook until al dente.

Once the mass of broccoli and cauliflower has shrunken by about one-third and is largely tender, reduce the heat and add the garlic, fennel, and chili.  Give the vegetables a toss to distribute.  Cook for another few minutes, then add the olives.  Carefully add the pasta to the skillet, using tongs for fettucine or a slotted spoon for penne.  Add the pasta water by ladleful as needed to keep the pasta loose.  Garnish with the toasted bread crumbs if desired.


K.I.S.S

January 25, 2011

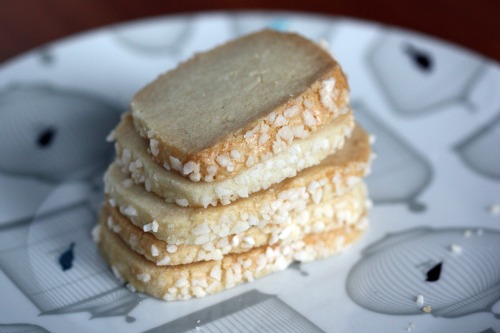
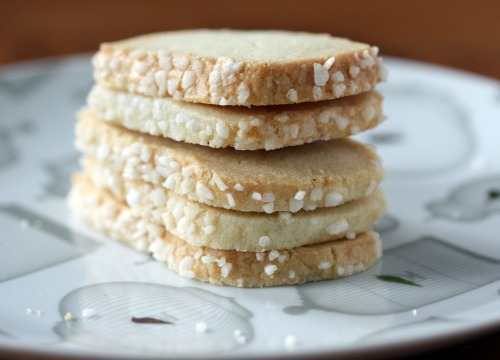
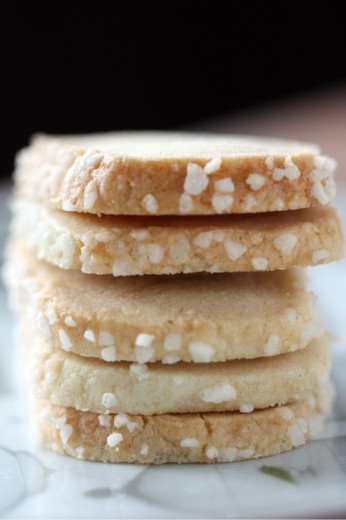
Remember those Danish butter cookies?  The kind that come in the blue tin?  I LOVED those cookies as a kid.  We used to get them every year around the holidays and we would slowly make our way through them.  I liked the round ones with the grooves but the rectangular shaped ones with the sugar were my favorite.

The only time I ever see those cookies these days is when we go to cut down our Christmas tree.  We have gone to several different farms over the years and all of them seem to have bad coffee, overly sweet hot cider, and tins of those cookies.  My kids go nuts over them and even though my palate is much more sophisticated than it once was, I still like those buttery cookies.

Making these Simple Sweet Diamants was an exercise in K.I.S.S.  I trust you are familiar with this term.  Keep It Simple Stupid.  Or Keep It Simple Silly since, in our house, stupid is a bad word.  Anyway.  I feel like I’ve been making a lot of aggressively flavored treats recently.  Most of the time, I would pick a cookie laden with stuff over a simple one.  I had the Compost Cookie at Momofuku’s Milk Bar a couple of years ago and OMG was it good.  This simple butter cookie is about the opposite of that one.  But as we all know, sometimes simple is best.

One Year Ago: Chickpea, Chard, and Couscous Soup
Two Years Ago: Orange Pound Cake

Simply Sweet Diamants
Baking for All Occasions
Makes about 3 dozen cookies

My only quibble with this recipe was the yield.  I was supposed to get 5 dozen but looking at the quantity of ingredients, I didn’t see how that was possible.  I doubled the recipe and got 5 dozen.

6 ounces (1½ sticks) unsalted butter, soft
½ cup granulated sugar
½ tsp. vanilla extract
1¾ cups all purpose flour
1/8 tsp. salt
1 cup pearl or sanding sugar
1 large egg white, lightly beaten

In the bowl of a stand mixer fitted with the paddle attachment, beat together the butter, granulated sugar, and vanilla on the lowest speed until creamy and well blended, 1 to 2 minutes.  Maintaining the same speed, add the flour and salt and mix just until combined.

Divide the dough into thirds.  On a clean work surface, roll each piece into a log 1¼ inches in diameter.  (DT: This dough is extremely crumbly so I found it impossible to roll it out that much.  Furthermore, I had to shape it more into a cube rather than a roll to keep it from cracking.)  Wrap the logs separately in plastic wrap and chill until firm, about 2 hours or up to 2 weeks.  For longer storage, overwrap with aluminum foil, label the contents and date, and freeze for up to 1 month.  Thaw in the refrigerator for 8 hours or overnight.

Center a rack in the oven and preheat the oven to 325ºF.  Line 2 large baking sheets with parchment paper, so you can get a second pan ready while the first one is baking.

Remove the logs from the refrigerator.  Spread the pearl sugar in a large rectangular pan.  One at a time, brush each log with the egg white, and then roll in the pearl sugar to coat evenly.  Press lightly so the sugar sticks to the dough.  Using a sharp knife, cut 1 dough log into slices 1½-inch thick.  Place the slices on a prepared baking sheet, spacing them 1 inch apart.

Bake the cookies just until they are ivory colored on top and lightly golden on the bottom, about 12 minutes.  Using a metal spatula, transfer the cookies to wire racks to cool completely.  Repeat with the remaining logs.

Stack the cooled cookies in an airtight container and store at room temperature for up to 10 days.


Meyer Lemon Risotto Cakes

January 24, 2011

Sometimes I am struck by the fact that having a food blog is kind of weird.  I take pictures of my dinners and my salads and my treats and I write about those things.  I put the pictures out there for anyone to see.  I love doing it and it is a big part of my life, but imagine explaining it to someone who has never read a food blog or doesn’t think finding the perfect chocolate cake is important.  Weird.

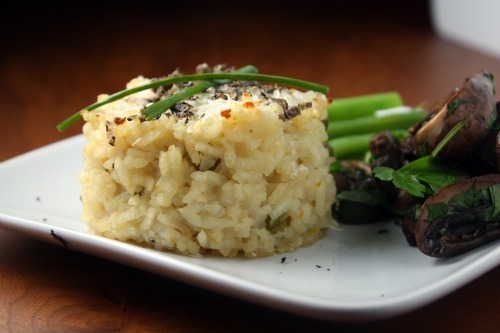
I bring this up because if I didn’t have a food blog, I would have been really happy about this dinner.  As is stands, I was happy but also crestfallen because I didn’t pay that much attention to measurements.  This is one of those “doing the very best with leftovers” and “planning ahead ” kind of meals – neither of which, I have no problem admitting, I am any good at.   In my haste, I did not weigh or measure or really even eyeball anything.  But because our dinner was good, because I got some decent photos, and because there was a truffle involved, I am going to soldier on.

Here is the deal.  I made risotto.  I had risotto left over.  I had a husband out of town.  I like to make dinners on Sundays, especially when he has been out of town, but am usually kind of worn out from the weekend.  In other words, I prefer not to start from square one.  In my foggy brain, I managed to realize early in the week that I would probably have leftover risotto and so bought things to compliment it.  Then I remembered that I don’t like leftover risotto unless it takes another form.  Like risotto cakes.

I stopped eating meat when I was 16 but I ate fish for another 4 years after that.  I remember going to the Bay Café on Lopez Island where they almost always have two fish specials.  One is salmon and one is halibut.  One has a side of rice cakes and the other has a side of potato cakes.  I would choose whichever fish had rice cakes as the side.  The Bay Café’s rice cakes, super savory, crispy on the outside and tender on the inside, were to die for.  Once I really paid attention to that fact – that my diet was much more about side dishes than the “protein” – making the switch to full vegetarian was very easy.

I loved rice cakes then and I still love them.  In fact, I think I will always make more risotto than I need just so I can make these.  I make this very easy on myself by making sure I have very cold risotto and using a 3-inch biscuit cutter to mold them.  I find that little tool works best but I have also used a stainless steel measuring cup with good results.  If you try that, just run a little water in it every other cake or so, making sure they come out easily.

You can certainly pan-fry them either in olive oil or butter.  You will get more browning and a crunchier crust.  But the healthy me just can’t pan-fry something when I know I can bake it with almost as good results.  20 minutes in a 375º oven does a pretty nice job.

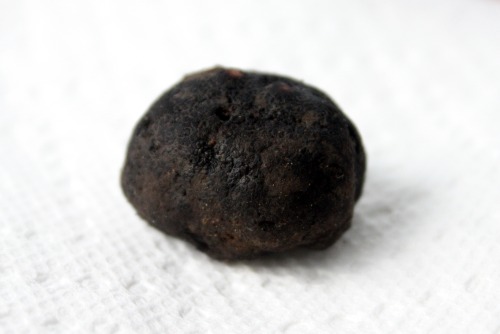
I was looking forward to this dinner almost as soon as the first round of the original risotto was in its resting place in the refrigerator.  And then I bought a truffle at the farmers’ market.  Did you know that in addition to having chanterelles and matsuke and lobster and porcini mushrooms growing in our half of the state, we also have truffles?  This little mushroom made me very happy.  If you have ever bought Italian or French truffles, you might be amazed that this little guy, the size of a chocolate truffle, cost me only $3.  Now, my first black truffle was shaved over a plate of homemade pasta in Paris on my 34th birthday.  This Washington guy did not have the potency but did have a nice flavor.  I would say it certainly brought a special something to a plate of leftovers.

Meyer Lemon Risotto Cakes
Dana Treat Original

If you make the risotto recipe below, you can serve 2 with it and then 2 making cakes with the leftovers another day.  Approximately.  You can, of course, use this method with any leftover risotto.  The mushrooms I served alongside can be found here.

Olive oil
1 large shallot, finely diced
1 tbsp. fresh thyme, chopped
1 ½ cups Arborio rice
½ cup dry white wine
5 cups vegetable stock
½ cup freshly grated Parmesan, plus more for garnish
½ cup frozen peas, thawed
Zest and juice of 2 Meyer lemons
Kosher salt and freshly ground black pepper
Parsley or chives to garnish

Bring the stock to a boil in a medium saucepan.  Turn the heat to low and keep warm.

Put a wide shallow pot over medium heat.  Add just enough olive oil to coat the bottom of the pot and then add the shallots along with a large pinch of salt.  Cook, stirring frequently, until they start to soften, but before they brown.  Add the rice and stir well to coat the rice with oil and the shallots.  Stir in the thyme and the lemon zest (not the juice).  Pour in the wine, another large pinch of salt, and a few grinds of pepper.  Stir constantly until the wine is absorbed.

Ladle one cup of stock into the pot and stir constantly until it is absorbed.  Ladle in another two cups, give it a vigorous stir as you bring the rice to a boil.  Turn the heat to low and cover the pot.  Allow to cook for 15 minutes, stirring it twice during that time.

Remove the cover and add another cup of stock plus the lemon juice and peas.  Stir vigorously until the stock is absorbed.  When it is about half absorbed, add the Parmesan and continue to stir.  At this point, you may not need any more stock.  If the rice is too al dente for your taste, add a bit more and continue to cook.  Also, if you prefer your risotto brothier, add more.  The  risotto will continue to thicken as it sits so if you aren’t serving it right away, add more liquid than you think it will need to prevent it from drying out.

Season to taste with salt and pepper.  Serve in wide bowls garnished with chives and more Parmesan.  Allow the unused portion to cool completely, then cover and place in the refrigerator for up to 3 days.

For the Cakes
Preheat the oven to 375ºF.

Line a small baking sheet with parchment paper. Place a 3-inch (or smaller) biscuit cutter on the baking sheet and pack it full of the cold risotto.  Smooth the top.  Remove the biscuit cutter and repeat with the remaining risotto.  (If you are using a measuring cup, you will need to pop the cake out of the cup.)

Sprinkle each risotto cake with a nice dusting of Parmesan and bake in the oven until the cheese is melted and the cake is heated through, about 25 minutes.  Garnish with shavings of fresh truffle – if you are lucky.


Not My Regular Salad

January 22, 2011

I have a house salad.  You know.  The one you make just about every time you make a salad.  Mine always features mushrooms, cherry tomatoes, avocado, and lettuce.  Sometimes I add hearts of palm, kalamata olives, chickpeas, celery, and/or hard boiled egg slices.  Once in a great while there is cheese.

But when we have company, I usually shake it up and make another kind of salad.  My in-laws were here for the week between Christmas and New Year’s and I made dinner for all of us one night.  I was lucky enough to have a small ball of burrata in my possession and I decided to make a take on a panzanella.  I toasted up croutons, sliced up fresh basil, and since our tomatoes are ghastly this time of year, I roasted some plum tomatoes with olive oil and a bit of balsamic vinegar until the flavor concentrated and they were squishy.  I poured the croutons into a big bowl, scattered the basil throughout, scraped the tomatoes and their juices on top and tossed everything together with a bit of olive oil and more balsamic.  Then I pulled apart the cheese with my hands, added it to the salad, and tossed it again gently.

The result was the kind of salad that can make you forget about dinner.  The kind that people return to for seconds.  The kind that has stray fingers wandering into the bowl after everyone is stuffed, hoping for one last flavor-soaked crouton.  I was pretty proud of myself.  And I have been thinking of that salad ever since.

My brother Michael came over for dinner last night.  When I invited him, I immediately knew I wanted to re-create the salad.  The first time I ever used burrata was for a dinner that he hosted and I know he is a big fan.  Unfortunately there are only two places in Seattle that sell the stuff and neither had any.  (Seattle people, I’m talking about Calf and Kid and DeLaurenti – do you know of any other place?)  I didn’t want to abandon my plan but I had to change things up a bit.

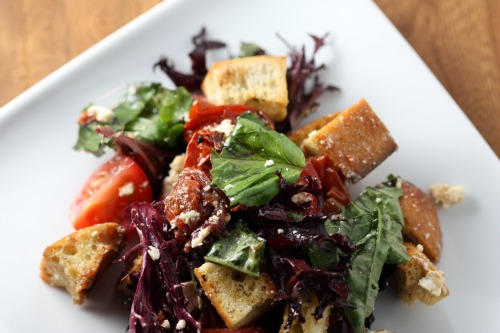
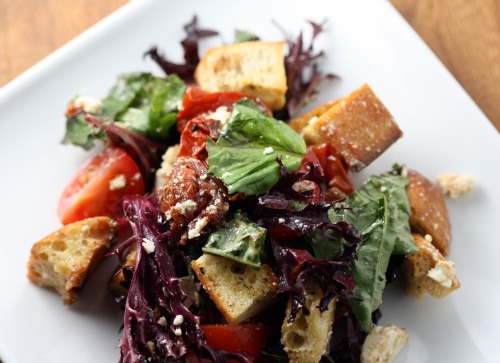
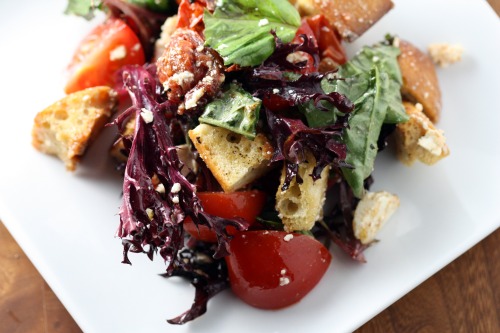
This time I kept the croutons and basil, but I used smaller tomatoes (what is going on with plum tomatoes???) and put a few non-roasted ones in, added some pretty lettuce to fill it out a bit, and used a bit of ricotta salata I found in my cheese drawer.  I also made a dressing for a bit more flavor instead of just olive oil and balsamic.  The verdict?  I missed the burrata but this was still pretty darn good.

One Year Ago: Peanut Butter Cookies with Milk Chocolate Chunks (ironic considering my last post)
Two Years Ago:  Lemon Bars

Roasted Tomato Salad with Croutons
Dana Treat Original
Serves 2 generously

I like my salad dressing to have a lot of bite, so I use much less olive oil than the standard 3:1 ratio.  Definitely make yours to your taste.  The baked tomatoes are a riff on a Barefoot Contessa recipe and this is a great method to make sub-par tomatoes taste good.

For the Dressing
1 small shallot, minced
2 tbsp. lemon juice
1 tsp. mustard
½ tsp. sugar
Large pinch of salt and freshly ground black pepper
3 tbsp. olive oil

For the Salad
5 slices good country bread, cut into 1-inch pieces
Olive oil
Kosher salt and freshly ground black pepper
Good balsamic vinegar
12 “strawberry” tomatoes
1 tsp. sugar
12 basil leaves, julienned or torn
2 handfuls lettuce leaves
½ cup ricotta salata, broken into big crumbles

Make the Dressing
Place the shallot, lemon juice, mustard, sugar, salt and pepper in a wide mouth jar.  Cover the jar and give it a good shake.  Remove the cover and add the olive oil.  Cover and shake again.  Taste for seasoning and adjust as necessary.  (Can be made up to a week ahead.)

Make the Salad
Preheat the oven to 375ºF.  Place the bread cubes on a baking tray and drizzle with olive oil.  Sprinkle a large pinch of salt over top and a few grinds of black pepper.  Toss well with your hands.  Place in the oven and bake until starting to turn golden brown, about 10 minutes.  Set aside.

Turn the oven up to 425ºF.  Slice each tomato in half.  Set aside four of them and seed the other eight.  Place on small baking tray and drizzle with olive oil along with the sugar, and a large pinch of salt and a couple grinds of pepper.  Toss gently with your hands.  Carefully drizzle on just a bit of balsamic vinegar.  Bake until dark, caramelized and slightly collapsed, about 25 minutes.  Remove and set aside.

Place the croutons in a salad bowl.  Scrape the tomatoes and any juices over top.  Chop up the raw tomatoes and add them to the bowl along with the basil and and the lettuce.  Scatter the cheese over top and pour about half the dressing over top.  Toss carefully and taste.  Add more dressing as needed.


« Older Posts