Category: Eggs

College Majors and Eggs for Dinner

February 23, 2012

I graduated from college with a degree in theatre.  I got plenty of “What are you going to do with a degree in theatre?”, though thankfully, not from my parents who were supportive of a less conventional major.  I attended a liberal arts college so there were plenty of English and Art History majors, but there were also lots of Economics and Government majors who all thought their degrees would be more “useful”.  My college roommate’s father allowed her to major in theatre but only if she double majored in Economics.  Not a lot of crossover in those two fields.

While I did not go on to become an actress, nor did I ever attempt to become an actress, I feel like my degree has been extremely useful in my life.  At the most basic level, I learned a lot about theatre and plays and I had a chance to read some of our greatest examples of literature.  Randy and I make it a priority to go the theatre and I am always amazed by how much knowledge I have retained.  (I can’t say the same about my math class.)  I got to experience putting on the makeup and costume of another person and becoming that person for a few hours every night.  I learned the art of working ahead – getting school work done a week before it was actually due so that I would have production week free from those pressures.  I also learned how to do work behind the scenes as a stage manager, makeup artist, costume assistant.  I learned that, no matter how intense the butterflies in my stomach, I would never actually throw up, and how to channel that adrenaline into a better performance.

Beyond those four years of acting, directing, reading, I also learned how to speak clearly, make eye contact, appear calm even when I am not, and use my voice effectively.  I’ve used those skills while performing in plays or singing in coffeehouses but also in every job interview I have sat through, every date I have been on, every presentation I have ever made, and every class I have ever taught.  Like many of my classmates, I would never have imagined myself doing what I do now when I was throwing my cap up in the air in May of 1992.  But I can’t believe how much I love it.

I know I mention my cooking classes here often but I don’t think I’ve mentioned how I feel about them.  I love teaching.  I really do.  I taught yoga from 2001-2003 and I loved that as well.  Sometimes a special thing happens between teacher and student, especially when the teacher is really passionate about what they teach, and I feel lucky to have experienced that feeling in two different spheres.  I am in planning mode for my spring quarter of classes and am really excited about what the next few months will hold.

Alas, teaching means testing.  And I don’t mean making my students take a test.  I mean searching out recipes, or developing my own, and making sure, time and time again if necessary, that they work.  I mean sometimes eating the same thing several nights in a row while trying to get it right.  It’s all worth it of course.  But sometimes, when I am gearing up for a busy couple of weeks, I miss just being able to, you know, make dinner.

I had a little window before my cooking life became not my own and I knew I had to take advantage of that freedom to just make something I wanted to eat.  Not test.  As is often the case, I got a little overwhelmed with choices.  I have so much bounty in terms of recipes between books, magazines, blogs, restaurant experiences – how to choose what to make.  Perhaps you are familiar with this feeling.  As I started to get overwhelmed and ordering pizza started to seem like a good idea, I opted to just stick with a cookbook that is relatively new to me and exciting.  It was the jumping off point for this salad and also has the least imaginative name ever.  But boy, did we love this dish.

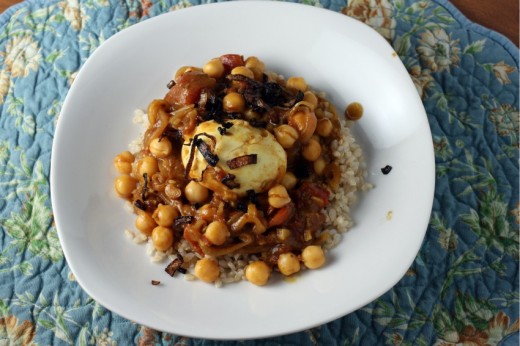
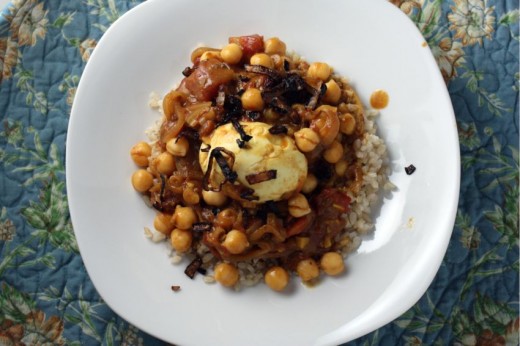
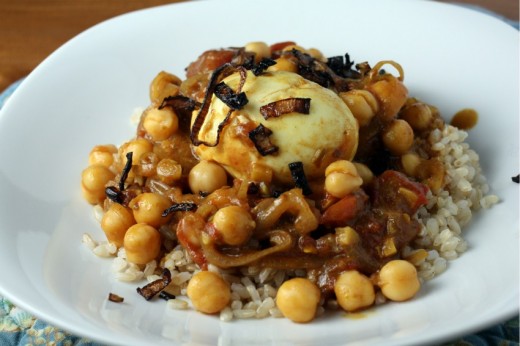
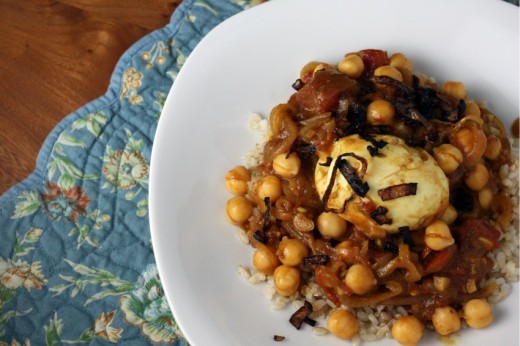
We don’t often eat eggs for dinner.  You should know that as I’m typing that sentence, I am simultaneously promising myself that we will eat eggs more often for dinner.  I love a good poached/fried/soft-boiled egg but none of those options sound good to me at breakfast time.  It would make sense, seeing as I love them and that I am a vegetarian, that eggs would be a regular part of our dinner routine.  I’ve just never made them a priority.  But when I see a recipe like this one, really just an egg curry, and it speaks loudly to me, it is clear I need to rethink the egg and dinner relationship.  As I was getting ready to serve this lovely, filling, and nutritious dish, I decided it seemed a little thin, so I added chickpeas.  Not necessary, especially if you add more eggs, but I thought the combination was great.

Two Years Ago:  Red Lentil Dhal
Three Years Ago:  Oatmeal Chocolate Chunk Cookies

Sambal Telur
Loosely adapted from Vegetarian
Serves 4

4 eggs
2 tbsp. vegetable oil
4 shallots, 1 chopped for garnish, 3 thinly sliced
Kosher or sea salt
3 garlic cloves, minced
2-inch piece of ginger, finely minced or grated
1 tsp. coriander seeds, crushed
1 tsp. cumin seeds, crushed
½ tsp. ground tumeric
1 tbsp. sambal oelek, or other chile sauce
1 14-ounce can diced tomatoes
2 tbsp. tomato paste
1 14-ounce can coconut milk (can be “lite”)
1 tbsp. tamarind concentrate
1 tbsp. light brown sugar
1 15-ounce can chickpeas, rinsed and drained

Place the eggs in a medium saucepan and fill to cover with cold water.  Bring to a boil, then turn off the heat and set the timer for 6 minutes.  Immediately scoop out the eggs and place in a bowl of ice water to stop the cooking.  Drain and set aside.  (This amount of cooking time will give you an egg with a very soft yolk.  Let them sit for another minute, 7 total, if you like your yolk a little firmer.)

Place a large sauté pan over medium-high heat.  Drizzle in about 1 tablespoon of the oil.  Add the chopped shallots along with a healthy pinch of salt, and cook, stirring frequently, until cooked through and brown, about 5 minutes.  Shallots burn very easily so keep a close eye on them.  Scrape the shallots out onto a paper towel lined plate.  Set aside for the garnish.

Return the pan to the heat.  Pour in the other tablespoon of oil, then add the sliced shallots, garlic, and ginger, and cook for a minute.  Add the coriander, cumin, tumeric, sambal oelek, the canned tomatoes, and the tomato paste.  Sauté for 5 minutes, stirring frequently.

Stir in the coconut milk, tamarind, and brown sugar along with a large pinch of salt.  Bring to a boil and simmer for about 5 minutes until the mixture thickens.  Add the eggs and the chickpeas and simmer for a few minutes more to heat it all through.  Serve over rice and garnish with the fried shallots.


Spinach Cheddar (and Egg!) Casserole

January 5, 2012

Eggs for one is easy.  You poach, scramble, fry, hard boil, soft boil, or make an omelet.  Whatever suits you.  Eggs for two is the same.  Even eggs for four, although the poaching might get a little tricky and you might feel like a buffet cook at a bad hotel with the omelets.  Eggs for eight really necessitates a frittata, a Mediterranean style one or a frittata made with grits, or perhaps onions that have been cooked long and slow.  But more than eight people means you need to start thinking egg casserole.

We attended a New Year’s Day brunch with a group of my favorite people.  Five couples with kids, all of whom had celebrated New Year’s Even in some way or another.  In other words, we needed plenty of eggs and the cheesy grits that our hosts make and make so very well.  I have made a savory bread pudding for this gathering before but with the grits and biscuits and muffins, I thought something without bread added it to it would be a better option.

Epicurious had plenty egg casseroles but most of them had giant huge tremendous amounts of cheese.  One notable recipe had 8 cups, that is two pounds, of cheese for four eggs.  I’m sorry.  That is a cheese casserole, not an egg casserole.

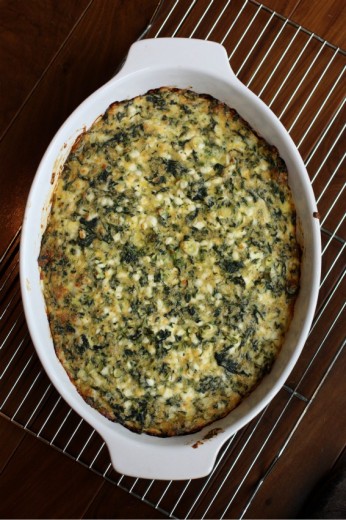
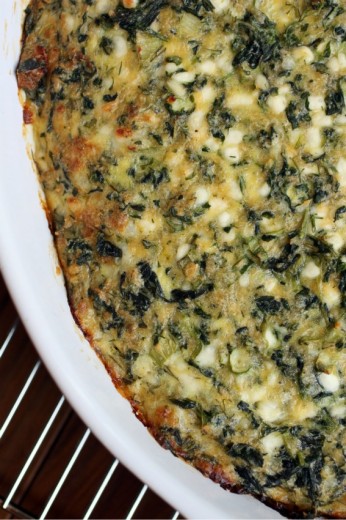
The one I eventually decided on is not exactly spa food but there are some vegetables and herbs and much of the cheese is actually cottage cheese.  Because we were a large group, I tripled this recipe and split it between two large dishes.  As it baked and I could smell the mingling of the scallions, cheese, and dill, I realized that I had made a very good choice and the taste proved me right.  We ate a full one and a half which was a lot of egg casserole.  I even sacrificed some of the stomach room I had reserved for cheesy grits and filled it with egg casserole.  The next time you are making eggs for a group, this is a surefire hit, but you can also enjoy it on a much smaller scale by making the recipe as written and not tripling it.

One more note.  I know some of you are new here so I thought I would put this out there.  I cook a lot of food and a large percentage of that food never sees this blog.  Sometimes it is because I just can’t get a decent photo (there is a gorgeous Beet Tart that I made four times in a month and just can’t seem to get my photography ducks in a row).  Sometimes it is because the food is not blog worthy.  In other words, I don’t put up every single thing I cook – only the things that I really like or think you would really like.  Occasionally, I will talk about something that didn’t work but I really do that to air out my frustration or to demonstrate that, although I have been cooking for almost 20 years and have made somewhat of a career out of it, I can make mistakes just as easily as a newbie.  All this to say, I’m not just telling you about egg casserole because it was something I made.  It’s good.

One Year Ago:  Tofu and Shiitake Noodle Soup
Two Years Ago:  Bruce and Dana’s Pasta Sauce

Spinach Cheddar Casserole
Adapted from Bon Appétit
Serves 4-6

4 eggs
¾ tsp. kosher salt
½ tsp. pepper
1 10-ounce package frozen chopped spinach, thawed, squeezed dry
1 16-ounce container cottage cheese
1 bunch green onions, chopped
1 cup packed grated sharp cheddar cheese
¼ cup all purpose flour
3 tablespoons chopped fresh dill

Preheat oven to 350°F. Butter 8x8x2-inch glass baking dish. Beat eggs, salt and pepper to blend in large bowl. Mix in spinach. Add remaining ingredients and stir until well blended. Transfer mixture to prepared dish.

Bake casserole until center is firm and top is golden, about 45 minutes.  Give the dish a shake, the center should not wobble.  Allow to cool 10 minutes, then serve.  This dish can sit and be served at room temperature.


Inspired by a Menu

March 10, 2011

There is a restaurant in Seattle called Sitka and Spruce and it is a pretty much uncontested local treasure.  It is always on “best of” lists and gets lots of awards.  They are passionate about local and have been for years – even before it was super cool to cook like a locavore.  The restaurant used to be in a tiny and unassuming space in an urban strip mall.  Randy and I had some amazing meals there.  The menu was always just written up on the blackboard according to the chef’s whims and the food was always super fresh, innovative, and very tasty.

One night, we went in for dinner and were told that it would be a 20 minute wait.  We went across the street for a beer only to come back and have them tell us that it would be another 20 minutes.  I’ll spare you the play by play but by the time we walked out, we had been waiting for an hour and a half with no apology, no offer for an appetizer on the house, no comped glass of wine.  Randy swore he would never eat there again.

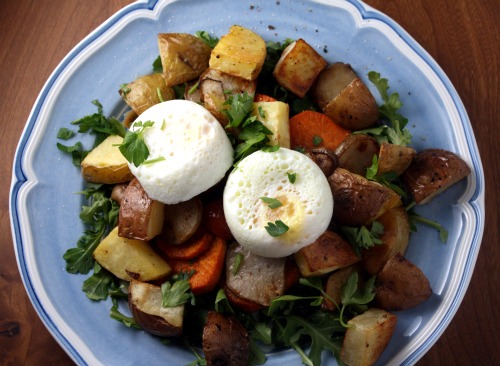
And, until recently, he didn’t.  When the restaurant moved into decidedly more swanky digs and I was dying to try it, I went for lunch with friends.  Twice.  The food is still super local, inspired, and very flavorful.  They also have an incredibly heavy hand with the olive oil which I don’t love.  Still, it is a very special place.  And they have a tiny grocery area where they sell amazing things that are hard to find elsewhere.  Last time I was in there, I picked up some Muscat vinegar.  As I was waiting to pay, I glanced at the menu.  All I saw was something like Potatoes, Jerusalem Artichokes, Arugula, and a Poached Egg.  If I hadn’t already eaten lunch, I would have ordered it right then and there.  So I did the next best thing.

I am often inspired by menus.  The dishes I make from those inspirations are usually things I have actually eaten in the restaurant.  But with those ingredients, all of which I was able to find in the Sunday farmers market, I knew I would have a home run.  Plus, roasted potatoes for dinner?  Hurray!

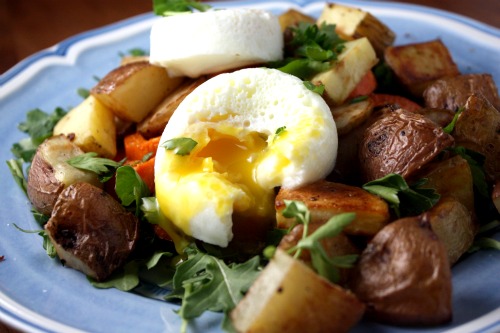
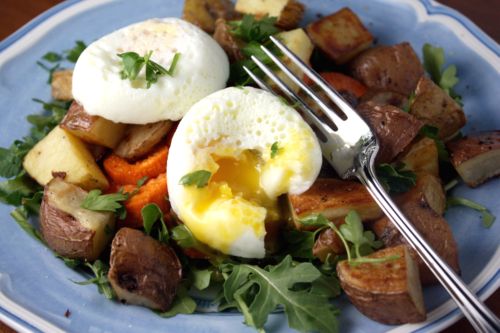
Potatoes, Jerusalem Artichokes, Arugula, and a Poached Egg
Dana Treat Original, Inspired by Sitka and Spruce
Serves 2

I confess to having an egg poacher (which is mine look like that) so I am not going to offer advice on how to do it the old fashioned way.  I am not very good at it.  You can check here for good instructions.  Jerusalem artichokes look like something you want to peel, but it is not necessary.  Just give them a good scrub.

1 tbsp. unsalted butter
3 medium Jerusalem artichokes, scrubbed and thinly sliced
Kosher salt and freshly ground black pepper
3 large Yukon gold potatoes, cut into large chunks
1 small sweet potato, peeled and cut into large chunks
Olive oil
8 cherry tomatoes
2 ounces arugula leaves
Good olive oil
Your favorite vinegar
4 eggs, poached
3 tbsp. chopped parsley

Preheat the oven to 400ºF.

Melt the butter in a medium skillet and then add the Jerusalem artichokes along with a pinch of salt.  Try to lay them in one layer if possible.  Cook, turning occasionally, until completely tender and browned in spots, about 10 minutes.  Turn out onto a paper towel lined plate.

Place the potatoes and sweet potatoes on a medium baking sheet.  Drizzle with about 2 tablespoons of olive oil and then sprinkle on a large pinch of salt and a few grinds of pepper.  Place the tomatoes on a small baking sheet and drizzle them with about 1 tablespoon of olive oil, salt, and pepper.  The sweet potatoes will roast faster than the Yukon golds so separate them on the baking sheet.

Bake the tomatoes for about 10 minutes, or until starting to brown.  Bake the sweet potatoes and Yukon golds until fork tender, about 16 minutes for the sweet and 25 minutes for the Yukons.  Resist the urge to toss them, allow them to develop a nice brown side.

Place about 1 ounce of arugula on each plate.  Drizzle with your best olive oil and then your favorite vinegar and sprinkle with salt.  Add pepper if you like it.  Top with half the vegetables and one or two poached eggs.  Sprinkle with parsley and repeat with the other plate.


Over-the-Top Mushroom Quiche

December 15, 2010

One of the very trickiest things about cooking is the timing.  Getting dishes to come out around the same time or having food on the table when you want it to be ready can be very tricky.   I truly believe the timing piece only comes with practice.  Someone can have a naturally good palate but kitchen timing does not seem to be a genetic trait.

I remember struggling with timing when I was first learning to cook.  Learning that you really need to read a recipe thoroughly before you start cooking helped.  But truly I got better from sheer practice.  These days, I’m pretty good at getting everything to come out at once.  I’m also good at judging how long things will take start to finish.  But once in a while, I get tripped up.

This recipe for a mammoth quiche has been sitting quietly in my notebook for years now.  It is a recipe that is never far from my mind.  With all the cooking I do, it is hard for me to believe that it took me all this time to make it.  I guess it’s not really weeknight cooking because it is a little fussy and it is also huge.  It’s not really dinner party cooking because, I don’t know – quiche seems a little brunchy for a dinner party.  We have people over often for brunch – so why didn’t I make it one of those times?  I wondered all of this as I was preparing to make it.  And then, when all was said and done, I realized why.

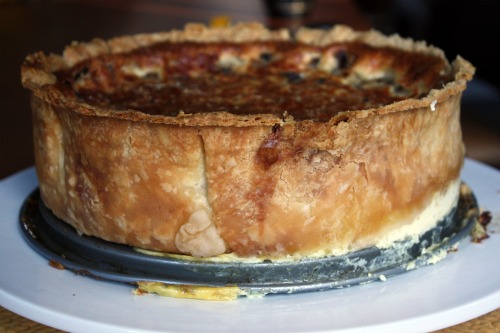
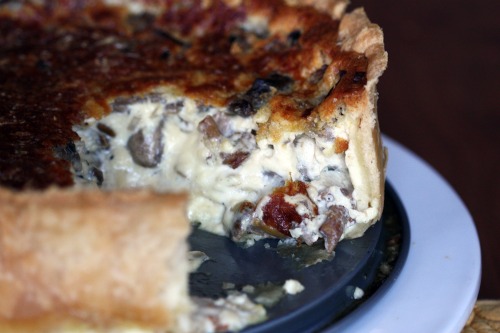
This is a Thomas Keller recipe that comes from the Bouchon cookbook, but I have it because it appeared in Food & Wine.  I remember Keller writing that, for him, quiche needed to be large.  And boy, is this large.  Rather than a tart pan or a pie plate, this baby is made in a springform pan.  The crust itself is several inches high.  The filling has 2 cups of milk, 2 cups of cream, 6 eggs, 2 pounds of mushrooms, and just a smattering of cheese.  It is gorgeous.  It is awe-inspiring.  And if you ever make it, please remember to read the part where I tell you it takes about 5 hours to make, start to finish.

Yep.  I had some good friends over today for a late morning get together.  I put out pumpkin bread and granola and thought I would serve the quiche as it got closer to lunch time.  But, because I had a momentary being-good-at-timing lapse, all my friends left and the quiche wasn’t even out of the oven.  I left it in there for a full two hours and, as you can see from the photos, it still wasn’t completely cooked.  Regardless of runniness, we will be eating this quiche for days for several reasons.

1)  Anything that takes me 5 hours to make will be consumed without question.
2)  This is one of the tastiest things I have ever made.
3)  I used a pound of button mushrooms and a pound of chanterelles (some regular and some yellow foot) which cost me $16.

So, Over the Top Mushroom Quiche it is until Sunday!

One of my readers made a terrific suggestion – how about creating a “My Favorites” category.  I went back through my old posts and tagged the recipes that I like the very best.  You can scroll down to it on the sidebar to your right.  In spite of this being truly delicious and a recipe I will no doubt make again – I’m not sure I can call a five hour egg and crust dish a favorite.  Not yet anyway.

One Year Ago: Frittata with Caramelized Onions, Goat Cheese, and Sage
Two Years Ago: Fennel and Brie Risotto Wedges

Over-the-Top Mushroom Quiche
Adapted from Food & Wine
Serves 12

Keller recommends oyster mushrooms but that type creeps me out.  And I live in a part of the country where we get incredible (and relatively affordable) wild mushrooms.  Use what you like.  I had Manchego in my cheese drawer so I used that but his recommendation is Comté or Emmental.  Finally, as stated above, it took my quiche a LOT longer to bake than the time specified below, but every oven is different!)

1 tbsp. vegetable oil
1 pound exotic mushrooms
1 pound white mushrooms, quartered
Salt and freshly ground black pepper
1 tbsp. unsalted butter
2 small shallots, minced
1 tbsp. fresh thyme, chopped
¾ cup shredded Manchego cheese
Buttery Pastry Shell (recipe follows)
2 cups milk
2 cups heavy cream
6 large eggs, lightly beaten

Preheat oven to 325º.  In a very large skillet, heat the oil.  Add all the mushrooms, season with salt and pepper, and cook over high heat, stirring until starting to soften, about 5 minutes.  Reduce the heat to moderate.  Add the butter, shallots, and thyme and cook, stirring often, until the mushrooms are tender, about 12 minutes longer.  Season with salt and pepper and let cool.

Scatter ¼ cup of the cheese and half of the mushrooms evenly over the bottom of the Buttery Pastry Shell.  In a blender, mix half each of the milk, cream, and eggs and season with 1½ teaspoons salt and 1/8 teaspoon of pepper.  Blend at high speed until frothy, about 1 minute.  Pour the custard into the pastry shell.  Top with another ¼ cup of cheese and the remaining mushrooms.  Make a second batch of custard with the remaining milk, cream and eggs plus the same amount of salt and pepper, and pour into the shell.  Scatter the remaining ¼ cup of cheese on top.

Bake the quiche for about 1½ hours, or until richly browned on top and the custard is barely set in the center.  Let cool in the pan until very warm.

Using a serrated knife, cut the pastry shell flush with the top of the pan.  Carefully lift the springform pan ring off the quiche.  Cut the mushroom quiche into wedges and serve warm.  (The unmolded quiche can be cooled completely, then refrigerated overnight.  To serve, carefully cut the quiche into wedges, arrange on a baking sheet and bake in a 350ºoven until warm, about 10 minutes.)

Buttery Pastry Shell
Makes one 9-inch shell

Since I love to make savory tarts and galettes, I have a lot of experience with tart dough.  I have learned to sacrifice flakiness for flavor when using all butter.  This crust is almost impossibly flaky in spite of having no shortening and the flavor is terrific.

2 cups all-purpose flour, plus more for dusting
1 tsp. kosher salt
2 sticks chilled unsalted butter, cut into ¼-inch dice
¼ cup ice water
Canola oil, for brushing

In the bowl of a standing mixer fitted with the paddle attachment, mix 1 cup fo the flour with the salt.  At low speed, add the butter pieces, a handful at a time.  When all of the butter has been added, increase the speed to medium and mix until the butter is completely incorporated.  Reduce the speed to low and add the remaining 1 cup of flour just until blended.  Mix in the water just until thoroughly incorporated.  Flatten the pastry into an 8-inch disk, wrap in plastic and refrigerate until chilled, at least 1 hour or overnight.

Set the ring of a 9-inch springform pan on a rimmed baking sheet lined with parchment paper, leaving the hinge open. Brush the inside of the ring with oil.

Dust the pastry on both sides with flour.  On a lightly floured work surface, roll out the pastry to a 16-inch round, about 3/16-inch thick.  Carefully roll the pastry around the rolling pin and transfer to the prepared ring, pressing it into the corners.  Trim the overhanging pastry to 1 inch and press it firmly against the outside of the ring.  Use the trimming to fill any cracks.  Refrigerate the shell for 20 minutes.

Preheat the oven to 375º.  Line the pastry shell with a 14-inch round of parchment paper; fill the shell with dried beans or rice.  Bake for about 40 minutes, or until the edge f the dough is lightly browned.  Remove the parchment and beans and continue baking the pastry shell for about 15 minutes longer, or until richly browned on the bottom .  Transfer the baking sheet  to a rack and let the pastry cool.  Fill any cracks with the reserved pastry dough.  (The uncooked pastry can be frozen for up to 1 month.  The Baked pastry shell can be wrapped in plastic and kept at room temperature overnight.)


Leftover Love

July 16, 2010

True confession time.  I have a deep dislike of leftovers.  There.  I said it.  Randy would be happy to spend the rest of his life eating left over food out of plastic containers, but I would rather eat a plain bagel than last night’s dinner tonight.  Why?  I don’t know.  I have no good answer for you.  If forced, I still need to make something fresh – a crostini or a big salad – to negate the leftover-ness of the meal.

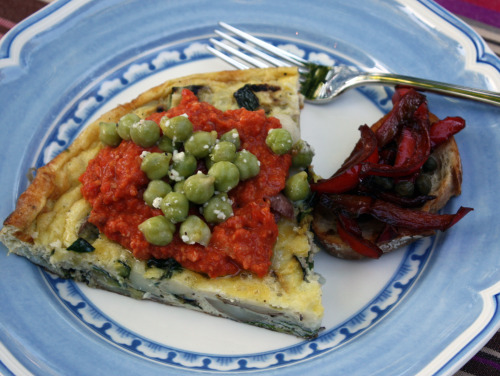
Leftover ingredients fall into a slight different category.  Bits and pieces that I can be creative with feel more like a challenge to me than drudgery.  As I do more catering, my refrigerator can, at times, have some pretty interesting things in it.  I did that party last Friday and then friends came over for dinner on Saturday.  I was thinking I wanted to keep things pretty simple after making appetizers for 25 people but, as usual, I got kind of carried away.  I started with the idea of making a Spanish tortilla for dinner using up the leftover potatoes pieces and Romesco sauce.  Soon a crostini with balsamic sauteed red peppers got added along with a green salad featuring watermelon, haloumi, and fennel.  And homemade white chocolate chocolate chip ice cream sounded like a terrific idea for a hot night.  Can simple food still be called simple if there are many different components?

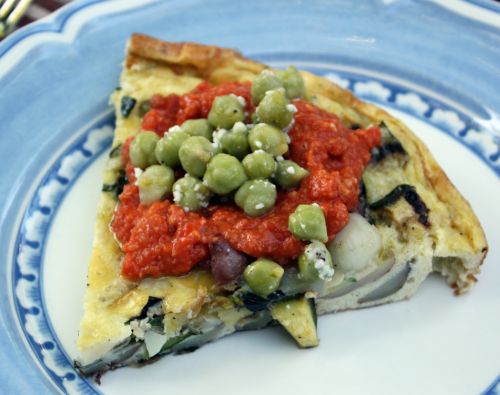
Remember those chickpeas?  Remember that when I tasted them at Cantinetta they were the fresh kind?  Well, when I want to the store to buy the zucchini that I decided to add to the tortilla, my Whole Foods had fresh chickpeas.  What is a girl to do but buy them, painstakingly pop each one out of the skin while she should have been doing countless other kitchen tasks, quickly boil them and give them the olive oil, lemon juice, and Pecorino Romano cheese treatment?  {Moment of silence.}  Those things are so good.  Check out my bean section on the side bar to your right and you will see that I love me some chickpeas.  Fresh is a whole different animal.  I mean really different.  Fresh they taste more like a pea than a bean and they are tremendous as a garnish on this tortilla.

This is a non-traditional way of making a tortilla because the potatoes are already cooked and I just served it right from the pan rather than turning it out.  I know this.  Please don’t sic the tortilla police on me.

Tortilla with Potatoes and Grilled Zucchini
Dana Treat Original
Serves 6

2 medium zucchini, cut into thirds lengthwise
Olive oil
Kosher salt and freshly ground black pepper
1½ cup potato trimmings or cooked slices of potato
10 eggs
½ cup grated Pecorino Romano cheese, divided
¼ cup fresh basil, julienned

Preheat a grill to high.  Place the slices of zucchini on a baking sheet and toss with a drizzle of olive oil, a healthy pinch or two of salt, and a few grinds of pepper.  Place each slice on the grill and cook, until grill marks appear, turning once.  Make sure the zucchini are tender but not mushy.  Remove and allow to cool.  Cut into 1-inch pieces and set aside.

Preheat the oven to 400ºF with the rack in the middle position.  Heat a large cast iron skillet, or other oven-proof pan over medium-low heat.  Drizzle olive oil to coat the bottom of the pan.  Crack the eggs into a large mixing bowl then give them a good whisk.  Add in the potatoes, zucchini, ¼ cup of the Pecorino Romano, the basil, a pinch of salt and a few grinds of pepper.  Carefully whisk the mixture together and then pour it into the pan.  Cook slowly, occasionally scooping up the edges of the tortilla to let some of the raw egg seep around the edges of the pan.  You don’t want to stir it and you don’t want to cook it so fast that the bottom gets brown.  Turn down the heat as necessary.

When the edges are looking set but the middle is still runny, scatter the remaining Pecorino Romano over the top and place the pan in the oven.  Bake until the middle is set, about 15 to 20 minutes.  Carefully remove the pan from the oven (it will be extremely hot) and allow to cool for 10 minutes.  Slice it into wedges and serve topped with Romesco sauce.  (And fresh chickpeas if you are lucky enough to find them.)


« Older Posts