Category: Cheese

Greek Mac and Cheese

September 23, 2013

Five years ago this month, I went to the first BlogHer Food in San Francisco.  It was an amazing experience.  I didn’t really learn anything about blogging, but I finally got to meet so many people whose blogs I read then (and still read now) and people I knew only from Twitter.  A group of us bonded quickly and many of those people are now friends who I treasure.  One of those people is Allison, who used to write the blog Local Lemons and now is the co-owner of Homeroom in Oakland.

Here is a little story.  Four years ago, while still living in Seattle, Randy and I stole away to San Francisco for a weekend away from our kids.  He had to work one of the days and Allison, one of my favorite blogging friends, met me at the Ferry Building for a day of exploring.  She lives in Oakland, a place that, at the time, I knew next to nothing about.  I wasn’t even quite sure where it was.  Maybe kind of “over there”.  Bay Bridge?  Golden Gate Bridge?  Not sure.  We shared an amazing day of wandering.  We had terrific pizza and shared a bottle of wine at Delfina and I bought my copy of Plenty, then only available in the British version and costing $65, at Omnivore Books.  Along the way, Allison mentioned to me that might be opening a restaurant.  She went on to tell me the incredible story of meeting a like minded person while waiting for a table in a coffee shop, and they were thinking of doing a restaurant serving mac and cheese.  I listened to and supported her.  And in my head I kept thinking, “There are restaurants in Oakland?”

I often think of that day with Allison for many reasons.  One is that she did open that restaurant and they have been incredibly successful from day one.  Another is that Allison is still a close friend of mine and now that we live close to one another, we love spending time with her, her awesome husband Alejandro and their beautiful baby Nico.  And another is how amazing it is to me that I had no perception of Oakland, other than it was “over there”, and now I live here.  And yes, there are lots of restaurants in Oakland!

Recently, Allison and her partner Erin came out with a cookbook and I was lucky enough to get a review copy.  We have enjoyed eating at the restaurant many times and have been to parties where their stellar mac and cheese was on the menu.  I wondered how the restaurant recipes would translate to the home cook.  I am here to tell you this is a winner of a book.  It totally captures the sweet spirit of the restaurant and all the favorite dishes, mac and cheese and sides alike, are in there.  You get a feeling for what it is like to eat at Homeroom and you also get to read about their unlikely partnership.  I never really thought that I had passionate feelings about whether mac and cheese should be served creamy from the pot, or topped with crunchy breadcrumbs from the oven, but in fact I do have extremely strong feelings about this important distinction.  (The latter.  And the book allows you to make most of the macs both ways.)  I made two of the mac and cheese recipes and they were, dare I say it?, better than the restaurant.  Mac and cheese is special, of course.  It is comfort food at its highest level.  Some people would say that there is no reason to get fancy.  That plain ol’ regular mac and cheese is perfect.  I challenge those people to make the Macximus.

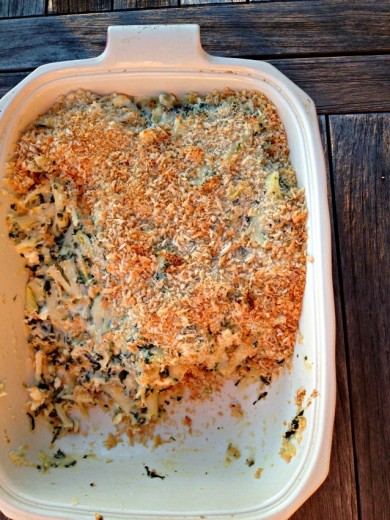
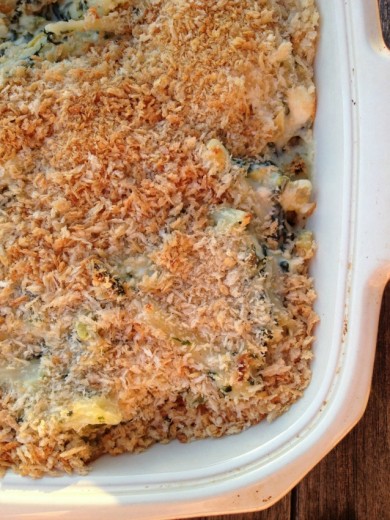
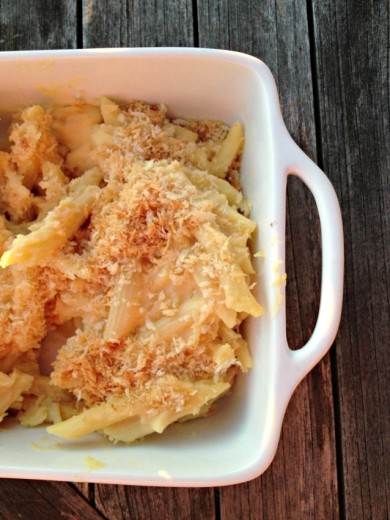
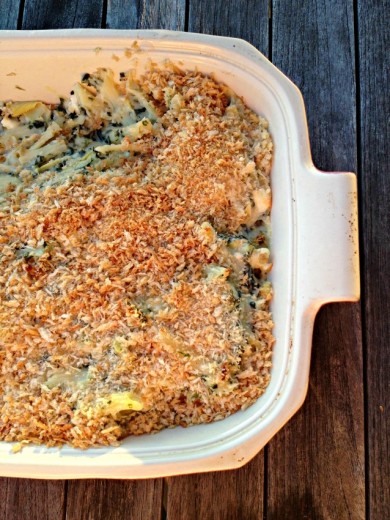
This is deliciousness comes from the “International Relations” chapter of the book where you will find other stunners like Croque Madame Mac and Shepherd’s Mac.  In this one, we have spinach, artichoke hearts, and three cheeses (feta! Pecorino! Jack!) that go so well together that the end result might stun you a bit.  I love mac and cheese as much as the next person but sometimes I find it can get a bit monotonous.  All that creaminess in one dish and my palate gets kind of tired.  This dish gave my taste buds something else to think about with the added vegetables and the tangyness of the cheese.  This is not to say that the Basic Baked Mac and Cheese, which I made for, ahem, the kids, was not amazing.  I may have dipped my fork into that dish a time or two.  Or three.

(The anything-but-basic version.)

Two Years Ago:  Yogurt and Oregano Pesto Soup, Chocolate Dipped Ice Cream Sandwiches, Corn with Tons of Herbs, Heirloom Tomato Tart
Three Years Ago:  Savory Scones, Stuffed Summer Squash with Goat Cheese and Mint, Tomato, Semolina, and Cilantro Soup, Double Layer Chocolate Cake
Four Years Ago:  Mint Filled Brownie Cupcakes, Corn and Zucchini Timbale, Nectarine and Mascarpone Tart, Chickpeas and Chard with Cilantro and Cumin, Nutella Pound Cake,
Five Years Ago:  Summer Rolls (I make these all the time), Chocolate Peanut Toffee (ditto), Pomodori Al Forno (double ditto), Pissaladière

Macximus
Adapted from The Mac and Cheese Cookbook
Serves 6-8

I made a couple of small changes.  I added twice the amount of spinach in the original recipe, more shallots, and more artichoke hearts.  I also quartered those hearts.  The recipe says this serves 4 but we got almost 8 servings out of it.  It is rich!

½ pound dried elbow pasta
1 cup crumbled feta cheese
½ cup grated Jack cheese
½ cup grated Pecorino cheese
2 small shallots, minced
1 cup thawed frozen chopped spinach, thoroughly drained
¾ cup canned artichoke hearts, drained and quartered
2 cups Mac Sauce (recipe follows)
½ cup panko (Japanese bread crumbs)

1.  Cook the pasta in salted boiling water until a little less than al dente.  Drain, rinse with cold water, and drain the pasta again.

2.  Preheat the oven to 400ºF.  Add the feta, Jack, Pecorino, shallots, spinach, artichokes, and sauce to a large, heavy-bottomed pan over medium heat.  Stir until the cheeses begin to melt, about 4 minutes (the feta will not melt, so you are just looking for the Pecorino and Jack to melt and the mixture to get hot).

3.  Slowly add the cooked pasta and stir until hot.  Pour into a 12-inch baking dish and top with the panko.  Bake until bubbly, 10 to 15 minutes.

4.  Spoon into bowls and serve hot.

Mac Sauce
Makes 3 cups

Note that this recipe makes 3 cups of sauce but you only need 2 for the Macximus recipe.  Allison and Erin suggest using the leftover cup to make biscuits and gravy or chicken à la king.

3 cups whole milk
½ cup unsalted butter
½ cup all-purpose flour
1 tsp. table salt

1.  Heat the milk in a pot over medium heat until it just starts to bubble, but is not boiling, 3 to 4 minutes.  Remove from the heat.

2.  Heat the butter over medium heat in a separate, heavy-bottomed pot.  When the butter has just melted, add the flour and whisk constantly until the mixture turns light brown, about 3 minutes.  Remove from the heat.

3.  Slowly pour the warm milk, about 1 cup at a time, into the butter-flour mixture, whisking constantly.  It will get very thick when you first add the milk, and thinner as you slowly pour in the entire three cups.  This is normal.

4.  Once all the milk has been added, set the pot back over medium-high heat, and continue to whisk constantly.  In the next 2 to 3 minutes the sauce should come together and become silky and thick.  Dip a metal spoon int the sauce – if the sauce coats the spoon and doesn’t slide off like milk, you’ll know the sauce is ready.  You should be able to run your finger along the spoon and have the impression remain.  Add the salt.

5.  The Mac Sauce is ready to use immediately and does not need to cool.  Store in the fridge for a day or two if you want to make it ahead of time – it will get a lot thicker when you put it in the fridge, so it may need a little milk to thin it out a bit when it comes time to melt in the cheese.  Try melting the cheese into the sauce first, and if it is too thick then add milk as needed.


Stocking Up

June 17, 2013

I know.  A few more salads and I’m going to have to change the name of this site to Dana Salad.  I can’t help it.  I love salad and it is salad season.  Actually, in California it is always salad season.  I’m making a name for myself as a good cook and baker in my community and some people have even called me a salad master.  This is serious stuff.  It is all because of inspiring produce and my experience – years of making lots of salads.

This beauty grew out of having a well-stocked refrigerator.  Most cooks will tell you that having a well stocked pantry is the key to cooking on fly but in my life, I need produce in the fridge too.  I shop for specific meals I am making but I also just kind of buy what I like.  This goes for cheeses too.  I regularly go to the Cheeseboard Collective, an incredible cheese shop in Berkeley, and just buy chunks of things that speak to me.  Having a couple of good cheeses can make something decent into something special.

I needed a salad to bring to a kindergarten end-of-the-year potluck.  In my head I had a couscous dish that my mom used to make.  It is entirely too boring for me to recount the ways in which I changed this dish, so much so that my version only resembles the original in the dressing, but I think it is important to note that it was so very good because I had bits of pieces of some of my favorite things on hand.  Why did I buy three ears of corn at the market?  Because they looked good and we love corn.  I had no dish containing corn on the menu that week, but we like corn and I figured I would use it somehow.  Just that one decision added deliciously to my salad.  I cook so much and always seem to be making food to share, that even impulse purchases almost always get used up.

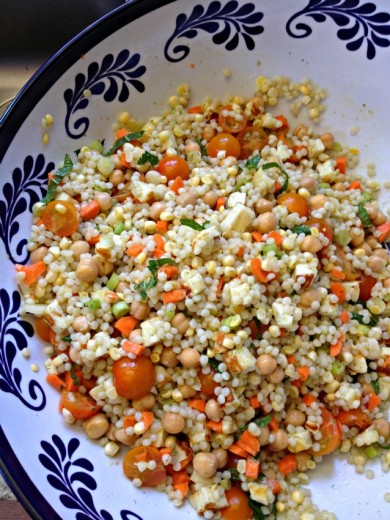
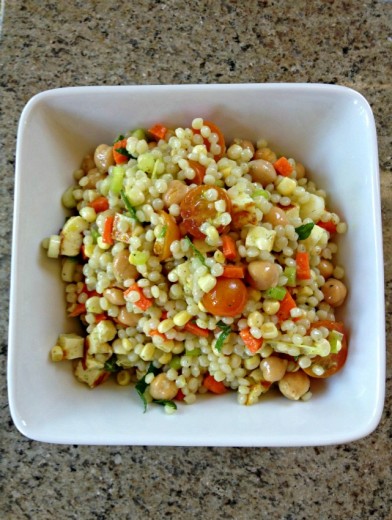
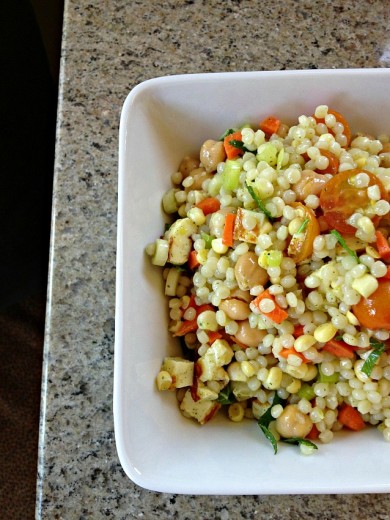
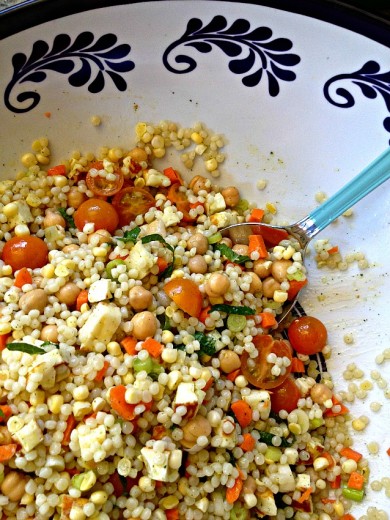
So what is going on here?  Israeli couscous, chunks of carrot, cherry tomatoes, chickpeas, and the kicker – haloumi cheese.  In my mind I was going to use feta but it turned out that I used the last of it in this salad.  Because I love haloumi, I always have some in my cheese drawer.  I like to be able to fall back on this appetizer, especially now that I have a lemon tree to draw from.  I used to stockpile it a bit because it was not always that easy to find but that is changing.  Whole Foods is a pretty reliable source as is any well-stocked cheese shop and just today, I found it at Trader Joe’s, pre-sliced and about $5.  I’ve never paid less than $10 so that is a huge deal.

Two Years Ago:  Mandelbrot, My Mostly Not Potato Salad, Gnocchi with Morels and Spring Peas
Three Years Ago:  Brown Rice with Tempeh and Tahini Sauce, Pasta with Chickpeas, Chili-Cheese Gratin Sandwiches
Four Years Ago:  Spicy Chickpeas with Ginger and Kale, Chilled Avocado Soup, Grilled Vegetable Quesadillas
Five Years Ago:  Barefoot Contessa’s Brownies, Curried Red Lentil Stew, Feta and Ricotta Cheese Pie

Israeli Couscous Salad with Haloumi and Mint Vinaigrette
Dana Treat Original
Serves 8 or more

The corn is not cooked in this recipe.  I like the crunch of raw corn but if you have leftover cooked (or grilled!) ears of corn, by all mean use them.  I would never normally rinse Israeli couscous but doing so keeps it from clumping.

For the Mint Vinaigrette:
¾ cup mint leaves, plus a few more for garnish
3 tbsp. white wine vinegar
1 garlic clove, roughly chopped
1 tsp. Dijon mustard
¼ tsp. sugar
½ tsp. kosher or sea salt
2/3 cup olive oil

For the salad:
1½ cups Israeli couscous
1 package haloumi cheese, cut into ¼-inch thick slices
1 bunch scallions, white and pale green parts only, thinly sliced
2 medium carrots, peeled and cut into very small chunks
2 ears of corn, shucked, kernels stripped off the cobs
½ pint cherry tomatoes, halved
1 14-ounce can chickpeas, drained and rinsed

Make the vinaigrette:
Place everything except the olive oil in a blender jar.  Blend to a paste.  You might have to scrape down the sides of the jar.  Through hole in the top, slowly pour in the olive oil, allowing it to emulsify.  Taste for seasoning and adjust if necessary.  (This can also be made in a food processor.)

Make the salad:
Bring a medium pot of salted water to a boil.  Pour in the Israeli couscous and allow to cook, stirring occasionally, until al dente, about 6 minutes.  (Taste to make sure.)  Drain and rinse, then drain again.

Place a nonstick skillet over medium-high heat.  Carefully lay the haloumi slices in the pan.  Cook until lightly browned in spots, about 3 to 5 minutes, then turn over and cook the other side.  Remove and allow to cool enough to handle, then cut into roughly chickpea sized pieces.

Place the couscous and all the other salad ingredients, including the cheese, in a large bowl.  Drizzle lightly with the dressing (you won’t need all of it).  Toss carefully and taste to make sure there is enough dressing and there is enough salt.  Adjust as necessary.  Just before serving, toss in some slivered mint leaves.


Homemade with Love, Indeed

May 25, 2013

If you came into my house right now, you would find homemade cookies in the cookie jar, homemade ice cream in the freezer (and some non-homemade flavors), about ten different kinds of baking chocolate, half of a homemade ginger pound cake, half a homemade chocolate pound cake, and remnants of Easter candy.  Some people might wonder how I can live with all of these things surrounding me and not eat them.  The reason is because I am a savory person.  Not that I don’t like sweet, believe me, the chocolate tempts me sometimes.  But it is not all that difficult for me to ignore the fact that I have a mini bakery going on in my house.  My problem area is the shelf that houses the chips, pretzels, crackers, and don’t even get me started on popcorn.

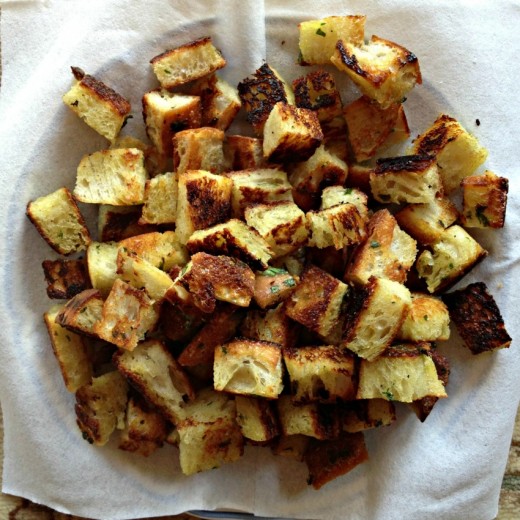
Something I truly can not stop eating is homemade croutons.  Therefore I do not make them all that often and when I do, I double the amount I need so that there will be some left, you know, for the dish they were intended.  I have always baked my croutons in the oven.  And they have always been great.  What is better than great?  Awesome?  Stupendous?  When you cook them in a pan on the stove, croutons become stupendous.

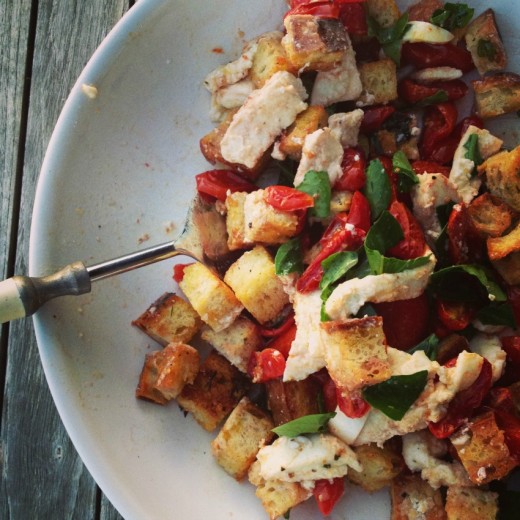
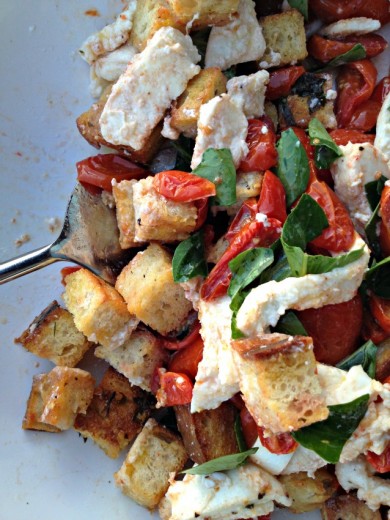
Homemade croutons figure very prominently in Panzanella, the Italian bread salad.  It is a very simple dish with few ingredients.  It is the epitome of rustic Italian food.  Take the very best quality things and put them together in a simple and beautiful way.  I’ve made many Panzanella recipes in my cooking life but have either made more complicated versions (see this Heirloom Tomato Salad  and Panzanella with Artichokes, Olives, and Manchego) or I have half heartedly thrown halved (pretty flavorless) cherry tomatoes, those mini balls of mozzarella, a few basil leaves, and croutons in a bowl.  It sad to me now that I could have been so overambitious or so careless with something that can be so simple to make and so incredibly tasty.

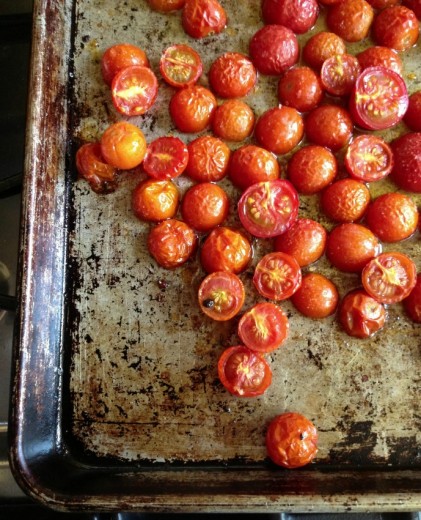
You know what they say about pizza, right?  Even when it is bad it is still good.  I’ve eaten plenty of Panzanella in addition to the ones I have made and I always like it.  A few weeks ago, when I went to a lunch party thrown by Jennie to celebrate her new book, Homemade with Love, I got to taste the Panzanella that helped me see the light.  Jennie did all the cooking for the party and I was delighted to see that everything was vegetarian.  I took a bit of everything on my plate with an extra healthy helping of her Panzanella.  All the food was beautifully presented and incredibly tasty, no small feat when you are cooking out of a hotel room kitchen, but this salad stole the show for me.  What had always been really just an excuse for me to eat dressing soaked croutons has become a thing of beauty where each ingredient shines and together there is magic.  Cherry tomatoes are better than romas but slow-roasted cherry tomatoes are glouriously sweet and jammy.  Any crouton is a good crouton, as I think I have made clear, but tossing them with just a bit of Parmesan and parsley and then cooking them in a pan on the stove, gave them charming browned bits and that perfect texture of crunch but with a little squish.  (Technical terms.)  It became clear that this would become my Panzanella forever more.

I have now made this several times and I have just a few tips.  I like using a loaf of bread with a dense crumb.  Too many air pockets means croutons that are too crispy and potentially burned in spots.  I have had luck with Pugliese bread.  I cut off each end and then shave a bit of the crustiest parts off.  More or less equal sized pieces are my preference and I like them big.  As much as I am absolutely smitten with the stovetop method, the second time I made the salad I had a lot going on in the kitchen and didn’t feel like I could successfully manage to keep turning the croutons in the manner they deserved.  So I put them in a 375º oven and they were great.  Not stupendous, but still great.  Because there are so few ingredients here, do use the very best.  Be sure to grate your own Parmesan for the croutons and buy a really good fresh mozzarella, preferably an Italian one made with buffalo milk.

Two Years Ago:  No Knead Olive Bread
Three Years Ago:  Spicy Peanut Noodles, Pull-Apart Cheesy Onion Bread (sooooo good)
Four Years Ago:  Greek Pasta Casserole, Green Bean and Fennel Salad

Slow-Roasted Tomato & Fresh Mozzarella Panzanella
Homemade with Love
Serves 2

Please note, this recipe as written serves only 2.  Both times I have made it, I have scaled it up by using a the whole pint of cherry tomatoes, more croutons, and about 8 ounces of mozzarella.

1½ tbsp. extra-virgin olive oil
2 tsp. apple cider vinegar
1 tsp. honey
Sea salt flakes and freshly ground black pepper, to taste
2 cups Parmesan Skillet Croutons (recipe follows)
3 ounces fresh mozzarella, cubed
½ cup Slow-Roasted Tomatoes (recipe follows)
Handful fresh basil leaves, torn

To  make the dressing, whisk the oil, vinegar, honey, salt, and pepper together in a deep bowl.  Adjust the seasonings to taste.  Add the croutons, mozzarella, tomatoes, and basil to the bowl, tossing well to combine.  Let the salad sit for at least 5 minutes so the croutons can absorb the flavors, but mo more then 15 minutes or they will get too soggy and lose their crunch.  To serve, spoon the salad onto a platter or individual plates.

Parmesan Skillet Croutons
Makes 2 cups

2 cups cubed day-old bread
1 tsp. finely chopped parsley
2 tbsp. grated Parmesan cheese
Sea salt and freshly ground black pepper, to taste
1 tbsp. extra-virgin olive oil

Toss all the ingredients together in a bowl until the bread cubes are well coated

Heat an 8-inch skillet over medium heat.  Add the seasoned bread cubes to the pan and cook, turning occasionally, until golden all over, 5 to 7 minutes.  Store in an airtight container for up to 3 days.

Slow-Roasted Tomatoes
Makes about 1½ cups

1 pint grape tomatoes, cut in half
¼ cup extra-virgin olive oil
Fine sea salt and freshly ground black pepper
6 sprigs fresh lemon thyme, copped

Preheat the oven to 250ºF.  Add all the ingredients to an 8-inch square baking dish and toss well to coat.  Adjust seasonings to taste.  Bake until the tomatoes are slightly collapsed and tender, about 1 hour.  Let cool completely, and store in a tightly covered mason jar or container in the fridge for up to 2 weeks.


Veggies and Dip

September 3, 2012

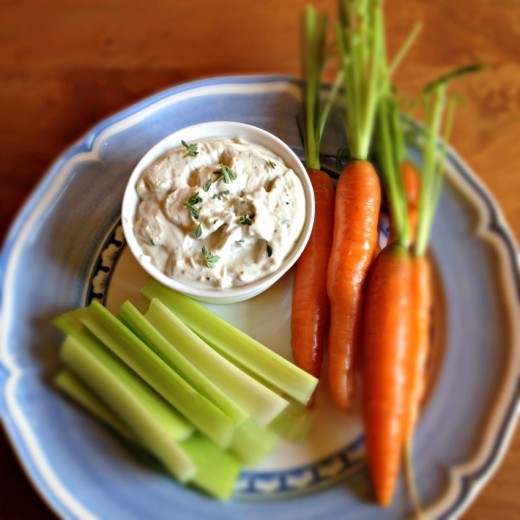
Where do you stand on the term “foodie”?  How about “fridge”?  And “veggies”?  These are all words that food people frown upon.  I find myself refraining from using them when in reality none of them bother me and “fridge” is much easier to type than “refrigerator”.  So I’m going to talk about veggies and dip.  Not vegetables and dip.

You might think that years of going to parties where the only thing I could eat was veggies and dip might have soured me on that combo.  The opposite is true.  I zero in on that platter.  If I parked myself next to it, I might be able to eat the whole thing.  And taking a few veggies on your plate with a spoonful of dip just doesn’t taste as good as standing at the table and eating from the platter.  The same is true of chips and salsa.  Am I right?

I like making dips that keep well and having them easily accessible for friends and relatives who might stop by.  A casual weeknight dinner feels just a little bit more fancy if there is an appetizer involved.  I always keep good olives in my fridge (not refrigerator) for that same reason.  And then no one minds if it takes you a little longer to get dinner on the table.

This dip is just a bit unexpected with the smoked blue cheese.  I’m sure it would be great with regular blue cheese too but I have always been a fan of any smoked cheese.  I served this one night with these beautiful vegetables from Oxbow Farm and on another night with pita chips.

One Year Ago:  Yogurt and Oregano Pesto Soup,
Two Years Ago:  Savory Scones
Three Years Ago:  Mint Filled Brownie Cupcakes
Four Years Ago:  Fresh Summer Rolls with Hoisin Peanut Dipping Sauce 

Blue Cheese Dip

Bon Appétit
8-10 servings

Kosher salt
1 garlic clove, coarsely chopped
2½ tsp. red wine vinegar
1 tsp. finely chopped fresh thyme
½ pound smoked (or regular) blue cheese, crumbled
1 cup sour cream
2/3 cup mayonnaise
Freshly ground black pepper

Sprinkle salt over garlic and chop, occasionally smearing mixture with blade of knife, until paste forms.  Whisk garlic paste, vinegar, and thyme in a medium bowl.  Add cheese; mash with the back of a fork until cheese in finely crumbled.  Stir in sour cream and mayonnaise.  Season dip to taste with salt and pepper.  Serve with assorted vegetables.  (Can be made 2 days ahead.  Cover and chill.)


Disappearing Dip

May 15, 2012

About 3½ years ago, my friend Jen asked if I would be interested in co-hosting yoga retreats with her at her Bainbridge Island studio.  I have known Jen since seventh grade and we have been very close friends since we spent three months riding on bikes through the French countryside.  She is one of my favorite people in the world and I have nothing but respect for her as a teacher and a business owner.  So it took me about four seconds to say yes.

On Saturday, we did our 13th retreat.  Once a quarter for three years.  We have slipped into a well established pattern.  The morning starts at 9:30 with introductions, followed by an intense hot yoga class.  The group gets to take part in a meditations exercise of some kind while I run up to the house, shower, and get lunch going.  When I first started doing these retreats, I realized that people would be hungry and I would not necessarily have every 100% ready by the time they were ready to eat.  So I always plan on having some kind of nibble in case I need to buy a little time.

Now you see it.

Now you don’t.

This was my nibble on Saturday.  A smooth layer of goat cheese topped with an unusual but incredible mixture of sweet jam, spicy peppers, mustard, and onions.  I did a test run of it the night before so I knew it was super delicious but I did not anticipate how quickly it would be inhaled.  I had intended to get a shot with a few swipes of dip taken out but by the time I started bringing out the lunch food, the dip was all but gone.  One of the things I like best about making lunch for yoginis is how hungry they are.  In my experience, women can sometimes be funny about food.  Dieting and all that.  But not this group.  They eat with gusto and deep appreciation and those are the best kinds of people to cook for.

One Year Ago:  Cheddar Crackers, Kaye Korma Curry, Stir-Fried Sesame Broccoli and Tofu with Rice Noodles
Two Years Ago:  Corn Salad Sandwich with Poblano Peppers, Chickpeas with Lemon and Pecorino Romano
Three Years Ago:  Mexican Brownies, Quinoa with Grilled Zucchini and Chickpeas, Peanut Butter Cup Brownies

Pepper-Glazed Goat Cheese Gratin
Food & Wine
About 8 servings

I made this using 30 ounces of goat cheese and roughly doubling the topping.  I put it in a 8×12-inch casserole dish and it fed about 20 people.  But I could have made more easily and I’m sure it would have been devoured.  The combination of creamy, sweet, and spicy is amazing.

1 pound creamy fresh goat cheese, softened
6 tbsp. apricot preserves
4 Peppadew peppers, finely chopped
1 pickled jalapeño, seeded and finely chopped
2 tbsp. minced cocktail onions
2 tsp. Dijon mustard
1½ tsp. dried sherry
Pita chips, crackers, or baguette slices for serving

Preheat the oven to 400ºF.  Spread the goat cheese in a 5-by-8-inch gratin dish in an even layer.  In a small bowl, whisk the preserves with the Peppadews, jalapeño, onions, mustard, and sherry.  Spread the mixture over the goat cheese and bake on the top rack of the oven for about 5 minutes, until warm.  Turn on the broiler and broil for about 2 minutes, until the topping is bubbling and lightly browned at the edges.  Serve hot.

(DT:  I assembled the dish the night before, refrigerated it, transported it to Bainbridge and baked it off there.  Worked beautifully.)


« Older Posts