Category: Party Food

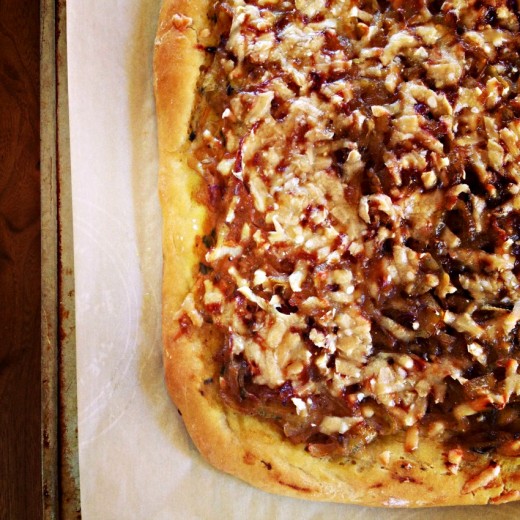
Onion Tart with Mustard and Fennel

May 21, 2013

You may not agree with me but I think the tendency to hang on to things is genetic.  I am a purger.  Randy is a saver.  (Not hoarder.  No cat skeletons hiding under mountains of garbage in our house.)  My parents have barely held on to anything from out childhoods except for photographs.  Randy’s parents periodically send us packages containing things (books, art work, letters) from his youth.  My parents purge and Randy’s save.

There is no time when those differences are clearer than when you move.  Each time I have moved, I have gotten rid of a tremendous amount of stuff.  I basically eye each thing I am about to put in a box and ask myself, “Do I want to pack this, only to have to unpack it?”  Many times the answer is no.  So off to Goodwill it goes.  Randy has a harder time with this process.  He often can’t give things away because he either “paid good money for it” or because the thing in question has sentimental value.  I might be thinking in particular of a hideous green and yellow jersey that, while I have not successfully persuaded him to toss, I have successfully persuaded him he should not wear.

This last time, for our move to Oakland, we had movers who packed us up.  This incredible service was paid for by his company and I can honestly say I’m never doing it any other way.  You basically just live your life in your house with all your stuff until the moving day and then bam! a team of professionals descends on you and packs everything in sight.  They wrap all the dishes and glassware, have special boxes for hanging clothes, and label everything clearly.  I’ve heard some people say that these types of teams even pack the garbage in the garbage can but that was not our experience.

Having this service was an incredible luxury with one caveat.  Because I wasn’t packing each box myself, or loading each thing on a truck, quite a bit slipped through the cracks.  Once we got to Oakland, they put all the boxes and furniture in the right rooms but we were responsible for the unpacking part.  About 100 times, I asked, “Why did this make it here?”  We had done a purge before they arrived but there is no purge like the one where you look hard at something and ask yourself whether or not it should make the trip.

All this to say that we have this little basket with a top that I would probably have donated to Goodwill sitting beside our couch.  It acts as a mini coffee table for Randy’s watching-tv-glass-of-water or bourbon.  Sometimes he remembers to bring that glass of water back over to the sink at night and sometimes he does not.  Recently, the boys were horsing around in that room and knocked over the leftover water (which, thankfully, was water and not bourbon) and as I was cleaning up, I realized that there were food magazines stashed away in that basket.  Not just food magazines, but a few copies of Gourmet from 2007.

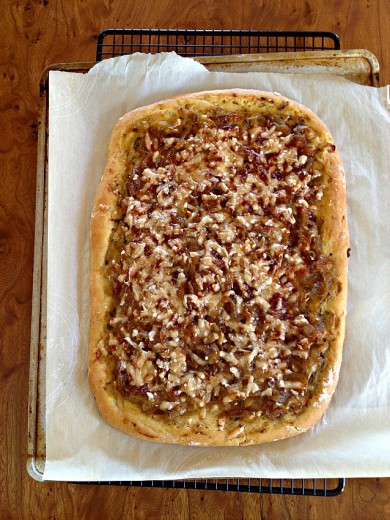
Now, we all miss Gourmet, right?  I know I do.  I have years and years of recipes cut our from that magazine along with Bon Appétit and Food & Wine.  Paging through the issues that I had left, I found recipes for things that I wanted to make immediately.  One of which was this onion tart.  I make a great Pissaladière,  which this tart resembles but with some intriguing differences.  The base is a yeasted tart dough rather than puff pastry, it features a slick of mustard on the bottom of the crust, fennel seeds sautéed with the onions, and a topping of Parmesan cheese.  I had the kindergarten moms come for dinner last week and this tart swiftly went on the menu.

I love a recipe that can be made for lunch, brunch, dinner, or an appetizer and this one fits the bill.  I thought the dough was incredibly sticky and I might have cursed Gourmet a few times (I love you! I miss you! I hate you!) but in the end this was an incredibly fragrant and powerfully flavored tart.  Unlike a Pissaladière, the crust is very neutral tasting but with a bit of crunch, so the onions are really the star of the show.  Just that little bit of cheese is a beautiful balance of savory to the gorgeous sweetness of the onions and the mustard gives you a nice hit of spice.  I let the tart cool to room temperature and then cut it into small pieces, but it could easily but cut into nice wedges for more of a main course.

UPDATE 5-25-13: I had wedges of this tart left over.  I wrapped them in foil and stored them in the fridge.  Days later, I reheated them, in a 250º oven, and the tart tasted as good as the day it was made.

Two Years Ago:  Spiced Cocktail Nuts
Three Years Ago:  Lighter Fettucine Alfredo, Curried Tofu and Avocado Dip, Giant Chocolate Cake
Four Years Ago:  Roasted Asparagus with a Poached Egg, Ginger Ice Cream, Tofu and Cucumber Salad with Spicy Peanut Sauce

Onion Tart with Mustard and Fennel
Adapted from Gourmet
Serves about 8 as an appetizer

I like to slow cook my onions in a cast iron skillet.  I find the evenness and the retention of the heat works really well.  I would avoid a non-stick pan as it can take longer for them to caramelize.  The round of parchment helps keep the onions really moist and takes them to a jammier texture but you can omit that step.  Just make sure the heat is nice and low, stir them occasionally, and allow them at least an hour (or more) to achieve their dreamy potential.

2 ¼ teaspoons active dry yeast (a ¼-ounce package)
½ cup warm water (105-115°F)
1½ to 1 ¾ cups all-purpose flour
1 large egg
1/3 cup plus 1 tablespoon extra-virgin olive oil, divided
2 ½ teaspoons salt, divided
2 teaspoons fennel seeds
3 pound yellow onions, halved and thinly sliced
1 tablespoon Dijon mustard
½  cup freshly grated Parmigiano-Reggiano

Stir together yeast and warm water in a small bowl and let stand until foamy, about 5 minutes. (If mixture doesn’t foam, start over with new yeast.)

Put 1 ½ cups flour in a medium bowl, then make a well in center of flour and add yeast mixture to well. Stir together egg, 1 tablespoon oil, and 1 ½ teaspoons salt with a fork. Add egg mixture to yeast mixture and mix with a wooden spoon or your fingertips, gradually incorporating flour, until a soft dough forms. Transfer dough to a floured surface and knead, working in additional flour (up to ¼ cup) as necessary, until smooth and elastic, about 5 minutes. (DT: I used a lot of flour on my board to keep the dough from sticking.)  Transfer dough to an oiled bowl and turn to coat. Cover with plastic wrap and let rise in a draft-free place at warm room temperature until doubled, 1 to 1 ½ hours.

While dough rises, heat remaining 1/3 cup oil in a 12-inch heavy skillet over medium-high heat until it shimmers, then sauté fennel seeds until a shade darker, about 30 seconds. Stir in onions, remaining teaspoon salt, and 1/2 teaspoon pepper, then reduce heat to medium-low and cover onions directly with a round of parchment paper. Cook, stirring occasionally, until onions are very tender and golden brown, 1 to 1¼ hours.

Preheat oven to 375°F with rack in middle.

Knead dough gently on a floured surface with floured hands to deflate.  Transfer dough to a heavy baking sheet lined with parchment paper.   Pat out dough into a roughly 15- by 12-inch rectangle, turning up or crimping edge, then brush mustard evenly over dough, leaving a ½-inch border around edge. Spread onions evenly over mustard, then sprinkle evenly with cheese.

Bake tart until crust is golden brown, 30 to 35 minutes. Cut into 2-inch squares or diamonds and serve warm or at room temperature.

Spring Tartines

May 30, 2012

I’ve written a bit about Book Larder, the amazing cookbook store where I am lucky enough to work.  The shop opened in October and it has been gangbusters ever since.  I was hired with the idea that I would teach classes there and coordinate with other teachers around town to bring them in for classes as well.  As the months have passed, my job has morphed a bit and my official title is Culinary Director.

What does that mean exactly?  The easiest way to explain it is that I get to handle all things food related.  I teach classes and I also work as the assistant when we have other teachers or chefs in the kitchen.  If we have an author come to town for an appearance, I bake or cook from their books.  I do all the shopping for classes and events and any prep that needs to be done.  I love it.  LOVE IT.  Imagine cooking in a lovely kitchen surrounded by 3,000 beautiful cookbooks.  And then imagine getting to meet people like Christina Tosi, Alice Medrich, Paula Wolfert, Patricia Wells, Lynn Rosetto Kaspar.  Making their food from their books for them.  It is crazy-town cool.

A few months ago, we threw a party for Willi Galloway, an amazing gardener and cook.  She used to live in Seattle but now calls Portland home.  Her book, Grow Cook Eat, is a gorgeous example of how beautiful and delicious fresh garden produce can be.  I am about the furthest thing from a gardener, but the book makes me want to get out in the dirt.  (Except there are bugs there, right?)  We hosted a book release party for her and I was lucky enough to cater the event.  Willi chose four recipes from her book and I made enough food to feed an army.  Everything was so good, it was basically demolished by the end of the night.  I credit Willi’s recipes, not my cooking.

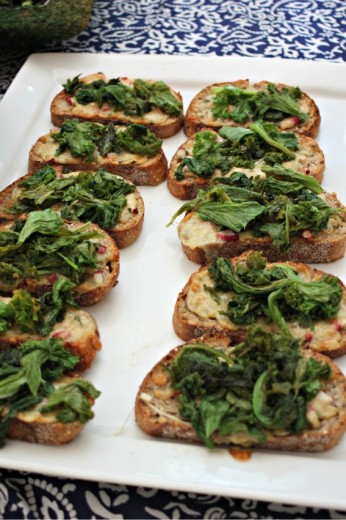
I loved everything I made but my favorite was the the Radish Tartines.  You mix a bit of butter with Gruyère cheese (one of my favorite cheeses), a healthy spoonful of mustard, chives, and diced radishes, spread that on a piece of hearty bread, then bake it in the oven until it puffs and browns.  Then you top that loveliness with the sautéed radish greens.  I love a recipe that uses all parts of a vegetable but I have to admit that, unless I am using über fresh farmers’ market radishes, I opt for mustard greens instead.  (I think any other “soft” green would work, including the extremely easy to find spinach.)

Side bar – what is a tartine?  Without looking anything up, this is my take.  Please be advised I could be totally wrong here.  I think of crostini as a thin slice of toasted bread with a topping.  I think of bruschetta as a thicker and heartier slice of bread, again – toasted, with a topping.  I think of a tartine as more of a open faced sandwich, the bread not toasted before the topping goes on.  A little easier to eat, no scraping the roof of your mouth.  Anyone else?

I’ve been making these beauties ever since that party and I love them more each time I eat them.  I made them for our last yoga retreat and they were at the top of the “Are you going to post this recipe on your blog?” list.

(Yes, this is the same photo as up above.  I only got one before they were snatched up!)
One Year Ago:  No-Knead Olive Bread
Two Years Ago:  Pull Apart Cheesy Onion Bread
Three Years Ago:  Individual Vegetable Tarts

Tartines with Gruyère and Greens

Adapted from Grow, Cook, Eat
Makes 6 large tartines

If you make them this way, they are kind of meal size.  Terrific with a bowl of pea soup or a hearty salad.  If you want more appetizer servings, use smaller slices of bread.  The topping can be made a day in advance and refrigerated, but definitely serve these just out of the oven.

2 cups grated Gruyere cheese (about 8 ounces)
3 tbsp. very soft unsalted butter
1 tsp. Dijon mustard
¼ cup finely chopped radishes
2 tbsp. fresh chives, chopped
Pinch of salt and few grinds of pepper
6 ½-inch thick slices good bread, such as pain de campagne
Olive oil
1 small bunch soft greens, such as mustard greens or spinach

Preheat the oven to 375F.  In a medium bowl, use a fork to really mash the butter.  Add in the cheese and mix well to combine the two.  Add the mustard, radishes, chives, and salt and pepper.  Divide the mixture between the bread slices, pressing down slightly.  Place the bread on a baking sheet and toast until the cheese puffs up and is lightly browned, 12 to 15 minutes.

Meanwhile, place a skillet over medium heat.  Drizzle in just enough olive oil to coat the bottom of the pan, then add the greens.  Cook, stirring frequently, until wilted, 5 to 10 minutes, depending on the green.  Spread the wilted greens on evenly over the cheesy toasts and serve immediately.


Disappearing Dip

May 15, 2012

About 3½ years ago, my friend Jen asked if I would be interested in co-hosting yoga retreats with her at her Bainbridge Island studio.  I have known Jen since seventh grade and we have been very close friends since we spent three months riding on bikes through the French countryside.  She is one of my favorite people in the world and I have nothing but respect for her as a teacher and a business owner.  So it took me about four seconds to say yes.

On Saturday, we did our 13th retreat.  Once a quarter for three years.  We have slipped into a well established pattern.  The morning starts at 9:30 with introductions, followed by an intense hot yoga class.  The group gets to take part in a meditations exercise of some kind while I run up to the house, shower, and get lunch going.  When I first started doing these retreats, I realized that people would be hungry and I would not necessarily have every 100% ready by the time they were ready to eat.  So I always plan on having some kind of nibble in case I need to buy a little time.

Now you see it.

Now you don’t.

This was my nibble on Saturday.  A smooth layer of goat cheese topped with an unusual but incredible mixture of sweet jam, spicy peppers, mustard, and onions.  I did a test run of it the night before so I knew it was super delicious but I did not anticipate how quickly it would be inhaled.  I had intended to get a shot with a few swipes of dip taken out but by the time I started bringing out the lunch food, the dip was all but gone.  One of the things I like best about making lunch for yoginis is how hungry they are.  In my experience, women can sometimes be funny about food.  Dieting and all that.  But not this group.  They eat with gusto and deep appreciation and those are the best kinds of people to cook for.

One Year Ago:  Cheddar Crackers, Kaye Korma Curry, Stir-Fried Sesame Broccoli and Tofu with Rice Noodles
Two Years Ago:  Corn Salad Sandwich with Poblano Peppers, Chickpeas with Lemon and Pecorino Romano
Three Years Ago:  Mexican Brownies, Quinoa with Grilled Zucchini and Chickpeas, Peanut Butter Cup Brownies

Pepper-Glazed Goat Cheese Gratin
Food & Wine
About 8 servings

I made this using 30 ounces of goat cheese and roughly doubling the topping.  I put it in a 8×12-inch casserole dish and it fed about 20 people.  But I could have made more easily and I’m sure it would have been devoured.  The combination of creamy, sweet, and spicy is amazing.

1 pound creamy fresh goat cheese, softened
6 tbsp. apricot preserves
4 Peppadew peppers, finely chopped
1 pickled jalapeño, seeded and finely chopped
2 tbsp. minced cocktail onions
2 tsp. Dijon mustard
1½ tsp. dried sherry
Pita chips, crackers, or baguette slices for serving

Preheat the oven to 400ºF.  Spread the goat cheese in a 5-by-8-inch gratin dish in an even layer.  In a small bowl, whisk the preserves with the Peppadews, jalapeño, onions, mustard, and sherry.  Spread the mixture over the goat cheese and bake on the top rack of the oven for about 5 minutes, until warm.  Turn on the broiler and broil for about 2 minutes, until the topping is bubbling and lightly browned at the edges.  Serve hot.

(DT:  I assembled the dish the night before, refrigerated it, transported it to Bainbridge and baked it off there.  Worked beautifully.)


Spicy Squash and Feta Puff Pastry Tarts

December 17, 2011

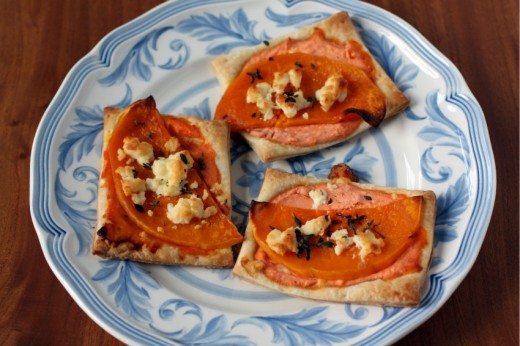
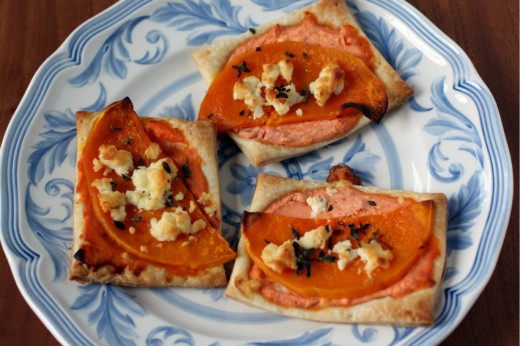
For my December baking class, I taught my students how to work with store-bought filo dough and puff pastry.  We also made no-knead bread, a gorgeous beet tart, and that incredible brown sugar pound cake.  For the puff pastry, I was planning on doing some classic riff on butternut squash, leeks, and thyme.  Until I flipped through the appetizer section of a new-to-me cookbook and found a version using squash, spicy harissa, and feta cheese.  Hello?  Hello!

I tested the recipe for a party we threw for Randy’s work.  I tweaked it a bit.  I wondered if it would be too spicy or too out-there for a group of people I didn’t really know.  It was one of those times when I put the plate of mini-tarts out, turned my back for a moment or two to finish something at the stove, turned back around to find them gone.  Gone.  I got more comments on those little tarts than I did on anything else I made for that night (including a very cool Bûche de Noël – recipe coming soon).

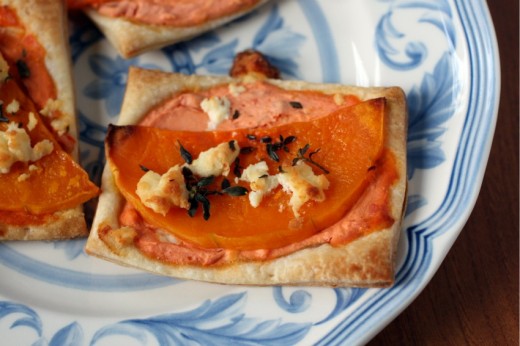
When I made them for the party, I used my default favorite squash – the delicata.  I love those little guys for their ease of preparation (you don’t have to peel them) and for their subtle flavor.  But I didn’t like how the slices looked on the tart and I think the flavor got lost.  When I made them for the class (and the subsequent times after – yes, I’ve made them three times in two weeks), I used butternut.  I advise looking for a squash with a long neck since the slices you get from the neck are more uniform than the ones you get from the body.  Unless you are able to find a very small squash, you will likely have leftovers.  Personally, having a little stash of roasted squash in my refrigerator to add to all manner of things (risotto, pasta, soup, salad), makes me very happy.

Now permit me a paragraph of utter geekdom as I talk about store-bought puff pastry.  Having used it for years and now having taught how to work with it to several classes, I know a thing or two about it.  Let’s start with the fact that you don’t want to use Pepperidge Farm if you can possibly help it.  I know it is widely available and I know it is cheap, but I also know that puff pastry should only contain three ingredients (flour, butter, and salt), and possibly four (sugar).  Pepperidge Farm not only is not an all-butter puff, it is a no-butter puff.  There is a long list of ingredients on the side of the package, not one of them is butter and most of them I can’t pronounce.  So unless that is your only option, steer clear.  In Seattle, we are lucky to have two excellent sources of store-bought puff – DeLaurenti and Grand Central Bakery.  Both are affordable and terrific and only contain the three or four ingredients I mentioned.  Nationally, Trader Joe’s carries puff pastry seasonally, and that season is right now.  I tried it for the first time recently and found it to be fine.  Not terrific but good, four ingredients, affordable.  So stock up!  One other option if price is not an issue is DuFour, an exquisite puff that comes with the exquisite price tag of $16/pound.

Each type of store-bought puff (and yes, I am aware on into my second paragraph of geeking out) comes in a different amount, so be flexible when working with this recipe.  I call for 12 ounces because I tested it using the DeLaurenti brand and theirs comes in a 12-ounce sheet.  Yours might be different.  It’s all good – just roll with it.  No pun intended.  Also, remember you can make these lovely spicy pastries bite-size or larger for more of a substantial first course.  You could even serve them as a main course.

One Year Ago:  Sweet & Salty Brownie
Two Years Ago:  Caramel Chocolate Treasures
Three Years Ago:  Jalapeño Cheddar Cornbread

Spicy Squash and Feta Puff Pastry Tarts

Inspired by Vegetarian
Makes about 16-32 tarts (depending on how you cut them)

1 medium butternut squash, preferably one with a long neck
Olive oil
Kosher salt
7 ounces Fage 2% Greek yogurt
1-2 tbsp. harissa
7 ounces feta cheese, 2 ounces crumbled finely, 5 ounces cut into small cubes
12 ounces all-butter puff pastry
4 thyme sprigs, leaves stripped

Preheat the oven to 375F.  Peel and seed the squash.  Split the neck in half and thinly slice into semi-circles.  Slice the base into thin crescents.  Put all the squash onto a large baking sheet and drizzle with olive oil and a large pinch of salt.  Use your hands to mix together well.  Spread out on the sheet and bake for 25 minutes, or until tender.  Remove from the oven and allow to cool.

Mix together the Greek yogurt, 1 tablespoon of the harissa, and the 2 ounces of crumbled feta.  Taste it and add more harissa if you would like more heat. Set aside.

Unfold the puff pastry onto a lightly floured surface.  Roll it out with a rolling pin, just to even out the folds and to make an even rectangle.  Using a pizza cutter or a sharp knife, cut into 16 rectangles.  If you are making cocktail sized appetizers, cut each rectangle in half.

Transfer the rectangles to two baking sheets.  Spoon about a tablespoon of the yogurt mixture onto each rectangle and top with a slice of squash.  Add one or two cubes of feta to each pastry.  Repeat with the remaining rectangles.  Sprinkle them all with thyme and bake in the oven for 15-20 minutes until puffed and golden.  Serve warm or cool the tarts on a wire rack.


Squash Hummus and Homemade Flatbread

November 16, 2011

If you have been reading here for any time at all, then you know I have two children.  Boys.  First grade and pre-K.  If you have been reading for a bit of time, you might know that those two boys are vegetarian.  Like me.  I’m sure they will eat meat at some point but for now, I am the cook in the family and I only cook vegetarian.  And to keep things uncomplicated and black and white, the boys are veg.

What you may not know is that my boys, the ones who are, ahem, vegetarians, don’t really eat vegetables.  Not for lack of trying.  We offer, they decline.  They like carrots and will eat an alarming amount of celery if it has peanut butter and raisins on it, but that is pretty much it.  And actually, I really should say that Graham (older) will eat broccoli and peas but Spencer (younger, pickier) will not.  We went to a friends’ house recently and they served the boys peas and Spencer put one in his mouth at a time and washed it down with a gulp of milk.  Just like he was taking a pill.

Do I worry about this lack of vegetable eating?  No.  I remember my pediatrician saying that ideally a child eats both fruits and vegetables but as long as they eat one or the other, there is no need to worry.  Considering that my boys eat fruit at all three meals and sometimes for a snack, and considering that I prefer not to worry if worrying is not necessary, I don’t worry.  I also don’t believe in hiding vegetables to try and trick my kids into eating them.  If I put a vegetable in something, like this mac and cheese, I tell them it’s there.

So last night, I made squash hummus.  My timing was good – Graham’s school is starting a new program where each grade works with a certain vegetable and the rest of the school has an assignment to actually eat that vegetable.  This week it is squash.   He was actually assigned to eat squash.  He was telling me this as I was literally taking it of the oven and he looked at me with that sweet almost 7 year-old wonder of, “My mom is magic!”

Normally, I would have to say I’m a hummus purist.  Hummus is chickpeas, tahini, lemon juice, a small clove of garlic, salt, pepper, olive oil, and maybe a sprinkle of cumin.  That is how I make it, that is how I like it.  Calling something that does not have chickpeas or tahini in it “hummus” bothers me.  But adding something, a vegetable I happen to love, to hummus can still be called hummus, according to the Dana Treat rules.

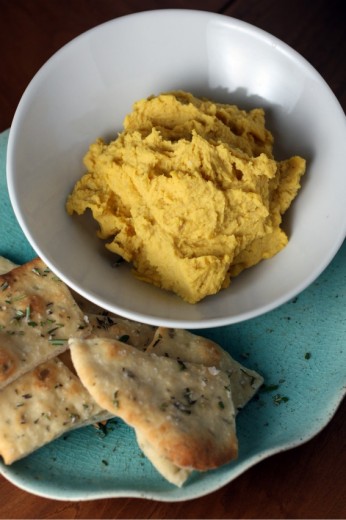
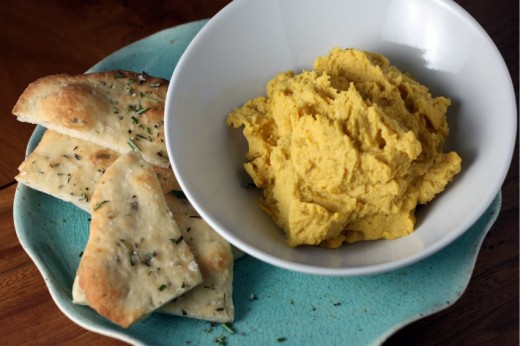
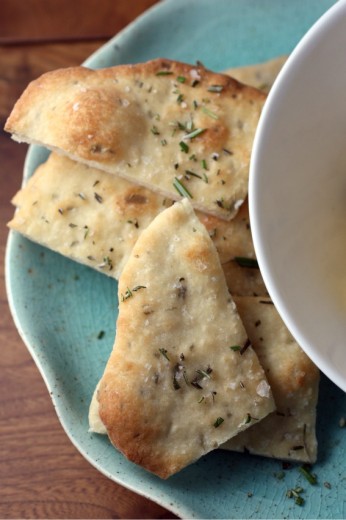
So how was it?  Good.  Sweeter and more yellow than my regular hummus.  Thicker too.  Most importantly, my kids loved it.  I called it squash hummus – there was no trickery going on here.  Spencer requested that I keep his squash separate and when I told him that was impossible, he just dug in anyway.  I was helped by the fact that I made flatbreads to go with it which fascinated the boys.  They scooped, ate, and scooped again.  The other boy in my family – that would be my husband – was equally smitten with both the flatbreads and the hummus, the latter of which he started eating with a spoon when the bread ran out.

Two notes.  The hummus recipe calls for a 2/3 pound butternut squash.  I know we live in squash country and they grow nice and big in our climate, but I have never seen anything close to a squash that small.  In many grocery stores, they sell pre-cut and seeded chunks of squash which is what I bought.  It doesn’t matter what type it is.  And if you suffer from yeast/dough fear, this flatbread is a great place to start.  It is foolproof and if you roll it into shapes that are other than circles, it will look extra cool.


Squash Hummus
Adapted from Fresh from the Garden
Makes about 3 cups

All food should be done to your taste but I think this is especially true of things like hummus and salad dressing.  Start with this recipe and then add more olive oil (or more water) if you want a looser consistency and be sure to add more salt if it needs it.  I added a bit more lemon juice to mine too.

1 small squash (about 2/3 pound)
1 15-ounce can chickpeas, rinsed and drained
1 small garlic clove, minced
2 tbsp. tahini paste
Juice of 1 lemon
2 tbsp. olive oil
2 tbsp. water
Sea salt and coarsely ground black pepper

Preheat the oven to 375ºF.  Cut the squash in half and scrape out the seeds.  Drizzle the cut surfaces with olive oil, then wrap it in foil.  Bake for about an hour – until a knife easily pierces the flesh.  Set aside to cool enough to handle.

Scrape out the squash flesh into the bowl of a food processor fitted with the steel blade.  Add the chickpeas, garlic, tahini, lemon juice, a large pinch of salt and a few grinds of pepper.  Pulse to combine.  With the machine on, pour the olive oil and then the water through the feed tube.  Stop and scrape down the sides, then continue to process until you have a nice smooth consistency.  Adjust the seasoning to your taste.

Rosemary Flatbread
Makes 6 medium-sized breads

I make bread often and it is rare, unless I am making the no-knead version, to have the dough actually double in size in a short period of time.  Don’t worry about it, just continue with the recipe.

1½ cups all-purpose flour
½ tsp. dried yeast
2 tbsp. fresh rosemary, finely chopped, plus extra for topping
1 tbsp. olive oil plus extra for brushing
Sea salt

Place the flour in a medium bowl and add the yeast.  Add 2/3 cup tepid water, the rosemary, olive oil, and a pinch of salt, and start mixing it all together to form a rather sloppy dough.  If your mix is too dry, add a bit more water.  If the mix is too wet, add a little more flour.

Once you have a ball of dough, take it out of the bowl and knead on a floured surface for 5 minutes, until it is elastic and slightly tacky.  Leave the dough to rest in a warm place under a damp kitchen towel for 1 hour; until it has about doubled in size.

Preheat the oven to 400ºF.  Line two baking sheets with parchment paper.

Break off about 1/6th of the dough and, using your hands, roll it into a ball.  Place on a floured surface and roll out to a thickness of about 1/8th of an inch.  Repeat until you have used all the dough.  Transfer to the prepared sheets and brush each flatbread with olive oil.  Sprinkle with a little salt and more rosemary.

Place the sheets in the oven for 12 to 15 minutes, until the surface of the breads starts to bubble and turn golden brown.  Don’t cook them too long or they will turn into cardboard.  Serve immediately.


« Older Posts