Archive for April, 2009

Nicoise Salad

April 30, 2009

img_2006

This past Saturday, we had people over for both brunch and for dinner.  Because the week before included me catering a dinner party, cooking for my regular clients, and teaching a cooking class, I thought take-out would be a good option for our dinner guests.  Until I realized that really, I have a reputation to uphold and I can’t serve friends take-out – no matter how good our local Thai food is.  I decided to spend time on the dessert and to make something more simple for dinner.  Sometimes simple doesn’t necessarily mean quick, but in the case of this salad, you can get a wonderful and satisfying meal on the table pretty fast.

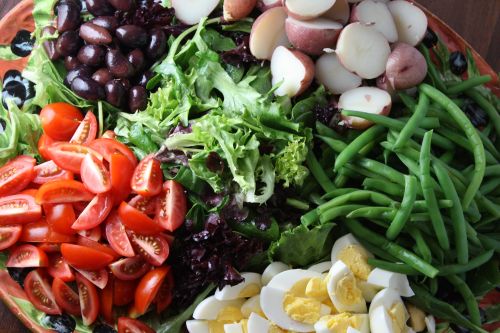
I make this Niçoise Salad a lot in the summer when we want something good but light.  Randy will throw a can of tuna on his portion and I will take extra egg, or will add some chickpeas or other white beans to mine.  For our guests, Randy grilled some fresh tuna and I just ate extra salad.  I also made some tartines which are like giant crostini.  I slathered them with olive tapenade and topped them with peppers and onions cooked down with lots of smoked paprika.

This salad lends itself to lots of different interpretations.  What I included Saturday are the things I always include – olives, green beans, hard boiled egg, potatoes, and olives.  Sometimes I add white beans, sometimes I roast the potatoes instead of boiling them, sometimes I use Kalamata olives and sometimes I just use whatever is in the refrigerator.  Feel free to experiment.  I used a (gasp!) bottled dressing on Saturday, but I would advise tossing everything with something lemony with a mustard kick – homemade preferably.

img_2012

Niçoise Salad
Serves 6

This is the veg version.  If you want to top it with fresh tuna, figure on a 3-4 ounce piece per person.

2 big handfuls green beans, ends trimmed
1 1/2 pounds small red potatoes
6 large eggs
1 lb. cherry tomatoes, halved
1 large handful Kalamata olives
10 oz. pretty bagged lettuce
Dressing of your choice

Bring a medium pot of water to a boil.  Fill a large bowl with ice water.  Add the green beans to the pot and cook until crisp-tender, about 2-3 minutes.  Using a slotted spoon, scoop the beans out and immediately place them in the ice water.  Wait until they feel cool to the touch and then scoop the beans out to drain in a colander.  Meanwhile, add the potatoes to the boiling water and cook until the tip of a knife slides in and out easily, 15-20 minutes.  Drain.

Rinse the pot in cold water to cool it down, then fill with cold water.  Add the eggs and bring to a boil.  Cover and turn off the heat.  Add more ice to the ice water.  Allow eggs to sit for 12 minutes, then scoop them out and into the cold water.  Allow to cool then drain.

Toss the lettuce with some of the dressing in a large bowl then place on a serving platter.  Cut the potatoes into halves, quarters if large.  Peel the eggs and quarter or slice them.  Arrange the potatoes, eggs, beans, olives, and tomatoes decoratively around the platter.  Drizzle a little dressing over each component.


Geographical Vegetarian

April 29, 2009

img_2031

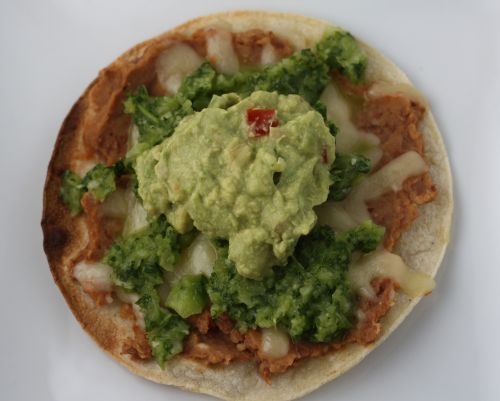
I recently heard the term “geographical vegetarian”.  It was introduced to me by a man who eats meat but whose wife does not.  He eats vegetarian in their home but eats meat outside of it.  I was thrilled to hear this term because now I can attach a name to what my husband is.  As in, Q: “Is your husband a vegetarian?”  A: “My husband is a geographical vegetarian.”  Aside from a little fish that he grills now and then (and mussels I make for him once in a great while), no meat eating goes on in our house.  People are confused by this.  How could a red-blooded carnivore be forced to eschew his meat-eating ways in his own home?

It’s simple really.  I’m a good cook.  He likes my food.  He eats meat for lunch at work and when we go out.  Food is not his be all end all as it is for me.  And I make Mexican food, which is his favorite, often.

Truthfully, I could make the same Mexican meal three nights a week and he would be happy.  As long as there is guacamole and some kind of beans – I would never hear a complaint.  But I would complain.  I need variety so I am always trying to mix it up.

I read about a salad on For the Love of Cooking that I was dying to try.  The dressing featured lots of cilantro and lime juice and the salad had corn, beans, Cotija cheese, avocado, and all kinds of other yummy things in addition to romaine lettuce.  I’m a sucker for a salad with lots of “stuff” in it.  To go with it, I made these tostadas.  They are relatively simple but with a powerful flavor punch from this sofrito.  You will get more sofrito than you need for these tostadas, but you can use it to flavor rice, soup, beans, or anything else in your next Mexican meal.

Bean Tostadas with Sofrito
Adapted from Simple Vegetarian Pleasures
Serves 4

Personally, I don’t really like the taste of raw onion and using a whole onion in the sofrito was too strong for me.  Next time I will use half. You could streamline this recipe by using canned re-fried beans thinned with a little water.

Sofrito
3-4 cups lightly packed cilantro, stems included
1 small jalapeño pepper, seeded and chopped
1 small green pepper, cored and chopped
2 garlic cloves, minced
1 small onion, chopped
1/3 cup olive oil
1/4 cup cider vinegar
1/2 tsp. salt

Beans
1 (15 oz) can pinto or kidney beans, rinsed well and drained
1 tsp. chili powder
1/4 cup water
1/4 tsp. salt

Tortillas
8 small (6-inch) soft corn tortillas
2-3 tbsp. canola oil
1 cup grated Monterey Jack cheese

1.  To make the sofrito, combine all the sofrito ingredients in a food processor or blender and puree until smooth.  Pour into a container with a cover and set aside.

2.  To prepare the beans, combine them with the chili powder, water, and salt in the container of a food processor and purée.  Scrape into a bowl.

3.  Preheat the broiler.  Brush both sides of each tortilla with some of the oil, and place the tortillass on a baking sheet.  (You may have to do this in batches.)  Broil on both sides until golden and crisp.  (The tortillas can be prepared up to this point 24 hours in advance.)

4.  Divide the bean mixture and spread some on each tortilla.  Top each with some of the grated cheese.  Broil the tostadas until the cheese has melted and they are hot throughout.  Serve with little spoonfuls of sofrito dotted on top of each tostada.  (DTI also topped them with guacamole.)


The Spring Tart You Must Make

April 28, 2009

img_2015

My husband Randy likes to rate things on a scale from 1 to 10.  The rating system applies to meals he has had, presentations he has done, movies he has seen.  It is a way for his linear mind to organize input.  My non-linear mind has no need for such organization so I find it somewhat irksome that he often asks me to rate certain things.  I can’t assign a number to a meal or an experience.  When he presses me, I will come up with a number, but it feels so wrong to me and I immediately question whatever number I have chosen.

Having said all that, I have no problem telling you and anyone else who will listen that this dessert is a 10.  It was that good.  This is huge because for me, desserts fall into one of two categories.  #1 – Chocolate, #2 – Everything Else.  I call that second category “sort of desserts”.  Don’t get me wrong, I love lemon and I love apple but they are not chocolate and therefore not truly dessert…in my opinion.  The possible exception here is caramel which I love with enough passion to put it in the chocolate category.

If you scroll through the dessert section of this site, you will notice plenty of non-chocolate things.  That is because I am almost always baking for people other than myself and I recognize that there are many misguided souls out there who don’t fully appreciate a chocolate dessert – my husband being one of them.  In the interest of broadening my horizons, I decided to make this rhubarb tart (rhubarb? not even on my radar) for a dinner party on Saturday night.  It is in season right now and I know there are people who feel about rhubarb the way I feel about chocolate, my husband being one of them.

img_2002

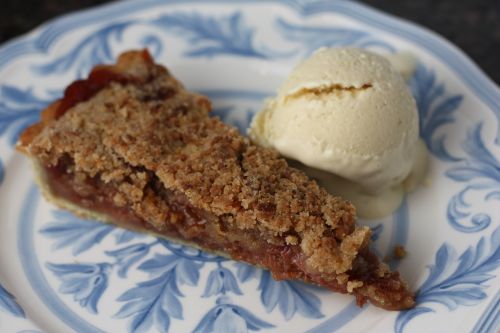
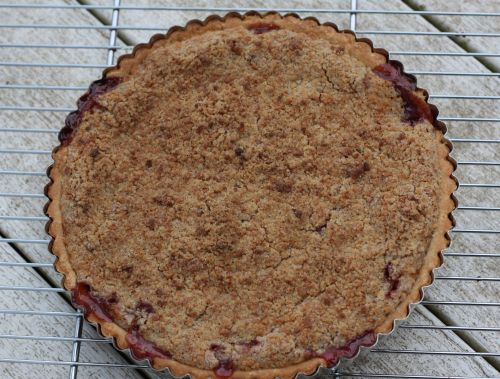
Where to start?  The recipe is perfect.  The crust was easy to work with and had just the perfect hint of sweetness.  The rhubarb is cooked down with plenty of brown sugar and cinnamon, so a sweetness emerges, but it still retains it’s delightful tang.  The crisp part is amazing as the crisp part of crisp desserts always is – the difference being that here there is a ton of it but not so much so that it is all you taste.  Again, the flavors and textures are perfect – a very well-written recipe.

img_2014

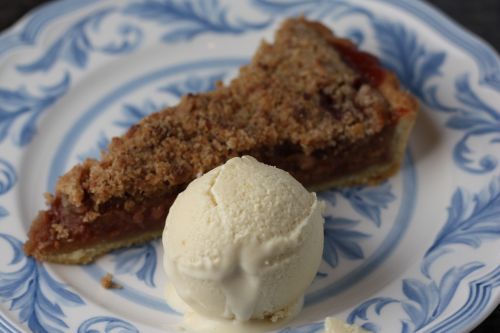
And then there is the ice cream.  Brown Sugar – Sour Cream Ice Cream.  Do I really need to attempt to find words to describe it?  Suffice it to say that is the perfect match for the tart.  This is only the second time I have made ice cream and, as with the first time, I wondered why I don’t do this everyday.  If you have made ice cream you know, the texture and flavor cannot compare with store-bought – even the very best store-bought.  And it really takes no effort.  If you are looking for a perfect spring time tart, look no further.img_2019

Rhubarb Streusel Tart with Brown Sugar – Sour Cream Ice Cream
The Farm to Table Cookbook
Makes one – 9 inch tart

For the Crust:
1 1/2 cups all-purpose flour
1/4 cup sugar
1/4 tsp. kosher salt
1/2 cup (1 stick) cold unsalted butter, cut into 1/2 inch pieces
2 egg yolks

For the Streusel:
6 tbsp. cold unsalted butter, cut into 1/2 inch pieces
2 1/2 tbsp. almond paste or marzipan
1/2 cup sugar
2/3 cup all-purpose flour
1 tsp. ground cinnamon

For the Filling:
1 1/2 pounds (about 6 cups) rhubarb, thinly sliced
1 cup brown sugar
1 1/2 tsp. ground cinnamon

1.  To make the crust, blend the flour, sugar, salt, and butter in a food processor or an electric mixer with the paddle attachment until the butter lumps are no larger than peas.  Whisk the egg yolks in a small measuring cup and add enough water to make 1/4 cup liquid; add to flour mixture.  Mix until the dough just starts to come together.  (DT: I had to add another couple tablespoons water to get the dough to come together.  I also used ice cold water.)  Gather the dough, shape into a disc, and wrap in plastic.  Chill for at least 1 hour or up to 3 days.

2.  To make the streusel, combine the butter, almond paste, sugar, flour, and cinnamon in food processor and process until the mixture is in fine crumbles.  (Alternatively, use a pastry blender.)  Refrigerate until needed.

3.  Allow the dough to stand at room temperature for 5 minutes.  Roll on a lightly floured surface into a 1/2-inch-thick disc, frequently rotating the dough to prevent sticking.  Transfer to a 9-inch tart pan with removable bottom.  Ease the dough into the pan, fitting it to the pan’s contour with fingertips, leaving some dough hanging over the edges.  Trim the pastry edges by rolling the pin over the rim and discard trimmings.  Freeze the shell until firm, about 30 minutes.

4.  Preheat the oven to 375 degrees.

5.  Make the rhubarb filling by combining the rhubarb, brown sugar, and cinnamon in a large sauté pan.  Cook over medium heat, stirring frequently, until the rhubarb is fall-apart tender, about 10 minutes.

6.  Fill the tart shell with the rhubarb mixture to within 1/2 inch from the top of the crust.  Sprinkle on the streusel and transfer to a baking sheet.  Bake until the streusel is golden brown and the filling is bubbly, about 45 minutes.  Transfer the tart shell to a wire rack and cool completely.  Using a small sharp knife, gently loosen the crust from sides of pan.  Push up pan bottom to release tart.  Serve with ice cream.

Brown Sugar – Sour Cream Ice Cream
Makes 1 quart

2 cups half-and-half
1 1/4 cups brown sugar
8 egg yolks
2 cups sour cream

1.  In a small saucepan, scald the half-and-half over medium-low heat until hot.

2.  Whisk the brown sugar and egg  yolks together in a medium bowl.  Slowly whisk in the half-and-half.

3.  Return the mixture to the saucepan and cook over medium-low heat, stirring constantly with a rubber spatula until the mixture thickens enough to coat it, about 5 minutes.

4.  Strain the mixture through a fine-mesh sieve into a metal bowl.  Refrigerate until cold, then whisk the sour cream into the half-and-half mixture and freeze in an ice cream maker according to manufacturer’s instructions.


Spreading Scone Love

April 26, 2009

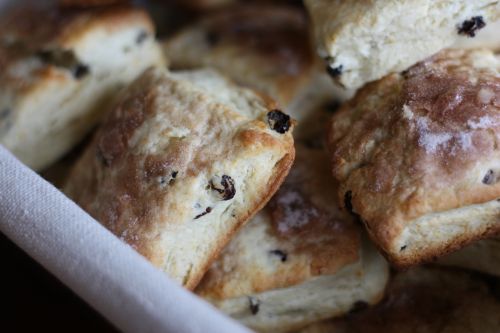
img_1988

Scones.  They are almost everywhere coffee is sold (in Seattle, that is everywhere), and most of them are terrible.  It seems to me that each year, they get a little bigger and a little less flavorful.  At this point in history, they just taste like flour, sugar, and air.

This is the only scone I have ever made and, aside from a pumpkin one I remember seeing on Eggs on Sunday, the only one I will probably ever make.  Everyone who eats them loves them.  Our brunch guests each had several and my own four year old had two all to himself.  I think it’s because they are simple.  No 100 ingredients thrown in to mask the taste of nothing, just a few really good things.

I got this recipe from The Joy of Cooking.  It’s a book I turn to when I just want the essence of a dish.  Do you ever feel like no, I don’t want to make a pasta salad with heirloom beans and $75 balsamic vinegar, I just want to make a pasta salad?  The Joy of Cooking is your friend.  One day, long ago, I found myself wanting to make scones and all the recipes I was seeing had enough ingredients in them to make my mouth tired just thinking about eating them.  I turned to this book and it did not disappoint.

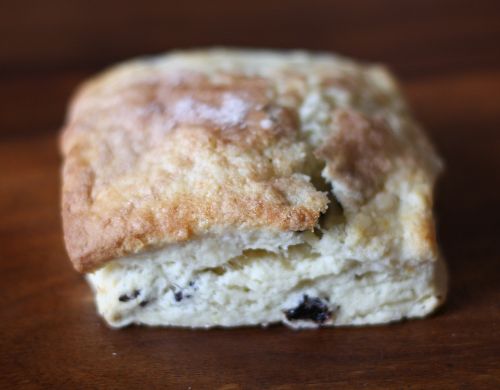
img_1992

Classic Currant Scones
Adapted from The Joy of Cooking
Makes 8-12 scones

Do yourself a favor and double this recipe.  It takes no extra effort and they freeze beautifully.  I used square biscuit cutters for these but I have also used round and have formed the dough into a round and cut them into wedges as described below.  All wonderful!

2 cups all-purpose flour
1/3 cup sugar
1 tbsp. baking powder
1/2 tsp. salt
6 tbsp. (3/4 stick) cold unsalted butter, cut into 1/2 inch pieces
1/2 cup dried currants or raisins
1 large egg
1/2 cup heavy cream
1 tsp. grated orange zest (optional)
2-3  tsp. heavy cream or milk
Cinnamon and sugar

Position a rack in the middle of the oven.  Preheat to 425 degrees.  Have ready a large ungreased baking sheet. Whisk together the flour, sugar, baking powder, and salt in a large mixing bowl.  Drop in the butter and cut it in with 2 knives or a pastry blender, tossing the pieces with the lour mixture to coat and separate them as you work, until the largest pieces are the size of peas and the rest resembles breadcrumbs.  Stir in the currants.

In a liquid measuring cup, whisk together the egg, cream, and zest.  Add to the flour mixture.  Mix with a rubber spatula, wooden spoon, or fork just until the dry ingredients are moistened.  (DT: I usually find it necessary to add a little extra cream here, maybe 1-2 tbsp.)  Gather the dough into a ball and knead it gently against the sides and bottom of the  bowl 5-10 times, turning and pressing any loose pieces into the dough each time until they adhere and the bowl is fairly clean.  Transfer to a lightly floured surface and pat the dough into an 8-inch round about 3/4 inch thick.  Cut into 8 or 12 wedges and place at least 1/2 inch apart on the baking sheet.  Brush the tops with the cream or milk and sprinkle with the sugar and cinnamon.

Bake until the tops are golden brown, 12-15 minutes.  Let cool on a rack or serve warm.


Sushi Rice Salad

April 25, 2009

img_1911

What do I make when I’m making miso soup?  Sushi Rice Salad.  I’ve made sushi rolls before – I have the bamboo mat to prove it.  But, while they are delicious, healthy, and nutritious, they are also kind of time consuming and fussy.  When I crave those flavors, I make this salad.  A purist would gasp but someone wanting sushi would just dig in.

This recipe is written on yellow legal paper in my own hand and I have no idea where I got it.  I have tweaked it significantly over the many times I have made it so I am going to officially call it my own.  Whoever wrote the original says to use long-grain rice.  Every single time I have made it, except for this last one, I have used sushi rice.  You have to wash sushi rice endlessly so it doesn’t gum up and wouldn’t you know it, every time I made this dish, the rice gummed up.  Last week I decided to make it with brown rice and I loved it.  Try whatever you like.

Sushi Rice Salad
Serves 4-6

You should be able to find all the more unusual ingredients in the Asian food section of your grocery store.

1/2 cups long grain rice or brown rice
1/4 cup + 3 tbsp. rice wine vinegar, divided
1/4 cup sugar
1 1/2 tsp. salt
1 tbsp. sesame seeds, lightly toasted
3 tbsp. vegetable oil
2 tbsp. finely chopped pickled ginger
3 scallions, thinly sliced
1/2 cup shredded carrots
1 English cucumber, seeded and chopped
8 oz. extra firm tofu, cut into small cubes
2 sheets nori
1 avocado

Cook rice.  (If making brown rice, simply boil in a large pot of water, as you would for pasta.  Cook until tender and then drain.)  Meanwhile, in a small saucepan 1/4 cup vinegar to boil with sugar and salt, stirring until sugar is dissolved and remove from heat.

Transfer rice to a large bowl and stir in vinegar mixture.  Cool rice.  (If there is excess liquid in the bottom of the bowl, drain rice again.)  Stir in sesame seeds, remaining 3 tbsp. vinegar, oil, ginger, scallions, cucumber, tofu, and carrot.

Cut nori sheets into 1 inch wide strips.  Peel and pit avocado.  Quarter, then cut cross-wise into thin slices.  Add avocado to salad with nori.  Toss well.

Dressing

I like a lot of wasabi with my sushi.  I like my nose to burn a little bit.  If you like things mellower, add between 1 and 2 tsp. wasabi and then see how it tastes before you add it to the salad.

3 tsp. wasabi paste
1 tbsp. hot water
2 tbsp. cold water
2 tbsp. soy sauce
2 tsp. ginger juice

In a small bowl, stir all ingredients together.  Drizzle dressing over salad and mix carefully.


« Older Posts