Category: Main Course

Back with a Winner

November 13, 2013

Hello friends. How do I explain an over month-long absence? It would be easier if I had some good excuse as to why I’ve been gone. A long trip maybe or a super exciting professional assignment. I can’t boast either. I can’t hide behind illness or family troubles because, truthfully, everything is going swimmingly. It turns out that writing is like exercise for me. Either I’m in it, doing the work on an almost daily basis and it feels natural, or I’m out. I never meant to be out and I apologize that so much time has passed since my last post and this one. My own brother called me a slacker.

Here is a reason that I believe I will never have an over month-long absence for this space again. We moved around our guest bedroom and study. My writing space was once downstairs and is now on the main floor, just a few steps from the kitchen. I know it’s silly that a few stairs kept me from writing but, after living with things the old way for a year, it seemed time to make a change. Also, our new guest digs are bigger, brighter, and more private. A win win for everyone.

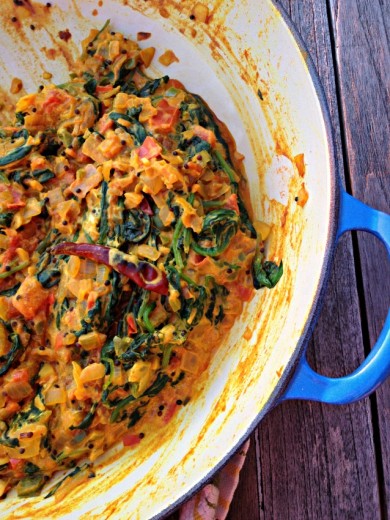
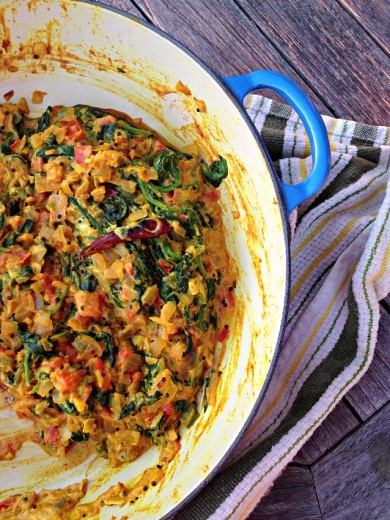
So I’m returning with a favorite. I have always loved making Indian food, never more than once I got my hands on two very special cookbooks from a favorite restaurant in London. (Amazon carries at least one of them.) I turn to them over and over again, their pages splattered and slightly coming away from the spine of the books. When an Indian food craving hits, I almost always make this dish alongside some rice (Peas Pilau Rice from one of the books is particularly good) and some other delicious offering, most often starring potatoes and/or chickpeas. Raita and some kind of chutney round out the meal. What makes this dish special is that it is mild, a bit tangy, but still with plenty of spices and the haunting and unique flavor of fresh curry leaves. It’s mildness and creaminess is most welcome on a table of spicy things. I love a dish that can taste so good with a slight richness and that is also so good for you.

Curry leaves are an ingredient that can be hard to find but they do add an unmistakable and hard-to-put-your finger on flavor here. I was able to find them at Uwajimaya in Seattle and I have found them in Berkeley Bowl and Monterey Market here in the East Bay. If you have an Asian market or other ethnic store near you, chances are you can find them. They keep for a long time so buy extra because you’ll want to make this dish again. If you can’t find them, make the dish anyway. In addition to being tasty and tangy, it’s healthy with tons of spinach and the creaminess comes from plain yogurt. Sorry for being away for so long.

One Year Ago:  Salted Caramel Ice Cream and Malted Vanilla Milkshakes (and another apology)
Two Years Ago:  Bulghur Salad Stuffed Peppers, Stilton Tart with Cranberry Chutney (Thanksgiving appetizer anyone?)
Three Years Ago:  Romaine Leaves with Caesar Dressing and a Big Crouton, Roasted Mushrooms and Shallots
Four Years Ago:  Holly B’s Gingersnaps, Gianjuja Mousse
Five Years Ago:  Bulghur and Green Lentils with Chickpeas, Pumpkin Whoopie Pies

Cheera Thayir Curry

Adapted from The New Tastes of India
Serves 4

Vegetable, canola, or coconut oil
2 tsp. mustard seeds
3 cloves garlic, minced
3 dried red chilies
10 curry leaves
Pinch of fenugreek (optional)
1 large onion, finely chopped
2 large tomatoes, seeded, finely chopped
3 jalapeno peppers, seeds and membranes removed for less heat, chopped
2 tbsp. peeled fresh ginger, minced or grated
1 tsp. tumeric
5 ounces baby spinach
1 cup plain yogurt (whole milk or 2%, do not use non-fat)
Kosher or sea salt

Place a large saucepan over medium heat and have a lid ready.  Pour in just enough oil to coat the bottom of the pan and then add the mustard seeds.  After a couple of moments they will start to pop.  Immediately add the garlic, dried red chilies, curry leaves, and fenugreek.  If the popping gets out of hand, just cover the pot with the lid until it calms down.  Cook, stirring frequently, for 2 minutes, then add the onion, green chilies, ginger, and a large pinch of salt.

Cook until the onion is starting to turn brown, about 8 minutes.  Add the tomatoes, tumeric, and another pinch of salt.  Mix thoroughly, then add the spinach and cook for 5 minutes, stirring occasionally.

Remove the pan from the heat.  Gradually add the yogurt, stirring slowly and continuously.  Return the pan to low heat and for another couple of minutes just to bring all the flavors together.  Serve warm.


Greek Mac and Cheese

September 23, 2013

Five years ago this month, I went to the first BlogHer Food in San Francisco.  It was an amazing experience.  I didn’t really learn anything about blogging, but I finally got to meet so many people whose blogs I read then (and still read now) and people I knew only from Twitter.  A group of us bonded quickly and many of those people are now friends who I treasure.  One of those people is Allison, who used to write the blog Local Lemons and now is the co-owner of Homeroom in Oakland.

Here is a little story.  Four years ago, while still living in Seattle, Randy and I stole away to San Francisco for a weekend away from our kids.  He had to work one of the days and Allison, one of my favorite blogging friends, met me at the Ferry Building for a day of exploring.  She lives in Oakland, a place that, at the time, I knew next to nothing about.  I wasn’t even quite sure where it was.  Maybe kind of “over there”.  Bay Bridge?  Golden Gate Bridge?  Not sure.  We shared an amazing day of wandering.  We had terrific pizza and shared a bottle of wine at Delfina and I bought my copy of Plenty, then only available in the British version and costing $65, at Omnivore Books.  Along the way, Allison mentioned to me that might be opening a restaurant.  She went on to tell me the incredible story of meeting a like minded person while waiting for a table in a coffee shop, and they were thinking of doing a restaurant serving mac and cheese.  I listened to and supported her.  And in my head I kept thinking, “There are restaurants in Oakland?”

I often think of that day with Allison for many reasons.  One is that she did open that restaurant and they have been incredibly successful from day one.  Another is that Allison is still a close friend of mine and now that we live close to one another, we love spending time with her, her awesome husband Alejandro and their beautiful baby Nico.  And another is how amazing it is to me that I had no perception of Oakland, other than it was “over there”, and now I live here.  And yes, there are lots of restaurants in Oakland!

Recently, Allison and her partner Erin came out with a cookbook and I was lucky enough to get a review copy.  We have enjoyed eating at the restaurant many times and have been to parties where their stellar mac and cheese was on the menu.  I wondered how the restaurant recipes would translate to the home cook.  I am here to tell you this is a winner of a book.  It totally captures the sweet spirit of the restaurant and all the favorite dishes, mac and cheese and sides alike, are in there.  You get a feeling for what it is like to eat at Homeroom and you also get to read about their unlikely partnership.  I never really thought that I had passionate feelings about whether mac and cheese should be served creamy from the pot, or topped with crunchy breadcrumbs from the oven, but in fact I do have extremely strong feelings about this important distinction.  (The latter.  And the book allows you to make most of the macs both ways.)  I made two of the mac and cheese recipes and they were, dare I say it?, better than the restaurant.  Mac and cheese is special, of course.  It is comfort food at its highest level.  Some people would say that there is no reason to get fancy.  That plain ol’ regular mac and cheese is perfect.  I challenge those people to make the Macximus.

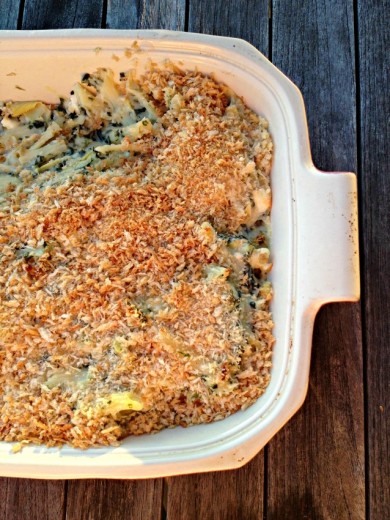
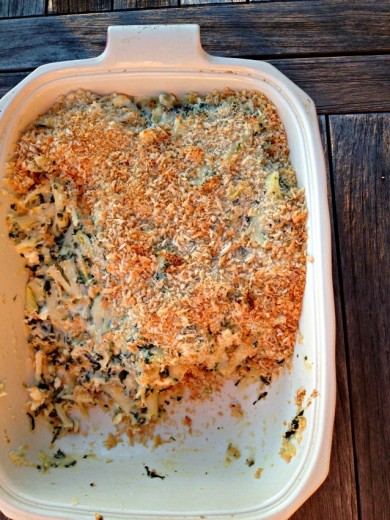
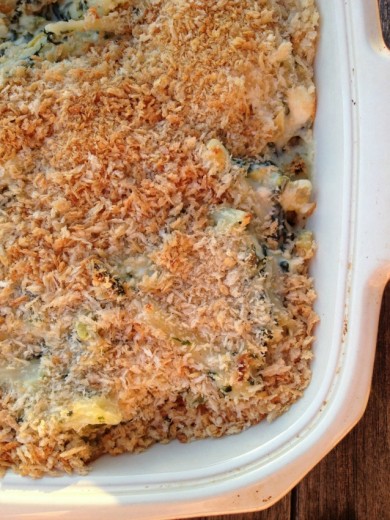
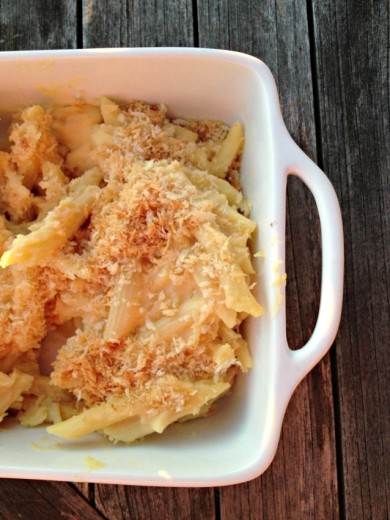
This is deliciousness comes from the “International Relations” chapter of the book where you will find other stunners like Croque Madame Mac and Shepherd’s Mac.  In this one, we have spinach, artichoke hearts, and three cheeses (feta! Pecorino! Jack!) that go so well together that the end result might stun you a bit.  I love mac and cheese as much as the next person but sometimes I find it can get a bit monotonous.  All that creaminess in one dish and my palate gets kind of tired.  This dish gave my taste buds something else to think about with the added vegetables and the tangyness of the cheese.  This is not to say that the Basic Baked Mac and Cheese, which I made for, ahem, the kids, was not amazing.  I may have dipped my fork into that dish a time or two.  Or three.

(The anything-but-basic version.)

Two Years Ago:  Yogurt and Oregano Pesto Soup, Chocolate Dipped Ice Cream Sandwiches, Corn with Tons of Herbs, Heirloom Tomato Tart
Three Years Ago:  Savory Scones, Stuffed Summer Squash with Goat Cheese and Mint, Tomato, Semolina, and Cilantro Soup, Double Layer Chocolate Cake
Four Years Ago:  Mint Filled Brownie Cupcakes, Corn and Zucchini Timbale, Nectarine and Mascarpone Tart, Chickpeas and Chard with Cilantro and Cumin, Nutella Pound Cake,
Five Years Ago:  Summer Rolls (I make these all the time), Chocolate Peanut Toffee (ditto), Pomodori Al Forno (double ditto), Pissaladière

Macximus
Adapted from The Mac and Cheese Cookbook
Serves 6-8

I made a couple of small changes.  I added twice the amount of spinach in the original recipe, more shallots, and more artichoke hearts.  I also quartered those hearts.  The recipe says this serves 4 but we got almost 8 servings out of it.  It is rich!

½ pound dried elbow pasta
1 cup crumbled feta cheese
½ cup grated Jack cheese
½ cup grated Pecorino cheese
2 small shallots, minced
1 cup thawed frozen chopped spinach, thoroughly drained
¾ cup canned artichoke hearts, drained and quartered
2 cups Mac Sauce (recipe follows)
½ cup panko (Japanese bread crumbs)

1.  Cook the pasta in salted boiling water until a little less than al dente.  Drain, rinse with cold water, and drain the pasta again.

2.  Preheat the oven to 400ºF.  Add the feta, Jack, Pecorino, shallots, spinach, artichokes, and sauce to a large, heavy-bottomed pan over medium heat.  Stir until the cheeses begin to melt, about 4 minutes (the feta will not melt, so you are just looking for the Pecorino and Jack to melt and the mixture to get hot).

3.  Slowly add the cooked pasta and stir until hot.  Pour into a 12-inch baking dish and top with the panko.  Bake until bubbly, 10 to 15 minutes.

4.  Spoon into bowls and serve hot.

Mac Sauce
Makes 3 cups

Note that this recipe makes 3 cups of sauce but you only need 2 for the Macximus recipe.  Allison and Erin suggest using the leftover cup to make biscuits and gravy or chicken à la king.

3 cups whole milk
½ cup unsalted butter
½ cup all-purpose flour
1 tsp. table salt

1.  Heat the milk in a pot over medium heat until it just starts to bubble, but is not boiling, 3 to 4 minutes.  Remove from the heat.

2.  Heat the butter over medium heat in a separate, heavy-bottomed pot.  When the butter has just melted, add the flour and whisk constantly until the mixture turns light brown, about 3 minutes.  Remove from the heat.

3.  Slowly pour the warm milk, about 1 cup at a time, into the butter-flour mixture, whisking constantly.  It will get very thick when you first add the milk, and thinner as you slowly pour in the entire three cups.  This is normal.

4.  Once all the milk has been added, set the pot back over medium-high heat, and continue to whisk constantly.  In the next 2 to 3 minutes the sauce should come together and become silky and thick.  Dip a metal spoon int the sauce – if the sauce coats the spoon and doesn’t slide off like milk, you’ll know the sauce is ready.  You should be able to run your finger along the spoon and have the impression remain.  Add the salt.

5.  The Mac Sauce is ready to use immediately and does not need to cool.  Store in the fridge for a day or two if you want to make it ahead of time – it will get a lot thicker when you put it in the fridge, so it may need a little milk to thin it out a bit when it comes time to melt in the cheese.  Try melting the cheese into the sauce first, and if it is too thick then add milk as needed.


Celebrating the Unusual

August 12, 2013

Sometimes making dinner decisions is really easy for me.  I crave something and I make it.  Maybe I get the recipe from one of my many sources, sometimes I make it up.  Often times I am inspired by produce at the markets, or by a dish I had in a restaurant, or something I saw on a menu, or a dish described to me by my mother or a friend.  And then there are times when I get stuck.  I page through my books and nothing pops out for me.  Cooking dinner looms as a chore, not the thing I look forward to each evening.  That is when I turn to Heidi Swanson.

If you read my blog, chances are you also read Heidi’s as well and you might even have one or both of her cookbooks.  She is a very talented woman from whom I have pulled inspiration for years.  An amazing photographer and a healthy and inventive cook is a pretty compelling combination.  The reason I turn to her when I am stuck is her tendency toward the unusual.  I’m a good cook and I often create my own recipes but I don’t think I have the flair that Heidi does.  I often find things in her ingredient lists that I would never think to put together and what I have found is that the unusual, when left to her capable hands, always works.

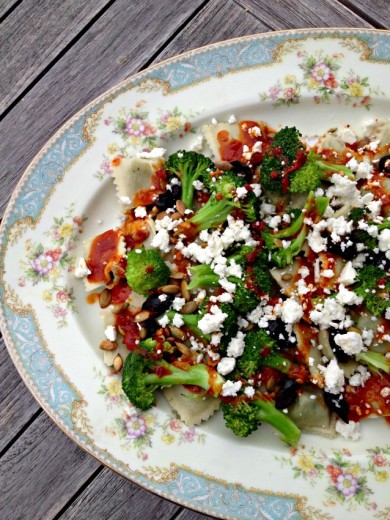
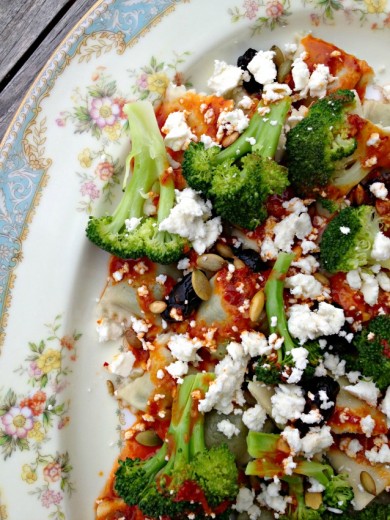
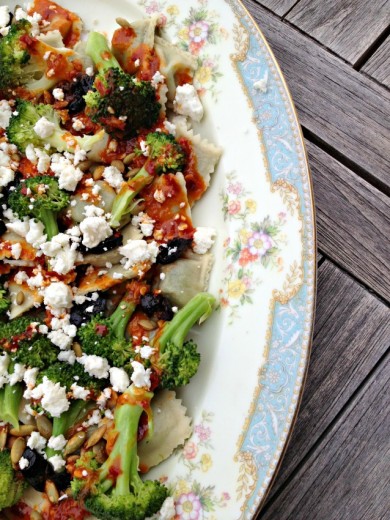
This dish takes ravioli and Middle Eastern harissa and marries them together with some of my favorite ingredients – broccoli, oil-cured olives, and good feta.  I bought some plump fresh spinach and ricotta mini ravioli (raviolini?) and patted myself on the back for being a good wife and making a dish that provide leftovers for Randy’s dinner the next night.  Except that, between the two of us, we finished the whole platter.  Two notes on the platter.  First, use one instead of a bowl.  Heidi instructs you to mix the cooked pasta with the broccoli and the harissa oil in a bowl, but mine were tiny and delicate and I just knew a toss would destroy too many of them.  On the platter, everything can be laid out and the sauce drizzled over top.  Second, the one you see in the photos belonged to my great-grandmother Lena.  I always thought I would name a daughter after her but alas, I have two boys.

A few notes on ingredients.  Harissa can be found in well-stocked grocery stores.  It usually comes in a jar and can be found on either the international food aisle or the condiment aisle near the olives.  Speaking of olives – oil cured olives can sometimes be found in jars but are easier to seek out at an olive bar.  They are very black and wrinkly and are my favorite olive.  You could always substitute kalamata.  Finally, as I will say whenever I talk about feta cheese, buy the good stuff in a brick, not the pre-crumbled stuff.  I’ve always been happy with Mt. Vikos brand but there are other good ones out there.

One Year Ago:  Blackberry Buttermilk Cake, Cilantro Scallion Bread
Two Years Ago:  Grilled Onion Guacamole, Double Chocolate Peanut Butter Pie
Three Years Ago:  Lavender and Honey Tea Cakes, Polenta with Corn, Tomatoes, and Basil,
Four Years Ago:  Cheese Balls Three Ways, Rosemary and Walnut Paté, Melon Soup with Cucumber Chile Ice
Five Years Ago:  Olive and Jarlsberg Sandwich, Farro with Green Beans and Corn

Harissa Ravioli
Adapted from Super Natural Everyday
Serves 4 (not in my house)

This is super close to the recipe in the book.  My little tweaks were more lemon and less oil in the dressing and more olives, plus the platter and not bowl.

1 clove garlic, smashed
¼ tsp. fine-grain sea salt
Juice of 1 lemon
2 tbsp. harissa
3 tbsp. extra-virgin olive oil
12 ounces fresh or frozen ravioli or tortellini
8 ounces broccoli florets, trimmed into bite-size pieces
¼ cup pepitas, sliced almonds, or pine nuts, toasted
Scant ¼ cup crumbled feta cheese
8 oil-cured black olives

Bring a large pot of water to boil.  In the meantime, make the harissa oil.  Sprinkle the smashed garlic clove with the salt and chop into a paste.  Transfer it to a small bowl and stir in the lemon juice, harissa, and olive oil.  Taste and add more salt, if needed.

When the water boils, salt it generously, add the ravioli, and boil until they float and are cooked through, usually 1 or 2 minutes.  About 30 seconds before the ravioli has finished cooking, add the broccoli to the pot, boil for the remaining time, then drain.

Lay the ravioli and broccoli out on a platter and drizzle generously with the harissa oil.  Scatter the pepitas over top, followed by the olives and feta cheese.  Drizzle with more oil if desired.


A Real 30 Minute Meal

June 21, 2013

If I say 30-Minute Meal, what pops into your head?  Letmeguess.  Rachael Ray.

There was a time when Rachael Ray was just a woman with a successful show on the Food Network.  Before her magazine, talk show, multiple endorsements, and annoying sayings.  Back then, I watched her occasionally.  I got a santoku because I liked the look of her knife (back when she used a Wüstoff, before she had her own line), and I got a kick out of watching her race through putting a meal together in 30 minutes.

These days, I have a hard time with her.  The sound of her voice alone is enough to make me leave the room.  I admire her.  I know she came from humble beginnings and is totally self-made.  She has worked hard for her many successes and I applaud her for all of that.  She, and her food, are just not for me.

The concept of the 30-minute meal is brilliant.  30 minutes is about the time limit of what a normal person wants to spend on making dinner.  (I am not a normal person and sometimes spend two to three times that long.)  What I have heard from friends who like her is that as much as they try to get all of her menus done in 30, it never works out that way.  False advertising.

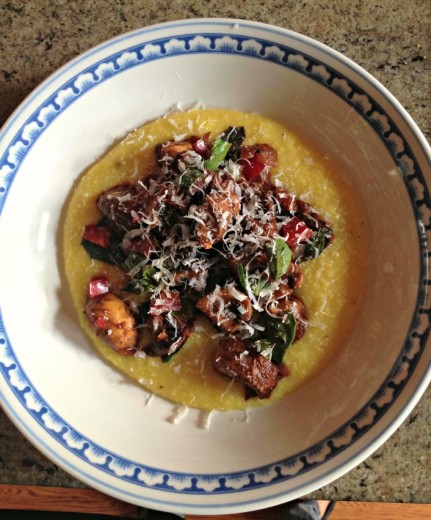
I hope this is not false advertising.  In my house, this is a 30-minute meal.  That includes time to make a salad.  Over the many years I have been cooking and working with food, I have gotten to be very good at working efficiently in the kitchen.  So this is how I would make this meal.  I would start the polenta first.  It takes a bit of your attention at the beginning and then it basically cooks itself with an occasional stir.  This is one of the beauties of polenta and why you might want to make it part of your regular menu planning.  While it is doing its thing, I would heat up the sauce pan and chop the onion and red pepper.  Once those are sautéing, I would chop the mushrooms and the basil.  Once all the ingredients are in the pan and simmering, I would put together the salad.  I actually think the sweetness of the cherries in this salad would balance nicely with this super savory dish.  Seriously.  30 minutes.

Two Years Ago:  Sour Cream Chocolate Cake, Late Spring Pizza with Nettle Pesto
Three Years Ago:  Perfect Chocolate Chip Cookies, Flo’s Chocolate Snaps, MY TATTOO!
Four Years Ago:  Strawberry Sour Cream Ice Cream, Feta Radish Spread, Spring Vegetables with Lemon Vinaigrette
Five Years Ago:  Spicy Tofu in Lettuce Cups, Chocolate Dulce de Leche Bars, Mushroom Pearl Pasta with Sweet Peas

Polenta with Spicy Mushrooms
Dana Treat Original
Serves 4

You can use any grind of cornmeal for the polenta.  It does not have to be labeled “polenta”.  I’ve had success with all of it.  I personally think the polenta itself has a ton of flavor with just vegetable broth and a small handful of Parmesan cheese but you can add cream and more cheese if you want it to be richer. 

Unless I am serving them stuffed or grilled, I almost always scrape the gills out of a portabello mushroom.  There is no flavor in the gills and it just make the color of whatever you are cooking muddy.  I just use a teaspoon to scrape them out.

1½ cups polenta or cornmeal
6 cups water or vegetable broth
Kosher or sea salt and freshly ground black pepper
¼ cup shredded Parmesan cheese
Extra-virgin olive oil
1 large yellow onion, finely chopped
1 large red bell pepper, finely chopped
2 garlic cloves, minced
½-1 tsp. red pepper flakes
2 large portabello mushrooms, gills scraped out, cut into 1-inch pieces
½ pound cremini or white mushrooms, halved or quartered if large
2 tbsp. tomato paste
½ cup dry white wine
¼ cup fresh basil leaves, shredded
Additional Parmesan cheese

Pour the water or broth into a medium saucepan and bring to a boil.  Slowly add the polenta in a steady stream, whisking constantly.  Continue whisking until the mixture seems really thick.  It will seem like too much liquid at first but will thicken up quickly.  Add a pinch of salt and turn down the heat.  Cook, stirring once every five minutes or so, until very thick, about 25 minutes.  Stir in the ¼ cup Parmesan cheese and season to taste with salt and pepper.

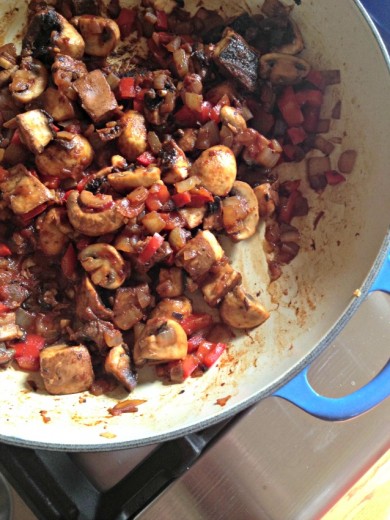
Meanwhile, place a large sauté pan over medium heat.  Drizzle in just enough olive oil to coat the bottom of the pan, then add the onions and red bell pepper along with a large pinch of salt.  Continue to sauté, stirring occasionally, until the vegetables soften and just start to brown, about 7 minutes.  Add the garlic and red pepper flakes.  Cook until fragrant but make sure the garlic does not burn, about 3 more minutes.  Add all the mushrooms, turn up the heat to medium-high, and cook until the mushrooms are brown in spots, another 7 to 10 minutes.

Add the tomato paste and stir well to incorporate.  Pour in the wine and bring to a boil.  Lower the heat to a simmer and cook until the liquid is reduced to a syrupy consistency.  Stir in the basil and taste for salt and pepper.  Serve bowls of polenta topped with the mushroom mixture and a sprinkling of Parmesan cheese.


Onion Tart with Mustard and Fennel

May 21, 2013

You may not agree with me but I think the tendency to hang on to things is genetic.  I am a purger.  Randy is a saver.  (Not hoarder.  No cat skeletons hiding under mountains of garbage in our house.)  My parents have barely held on to anything from out childhoods except for photographs.  Randy’s parents periodically send us packages containing things (books, art work, letters) from his youth.  My parents purge and Randy’s save.

There is no time when those differences are clearer than when you move.  Each time I have moved, I have gotten rid of a tremendous amount of stuff.  I basically eye each thing I am about to put in a box and ask myself, “Do I want to pack this, only to have to unpack it?”  Many times the answer is no.  So off to Goodwill it goes.  Randy has a harder time with this process.  He often can’t give things away because he either “paid good money for it” or because the thing in question has sentimental value.  I might be thinking in particular of a hideous green and yellow jersey that, while I have not successfully persuaded him to toss, I have successfully persuaded him he should not wear.

This last time, for our move to Oakland, we had movers who packed us up.  This incredible service was paid for by his company and I can honestly say I’m never doing it any other way.  You basically just live your life in your house with all your stuff until the moving day and then bam! a team of professionals descends on you and packs everything in sight.  They wrap all the dishes and glassware, have special boxes for hanging clothes, and label everything clearly.  I’ve heard some people say that these types of teams even pack the garbage in the garbage can but that was not our experience.

Having this service was an incredible luxury with one caveat.  Because I wasn’t packing each box myself, or loading each thing on a truck, quite a bit slipped through the cracks.  Once we got to Oakland, they put all the boxes and furniture in the right rooms but we were responsible for the unpacking part.  About 100 times, I asked, “Why did this make it here?”  We had done a purge before they arrived but there is no purge like the one where you look hard at something and ask yourself whether or not it should make the trip.

All this to say that we have this little basket with a top that I would probably have donated to Goodwill sitting beside our couch.  It acts as a mini coffee table for Randy’s watching-tv-glass-of-water or bourbon.  Sometimes he remembers to bring that glass of water back over to the sink at night and sometimes he does not.  Recently, the boys were horsing around in that room and knocked over the leftover water (which, thankfully, was water and not bourbon) and as I was cleaning up, I realized that there were food magazines stashed away in that basket.  Not just food magazines, but a few copies of Gourmet from 2007.

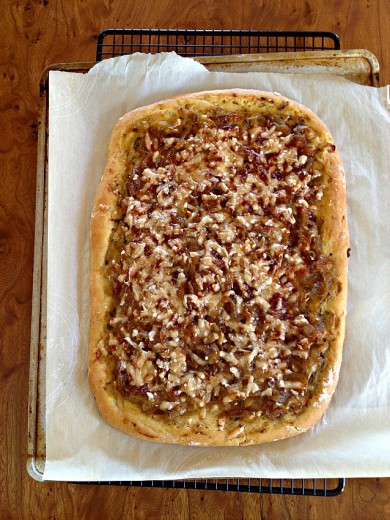
Now, we all miss Gourmet, right?  I know I do.  I have years and years of recipes cut our from that magazine along with Bon Appétit and Food & Wine.  Paging through the issues that I had left, I found recipes for things that I wanted to make immediately.  One of which was this onion tart.  I make a great Pissaladière,  which this tart resembles but with some intriguing differences.  The base is a yeasted tart dough rather than puff pastry, it features a slick of mustard on the bottom of the crust, fennel seeds sautéed with the onions, and a topping of Parmesan cheese.  I had the kindergarten moms come for dinner last week and this tart swiftly went on the menu.

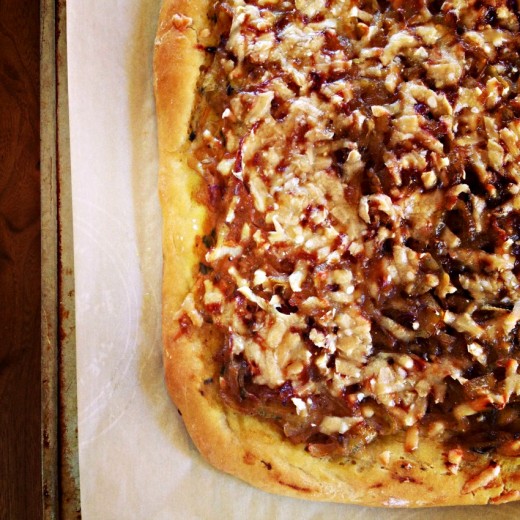
I love a recipe that can be made for lunch, brunch, dinner, or an appetizer and this one fits the bill.  I thought the dough was incredibly sticky and I might have cursed Gourmet a few times (I love you! I miss you! I hate you!) but in the end this was an incredibly fragrant and powerfully flavored tart.  Unlike a Pissaladière, the crust is very neutral tasting but with a bit of crunch, so the onions are really the star of the show.  Just that little bit of cheese is a beautiful balance of savory to the gorgeous sweetness of the onions and the mustard gives you a nice hit of spice.  I let the tart cool to room temperature and then cut it into small pieces, but it could easily but cut into nice wedges for more of a main course.

UPDATE 5-25-13: I had wedges of this tart left over.  I wrapped them in foil and stored them in the fridge.  Days later, I reheated them, in a 250º oven, and the tart tasted as good as the day it was made.

Two Years Ago:  Spiced Cocktail Nuts
Three Years Ago:  Lighter Fettucine Alfredo, Curried Tofu and Avocado Dip, Giant Chocolate Cake
Four Years Ago:  Roasted Asparagus with a Poached Egg, Ginger Ice Cream, Tofu and Cucumber Salad with Spicy Peanut Sauce

Onion Tart with Mustard and Fennel
Adapted from Gourmet
Serves about 8 as an appetizer

I like to slow cook my onions in a cast iron skillet.  I find the evenness and the retention of the heat works really well.  I would avoid a non-stick pan as it can take longer for them to caramelize.  The round of parchment helps keep the onions really moist and takes them to a jammier texture but you can omit that step.  Just make sure the heat is nice and low, stir them occasionally, and allow them at least an hour (or more) to achieve their dreamy potential.

2 ¼ teaspoons active dry yeast (a ¼-ounce package)
½ cup warm water (105-115°F)
1½ to 1 ¾ cups all-purpose flour
1 large egg
1/3 cup plus 1 tablespoon extra-virgin olive oil, divided
2 ½ teaspoons salt, divided
2 teaspoons fennel seeds
3 pound yellow onions, halved and thinly sliced
1 tablespoon Dijon mustard
½  cup freshly grated Parmigiano-Reggiano

Stir together yeast and warm water in a small bowl and let stand until foamy, about 5 minutes. (If mixture doesn’t foam, start over with new yeast.)

Put 1 ½ cups flour in a medium bowl, then make a well in center of flour and add yeast mixture to well. Stir together egg, 1 tablespoon oil, and 1 ½ teaspoons salt with a fork. Add egg mixture to yeast mixture and mix with a wooden spoon or your fingertips, gradually incorporating flour, until a soft dough forms. Transfer dough to a floured surface and knead, working in additional flour (up to ¼ cup) as necessary, until smooth and elastic, about 5 minutes. (DT: I used a lot of flour on my board to keep the dough from sticking.)  Transfer dough to an oiled bowl and turn to coat. Cover with plastic wrap and let rise in a draft-free place at warm room temperature until doubled, 1 to 1 ½ hours.

While dough rises, heat remaining 1/3 cup oil in a 12-inch heavy skillet over medium-high heat until it shimmers, then sauté fennel seeds until a shade darker, about 30 seconds. Stir in onions, remaining teaspoon salt, and 1/2 teaspoon pepper, then reduce heat to medium-low and cover onions directly with a round of parchment paper. Cook, stirring occasionally, until onions are very tender and golden brown, 1 to 1¼ hours.

Preheat oven to 375°F with rack in middle.

Knead dough gently on a floured surface with floured hands to deflate.  Transfer dough to a heavy baking sheet lined with parchment paper.   Pat out dough into a roughly 15- by 12-inch rectangle, turning up or crimping edge, then brush mustard evenly over dough, leaving a ½-inch border around edge. Spread onions evenly over mustard, then sprinkle evenly with cheese.

Bake tart until crust is golden brown, 30 to 35 minutes. Cut into 2-inch squares or diamonds and serve warm or at room temperature.


« Older Posts