Category: Holly B’s

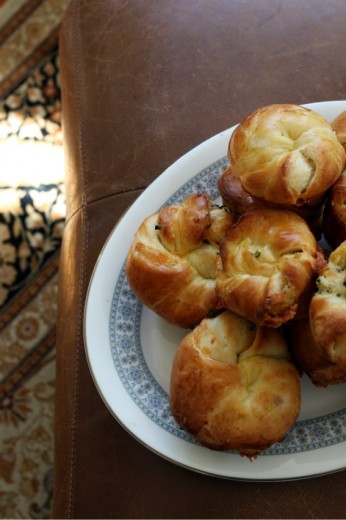
Holly B’s Savory Brioches

April 9, 2012

When you walk into Holly B’s, the beloved bakery on the beloved island of Lopez, it can be a little overwhelming.  What to choose?  I’ve said this before about that amazing place, but this is not a bakery of wonders.  There are no perfectly shaped chocolate domes with pearled sugar placed just so, no clean cuts of multi-layered cakes, no puff pastry marvels with flawless custard and fruit cut in exactly the same size slices.  What you will find is time-tested and time-honored treats.  Rustic, homemade, generous, imperfect in the perfect way.  Kind of like if you were a really good home baker and you just happened to open a bakery on a rural island (which is just what Holly B did).

Here is the catch.  We often hit Holly B’s at lunch time and at lunch time, I want lunch.  Yes, a cinnamon roll or an orange swirl or an almond butterhorn can make a very nice lunch.  Especially when followed by a peanut butter brownie or a cappuccino bar.  But the truth is that, being a savory person, I want something savory for lunch.  Holly B’s sometimes has pizza (and if you ever go, and they have the Mexican pizza, buy two pieces and eat one for me) but more often than not, the savory options are only a few.  There is almost always a ham and cheese croissant (no thanks) and there is always a savory brioche.

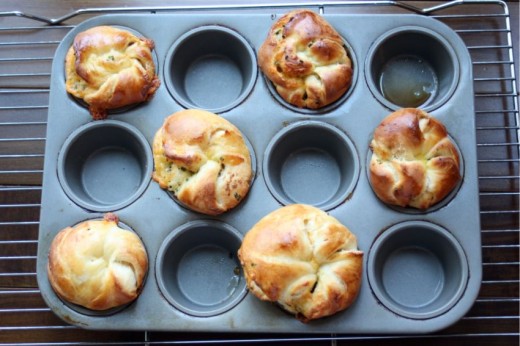
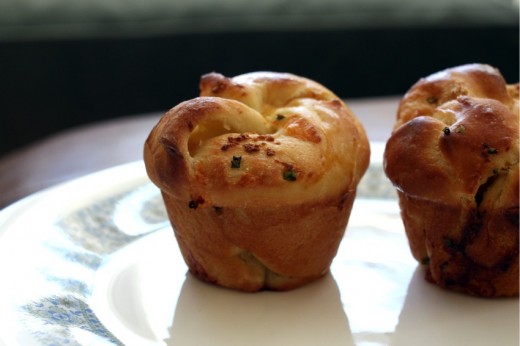
Having enjoyed her brioches for so many years, it is a little surprising that I haven’t made them yet.  Up until recently, I was a little intimidated by brioche.  Then I made some for Patricia Wells and I realized that it isn’t hard at all, there is just a lot of mixing, and you need to start the dough the night before you need it.  This recipe is really very easy – not too much mixing, and super dreamy easy-to-work-with dough.  There are many options in the book for fillings, most of them savory.  All sounded good to me (Pesto and Parmesan, Cheddar and Salsa, among others) but I opted for Cheddar, Garlic, and Chive Brioches because I had all the ingredients on hand.

I made these beauties for our annual Easter egg hunt with friends that happens the Saturday of Easter weekend.  I have made many things over the years for this celebration but this is my first time making something savory (I also made something sweet).  I liked having the option and these were terrific.

One Year Ago:  Apple Snacking Spice Cake, Snickerdoodles, Eggplant and Mushroom Pasticcio
Two Years Ago:  Blueberry Sour Cream Torte, Fideos with Pasilla Chiles, Avocado, and Crema, Swiss Chard Tart with Goat Cheese, Currants, and Pine Nuts, Baked Rice with Chiles and Pinto Beans
Three Years Ago:  Spicy Sweet Potatoes with Lime (have you made these?), Marinated Chickpea Salad with Radishes and Cucumber, Pasta with Broccoli Rabe and Chickpeas

Cheddar-Garlic-Chive Brioches
With Love & Butter
Makes 10

¼ cup warm water
2¼ tsp. (1 packet) quick-rise yeast
1 egg plus 1 yolk for dough, plus 1 yolk for wash
2 tbsp. honey
¾ cup whole milk
6 tbsp. unsalted butter, melted, for dough, plus 2 tbsp. for brushing surface
¾ tsp. salt
3+ cups all-purpose flour
2 tbsp. pressed garlic
¼ cup minced chives
1 cup grated extra sharp Cheddar cheese

Put the water and the yeast in a mixer bowl and swish around with a spoon.  Attach the dough hook.  Add the 1 egg plus 1 yolk and the honey and mix briefly.  Add the milk, 6 tablespoons melted butter, salt, and 3 cups flour and mix until smooth.  (This will take about 5-10 minutes.)  Scrape down the sides of the bowl with a rubber spatula and mix again.  Toss a handful of flour on top of the dough and mix for a couple of seconds or until the dough balls up, but stop mixing before the flour disappears.  The dough will be soft and sticky.  Turn into a well-oiled bowl or tub with enough room for the dough to triple in size.  Cover with plastic wrap and refrigerate overnight.

The next morning, butter the rims and cups of 2 standard-sized 12-hole muffin cups.  Turn the dough onto a lightly floured surface and shape into a rough rectangle with your hands.  Lightly flour the top of the dough, then flip and flour the bottom.  Roll the dough into a rectangle about 8 by 16 inches and ½-inch thick.  Regularly check the underside of the dough for sticking and scatter on a bit more flour.  The dough should be free from the surface but not too floury.

Position the rectangle of dough on your work surface with the short sides at the top and bottom and the long sides left and right.  Brush the entire surface with the remaining two tablespoons of melted butter.  Scatter on the garlic, chives, and Cheddar cheese.  Press the toppings lightly into the surface.

Fold the top 1/3 of the dough to the center of the bottom 2/3, as if you were folding a letter.  Fold again to close the bundle.  The dough will now be folded in thirds.  Use the rolling pin to gently flatten the dough to about ¾-inch thick.  Now use a pizza cutter or sharp knife to cut the dough into 10 event strips along the short dimension.

Take up a strand of dough, one end in each hand.  Stretch the dough slightly and twist 3 or 4 times in opposite directions.  (Or, you can place the strip on your work surface and use the palms of your hands to roll the ends in opposite directions.)  Now gather both ends in one hand, maintaining the twist, and grasp the loop that’s hanging down with your other hand.  Place the ends in one of the muffin cups and arrange the loop around the rim on top of the cup.  (It will seem like there is a lot of empty space but the dough will fill it when it rises and bakes.)  Repeat with the remaining strips of dough, filling every other cup to give the brioches plenty of room to expand.

Whisk the remaining egg yolk with 1 teaspoon of water and brush the tops of the brioches.  Cover with plastic wrap and set to rise in a warm place until puffy and roughly doubled in size, 30 to 90 minutes.

Preheat the oven to 375ºF with the rack in the center position.  Remove the plastic and bake the brioches 10 minutes, then rotate the pans and bake another 5 to 10 minutes longer, or until golden brown and not doughy in center.  Cool.


Reunion

June 16, 2011

When I was about 8 months pregnant with Graham, my oldest child, Randy and I did a Lamaze weekend out of town.  Most OB’s recommend you do some kind of class to prepare you for childbirth and the hospital where we ultimately delivered offered a six week course.  Randy had just started working at Microsoft and was spending a ridiculous number of hours there trying to get up to speed.  The thought of trying to get back across the lake in time for a class stressed him out, so we opted to cram all those classes into one weekend instead.

Sometimes things happen for a reason and I think we ended up going this Lamaze route so we could meet an incredible group of people.  There were 12 couples, all due within a few months of each other, and over the course of the weekend and talking about things like contractions and bed-rest and colostrum, we got to know each other.  We were all in this incredibly heady time in our lives – about to have our first baby.  Scared, excited, scared and um, scared.  The weekend ended and we drifted away from each other and back to our lives.

The first couple had their baby just days before we had Graham.  The husband emailed their news out to the group and, now that we were connected, all the rest of the couples followed suit.  Through this email connection, the women started bonding.  Once all of us had our babies, we began to get together with our brand new babies.

At the time I was in a PEPS group (Program for Early Parenthood Support), an organization I believe in and support.  I even lead a group myself when Graham was a year old.  But my particular group was a little funny.  Everyone was nice but there were some big overachievers in there and everyone seemed to have it together.  No one cried, everyone’s baby seemed to be sleeping, nursing was going well for all the moms – in short, no one was real.  I went to those meetings making sure I had showered, did not cry, bit my lip the whole time, and left feeling like a failure.  It was the weekly gathering of Lamaze ladies where I could be myself.  It was my lifeline.  Being able to walk out of the house unshowered, crying baby in tow, get to a friend’s house who was in a similar mental and emotional space as me, and be able to cry myself – out of exhaustion, frustration, fear, and hormones – is what saved me in those first few months.  One in our group gave us this quote: “You make friends for a reason, a season, or a lifetime.”  It seemed we had made lifelong friends.

Sadly, within a couple of years, 6 of the 12 couples moved away.  We all got busy with our lives, husbands, work, second children.  I have remained extremely close with two of the women – I consider them two of my closest friends.  I wish I saw everyone else more frequently but busy lives and distance makes it difficult.  Donna was one of our true gems and she had the nerve to North Carolina before we knew it.  Donna and I have been keeping in intermittent touch on Facebook and I will occasionally get a comment from her on this blog.  She emailed last week to say that she and the family were heading to town and could we gather?  Of course!

6 adults, 10 kids, 2 pizzas, 2 salads, and 1 cake makes for a rocking good time.  Graham was in heaven because all the six-year-olds were girls.  Spencer was in heaven because there were so many people to play with.  It was so nice seeing them all as such big kids and seeing how truly far we have come.  In true Lamaze group fashion, we shared some of the joys and some of the frustrations we are experiencing.  And we got to sing “Happy Birthday” to one of our group whose birthday is Friday.

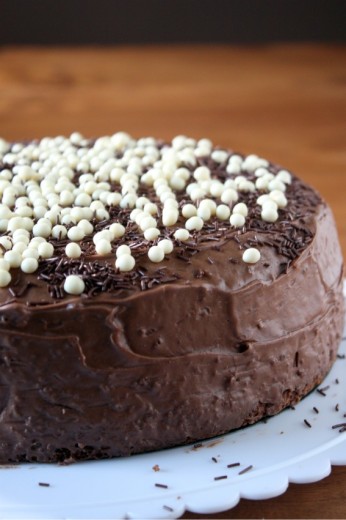
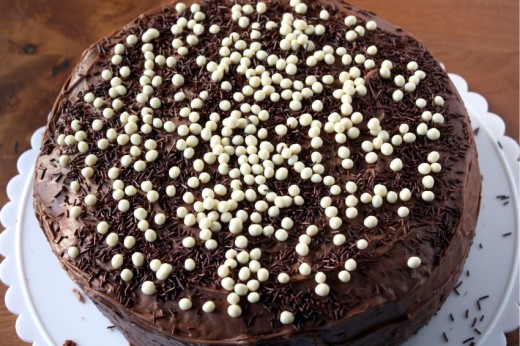
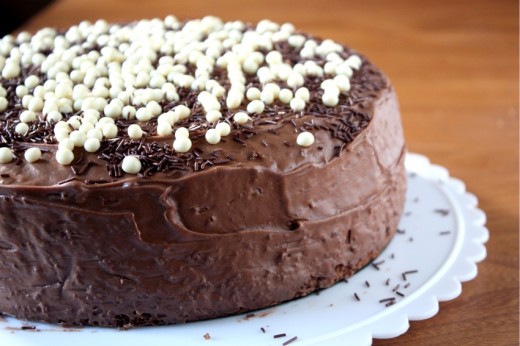
I have been wanting to practice my layer cake technique ever since watching this incredibly helpful video.  A friend’s birthday is the perfect excuse for practice.  This is a Holly B’s recipe and it’s hard for me to believe I have never made it.  Holly mentions in her book that this is the standard birthday cake in her family and now I know why.  It’s a perfect chocolate cake.  The cake itself is moist, the frosting is to die for and the whole thing is incredibly easy and quick to make.  Yes, really.  My only quibble is that there was not enough frosting.  The cake is very crumbly so it needs a crumb coat, but there was not enough for me to do that.  No matter, sprinkles cover a lot of error.  But next time I will one and a half the frosting recipe to make sure there is enough to really cover the cake and for little fingers to dip into.

One Year Ago: Chile Cheese Gratin Sandwiches
Two Years Ago:
Grilled Vegetable Quesadillas
Three Years Ago:
Feta and Ricotta Cheese Pie (ignore the bad photo, this is a terrific recipe)

Sour Cream Chocolate Cake

With Love & Butter

Makes a 9-inch double layer cake

I‘m giving you the recipe as written in the book.  Remember, I would at least one and a half the frosting recipe – even double it and do a crumb coat.  To do so, spread a thin layer of frosting all over the cake and place it in the freezer for about 15 minutes.  Then frost the rest of the cake.  This will keep little crumbs from marring the smooth appearance of your masterpiece.

Cake
1 cup (2 sticks) unsalted butter, at room temperature
½ cup unsweetened cocoa
½ cup boiling water
1 cup granulated sugar
2/3 cup brown sugar, firmly packed
2 tsp. vanilla extract
3 eggs
1 cup sour cream
2 cups flour
1½ tsp. baking powder
1 tsp. baking soda
¼ tsp. salt

Chocolate Sour Cream Frosting
¾ cup sour cream
4 cups powdered sugar
1 tsp. vanilla extract
¼ tsp. salt
1/3 cup (2/3 stick) unsalted butter, melted
¾ cup unsweetened cocoa powder

Make the cake
Preheat the oven to 375ºF with the rack in the center position.  Butter and flour 2 9-inch round cake pans.

Melt ¼ of the butter (½ of one stick) and combine with the cocoa powder and boiling water in a small bowl.  Stir until smooth and set aside.

In the large bowl of an electric mixer, cream the remaining butter with the granulated and brown sugars and vanilla.  Add the eggs and beat until smooth.  Mix in the sour cream, then the reserved cocoa mixture.  Finally, dump in the flour, baking powder, baking soda, and salt and mix just until combined.  Divide the batter between the 2 pans and smooth the tops with a rubber spatula.

Bake the layers for 10 minutes, rotate the pans and bake for 10 to 15 minutes more or until a toothpick just comes out clean.  Don’t overbake – moistness is your goal.  Cool the cakes on a rack.

Make the frosting
Put the sour cream, powdered sugar, vanilla, and salt in the bowl of a mixer.  Whip to combine.  Stir the melted butter and cocoa together.  If the mixture begins to harden, dribble in a little more melted butter and beat until free of lumps.  Add to the sour cream mixture and beat until smooth.

Put one cake layer top-side-up on a serving plate and spread frosting generously to within ½-inch of the edge.  Place the second layer on top, bottom-side-up.  Smooth the remaining frosting over top and sides.

(DT: I made this cake a day ahead frosted and all.  I waited until the frosting had hardened slightly and loosely covered the whole thing with foil.  I think it improved both the flavor and texture of the cake so don’t hesitate to do the same.  You could probably even make it two days ahead, but then I would refrigerate it, covered, and bring it to room temp before serving.)


Savory Scones

September 1, 2010

Some people love breakfast.  Other people only eat breakfast because they know they are supposed to and they know that if they don’t, they will inhale an entire table’s worth of food for lunch.  I put myself in the second category.  I never feel hungry in the morning and, consequently, I eat one of the same three things every single day.  Having a rotation of three things is actually fairly recent.  Up until this year, I ate a Luna bar every day for nine years.  Nine years.  Now I alternate with thrilling things like yogurt and cereal.

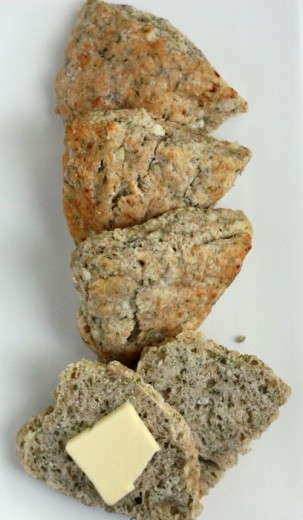
Sweet scones are all well and good but how about a savory scone?  I made these with a combination of dill and aged Cheddar but there are many other combos that would work.  Roasted red pepper and feta, scallion and chèvre, thyme and Gruyère all sound good to me.  I like the idea of serving these with some soup on a fall day in addition to offering them to friends for breakfast.

For this basic recipe, you use a (homemade) scone mix.  After I made the blueberry ones, I had just enough left over for another batch.  I kept the mix in the refrigerator and was so happy to have some on hand so I could make treats for my guests.


Scones previously on Dana Treat:
Almond Praline Scones, Classic Currant Scones|
One Year Ago:
Mint Filled Brownie Cupcakes
Two Years Ago:
Fresh Summer Rolls with Tofu

Savory Scones

Adapted from With Love & Butter
Makes 12 scones

For this recipe, you will need approximately half the Scone Mix.  Or if you want, you can double the Savory Scones and freeze half of them.  Lots of options.

4½ cups Scone Mix
½ cup coarsely grated Cheddar cheese
¼ cup chopped fresh dill
1 large shallot, chopped
½ tsp. freshly ground black pepper
1 cup buttermilk
½ cup cottage cheese

Preheat the oven to 375ºF with the rack in center position.  In a medium bowl, toss together the Scone Mix, cheese, dill, shallot, and pepper.  Drizzle the buttermilk over the surface and blob in the cottage cheese.  (DT: “Blob” is Holly’s word!)  Stir until mixed.  If the dough is too dry to stick together when pressed, add a bit more buttermilk.  You want to be able to make a nice firm shape.

Turn the dough onto a lightly floured surface and pat into two disks about 1½-inches thick.  Cut each disk into 6 wedges and arrange 1-inch apart on a cookie sheet.  Bake in two batches if they don’t fit on one sheet.  Bake 15 minutes, rotate the pan, and bake another 10 to 15 minutes, until the scones are light brown on top and darker on the bottom, and no longer soft and doughy in the center.  When judging doneness, don’t rely on the color of the tops alone.  The tops can look quite light and undone while the bottoms are getting quite brown.

Scone Mix
4½ cups all-purpose flour
1 cup plus 2 tbsp. whole wheat flour
2 tbsp. sugar
1½ tbsp. baking powder
1¼ tsp. baking soda
¾ tsp. salt
2¾ sticks cold butter, sliced

Place all the ingredients except the butter in a large bowl and mix.

Fit your food processor with the steel knife blade.  Put half the butter in the bowl and top with half the dry ingredients.  Pulse until the butter is reduced to pearl-sized bits.  Don’t over process or it will turn into a dough, you want a dry mix.  Pour the processed mixture into another large empty bowl.  Repeat this process with the remaining dry ingredients and butter.  Be sure to break up any large lumps of butter and, when through, toss thoroughly with your fingers.

Transfer the scone mix to an airtight container and store it in the refrigerator for up to 2 months, or in the freezer for up to 6 months.


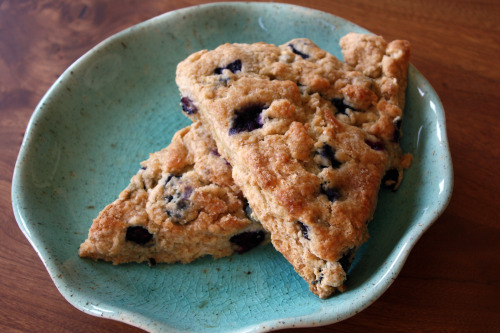
Holly B’s Fruit Scones

July 30, 2010

We have an interesting phenomenon in our house.  If you are a parent, perhaps you are familiar with this one.  It’s the “whenever I don’t have much of something the kids want tons of it, but when I buy tons of it, the kids want nothing to do with it” phenomenon.  There is an additional part to it which is the “whatever the kids love and adore at their friends’ houses, they will not eat at home”.

Blueberries.

Last Friday, I brought the boys to a favorite farmers market and I needed some berries for a dessert for the next day.  I bought a half flat – three boxes of blueberries, two of raspberries, and one of strawberries.  The boys were literally eating the blueberries by the handful, shoveling them in their mouths like I had never given them fruit before.  But I had to cut them off because I needed some of those blueberries and they acted like I had just taken ice cream cones away from them.

So on our way home from a family birthday celebration on Lopez Island, as we passed farm stand after farm stand full of berries, we pulled off and I bought a full half flat of blueberries.  They had a few and now are over it.  Which leaves me with precisely almost a full half flat of blueberries.  Only one thing to do with them.

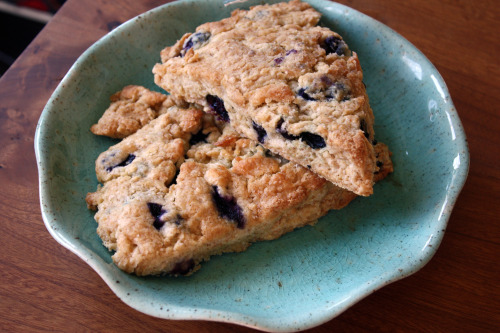
Actually, there are lots of things I could do with them and considering I still have lots left over, I will be doing something else.  (Suggestions?)  The reason I went right to scones is because of good old Holly B.  We left for Lopez on Sunday and my sister-in-law Amy, who was leaving the island just as we were arriving, was kind enough to text me that Holly B’s would be closed on Monday, my birthday, for an “over-the-hump” day.  WHAT?? The nerve!  So we made sure to stop off on the way to the house.  Usually, when we go for the weekend, I have at least two visits to the bakery.  This time there was only one and if you can only go once, you have to get a cinnamon roll.  At least if you are me.  Oh yes, I could have gotten multiple things but there is such a thing as OD’ing on baked goods (oh yes there is!) and I’d rather than have a little than too much.  So I baked scones instead of buying them at the bakery.

Truth be told, I’m not a big scone girl.  Or muffin or pancake girl.  I like my breakfasts on the savory side and if I am going to eat something with loads of butter, I would rather have a brownie.  But when fruit is calling you and you have just seen gorgeous scones in a favorite bakery that you didn’t get a chance to sample, it’s time to make scones.

Now I have to tell you about my new favorite flour.  Over the past couple of months, I have gotten numerous emails from companies offering me free things with the idea that I will blog about them.  Many of the products are things I would never use but occasionally something catches my attention.  One of the first offers I got was for some flour from a company called Stone-Buhr.  Stone-Buhr works with wheat farmers in Washington, Oregon, and Idaho and has a web site (www.findyourfarmer.com) where you can find out where your bag’s wheat came from.  Cool, huh?  I’ve been a loyal King Arthur flour user for years but I love the idea of supporting local farmers and I have now officially made the switch.  After using up my free bag in a hurry (I go through a lot of flour), I was thrilled to find Stone-Buhr in my local grocery store.

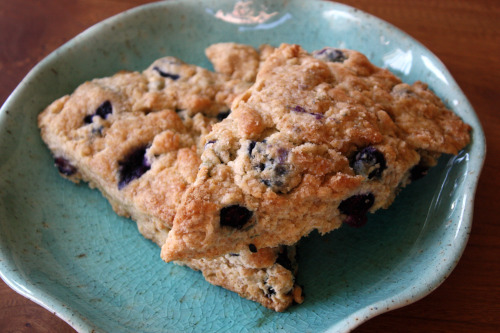
Back to the scones.  I really liked these because they are not too sweet so that the fruit can shine through.  There are all kinds of combinations you could use here and just about everything would be good.  Holly’s original recipe has you make a giant amount of scone mix which, although it keeps well, is not something I feel like storing in my refrigerator.  I cut it in half which is why some of the measurements might sound a little odd.  You will still have enough for two batches of scones.

One Year Ago: Indian Spiced Chickpea Salad
Two Years Ago: Raspberry Cake with Marsala

Holly B’s Fruit Scones
Adapted from With Love & Butter
Makes 8 large scones

Scone Mix
4½ cups all-purpose flour
1 cup plus 2 tbsp. whole wheat flour
2 tbsp. sugar
1½ tbsp. baking powder
1¼ tsp. baking soda
¾ tsp. salt
2¾ sticks cold butter, sliced

Place all the ingredients except the butter in a large bowl and mix.

Fit your food processor with the steel knife blade.  Put half the butter in the bowl and top with half the dry ingredients.  Pulse until the butter is reduced to pearl-sized bits.  Don’t over process or it will turn into a dough, you want a dry mix.  Pour the processed mixture into another large empty bowl.  Repeat this process with the remaining dry ingredients and butter.  Be sure to break up any large lumps of butter and, when through, toss thoroughly with your fingers.

Transfer the scone mix to an airtight container and store it in the refrigerator for up to 2 months, or in the freezer for up to 6 months.

Fruit Scones
3¼ cups scone mix
¼ cup sugar
1 cup fresh or frozen fruit, berries left whole, other fruit cut into ½-inch cubes
¾ cup buttermilk
Sugar for topping the scones

Preheat the oven to 375ºF with the rack in the center position.

In a medium bowl, toss the Scone Mix and sugar together with your fingers.  Add the fruit and toss again until just-mixed.  Frozen fruit will begin to melt and bleed at bit – this is OK.  Drizzle the buttermilk over the mixture and stir gently.  The mixture should be just wet enough to make a ball when pressed together.  If too dry, drizzle on more buttermilk.  Dryer is better than wetter.

Turn the dough onto a lightly floured surface and form into a disk 1½ inches thick.  Sprinkle generously with sugar.  Cut the circle into 8 wedges.  Place the scones at least 1 inch apart on a baking sheet.

Bake 10 minutes, rotate the pan, and bake 5 to 10 minutes more or until the scones are brown on the bottom (check with a spatula) and slightly brown on top.  The baking time maybe shorter if you are using fresh fruit.  Cool, or serve warm.

(DT: These get a bit soggy after a day or so, but still taste delicious.  You can always freeze them.)


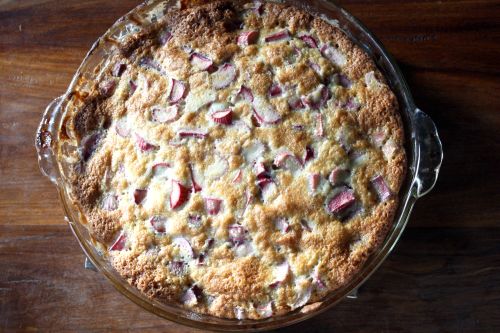
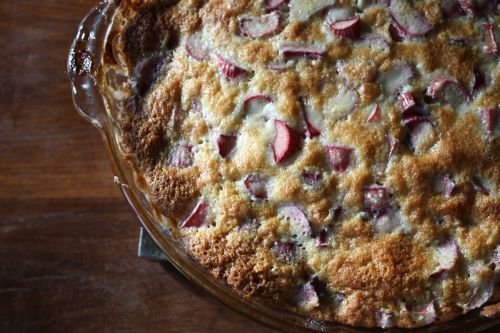
Holly B’s Rhubarb Bette

May 29, 2010

Recently, I taught a cooking class to a fun and engaging group of women.  I decided to focus on spring produce since it is finally showing its face in our wet climate.  Normally I don’t tackle desserts in my classes (simply because of time), but I thought it made sense to make something with rhubarb.  I had planned to make this cake but in flipping through that much-beloved book, I found something even easier.

There are people who love rhubarb.  My husband is one of them.  Me – I don’t really get it.  It’s sour.  Why do I want a dessert that has something sour in it?  But, after making this dessert twice in a week, it’s kind of growing on me.

This recipe is so simple and it tastes so good, especially if you are in the rhubarb-loving camp.  Even if you think you can’t bake, you can make this.

One Year Ago:  Rosemary Raisin Pecan Crisps (I’ve made these countless times since)
Two Years Ago:  Roasted Potatoes with Onions and Wilted Greens (and the story of how I went veg)

Rhubarb Bette

With Love & Butter
8 servings

Approximately 5 cups sliced rhubarb (1/2-inch thick slices)
¾ cup plus 1/3 cup sugar
2 tbsp. mild tasting oil
1 egg
1 cup flour
½ tsp. baking powder
¼ tsp. salt
1/3 cup milk
½ tsp. vanilla extract

Preheat oven to 375 degrees.  Adjust the rack to the center position.  Butter a 9-inch glass pie plate.

Tumble the sliced rhubarb into the pie pan.  The rhubarb should come to within ½-inch of the rim.  Sprinkle the ¾ cup sugar on top and set aside.

In a big bowl, mix the remaining 1/3 cup sugar with the oil and egg.  Add the flour,  baking powder, salt, milk, and vanilla and combine into a smooth batter.  Now dumb the rhubarb from the pie dish into the batter.  Stir gently to incorporate the rhubarb, then pour the whole works back into the buttery-sugary pie dish.  Spread evenly in the dish, but leave the surface lumpy and interesting-looking.  Sprinkle with a little more sugar and bake 40 to 50 minutes, until caramel-colored on top and bottom.  Serve warm, in bowls, with vanilla ice cream or sweetened whipped cream.


« Older Posts