Category: Dana Treat Original

A Real 30 Minute Meal

June 21, 2013

If I say 30-Minute Meal, what pops into your head?  Letmeguess.  Rachael Ray.

There was a time when Rachael Ray was just a woman with a successful show on the Food Network.  Before her magazine, talk show, multiple endorsements, and annoying sayings.  Back then, I watched her occasionally.  I got a santoku because I liked the look of her knife (back when she used a Wüstoff, before she had her own line), and I got a kick out of watching her race through putting a meal together in 30 minutes.

These days, I have a hard time with her.  The sound of her voice alone is enough to make me leave the room.  I admire her.  I know she came from humble beginnings and is totally self-made.  She has worked hard for her many successes and I applaud her for all of that.  She, and her food, are just not for me.

The concept of the 30-minute meal is brilliant.  30 minutes is about the time limit of what a normal person wants to spend on making dinner.  (I am not a normal person and sometimes spend two to three times that long.)  What I have heard from friends who like her is that as much as they try to get all of her menus done in 30, it never works out that way.  False advertising.

I hope this is not false advertising.  In my house, this is a 30-minute meal.  That includes time to make a salad.  Over the many years I have been cooking and working with food, I have gotten to be very good at working efficiently in the kitchen.  So this is how I would make this meal.  I would start the polenta first.  It takes a bit of your attention at the beginning and then it basically cooks itself with an occasional stir.  This is one of the beauties of polenta and why you might want to make it part of your regular menu planning.  While it is doing its thing, I would heat up the sauce pan and chop the onion and red pepper.  Once those are sautéing, I would chop the mushrooms and the basil.  Once all the ingredients are in the pan and simmering, I would put together the salad.  I actually think the sweetness of the cherries in this salad would balance nicely with this super savory dish.  Seriously.  30 minutes.

Two Years Ago:  Sour Cream Chocolate Cake, Late Spring Pizza with Nettle Pesto
Three Years Ago:  Perfect Chocolate Chip Cookies, Flo’s Chocolate Snaps, MY TATTOO!
Four Years Ago:  Strawberry Sour Cream Ice Cream, Feta Radish Spread, Spring Vegetables with Lemon Vinaigrette
Five Years Ago:  Spicy Tofu in Lettuce Cups, Chocolate Dulce de Leche Bars, Mushroom Pearl Pasta with Sweet Peas

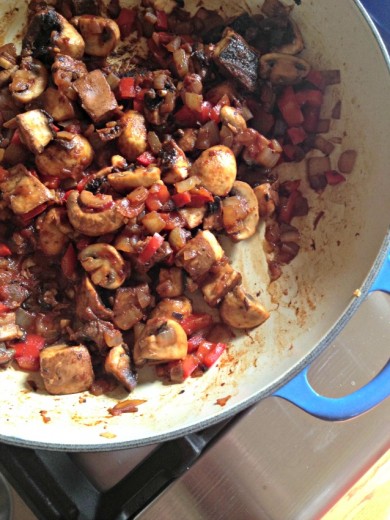
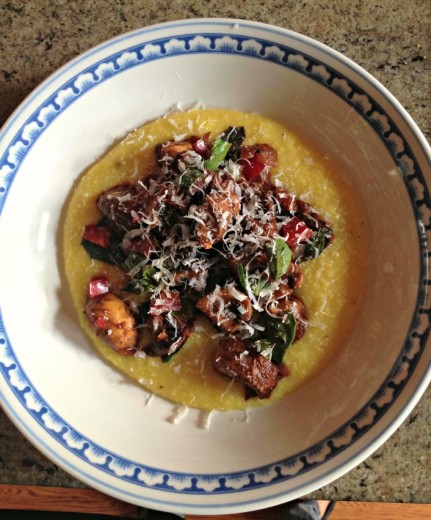
Polenta with Spicy Mushrooms
Dana Treat Original
Serves 4

You can use any grind of cornmeal for the polenta.  It does not have to be labeled “polenta”.  I’ve had success with all of it.  I personally think the polenta itself has a ton of flavor with just vegetable broth and a small handful of Parmesan cheese but you can add cream and more cheese if you want it to be richer. 

Unless I am serving them stuffed or grilled, I almost always scrape the gills out of a portabello mushroom.  There is no flavor in the gills and it just make the color of whatever you are cooking muddy.  I just use a teaspoon to scrape them out.

1½ cups polenta or cornmeal
6 cups water or vegetable broth
Kosher or sea salt and freshly ground black pepper
¼ cup shredded Parmesan cheese
Extra-virgin olive oil
1 large yellow onion, finely chopped
1 large red bell pepper, finely chopped
2 garlic cloves, minced
½-1 tsp. red pepper flakes
2 large portabello mushrooms, gills scraped out, cut into 1-inch pieces
½ pound cremini or white mushrooms, halved or quartered if large
2 tbsp. tomato paste
½ cup dry white wine
¼ cup fresh basil leaves, shredded
Additional Parmesan cheese

Pour the water or broth into a medium saucepan and bring to a boil.  Slowly add the polenta in a steady stream, whisking constantly.  Continue whisking until the mixture seems really thick.  It will seem like too much liquid at first but will thicken up quickly.  Add a pinch of salt and turn down the heat.  Cook, stirring once every five minutes or so, until very thick, about 25 minutes.  Stir in the ¼ cup Parmesan cheese and season to taste with salt and pepper.

Meanwhile, place a large sauté pan over medium heat.  Drizzle in just enough olive oil to coat the bottom of the pan, then add the onions and red bell pepper along with a large pinch of salt.  Continue to sauté, stirring occasionally, until the vegetables soften and just start to brown, about 7 minutes.  Add the garlic and red pepper flakes.  Cook until fragrant but make sure the garlic does not burn, about 3 more minutes.  Add all the mushrooms, turn up the heat to medium-high, and cook until the mushrooms are brown in spots, another 7 to 10 minutes.

Add the tomato paste and stir well to incorporate.  Pour in the wine and bring to a boil.  Lower the heat to a simmer and cook until the liquid is reduced to a syrupy consistency.  Stir in the basil and taste for salt and pepper.  Serve bowls of polenta topped with the mushroom mixture and a sprinkling of Parmesan cheese.


Stocking Up

June 17, 2013

I know.  A few more salads and I’m going to have to change the name of this site to Dana Salad.  I can’t help it.  I love salad and it is salad season.  Actually, in California it is always salad season.  I’m making a name for myself as a good cook and baker in my community and some people have even called me a salad master.  This is serious stuff.  It is all because of inspiring produce and my experience – years of making lots of salads.

This beauty grew out of having a well-stocked refrigerator.  Most cooks will tell you that having a well stocked pantry is the key to cooking on fly but in my life, I need produce in the fridge too.  I shop for specific meals I am making but I also just kind of buy what I like.  This goes for cheeses too.  I regularly go to the Cheeseboard Collective, an incredible cheese shop in Berkeley, and just buy chunks of things that speak to me.  Having a couple of good cheeses can make something decent into something special.

I needed a salad to bring to a kindergarten end-of-the-year potluck.  In my head I had a couscous dish that my mom used to make.  It is entirely too boring for me to recount the ways in which I changed this dish, so much so that my version only resembles the original in the dressing, but I think it is important to note that it was so very good because I had bits of pieces of some of my favorite things on hand.  Why did I buy three ears of corn at the market?  Because they looked good and we love corn.  I had no dish containing corn on the menu that week, but we like corn and I figured I would use it somehow.  Just that one decision added deliciously to my salad.  I cook so much and always seem to be making food to share, that even impulse purchases almost always get used up.

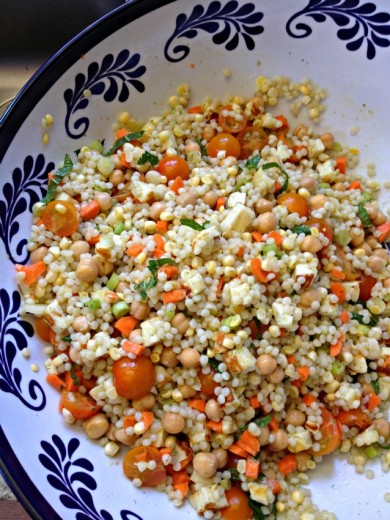
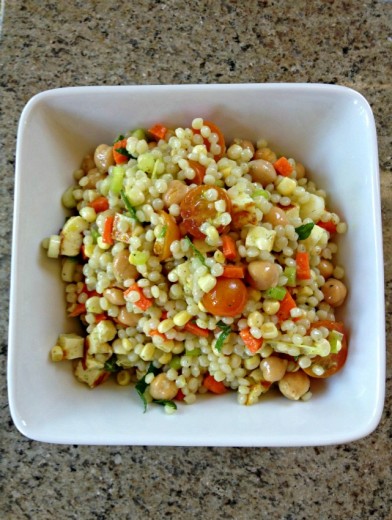
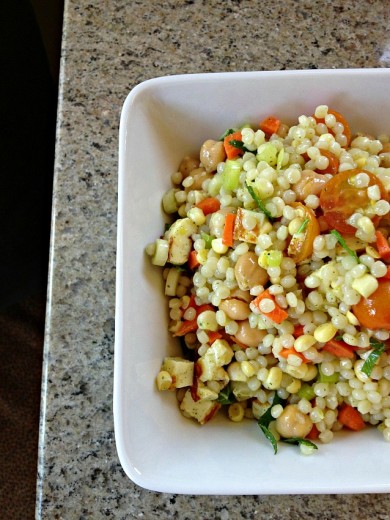
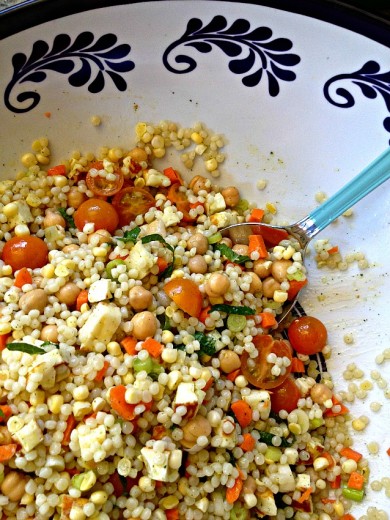
So what is going on here?  Israeli couscous, chunks of carrot, cherry tomatoes, chickpeas, and the kicker – haloumi cheese.  In my mind I was going to use feta but it turned out that I used the last of it in this salad.  Because I love haloumi, I always have some in my cheese drawer.  I like to be able to fall back on this appetizer, especially now that I have a lemon tree to draw from.  I used to stockpile it a bit because it was not always that easy to find but that is changing.  Whole Foods is a pretty reliable source as is any well-stocked cheese shop and just today, I found it at Trader Joe’s, pre-sliced and about $5.  I’ve never paid less than $10 so that is a huge deal.

Two Years Ago:  Mandelbrot, My Mostly Not Potato Salad, Gnocchi with Morels and Spring Peas
Three Years Ago:  Brown Rice with Tempeh and Tahini Sauce, Pasta with Chickpeas, Chili-Cheese Gratin Sandwiches
Four Years Ago:  Spicy Chickpeas with Ginger and Kale, Chilled Avocado Soup, Grilled Vegetable Quesadillas
Five Years Ago:  Barefoot Contessa’s Brownies, Curried Red Lentil Stew, Feta and Ricotta Cheese Pie

Israeli Couscous Salad with Haloumi and Mint Vinaigrette
Dana Treat Original
Serves 8 or more

The corn is not cooked in this recipe.  I like the crunch of raw corn but if you have leftover cooked (or grilled!) ears of corn, by all mean use them.  I would never normally rinse Israeli couscous but doing so keeps it from clumping.

For the Mint Vinaigrette:
¾ cup mint leaves, plus a few more for garnish
3 tbsp. white wine vinegar
1 garlic clove, roughly chopped
1 tsp. Dijon mustard
¼ tsp. sugar
½ tsp. kosher or sea salt
2/3 cup olive oil

For the salad:
1½ cups Israeli couscous
1 package haloumi cheese, cut into ¼-inch thick slices
1 bunch scallions, white and pale green parts only, thinly sliced
2 medium carrots, peeled and cut into very small chunks
2 ears of corn, shucked, kernels stripped off the cobs
½ pint cherry tomatoes, halved
1 14-ounce can chickpeas, drained and rinsed

Make the vinaigrette:
Place everything except the olive oil in a blender jar.  Blend to a paste.  You might have to scrape down the sides of the jar.  Through hole in the top, slowly pour in the olive oil, allowing it to emulsify.  Taste for seasoning and adjust if necessary.  (This can also be made in a food processor.)

Make the salad:
Bring a medium pot of salted water to a boil.  Pour in the Israeli couscous and allow to cook, stirring occasionally, until al dente, about 6 minutes.  (Taste to make sure.)  Drain and rinse, then drain again.

Place a nonstick skillet over medium-high heat.  Carefully lay the haloumi slices in the pan.  Cook until lightly browned in spots, about 3 to 5 minutes, then turn over and cook the other side.  Remove and allow to cool enough to handle, then cut into roughly chickpea sized pieces.

Place the couscous and all the other salad ingredients, including the cheese, in a large bowl.  Drizzle lightly with the dressing (you won’t need all of it).  Toss carefully and taste to make sure there is enough dressing and there is enough salt.  Adjust as necessary.  Just before serving, toss in some slivered mint leaves.


Idiosyncrasies

June 6, 2013

Most of us have food idiosyncrasies.  (I just spelled that word without spell check.  Did you know I won the 4th grade spelling bee?)  I am grateful that my husband doesn’t really have any.  He is pretty black and white.  There are a few things he does not like (beets the hardest one for me to accept) and otherwise he is happy to eat whatever I make for dinner.

All in all, I consider myself to be a good and not picky eater.  I don’t eat meat and I don’t like okra or papaya.  Even my idiosyncrasies are things that don’t prevent me from enjoying a meal at your house.  Curious?  Here they are.

I don’t like nuts in my sweets.  I’ve mentioned this many times here.  I would never put nuts in my brownies and I only tolerate them in cookies like this one.  I like nuts by themselves and in savory food but please keep them out of my treats.

I don’t like my food to touch each other.  I’m fine with soups and stews where things are all mixed together but if I have a dinner plate with three different things on it, I will eat those things one at a time, and I would prefer that they not actually touch.  Weird?  Thanksgiving is tough for me.

I don’t like fruit in my salads.  I like fruit salad.  I just don’t like fruit in my salad.

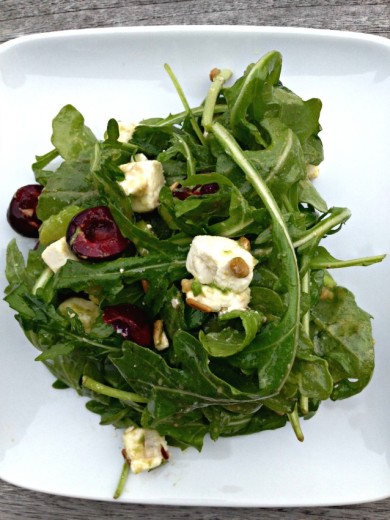
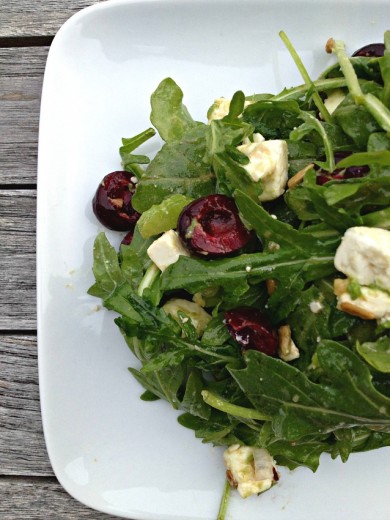
But I think it is good to challenge idiosyncrasies or dislikes, which is why I make Randy try a beet at least once a year.  And it is why I made a salad with cherries.  Guess what?  It was great!  The key for me was creating a good balance for the sweetness of the cherries.  I used peppery arugula as my lettuce and a salty tangy feta.  I threw in some scallions for a bit of heat, a very rare addition salad addition for me since I don’t really like raw members of the onion family (idiosyncrasy?)  I always make my vinaigrettes with a lot of bite but this one was downright assertive and it went perfectly with the rest of the salad.

A few notes.  Arugula has a lot of personality in the taste department but it is a soft lettuce and wilts quickly.  Dress the salad right before you are going to eat it.  I will always encourage you to buy great cheese and feta is no exception.  Bad feta, usually the kind that is pre-crumbled, is dry and tastes a bit like sawdust.  You want either a French or Greek cheese that is sold in a brick, not a tub.  This recipe will make more dressing than you need for this salad but it will keep for a week or more in your refrigerator (this is true of most salad dressing you make).  Finally, I would say this salad serves four normal salad eaters but Randy and I ate the whole thing.

One Year Ago:  Roasted Pickled Cauliflower Salad
Two Years Ago:  Puff Pastry Squares with Pea and Tarragon Purée,
Three Years Ago:  Radishes with Sweet Butter and Chive-Sage Salt, Asparagus and Grilled Shiitake with Soy Vinaigrette
Four Years Ago:  Oven-Fried Rice Balls with Gruyère, Mexican Pizza, Strawberry Rhubarb Coffee Cake
Five Years Ago:  Gazpacho

Arugula Salad with Cherries and Feta

Dana Treat Original
Serves 4 as a first course

For the dressing:
1 large garlic cloved, pressed or minced
1½ tsp. Dijon mustard
1 tsp. honey
4 tbsp. sherry vinegar
¼ tsp. each sea salt and freshly ground black pepper
½ cup + 1 tbsp. olive oil

For the salad:
2 scallions, white and pale green part only, thinly sliced
12 cherries, pitted and halved
1 small avocado, pitted, and cut into small chunks
1 stalk celery, thinly sliced
3 ounces feta cheese, cut into small cubes
5 ounces arugula
2 tbsp. sunflower seeds

Make the dressing:
Place the first five ingredients in a clean wide-mouth jar or a bowl.  Use a whisk to blend.  (This helps the honey get incorporated.)  Add the olive oil and whisk if you are using a bowl, or cover and shake vigorously if you are using a jar.  Taste.  If the dressing is too strong for you, add a bit more honey and a bit more olive oil to taste.  (Store the unused portion of the dressing in the refrigerator.  The olive oil will solidify in the cold so remember to allow the dressing about minutes at room temperature before using it for the next salad.)

Make the salad:
Place all the ingredients except the sunflower seeds in a large bowl.  Drizzle with a bit of dressing and toss carefully so the cheese doesn’t fall apart.  Scatter the sunflower seeds over top and toss again.


In Time for Memorial Day

May 23, 2013

There are many things that I am but I am not the food blogger who posts holiday recipes in time for holidays.  I’m just not usually that organized.  I make a Christmas-worthy cake on Christmas, not days ahead so that I can share the recipe.  Maybe I share the recipe days after and tell you to make it next year.  I realize this is not all that helpful and I’m sorry.  I do get contacted by people like the Cream Cheese Commission reminding me that National Cream Cheese Day is coming up and might I want to create a recipe and tell my readers about it!  Except I don’t.  The food I share here is food I cook for myself, my family, or for clients.  It is food I make because I want to eat it.  And I like it enough to want to share it with you.

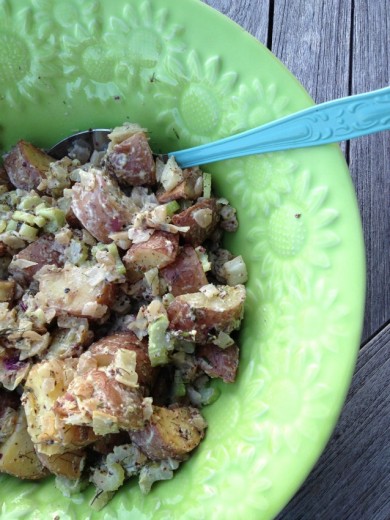
All this to say that I happened to make a potato salad last night that I really liked and hey! what do you know?, it’s Memorial Day weekend and you might need a good potato salad.  Because of my intense love of potatoes, I really like just about any potato salad.  I like them with a mayonnaise dressing and also with an olive oil one.  I like them with pickles, hard boiled egg, scallions, celery, and without any of those things.  I have even been known to eat those gloppy yellowing mayo soaked ones that you find in plastic tubs from a grocery store.  This potato salad is nothing like that kind.  I created this one as a way to highlight the flavor of the ingredients, not drown them in dressing.  And, as usual these days, I was inspired by the produce at the markets.

Boiling potatoes, especially lovely pink hued new potatoes from the Berkeley farmers’ market, is a cruel way to treat them.  It zaps all their flavor and tends to make them mushy.  Mushy potatoes don’t work well in potato salads because when you go mix everything together, they fall apart.  Their skins tend to peel off.  Much better to roast the potatoes in the oven, with a little olive oil and plenty of salt.  Then your prime ingredient tastes good on its own so it can’t help but be delicious in the finished product.  I sautéed purple spring onions and fennel with just a bit of parsley and mixed in thinly sliced celery.  I think mustard and potatoes are great friends so I made a dressing that is nice and creamy but with a lot of bite from two kinds of mustard and some horseradish. If you hate mayonnaise, and I know there are many of you out there, I imagine you could use all yogurt or sour cream instead.  I like my potato salads lightly dressed but this recipes makes plenty of it in case you want to add more or make the salad again.  It will keep for a week in the refrigerator and would be a great sandwich spread too.

Three Years Ago:  Mushrooms with White Wine
Four Years Ago:  Individual Vegetable Tarts
Five Years Ago:  Niçoise Tartines with Peperonata

Potato Salad with Fennel and Mustardy Dressing
Dana Treat Original
Serves 6-8

Spring onions look like giant scallions.  You will want to use the bulb part only (the part that looks like an onion) and discard the greens.  You could substitute a large sweet onion (like Walla Walla or Vidalia) instead.  Be sure to buy a fennel that has some of the fronds attached (the green dill like looking top) because you will stir some of the chopped fronds into the finished salad.  Make sure to dress the salad when the potatoes are warm.  They will absorb the dressing beautifully.  Finally, potato salads, like pasta salads, taste best room temperature.  You can store the salad for a day or so in the fridge but take it out about an hour before you want to serve it.

For the dressing:
2 tbsp. plain yogurt
2 tbsp. mayonnaise
2 tbsp. Dijon mustard
2 tbsp. whole grain mustard
2 tbsp. horseradish
Juice of ½ a lemon
Pinch of salt and freshly ground black pepper

For the salad:
2½ pounds new potatoes, scrubbed and cut into large bite-size chunks
Olive oil
3 spring onions, bulb part only, chopped
1 large fennel, inner core removed, chopped
2 tbsp. fresh parsley, chopped
4 stalks of celery, thinly sliced
2 tbsp. chopped fennel fronds

Make the dressing:
Mix together the first six ingredients in a bowl.  Taste and add salt and pepper to your liking.

Make the salad:
Preheat the oven to 375ºF.  Lay the potato chunks on a large baking sheet and drizzle with 2-3 tablespoons of olive oil.  Shower with salt and a few grinds of pepper.  (Potatoes need salt!)  Place in the oven and bake for 20-25 minutes without disturbing them.  A paring knife should easily pierce them.  Remove from the oven and let cool slightly.

Meanwhile, place a large sauté pan over medium heat.  Drizzle in just enough olive oil to coat the bottom, then add the onions and fennel and a large pinch of salt.  Cook, stirring occasionally, for about 5 minutes, then add the parsley.  Continue to cook until the vegetables are very soft and brown in places, about 10 more minutes.  Scrape the contents of the pan into a large bowl.

Transfer the still quite warm potatoes to the bowl along with the celery.  Spoon out about five tablespoons of the dressing into the bowl and, using a spatula, mix together gently.  Add the fennel fronds and mix again.  Taste for salt and pepper and additional dressing if desired.


What Grows Together Goes Together

May 16, 2013

What grows together goes together.  Are you familiar with this saying?  It is a terrific mantra when you find yourself at a farmers’ market.  Now you Northern climate people, before you close your eyes and mutter, “Enough with the bragging about California farmers’ markets”, remember that I was one of you.  I was the person who counted down the weeks until my neighborhood market started in May, and then counted down the weeks until real actual produce, not just kale and parsnips, arrived.  I was the one finally (finally!) buying English peas, snap peas, fava beans, and other green spring things in late June which is not (not!) spring.  I have been there.  And now I am here in California and I am going to talk about my glorious California farmers’ markets.  So there.

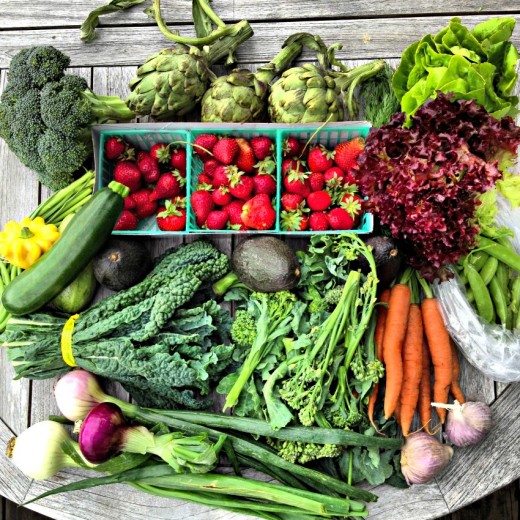
I used to hit the markets with a list.  I would plan my menu for the week and I would try to buy as much as I could at the market.  Whatever I couldn’t find there I would buy at the grocery store.  This approach led to a lot of frustration.  Walking in to a farmers’ market with a set idea of what to buy just might leave you agitated because there is not guarantee that what you want will be there.  Even if it is in season.  It is better, I have found, to just go and buy what looks good to you.  Buy what you like.  Ideas will pop into your head and since you are shopping seasonally and locally, all the things you buy will go together in some way or another.  What grows together goes together.  And if you are really a list person, bring a blank list to the market.  Once you have you have been inspired by the produce there and bought what you like, you can make a list of the things you need to fill out the dinners you have planned.

Last week, I bought a truly shocking amount of produce.  How could I not?  Everything looked so amazing.  I realized, soon after putting everything away, that Randy was going to be out of town the first part of the week and that I had better get some friends to come eat with me.  I made pizzas and a huge salad which we devoured.  I told Randy about my creations and he was crestfallen that I had made pizza, on the grill no less, without him.  So I made the same dinner, just for us, on Mother’s Day.  Yes, I cooked on Mother’s Day.  In fact, I made breakfast and dinner.  No sad trombone or tiny violins here.  I had two friends come down from Seattle last weekend and we spent all Saturday out and about in Oakland and then San Francisco, topped off with a dinner at AQ.  It was such a gift to be able to just hang with my friends and not have to worry about the boys, I wanted to thank him for giving me that time.  I also wanted to just be home with my family and enjoy pizza and wine on our deck, rather than at a busy restaurant.

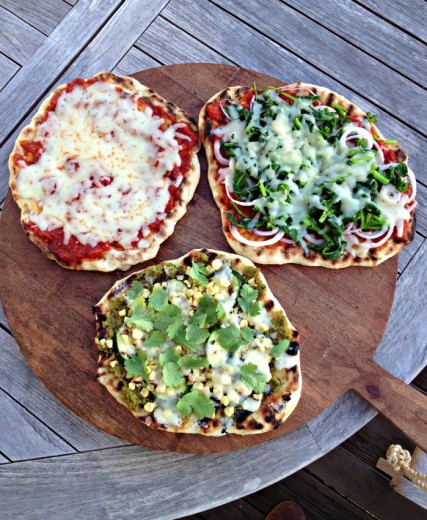
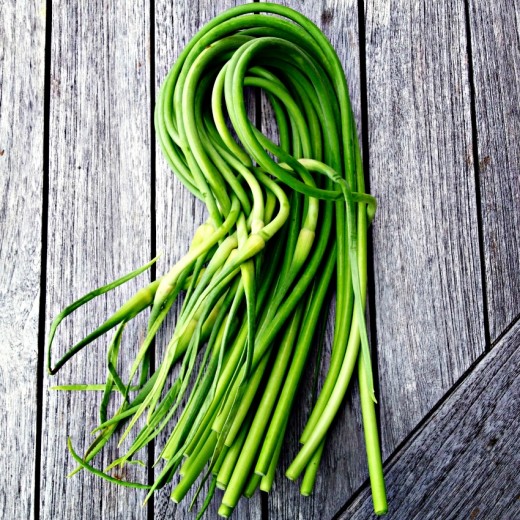
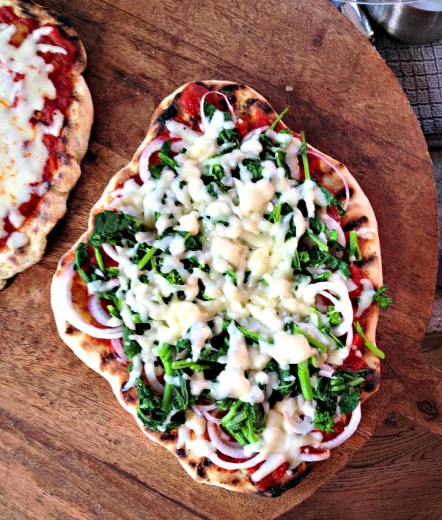
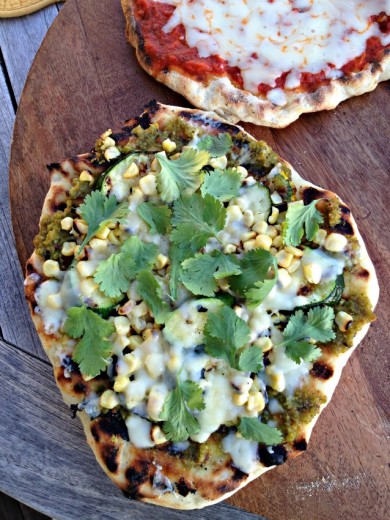
I could just have easily titled this post Put It On a Pizza.  When I end up with a surplus of fresh seasonal produce, I often end up making pizza and combining things I have on hand for a topping.  I also do this with pasta or risotto but pizza is my favorite.  Especially when I make it on the grill.  With my crazy produce haul, I had the most beautiful bunch of garlic scapes (see photo above) which I made into a pesto.  That got brushed on one pizza and was topped with grilled zucchini and grilled corn (corn in May!) and some shaved Manchego cheese.  A few cilantro leaves on top too.  I love broccoli rabe on pizza so for the other one, I blanched a bunch of that, chopped it up, and paired it with sweet spring onion rounds on a marinara slathered crust, topped with mozzarella.  When I made dinner for my family on Sunday, I repeated everything but also made a third pizza of just cheese and sauce for the boys.

I almost always use Mark Bittman’s pizza dough recipe.  It is easy and has a short rising time.  I keep promising myself that I will try others, notably the ones that have a longer rise, but the truth is that I am not always forward thinking when I make pizza.  If I realize that at 5:30 I still haven’t made the dough, we can still be eating by 7.  If you have small people who would be terrified to even contemplate anything other than a cheese pizza, divide the dough into three pieces and make one of them more plain.  I’m going to give directions for cooking pizza on the grill, since we are coming upon grilling season, but these can of course be made in a very hot oven.

One Year Ago:  Pepper Glazed Goat Cheese Gratin (I’ve made this countless times – so amazing and easy!)
Two Years Ago:  White Bark Balls
Three Years Ago: Chickpeas with Lemon and Pecorino Romano (so good!), Potato Salad with Snap Peas
Four Years Ago:  Quinoa with Grilled Zucchini and Chickpeas, Peanut Butter Cup Brownies, Raspberry Almond Bars

Pizza with Garlic Scape Pesto, Grilled Zucchini and Corn
Dana Treat Original (mostly)
Serves 4 along with another pizza (or double this recipe and make two)

You might not use all the zucchini or corn, but just throw them in a salad another night.  The pesto makes quite a bit.  It is terrific with pasta, rice, and eggs, or as a sandwich spread.  You can always take half of it, put it in a container, and freeze it for another time when garlic scapes are a distant memory.  Finally, this pizza has a LOT of flavor, so I didn’t think it needed much cheese.  But add as much as you like.  You can, of course, substitute another cheese for the Manchego.

½ ball pizza dough (recipe follows)
Garlic scape pesto (recipe follows)
2 small zucchini or other summer squash, sliced on the diagonal, about ¼-inch thick
2 ears of corn, shucked
Olive oil
Kosher or sea salt
½ cup (or more) Manchego cheese, shaved
Few cilantro leaves

Heat a grill to high.  Place the zucchini slices on one side of a rimmed baking sheet and the corn on the other.  Drizzle it all with a little olive oil and then add a healthy pinch of salt to both vegetables.  Using your hands, toss well (keep the vegetables separate).  Grill the zucchini and corn.  You will want nice grill marks on the zucchini and the corn should brown in places.  Remove back to the baking sheet.  Leave the grill on.  When the corn is cool enough to handle, slice the kernels off the cob.

Scatter a bit of cornmeal on a pizza peel (or the bottom of a baking sheet can work too).  Stretch the dough out to a nice thin circle, then place it on the peel.  Slide the dough onto the grill, close the lid, and let cook for4 minutes, or until the bottom is nice and golden brown with some grill marks.  Carefully coax it back onto the peel (tongs can be useful for this step).  If you are using an oven instead of a grill, just top the raw dough with the toppings – you won’t need to flip.

Turn the dough over and smear the top with some of the pesto going almost to the edges of the circle.  It is quite strong so you don’t need a lot.  Add the zucchini slices and the corn.  Top with the shaved Manchego.  Slide the pizza back on the grill, cover and cook for 2 minutes or until the cheese is melted and the visible dough is golden brown.  Slide back on the peel and scatter cilantro leaves over the top.  Let sit for a minute, then slice and serve.

Pizza Dough
Courtesy of Mark Bittman
Makes: Enough for 1 large or 2 or more small pies

To make pizza dough by hand or with a standing mixer, follow the directions, but use a bowl and a heavy wooden spoon or the mixer’s bowl and the paddle attachment instead of the food processor. When the dough becomes too heavy to stir, use your hands or exchange the mixer’s paddle for the dough hook and proceed with the recipe.

3 cups all-purpose or bread flour, plus more as needed
2 teaspoons instant yeast
2 teaspoons coarse kosher or sea salt, plus extra for sprinkling
2 tablespoons extra virgin olive oil

Combine the flour, yeast, and salt in a food processor. Turn the machine on and add 1 cup water and the oil through the feed tube.

Process for about 30 seconds, adding more water, a little at a time, until the mixture forms a ball and is slightly sticky to the touch. If it is still dry, add another tablespoon or two of water and process for another 10 seconds. (In the unlikely event that the mixture is too sticky, add flour a tablespoon at a time.)

Turn the dough onto a floured work surface and knead by hand for a few seconds to form a smooth, round dough ball. Put the dough in a bowl and cover with plastic wrap; let rise until the dough doubles in size, 1 to 2 hours. (You can cut this rising time short if you’re in a hurry, or you can let the dough rise more slowly, in the refrigerator, for up to 6 or 8 hours.) Proceed to Step 4 or wrap the dough tightly in plastic wrap or a zipper bag and freeze for up to a month. (Defrost in the bag or a covered bowl in the refrigerator or at room temperature; bring to room temperature before shaping.)

When the dough is ready, form it into a ball and divide it into 2 or more pieces if you like; roll each piece into a round ball. Put each ball on a lightly floured surface, sprinkle with flour, and cover with plastic wrap or a towel. Let rest until they puff slightly, about 20 minutes.

Garlic Scape Pesto
Courtesy of Epicurious
Makes about 1½ cups

I only had salted pistachios on hand so I only added a pinch of salt to the pesto.

10 large garlic scapes
1/3 cup unsalted pistachios
1/3 cup finely grated Parmigiano-Reggiano
Kosher salt and black pepper
1/3 cup extra-virgin olive oil

Puree the garlic scapes, pistachios, Parmesan, ½ teaspoon salt, and ¼ teaspoon pepper in a food processor until very finely chopped. With the motor running, slowly pour the oil through the opening. Season the pesto with salt and pepper to taste. (The pesto keeps in the fridge, covered, for 1 week or frozen for a month.)


« Older Posts