Category: Weekly Treat

New School Rules

October 17, 2011

It’s a new school year and we have a new rule in our house.  This rule has to do with treats in lunch boxes.  Although my children have been in some kind of school since they were three years old, I am relatively new to the whole packing-a-lunch thing.  The preschool that Spencer goes to, which is the same one that Graham attended, serves the kids a hot lunch every day.  So in preschool days, I only pack a lunch when there is a field trip.  Packing a lunch – having a lunchbox, getting to drink juice at lunch, my food instead of the school’s – is special for Spencer just as it was for Graham.  I started a tradition in Graham’s first year of  preschool – including a special treat in his lunchbox.  That treat, when packed lunch was something that happened without regularity, was a chocolate kiss.

Once Graham started kindergarten last fall, I wanted to keep up the treat tradition.  As a child, I remember looking forward to lunch even in first grade, and I know my little foodie first grader is the same.  For the first few months of kindergarten, I stuck with the chocolate kiss.  Then, after Halloween, it was a piece of his Halloween candy.  And then Valentine’s Day candy.  And then Easter candy.  And then whatever candy we had lying around the house.  Now, I am fine with my kids eating candy.  I ate candy as a kid and I turned out all right.  But when I would offer him a homemade cookie as a treat and he chose some disgusting artificially flavored and colored thing instead, my feelings got hurt.

Hence the new rule.  It is hereby declared that all treats in lunch boxes must be homemade.  I will relent for a few weeks after Halloween because it is a BIG DEAL for my kids (most kids) but then it’s back to homemade.  I know, for us adults being force to bring a homemade cookie is hardly a hardship but for a 6¾ year-old, it might take some getting used to.

When Randy started his new job in January, I decided to send him in with treats every week.  I was good for the first couple months and then as my classes started getting busier I just couldn’t fit it in.  So it is now my hope that I can combine the lunchbox treat for Graham and the office treat for Randy and still have a few left over for Mommy.

I have a lot of baking books.  And yet, I can sometimes find making cookies uninspiring.  I look at recipes and my thinking is, “yep, seen this all before”, so I resort to tried and true favorites.  There is nothing wrong with those favorites but when I am feeling stuck, I often turn to Martha Stewart’s Cookies.

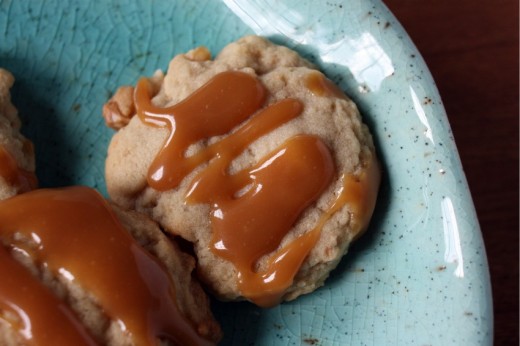
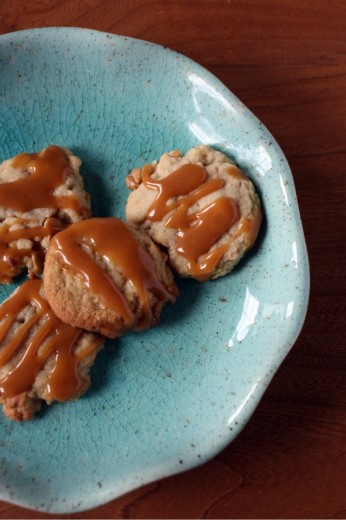
These cookies could easily fall into the “look pretty but taste boring” category.  But they don’t.  Cashews play a role in one of my all-time favorite cookies and they are wonderful here as well.  There are chunks throughout but you also purée some down with a bit of oil to make your own cashew butter.  The chunks and the butter, combined with the caramel drizzle on top, make for an addictive cookie.  These guys are sticky though.  I made them small so that I would get a large yield and they kind of wanted to just all stick together in one massive cookie.  I’m a little tired these days and finding a plastic container where I could lay them between layers of waxed paper seemed like a little too much effort.  Hence, they went to work with Randy in a foil-wrapped cookie ball and they are sitting in my cookie jar en masse.  You’ve been warned.

One Year Ago:  Cranberry Bean Soup with Farro and Fresh Tomatoes
Two Years Ago:  Creamy Blue Cheese Dressing and Holly B’s Cappucino Bars
Three Years Ago:  White Beans with Tomatoes and Sage

Cashew Caramel Cookies
Martha Stewart’s Cookies
Makes about 3 dozen

1 2/3 cups all-purpose flour
½ tsp. coarse salt
2½ cups roasted salted cashews
2 tbsp. plus 1 tsp. canola oil
½ cup (1 stick) unsalted butter, room temperature
¾ cup packed light brown sugar
½ cup granulated sugar
1 large egg
1 tsp. vanilla extract
24 soft caramel candy cubes (7 ounces)
¼ cup heavy cream

Preheat oven to 350ºF.  Sift together flour and salt.  Coarsely chop 1 cup cashews; set aside.  Process remaining 1½ cups cashews in a food processor until finely chopped.  Pour in oil; process until creamy, about 2 minutes.

Put cashew mixture, butter, and sugars in the bowl of an electric mixer fitted with the paddle attachment.  Mix on medium speed until pale and fluffy, about 2 minutes.  Mix in egg and vanilla.  Reduce speed to low; gradually mix in flour mixture and reserved chopped cashews.

Using a 1½-inch ice cream scoop, drop dough onto baking sheets lined with parchment paper, spacing 2 inches apart.  Bake 6 minutes; gently flatten cookies  Bake until bottoms are golden, 6 to 7 minutes more.  Let cool on sheets on wire racks.

Melt caramels with cream in a saucepan over low heat, stirring.  Let cool a bit.  Using a spoon, drizzle caramel over cookies; let set.  Cookies can be stored in airtight containers at room temperature in single layers up to 3 days.


Banana-Date Tea Cake

April 13, 2011

Periodically, I want to make banana bread.  I can’t really explain why since I’m not even that fond of banana bread.  Maybe it is the ease of preparation, the ingredients seemingly always on hand, the satisfying and great smelling loaf that comes out of your oven after so little effort.  There is one problem with my desire to make banana bread.  We never have any bananas.

I buy bananas each week and my kids devour them.  Spencer (4) has been known to eat three in a day.  No matter how many I buy, they are eaten.  We never get close to over-ripe bananas.  I read about people who freeze bananas that are too brown to eat for future banana bread making days.  All I have to say is, can I have some of your stash?

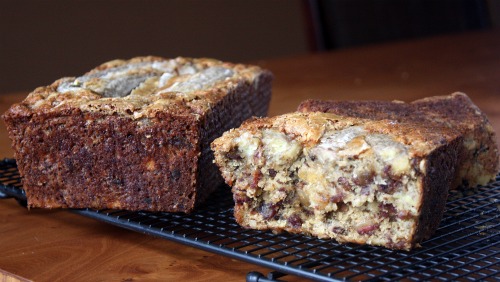
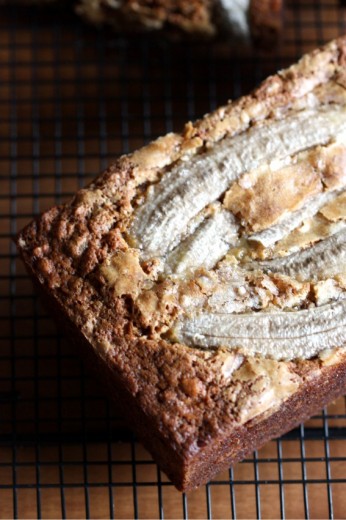
Paging through Tartine, I came across this recipe.  Instead of a banana bread, this is a banana tea cake, made different by the use of butter (rather than oil), and the addition of chopped dates.  Immediately I glanced at my fruit basket.  For some crazy reason, I had not one, not two, but eight ripe bananas.  Meaning I could double the recipe and have two cakes.   How did this happen?  Clearly this recipe was meant to be made in my kitchen.  I even had dates in the refrigerator from some catering last week.

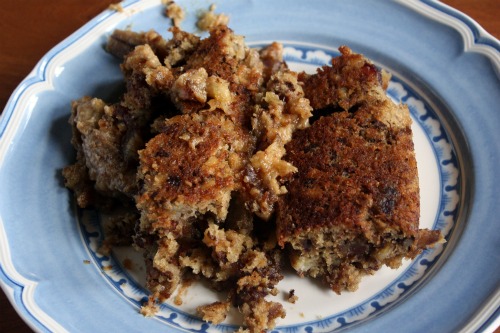
So, also periodically, I like to keep it real here.  I have disasters in my kitchen.  They usually involve cake.  Cake that either decides to stay in a pan because of an insufficient grease job, or cake that seems like it is baked through, only to have the middle of it puddle out after being removed from the pan.  I had a bit of both with one of these cakes.  And here is where I will tell you that sometimes equipment does matter, and that paying a bit more is worth it.  I have two 9×5 loaf pans.  One is really old and one is brand new.  The old one I bought in a grocery store years ago for about $7.  The new one came to me from the King Arthur Flour web site and set me back $16.95.  I baked my two loaves side by side in my oven, both were filled with the same amount of batter, and one turned out perfectly.  The other gave me this for a middle.

I will let you guess which was which.

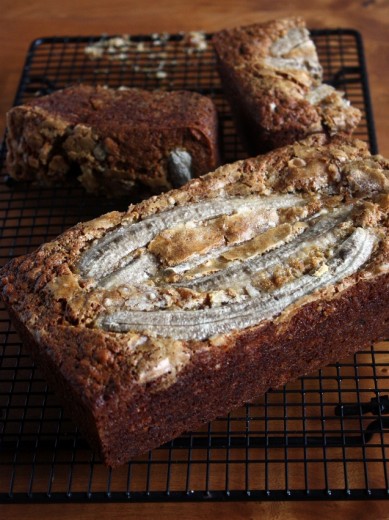
Here is my pretty cake with the two salvageable ends of the ugly cake behind it.  Disasters do happen.

The cake, no surprise, was delicious – even the mushy part.  I served slices to four children, ages 6, 5, 4, and 3 (my boys and their two best buddies).  I don’t really think of this as kid cake or kid dessert but it was all I had and I have a reputation for my treats not only with adults, but with kids as well.  All four of them cleaned their plates.  So did the adults.  Kendall, age 5, was dismayed that she didn’t get to take the leftovers home with her, as they were destined for Randy’s office.  “But you always send us home with treats!”

One Year Ago: Cinnamon Chocolate Ribbon Cake
Two Years Ago: Orange Cinnamon Biscotti

Banana-Date Tea Cake
Tartine
Makes 1 large loaf

1 cup + 2 tbsp. all-purpose flour
2 tbsp. cornstarch
1 tsp. ground cinnamon
2 tsp. baking powder
1 tsp. baking soda
3 medium bananas, very ripe
2 large eggs
1½ tsp. vanilla extract
½ tsp. salt
6 tbsp. (¾ stick) unsalted butter
¾ cup + 2 tbsp. sugar
1 cup walnuts, lightly toasted and coarsely chopped
1¾ cups (about 8 oz.) dates, pitted and coarsely chopped

Topping
1 medium banana
2 tbsp. sugar

Preheat the oven to 325ºF.  Lightly butter the bottom and sides of a 9-by-5-inch loaf pan.

This recipe is easily mixed by stand mixer fitted with the paddle attachment on medium speed or by hand with a wooden spoon.  In a mixing bowl, combine the flour, cornstarch, cinnamon, baking powder, and baking soda and stir too  mix.  Set aside.  Peel the bananas and place in a second bowl.  Mash with a fork until you have a chunky purée.  Add the eggs, vanilla, and salt to the bananas and stir to mix well.  Set aside.

In a third mixing bowl, beat the butter until light and creamy, about 2 minutes.  Slowly add the sugar and beat until light in color and fluffy, about 2 minutes.  Scrape down the side of the bowl with a rubber spatula.  Slowly add the banana mixture and beat until incorporated.  Again scrape down the sides of the bowl, and then mix for anther 30 seconds to make sure all the ingredients are incorporated.

Using a rubber spatula, fold the dry ingredients into the banana mixture.  Then fold in the nuts and dates.  Scrape down the sides of the bowl and mix again, making sure all the ingredients are fully incorporated.

Transfer the batter to the prepared loaf pan and smooth the surface with an offset spatula.  To top the cake, peel the banana and cut in half lengthwise.  Then place each half cut side down and cut in half lengthwise, to yield 4 long slices.  (DT: I didn’t do this quite right.)  Lay the slices on top of the batter.  Sprinkle with sugar.

Bake until a cake tester inserted in the center comes out clean, about 1 hour.  Let cool in the pan on a wire rack for about 20 minutes, and then invert onto rack, turn right side up, and let cool completely.  Serve the cake at room temperature.  It will keep, well wrapped, at room temperature for 2 days or in the refrigerator for about 1 week.


Date Bars Gone Bad, Or Maybe Not

March 22, 2011

You know what I hate?  Poorly written recipes.  You know what else I hate?  Wasting quality ingredients.  Which is why I will never make these bars again.*

In searching fora different book, I came across my copy of Sticky, Chewy, Messy, Gooey.  I wondered, “Why haven’t I been using this book more?”  Now I know.  First there was the unclear directions about refrigerating the dough and then there was the fact that there was a full third too much of that dough.  I essentially threw out 10 tablespoons of butter.  Add to that the fact that the final baking time was off.  Way off.  Like the recipe said the bars would be done at 30 minutes.  Mine were done at 60.  I understand accommodating for oven differences and add 10 minutes here and there.  But double the amount of time?  Did anyone test this recipe?

This was the weekly treat and I’m sure the crew will enjoy them and might even request the recipe.  But my math skills would need to be much better in order to tell you how to either successfully cut the recipe for the dough by a third, or to increase the amount of date filling for an additional set of bars in a smaller pan to accommodate the leftover dough.  Ahem.  Too. Much. Trouble.

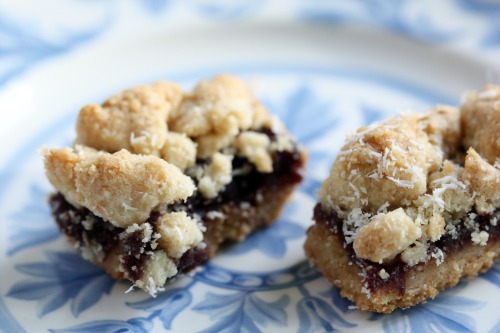
*But here is the thing.  I wrote the above paragraphs as I was checking the pan in the oven and while I was waiting for the bars to cool.  I was fully prepared to hate them.  I sheepishly have to tell you they are delicious.  A totally wonky, poorly written, proportionately-off delicious recipe.  What do you do with that?

I’m going to give you the recipe as written.  If one of you out there in Internet land can figure out a better way to make these bars, of if one of you makes them successfully using this recipe as written, will you let me know?  Please and thank you.

(UPDATE: I just want to clarify that the book in question is Sticky, Chewy, Messy, Gooey by Jill O’Connor – NOT Chewy, Gooey, Crispy, Crunchy.  The latter is the most recent book by Alice Medrich and has been celebrated by everyone who has used it.  Note to self: do not use a four adjective title for any future cookbooks.)

One Year Ago: Baked Pasta with Tomatoes and Mozzarella
Two Years Ago: Pasta with Roasted Cauliflower and Parsley Pesto

Chewy Date Bars
Sticky, Chewy, Messy, Gooey
Makes 24 bars

A couple of hints.  I was not clear on whether I was supposed to refrigerate the dough pressed into the pan as well as the topping dough.  I did just to be safe.  You will need a stand mixer for the dough.  I have the “professional” size Kitchen Aid and it struggled.  Do not attempt to mix it on medium.

1 pound (4 sticks) unsalted butter, at room temperature
1 cup granulated sugar
1½ cups confectioners’ sugar
2 tsp. vanilla extract
1½ tsp. salt
4 cups all-purpose flour
2 tsp. baking powder
1 1/3 cups desiccated coconut

For the date filling
1 pound dates, preferably Medjool, pitted and coarsely chopped
1½ cups water
¼ cup granulated sugar

Combine the butter and sugars in a large bowl.  With an electric mixer set at medium speed, beat the butter and sugars together until creamy.  Add the vanilla and salt and beat to combine.  Beat in the flour, baking powder, and 1 cup of the coconut just until a soft dough forms.

Spray a 9-by-13-inch pan with nonstick cooking spray.  Press one-third of the dough into the pan to form a bottom crust.  Wrap the remaining dough in plastic wrap and refrigerate until firm, at least 30 minutes.

Meanwhile, make the filling.  Combine the dates, water, and granulated sugar in a heavy-bottomed saucepan over medium heat.  Cover the pan and cook the dates, stirring occasionally, until they are very soft and have turned into a glossy brown mass, 10 to 15 minutes.  There still may be chunks of dates in the mixture.  Remove from the heat and let cool slightly.  Transfer the date mixture to a food processor fitted with a metal blade and, using short pulses, grind the dates to a fine paste.

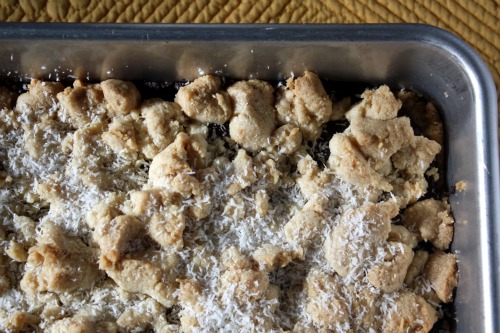
Position a rack in the middle of the oven and preheat to 325ºF.  Bake the bottom crust until firm and just beginning to turn golden around the edges of the pan, 20 to 25 minutes.  Let cool slightly.  Spread the date filling evenly over the crust.  Crumble the remaining dough over the date filling to form a pebbly, crumbled topping.

Return the pan to the oven and continue baking until the topping is firm and crisp and just beginning to color, about 30 minutes.  Remove the pan from the oven and sprinkle with the remaining 1/3 cup coconut.  Let cool to room temperature on a wire rack.  Using a sharp knife, cut into 24 bars.


Macaroon Brownie Bars

January 31, 2011

I went to a college where we had self-scheduled exams.  After classes were over, there was a 10 day period when exams were held at three different times of day.  When you were ready to take your European History exam for example, you showed up to the appointed place in the morning, afternoon, or evening and took the test.  If you decided you weren’t quite ready, you could wait until you were.  Whenever I tell people about this phenomenon, they always ask if people cheated.  Of course they did.  But we all signed an honor code at the beginning of our freshman year saying we wouldn’t.

For me, exam week was a very interesting exercise in time management.  Because I went to college 3,000 miles away from home, I always had a plane ticket limiting my time.  I would get to the end of the semester, look at all the papers I still had to write, all the studying I had to do, and the exams I had to take, I would panic, and then I would realize that I just simply had to get it all done.  Regardless of how overwhelming the work, how many all-nighters I was going to have to pull, I had a deadline with wings.

I am reminded of that time in my life because I have a lot to get done in the next couple of weeks.  I am teaching two Seasonal Feast classes, a private class, cooking a yoga retreat dinner for 24 people, and making a birthday cake for my younger son.  All before February 12th.  And classes aren’t just teaching, there is tons of prep involved and recipe testing, shopping, and typing up of recipes.

This would be the time to ask for a hall pass on the weekly treat idea.  But I can’t.  I went to Randy’s new office for the first time last week and there was a white board outside his cube.  On that board was written, “More cookies please” and it was signed the Cookie Monster.  I mean, I can’t let the cookie monster down, right?  No matter how busy I am.

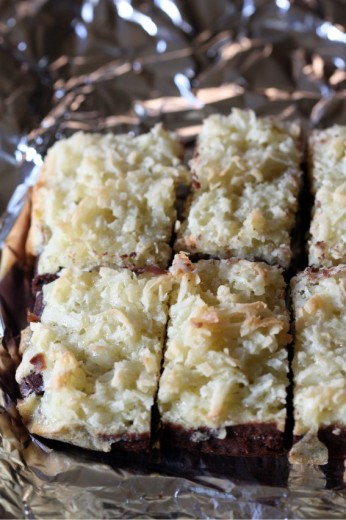
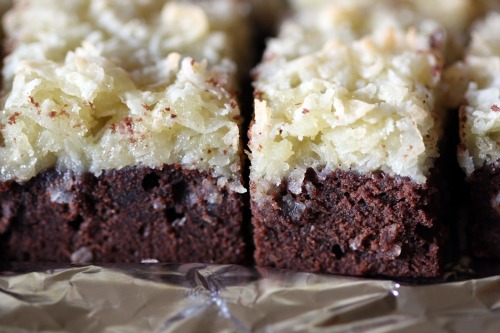
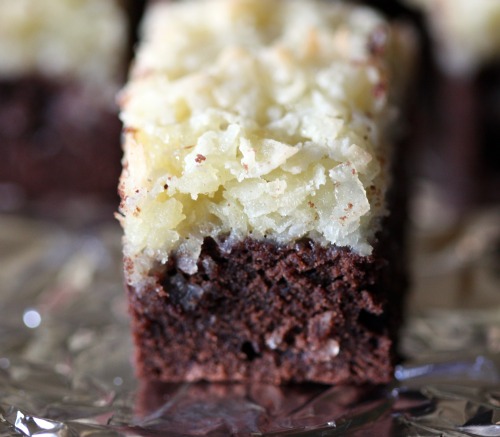
So this week it is Coconut Brownie Bars.  I’m actually surprised this recipe spoke to me.  The two candy bars that were always left in my Halloween bag were Almond Joy (because of the nuts) and Mounds (because of the dark chocolate).  And both of them were also left in there because of the coconut.  My parents were thrilled about this fact because they are both huge coconut fans.  Nuts I still don’t like in my sweets but dark chocolate and I are much better friends.  Coconut – hmmmm.  I’m still on the fence.  Sometimes I like it and sometimes I don’t.  This  bar is a nice mix of a brownie and a macaroon and I actually really liked the contrast of tastes and textures.

Chocolate and Coconut Previously on Dana Treat: Coconut Bars
One Year Ago: Baked White Bean Purée
Two Years Ago: Lentils with Capers, Walnuts, and Mint

Macaroon Brownie Bars
The Greyston Bakery Cookbook
Makes 16

For the Brownie Base
2/3 cup flour
1/3 cup unsweetened cocoa powder
¼ tsp. salt
½ cup (1 stick) unsalted butter, softened to room temperature
2/3 cup sugar
3 eggs
1 tsp. pure vanilla extract
½ tsp. pure almond extract
4 ounces good quality bittersweet chocolate, chopped into chunks

For the Coconut Topping
2 eggs
2/3 cup sugar
¼ tsp. pure almond extract
1/3 cup flour
2 ¼ cups (7 ounces) sweetened flaked coconut

Prepare the brownie base
Place a rack in the center of the oven and preheat the oven to 350ºF.  Grease a 9-inch baking pan and line it with parchment paper, leaving about 1 inch of paper overhanging the two long sides.

In a bowl, whisk together the flour, cocoa powder, and salt until well blended.

In the bowl of a stand mixer, cream the butter and sugar on medium speed.  Add the eggs, one at a time, mixing well after each addition.  Stir in the vanilla and almond extracts.  Gradually mix in the dry ingredients until well combined.  Stir in the chocolate.

Spread the batter evenly in the prepared pan.  Bake for 20 minutes, or until the sides begin to set but the center is still soft.  Remove the pan from the oven and set on a wire rack to cool slightly.

Prepare the coconut topping
In a bowl, whisk together the eggs and sugar.  Stir in the almond extract.  Gradually stir in the flour, mixing thoroughly.  Stir in the coconut.

Using two spoons, gently place spoonfuls of the mixture over the partially baked brownie base and spread evenly with the back of a spoon for a rubber spatula.

Return the pan to the oven and bake for 30 minutes, or until the topping is golden brown and a wooden skewer inserted in the middle come out almost clean.  (Some crumbs will still be attached.  Do not overbake.)  Remove the pan from the oven and set it on a wire rack to cool completely.  Remove the brownies by grasping and lifting the edges of the parchment paper.  Cut into bars.


Change

January 15, 2011

Last week something amazing happened.  On Thursday, at around noon, I sat and had a lunch date with my husband.  In the 6½ years since we returned from London, we had never done that.  I don’t think we ever did it in London either for that matter.

The reason for the lack of lunch dates?  Randy worked at a very large company located across the lake from our house, a company well-known for a certain “culture”.  A company called Microsoft.  Perhaps you have heard of it?  Perhaps you know its reputation for asking a lot of their employees?

Randy is a self-described type Triple-A personality.  He works incredibly hard.  His trajectory since graduating from the Naval Academy in Annapolis goes a little something like this:

Go to flight school and graduate top of his class
Fly A-6 Intruders for a few years until they de-commission the aircraft
Go back to the Naval Academy to teach English
Get a Masters in Philosophy at nearby St. John’s at the same time
Go to Harvard for the MBA program
Move to Seattle to work at a start-up (this is when we met)
Get recruited by Microsoft

Basically, the guy has not slowed down since the day he was born.  Microsoft LOVES people like that.

All along, his career has afforded us a wonderful lifestyle but has also been hard on me and our family.  For the first five years of having children, he rarely saw them during the week.  Because of the commute, he was on the road before they were awake and home after they were in bed.  In the last year and a half, his office moved to the Seattle side of the lake and things got significantly better.  But then his travel schedule picked up dramatically and he was out of state 50-60% of the time.  He would come home and be exhausted from time changes plus the overall stress of travel and the job.

Periodically we would check in.  Is it worth it?  Are we ok?  Are the kids ok?  I would worry about him.  Waking up at 3am and not being able to fall back to sleep night after night because of stress is not sustainable.  To be fair, that was an extreme.  Most of the time, life as a Microsoft employee was challenging but not over the top.  He was very successful there and they recognized his hard work.  He was promoted steadily and received awards for the work he did.  And for the most part, he enjoyed his actual job, the work he did day to day.  He did not enjoy the constant “re-orging” and never being sure if the job he was doing that day would be there the next.

And then one day, Randy had had enough.  It was one request too many or one too many trips.  Maybe it was looking at Graham and thinking, “I have a six year old and I have not been here”.  Whatever it was, he reached a breaking point.  He reached out to his considerable network and started taking recruiting calls more seriously.  A company that had already approached him about a job twice re-appeared, this time with a friend of over 20 years as CEO.  Coffees, conversations, and number crunching happened.  As a family, we weighed the pros and cons.

I had always heard that term “golden handcuffs” but working through the decision, I really came to understand what it meant.  In all the years with Microsoft, we never paid a single cent for health care.  No monthly fees, no co-pays, no deductibles, no cost for drugs.  My two c-sections, Randy’s knee surgery, a herniated belly button surgery for Graham, four years of speech therapy, all the pediatric visits, and the two emergency room visits – we never paid a dime.  It is probably the best health care in the United States.  To me that was much more valuable than the stock left behind.

The fact that Randy would be taking a pay cut and our benefits would become more like most Americans (at least those who have health care) were the cons for the new job.  The pros list was less tangible and more emotional.  Working alongside two people he admires without question, an office 2.1 miles from our house, 25% travel at the most, a conscious decision to slow down – to be more present in our family.  It was that last one we really discussed.  For him to make this move, it had to be a lifestyle move, not just a job change.

I give him a lot of credit.  He was climbing the corporate ladder.  He had over 300 people reporting to him.  He had tremendous success.  And he decided that having lunch with his wife once a week was more important.  This new job is going to be very challenging.  He will still work very hard – he doesn’t know how to work any other way.  But he will go on field trips with Graham, he will be home at 6 (!) every night, he will sleep better, and learn from a trusted friend.

I have always loved the idea of sending Randy to work with a weekly treat.  But Randy has always worked in groups that were too large for it to make sense.  Now that he is at a much smaller company, the weekly treat tradition has begun.  His first week, I asked what he wanted me to make.  I knew it would either be the White Chocolate Almond Chunk Cookies or the Cowgirl Cookies, so I already had the Holly B’s cookbook in hand when I asked.  Sure enough, the Cowgirls won out.

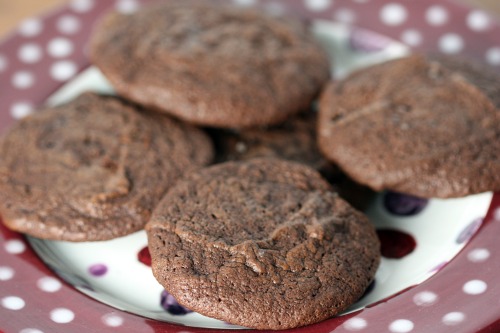
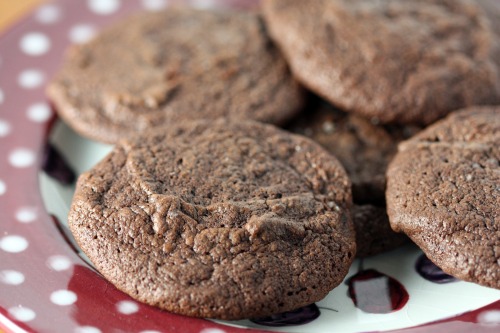
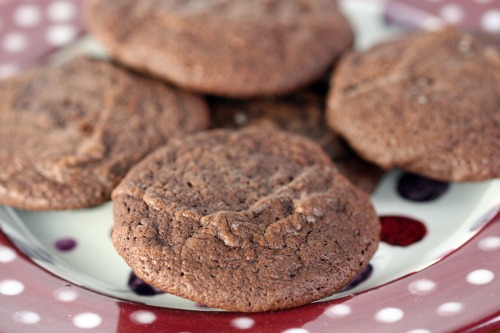
This week, I made something new.  I was paging through my Tartine book, looking for the Lemon Cream recipe for last week’s party, when I happened upon this chocolate amazingness.  How is it that my chocolate loving self never made these?  I know they don’t look like much, but they are one of my most favorite cookies ever.  Essentially, they are a regular cocoa-based chocolate cookie to which you add a half pound of melted bittersweet chocolate.  The batter is like ganache and you pull the cookies out when they are just starting to set and the end result is like a chocolate pillow that you will want to sleep on forever.  As I was scooping them out, I thought a scattering of chocolate chips might be good for texture, but no no no!  No texture needed.  My only change is that I scattered a bit of sea salt (smoked Chardonnay if you must know) over the top of each cookie before baking and that was a good decision.

One Year Ago: Oatmeal Carmelitas

Deluxe Double Chocolate Cookies
Tartine
Makes about 24 large or 36 small cookies

These cookies are very soft when you take them out of the oven so I would advise letting them rest on their baking sheet for a few minutes before moving them to the cooling rack.

8 oz. bittersweet chocolate, coarsely chopped
1 cup + 1 tbsp. flour
½ cup + 2 tbsp. cocoa powder
2 tsp. baking powder
½ cup unsalted butter, at room temperature
1 cup + 2 tbsp. sugar
2 large eggs
¼ tsp. salt
1 tsp. vanilla extract
1/3 cup whole milk
Sea salt, for sprinkling (optional)

Preheat the oven to 350ºF.  Butter a baking sheet or line with parchment paper.

Pour water to a depth of about 2 inches into a saucepan, place over medium heat, and bring to a simmer.  Put the chocolate into a stainless-steel bowl that will rest securely in the rim of the pan and place it over, not touching, the water.  Make sure the pan is completely dry before you add the chocolate and that no moisture gets into the chocolate.  Moisture will cause the chocolate to seize, or develop lumps.  Heat, stirring occasionally, just until the chocolate melts and is smooth.  Remove from the heat and let cool.

Stir together the flour, cocoa powder, and baking powder in a bowl.  Set aside.  Using a stand mixer fitted with the paddle attachment, beat the butter on medium-high speed until creamy.  Slowly add the sugar and mix until the mixture is completely smooth and soft.  Stop the mixer and scrape down the sides of the bowl with a rubber spatula as needed.  Add the eggs one at a time, mixing well after each addition until incorporated before adding the next egg.  Beat in the salt and vanilla, and then add the melted chocolate and beat until incorporated.  Add the milk and beat until combined.  Finally, add the flour mixture and beat on low speed until incorporated.

Drop the dough by heaping tablespoonfuls onto the prepared sheet, spacing them about 1 inch apart.  Bake the cookies until they are just barely firm on top when lightly touched but are still very soft underneath, about 7 minutes.  They wil get firmer as they cool.  Transfer the cookies to a wire rack and let cool.  They will keep in an airtight container at room temperature for several days.


« Older Posts