Category: Bars

Treats Are Important

March 1, 2012

A few weeks ago, we went over to some friends’ house for dinner.  They had been living in China for three years so we had a lot to catch up on.  They have three children, two girls and a boy, and our boys thought they were in heaven with all the fun and attention.

We had a delicious dinner and a wonderful time catching up and as we were starting to move toward leaving, Spencer burst into tears.  “But we haven’t had dessert!” he wailed.  Our friends were a bit puzzled.  Dessert doesn’t happen on a regular basis in their house but they gamely pulled some Girl Scout cookies out of their freezer to appease my traumatized son.

We got in the car and Randy said to me, “Maybe we give them too many sweets.  They shouldn’t expect it.”  So we had a little talk with the boys about how not every family has dessert every night in addition to occasional other treats – hot chocolate, ice cream cones, jelly beans, never all three!- during the day.  We suggested that they are lucky that Mommy likes to bake and that they should appreciate the treats that she makes, not expect them.  It is a difficult concept for a seven and five year old to grasp.  Why would a family, a perfectly normal seeming family, not have treats every chance they get?

I know that many people think sugar makes children hyper or it is terribly unhealthy for them.  I respectfully disagree.  For the most part, my kids eat healthier than a large percentage of the population.  I make almost all of their meals, they don’t eat meat, they eat very little processed food, they have never had even a sip of soda, they have to eat a fruit or vegetable with all meals, snacks have to start with something “healthy”, and dessert does not come without finishing dinner first.  And we have the rule in our house, a rule which is terribly hard on them when there is Valentine’s Day candy still sitting in their little Valentine’s card boxes, that if there are homemade cookies in the cookie jar, or homemade ice cream in the freezer, then that is what is for dessert.  It’s not perfect but I do try and my kids are thriving healthy little beings who very very rarely get sick.  (I just knocked on wood.)  I’m not patting myself on the back – I, like most moms I know, am doing the best I can to nourish my children.  I just happen to believe that nourishment also happens to include food that nourishes the soul, the kid in all of us.

I’ve mentioned this before, but in my house growing up, we had all kinds of junk food.  Ice cream, chips, cookies, full size candy bars.  My mom is a good cook and we had healthy meals and we also got dessert every night.  Sugar was not something forbidden or evil, it was just a part of our lives.  My friends would come over and gawk at the pantry – so much good stuff in there!  But because I was always around sweets, they didn’t have any mystique for me.  And so I grew to love and appreciate dessert, but not be ruled by it.  To this day, both my brothers and I prefer dinner to dessert.  We all three have much more savory palates than sweet.  My brother Alex has an anything-lemon weakness, cookies are Michael’s kryptonite, and I can’t say no to brownies or caramel – but other than those things, we are salty people.

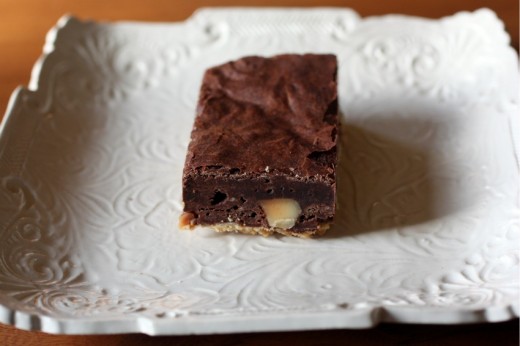
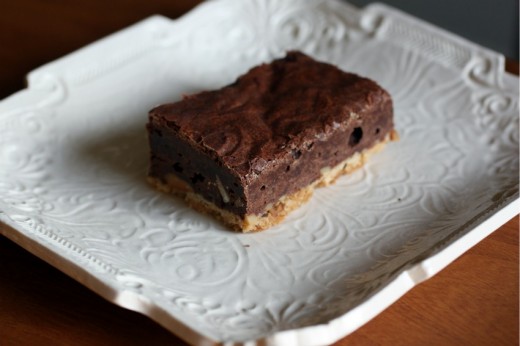
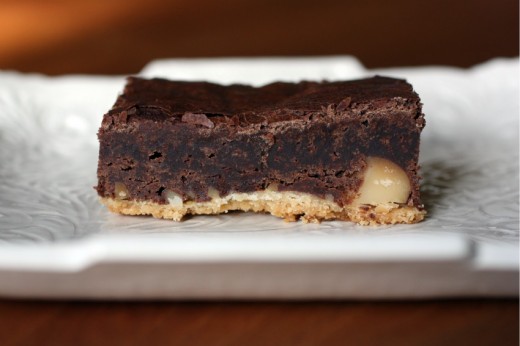
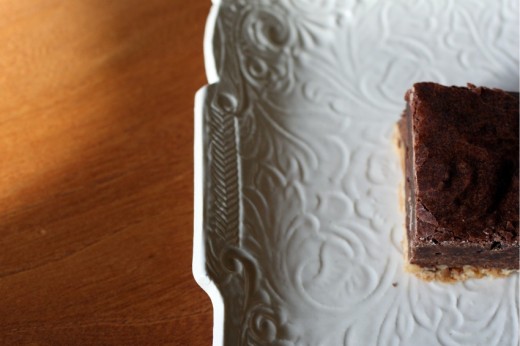
So I believe in treats.  I believe in de-mystifying sugar and not making it something forbidden.  I believe in allowing my children the pure unadulterated joy that only a cookie (or brownie or ice cream) can bring.  I love when Graham comes home from school, takes a big sniff, and says, “Mmmmm, it smells so good.  What did you make?”  I love that Spencer has an opinion about his sweets.  This brownie for example.  He told me, “I like the top part but not the bottom part.”  Hmmm.  The top part is chocolate brownie and the bottom part is kind of shortbread-y and has macadamia nuts in it.  Seeing as there is a gene in his gene pool for not liking nuts in sweets, his dislike is not all that surprising.  But I was happy to hear that he could taste the difference in the two parts, that he had an opinion about that brownie, that it wasn’t just a sugar fix.

For the record, I kind of liked these brownies.  Brownies are indeed my favorite treat but even I will say that they can sometimes be a little monotonous.    Some people might think that walnut chunks are a great way to break up all that chocolate but I say No Way.  A little buttery crust on the bottom with some very small chunks of crunchy nuts is a little different story and I thought these were lovely.

One Year Ago:  Dal with Winter Vegetables
Two Years Ago:  Grilled Haloumi with Cheese and Lemon, Brownie Chunk Cookies
Three Years Ago:  Rosemary Flatbread with Blue Cheese, Grapes, and Honey, Smoky Cashews, Pappa al Pomodoro

Macadamia Shortbread Brownies
Adapted from Bittersweet
Makes 25 brownies

For the crust:
6 tbsp. unsalted butter, melted
2 tbsp. sugar
¼ tsp. vanilla extract
Pinch of salt
¾ cup all purpose flour
½ cup untoasted unsalted macadamia nuts, chopped medium-fine

For the brownie batter:
6½ ounces bittersweet chocolate, chopped
7 tbsp. unsalted butter, cut into 7 pieces
1 cup sugar
1 tsp. pure vanilla extract
¼ tsp. salt
2 large eggs
½ cup all purpose flour

Make the crust:
Position a rack in the lower third of the oven and preheat to 350ºF.  Line a 9-inch square baking pan with foil and make sure the ends extend up over the sides by several inches.  (This will serve as handles to remove the brownies from the pan once they are baked.)

Combine the melted butter, sugar, vanilla, and salt in a bowl.  Stir in the flour to make a dough.  Scrape the dough into the prepared pan and, using your fingers, press the dough all over the bottom of the pan and just a bit up the sides.  Bake until the crust is nicely brown all over, 15 to 20 minutes.

Make the brownie batter:
Combine the chocolate, butter, and sugar in a medium heatproof bowl.  Place the bowl over a pot of simmering water.  Stir frequently until the chocolate is melted and the mixture is smooth and hot enough that you want to remove your finger fairly quickly after dipping it in to test.

Remove the bowl from the pot.  Stir in the vanilla and salt with a wooden spoon.  Add the eggs, one at at time, stirring until the fist one is incorporated before adding the next.  Stir int he flour and beat with a wooden spoon or rubber spatula until the batter is smooth, glossy, and beginning to come away from the sides of the bowl, 1 to 2 minutes.

Assemble the brownies:
Spread the brownie batter evenly over the hot crust and bake until the edges puff and begin to show fine cracks, 20 to 25 minutes.  Let cool completely in the pan on a rack.

Remove the brownies from the pan by lifting up the ends of the foil, and transfer to a cutting board.  Cut into 25 squares with a heavy knife.


Sleeplessness

January 15, 2012

Before having children, I would say I was a champion sleeper.  My head hit the pillow at night and off I went into dreamland, only to be awakened by my alarm clock (and a couple snooze buttons pushings) the next morning.  My freshman year of college, I lived at one end of campus and on the weekends, meals were only served at the other end.  Brunch stopped being served at 1pm and it was a struggle of superhuman proportions to get there before they pulled the food.  At 1pm.  And I did not drink in college.  It’s hard for me to even imagine (both of those things) now.

Because now, things are a little different.  First of all, I have these kids.  But I can’t really blame any sleeplessness on them.  My boys are great sleepers.  They go to sleep without a peep and, barring a bloody nose or a tummy ache, stay asleep until around 7 the next morning.  They even now will creep out of their rooms and go into the TV room for some PBS or Disney channel before I can rouse myself.

Maybe it’s the months of waking in the middle of the night to breastfeed, maybe it’s the worry that comes along with being a mother, maybe it’s getting older, but I’m not nearly as good a sleeper as I used to be.  Sometimes it takes me a good couple of hours to fall asleep.  Sometimes I fall asleep fine but then wake at 3am and feel wide awake even though I know exhaustion is waiting for me as soon as the day dawns.  Some people say that if you can’t sleep, you should change your environment – go to another room and read with a low light.  But usually I am too cold to leave my warm bed and so I just lay there awake, thinking about food and cooking.

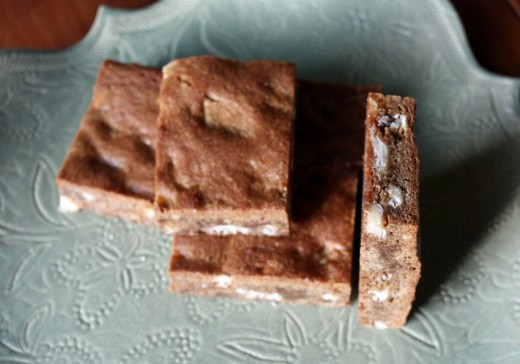
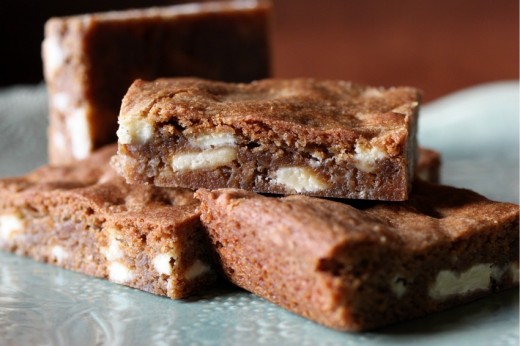
Some people count sheep, I go over recipes for my week.  I had one of those nights earlier this week, right before I had planned to make these bars.  Even though December has passed us by, I am not quite ready to give up gingerbread and I was intrigued by the combo of gingerbread and white chocolate.  In my sleepless state, I remembered reading that you were supposed to make these bars in a 17×12 baking sheet.  That seemed awfully large to me and so, because I had nothing better to do except, well, sleep, I thought about other options.  13×9 would be too small, the bars too thick.  How about a 15×10-inch pan traditional jelly roll pan?  What if I made them in cake pans and cut them into wedges instead of rectangles?  Yes, the boredom of thinking about pan sizes did eventually put me to sleep.

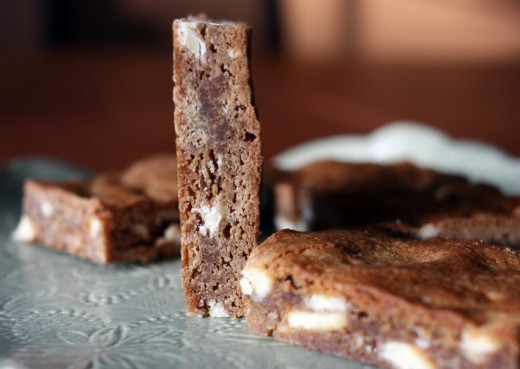
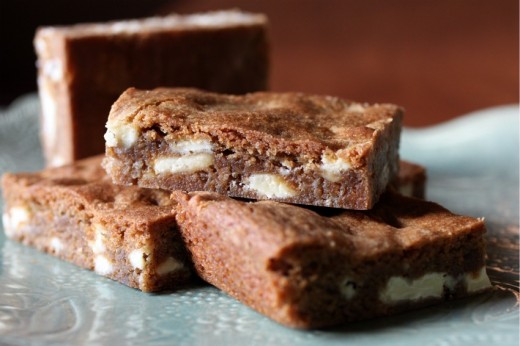
When I was ready to make the bars, I opted for the jelly roll pan.  And I am very glad I did.  I can’t imagine this amount of batter filling any larger pan and even if I was able to spread the batter to within an inch of its life, they would have been very thin, very sad little bars.  In the properly sized pan, they came out just the right thickness and the bars have a perfect soft bite, like a brownie, but with a lovely spice and a tiny bit of crunch from the white chocolate bits.  Say what you will about white chocolate, I think it’s really nice from time to time.  I find that, even more so than dark chocolate, quality plays a huge role in the taste and creaminess of white chocolate.  I used Lindt in these bars and I thought it was terrific.

One Year Ago:  Baked Tofu with Peppers and Olives
Two Years Ago:  Oatmeal Carmelitas

Gingerbread-White Chocolate Blondies
Adapted from Martha Stewart’s Cookies
Makes about 3 dozen, depending on how you cut them

2¾ cups plus 1 tbsp. all-purpose flour
1¼ tsp. baking soda
1¼ tsp. salt
1¼ tsp. ground cinnamon
1 tsp. ground ginger
¼ tsp. ground cloves
1¼ cups (2½ sticks) unsalted butter, room temperature
1¼ cups packed light brown sugar
½ cup plus 2 tbsp. granulated sugar
2 large eggs plus 1 egg yolk
1¼ tsp. pure vanilla extract
1/3 cup unsulfured molasses
1¾ cups coarsely chopped best-quality white chocolate (10 ounces)

Preheat oven to 350ºF.  Coat a 15 by 10-inch rimmed baking sheet with nonstick spray and line the bottom with parchment paper.  Allow a couple inch overhang of the parchement on each of the short sides.  (I used the wrappers from the butter to coat my pan.)

Whisk together the flour, soda, salt, and spices in a bowl.

In the bowl of an electric mixer fitted with the paddle attachment, beat butter and sugars on medium-high speed until creamy and pale, about 3 minutes.  Add eggs and yolk, scraping down the sides of the bowl as needed.  Add vanilla and molasses and mix on medium speed until combined.  Add flour mixture on low speed until combined.  Stir in the white chocolate.

Spread batter evenly into prepared pan and bake until golden on edges, about 25 minutes.  Let cool completely in pan.  Using the “handles” of the parchment, remove the bars from the pan and cut into even squares or rectangles.  Blondies can be stored in an airtight container at room temperature for up to one week.


Brownies for the Adults

October 7, 2011

Let me get this out of the way.  These are not pot brownies.  I have not made or eaten pot brownies.  Not that there is anything wrong with pot brownies – they are just really not my thing.  I have to say that because I bet there is at least one person out there who sees “brownies for adults” and assumes they must have weed in them.

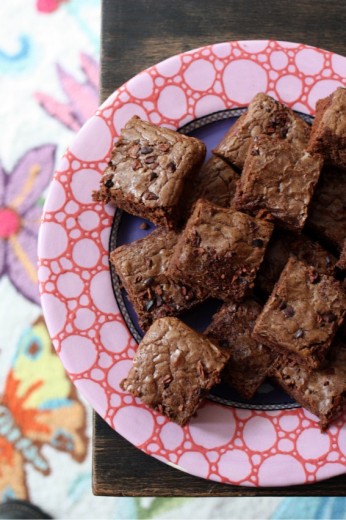
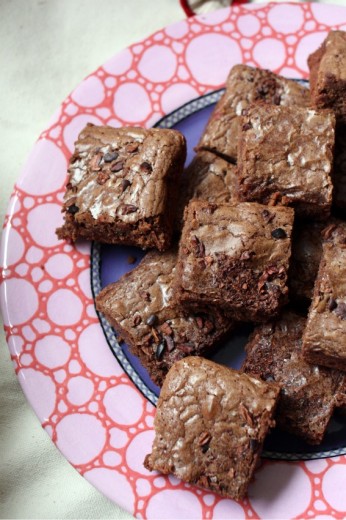
And here, rather than just tell you why I think these brownies are for adults (cocoa nibs!  but my kids loved them too!) and why I liked them very much although they are quite different from my favorite (cakier!  less intense!), and why I made them (yoga retreat!), I have to tell you about my dad.

My dad is a retired oncologist.  He spent 30-something years treating people with cancer and doing so with kindness and empathy.  The man who would famously tell his kids and wife, sort of jokingly, “Take 2 aspirin and call me in the morning” when one of us was sick, was the most compassionate kind of doctor.  I know because he really is a compassionate dad and I also know because every single person I have ever met who was either in his care or had a family member in his care, practically swoons at the mention of his name.  Nurses too.  And nurses know.

One Wednesday this past summer, I brought my parents to our neighborhood farmers’ market along with the boys.  It is something we like to do together when the timing is right.  Outside, a man was gathering signatures to introduce a measure to legalize medical marijuana in Washington state.  My dad stopped, broke away from us, and went over to sign the ballot.  He is not the ballot-signing type so I was surprised.  I know his views on drugs are more liberal than the average 68 year old but still.  I asked why he felt so strongly.  I asked if he thought that pot does actually help people who are nauseated by chemotherapy.  He said, “Not at all.  Medically, I don’t think it helps.  But if someone has cancer and is that ill, and their immune system is compromised and their hair is falling out and they can’t eat because everything nauseates them, and they think that the pot helps?  Then they should be able to smoke all they want.”  Go Dad.

So yes, I know that this is a bit of a stretch – brownies with cocoa nibs to pot to my dad and ballot measures, but sometimes stories just must be told.

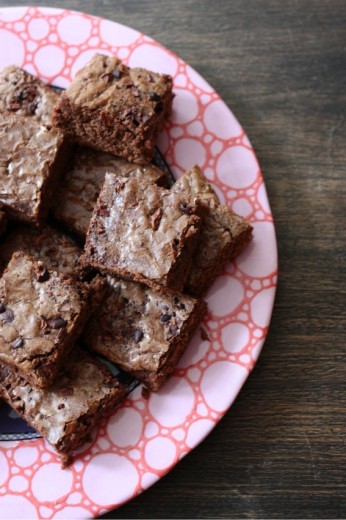
Onward!  I have a lot of brownie recipes here at Dana Treat.  As a chocoholic, I consider brownies a perfect treat.  And because I love chocolate, my perfect brownie is dark, dense, and intense.  But sometimes it is nice to have a brownie that is more like a little piece of cake than a piece of fudge and that is where this guy comes in.  It is not a wimpy brownie, I would say it’s very pleasant.  Well-behaved.  Slightly elegant but also quirky with a bit of crunch.  If you have not tasted cocoa nibs before, they can fool you a bit.  For me, in the first second, I taste chocolate, then coffee, then a bit of bitter.  I like chocolate chips in brownies because I like the break in texture from smooth and rich.  But sometimes some less sweet, less chocolate-y, is welcome.

One Year Ago:  Ratatouille and Mushroom and Herb Polenta
Two Years Ago:  Asian Coconut Noodle Soup and Pasta with Tomato Sauce and Arugula
Three Years Ago:  Mediterranean Five Lentil Soup

Cocoa Nib Brownies
The Modern Baker
Makes about 24 brownies

8 ounces (2 sticks) unsalted butter, cut into 12 pieces
9 ounces bittersweet (not unsweetened) chocolate, cut into ¼-inch pieces
1¼ cups dark brown sugar, firmly packed
4 large eggs
½ tsp. salt
¾ cups granulated sugar
1 tbsp. vanilla extract
1¼ cups flour
½ cup cocoa nibs

Line a 13x9x2-inch pan with foil.  Butter foil and set aside.  Set a rack in the middle level of the oven and preheat to 350ºF.

Put the cut-up butter into a medium saucepan and place over medium heat.  Let the butter melt, stirring 2 to 3 times, then allow it to bubble for about 10 seconds.  Remove the pan from the heat and add the chocolate.  Gently shake the pan to submerge the chocolate in the hot butter and set aside for a few minutes so that the chocolate melts.  Use a small whisk to mix smooth.

Place the brown sugar in the bowl of an electric mixer.  Beat in 1 egg on lowest speed using the paddle attachment.  Add the remaining eggs, one at a time, beating smooth after each.  Add the salt, sugar, and vanilla and beat smooth.

Remove the bowl from the mixer and use a large rubber spatula to mix in the chocolate and butter mixture.  Mix in the flour followed by ¼ cup of the cocoa nibs.

Scrape the batter into the prepared pan and smooth the top.  Scatter the remaining ¼ cup cocoa nibs on the batter.

Bake the brownies until they are firm, but still very moist in the center, about 30 minutes.

Cool the brownies in the pan on a rack.

Wrap the pan in plastic wrap and refrigerate the brownies for several hours or overnight before attempting to cut them – they are very moist.


Um….

July 19, 2011

Do you know what SEO stands for?  Search Engine Optimization.  I’ve been to two food blogging conferences and both times there was a lot of talk about SEO.  I don’t make any money on this blog so truthfully, I kind of tune out when people start talking about metrics and how to drive more traffic.  I do remember talk of how to title your posts and write content so that search engines send eager clickers your way.

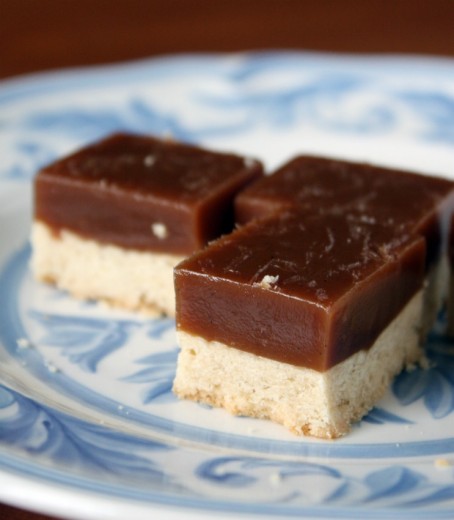
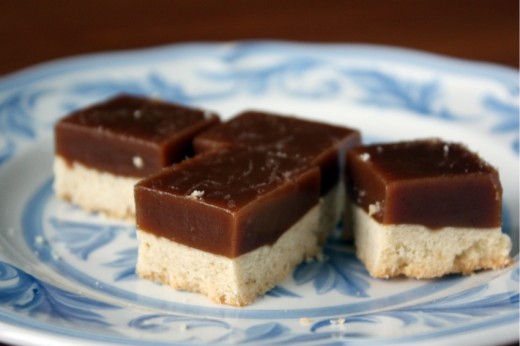
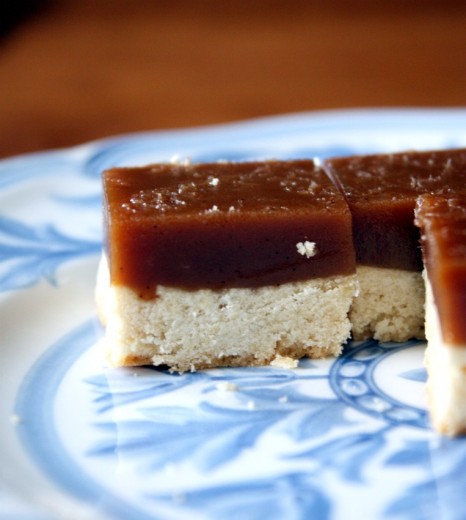
Obviously, the people who know a thing or two about SEO would be horrified by the title of this post.  But what else could I call it?  Salted Caramel Squares I guess would have been a good alternative but even typing that I get a little misty-eyed and spacey and just start thinking, “Um…..”

You see, I love chocolate.  You probably know that if you visit here even semi-frequently.  I also love caramel.  Maybe more than chocolate.  I don’t know.  Don’t make me choose! A while back, a friend gave me a box of salted caramels wrapped in pretty gold foil and I hid them from my family.  When I ran out of my secret stash, I panicked and bought Kraft caramels only to curse them and throw them away because they were not as good as I wanted them to be, and then I cursed myself for throwing them away and leaving my house caramel-free.  Oh wait.  I think I may have just over-shared.

Solution!  Make these unbelievable squares.  Yes, there are two parts and a candy thermometer is involved but do not let either of those facts deter you.  The two steps are easy, a candy thermometer is a good thing to have in your house anyway, this recipe makes a ton of bars (especially if you cut them bite-size which is what they should be), and they keep well.  The only thing I would do differently next time is to sprinkle just a bit of sea salt over top for a step into perfection.

One Year Ago: Chocolate Pavé and Romesco Filled Potatoes
Two Years Ago: Honeyed Goat Cheese Tart with Pistachio Crust and Blasted Broccoli
Three Years Ago: Orzo with Broccoli, Feta, and Olives

Salted Caramel Squares
Food & Wine
Makes 32 squares (more if you cut them smaller)

Note that this recipe calls for kosher salt in both the crust and the caramel.  Do not substitute table salt – they will be way too salty. I like Diamond Brand.

Pastry Shell
1 stick unsalted butter, softened
1 cup confectioners’ sugar
2 large eggs, beaten
2 cups all-purpose flour
1 tsp. kosher salt
1 large egg white, beaten

Caramel
2¼ cup heavy cream
1 vanilla bean, split, seeds scraped
2¼ cups sugar
1¾ sticks unsalted butter
2½ tsp. kosher salt

Prepare the shell
Preheat the oven to 350ºF.  Line a 9-by-13-inch baking pan with parchment paper, leaving a 2-inch overhang on the short sides.  In a large bowl, using a handheld mixer at low speed, cream the butter.  Beat in the confectioners’ sugar.  Add the whole eggs and beat until incorporated, then beat in the flour and salt.  Press the pastry into the prepared pan in an even layer, ¼-inch thick.  Freeze until firm, 10 minutes.

Line the pastry with parchment paper and fill with pie weights.  Bake for 35 minutes, until just set.  Carefully remove the pie weights and parchment paper.  Brush shell with the egg white and bake for 20 minutes longer, until golden and cooked through.  Let cool.

Make the caramel
In a saucepan, bring the cream, vanilla bean, and seeds to a simmer.  Cover; keep warm.

In a large heavy saucepan, stir the sugar into  ¼ cup of water.  Simmer over moderate heat, without stirring, until a deep amber caramel forms, 7 minutes.

Remove the caramel from the heat and carefully add the cream.  (DT: It will bubble up vigorously so slow as you go.)  When the bubbling subsides, stir in the butter.  Insert a candy thermometer and cook over moderately high heat, stirring with a wooden spoon, until the caramel reaches 240º, 10 minutes.  Discard the vanilla bean and stir in the salt.  Pour the caramel over the shell.  Refrigerate until firm, 4 hours or overnight.  Remove the bar from the pan using the parchment overhang; cut into squares.  (DTIn my experience, these squares kept well for several days but I did not cut them all at once.  I cut off what I needed and wrapped the rest, carefully, in foilThey are equally good cold or at room temperature.)


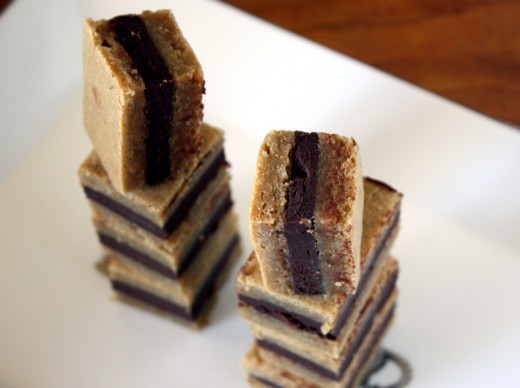
Ganache-Filled Brown Sugar Bars

June 30, 2011

Friends, it’s that time of year.  It seems that ever since I have kept this blog, I go out of town around the end of June/beginning of July.  Last year, I went to Cannes/Paris/London.  This year, I am going to Delaware.  Ahem.  Not that there is anything wrong with Delaware it’s just not, well, um, Cannes, Paris, or London.  I don’t think I will be shopping for copper pots or taking a train underneath the English Channel.  What I will be doing is getting quality time with Randy’s huge extended family.

Here is what I expect: a plane ride complete with ridiculous amounts of technology and lots of usually-forbidden snacks, two boys spending a week covered in sand and smelling of sunscreen and Popsicles, eating lots and lots of carbs, getting forced to sing and play guitar in front of  50+ family members, roller coasters and cotton candy on the boardwalk, and truly enjoying a vacation.

This has been a busy month.  I taught six classes in three weeks.  I didn’t do much cook-for-my-family cooking.  But I did manage to squeeze some yummy things in.  I have time to share the food but I don’t have time to write super witty and topical posts to accompany the recipes.  Forgive me?  I think after this treat you just might.

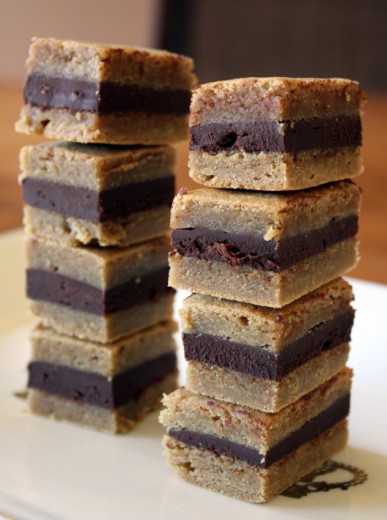
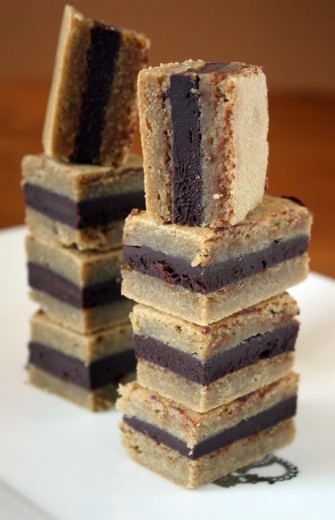
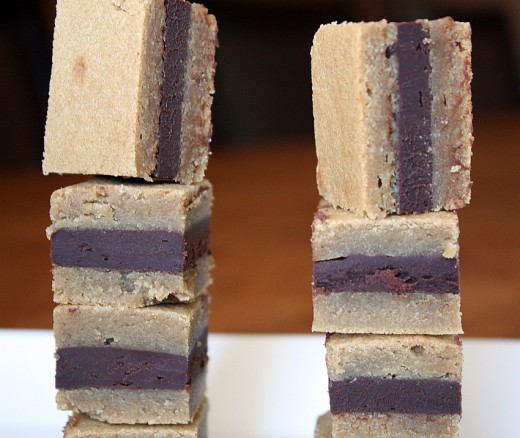
Sometimes I look at a recipe with few ingredients and scoff.  A “how could this be good?” kind of thing.  I’ll tell you how this can be good – brown sugar bars with chocolate ganache sandwiched in the middle.  The components of these bars are super easy to make.  Assembly is a little tricky.  Learn from my experience and mistakes:

Do butter and flour the pan well and definitely use the wax paper that is suggested.
Do dollop the batter all over the pan, this will make it easier to spread.
Do use a palette knife to smooth the top.
Don’t underbake.  Or overbake.
Do use a palette knife to coax the wax paper away from the pan before turning out onto a rack.
Don’t move the cake part around too much, this will make it crack.
Do make sure you put the cake on a cutting board that will fit in your refrigerator.
Do wipe your knife off in between cuts so you don’t get chocolate residue on the edges.  If you care about that sort of thing.  (I didn’t do this.)
Do use a ruler to make sure you get all your pieces the same size.  If you care about that sort of thing.  (See above.)
Do cut these in small pieces and be prepared for children in your life to go absolutely nuts for them.

Ganache-Filled Brown Sugar Bars
Adapted from Food & Wine
Makes 32 bars (or more if you cut them smaller)

½ cup heavy cream
½ pound bittersweet chocolate, very finely chopped
1¾ cups all-purpose flour
¼ tsp. salt
2 sticks (½ pound) unsalted butter, at room temperature
1 2/3 cups packed dark brown sugar
2 large eggs, at room temperature
1½ tsp. pure vanilla extract

Place the chocolate in a mixing bowl.  Bring the cream to a boil over moderate heat.  Pour the cream over the chocolate and allow to sit for one minute.  Using a rubber spatula, gently stir the two together until smooth.  Let stand until firm, 30 minutes to 1 hour.

Preheat the oven to 350ºF.  Lightly butter a 10-by-15-inch baking pan.  Line the pan with wax paper; butter and flour the paper.

Whisk the flour with the salt.  In a large bowl, using an electric mixer, beat the butter and brown sugar at medium speed for 3 minute.  Beat in the eggs 1 at a time.  Beat in the vanilla.  At low speed, beat in the flour in 3 additions; the batter will be fairly stiff.  Spread the batter in the pan.  Bake for 18 to 20, or until a cake tester inserted in the center comes out clean.  Transfer to a rack to cool completely.

Cover the baking pan with a large wire rack and invert.  Remove the pan and peel off the wax paper.  Invert the cake onto a large cutting board.  Using a serrated knife, halve the cake crosswise.  Spread the ganache evenly over one of the cake halves, leaving a 1/8-inch border.  Top with the other cake half.  Cover and refrigerate until the ganache is set, at least 2 hours.

Trim the edges of the cake.  Cut the cake lengthwise into 4 strips, then cut each strip crosswise into 8 bars.  Serve chilled or at room temperature.


« Older Posts