Friends, let me tell you, I am RUSTY at this food blogging thing. I think I figured that when I finally sat down to get this old girl up and running again, the posts would just magically flow like they used to. Except the reality is that they never magically flowed. I worked hard on each post, reworking it over the course of several days, getting it to that point where I was making my story clear and enticing you to want to make the recipe. Being away for six and a half years made those writing muscles really rusty.
I posted about this Asian-Inspired Avocado Dip on Instagram recently, and got a bunch of people asking about it. It became clear to me that this was the first food I would need to post. I had other ideas but the more I thought about it, the more this dish makes sense as my first food post in a very long time. I’ve been making it forever – in fact, I had to look back through my “dip” category to make sure I hadn’t already written about it. It is one of those big wallop of flavor for little effort recipes, and every single time I’ve made it, the dip is demolished and several people ask me about it.
I started the first version of this post with a story about going to Las Vegas with my ex-husband and how my experience of eating every meal at a buffet made me realize that food needs to flow. As in, you shouldn’t have sushi next to meatballs and spaghetti. This was actually a seminal moment in my food journey. I have ever since been cognizant of how dishes go together, whether it’s for a simple dinner, a big dinner party, or an even bigger catered party. There doesn’t need to be a theme per se (July in Provence!), but some semblance of harmony within the dishes helps the food make sense. You don’t have to scratch your head about it, you can just enjoy. I don’t think I take this to the extreme but I made a red Thai curry for dinner last week and served a cucumber salad that I am currently obsessed with alongside. I was on the verge of apologizing that the cucumbers were really more of a Japanese recipe so probably shouldn’t have made them with a Thai dish, and then I realized my audience (my husband and two boys) probably wouldn’t even know what I was talking about, and closed my mouth. But this is the legacy of that trip to Vegas. Don’t serve sushi next to spaghetti and meatballs.
So allow me to kind of contradict myself when I tell you that while this dip definitely has ingredients often found in Asian cooking (soy sauce, wasabi, mirin, rice wine vinegar), it can be at home with just about anything. I used to do a regular party for a friend who owns a jewelry shop where I did all different kinds of appetizers. It was a little bit of everything and this dip was always at home. I even (gasp!) serve it with tortilla chips. I made it last week to bring to a socially distanced discussion about books and, unusually, had some left over. I made pizza that night to eat with a friend and her two boys who came over. Asian-Inspired Avocado Dip as an appetizer with pizza for dinner? I wasn’t sure. But do you know what? No one cared. It disappeared as it usually does and I realized that sometimes I need to get over myself.
A few notes about the recipe. It calls for jicama which isn’t always that easy to find and when you do find it, they are often ginormous. I have successfully used radishes as a substitute, although the jicama is better because it lends some nice sweetness. When I have the time and patience, I will cut the rest of the jicama into batons and serve them with the dip. A friend on Instagram asked if I had ever served it with rice crackers and no, I haven’t and yes, I will next time. I buy S&B wasabi which comes in like a mini toothpaste tube which I store in the fridge pretty much just for this recipe. It seems to be just fine in there for long-ish periods of time. And finally, while you can technically make this ahead, I find it gives off a fair amount of liquid, so it’s really at its most appetizing soon after you make it. You could certainly get all the components ready ahead of time and just chop the avocados and mix it right before serving.
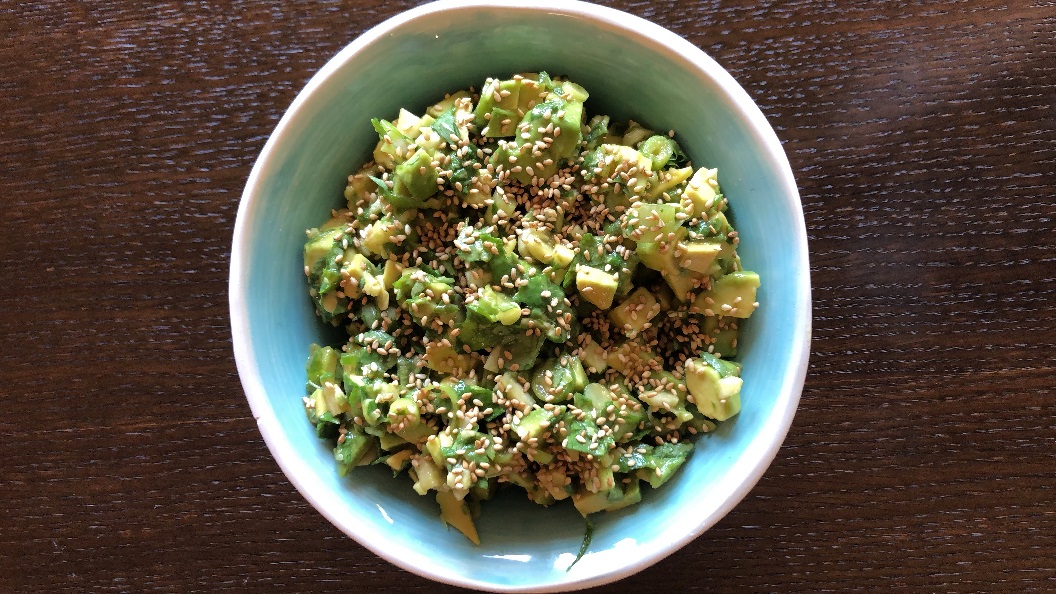
Asian-Inspired Avocado Dip
Adapted from Bon Appétit
Makes about 3 cups
1 tbsp. sesame seeds
2 tbsp. unseasoned rice vinegar
1 tbsp. mirin
1 tbsp. soy sauce
1 tsp. toasted sesame oil
1 tsp. wasabi paste
1 bunch watercress, leaves only, coarsely chopped
4 scallions, thinly sliced
½ cup ½-inch cubes peeled jicama
2 large avocados, halved, pitted, cut into small pieces
Stir sesame seeds in dry skillet over medium heat until aromatic and light golden, about 2 minutes. Allow to cool completely. (DT: I buy pre-toasted sesame seeds which make this dip even easier.)
Whisk next five ingredients in large bowl to blend. Add watercress, scallions, and jicama; toss to coat. Gently stir in avocado. Sprinkle dip with sesame seeds and serve.

 Share
Share


