Archive for May, 2013

Spring Vegetable Egg Drop Soup

May 30, 2013

I lived almost my entire life in Seattle and I will tell you that winter is not the cruelest season. Winter can be terrible in most parts of the country but in the Northwest, I never had to worry that my kids would actually freeze if they forgot their coat at school. As long as you had the right gear, you could be outside all season. I was thankful for no biting wind, almost no snow, and none of the electric shock you get in colder climates when you take off your overcoat. (And you don’t really have to wear an overcoat.)  Winter was no walk in the park but it was much milder and much better than many other places.

Spring is when I would start to go nuts. Because most years, there isn’t really a spring in Seattle. The winter just drags on and on. You will get a week or so of nice weather and everyone and their mother/grandmother/uncle/dog will be outside and everyone will be oh so optimistic that winter is over only to have it return, with a vengeance. Some people say if you are going to live in Seattle, you have to plan to get away in February, but I would change that month to May. February is when you can take refuge in the fact that you aren’t shoveling snow out of your driveway, or wondering if your car is going to start, or hoping your pipes don’t freeze. May is when you can’t quite understand why people are talking about spring and grilling and eating outside.  It is also when you might be cursing the fact that it is light until almost 10pm but you can’t enjoy it because it is raining. May is when I would question my choice to live in that city. May is when I would long for spring but never really feel it.

To add insult to injury, the spring produce would take forever to come in. Seattle markets, when they are in their prime, are a thing of beauty and glory. Early spring is not that time. Early spring, spring at all really, is meager and frustrating. While seemingly the rest of the country is enjoying all the lovely springy green things, Seattle has just not quite caught up.

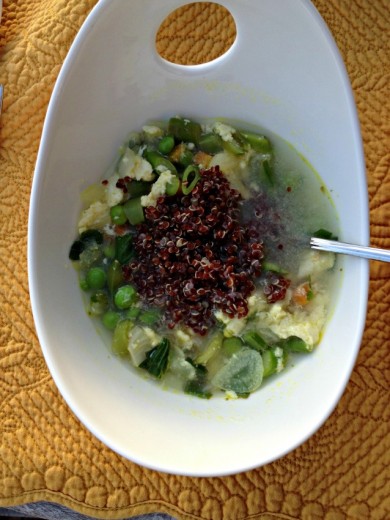
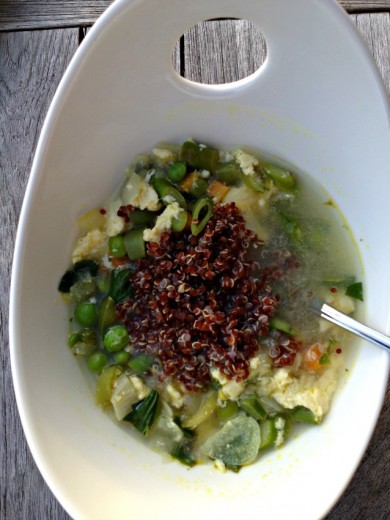
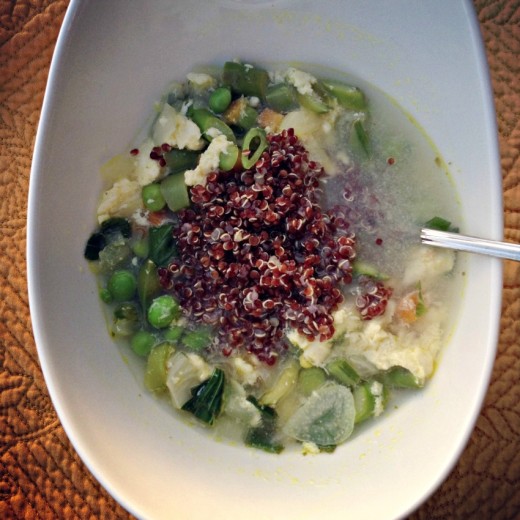
Because I shop at the farmers markets and because I cook seasonally, I am very in tune to seasonal transitions in produce. At no time are those transitions more remarkable than going from winter to spring. You essentially go from root-type vegetables that need to be roasted or stewed or braised to make them tasty, to gorgeous green things that only need a minute on the grill or in the oven or on the stovetop – or no cooking at all! – to make them tasty.  I found this soup on Epicurious when I was searching for a recipe for garlic scape pesto (it was actually in the May 2013 Bon Appétit).  It immediately brought back memories of my childhood because my mom used to make me egg drop soup all the time.  The one she made me was very kid friendly, i.e. no vegetables, and I loved it.  In this version, the vegetables are definitely the star of the show but the egg saves it from just being, you  know, a vegetable soup.  I served this as a main course and thought it needed a little something to make it more substantial, so I included a dollop of red quinoa.

One Year Ago:  Tartines with Gruyère and Greens
Two Years Ago:  Shaved Spring Vegetable Salad
Three Years Ago:  Rhubarb Bette
Four Years Ago:  Rosemary Raisin Pecan Crisps
Five Years Ago:  Roasted Potatoes and Onions with Wilted Greens (also the story of when I stopped eating meat)

Spring Egg-Drop Soup
Bon Appétit
Serves 4

The only changes I made to the recipe below is that I used less olive oil to sauté and served the quinoa on top.  I would say it serves 3 as a main course.  I spring garlic cloves instead of the garlic scapes only because I used all mine in the pesto.

¼ cup olive oil
2 medium carrots, peeled, chopped
6 small spring onions, bulbs only, coarsely chopped (about 1 ½ cups)
3 medium spring garlic bulbs, 1-2 garlic scapes, or 2 regular garlic cloves, thinly sliced
Kosher salt
4 cups low-sodium chicken broth
½ pound asparagus, sliced on a diagonal ½” thick
¼ pound sugar snap peas, sliced on a diagonal ¼” thick
2/3 cup shelled fresh peas (from about 2/3 pound pods)
2 large eggs
1 tablespoon grated Parmesan plus more for serving
¼ cup torn fresh basil leaves
¼ cup torn fresh mint leaves
1 ½  teaspoons (or more) fresh lemon juice
Cooked red quinoa (optional)

Heat oil in a large heavy pot over medium heat. Add carrots, spring onions, and garlic and season with salt. Reduce heat to medium-low, cover, and cook, stirring occasionally, until vegetables are soft, 15-20 minutes.

Add broth and bring to a boil. Add asparagus, sugar snap peas, and peas and cook until vegetables are crisp-tender, about 3 minutes.

Meanwhile, beat eggs in a small bowl with 1 tablespoon Parmesan, a pinch of salt, and 1 tablespoon water.

Reduce heat to low and stir basil and mint into soup. Drizzle in egg mixture in 4 or 5 spots around pot. Let stand for 1 minute so egg can set, then gently stir in 1 ½ teaspoons lemon juice. Season soup with salt and more lemon juice, if desired. Serve soup topped with more Parmesan and a dollop of quinoa, if desired.
Homemade with Love, Indeed

May 25, 2013

If you came into my house right now, you would find homemade cookies in the cookie jar, homemade ice cream in the freezer (and some non-homemade flavors), about ten different kinds of baking chocolate, half of a homemade ginger pound cake, half a homemade chocolate pound cake, and remnants of Easter candy.  Some people might wonder how I can live with all of these things surrounding me and not eat them.  The reason is because I am a savory person.  Not that I don’t like sweet, believe me, the chocolate tempts me sometimes.  But it is not all that difficult for me to ignore the fact that I have a mini bakery going on in my house.  My problem area is the shelf that houses the chips, pretzels, crackers, and don’t even get me started on popcorn.

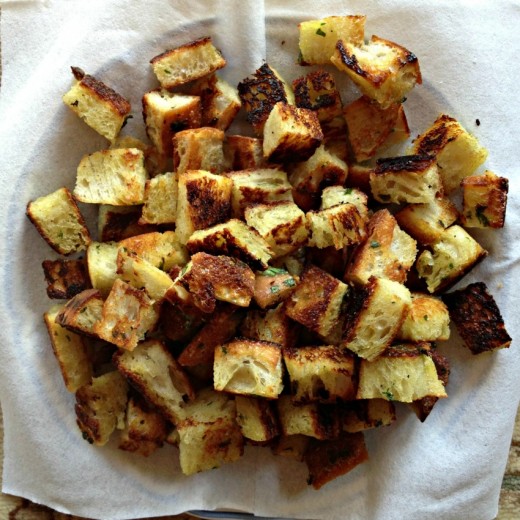
Something I truly can not stop eating is homemade croutons.  Therefore I do not make them all that often and when I do, I double the amount I need so that there will be some left, you know, for the dish they were intended.  I have always baked my croutons in the oven.  And they have always been great.  What is better than great?  Awesome?  Stupendous?  When you cook them in a pan on the stove, croutons become stupendous.

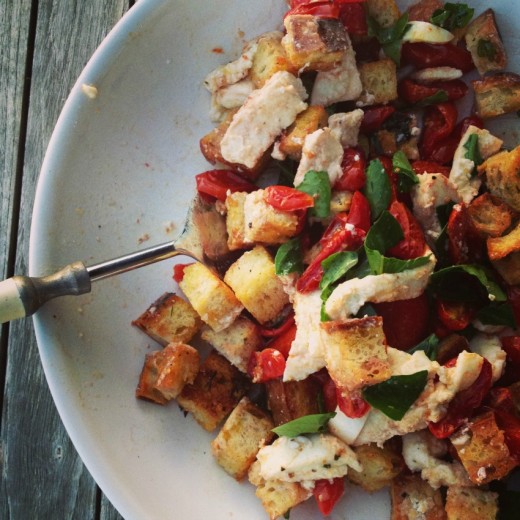
Homemade croutons figure very prominently in Panzanella, the Italian bread salad.  It is a very simple dish with few ingredients.  It is the epitome of rustic Italian food.  Take the very best quality things and put them together in a simple and beautiful way.  I’ve made many Panzanella recipes in my cooking life but have either made more complicated versions (see this Heirloom Tomato Salad  and Panzanella with Artichokes, Olives, and Manchego) or I have half heartedly thrown halved (pretty flavorless) cherry tomatoes, those mini balls of mozzarella, a few basil leaves, and croutons in a bowl.  It sad to me now that I could have been so overambitious or so careless with something that can be so simple to make and so incredibly tasty.

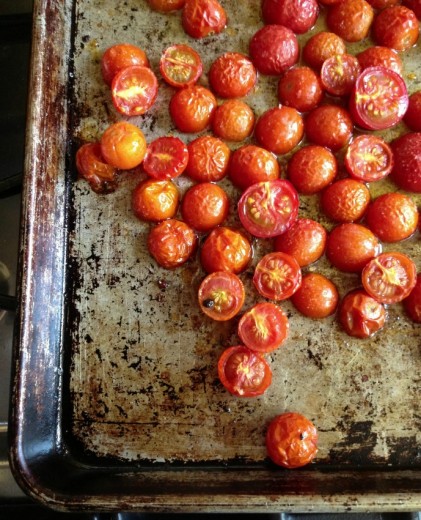
You know what they say about pizza, right?  Even when it is bad it is still good.  I’ve eaten plenty of Panzanella in addition to the ones I have made and I always like it.  A few weeks ago, when I went to a lunch party thrown by Jennie to celebrate her new book, Homemade with Love, I got to taste the Panzanella that helped me see the light.  Jennie did all the cooking for the party and I was delighted to see that everything was vegetarian.  I took a bit of everything on my plate with an extra healthy helping of her Panzanella.  All the food was beautifully presented and incredibly tasty, no small feat when you are cooking out of a hotel room kitchen, but this salad stole the show for me.  What had always been really just an excuse for me to eat dressing soaked croutons has become a thing of beauty where each ingredient shines and together there is magic.  Cherry tomatoes are better than romas but slow-roasted cherry tomatoes are glouriously sweet and jammy.  Any crouton is a good crouton, as I think I have made clear, but tossing them with just a bit of Parmesan and parsley and then cooking them in a pan on the stove, gave them charming browned bits and that perfect texture of crunch but with a little squish.  (Technical terms.)  It became clear that this would become my Panzanella forever more.

I have now made this several times and I have just a few tips.  I like using a loaf of bread with a dense crumb.  Too many air pockets means croutons that are too crispy and potentially burned in spots.  I have had luck with Pugliese bread.  I cut off each end and then shave a bit of the crustiest parts off.  More or less equal sized pieces are my preference and I like them big.  As much as I am absolutely smitten with the stovetop method, the second time I made the salad I had a lot going on in the kitchen and didn’t feel like I could successfully manage to keep turning the croutons in the manner they deserved.  So I put them in a 375º oven and they were great.  Not stupendous, but still great.  Because there are so few ingredients here, do use the very best.  Be sure to grate your own Parmesan for the croutons and buy a really good fresh mozzarella, preferably an Italian one made with buffalo milk.

Two Years Ago:  No Knead Olive Bread
Three Years Ago:  Spicy Peanut Noodles, Pull-Apart Cheesy Onion Bread (sooooo good)
Four Years Ago:  Greek Pasta Casserole, Green Bean and Fennel Salad

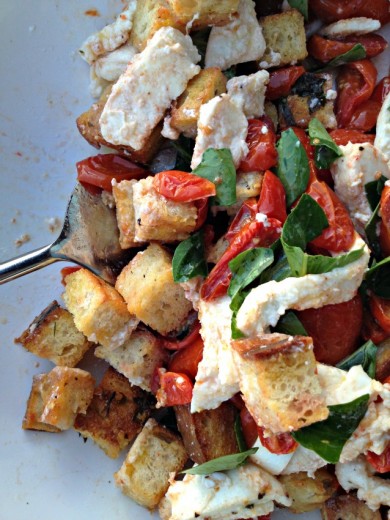
Slow-Roasted Tomato & Fresh Mozzarella Panzanella
Homemade with Love
Serves 2

Please note, this recipe as written serves only 2.  Both times I have made it, I have scaled it up by using a the whole pint of cherry tomatoes, more croutons, and about 8 ounces of mozzarella.

1½ tbsp. extra-virgin olive oil
2 tsp. apple cider vinegar
1 tsp. honey
Sea salt flakes and freshly ground black pepper, to taste
2 cups Parmesan Skillet Croutons (recipe follows)
3 ounces fresh mozzarella, cubed
½ cup Slow-Roasted Tomatoes (recipe follows)
Handful fresh basil leaves, torn

To  make the dressing, whisk the oil, vinegar, honey, salt, and pepper together in a deep bowl.  Adjust the seasonings to taste.  Add the croutons, mozzarella, tomatoes, and basil to the bowl, tossing well to combine.  Let the salad sit for at least 5 minutes so the croutons can absorb the flavors, but mo more then 15 minutes or they will get too soggy and lose their crunch.  To serve, spoon the salad onto a platter or individual plates.

Parmesan Skillet Croutons
Makes 2 cups

2 cups cubed day-old bread
1 tsp. finely chopped parsley
2 tbsp. grated Parmesan cheese
Sea salt and freshly ground black pepper, to taste
1 tbsp. extra-virgin olive oil

Toss all the ingredients together in a bowl until the bread cubes are well coated

Heat an 8-inch skillet over medium heat.  Add the seasoned bread cubes to the pan and cook, turning occasionally, until golden all over, 5 to 7 minutes.  Store in an airtight container for up to 3 days.

Slow-Roasted Tomatoes
Makes about 1½ cups

1 pint grape tomatoes, cut in half
¼ cup extra-virgin olive oil
Fine sea salt and freshly ground black pepper
6 sprigs fresh lemon thyme, copped

Preheat the oven to 250ºF.  Add all the ingredients to an 8-inch square baking dish and toss well to coat.  Adjust seasonings to taste.  Bake until the tomatoes are slightly collapsed and tender, about 1 hour.  Let cool completely, and store in a tightly covered mason jar or container in the fridge for up to 2 weeks.


In Time for Memorial Day

May 23, 2013

There are many things that I am but I am not the food blogger who posts holiday recipes in time for holidays.  I’m just not usually that organized.  I make a Christmas-worthy cake on Christmas, not days ahead so that I can share the recipe.  Maybe I share the recipe days after and tell you to make it next year.  I realize this is not all that helpful and I’m sorry.  I do get contacted by people like the Cream Cheese Commission reminding me that National Cream Cheese Day is coming up and might I want to create a recipe and tell my readers about it!  Except I don’t.  The food I share here is food I cook for myself, my family, or for clients.  It is food I make because I want to eat it.  And I like it enough to want to share it with you.

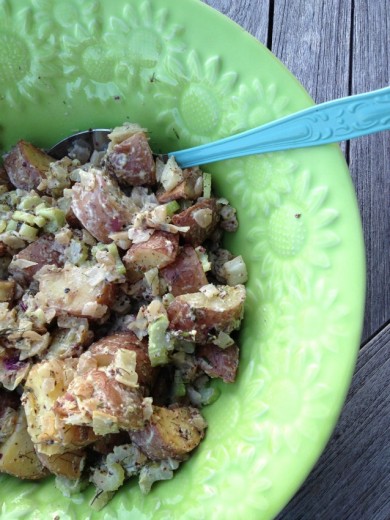
All this to say that I happened to make a potato salad last night that I really liked and hey! what do you know?, it’s Memorial Day weekend and you might need a good potato salad.  Because of my intense love of potatoes, I really like just about any potato salad.  I like them with a mayonnaise dressing and also with an olive oil one.  I like them with pickles, hard boiled egg, scallions, celery, and without any of those things.  I have even been known to eat those gloppy yellowing mayo soaked ones that you find in plastic tubs from a grocery store.  This potato salad is nothing like that kind.  I created this one as a way to highlight the flavor of the ingredients, not drown them in dressing.  And, as usual these days, I was inspired by the produce at the markets.

Boiling potatoes, especially lovely pink hued new potatoes from the Berkeley farmers’ market, is a cruel way to treat them.  It zaps all their flavor and tends to make them mushy.  Mushy potatoes don’t work well in potato salads because when you go mix everything together, they fall apart.  Their skins tend to peel off.  Much better to roast the potatoes in the oven, with a little olive oil and plenty of salt.  Then your prime ingredient tastes good on its own so it can’t help but be delicious in the finished product.  I sautéed purple spring onions and fennel with just a bit of parsley and mixed in thinly sliced celery.  I think mustard and potatoes are great friends so I made a dressing that is nice and creamy but with a lot of bite from two kinds of mustard and some horseradish. If you hate mayonnaise, and I know there are many of you out there, I imagine you could use all yogurt or sour cream instead.  I like my potato salads lightly dressed but this recipes makes plenty of it in case you want to add more or make the salad again.  It will keep for a week in the refrigerator and would be a great sandwich spread too.

Three Years Ago:  Mushrooms with White Wine
Four Years Ago:  Individual Vegetable Tarts
Five Years Ago:  Niçoise Tartines with Peperonata

Potato Salad with Fennel and Mustardy Dressing
Dana Treat Original
Serves 6-8

Spring onions look like giant scallions.  You will want to use the bulb part only (the part that looks like an onion) and discard the greens.  You could substitute a large sweet onion (like Walla Walla or Vidalia) instead.  Be sure to buy a fennel that has some of the fronds attached (the green dill like looking top) because you will stir some of the chopped fronds into the finished salad.  Make sure to dress the salad when the potatoes are warm.  They will absorb the dressing beautifully.  Finally, potato salads, like pasta salads, taste best room temperature.  You can store the salad for a day or so in the fridge but take it out about an hour before you want to serve it.

For the dressing:
2 tbsp. plain yogurt
2 tbsp. mayonnaise
2 tbsp. Dijon mustard
2 tbsp. whole grain mustard
2 tbsp. horseradish
Juice of ½ a lemon
Pinch of salt and freshly ground black pepper

For the salad:
2½ pounds new potatoes, scrubbed and cut into large bite-size chunks
Olive oil
3 spring onions, bulb part only, chopped
1 large fennel, inner core removed, chopped
2 tbsp. fresh parsley, chopped
4 stalks of celery, thinly sliced
2 tbsp. chopped fennel fronds

Make the dressing:
Mix together the first six ingredients in a bowl.  Taste and add salt and pepper to your liking.

Make the salad:
Preheat the oven to 375ºF.  Lay the potato chunks on a large baking sheet and drizzle with 2-3 tablespoons of olive oil.  Shower with salt and a few grinds of pepper.  (Potatoes need salt!)  Place in the oven and bake for 20-25 minutes without disturbing them.  A paring knife should easily pierce them.  Remove from the oven and let cool slightly.

Meanwhile, place a large sauté pan over medium heat.  Drizzle in just enough olive oil to coat the bottom, then add the onions and fennel and a large pinch of salt.  Cook, stirring occasionally, for about 5 minutes, then add the parsley.  Continue to cook until the vegetables are very soft and brown in places, about 10 more minutes.  Scrape the contents of the pan into a large bowl.

Transfer the still quite warm potatoes to the bowl along with the celery.  Spoon out about five tablespoons of the dressing into the bowl and, using a spatula, mix together gently.  Add the fennel fronds and mix again.  Taste for salt and pepper and additional dressing if desired.


Onion Tart with Mustard and Fennel

May 21, 2013

You may not agree with me but I think the tendency to hang on to things is genetic.  I am a purger.  Randy is a saver.  (Not hoarder.  No cat skeletons hiding under mountains of garbage in our house.)  My parents have barely held on to anything from out childhoods except for photographs.  Randy’s parents periodically send us packages containing things (books, art work, letters) from his youth.  My parents purge and Randy’s save.

There is no time when those differences are clearer than when you move.  Each time I have moved, I have gotten rid of a tremendous amount of stuff.  I basically eye each thing I am about to put in a box and ask myself, “Do I want to pack this, only to have to unpack it?”  Many times the answer is no.  So off to Goodwill it goes.  Randy has a harder time with this process.  He often can’t give things away because he either “paid good money for it” or because the thing in question has sentimental value.  I might be thinking in particular of a hideous green and yellow jersey that, while I have not successfully persuaded him to toss, I have successfully persuaded him he should not wear.

This last time, for our move to Oakland, we had movers who packed us up.  This incredible service was paid for by his company and I can honestly say I’m never doing it any other way.  You basically just live your life in your house with all your stuff until the moving day and then bam! a team of professionals descends on you and packs everything in sight.  They wrap all the dishes and glassware, have special boxes for hanging clothes, and label everything clearly.  I’ve heard some people say that these types of teams even pack the garbage in the garbage can but that was not our experience.

Having this service was an incredible luxury with one caveat.  Because I wasn’t packing each box myself, or loading each thing on a truck, quite a bit slipped through the cracks.  Once we got to Oakland, they put all the boxes and furniture in the right rooms but we were responsible for the unpacking part.  About 100 times, I asked, “Why did this make it here?”  We had done a purge before they arrived but there is no purge like the one where you look hard at something and ask yourself whether or not it should make the trip.

All this to say that we have this little basket with a top that I would probably have donated to Goodwill sitting beside our couch.  It acts as a mini coffee table for Randy’s watching-tv-glass-of-water or bourbon.  Sometimes he remembers to bring that glass of water back over to the sink at night and sometimes he does not.  Recently, the boys were horsing around in that room and knocked over the leftover water (which, thankfully, was water and not bourbon) and as I was cleaning up, I realized that there were food magazines stashed away in that basket.  Not just food magazines, but a few copies of Gourmet from 2007.

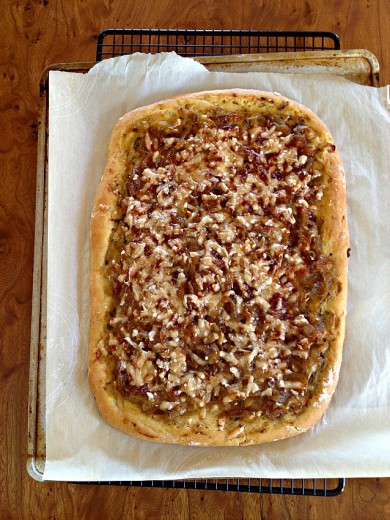
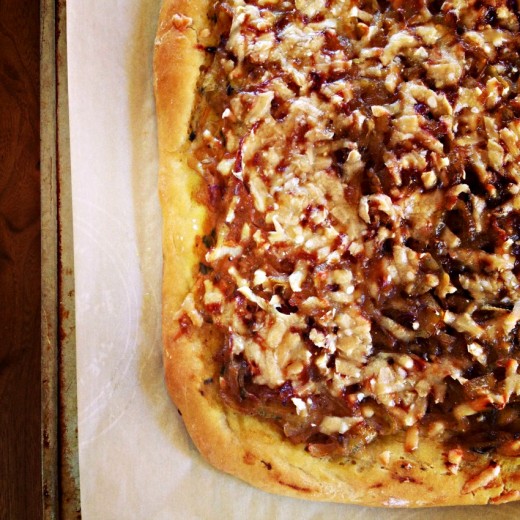
Now, we all miss Gourmet, right?  I know I do.  I have years and years of recipes cut our from that magazine along with Bon Appétit and Food & Wine.  Paging through the issues that I had left, I found recipes for things that I wanted to make immediately.  One of which was this onion tart.  I make a great Pissaladière,  which this tart resembles but with some intriguing differences.  The base is a yeasted tart dough rather than puff pastry, it features a slick of mustard on the bottom of the crust, fennel seeds sautéed with the onions, and a topping of Parmesan cheese.  I had the kindergarten moms come for dinner last week and this tart swiftly went on the menu.

I love a recipe that can be made for lunch, brunch, dinner, or an appetizer and this one fits the bill.  I thought the dough was incredibly sticky and I might have cursed Gourmet a few times (I love you! I miss you! I hate you!) but in the end this was an incredibly fragrant and powerfully flavored tart.  Unlike a Pissaladière, the crust is very neutral tasting but with a bit of crunch, so the onions are really the star of the show.  Just that little bit of cheese is a beautiful balance of savory to the gorgeous sweetness of the onions and the mustard gives you a nice hit of spice.  I let the tart cool to room temperature and then cut it into small pieces, but it could easily but cut into nice wedges for more of a main course.

UPDATE 5-25-13: I had wedges of this tart left over.  I wrapped them in foil and stored them in the fridge.  Days later, I reheated them, in a 250º oven, and the tart tasted as good as the day it was made.

Two Years Ago:  Spiced Cocktail Nuts
Three Years Ago:  Lighter Fettucine Alfredo, Curried Tofu and Avocado Dip, Giant Chocolate Cake
Four Years Ago:  Roasted Asparagus with a Poached Egg, Ginger Ice Cream, Tofu and Cucumber Salad with Spicy Peanut Sauce

Onion Tart with Mustard and Fennel
Adapted from Gourmet
Serves about 8 as an appetizer

I like to slow cook my onions in a cast iron skillet.  I find the evenness and the retention of the heat works really well.  I would avoid a non-stick pan as it can take longer for them to caramelize.  The round of parchment helps keep the onions really moist and takes them to a jammier texture but you can omit that step.  Just make sure the heat is nice and low, stir them occasionally, and allow them at least an hour (or more) to achieve their dreamy potential.

2 ¼ teaspoons active dry yeast (a ¼-ounce package)
½ cup warm water (105-115°F)
1½ to 1 ¾ cups all-purpose flour
1 large egg
1/3 cup plus 1 tablespoon extra-virgin olive oil, divided
2 ½ teaspoons salt, divided
2 teaspoons fennel seeds
3 pound yellow onions, halved and thinly sliced
1 tablespoon Dijon mustard
½  cup freshly grated Parmigiano-Reggiano

Stir together yeast and warm water in a small bowl and let stand until foamy, about 5 minutes. (If mixture doesn’t foam, start over with new yeast.)

Put 1 ½ cups flour in a medium bowl, then make a well in center of flour and add yeast mixture to well. Stir together egg, 1 tablespoon oil, and 1 ½ teaspoons salt with a fork. Add egg mixture to yeast mixture and mix with a wooden spoon or your fingertips, gradually incorporating flour, until a soft dough forms. Transfer dough to a floured surface and knead, working in additional flour (up to ¼ cup) as necessary, until smooth and elastic, about 5 minutes. (DT: I used a lot of flour on my board to keep the dough from sticking.)  Transfer dough to an oiled bowl and turn to coat. Cover with plastic wrap and let rise in a draft-free place at warm room temperature until doubled, 1 to 1 ½ hours.

While dough rises, heat remaining 1/3 cup oil in a 12-inch heavy skillet over medium-high heat until it shimmers, then sauté fennel seeds until a shade darker, about 30 seconds. Stir in onions, remaining teaspoon salt, and 1/2 teaspoon pepper, then reduce heat to medium-low and cover onions directly with a round of parchment paper. Cook, stirring occasionally, until onions are very tender and golden brown, 1 to 1¼ hours.

Preheat oven to 375°F with rack in middle.

Knead dough gently on a floured surface with floured hands to deflate.  Transfer dough to a heavy baking sheet lined with parchment paper.   Pat out dough into a roughly 15- by 12-inch rectangle, turning up or crimping edge, then brush mustard evenly over dough, leaving a ½-inch border around edge. Spread onions evenly over mustard, then sprinkle evenly with cheese.

Bake tart until crust is golden brown, 30 to 35 minutes. Cut into 2-inch squares or diamonds and serve warm or at room temperature.


What Grows Together Goes Together

May 16, 2013

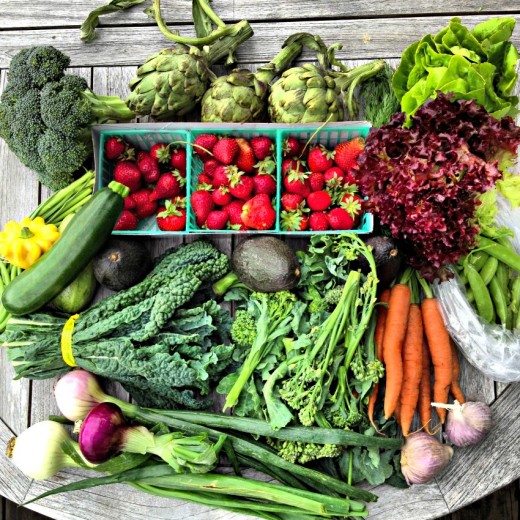
What grows together goes together.  Are you familiar with this saying?  It is a terrific mantra when you find yourself at a farmers’ market.  Now you Northern climate people, before you close your eyes and mutter, “Enough with the bragging about California farmers’ markets”, remember that I was one of you.  I was the person who counted down the weeks until my neighborhood market started in May, and then counted down the weeks until real actual produce, not just kale and parsnips, arrived.  I was the one finally (finally!) buying English peas, snap peas, fava beans, and other green spring things in late June which is not (not!) spring.  I have been there.  And now I am here in California and I am going to talk about my glorious California farmers’ markets.  So there.

I used to hit the markets with a list.  I would plan my menu for the week and I would try to buy as much as I could at the market.  Whatever I couldn’t find there I would buy at the grocery store.  This approach led to a lot of frustration.  Walking in to a farmers’ market with a set idea of what to buy just might leave you agitated because there is not guarantee that what you want will be there.  Even if it is in season.  It is better, I have found, to just go and buy what looks good to you.  Buy what you like.  Ideas will pop into your head and since you are shopping seasonally and locally, all the things you buy will go together in some way or another.  What grows together goes together.  And if you are really a list person, bring a blank list to the market.  Once you have you have been inspired by the produce there and bought what you like, you can make a list of the things you need to fill out the dinners you have planned.

Last week, I bought a truly shocking amount of produce.  How could I not?  Everything looked so amazing.  I realized, soon after putting everything away, that Randy was going to be out of town the first part of the week and that I had better get some friends to come eat with me.  I made pizzas and a huge salad which we devoured.  I told Randy about my creations and he was crestfallen that I had made pizza, on the grill no less, without him.  So I made the same dinner, just for us, on Mother’s Day.  Yes, I cooked on Mother’s Day.  In fact, I made breakfast and dinner.  No sad trombone or tiny violins here.  I had two friends come down from Seattle last weekend and we spent all Saturday out and about in Oakland and then San Francisco, topped off with a dinner at AQ.  It was such a gift to be able to just hang with my friends and not have to worry about the boys, I wanted to thank him for giving me that time.  I also wanted to just be home with my family and enjoy pizza and wine on our deck, rather than at a busy restaurant.

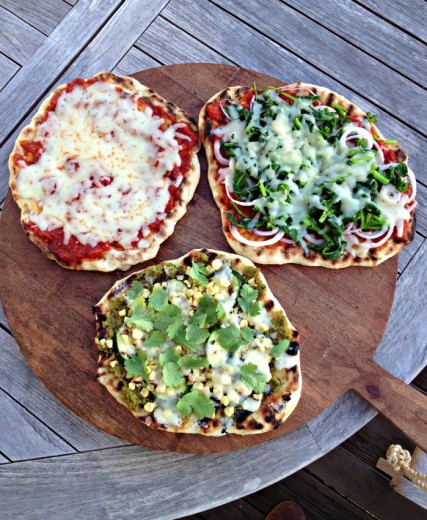
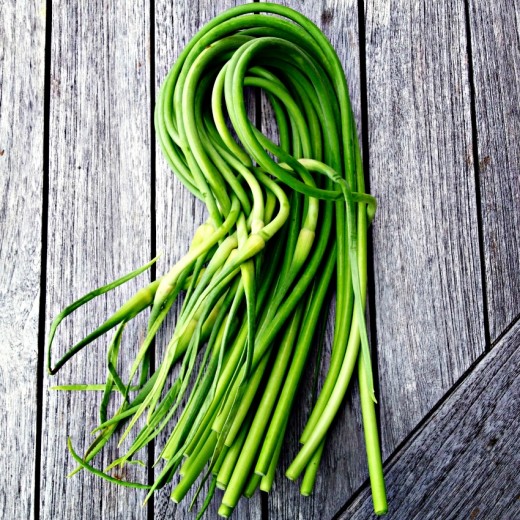
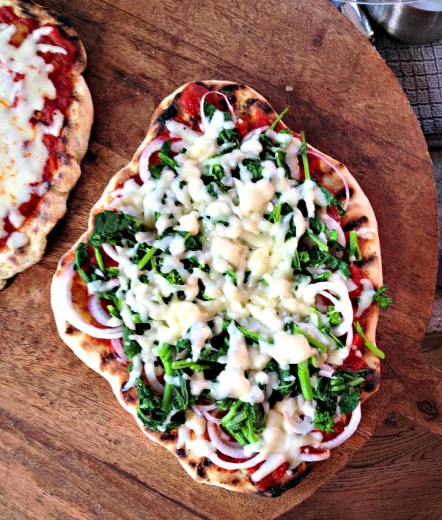
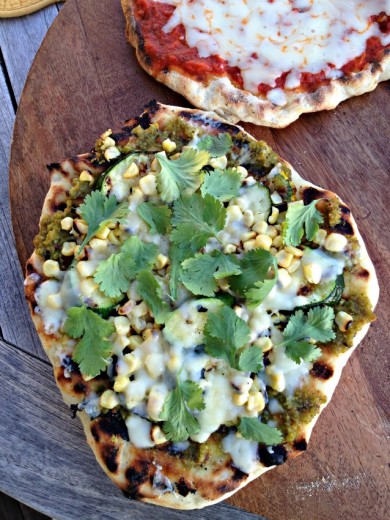
I could just have easily titled this post Put It On a Pizza.  When I end up with a surplus of fresh seasonal produce, I often end up making pizza and combining things I have on hand for a topping.  I also do this with pasta or risotto but pizza is my favorite.  Especially when I make it on the grill.  With my crazy produce haul, I had the most beautiful bunch of garlic scapes (see photo above) which I made into a pesto.  That got brushed on one pizza and was topped with grilled zucchini and grilled corn (corn in May!) and some shaved Manchego cheese.  A few cilantro leaves on top too.  I love broccoli rabe on pizza so for the other one, I blanched a bunch of that, chopped it up, and paired it with sweet spring onion rounds on a marinara slathered crust, topped with mozzarella.  When I made dinner for my family on Sunday, I repeated everything but also made a third pizza of just cheese and sauce for the boys.

I almost always use Mark Bittman’s pizza dough recipe.  It is easy and has a short rising time.  I keep promising myself that I will try others, notably the ones that have a longer rise, but the truth is that I am not always forward thinking when I make pizza.  If I realize that at 5:30 I still haven’t made the dough, we can still be eating by 7.  If you have small people who would be terrified to even contemplate anything other than a cheese pizza, divide the dough into three pieces and make one of them more plain.  I’m going to give directions for cooking pizza on the grill, since we are coming upon grilling season, but these can of course be made in a very hot oven.

One Year Ago:  Pepper Glazed Goat Cheese Gratin (I’ve made this countless times – so amazing and easy!)
Two Years Ago:  White Bark Balls
Three Years Ago: Chickpeas with Lemon and Pecorino Romano (so good!), Potato Salad with Snap Peas
Four Years Ago:  Quinoa with Grilled Zucchini and Chickpeas, Peanut Butter Cup Brownies, Raspberry Almond Bars

Pizza with Garlic Scape Pesto, Grilled Zucchini and Corn
Dana Treat Original (mostly)
Serves 4 along with another pizza (or double this recipe and make two)

You might not use all the zucchini or corn, but just throw them in a salad another night.  The pesto makes quite a bit.  It is terrific with pasta, rice, and eggs, or as a sandwich spread.  You can always take half of it, put it in a container, and freeze it for another time when garlic scapes are a distant memory.  Finally, this pizza has a LOT of flavor, so I didn’t think it needed much cheese.  But add as much as you like.  You can, of course, substitute another cheese for the Manchego.

½ ball pizza dough (recipe follows)
Garlic scape pesto (recipe follows)
2 small zucchini or other summer squash, sliced on the diagonal, about ¼-inch thick
2 ears of corn, shucked
Olive oil
Kosher or sea salt
½ cup (or more) Manchego cheese, shaved
Few cilantro leaves

Heat a grill to high.  Place the zucchini slices on one side of a rimmed baking sheet and the corn on the other.  Drizzle it all with a little olive oil and then add a healthy pinch of salt to both vegetables.  Using your hands, toss well (keep the vegetables separate).  Grill the zucchini and corn.  You will want nice grill marks on the zucchini and the corn should brown in places.  Remove back to the baking sheet.  Leave the grill on.  When the corn is cool enough to handle, slice the kernels off the cob.

Scatter a bit of cornmeal on a pizza peel (or the bottom of a baking sheet can work too).  Stretch the dough out to a nice thin circle, then place it on the peel.  Slide the dough onto the grill, close the lid, and let cook for4 minutes, or until the bottom is nice and golden brown with some grill marks.  Carefully coax it back onto the peel (tongs can be useful for this step).  If you are using an oven instead of a grill, just top the raw dough with the toppings – you won’t need to flip.

Turn the dough over and smear the top with some of the pesto going almost to the edges of the circle.  It is quite strong so you don’t need a lot.  Add the zucchini slices and the corn.  Top with the shaved Manchego.  Slide the pizza back on the grill, cover and cook for 2 minutes or until the cheese is melted and the visible dough is golden brown.  Slide back on the peel and scatter cilantro leaves over the top.  Let sit for a minute, then slice and serve.

Pizza Dough
Courtesy of Mark Bittman
Makes: Enough for 1 large or 2 or more small pies

To make pizza dough by hand or with a standing mixer, follow the directions, but use a bowl and a heavy wooden spoon or the mixer’s bowl and the paddle attachment instead of the food processor. When the dough becomes too heavy to stir, use your hands or exchange the mixer’s paddle for the dough hook and proceed with the recipe.

3 cups all-purpose or bread flour, plus more as needed
2 teaspoons instant yeast
2 teaspoons coarse kosher or sea salt, plus extra for sprinkling
2 tablespoons extra virgin olive oil

Combine the flour, yeast, and salt in a food processor. Turn the machine on and add 1 cup water and the oil through the feed tube.

Process for about 30 seconds, adding more water, a little at a time, until the mixture forms a ball and is slightly sticky to the touch. If it is still dry, add another tablespoon or two of water and process for another 10 seconds. (In the unlikely event that the mixture is too sticky, add flour a tablespoon at a time.)

Turn the dough onto a floured work surface and knead by hand for a few seconds to form a smooth, round dough ball. Put the dough in a bowl and cover with plastic wrap; let rise until the dough doubles in size, 1 to 2 hours. (You can cut this rising time short if you’re in a hurry, or you can let the dough rise more slowly, in the refrigerator, for up to 6 or 8 hours.) Proceed to Step 4 or wrap the dough tightly in plastic wrap or a zipper bag and freeze for up to a month. (Defrost in the bag or a covered bowl in the refrigerator or at room temperature; bring to room temperature before shaping.)

When the dough is ready, form it into a ball and divide it into 2 or more pieces if you like; roll each piece into a round ball. Put each ball on a lightly floured surface, sprinkle with flour, and cover with plastic wrap or a towel. Let rest until they puff slightly, about 20 minutes.

Garlic Scape Pesto
Courtesy of Epicurious
Makes about 1½ cups

I only had salted pistachios on hand so I only added a pinch of salt to the pesto.

10 large garlic scapes
1/3 cup unsalted pistachios
1/3 cup finely grated Parmigiano-Reggiano
Kosher salt and black pepper
1/3 cup extra-virgin olive oil

Puree the garlic scapes, pistachios, Parmesan, ½ teaspoon salt, and ¼ teaspoon pepper in a food processor until very finely chopped. With the motor running, slowly pour the oil through the opening. Season the pesto with salt and pepper to taste. (The pesto keeps in the fridge, covered, for 1 week or frozen for a month.)


« Older Posts