Category: Grains

Time to Share

July 24, 2013

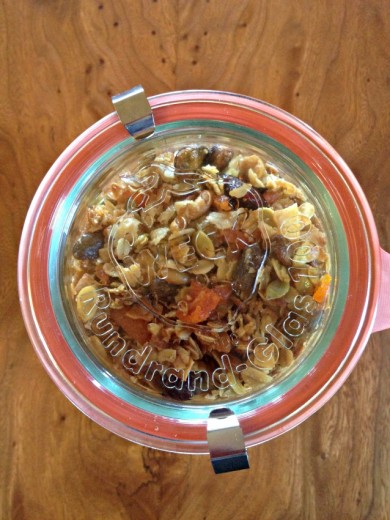
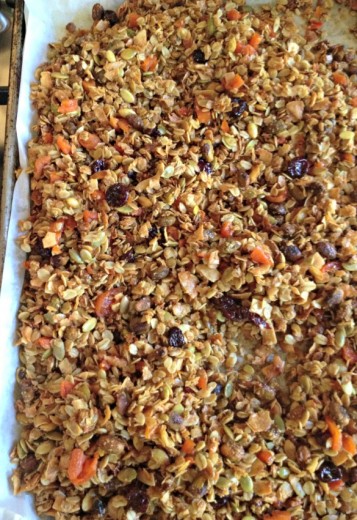
This is my go-to granola recipe.  I have been using it for about three years.  I had a go-to granola recipe before that that I used for many many years, but I like this one better.  I make huge batches of it and eat some, freeze some, and give some away.  Everyone loves it.  Why have I not shared this recipe until now?  Here are some reasons.

1) A part of me thinks that everyone has their own favorite granola recipe.
2) A part of me thinks I have seen 12 million granola recipes in the food blogosphere.
3) A part of me doesn’t want to take business away from this lovely lady.  (And if you are buying granola instead of making your own, you should buy it from her.)

My old favorite starred a lot of butter and honey and had lots of whole nuts in it.  I liked the flavor of it, butter and honey will do that to a person, but not the things in it as much.  If I am going to eat granola, and let’s face it – it’s not exactly health food – it has to be perfect.  This is pretty close and oh so easy to make.  You are really just measuring things out, mixing them all together in a big bowl, and waiting.  Your kitchen smells even better than when you make brownies.  Why am I sharing the recipe now?  Here are some reasons.

1) It’s just time I shared something that I make so often, regardless of reasons 1-3 above.
2) I brought giant bags of this granola with us to Bethany Beach a few weeks ago.  We kept one bag in the purple house and I brought the other over to the blue house, where much of the extended family was staying.  They all went crazy for it (people always do) and wondered when the recipe would be on my blog.  These are special lovely people.  So how could I not share?

A brief story.  I met Randy’s family, immediate and extended, twelve years ago this month.  We had just moved in together and he brought me back to a big family gathering in Baltimore.  Randy’s mom is the oldest of five and three of her siblings have children.  Some of them have children.  Even twelve years ago, there were a lot of White’s for me to meet.  I was nervous.  I knew Randy and I were headed for marriage and he had been married before (as had I).  His ex-wife had been a part of these gatherings and I did not know how I would fit in to that dynamic.

As it turns out, Randy’s ex-wife was not super popular with the family, some of the more tell-it-like-it-is members were very clear about this, and I was thought to be a breath of fresh air.  The fact that I come from a nice family, sing and play the guitar, and was clearly over the moon about this guy brought me a big thumbs up from everyone.  Phew!  Now all the times I have spent time with this group has been so wonderful.  I always have long and meaningful conversations with so many of them.  I’m lucky to have this large extended family.  So it is with great pleasure that I share this granola recipe!

A few notes.  This recipe comes from Melissa Clark’s book In the Kitchen with a Good Appetite.  As may be clear, I have made it countless times.  I pretty much follow it as written but have a few opinions (always!).

*It is very easy to double this recipe as long as you have a large mixing bowl and two large rimmed baking sheets.  Why not just double it and have lots of granola?  I would freeze some since it does, eventually, go stale.

*You can use salted, roasted pistachios instead of raw, I always do.  I buy them in huge shelled bags because I make this so often.

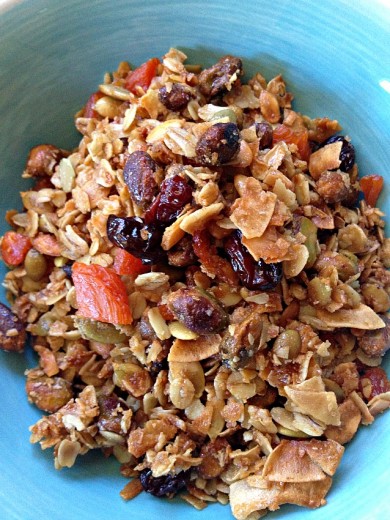
*You will need to seek out coconut chips.  It is just big shavings of coconut, not the powdery flaky kind that you use to make coconut bars.  Bob’s Red Mill has it in bags usually in the baking section.

*I add both dried apricots and dried cherries to mine.  Better color.  I’ve added all kinds of dried fruit to this granola.  The only thing I would avoid are regular raisins.  They don’t look appetizing.  Golden are better.  Be sure to add the fruit right when it comes out of the oven.  The granola is still soft and easily mixable.  As it cools, it crunches up and the fruit is more difficult to stir in.

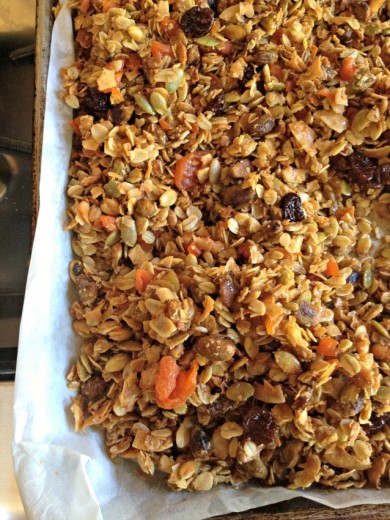
*Be sure to allow the granola to bake long enough that it really is golden, a touch darker is better than a touch lighter in my opinion.  If you let it become truly brown, it cools up nice and crunchy.  If you don’t bake it enough, it can be a little greasy and not crunchy.

One Year Ago:  Quinoa with Red Lentils and Mint, Baked Penne with Silky Fennel
Two Years Ago:  Savory Muffins, Salted Caramel Squares, Vegetable Enchiladas
Three Years Ago:  Roasted Cauliflower with Tomato and Dill, Best Tart Dough, Lavender Honey Ice Cream
Four Years Ago:  Honeyed Goat Cheese Tart, Blasted Broccoli, Gnocchi with Mushroom Sauce, Asparagus Ragout

Olive Oil Granola with Dried Apricots and Pistachios
Adapted from In the Kitchen with a Good Appetite
Makes about 9 cups

Clark serves her granola with ricotta cheese and fresh berries.  I usually put out milk and plain yogurt with berries.

3 cups old-fashioned rolled oats
1½ cups raw pistachios, hulled
1 cup raw pumpkin seeds, hulled
1 cup coconut chips
¾ cup pure maple syrup (you can use 2/3 cup, but the granola will be drier_
½ cup extra-virgin olive oil
1/3 cup packed light brown sugar
1 tsp. kosher salt
½ tsp. ground cinnamon
½ tsp. ground ginger
½ cup chopped dried apricots
½ cup dried tart cherries

Preheat the oven to 300ºF.

In a large bowl, combine the oats, pistachios, pumpkin seeds, coconut chips, maple syrup, olive oil, brown sugar, salt, cinnamon, and ginger.  Spread the mixture on a large rimmed baking sheet in an even layer and bake for about 45 minutes, stirring every 10 minutes, until golden brown and well toasted.

As soon as you pull it out of the oven, stir in the dried fruit, combining it carefully.  Allow to cool completely, then store in an airtight bag or jar.


My Old Job

April 25, 2013

My first job working with food kind of fell in my lap.  I had a good friend who had recently hired a personal chef.  While she liked the convenience, she found the food heavy and not all that inspired.  Without thinking too carefully I said, “I’ll cook for you.”  Without thinking too carefully she said, “OK.”  And suddenly, poof!, I was a personal chef.  The arrangement worked out for both of us and my friend recommended me to another family.  Up until I had Spencer, I cooked for those two families three nights a week.

When all was said and done, I did that job for three years.  I had my two regular families for all that time and a few others who stopped and started.  Graham, who is now eight, was 17 months old when I started cooking for money and I did it through my pregnancy with Spencer and, after a short maternity leave, when he was an infant.  I was lucky to have had very flexible clients who were great eaters and were just happy to eat whatever I brought them.  I was able to be creative and make a serious dent in my “want to make” recipe file.

I kept notebooks with every menu I ever made.  It is amazing to look back and see the food I was able to produce in my kitchen with very small children and not a lot of time.  In all three years, I almost never repeated dishes and when I did, it was because someone had made a request.  I’ve been thinking about those days recently because I’ve been thinking about whether or not I’d like to start personal cheffing again.  I loved doing it and the only reason I stopped is because I found the work too solitary.  Teaching cooking classes allowed me to have prep time alone but then to share time and food with others.

Whenever I think about starting up again, I think of this dinner.  It was the first thing I made for my first client and I agonized over the choice.  I felt so much pressure (from myself) for the meal to be a hit.  I wanted so badly to succeed.  Because of that, I went to a no-fail cookbook, Vegetarian Suppers from Deborah Madison’s Kitchen, and made a favorite dish.

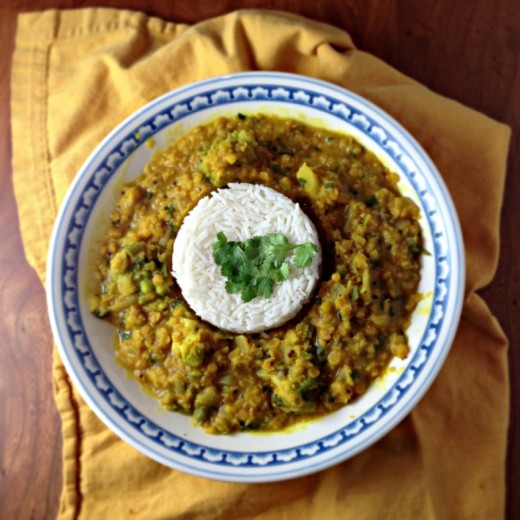
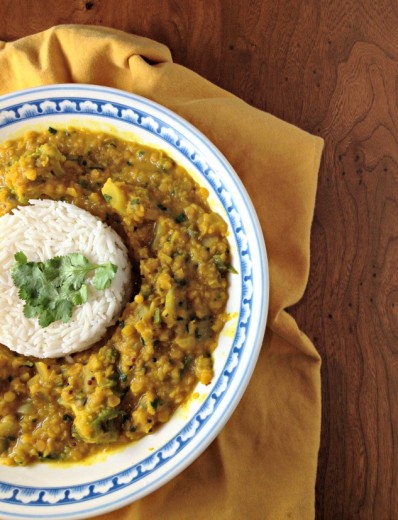
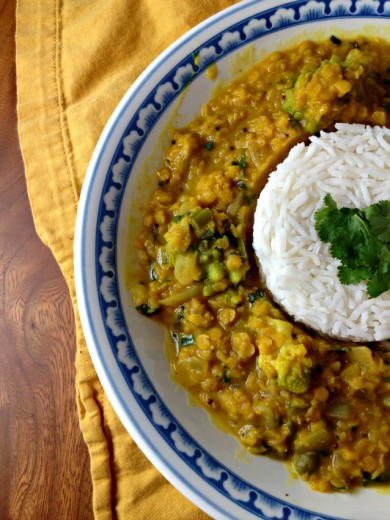
Over the years since I hung up the personal chef hat, I have made this dish many times.  I’ve made others like it too – I just really like my red lentils.  They are quick cooking and healthy and in about the time it takes for the rice to cook, you have a tasty and nutritious meal.  Recently I saw tables full of broccoli romanesco at the farmers’ market and whenever I see that beautiful vegetable, I always think of this dish.  After several years of making other versions of red lentil dhal, it was nice to come back to an old favorite.  There are a lot of steps to her recipe, and a little underseasoning, so I tweaked it to my current tastes.  Still, a classic is a classic.

One Year Ago:  Ginger Fried Rice with Roasted Tempeh, Maple Blueberry Tea Cake
Two Years Ago:  Butterscotch Pudding Tarts, Greek Salad
Three Years Ago:  Leek Frittata, Strawberry Ricotta Tartlets
Four Years Ago:  Ricotta Calzones with Broccoli Rabe, Miso Soup
[/donotprint]
Fragrant Red Lentils  with Broccoli Romanesco
Adapted from Vegetarian Suppers from Deborah Madison’s Kitchen
Serves 4

The final swirl of spices in oil might sound like an annoying extra step but it is really what makes this dish special.  I like to use coconut oil in this type of cooking but feel free to use butter, ghee, or another type of oil.

3 tbsp. coconut oil
1 small onion, finely chopped
1-inch piece fresh ginger, peeled and minced
3 cloves garlic, minced
1 large jalapeño chile, seeded and diced
2 tsp. ground cumin
1 tsp. ground coriander
1½ tsp. ground turmeric
¼ tsp. cayenne
2 cups red lentils
1 bay leaf
Kosher or sea salt
1 can coconut milk
1/3 cup finely chopped cilantro, plus extra for garnish
1 head broccoli romanesco or cauliflower, cut into bite sized pieces
1 tsp. mustard seeds
1 tsp. cumin seeds
Cooked basmati rice for serving

Place a large saucepan over medium heat.  Spoon in about 1 tablespoon of the coconut oil, then add the onion and a large pinch of salt.  When the onion is translucent and starting to brown, about 5 minutes, add the ginger, garlic and chile.  Sauté for a couple of minutes, then add the ground cumin, coriander, turmeric, and cayenne.  Stir for one minute, then add the lentils.  Stir to coat the lentils with the spices, then pour in 3 cups of water.  Turn up the heat so the mixture boils, then add the bay leaf, and turn the heat down so the mixture simmers.  Partially cover the pot and cook until the lentils are soft and most of the water is absorbed, about 15 minutes.

Add the coconut milk and simmer for another few minutes until the lentils are very soft and falling apart.  Remove from the heat and stir in the cilantro.  Cover and keep warm.

Steam the broccoli romanesco or cauliflower until tender.

To finish, heat another tablespoon of coconut oil in a small skillet over medium-high heat.  Add the mustard and cumin seeds and cook until they become very fragrant and the mustard seeds start to pop.  Immediately add to the red lentils and stir to combine.

To serve, pack the hot rice into ramekins and turn them upside down, one each, in a shallow pasta bowl.  Spoon a cup or more of the lentils around them, then lift off the ramekin, leaving the rice intact.  Top with the broccoli romanesco and garnish with cilantro sprigs.


Cashew Fried Rice

January 8, 2013

“Fried” is kind of a bad word in my family.  We – my brothers, sister-in-law, parents, and husband – are a pretty healthy bunch.  We all like to eat, some of us more than others, but we also like to fit into our clothes and we are all fairly health conscious.  That doesn’t mean that dietarily we are at a spa all the time.  There is plenty of time for Thai food, rich dips, the occasional chocolate cakeCookies and ice cream too.  But I think fried food is where most of us draw the line.  That and cream sauces.  I can’t enjoy something if I know it has been dredged in egg, then breadcrumbs, and then fried in cups of oil.  French fries are my very favorite thing on earth but I almost never eat them and if I do, it’s just a few.  Because I rarely eat fried food (or cream sauces), when I do, I almost always end up feeling sick.  So if I see “fried” on a menu, I usually pass it by.

I recently made fried rice and when I told Randy I was doing so, he scrunched up his nose.  I’ve been cooking for 20 years (!) and I think this was the second time in my life that I made fried rice.  I have childhood memories of sitting in our suburban Chinese restaurant digging through the pork fried rice for the succulent bits of pork (yes!  I ate pork!), ignoring the peas, and allowing the cooked egg and slippery grains of rice to slide down my throat.  Pork Fried Rice was a staple on that table.  As soon as I stopped eating meat, I never ordered it again.

I am here to tell you.  Fried rice is not fried.  At least, not the way I make it.  It is sautéed and, unless you are a raw foodist, most things you eat are sautéed.  This is what I told Randy and as soon as I said it, I realized it was completely true and that I had been passing recipes for fried rice by because of that pesky “fried” word.  In other words, I have been seriously missing out.

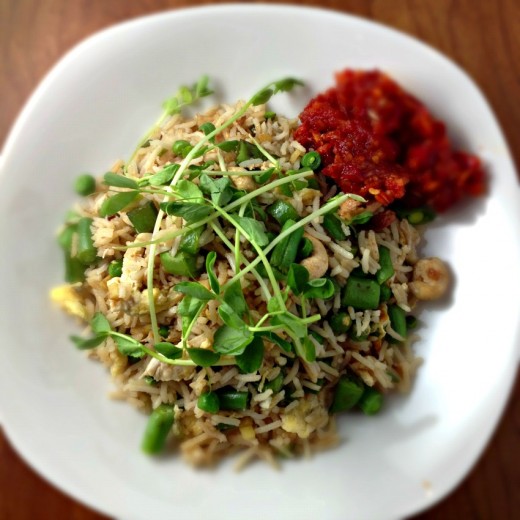
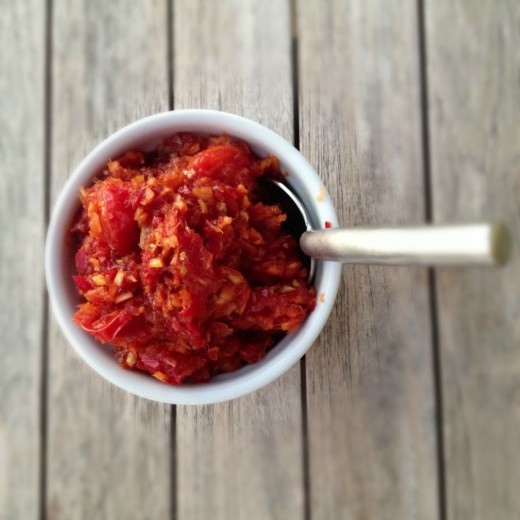
Now you can make fried rice lots of different ways and it is great for those little bits and bobs of produce that you have left over in your refrigerator after a week of cooking.  I’m giving you this recipe because a) it is what got me back on the road to fried rice, b) it is delightfully satisfying and yet healthy, and c) it features an intriguing sauce that makes an already nice dish extra tasty, and which you will want to put on just about anything.

One Year Ago:  Roasted Banana Muffins, Spinach, Cheddar, and Egg Casserole
Two Years Ago:  Linzer Tart, Yeasted Coffee Cake
Three Years Ago:  Bruce and Dana’s Pasta Sauce
Four Years Ago:  Curried Red Lentil Stew with Vegetables

Cashew Fried Rice
Adapted from Vegetarian
Serves about 4

The amounts I have listed here are a little loose.  The book has metric measurements and rather than explicitly translate them, I just kind of winged it.  And then I didn’t write down what I did.  If you have a little more or a little less rice, or a little more or a little less vegetables, all will work out fine.  You can really use whatever vegetables you like or have in your crisper drawer.  The main thing is that you want to use cold rice.  Warm rice, or even room temperature, will make your dish a big ball of mush.  Just make a bunch extra the next time you serve rice.

½ cup raw unsalted cashews
1 handful green beans, tipped and tailed, cut into 1″ pieces
1 handful snap peas, de-stringed, cut in half
¾ cup frozen peas, thawed
Canola oil
2 garlic cloves, minced
2-inch piece of peeled ginger, minced
About 4 cups cooked cold rice (I used basmati)
1-2 tbsp. soy sauce
2 eggs, beaten
1 tsp. toasted sesame oil
Green sprouts of any kind, for garnish (optional)
Chile Tomato Jam (recipe follows)

Preheat the oven to 350ºF.  Place the cashews on a baking sheet and toast in the oven until they are fragrant and just a shade darker, about 5 minutes.  I always do this in my toaster oven and you can also do it on the stove in a dry pan if you don’t want to heat up the oven.  Just watch them very carefully!

Bring a large pot of salted water to a boil.  Have a bowl of ice water nearby.  Drop in the string beans and snap peas and cook for 2 minutes.  Immediately scoop them into the ice water.  Once they are cool, drain and pat dry.

Heat a large skillet or a wok over medium heat.  Drizzle in just enough canola oil to coat the bottom.  Add the garlic and ginger and cook for a minute, then add the cold rice and the vegetables.  Stir fry for a good 2 minutes to heat through.  Push everything to the side of the pan and tip in the egg and sesame oil, stirring occasionally to form a sort of omelet.  Break the omelet into pieces with a spatula and mix it into the rice, then add the toasted cashews.  Season with soy sauce and serve topped with sprouts, if desired, and the chile tomato jam on the side.

Chile Tomato Jam

10 mild fresh red chiles, seeds and membranes removed
2 shallots, roughly chopped
2-inch piece of peeled ginger, roughly chopped
2 lemongrass stalks, touch outer stalks removed, roughly chopped
½ pound cherry tomatoes, halved
2 tbsp. light brown sugar
4 tbsp. rice wine vinegar
2 tbsp. soy sauce

Place the chiles in a food processor with the shallots, ginger, and lemongrass.  Pulse, scraping down the sides every few seconds, until finely chopped.  Scrape into a saucepan with the tomatoes and sugar, and cook over a medium-high heat for about 20 minutes.  Stir often until the liquid evaporates and the sugar caramelizes.  Add the vinegar and soy sauce and simmer until the liquid evaporates.  Season with salt to taste.  Allow to cool completely.  Can be stored in an airtight container in the refrigerator for a week or more.


Home Sweet Quinoa

July 20, 2012

Do not adjust your screen.  Yes that is food.  And yes there is a recipe at the end of this post.

I made dinner most nights we were in France.  When I first saw the kitchen and its equipment in the Cagnes-sur-Mer place, I assumed we would eat dinners out.  Two burners, one of them very small, and three pots, none of them bigger than a 3 quart.  One big bowl, one wooden spoon, one spatula, and a handful of duller-than-dull knives (thankfully, I brought a knife with me).  But after getting used to my tiny kitchen, I found making dinner each night to be lovely.  Pleasantly easing into the evening after a busy day of laying on the beach or exploring beautiful French towns.

I made things that were relatively quick and easy.  It was hot so I tried to keep my time in front of the stove at a minimum and I never turned on the oven.  I made a giant salad every night and sometimes I just ate that with a big hunk of bread.  I also kept it simple because I didn’t want to buy a bunch of ingredients that I would just have to leave behind.

So, we ate Mediterranean for a month.  And it was awesome.  But I missed Mexican, Asian, and Indian food.  The first thing I made when we got back was a rice dish.  I could have made risotto in France but I didn’t and I was craving rice like crazy by the time we got home.  Also – quinoa.  I found quinoa there but somehow it just didn’t seem like the right thing to cook there.  I’ve made it several times since we’ve been home.

Now, I love quinoa but I don’t love it by itself and I don’t love it just boiled away in water.  It is a very charming seed (not a grain!) but it needs a little help.  I find I like it best made more as a pilaf.  I sauté shallot rounds in a little butter, stir in the quinoa, then pour in a bit of white wine.  I cook it until the wine is syrupy, then add the water.  I have found that if you add just 1½ times the liquid as you have quinoa, it turns out great.  (So for a cup of quinoa, I add ½ of wine and 1 cup of water.)  It is not mushy and has that slight and delightful crunch.

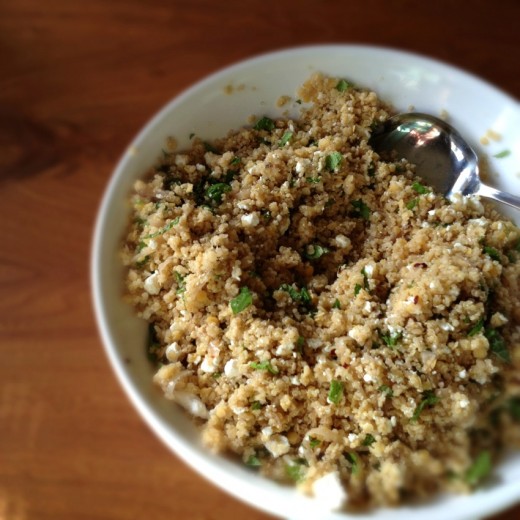
What else is going on in that bowl?  Red lentils, cooked just enough that they are soft but not so much that they lose their shape.  Ricotta salata, one of the world’s most charming cheeses.  A little crushed red pepper.  Lots of mint.  Lots of lemon juice.  A little olive oil.  Two additions I think would be lovely are pea shoots or broccoli rabe, the former blanched and finely chopped, the latter sautéed in olive oil, sprinkled with more red pepper flakes, and finely chopped.

One Year Ago:  Lemony Chickpeas and Oven-Dried Tomato Stew, Savory Spinach, Feta, and Peppadew Muffins, Salted Caramel Squares
Two Years Ago:  Chocolate Pavé, Roasted Cauliflower with Tomato, Dill, and Capers
Three Years Ago:  Blasted Broccoli, Gnocchi with Mushroom Sauce, Asparagus Ragout
Four Years Ago:  Green Goddess Salad with Romaine, Cucumbers and Avocado (pardon the terrible photos)

Quinoa with Red Lentils, Ricotta Salata, and Mint
Dana Treat Original
Serves 6-8

If you have never used ricotta salata, you are in for a treat.  It is very salty but still mild in flavor and has a nice texture.  Similar to feta but drier and the flavor is not as gamy.  You could use feta instead.  Don’t worry about the exact amount, a small wedge will do fine.

1 tbsp. unsalted butter
3 large shallots, peeled and thinly sliced
Kosher or sea salt
½ tsp. red pepper flakes
1 cup quinoa
½ cup dry white wine
1 cup red lentils
5 ounces ricotta salata
1 small bunch of mint, leaves stemmed and coarsely chopped
Juice of 2 lemons
2 tbsp. olive oil
Freshly ground black pepper

Place a medium (3 quart is perfect) saucepan over medium heat.  Melt the butter, then add the shallots along with a pinch of salt.  Stir in the red pepper flakes and cook until the shallots are brown in spots, about 5-7 minutes.  Stir in the quinoa, make sure it is coated with the butter and shallots, then pour in the wine.  Cook, stirring frequently, until the wine is mostly absorbed, then pour in a cup of water.  Bring to a boil, cover and reduce the heat to low.  Cook for 15 minutes, or until the liquid is completely absorbed.  Scrape the quinoa out into a large bowl.

Rinse out the saucepan, then pour in the lentils and cover them with cold water.  Bring to a boil, add a large pinch of salt, then reduce the heat to keep it at a lively simmer.  Scrape off any white foam that comes to the surface.  Cook just until the lentils are tender, avoid having them go mushy, about 10-12 minutes.  Drain and add to the quinoa.

Once everything is cool (room temperature is fine), stir in the olive oil and the lemon juice, a pinch of salt and some black pepper.  Crumble in the cheese and fold in the mint.  Season to taste with salt and pepper.  This salad will keep and taste great the next day, but the mint might turn black.


Bulgur Salad Stuffed Peppers

November 9, 2011

First, pears.  The winner of the Harry and David pear six-pack is commenter #74 – DVS – who tells us:

love love love H&D pears, though I haven’t had one in years. My favorite gift are the hand-decorated tiny gingerbread cookies my 92 year-old grandmother-in-law sends us every year.

Congratulations!  Send me an email so we can get you those pears!

A question that I get on a semi-frequent basis is whether or not I went to culinary school.  I did not.  I am a self-taught cook.  I learned by reading cookbooks, cooking a lot, and taking an occasional class here and there.  I love taking classes and always walk away with something that makes the cost and the time worth it.  I have two dear friends who attend all my cooking classes and they call all the little things they learn the “worth the price of admission tips”.  My friends have offered to write a guest post with their top ten of my tips.  Hopefully we’ll have that within the next month or so.

Anyway, we had a vegetarian cookbook author named Lukas Volger come to Book Larder recently.  He has a book called Vegetarian Entrées That Won’t Leave You Hungry.  The book is great.  I pick up a  lot of vegetarian cookbooks and 90% of the time, I put them back down because they contain the same old recipes that I have many versions of already.  Not this book.  The food is different  but not “out there”.  Hearty but not heavy.  Food I want to cook.  And eat.

Lukas is young and wiry and adorable.  He was effortless in the kitchen but not cocky.  He made three delicious dishes.  (Full disclosure, I did the prep work.)  When making this super tasty bulgur salad, he turned the heat up higher than I would have and got a nice char on the red onions.  The onions became not just a barely noticeable background flavor and texture but a full fledged lusty ingredient in their own right.  I always sauté my onions the same way, so it was nice to watch something different and then get to taste it.

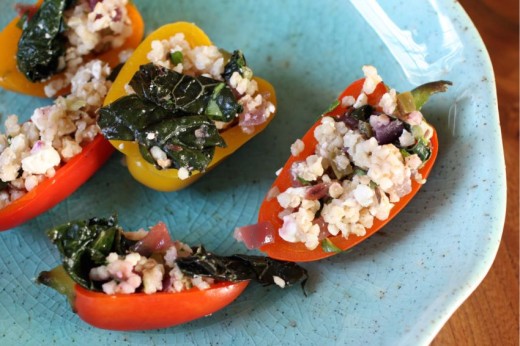
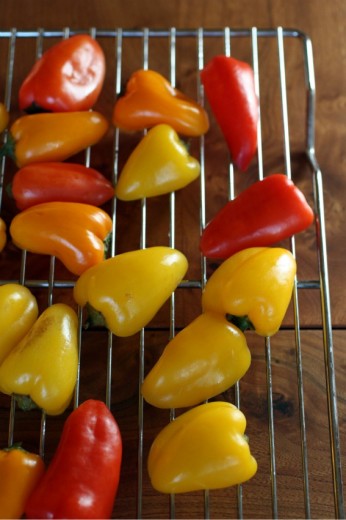
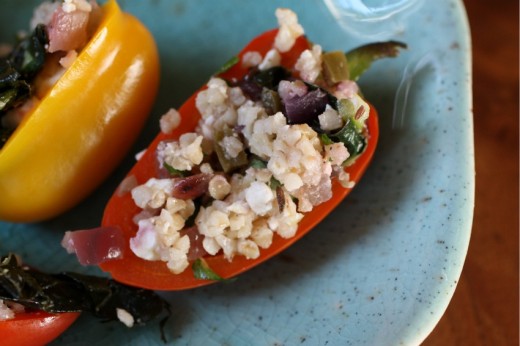
Lukas allowed us to all taste the salad and then we stuffed it into bell peppers that had been steamed.  I thought it was a lovely entrée and one day, when I spied bags of little bell peppers in the produce section, I knew bite-size versions were going on my next catering menu.

The recipe for the bulgur salad makes quite a bit so you can be confident that, even it if you use it to stuff peppers, you will get some delicious lunches out of it.  Just as an added note, you can steam peppers, large or small, by cutting them in half and scraping out the seeds and veins.  Place them in a large skillet (one with a lid) and pour in a bit of water.  Bring to a simmer and cover for 3 minutes, turn over and steam for another 3 minutes.  When Lukas made the larger peppers in the store, he placed them, filled, in a baking dish and covered it with foil.  They went into a 400º oven for about 20 minutes.  I didn’t bake my small ones.

One Year Ago:  Roasted Mushroom with Shallots and Fresh Herbs
Two Years Ago:  Creamy Artichoke Dip
Three Years Ago:  Spinach and Jerusalem Artichoke Soup

Bulgur Salad with Kale and Feta
Vegetarian Entrées That Won’t Leave You Hungry
Serves 4-6

If you are going to stuff small peppers, I recommend you dice the onions and cut the kale into smaller pieces so that you don’t have any bits that are too large.

1 cup bulgur
2 cups water
1 tbsp. canola oil or other neutral oil
2 tsp. cumin seeds
1 small red onion, sliced into strips
2 jalapeño peppers, minced (seeded for a milder heat level)
2 garlic cloves, minced
½ tsp. salt
¼ cup dry white wine or water
½ bunch kale, cut into thin strips
3 scallions, white and green parts, thinly sliced
½ cup coarsely chopped fresh cilantro
3 ounces feta cheese, crumbled
1 tbsp. olive oil

Combine the bulgur and water in a small saucepan over high heat.  Bring to a boil, then lower the heat, cover, and simmer for 15 minutes, until tender.  Strain off any water that hasn’t been absorbed.

Heat 1 tablespoon of the neutral oil in a sauté pan over medium-high heat.  Add the cumin seeds and let sizzle until fragrant, about 30 seconds.  Add the onion and cook until it’s browned around the edges, about 6 minutes.  Stir in the jalapeños, garlic, and salt.  Pour in the wine to deglaze the pan, scraping up any browned bits with a wooden spoon or spatula.  Add the kale and cook, tossing from time to time, until wilted, about 4 minutes.  Transfer to a mixing bowl and allow to cool slightly.  Stir in the scallions, cilantro, feta, cooked bulgur, and olive oil.  Taste and adjust the seasonings.  Serve warm, room temperature, or cold.  (Stored in an airtight container, this salad will keep for up to 3 days in the refrigerator.)


« Older Posts