Archive for April, 2012

A Slice of My Life – Week 18

April 30, 2012

Graham started a new before-school activity this week.  Lego club!  There were about five bins full to the brim of Legos.  Heaven for my little boy.

I was about to pay for my parking when a man jumped out of his car to give me his ticket that he wasn’t going to use.  Score!

I keep reading about the blow-your-mind bread coming out of the Corson Building and how you can buy it after 2pm at Sitka and Spruce.  Now, I didn’t make a special trip out of my to get the bread.  Um, not really.  OK, I did.  And yes, the bread is worth it.  Crust so dark and crackly that it shatters under the knife, sending crumbs everywhere.  A soft and airy and just slightly sour interior.  Addictive.

On April 27th, I took my kids to the park and I was still wearing my down jacket.  With the hood up.  Spring, please come join the party.

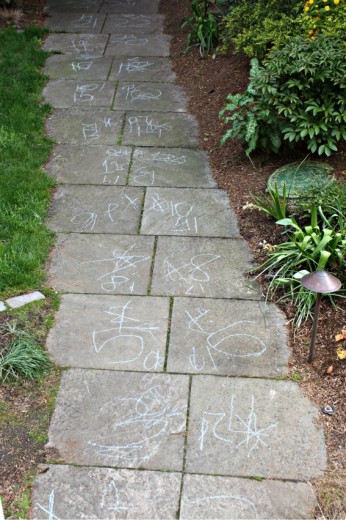
Ancient hieroglyphics or sidewalk chalk art?  You decide.

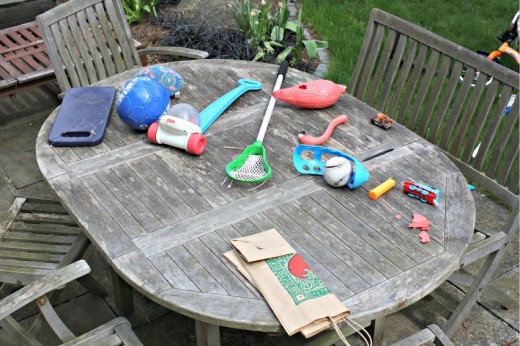
Cutting the grass means moving all toys off the grass.  Somewhere, hidden on our tiny patch of lawn, were all these things.  (Don’t ask what happened to that poor flamingo.)

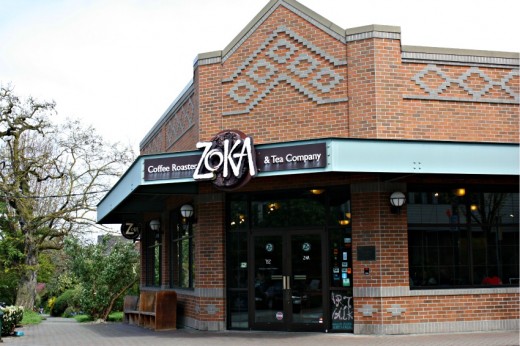
This is one of the best coffee shops in Seattle.  Upsides:  It is 1½ blocks from my house and makes a terrific mezzo (my drink of choice).  Downsides:  My Mezzo costs about a dollar more than anywhere else I order it and they seem to be incapable of honoring my request for decaf.

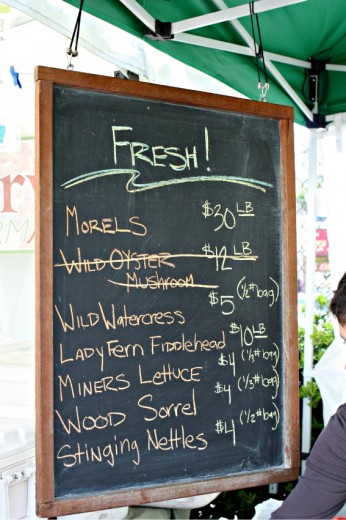
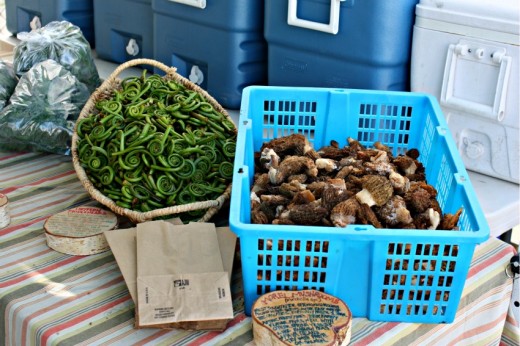
Spring farmers’ market.  This is at the Foraged and Found booth – the best place to buy wild mushrooms and other forest delicacies.  I bought nettles and miners lettuce.

I passed on the fiddleheads and the morels.  The fiddleheads freak me out and the morels will come down in price (from $30/pound).

Each week, Spencer brings any number of special projects home from school.  Usually they involve milk cartons and miles of masking tape.  This one is a special “bachine” (that would be machine) that tells us which way the wind is blowing.

Graham did a project about himself.  These are the things he wants to be when he grows up.  When we talked about it, he had the idea that he could be a football player in a stadium where he also had a pizza place and a sushi place.  Now we are on to something.

The boys and I took an afternoon trip to the Pike Place Market where we encountered this guy.

Sharing a beverage.

Randy and I have had season tickets to the Seattle Reperatory Theatre for the past couple of years.  Saturday night we saw our last play.  This season has been quite disappointing and I was really not in the mood to go.  The play was Clybourne Park and it was absolutely amazing.  I can’t stop thinking about it.


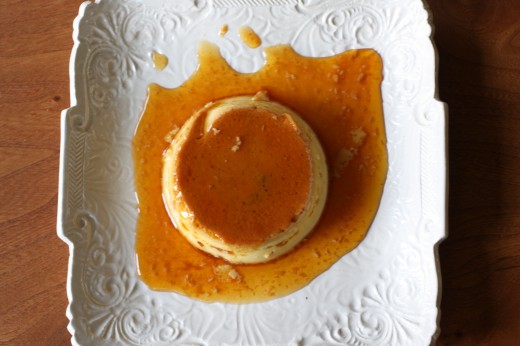
Flan!

April 28, 2012

Show me a dessert menu and I can tell you what I would order.  If there is chocolate, that is it.  If the chocolate is paired with caramel, I might hunt the server down to get our order in sooner.  No chocolate?  Fruit is all right, especially if it is an apple pie type thing in the fall or anything having to do with berries in the summer.  Sometimes a lemon tart can be nice.  After that, we kind of get into a no-man’s land of desserts for me.  Tiramisu, cheesecake, crème brulée – all things I would order really only under duress.  Like if I’m dying to have something sweet and there is no other choice.

Flan?  Or the French cousin crème caramel?  Not on my radar.  No eggy custard for me, thanks.  That is until recently.  This month I taught three versions of my Spanish cooking class and I put flan on the menu.  I usually try to include at least five dishes when I teach and I was going back and forth between doing another savory (gazpacho) and doing sweet (flan).  I remembered that I taught gazpacho last summer in a “beat the heat” class (which was funny because we had very little heat last summer), and there is nothing that interesting about watching me chopping vegetables and pouring tomato juice over them.  So, flan it was.
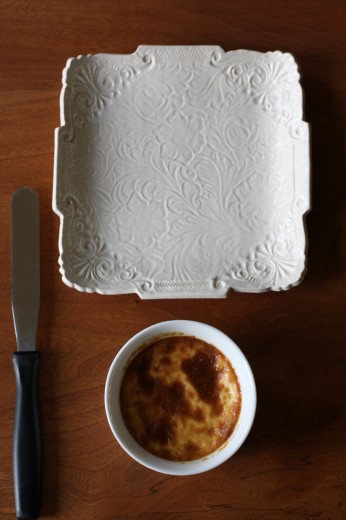
In order to make flan you make two things that seem to scare people.  Caramel and custard.  Being able to walk students through both of those tasks was very satisfying.  Because flan needs to be made the night before it is served, we had a lot of flan around here.  I would demonstrate how to make it and then the students would eat what I had prepped the previous day.  That meant that the version I made in class became our property the next night.  Brilliant, huh?

Who knew, but I really like flan.  As I was searching for recipes, I found countless versions (coconut, pumpkin, eggnog, lemon, dulce de leche, even asparagus!) but I opted to stay classic with this one.  I made it in both individual ramekins and also in a larger soufflé dish which makes a very impressive presentation.

Now that I have made it many many times, here are some tips.  First, the caramel.  I will tell you what anyone who has ever written a recipe for caramel will tell you – molten sugar is H-O-T so be careful when working with it.  Take your caramel off the heat about ½ a shade lighter than you actually want it (just shy of deep amber), because it will keep cooking and quickly.  This is especially true if you are pouring it into individual ramekins which takes more time than putting it in a big dish.  Whether you are using several small or one big vessel, cover your hand with an oven mitt when doing the tilting to cover the bottom and sides of the dish(es).  That way if a little caramel escapes, you won’t burn your hand.

Second, the custard.  No big insight here but I do find it helpful to put a piece of wet paper towel under the bowl where the egg yolks and sugar are.  This way you can whisk with one hand and pour in the milk/cream mixture with the other without your bowl rolling all over the place.  I do this when I make ice cream too.

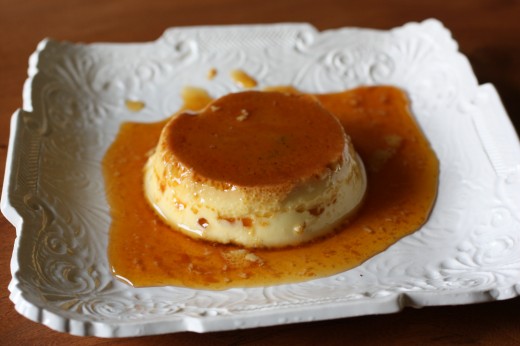
Third, removal and clean-up.  You will bake your flan in a water bath.  You will remove it from the baking pan and let it cool.  You will refrigerate it overnight.  You will take it out right before you are going to serve it and you will think, “There is no way this is coming out of the dish.”  And you will be wrong.  Trust me.  I know it looks like it’s in there forever.  I know it doesn’t make logical sense that you would coat the bottom and sides of a dish with molten sugar which hardens almost immediately on contact, fill that dish with custard, bake it, cool it, and refrigerate it and this thing that you created would not stick for all eternity.  I don’t know, magic happens in the kitchen sometimes.  Arm yourself with a palette knife or a very thin regular knife and run it around the edges of the dish.  Turn over onto a plate and it should just thwop right out.  (That is kind of the sound it makes.)  If it doesn’t, just repeat the knife technique and try again.  All of my many flans came out intact with a perfect puddle of caramel on top.  What you are left with is a dish (or dishes) that have some of the baked on caramel left in the bottom.  It looks kind of like a stained glass window.  It can be hard to get out.  My advice is just to let it soak overnight and it is easy to clean the next morning.

Wowza, I sound bossy.  Not trying to be so, just trying to get you to make flan!
One Year Ago:  Butterscotch Pudding Tarts, Greek Salad, Rhubarb “Big Crumb” Coffee Cake
Two Years Ago:  Leek Frittata, Strawberry Ricotta Tartlets, Tagine with Carrots, Potatoes, and Olives
Three Years Ago:  Miso Soup, Sushi Rice Salad, Classic Currant Scones

Flan
Adapted from Epicurious
Serves 6

If you happen to have 8 ramekins, this amount will fill 8 but 8 ramekins will not fit in a 13×9-inch pan.  If you want to serve 8 people, my advice would be to just make it in a large dish instead and cut it into slices.

1 ¾ cups whipping cream
1 cup milk (do not use low-fat or nonfat)
Pinch of salt
1/2 vanilla bean, split lengthwise
1 cup sugar
1/3 cup water
3 large eggs
2 large yolks
7 tablespoons sugar

Position rack in center of oven and preheat to 350°F. Combine cream, milk and salt in heavy medium saucepan. Scrape seeds from vanilla bean into cream mixture; add bean. Bring to simmer over medium heat. Remove from heat and let steep 30 minutes.

Meanwhile, combine 1 cup sugar and 1/3 cup water in another heavy medium saucepan. Stir over low heat until sugar dissolves. Increase heat to high and cook without stirring until syrup turns deep amber, brushing down sides of pan with wet pastry brush and swirling pan occasionally, about 10 minutes. Quickly pour caramel into six 3/4-cup ramekins or custard cups.  You can also use a 2 or 3-cup soufflé dish.  Using oven mitts as aid, immediately tilt each ramekin to coat sides. Set ramekins into 13x9x2-inch baking pan.

Whisk eggs, egg yolks and 7 tablespoons sugar in medium bowl just until blended. Gradually and gently whisk cream mixture into egg mixture without creating lots of foam. Pour custard through small sieve into prepared ramekins, dividing evenly (mixture will fill ramekins).  Transfer the pan with the full ramekins to the oven.  Carefully enough hot water into baking pan to come halfway up sides of ramekins, making sure not to splash any water into the custards.

Bake until centers of flans are gently set, about 40 minutes. Transfer flans to rack and cool. Chill until cold, about 2 hours. Cover and chill overnight. (Can be made 2 days ahead.)

To serve, run small sharp knife around flan to loosen. Turn over onto plate. Shake gently to release flan. Carefully lift off ramekin allowing caramel syrup to run over flan. Repeat with remaining flans and serve.


Yoga and Me

April 27, 2012

Every so often, I get an email from a reader asking me about my yoga practice.  It is something I have alluded to (like when I posted photos of 40 sun salutations on my 40th birthday, or every time I come back from a yoga retreat with Jen), but not something I have ever talked about in depth.  Because I am co-hosting a yoga retreat here in Seattle with the Yoga Tree this weekend, and because Jen and I are coming up on our three year anniversary of doing retreats on Bainbridge, I thought it was time to spend a little time talking about yoga.  (By the way, if you would like to sign up for the Seattle retreat, please visit this site.  You will get an amazing yoga class and a cooking class with me!)

Before I tell you my yoga story, I should say up front that yoga has mostly been a physical practice for me.  I am not a good meditator and it is hard for me to stay out of my head when practicing.  Pranayama (doing different breathing exercises) gives me a migraine so I tend to just focus on moving my body with my breath.  I do almost always dedicate my practice to someone, usually my son Graham, and I also send positive yoga vibes to people who need extra energy.  But I would still say that my yoga practice is mostly physical.

I went to my first yoga class in 1998.  I was working a job in radio advertising sales and several of the women in my office could not stop talking about a yoga class they loved.  I knew very little about yoga and decided to check it out.  I didn’t know there were lots of different kinds of yoga and if I had, I would have done a little more research.  But I went and I fell in love with yoga.

Now, I had never been into exercise at all.  I never played team sports.  I went to the gym because I had to but I didn’t enjoy it.  The only way I moved my body that I liked was when I took dance in college and when I went skiing.  But that was it.  After my first yoga class, I realized that I had been waiting for this kind of movement.  Some people’s bodies need running, others need soccer, mine needs yoga.

Unfortunately for me, that first yoga class, the one that hooked me, was a Bikram class.  Bikram, if you are not familiar with it, is a set series of 26 postures, each one done twice, in a room that is kept very hot.  Nowadays, there is “hot yoga” all over the place and only some of it is Bikram.  But in 1998, hot yoga meant Bikram.  There are people who swear by Bikram yoga.  I am not one of those people.  Yes, I fell in love with it but I also could never do it more than twice a week because the heat was really hard for me to deal with, and after a few months starting, I noticed that my lower back always hurt.  I felt like I continually needed to bend over and touch my toes to stretch it out.

After a year of doing Bikram, I knew something was just not right.  I took a month off and did some research.  Bikram is only one of many different types of yoga and, truthfully, it is not considered “true” yoga in that it does not really have any basis in Hatha yoga, an ancient lineage.  I am no expert here and I’m not trying to offend anyone, but most people who practice and/or teach yoga don’t recognize Bikram as “real” yoga.  There are a lot of things I could say here but I will just say Bikram = not for me.

I was lucky enough to spend the next part of my yoga journey at the Yoga Tree, a lovely studio in the Fremont neighborhood of Seattle.  (By happy coincidence, the Yoga Tree is now right next door to Book Larder.)  The Yoga Tree specializes in Iyengar yoga which is the yoga of alignment.  Poses are taught slowly with incredibly attention to detail.  Making sure that students learn to do everything from downward dog to handstand slowly and correctly insure that people get the feeling for the pose in their body and also limits injury.  The use of props is encouraged to make things that seem impossible attainable.  (Can’t reach your toes?  Put a block under your fingertips instead of just hanging out there in space and hurting your back.)  To this day, whenever I find myself in Warrior 2, I look down at my feet, making sure I have heel to arch alignment.

The Yoga Tree also offered a few other classes in different styles and one of those was Ashtanga.  I loved the Iyengar classes but after a year or so, I was ready for something a little more fast paced.  Ashtanga was perfect for me.  Like Bikram, it is a set series of postures, but this one felt like a dance to me.  Each class starts with ten sun salutations, moves through a series of standing postures, a series of seated postures, and a series of finishing postures.  You spend five breaths in each pose and each is linked to the next through breath.  It is very challenging but very graceful.  I loved it.

I was fortunate all along the way to have amazing teachers.  I looked forward to going to yoga each time I went and was so happy to see the teacher, so grateful for them.  I was working another sales job at the time and I knew my clients did not feel the same way about me.  When I got laid off, I decided I wanted to do something I loved.  I wanted to teach yoga.  I researched training programs and ultimately decided that since Ashtanga was the practice that spoke most clearly to me, I should train in that type.  I ended up in the same program where my Ashtanga teacher had trained in San Francisco.  (You can read a bit more about my time there in this post.)  It was an incredible and very intense month after which I returned to Seattle and started to look for jobs.

I taught for two years, some classes at gyms and some at yoga studios, including my beloved Yoga Tree.  I absolutely loved teaching.  To be able to share something so powerful with other people was incredible for me.  I kept taking classes myself, always wanting to strengthen my own practice and also to become a better teacher.  Those two years were wonderful ones in my life.  My engagement, marriage, and move to a new house all happened during that time.  I was strong, happy, healthy.

When we moved to London, about a year after we married, I said goodbye to my classes but I kept up my own practice.  Three days a week in our flat I would move our little coffee table out of the way, unroll my mat, and work my way through the primary series of Ashtanga.  There were a couple of studios somewhat nearby but they were incredibly expensive and I just decided to do my own thing.  Then I got pregnant and stopped doing yoga on my own.  When we moved back to Seattle, I did some pre-natal yoga (which I found to be a giant waste of time) and then I had a c-section and an endlessly hungry baby and I never thought I would see the inside of a yoga studio again.  I did start on the path to getting my practice back when Graham was about a year old, but after a few months I got pregnant again and just basically gave up.

About three years ago, I decided it was time for me to reunite with my yoga practice.  I deliberately chose a studio close to my house so that getting to and from was not an issue.  I found teachers I liked and class times that worked and tried time and time again to not remember where my practice once was.  Now that my children spend more time in school, it is easier for me to get to class.  When I had very little free time, devoting two hours to yoga was hard to do, but now it is a part of my routine.  I am in a new studio where the room is kept warm, not too hot, and the practice is very challenging.  I have a long way to go.  Before starting there, I had a lapse for a few months where I only went once a week or so.  I find that I lose so much strength and flexibility so quickly.  I am building back up and try to go four times a week.  It feels good to be back.


Editing is Important

April 25, 2012

Part of cooking well, like dressing well, is knowing when to edit.  There is a point where the dish is close to being just right and you can either just trust that it is good, or you can keep adding to it and potentially ruin it.  I think this is a particular danger with vegetarian food.  Without the protein anchor, sometimes it might feel like you need to keep adding layers of flavor to make up for what is “missing”.  Too many layers of flavor is my main critique of Seattle’s vegetarian restaurants and why I almost never frequent them.

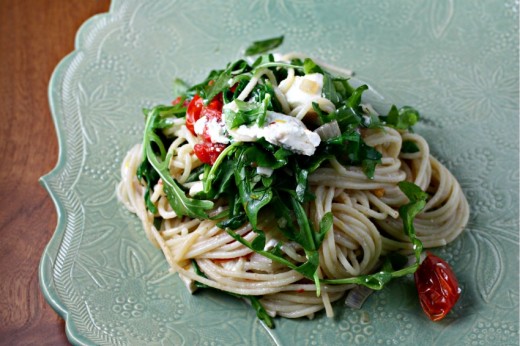
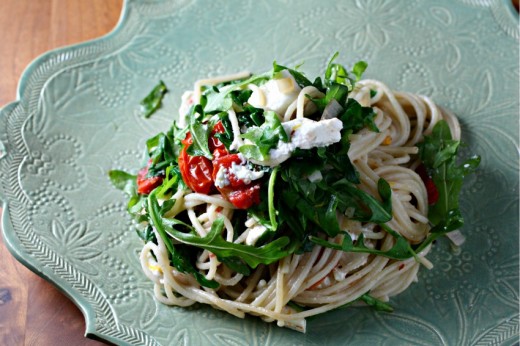
A dish doesn’t have to have a whiz! bang! pop! to be lovely.  I first got this idea from Tracy and her Angel Hair Pasta with Arugula and Lemon.  Every so often a dish sticks in my overstuffed brain and lately it has been this one.  As we were driving back from our decadent weekend in Walla Walla, I started dreaming of superfine pasta stuffed to the gills with arugula.  I had recently bought some angel hair in a lovely package and we were lucky enough to visit a goat cheese farm while in Walla Walla and had purchased some delightful mild feta.  I decided that, rather than make Tracy’s dish to the letter, I would just riff on it.

As it turns out, my dish is not much like hers.  That is what you get when you don’t actually consult a recipe you are trying to riff on!  But we loved this light and sunny pasta and it came together in no time.  I put some small cherry tomatoes in the oven to roast, got my pasta going, then satuéed shallots and red pepper flakes in a bit of olive oil.  I grated in the zest of a Meyer lemon and then waited for the pasta to cook.  Once it was just shy of al dente, I scooped it into the pan with the shallots and added lemon juice, lots of arugula, small cubes of feta, and the roasted tomatoes.  I used the pasta cooking water to loosen the sauce.  As I was tossing it all together, my mind was saying, “Olives! Pine Nuts! Parmesan!”, but I was able to edit and keep it simple.

One Year Ago:  Brown Sugar Pound Cake (I’ve probably made this cake more than any other)
Two Years Ago:  Zucchini and Olive Salad
Three Years Ago:  Ricotta Calzones with Sausage and Broccoli Rabe

Pasta with Lemon, Arugula, and Roasted Tomatoes
Dana Treat Original (but thanks Tracy for the inspiration)
Serves 2-3

My noodles were actually more like a cross between angel hair and spaghetti, so I’m suggesting you use spaghettini in the recipe below (it’s a thinner spaghetti).

Olive oil
20 small cherry tomatoes
Kosher or sea salt and freshly ground black pepper
1 large shallot, finely diced
½ tsp. red pepper flakes
Zest and juice of 1 Meyer lemon
4 ounces feta cheese, cut into small cubes
4 ounces arugula, plus more for garnish
8 ounces spaghettini

Preheat the oven to 375ºF.  Place the tomatoes on a small baking sheet.  Drizzle with olive oil and sprinkle with salt and pepper.  Roast in the oven until they soften, brown in spots, and start to collapse a bit, about 20 minutes.  Set aside.

Meanwhile, place a large skillet over medium heat.  Drizzle in just enough olive oil to coat the bottom of the pan, then add the shallots, red pepper flakes, and a large pinch of salt.  Sauté, stirring frequently, until the shallots soften and start to brown in spots, about 5 minutes.  Grate in the lemon zest and turn off the heat.

Meanwhile, bring a large pot of salted water to boil, then add the pasta.  Cook according the package directions until just al dente.  Taste it to make sure.  Using tongs, transfer the pasta to the skillet with the shallots.  Turn the heat to low and stir to coat the pasta with the shallots and pepper flakes.  Ladle in some pasta cooking water to loosen the sauce.  Add half of the arugula and keep tossing the pasta so that the arugula wilts.  Add the other half of the arugula along with the lemon juice, feta cheese, and the tomatoes.  Add more cooking water if the pasta seems too dry.  (You can also use olive oil if you prefer.)  Toss carefully.  Serve each portion topped with more of the arugula.


Maple Blueberry Tea Cake

April 24, 2012

Some people think that white flour and white sugar are evil.  I don’t feel that way.  I’ve been making treats for years (and years and years) with both of those snowy ingredients and I feel just fine about them.  In this post, I talked about how I feel like balance – in food but really in anything – is key.  If you’ve been eating lots of white flour and white sugar lately, maybe you should eat some kale.

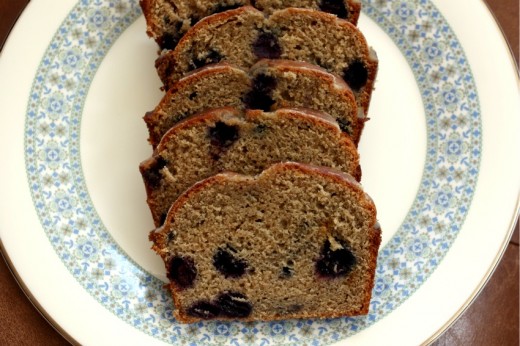
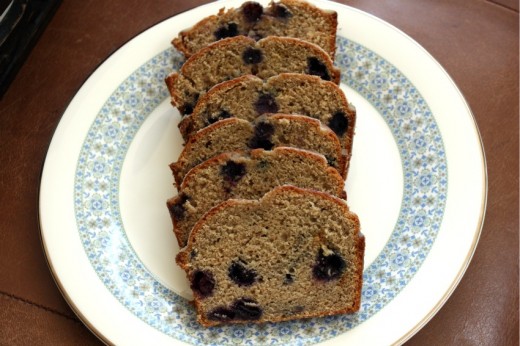
Or maybe you should eat this cake.  It has half whole wheat flour and is sweetened with maple syrup.  Now to some people, that may sound like health food.  Don’t worry, it is still cake.  If you are used to never having sweets, this might be a mind-blowing after dinner treat.  If you, say, eat Easter candy after dinner, this might be more of a very subtle and lovely brunch cake.  Either way, I like it for its coffee-with-milk coloring, its subtle sweetness, and the burst of (frozen!) berries.

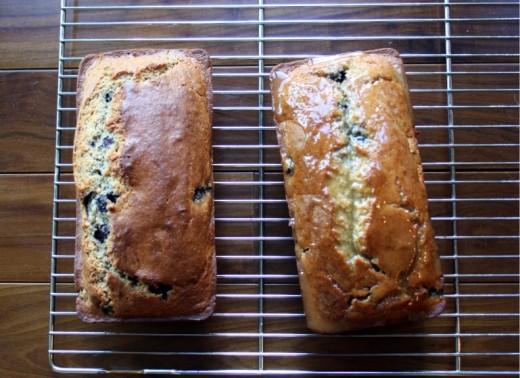
I followed my own advice and doubled the recipe for two cakes.  Do you do this?  Any time I make a pound cake, quick bread, or loaf cake of any kind, I double it.  No extra effort and that second one, unfrosted or unglazed, will last for 1-2 months in your freezer.  So you are never without cake!  Don’t tell me you only have one loaf pan.  Make a huge investment of $10-$20 and buy another one.  They stack together so they don’t take up any extra room.  I’m telling you – do it.  You can thank me later.  Or send me a cake.

One Year Ago:  Carrot Pancakes with Hummus and a Carrot Salad, Roasted Shallots
Two Years Ago:  Crostini with Goat Cheese and Leek Confit
Three Years Ago:  Gruyère Gougères, Mississippi Mud Cupcakes

Maple Blueberry Tea Cake with Maple Glaze
Cook This Now
Makes 1 8-inch loaf cake (see above)

If you are going to double the cake but plan on serving one of them.  Only make the glaze as written.  Cakes freeze best without the glaze.

For the cake
¾ cup plus 2 tbsp. all-purpose flour
¾ cup plus 2 tbsp. whole wheat flour
1½ tsp. baking powder
¼ tsp. baking soda
¼ tsp. kosher salt
2/3 cup pure maple syrup
1 large egg, lightly beaten
½ cup milk
6 tbsp. (¾ stick) unsalted butter, softened
1 cup fresh blueberries (I used frozen unthawed berries)

For the maple glaze
3 tbsp. maple syrup
3 tbsp. unsalted butter
Pinch kosher salt
¼ cup confectioners’ sugar

Preheat the oven to 400ºF.  Lightly grease an 8-inch loaf pan.

In a large bowl, combine the flours, baking powder, baking soda, and salt.

In a separate bowl, whisk together the maple syrup, egg, milk, and melted butter.  Pour the maple syrup mixture into the flour mixture and fold together until just combined.  Gently fold in the blueberries.  Pour the batter into the prepared pan.  Bake until golden brown and a tester inserted into the middle comes out clean, 50 to 60 minutes.

Transfer the cake to a wire rack set over a rimmed baking sheet; cool completely.  Once cool, run the tip of a knife or an offset spatula around the edges of the pan to loosen the cake.  Place a plate over the pan.  Flip the cake onto the plate.  Tap the sides and top of the pan to help release the cake (the berries might have gotten stuck and this helps unstick them.  Remove the pan.  Turn the cake right-side up and put on a rack-lined baking sheet.

In a small saucepan over medium heat, make the glaze:  Stir together the maple syrup, butter, and salt until combined.  Stir in the sugar and cook until completely dissolved.  Pour the warm glaze over the cake, allowing the excess glaze to drip onto the baking sheet.  Slice and serve.


« Older Posts