Category: Beans

Stocking Up

June 17, 2013

I know.  A few more salads and I’m going to have to change the name of this site to Dana Salad.  I can’t help it.  I love salad and it is salad season.  Actually, in California it is always salad season.  I’m making a name for myself as a good cook and baker in my community and some people have even called me a salad master.  This is serious stuff.  It is all because of inspiring produce and my experience – years of making lots of salads.

This beauty grew out of having a well-stocked refrigerator.  Most cooks will tell you that having a well stocked pantry is the key to cooking on fly but in my life, I need produce in the fridge too.  I shop for specific meals I am making but I also just kind of buy what I like.  This goes for cheeses too.  I regularly go to the Cheeseboard Collective, an incredible cheese shop in Berkeley, and just buy chunks of things that speak to me.  Having a couple of good cheeses can make something decent into something special.

I needed a salad to bring to a kindergarten end-of-the-year potluck.  In my head I had a couscous dish that my mom used to make.  It is entirely too boring for me to recount the ways in which I changed this dish, so much so that my version only resembles the original in the dressing, but I think it is important to note that it was so very good because I had bits of pieces of some of my favorite things on hand.  Why did I buy three ears of corn at the market?  Because they looked good and we love corn.  I had no dish containing corn on the menu that week, but we like corn and I figured I would use it somehow.  Just that one decision added deliciously to my salad.  I cook so much and always seem to be making food to share, that even impulse purchases almost always get used up.

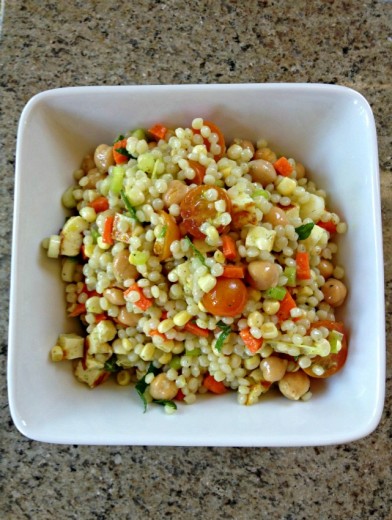
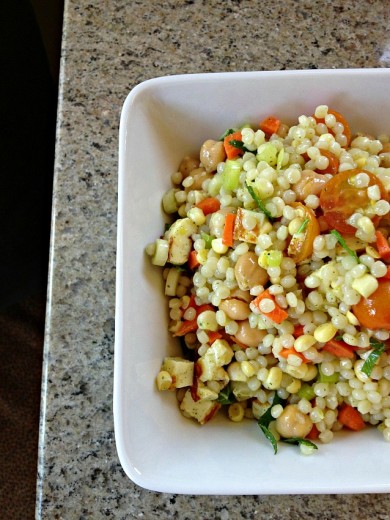
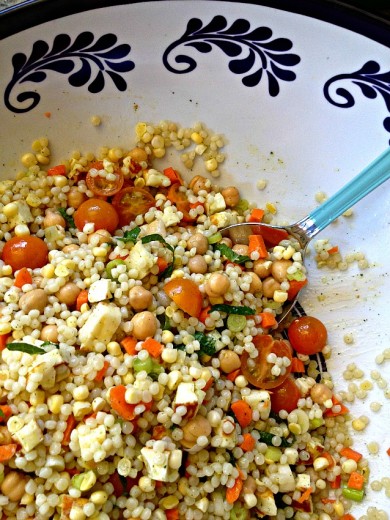
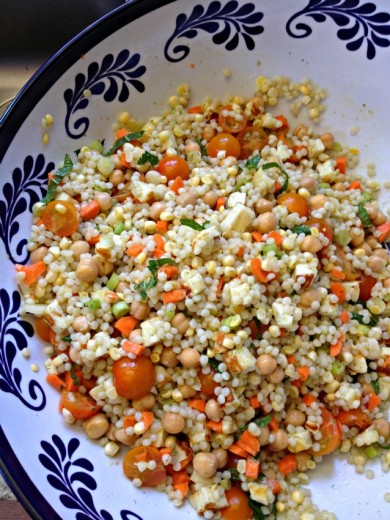
So what is going on here?  Israeli couscous, chunks of carrot, cherry tomatoes, chickpeas, and the kicker – haloumi cheese.  In my mind I was going to use feta but it turned out that I used the last of it in this salad.  Because I love haloumi, I always have some in my cheese drawer.  I like to be able to fall back on this appetizer, especially now that I have a lemon tree to draw from.  I used to stockpile it a bit because it was not always that easy to find but that is changing.  Whole Foods is a pretty reliable source as is any well-stocked cheese shop and just today, I found it at Trader Joe’s, pre-sliced and about $5.  I’ve never paid less than $10 so that is a huge deal.

Two Years Ago:  Mandelbrot, My Mostly Not Potato Salad, Gnocchi with Morels and Spring Peas
Three Years Ago:  Brown Rice with Tempeh and Tahini Sauce, Pasta with Chickpeas, Chili-Cheese Gratin Sandwiches
Four Years Ago:  Spicy Chickpeas with Ginger and Kale, Chilled Avocado Soup, Grilled Vegetable Quesadillas
Five Years Ago:  Barefoot Contessa’s Brownies, Curried Red Lentil Stew, Feta and Ricotta Cheese Pie

Israeli Couscous Salad with Haloumi and Mint Vinaigrette
Dana Treat Original
Serves 8 or more

The corn is not cooked in this recipe.  I like the crunch of raw corn but if you have leftover cooked (or grilled!) ears of corn, by all mean use them.  I would never normally rinse Israeli couscous but doing so keeps it from clumping.

For the Mint Vinaigrette:
¾ cup mint leaves, plus a few more for garnish
3 tbsp. white wine vinegar
1 garlic clove, roughly chopped
1 tsp. Dijon mustard
¼ tsp. sugar
½ tsp. kosher or sea salt
2/3 cup olive oil

For the salad:
1½ cups Israeli couscous
1 package haloumi cheese, cut into ¼-inch thick slices
1 bunch scallions, white and pale green parts only, thinly sliced
2 medium carrots, peeled and cut into very small chunks
2 ears of corn, shucked, kernels stripped off the cobs
½ pint cherry tomatoes, halved
1 14-ounce can chickpeas, drained and rinsed

Make the vinaigrette:
Place everything except the olive oil in a blender jar.  Blend to a paste.  You might have to scrape down the sides of the jar.  Through hole in the top, slowly pour in the olive oil, allowing it to emulsify.  Taste for seasoning and adjust if necessary.  (This can also be made in a food processor.)

Make the salad:
Bring a medium pot of salted water to a boil.  Pour in the Israeli couscous and allow to cook, stirring occasionally, until al dente, about 6 minutes.  (Taste to make sure.)  Drain and rinse, then drain again.

Place a nonstick skillet over medium-high heat.  Carefully lay the haloumi slices in the pan.  Cook until lightly browned in spots, about 3 to 5 minutes, then turn over and cook the other side.  Remove and allow to cool enough to handle, then cut into roughly chickpea sized pieces.

Place the couscous and all the other salad ingredients, including the cheese, in a large bowl.  Drizzle lightly with the dressing (you won’t need all of it).  Toss carefully and taste to make sure there is enough dressing and there is enough salt.  Adjust as necessary.  Just before serving, toss in some slivered mint leaves.


My Old Job

April 25, 2013

My first job working with food kind of fell in my lap.  I had a good friend who had recently hired a personal chef.  While she liked the convenience, she found the food heavy and not all that inspired.  Without thinking too carefully I said, “I’ll cook for you.”  Without thinking too carefully she said, “OK.”  And suddenly, poof!, I was a personal chef.  The arrangement worked out for both of us and my friend recommended me to another family.  Up until I had Spencer, I cooked for those two families three nights a week.

When all was said and done, I did that job for three years.  I had my two regular families for all that time and a few others who stopped and started.  Graham, who is now eight, was 17 months old when I started cooking for money and I did it through my pregnancy with Spencer and, after a short maternity leave, when he was an infant.  I was lucky to have had very flexible clients who were great eaters and were just happy to eat whatever I brought them.  I was able to be creative and make a serious dent in my “want to make” recipe file.

I kept notebooks with every menu I ever made.  It is amazing to look back and see the food I was able to produce in my kitchen with very small children and not a lot of time.  In all three years, I almost never repeated dishes and when I did, it was because someone had made a request.  I’ve been thinking about those days recently because I’ve been thinking about whether or not I’d like to start personal cheffing again.  I loved doing it and the only reason I stopped is because I found the work too solitary.  Teaching cooking classes allowed me to have prep time alone but then to share time and food with others.

Whenever I think about starting up again, I think of this dinner.  It was the first thing I made for my first client and I agonized over the choice.  I felt so much pressure (from myself) for the meal to be a hit.  I wanted so badly to succeed.  Because of that, I went to a no-fail cookbook, Vegetarian Suppers from Deborah Madison’s Kitchen, and made a favorite dish.

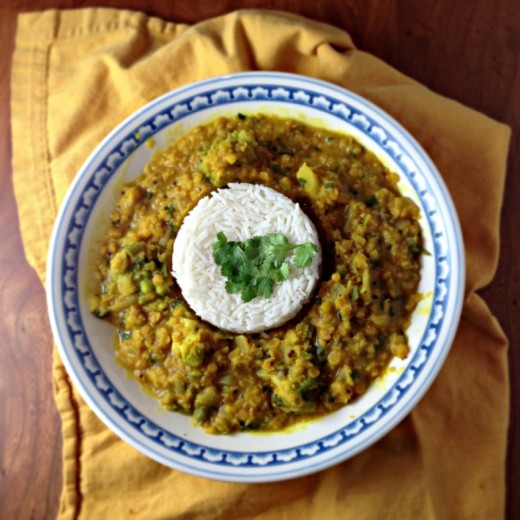
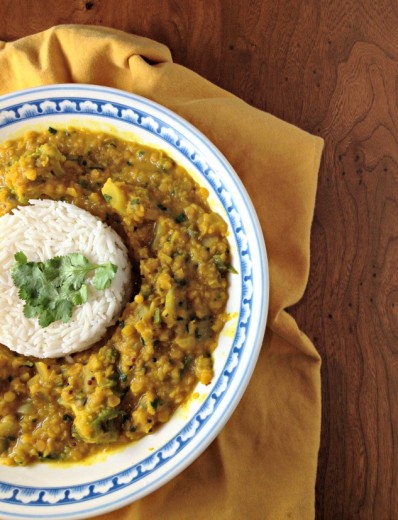
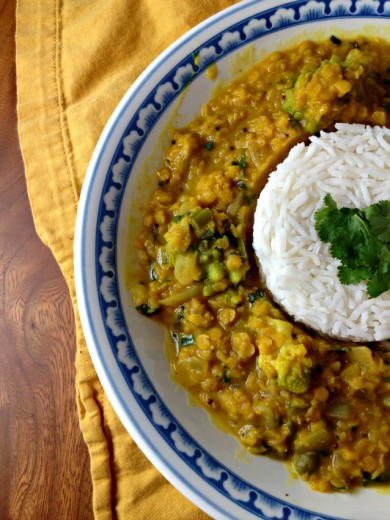
Over the years since I hung up the personal chef hat, I have made this dish many times.  I’ve made others like it too – I just really like my red lentils.  They are quick cooking and healthy and in about the time it takes for the rice to cook, you have a tasty and nutritious meal.  Recently I saw tables full of broccoli romanesco at the farmers’ market and whenever I see that beautiful vegetable, I always think of this dish.  After several years of making other versions of red lentil dhal, it was nice to come back to an old favorite.  There are a lot of steps to her recipe, and a little underseasoning, so I tweaked it to my current tastes.  Still, a classic is a classic.

One Year Ago:  Ginger Fried Rice with Roasted Tempeh, Maple Blueberry Tea Cake
Two Years Ago:  Butterscotch Pudding Tarts, Greek Salad
Three Years Ago:  Leek Frittata, Strawberry Ricotta Tartlets
Four Years Ago:  Ricotta Calzones with Broccoli Rabe, Miso Soup
[/donotprint]
Fragrant Red Lentils  with Broccoli Romanesco
Adapted from Vegetarian Suppers from Deborah Madison’s Kitchen
Serves 4

The final swirl of spices in oil might sound like an annoying extra step but it is really what makes this dish special.  I like to use coconut oil in this type of cooking but feel free to use butter, ghee, or another type of oil.

3 tbsp. coconut oil
1 small onion, finely chopped
1-inch piece fresh ginger, peeled and minced
3 cloves garlic, minced
1 large jalapeño chile, seeded and diced
2 tsp. ground cumin
1 tsp. ground coriander
1½ tsp. ground turmeric
¼ tsp. cayenne
2 cups red lentils
1 bay leaf
Kosher or sea salt
1 can coconut milk
1/3 cup finely chopped cilantro, plus extra for garnish
1 head broccoli romanesco or cauliflower, cut into bite sized pieces
1 tsp. mustard seeds
1 tsp. cumin seeds
Cooked basmati rice for serving

Place a large saucepan over medium heat.  Spoon in about 1 tablespoon of the coconut oil, then add the onion and a large pinch of salt.  When the onion is translucent and starting to brown, about 5 minutes, add the ginger, garlic and chile.  Sauté for a couple of minutes, then add the ground cumin, coriander, turmeric, and cayenne.  Stir for one minute, then add the lentils.  Stir to coat the lentils with the spices, then pour in 3 cups of water.  Turn up the heat so the mixture boils, then add the bay leaf, and turn the heat down so the mixture simmers.  Partially cover the pot and cook until the lentils are soft and most of the water is absorbed, about 15 minutes.

Add the coconut milk and simmer for another few minutes until the lentils are very soft and falling apart.  Remove from the heat and stir in the cilantro.  Cover and keep warm.

Steam the broccoli romanesco or cauliflower until tender.

To finish, heat another tablespoon of coconut oil in a small skillet over medium-high heat.  Add the mustard and cumin seeds and cook until they become very fragrant and the mustard seeds start to pop.  Immediately add to the red lentils and stir to combine.

To serve, pack the hot rice into ramekins and turn them upside down, one each, in a shallow pasta bowl.  Spoon a cup or more of the lentils around them, then lift off the ramekin, leaving the rice intact.  Top with the broccoli romanesco and garnish with cilantro sprigs.


Dinner or Post?

April 11, 2012

As a food blogger, I have a choice.  I can make getting the shot and documenting the meal the priority, or I can make interacting with my guests and eating the meal the priority.  Guess which way it went last night.

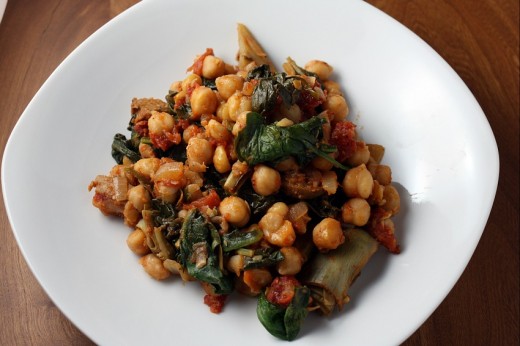
When this mind-blowingly delicious dish first made it into the bowl, it was gorgeous.  A riot of color.  My friend Deb was here with kids and we had spent the early part of the evening catching up, dishing out pasta and chickpeas and carrots and hummus to our tribes while we drank white wine.  On the stove, our chickpeas were bubbling away in a pot of water and the onions and (veg) sausage were in a sauté pan making us hungry with their smell.  (There are few things in this world that smell better than onions sautéing, in my opinion.)  The kids, having not seen each other in a long time (a month is a long time when you are seven, six, five, and four), ran downstairs to play and I put the finishing touches on our dinner.

You know when you just know something is going to be good?  This recipe comes from Gail Simmons’ book Talking with My Mouth Full which is a memoir with just a few recipes.  I think she is very interesting and intelligent but the book just doesn’t do her justice (sorry Gail!).  However, if the rest of the recipes are as good as this one, I will recommend you buy the book anyway.  A quick glance at the ingredients list told me this would be a winner.  Lots of chickpeas, fresh artichokes, smoked paprika, spinach – some of my very favorite things.  I have been using more vegetarian sausage products so I knew swapping the kielbasa for Tofurkey would not be a problem.  I spooned us each a healthy portion and then paused.  Should I take a photo?  I’m hungry.  Deb is waiting for me in the dining room.  Where is my light?  Where is my memory card?  Which lens do I have on my camera?  Oh, look at all that steam – hard to capture that in a photo.  Screw it.  I’ll take one after we are done.

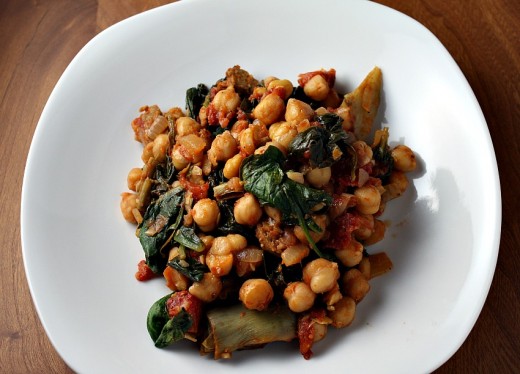
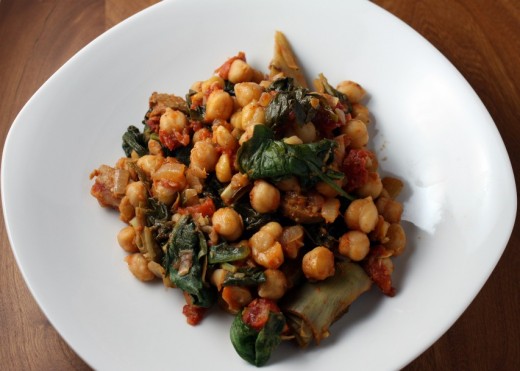
So this happened.  A picture that does not do this dish justice.  A kind of wilted flabby picture.  One you might very well pass by.  Don’t!  This stew has such a smoky hearty flavor and so many wonderful textures that I kind of fell in love with it.  I had planned to make it with frozen artichokes but then found some fresh beauties at the store and went that way instead.  I hear that frozen artichokes are a pretty acceptable substitute but when fresh are available, I always buy those.  I find breaking them down to be oddly meditative.  I know, there is so much waste! with fresh artichokes.  I’ll tell you what I tell my classes – get over it.

Finally, I used dried chickpeas in this dish because I really prefer them and I don’t think they take nearly as long to cook as most directions say.  With even a quick soak (2 hours), they cook up nice and tender in about 45 minutes.  But I’m sure canned would be fine here.  Use 2 15-ounce cans.

One Year Ago:  Lemon Cream Tart
Two Years Ago:  Black Bean Tostadas with Slivered Cabbage, Avocado, and Pickled Onions
Three Years Ago:  Butterscotch Spiral Coffee Cake

Chickpea, Artichoke, and Spinach Stew

Adapted from Talking with My Mouth Full
Serves 6-8

Gail says this serves 4 but it makes a HUGE amount of stew!  She adds 2 cups of stock to the dish, which would probably yield even more servings, but I opted to leave it out for a less liquid-y stew.  Next time I might add ½ a cup or so.

2 cups dried chickpeas, soaked overnight and drained
Olive oil
1 large onion, finely diced
2 garlic cloves, minced
½ pound vegetarian sausage (I like Tofurkey brand Italian style – use half a package)
One 28-ounce can diced Italian tomatoes
2 large artichokes, trimmed, chokes removed, hearts quartered and reserved in lemon water
2 tsp. smoked paprika
1 bay leaf
Kosher or sea salt
Freshly ground black pepper
10 ounces fresh spinach

In a medium saucepan, cover the chickpeas with 2 inches of water and bring to a boil.  Reduce the heat to low and simmer until the chickpeas are tender 45-60 minutes.  Add water as necessary to maintain level.  Drain the chickpeas and set aside.

Place a large heavy pot (like a Dutch oven) over medium heat.  Drizzle in just enough olive oil to coat the bottom of the pot, then add the onions and a large pinch of salt.  Cook until the onion begins to turn translucent, about 5 to 7 minutes, then add the garlic.  Cook for another 2 minutes, then add the sausage.  Continue to cook until the sausage starts to brown, about 10 minutes.  Add the tomatoes with their juices and cook until sizzling, about 4 minutes.  Add the artichoke hearts, smoked paprika, and bay leaf; cook for 5 minutes.  Add the drained chickpeas and bring to a boil.

Reduce the heat so that the stew simmers, then cover the pot and allow the artichoke hearts to cook through and the flavors to meld.  Check periodically to make sure nothing is sticking and add a bit of water as necessary.  When you can easily pierce an artichoke heart with a fork, remove the cover and start adding the spinach in batches.  Cook until all the spinach is wilted – this will take another 5 to 7 minutes.  Taste and adjust the seasoning as necessary.


College Majors and Eggs for Dinner

February 23, 2012

I graduated from college with a degree in theatre.  I got plenty of “What are you going to do with a degree in theatre?”, though thankfully, not from my parents who were supportive of a less conventional major.  I attended a liberal arts college so there were plenty of English and Art History majors, but there were also lots of Economics and Government majors who all thought their degrees would be more “useful”.  My college roommate’s father allowed her to major in theatre but only if she double majored in Economics.  Not a lot of crossover in those two fields.

While I did not go on to become an actress, nor did I ever attempt to become an actress, I feel like my degree has been extremely useful in my life.  At the most basic level, I learned a lot about theatre and plays and I had a chance to read some of our greatest examples of literature.  Randy and I make it a priority to go the theatre and I am always amazed by how much knowledge I have retained.  (I can’t say the same about my math class.)  I got to experience putting on the makeup and costume of another person and becoming that person for a few hours every night.  I learned the art of working ahead – getting school work done a week before it was actually due so that I would have production week free from those pressures.  I also learned how to do work behind the scenes as a stage manager, makeup artist, costume assistant.  I learned that, no matter how intense the butterflies in my stomach, I would never actually throw up, and how to channel that adrenaline into a better performance.

Beyond those four years of acting, directing, reading, I also learned how to speak clearly, make eye contact, appear calm even when I am not, and use my voice effectively.  I’ve used those skills while performing in plays or singing in coffeehouses but also in every job interview I have sat through, every date I have been on, every presentation I have ever made, and every class I have ever taught.  Like many of my classmates, I would never have imagined myself doing what I do now when I was throwing my cap up in the air in May of 1992.  But I can’t believe how much I love it.

I know I mention my cooking classes here often but I don’t think I’ve mentioned how I feel about them.  I love teaching.  I really do.  I taught yoga from 2001-2003 and I loved that as well.  Sometimes a special thing happens between teacher and student, especially when the teacher is really passionate about what they teach, and I feel lucky to have experienced that feeling in two different spheres.  I am in planning mode for my spring quarter of classes and am really excited about what the next few months will hold.

Alas, teaching means testing.  And I don’t mean making my students take a test.  I mean searching out recipes, or developing my own, and making sure, time and time again if necessary, that they work.  I mean sometimes eating the same thing several nights in a row while trying to get it right.  It’s all worth it of course.  But sometimes, when I am gearing up for a busy couple of weeks, I miss just being able to, you know, make dinner.

I had a little window before my cooking life became not my own and I knew I had to take advantage of that freedom to just make something I wanted to eat.  Not test.  As is often the case, I got a little overwhelmed with choices.  I have so much bounty in terms of recipes between books, magazines, blogs, restaurant experiences – how to choose what to make.  Perhaps you are familiar with this feeling.  As I started to get overwhelmed and ordering pizza started to seem like a good idea, I opted to just stick with a cookbook that is relatively new to me and exciting.  It was the jumping off point for this salad and also has the least imaginative name ever.  But boy, did we love this dish.

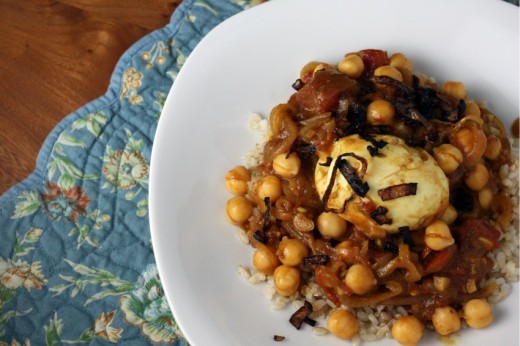
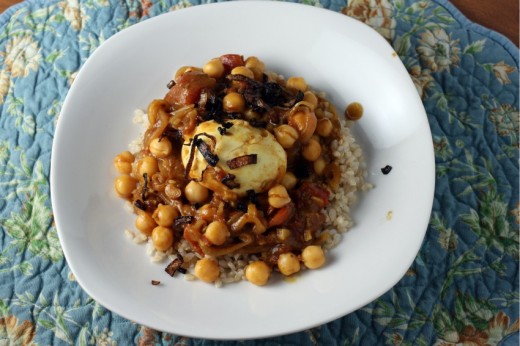
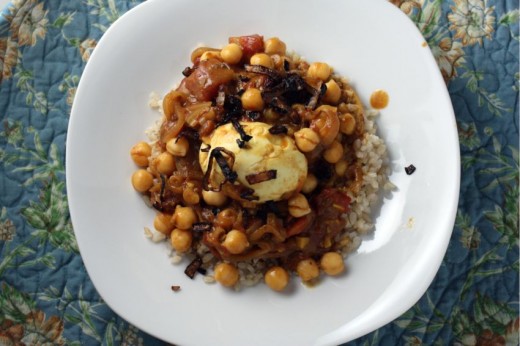
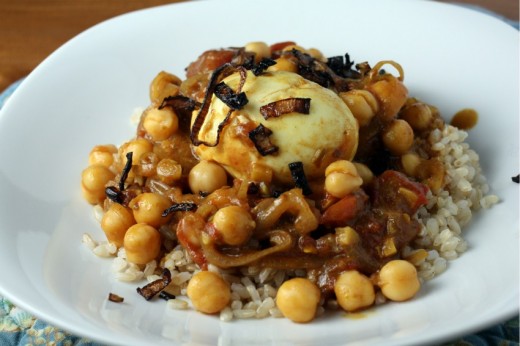
We don’t often eat eggs for dinner.  You should know that as I’m typing that sentence, I am simultaneously promising myself that we will eat eggs more often for dinner.  I love a good poached/fried/soft-boiled egg but none of those options sound good to me at breakfast time.  It would make sense, seeing as I love them and that I am a vegetarian, that eggs would be a regular part of our dinner routine.  I’ve just never made them a priority.  But when I see a recipe like this one, really just an egg curry, and it speaks loudly to me, it is clear I need to rethink the egg and dinner relationship.  As I was getting ready to serve this lovely, filling, and nutritious dish, I decided it seemed a little thin, so I added chickpeas.  Not necessary, especially if you add more eggs, but I thought the combination was great.

Two Years Ago:  Red Lentil Dhal
Three Years Ago:  Oatmeal Chocolate Chunk Cookies

Sambal Telur
Loosely adapted from Vegetarian
Serves 4

4 eggs
2 tbsp. vegetable oil
4 shallots, 1 chopped for garnish, 3 thinly sliced
Kosher or sea salt
3 garlic cloves, minced
2-inch piece of ginger, finely minced or grated
1 tsp. coriander seeds, crushed
1 tsp. cumin seeds, crushed
½ tsp. ground tumeric
1 tbsp. sambal oelek, or other chile sauce
1 14-ounce can diced tomatoes
2 tbsp. tomato paste
1 14-ounce can coconut milk (can be “lite”)
1 tbsp. tamarind concentrate
1 tbsp. light brown sugar
1 15-ounce can chickpeas, rinsed and drained

Place the eggs in a medium saucepan and fill to cover with cold water.  Bring to a boil, then turn off the heat and set the timer for 6 minutes.  Immediately scoop out the eggs and place in a bowl of ice water to stop the cooking.  Drain and set aside.  (This amount of cooking time will give you an egg with a very soft yolk.  Let them sit for another minute, 7 total, if you like your yolk a little firmer.)

Place a large sauté pan over medium-high heat.  Drizzle in about 1 tablespoon of the oil.  Add the chopped shallots along with a healthy pinch of salt, and cook, stirring frequently, until cooked through and brown, about 5 minutes.  Shallots burn very easily so keep a close eye on them.  Scrape the shallots out onto a paper towel lined plate.  Set aside for the garnish.

Return the pan to the heat.  Pour in the other tablespoon of oil, then add the sliced shallots, garlic, and ginger, and cook for a minute.  Add the coriander, cumin, tumeric, sambal oelek, the canned tomatoes, and the tomato paste.  Sauté for 5 minutes, stirring frequently.

Stir in the coconut milk, tamarind, and brown sugar along with a large pinch of salt.  Bring to a boil and simmer for about 5 minutes until the mixture thickens.  Add the eggs and the chickpeas and simmer for a few minutes more to heat it all through.  Serve over rice and garnish with the fried shallots.


Favorite Colors

October 3, 2011

When I was a little girl, my favorite colors were pink, purple, and red.  In that order.  Tomboy I was not.  I wasn’t overly froufy but I did love to wear dresses and pretend jewelry, I begged my mom to let me get my ears pierced when I was six (she let me), and I could not wait until the day when I could wear makeup.

In seventh grade, I changed schools and it was suddenly not cool at all to wear dresses or skirts.  Jeans only and those jeans had to be Levi 501’s – the kind that you bought indigo blue and stiff as a board, and had to wash a million times to get them to look cool at all.  I pretended, in those years, that I liked wearing jeans that were clearly cut for male bodies and that my favorite color was blue.  I got a blue ski jacket and painted my bedroom blue and all the while I missed pink.  And purple.  And red.  And dresses.

Somewhere along the line, in high school, I reclaimed myself and my girly ways.  I wore dresses again and became known for my love of purple because, at some point in those blue years, purple overcame pink as my true favorite.

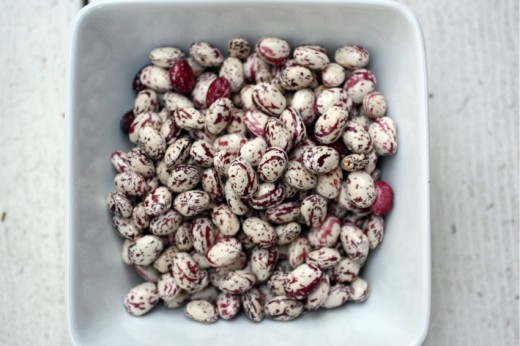
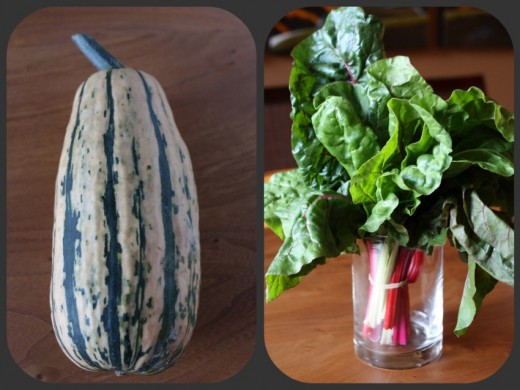
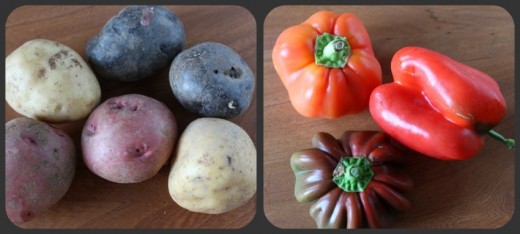
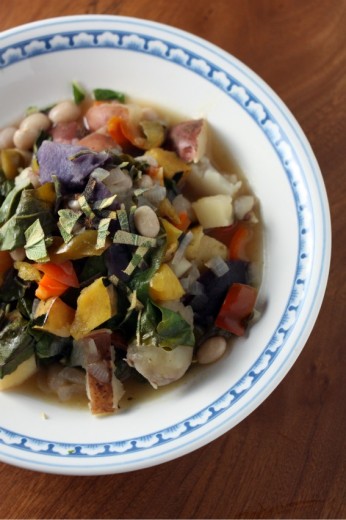
The only way this ties back to food is beans.  This is the time of year when school starts and when I start seeing fresh shelling beans at the markets.  Do these cranberries beans look like something found nature?  Or something that might be found, say, in my closet.  Or something that my kids would color for me because they are now aware of the concept of having a favorite color and they know what mine is.   I gathered all the ingredients for a stew at my farmers’ market and it all is so beautiful, is it not?

Sometimes cooking is just assembling really great ingredients and doing just a bit to bring out their flavors.  When you are using peak of the season produce, it’s easy to make something delicious.  This is not to say that this stew makes itself.  I took the time to roast the squash because I like it best that way but you could certainly just add it raw along with the potatoes to save yourself a step and a baking sheet to wash.  You also need to cook the beans separately but seeing as these are fresh, it only takes a half hour or so.  At my markets, you will often see the beans pre-shelled for you.  It is nice that someone did the dirty work for you and I used to buy them that way.  But the truth is that the beans in the pods are much fresher, they are cheaper, and shelling them is even easier to do than shelling peas.

One Year Ago:  Braised Purple Cabbage with Apples, Pecan Molasses Bundt Cake with Bourbon Glaze
Two Years Ago:  Carrot Soup with Ginger and Lemon, Soba Noodles with Mushrooms and Bok Choy, Holly B’s Peanut Butter Brownies
Three Years Ago:  Dimply Plum Cake

Cranberry Bean Stew with Maple Roasted Delicata Squash and Sage
Dana Treat Original
Serves 4

1½ pounds delicata squash, cut in half, seeded, and cut into ¾-inch chunks
Olive oil
Sea salt and freshly ground black pepper
4 tbsp. maple syrup
1 cup fresh shelling beans
1 medium red onion, diced
2 garlic cloves, minced
2 tsp. fresh thyme leaves
1 pound new potatoes, cut into 1-inch chunks
½ cup dry white wine
1 red bell pepper, seeded, diced
2 cups vegetable broth
½ bunch Swiss chard, leaves only, chopped
4 sage leaves, slivered, for garnish

Preheat the oven to 400ºF.  Place the squash chunks on a baking sheet and drizzle with about 2 tablespoons olive oil, a large pinch of salt, a few grinds of pepper, and the maple syrup.  Using your hands, toss well.  Place in the oven for 10 minutes.  Remove and flip the pieces over, return to the oven and bake for another 10 minutes, or until completely tender and browning in spots.  Remove and set aside.

Bring a medium saucepan of water to a boil.  Pour in the beans and cook, keeping the water at a mellow boil, until the beans are tender but not mushy, about 25 minutes.  Drain and set aside.

Heat a large soup pot over medium heat.  Add just enough olive oil to coat the bottom and then add the onion along with a large pinch of salt.  Sauté until starting to soften, about 5 minutes, then add the garlic.  Give it a stir, then add the thyme leaves.  Stir in the potatoes and cook, stirring occasionally, until the potatoes are browned in spots, about 8 minutes.  Things will start to stick but don’t worry about it.

Pour in the wine and scrape up any browned bits on the bottom of the pot.  Stir in the red pepper.  Pour in the broth and bring to a boil, then lower the heat to a simmer and cover.  Cook until potatoes are just tender, about 10 minutes.  Remove the cover and add the squash and the beans.  Stir well, then add the chard.  Continue to cook, covered, stirring occasionally, until the stew is heated through, the chard has wilted slightly, and the potatoes are fully cooked, about another 10 minutes.  Season to taste with salt and pepper.  Serve in shallow bowls garnished with fresh sage leaf slivers.


« Older Posts