Category: Thanksgiving

A Cake for Thursday

November 19, 2012

You may have noticed that I have been awfully quiet about Thanksgiving this year.  I’m feeling a little misty about it to tell you the truth.  For the last five years or so, Randy and I hosted Thanksgiving in our black house with a red door in Seattle.  We had large gatherings and small intimate dinners.  Most of the meal was the same from year to year with a few curveball side dishes to make things interesting.  Before those five years, my parents hosted every year in my memory with the exception of one trip to New York City and one trip to visit me in college.

This year, we no longer live in the same city as my family does.  When it came down to whether or not we would visit Seattle for Thanksgiving or Christmas, I didn’t hesitate to say Thanksgiving.  Because my mom is recovering from hip surgery, she will not be hosting.  It falls to family friends, with whom we have shared every Thanksgiving and Christmas dinner (with the exceptions noted above) since I was two years old, to host this year.  So I am not hosting, my mom is not hosting, and I will not really be cooking much.  My mom was given a couple of assignments which I will either be helping her with or cooking myself, depending on how she is feeling.  But it’s not the same.  I’m not making the bread that I have made every year for twelve years.  The excitement I usually feel at this time of year is missing.  I think it is partly that the sun and mild temperatures make it hard for me to believe it is November, let alone turkey day.

Wah wah, poor me.  I am grateful that my boys have the whole week off from school so we can spend a little extra time in my hometown.  I am grateful to a dear friend who is going to put us up and another who is going to host a get-together for me.  I am grateful to our family friends who are stepping in to host in this year of odd circumstances.  I am grateful that I get to celebrate the birthdays of my mom, Graham, my niece, and my sister-in-law in one fell swoop.  Wait – grateful?  No, I am thankful.  For this and so much more.

This cake will not have a place on our Thanksgiving table.  But if you are hosting and you haven’t already decided on dessert, you might want to consider this amazing treat.  I first made this cake years ago and I think the recipe came from Sunset.  My mom dictated it to me over the phone – she didn’t direct me to a web site or send it to me via email, so that will give you an idea of how long ago.  The note paper I scribbled it onto slipped behind other recipes in my notebook and I completely forgot about it until I was trying to decide on a dessert to make for special friends.  This just popped into my head.  It is the perfect fall cake and I think it would be terrific after Thanksgiving dinner.

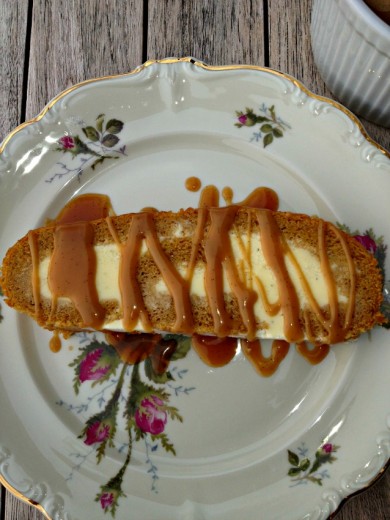
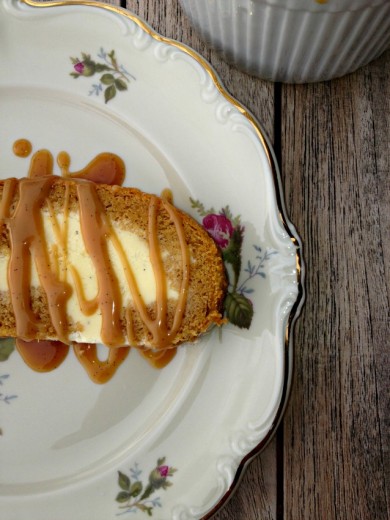
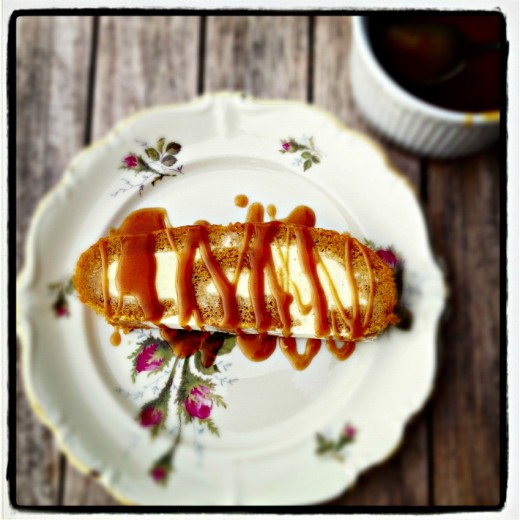
This is a simple jelly roll cake.  The cake itself is pumpkin and it is filled with vanilla ice cream.  I made it back when I was a pretty novice baker and it turned out perfectly, so don’t let the shape of it scare you.  In my more novice days, I bought a quality vanilla ice cream to fill the cake and a quality caramel sauce to drizzle over top.  Now that I am more experienced, I made the ice cream to fill it and a salted caramel sauce to drizzle over top.  Either way, what you have is a beautiful fragrant slice of fall that can be made in advance and brought out to a chorus of praise.  And thanks.  I wish you all the very best – whether you are making a big dinner, attending one, or Thursday is just another day.

One Year Ago:  Squash Hummus and Homemade Flatbread, Butternut Squash Soup with Ginger
Two Years Ago:  Three Cheese Mini Macs, Orecchiete with Creamy Leeks, Vegetarian Gravy, Burnt Sugar Bundt Cake
Three Years Ago:  Maple Roasted Delicata Squash, Naan, Peanut Curry with Sweet Potato and Collard Greens
Four Years Ago:  Pumpkin Whoopie Pies, Giant Chocolate Toffee Cookies, Brussels Sprouts Hash with Caramelized Shallots

Pumpkin Roll Cake
Adapted from Sunset (I think)
Makes 1 large roll, serving about 8-10

As I mentioned, you can certainly make this with store-bought ice cream and caramel sauce.  Use the best you can find.  My roll was more flat this time, my guests actually thought their slices were large biscotti, but I have gotten it to look more rounded in the past.  Patience helps as does ice cream that is soft but not too soft.

¾ cup flour
2 tsp. ground cinnamon
1 tsp. ground ginger
½ tsp. nutmeg
1 tsp. baking powder
½ tsp. table salt
3 eggs
1 cup sugar
2/3 cup canned pumpkin
Powdered sugar

1 quart vanilla ice cream (recipe follows)
Salted caramel sauce (recipe follows)

Preheat oven to 375ºF.  Grease a jelly roll pan, then line the pan with parchment paper.  Grease the paper.

Mix flour, cinnamon, ginger, nutmeg, baking powder, and salt together in a small bowl.  Beat eggs on high speed for 5 minutes, or until very thick.  Gradually beat in the sugar.  Using low speed, mix in the pumpkin, followed by the flour mixture.

Spread batter into prepared pan and smooth it well.  Bake for about 15 minutes, until the center of the cake springs back when touched.

Sprinkle a clean kitchen towel generously with powdered sugar.  Remove the cake from the oven and carefully invert the cake out onto the towel.  Remove the parchment paper.  Roll the cake up with the towel into a cylinder.  Cool completely.

Soften your ice cream for about 20 minutes in the refrigerator.  (If using homemade, you can use it directly out of the ice cream maker.)  Unroll the cake.  Spread the ice cream over the entire surface of the cake.  Roll the cake back up without the towel.  Working quickly, wrap the cake in parchment paper and then foil and immediately place in the freezer.  You can make this cake three days ahead, allow it to soften by pulling it out of the freezer about 10 minutes before you serve it.  Serve with caramel sauce.

Vanilla Ice Cream
The Perfect Scoop
Makes about 1 quart

1 cup whole milk
A pinch of salt
¾ cup sugar
1 vanilla bean, split lengthwise
2 cups heavy cream
5 large egg yolks
1 teaspoon pure vanilla extract

Heat the milk, salt, and sugar in a saucepan. Scrape the seeds from the vanilla bean into the milk with a paring knife, then add the bean pod to the milk. Cover, remove from heat, and infuse for one hour.

To make the ice cream, set up an ice bath by placing a 2-quart (2l) bowl in a larger bowl partially filled with ice and water. Set a strainer over the top of the smaller bowl and pour the cream into the bowl.

In a separate bowl, stir together the egg yolks. Rewarm the milk then gradually pour some of the milk into the yolks, whisking constantly as you pour. Scrape the warmed yolks and milk back into the saucepan.

Cook over low heat, stirring constantly and scraping the bottom with a heat-resistant spatula, until the custard thickens enough to coat the spatula.

Strain the custard into the heavy cream. Stir over the ice until cool, add the vanilla extract, then refrigerate to chill thoroughly. Preferably overnight.

Remove the vanilla bean and freeze the custard in your ice cream maker according to the manufacturer’s instructions.

Salted Caramel Sauce
Bon Appetit
Makes about 1 cup

¾ cup plus 2 tbsp. heavy cream
½ vanilla bean, split lengthwise
½ cup sugar
2 tbsp. light corn syrup
4 tbsp. (½ stick) unsalted butter, cut into ½-inch cubes
¼ tsp. kosher salt
Place cream in a small pitcher.  Scrape seeds from vanilla bean; add bean.  Set aside.
Stir sugar, corn syrup, and 2 tablespoons water in a heavy saucepan over medium heat until sugar dissolves.  Increase heat to medium-high; boil, occasionally swirling pan and brushing down sides with a wet pastry brush, until deep amber color forms, 506 minutes.  Remove from heat; gradually add vanilla cream (mixture will bubble vigorously).  Whisk over medium heat until smooth and thick, about 2 minutes.  Remove from heat; whisk in butter and salt.  Strain into a heatproof measuring cup.  Let cool slightly.  (Sauce can be made up to 3 days ahead.  Reheat in the microwave or in a saucepan over low heat.)


Stilton Tart with Cranberry Chutney

November 11, 2011

Ever since moving into my first apartment many many years ago, I have subscribed to food magazines.  The roster has changed a bit, but receiving at least one and as many as five magazines full of glossy food pages has been a constant in my cooking life.  I do love cookbooks, oh how I love cookbooks, but I also love how current magazines are and I also love the monthly inspiration.  My routine was that every couple of months, I would sit down and tear out recipes that I had flagged, then I would cut them out, then I would tape them into binders I have that are filled with almost twenty years of magazine recipes.

Then life got super super busy.  I have an over two year backlog of magazines in our bulging magazine holder and a whole other pile of recipes that are cut out but need to be taped.  Periodically I feel guilty.  So many recipes waiting to take up residence in my cute binders!  So many things waiting to be cooked!  And then the end of the day comes and I am spent and the last thing I feel like doing is dealing with my magazines.  So I put them off again.  Periodically, I think about just recycling all of those old magazines and starting fresh with the December issues.  But there are treasures in there.  Like this recipe.

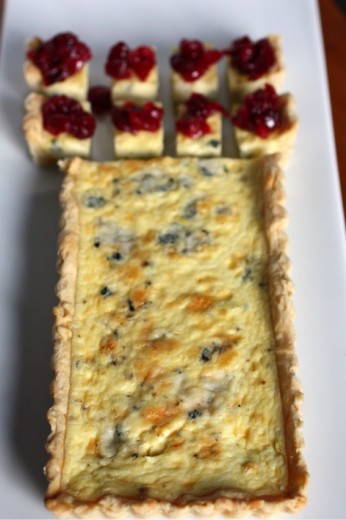
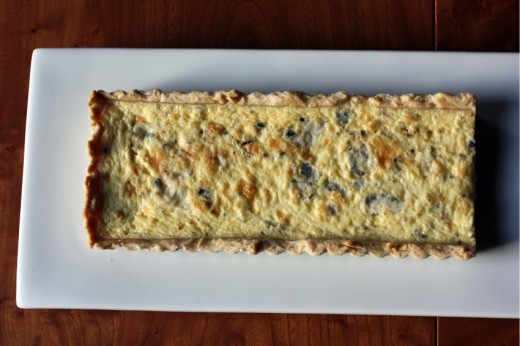
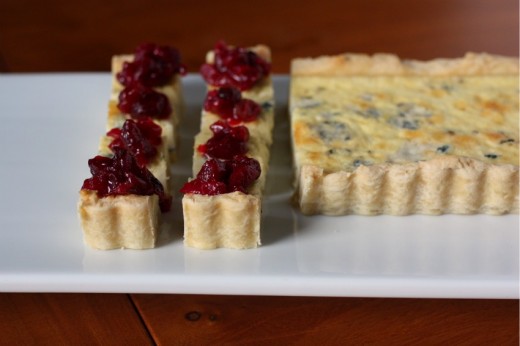
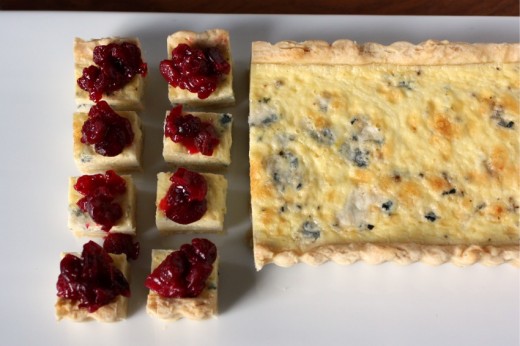
I cut this out years ago, the actual recipe is from Gourmet (sob!) back in 2001.  I cut out the photo as well and every time I page through the appetizer section of that binder, I look at it longingly.  You see, up until recently, I did not have a rectangular tart pan.  Of course, I could have made it in a round pan but that didn’t seem right to me.  I wanted to serve it in little bites, just like the photo in the magazine.

Last week was the last of my catered openings at the art gallery (although I hope to do more next year).  I’ve paid off my spoons.  This opening was for Erik Hall, the gallery owner (along with his amazing wife) and an incredibly talented artist.  I have been waiting for the right excuse to make this tart ever since I bought that pan and November and an art opening seemed just right.

After gazing at the photo for so many years and cursing the fact that I did not have a rectangular pan, it might have turned out that the tart was a disappointment.  Nope.  Very easy to make, very pretty, holds well, and a terrific contrast of flavor and texture.  The crunch of the crust, the creaminess of the filling, the sharpness of the cheese, and then the sour bite of the chutney combines for a delicious bite.  I can only say this with authority because I made the tart twice.  The first time, at the gallery, it got devoured before I had a chance to try a piece.  So because I wanted to taste it, and because I wanted to share the recipe with you, and because I was smart enough to double the crust recipe, and because the chutney makes a lot, I can now say, without hesitation, Make This Tart!  It would be a beautiful way to welcome your Thanksgiving guests.  Or, if you travel by car for the holiday, you can still make it.  Just bring the tart in its pan and cut and top it at your destination.

One Year Ago:  Romaine Leaves with Caesar Dressing and a Big Crouton
Two Years Ago:  Holly B’s Gingersnap Cookies
Three Years Ago:  Bulgur and Green Lentil Salad with Chickpeas

Stilton Tart with Cranberry Chutney
Gourmet
Makes 32 appetizer portions (more if you cut the pieces larger)

For the pastry dough:
1¼ cups all-purpose flour
¾ stick (6 tablespoons) cold unsalted butter, cut into 1/2-inch cubes
2 tablespoons cold vegetable shortening
¼teaspoon salt
2 to 4 tablespoons ice water

Blend together flour, butter, shortening, and salt in a bowl with your fingertips or a pastry blender (or pulse in a food processor) just until most of mixture resembles coarse meal with small (roughly pea-size) butter and shortening lumps. Drizzle evenly with 3 tablespoons ice water and gently stir with a fork (or pulse in processor) until incorporated.

Squeeze a small handful: If it doesn’t hold together, add more ice water, 1/2 tablespoon at a time, stirring (or pulsing) until just incorporated, then test again. (If you overwork mixture, pastry will be tough.)

Turn out mixture onto a lightly floured surface and divide into 4 portions. With heel of your hand, smear each portion once or twice in a forward motion. Gather dough together with scraper and press into a ball, then flatten into a 5-inch disk. Chill dough, wrapped in plastic wrap, until firm, at least 1 hour.

For the tart:
1 recipe Pastry Dough (see above)
1 cup heavy cream
1 whole large egg
2 large egg yolks
¼ teaspoon salt
¼ teaspoon black pepper
5 oz chilled Stilton, rind removed and cheese crumbled (1½ cups)

Make tart shell:
Preheat oven to 350°F.

Roll out dough on a lightly floured surface with a floured rolling pin into a 17- by 8-inch rectangle and fit into tart pan. Trim excess dough, leaving a 1/2-inch overhang, then fold overhang inward and press against side of pan to reinforce edge. Lightly prick bottom and sides all over with a fork. Chill until firm, about 30 minutes.

Line pastry shell with foil and fill with pie weights. Bake in middle of oven 20 minutes, then carefully remove foil and weights and bake until golden, 10 to 15 minutes more. Cool shell in pan 20 minutes.

Reduce oven temperature to 325°F.

Make filling:
Whisk together cream, whole egg, yolks, salt, and pepper until combined.

Put tart shell (still in pan) on a baking sheet and scatter cheese evenly in shell. Slowly pour custard into shell and bake in middle of oven until golden around edge and custard is just set, 30 to 35 minutes. Cool tart completely in pan on a rack.

Cut tart into 32 rectangles and serve at room temperature, topped with chutney.

(Dana’s Make Ahead Tips:  You can make the pastry dough up to one month in advance, wrap it well, and freeze it.  Allow it thaw overnight in the refrigerator before using.  You can blind bake the shell earlier in the day and let it cool completely before filling and continuing to bake.  Finally, you can wrap the whole tart well, still in its pan, and refrigerate it overnight.  Allow it to come to room temperature for several hours before serving or heat it for about 10 minutes in a low oven.)

Cranberry Chutney
Makes about 2 cups

You will have more chutney than you need for this recipe but it’s delicious and it keeps well.

2 large shallots (3 oz), coarsely chopped
1 tablespoon vegetable oil
1 (12-oz) bag fresh or frozen cranberries (not thawed)
2/3 cup sugar
3 tablespoons cider vinegar
1 teaspoon minced garlic
1 teaspoon minced peeled fresh ginger
½ teaspoon salt
1/8 teaspoon dried hot red pepper flakes

Cook shallots in oil in a 3-quart heavy saucepan over moderate heat, stirring occasionally, until softened, about 3 minutes. Stir in remaining ingredients and simmer, uncovered, stirring occasionally, just until berries pop, 10 to 12 minutes, then cool.  (The chutney will keep for a week, covered, in the refrigerator.)


Our Holiday Bread

December 19, 2010

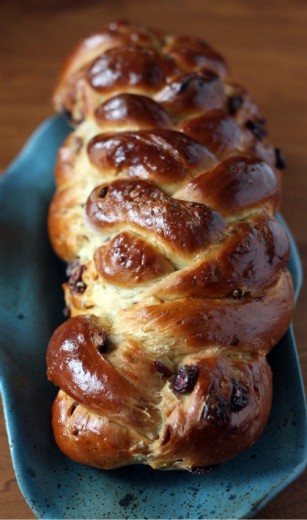
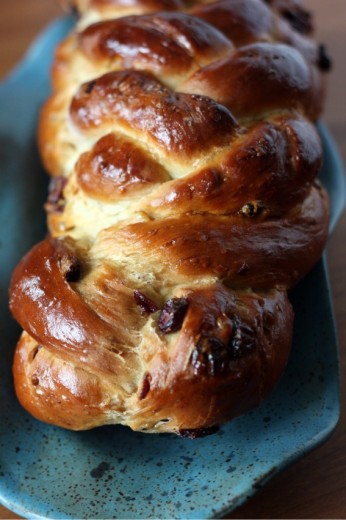
It might seem like cheating that I am kicking off my post-a-day-until-Christmas with something I have already written about.  But here is the thing.  I wrote about this incredible bread back in November of 2008.  I had about 12 readers back then, probably 6 of whom live within a mile of me.  The photo was taken with my old point and shoot camera and it is a terrible photo.  I would just re-direct you to that post, but I have new photos and I have more to say.  I can’t let another holiday season go by without talking about it again.

I have made this bread every Thanksgiving for the last 11 years.  I only know the year I started making it (1999) because our Thanksgiving was remarkable that year.  Not remarkable in that it was so wonderful but in that it was so different.  My parents were in the midst of remodeling their house and so we did the dinner at my grandmother’s which felt weird.  But what felt weirder is that my divorce from my first husband had just been finalized and I was at the family feast alone.  A good distraction from the sadness of that fact was to bake bread.

I was not a great bread baker at the time (I’m still not) but this turned out beautifully.  Both in looks and taste.  The sweetness of it complimented the rest of the meal so well and I have been making it ever since.  Thanksgiving is at our house now and Randy and I have spent ten of them together.  Thanks to a special request, this bread will now be on the Christmas table every year going forward.  It is wonderful at the holidays but I think it would also be terrific at just about any meal.

If you needed any more reason to make this (and please do, you will be astounded by how easy it is and how delicious it is), my brother Michael, who loves good food, asked me to make him two loaves as a holiday gift.  Nothing else – just bread.  He wants to be able to slice it and keep it in the freezer for a special treat.

One Year Ago:  Chocolate Caramel Treasures

Cranberry-Walnut Braid
Adapted from Bon Appétit
Makes 1 Loaf

I have had trouble finding orange extract so I use Simply Organic’s Orange Flavor which is essentially orange flavored oil.

3 cups (or more) bread flour
1/4 cup sugar
2 envelopes quick-rising yeast
1 1/2 tsp. salt
1/2 cup buttermilk
2 large eggs
2 tbsp. (1/4 stick) unsalted butter, melted
1 1/2 tbsp. orange extract
1/3 cup (about) hot water (120-130 degrees F)
1 cup dried cranberries
1/2 cup coarsely chopped walnuts
1 large egg, beaten to blend (for glaze)

Stir 3 cups flour, the sugar, yeast and salt in large bowl to blend. Add buttermilk, 2 eggs, melted butter and orange extract and stir vigorously until well blended. Gradually stir in enough hot water to form soft, slightly sticky dough. Transfer dough to floured work surface. Knead dough until smooth and slightly tacky but not sticky, adding more flour if necessary, about 7 minutes. Knead in dried cranberries 1/3 cup at a time; then knead in walnuts. Form dough into ball.

Oil large bowl. Add dough to bowl, turning to coat with oil. Cover bowl with plastic wrap, then towel. Let dough rise in warm draft-free area until doubled in volume, about 1 1/2 hours.

Lightly oil large heavy baking sheet (or line with parchment paper). Punch down dough. Turn dough out onto floured surface. Divide dough into 4 equal pieces; then divide 1 piece of dough into 3 equal pieces and reserve. Using palms of hands, roll out each of remaining 3 large pieces on work surface to 13-inch long ropes. Braid ropes together. Tuck ends under and pinch together. Transfer braid to prepared baking sheet. Roll out each of the reserved 3 small dough pieces to 10-inch long ropes. Braid ropes together. Tuck ends under and pinch together. Brush large braid with some of egg glaze. Place small braid atop center of large braid. Brush small braid with some of egg glaze. Let rise uncovered in warm area until almost doubled in volume, about 1 hour 15 minutes.

Preheat oven to 325 degrees. Brush loaf again with egg glaze. Bake until loaf is deep golden brown and sounds hollow when tapped on bottom, about 45 minutes. Transfer loaf to rack and cool at least 45 minutes before slicing. (Can be made ahead. Cool completely. Wrap tightly in foil and a plastic bag and freeze for up to 2 weeks. Thaw at room temperature.)


My Thanksgiving Dessert

November 29, 2010

Whew.  That was a busy weekend.  We hosted Thanksgiving for 16 adults and 4 children on Thursday.  We hosted 10 kids and 24 adults for dinner on Friday to celebrate Graham’s birthday.  We went to a brunch on Saturday morning and the boys went to a birthday party on Saturday night while Randy and I went out to celebrate my mom’s birthday.  And Sunday, we rode the Christmas train and got a tree.  Overall, my plan is to never eat again.

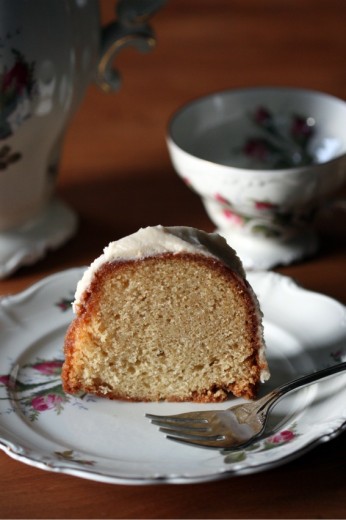
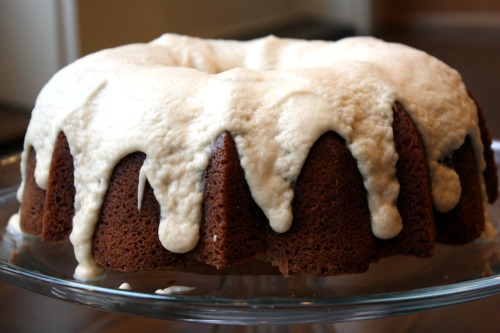
There are food bloggers who are ultra-organized and who test recipes ahead of time so they can tell you what to put on your Thanksgiving table.  I am not one of those people.  I am also not one of those people who will pull out my camera at a table of ten to take a picture of my stuffing, no matter how good it was.  (It was really good.)  So, I offer you a cake I made for the big feast and I took pictures of it before and after the dinner.  You can make it for Thanksgiving next year or make it for Christmas this year or make it for Tuesday because it’s really special.

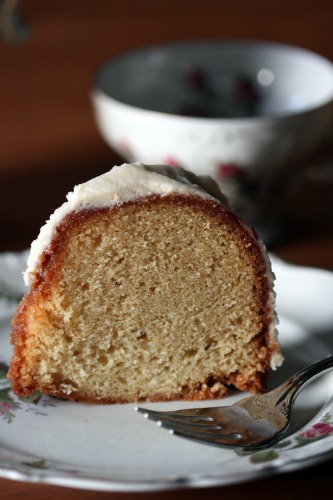
Sometimes you just want cake.  Not plain but not fussy.  I’ve written several times about that generalized craving that I sometimes get.  Because there is icing here, you might think it’s fancy.  But it’s not and I mean that in the best way.  The cake is perfectly moist and rich but with a gentle flavor.  All by itself it might be a little too boring for me.  But the rum spiked frosting makes it a much more interesting (and much more delicious) cake.

One tip.  Do not attempt to make the frosting and then frost the cake after you have had wine with your dinner.  My frosting, while delicious, did not have quite the right consistency and I did not frost it as decoratively as I would have liked.  Had I been more, ahem, sober, I would have added more powdered sugar to the frosting to make it thicker.  As per usual with my perfectly delicious but less-than-perfect-looking desserts, no one seemed to care.

One Year Ago: Endive Spears with Manchego and Membrillo
Two Years Ago: Broccoli Rabe, Radicchio, and Carrot Salad

Burnt Sugar Bundt Cake
Baked Explorations
Serves 12-16

For the Burnt Sugar Liquid
½ cup sugar
½ cup heavy cream
Approximately ¾ cup coconut milk
1½ tbsp. lemon juice

For the Bundt Cake
3 cups all-purpose flour
1 tsp. baking powder
½ tsp. baking soda
1 tsp. salt
1¼ cups unsalted butter (2½ sticks), cut into 1-inch cubes, at room temperature
2 cups sugar
4 large eggs
1 tsp. pure vanilla extract
Burnt Sugar Liquid (see above)

For the Caramel Rum Frosting
½ cup (1 stick) unsalted butter
2 tbsp. dark rum
2 1/3 cups confectioners’ sugar
Burnt Sugar Liquid (see above)

Make the Burnt Sugar Liquid
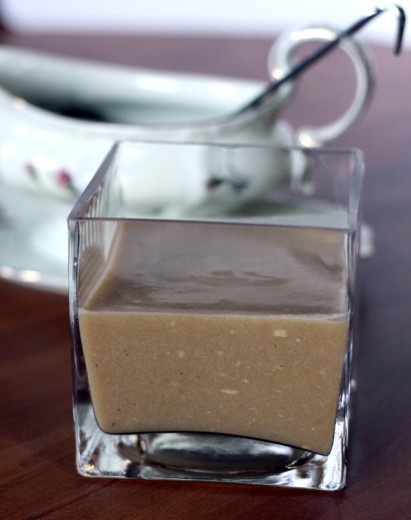
In a medium saucepan over medium heat, slowly melt the sugar.  Use a wooden spoon to stir it continuously to ensure even melting.  When the sugar turns a dark caramel color, remove the pan from the heat and slowly stream in the cream while continuing to stir (don’t worry if mixture starts to clump).  Return the pan to medium heat and stir until completely combined; cook for 2 minutes longer, stirring.

Transfer the burnt caramel mixture to at least a 2-cup heatproof liquid measuring cup (like Pyrex) and add enough coconut milk to make 1¼ cups liquid.  Add the lemon juice.  Whisk to combine, divide the mixture in half, and set both portions aside.

Make the Bundt Cake
Preheat the oven to 325ºF.  Generously spray the inside of a 10-inch Bundt pan with nonstick spray; alternatively, butter it thoroughly, dust it with flour, and knock out the excess flour.

In a medium bowl, whisk together the flour, baking powder, baking soda, and salt.  Set aside.

In the bowl of a standing mixer fitted with the paddle attachment, beat the butter and sugar until pale and fluffy.  Scrape down the bowl and add the eggs, one at a time, beat until each is incorporated.  Add the vanilla and beat for 5 more seconds.

Retrieve one of the reserved portions of burnt sugar liquid.  Add the flour mixture in three parts, alternating with the burnt sugar, beginning and ending with the flour mixture.  Scrape down the sides and bottom of the bowl and beat again for 10 seconds.  Pour the batter into the prepared pan and bake for 45 to 50 minutes, or until a small sharp knife inserted into the center of the cake comes out clean.  Transfer the pan to wire rack to cool completely.  Gently loosen the sides of the cake from the pan and turn it out onto the rack.

Make the Caramel Rum Frosting
Put the butter, rum, confectioners’ sugar, and remaining portion of burnt sugar liquid in a food processor.  Pulse in short bursts until the frosting is shiny and smooth.

Assemble the Burnt Sugar Bundt Cake
Use an offset spatula to spread the frosting over the crown of the cake in a thick layer.  Let the frosting set before serving.  The cake will keep in an airtight container, at room temperature, for up to 3 days.


Gravy – Vegetarian and Gluten-Free

November 23, 2010

One of the very first blogs I read, way back when, was Shauna’s Gluten-Free Girl.  I linked to her through a story on the Seattle Times web site.  It was truly before I knew what a blog was but I, like so many people around the world, was immediately captivated by her writing and her story.  She is one of the superstars who inspired me to start my own blog.

Over the past couple of years, I have been lucky enough to get to know Shauna and to visit her, Danny, and adorable Lu on their magical island.  She is as kind and generous-hearted as she comes across in her posts.  She also gives the best hugs I have ever received (if you have gotten one, you will no doubt agree with me).  Shauna has the most positive attitude toward the foods she can eat, not lamenting those she can’t.  This attitude mirrors the approach I take to my vegetarian diet, although I am well aware that mine is a choice and hers is not.  Still, I think we both feel that eating is celebrating what you can eat not bemoaning what you can’t.

Shauna, in her wonderful community-oriented way, put a call out to bloggers everywhere.  She reminded us, in her gentle way, that Thanksgiving can be a rough holiday for those who can’t eat gluten.  She challenged us to make something gluten-free and share with our readers and hers.  This cause is near and dear to my heart because, of course, Thanksgiving is not the best holiday for vegetarians either.  If you come to my house, you will find a lot of side dishes so that there is plenty for me, my mom, my sister-in-law, and my brother’s girlfriend to eat.  (Yes, all the women in the family are veg.)  I love that Shauna asked for help in getting the word out and I wanted to do my part.

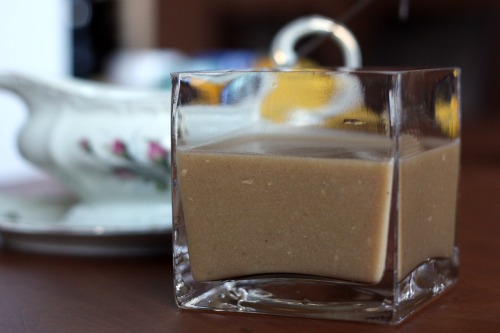
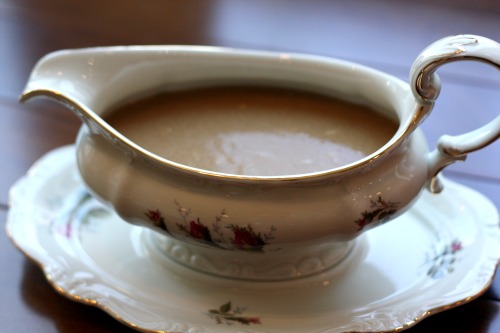
What I really wanted to share, the thing I discussed with her last time I saw her, is my vegetarian gravy.  Even in my early years, when I still ate meat, I could not bring myself to eat more than a couple bites of turkey.  And I would choke those few bites down dry because I could not bear gravy.  Once I announced my vegetarianism, I still steered clear of the gravy and that did my best to swallow dry mashed potatoes and stuffing.  Then one day, in my 20’s, I realized that I could make vegetarian gravy, and Thanksgiving changed forever for me.  It took a few years to find the right one, but now I smother my mashed potatoes and just about everything else on my plate with it.  In fact, I need to start using this savory stuff at times other than turkey day.  Maybe a giant grilled portabello mushroom bathing in gravy with a poached egg on top.  This recipe makes plenty of gravy and we are housebound with the wonderful weather so those mushrooms might be on my table tonight.  Mmmmm.

Anyway, I remember reading on Shauna’s site that you can easily make gravy gluten free by swapping out regular flour for rice flour.  Vegetarian gravy can be made ahead of time because there are no turkey drippings involved – another thing to recommend it.  So here we are, the Tuesday before Thanksgiving and I have my delicious, vegetarian, gluten-free gravy already done.  The rice flour, which I already had on hand from making those sage tempura, worked beautifully.  It tastes just the same as I remember.  Which is to say, delicious.

You may have heard, but it’s getting close to holiday season around here and that means you might have a few gifts to purchase.  If you have someone on your list who loves to read cookbooks cover to cover, and also happens to like cooking good food, I can highly recommend Shauna and Danny’s love story/cookbook Gluten-Free Girl and the Chef. Their love and enthusiasm is contagious and the cookbook is written with lots of suggestions of how to add your own flair – something I always appreciate.

If you have some gluten-free guests coming to your dinner, be sure to check out Shauna’s Thanksgiving post.  There are a million and one great ideas there.

One Year Ago: Peanut Curry with Sweet Potato and Collard Greens, Yogurt Flatbread, Cider-Caramelized Apple Pound Cake
Two Years Ago: Giant Chocolate Toffee Cookies, Brussels Sprout Hash with Caramelized Shallots, Parmesan and Thyme Crackers

Vegetarian Gluten-Free Gravy

Adapted from Gourmet
Makes enough to serve 6-8 people

A few notes.  You will want to use a wide mouth pot for this one.  A 4 quart will work, a 6 quart would be better.  I found it took the rice flour longer than all-purpose to thicken this gravy but it definitely did the job.  Just keep a low heat under it and keep whisking.  I always think vegetable broths are very ho hum but I have finally realized this is the broth of my dreams.  It could hold its own in a French onion soup.  I think I know what just went on the menu for next week.  Note to self.

This is a salty gravy, which I like, but if you are wanting it to be less so, I would use less soy sauce, ¼ of a cup would be good.  Finally, regular soy sauce is not gluten-free so if you are making it that way, be sure to use tamari.  I always do anyway because I think it tastes better.

1 large head garlic
2 tbsp. olive oil, plus additional for drizzling
1 leek, quartered and washed
1 onion, left unpeeled, quartered
2 carrots, quartered
1 parsnip, quartered
2 celery ribs, quartered
1 bay leaf
½ tsp. whole peppercorns
1½ cups dry white wine
1/3 cup tamari
6 cups cold water
5 tbsp. unsalted butter
1/3 cup rice flour

Preheat oven to 400ºF.  Separate 6 cloves from garlic (do not peel), drizzle with a little olive oil and double-wrap tightly in foil.  Roast until garlic is very soft, about 45 minutes.  (I always roast my garlic in the toaster oven.)

While garlic roasts, heat 2 tbsp. olive oil in a wide mouth pot (4-6 quarts) over medium heat until it shimmers, then cook vegetables, remaining garlic cloves (separated but not peeled), bay leaf, and peppercorns, stirring occasionally, until browned, about 10 minutes.  Sir in wine and boil until most of it has evaporated.  Add tamari and water and simmer, uncovered, 30 minutes.

Strain stock through a fine-mesh sieve into a large measuring cup.  If you have more than 4 cups, boil to reduce; if less, add water.

Mash roasted garlic to a purée.  Melt butter in a heavy medium saucepan over medium heat.  Stir in rice flour and garlic purée, then slowly pour in the stock, whisking all the while.  Cook, stirring, 5 minutes until thickened.  Season to taste with salt and pepper.  (Can be made up to 3 days ahead.)


« Older Posts