Category: Pie

Yep, Me Too

August 15, 2011

If you read any food blogs other than this one, chances are you have had your fill of posts about peanut butter pie.  If you have no idea what I am talking about, food bloggers around the world have spent the past few days making peanut butter pie, and writing about it, because one in our midst lost her husband unexpectedly.  When someone experiences tragedy, our natural reaction is to want to help – even if we don’t know the person who is suffering.  I always offer food to people in need but seeing as Jennie lives clear across the country, cooking dinner for her and her daughters was not realistic.

Jennie took to her blog and wrote a heartbreaking post about her husband’s love for peanut butter pie and that, if we wanted to help her, we should all make one in his honor.  She said that she never made it often enough for him, that there was always tomorrow or the next week and other dishes, or even just plain old life, got in the way.  I think this emotion resonated with so many people and it is the reason that there is peanut butter pie everywhere you look.  We all assume that if our families are intact today, the same will be true tomorrow.  We all know life is fragile, relationships are tenuous, and yet we soldier on as if everything will last forever.  Of course we do.  If we didn’t, we would be living in a state of constant fear and that isn’t good for anyone.

Randy travels frequently for work, I send my kids off to school/preschool/camp, where they are in the hands of airline captains, teachers, and counselors.  If I wondered every single day whether that plane ride or bus ride or car ride was going to be their last, I would not be able to get out of bed in the morning.  But hearing of the death of a beloved spouse and father of two young children certainly gives me pause and makes me reflect on what I have and how fortunate we are.

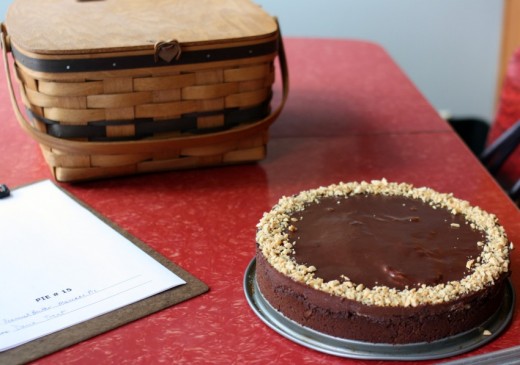
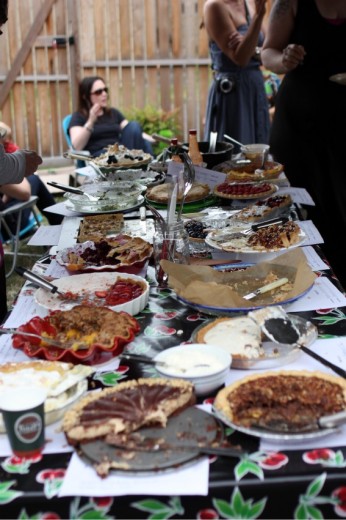
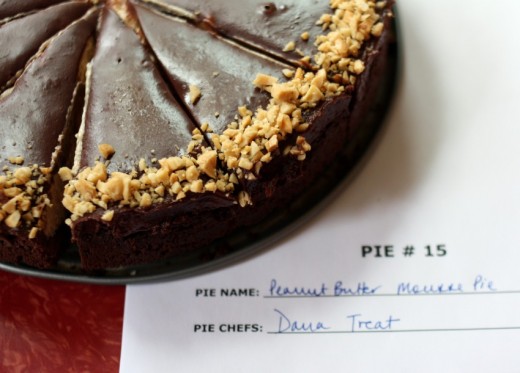
Anyway, more eloquent writers than me have done a much better job of writing about Jennie, about loss, about this amazing community of food bloggers who rally around our own.  I’m a little late to the party but I did make a peanut butter pie.  I didn’t make Mikey’s version, I made one that has been in my “to make” file forever and I brought it to a pie party.  Every year, our friends Matt and Jessica throw a pie party where there are categories, judging, and prizes.  I am not a competitive type but I do have a reputation to uphold and truthfully, I had plans to bring a different kind of pie.  One that celebrates summer in Seattle with nectarines and blackberries or apricots and raspberries.  But I couldn’t make a pie and not make a peanut butter pie.  I didn’t win and I didn’t care – the pie was delicious.  Bittersweet though.

Double-Chocolate Peanut Butter Pie
Food & Wine
Makes one 9-inch pie

Chocolate Crust
4 ounces semisweet chocolate, chopped (½ cup)
½ stick unsalted butter, cut into tablespoons
8 ounces chocolate wafer cookies (from a 9-ounce package), finely ground (2 cups)

Peanut Butter Filling
8 ounces cream cheese, softened (1 cup)
1 cup chunky peanut butter
½ cup sugar
2 tsp. pure vanilla extract
1 cup well-chilled heavy cream
¾  cup salted roasted peanuts, chopped
Kosher salt

Chocolate Topping
4 ounces semisweet chocolate, chopped (½ cup)
½ cup heavy cream

Make the chocolate crust
Preheat the oven to 375ºF.  In a medium glass bowl, combine the chocolate and butter and microwave at high power in 20-second intervals until the chocolate is melted.  Stir well, then stir int eh cookie crumbs.  Press the cookie crumbs over the bottom of a 9-inch springform pan and 1½ inches up the side.  Bake the crust for 10 minutes, or until set; the crust will continue to firm up as it cools.

Make the peanut butter filling
In a large bowl, using a handheld mixer, beat the cream cheese with the peanut butter, sugar, and vanilla extract until blended.  In another large bowl, using the same beaters, whip the chilled cream until firm.  Fold one-third of the whipped cream into the peanut butter mixture to loosen it, then fold in the remaining whipped cream and ½ cup of the chopped peanuts.  Spoon the filling into the crust, smoothing the surface.  Sprinkle lightly with salt and refrigerate until set, about 3 hours.

Make the chocolate topping
In a medium glass bowl, combine the chocolate with the heavy cream and microwave at high power in 20-second intervals until the chocolate is melted and the cream is hot.  Stir the chocolate topping until blended and then cool to barely warm, stirring occasionally.

Spread the chocolate topping over the peanut butter filling and refrigerate until just firm, 15 minutes.  Sprinkle with the remaining ¼ cup of chopped peanuts around the edge of the pie.  Carefully run a thin knife around the edge of the pie, then remove the springform ring.  Using a sharp knife, cut the pie into wedges.  Run the knife under hot water and dry between each cut.

Make ahead
The pie can be covered and refrigerated overnight.  Garnish with chopped peanuts right before serving.  Serve the pie chilled or slightly cooler than room temperature.


Baby in a Corn Tree

August 2, 2011

If you are a parent and you live in the Seattle area, chances are you have heard of Caspar Babypants.  Mr. Babypants is the alter ego of Chris Ballew, otherwise known as the lead singer of The Presidents of the United States of America and also former schoolmate of mine.  (He was several years ahead of me so while I knew who he was, he had no idea I existed.)  Caspar Babypants has four CDs of music out that are extremely unique in that kids and adults alike know and love the songs.  I will get them stuck in my head for days.  My kids know the words and whenever we see him around town (he does frequent and free shows), I am always amazed at how the kids just dig him.

One of his songs is called “Baby in a Corn Tree” and has the lyric, “Baby in a corn tree, wants to wear a poncho, flying through the river on a steaming hot day.”  It makes no sense but it is catchy.  So catchy in fact, that whenever I contemplate making or eating corn, this very lyric pops into my head.  Seeing as we are barreling down the path to full-blown corn season, this could be a problem.

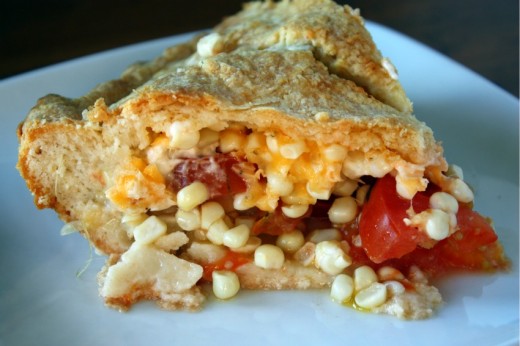
It’s worth it though, having a children’s song lyric that makes no sense stuck in my head for the next month or so, if it means I can eat things like this pie.

I had a, uh, moment last night with my husband over this pie.  I made it because I have been wanting to ever since it came out in Gourmet (sniff), because I needed to test it for some upcoming classes, because it sounded so incredibly good to me, and because I thought Randy would love it.  A tender crust, tomatoes, fresh corn, herbs, sharp Cheddar cheese – all right up Randy’s alley, especially the corn part.  But no.  He liked the crust but thought the filling needed more “oomph”.  What exactly have I created here?  Randy is, of course, welcome to his opinions and is generous with his praise when he likes something, but disappointed because of lack of “oomph” in a homemade savory pie on a Monday night?  People, can I get an amen here?

For the record, in my opinion, there was no lack of oomph.  It’s summer and that means that good ingredients speak for themselves.  There is no need for a thick custard filling when tomatoes and corn and herbs are at seasonal perfection.  The crust is super easy to make and is perfect for this particular pie – not too crust-like, more like a biscuit.  I wondered why a bit of mayo thinned with lemon juice made an appearance here but it was a perfect bit of creaminess without being too heavy.

As much as I loved Gourmet and as much as I miss receiving it in my mailbox every month, their recipes often seemed overly fussy to me.  I have streamlined this one a bit to make it more of a weeknight meal.

One Year Ago:  Holly B’s Fruit Scones
Two Years Ago:  Zesty Tofu Wraps
Three Years Ago:  Pasta with Cauliflower and Peppers, and Walnut Pesto

Tomato and Corn Pie
Adapted from Gourmet
Serves 6

2 cups all-purpose flour
1 tbsp. baking powder
1¾ tsp. salt, divided
¾ stick cold unsalted butter, cut into ½-inch cubes, plus 2 tsp. melted
¾ cup whole milk
1/3 cup mayonnaise (DT:  I used low-fat)
2 tbsp. fresh lemon juice, or more as necessary
2 pounds beefsteak tomatoes, sliced crosswise ¼-inch thick, divided
3 ears of corn, kernels cut off the cobs
¼ cup chopped fresh basil, divided
2 tbsp. chopped fresh chives, divided
Freshly ground black pepper
1½ cup sharp Cheddar cheese, divided

Preheat oven to 400ºF.  Whisk together flour, baking powder, and ¾ tsp. salt, then blend in cold butter (¾ stick) with your fingertips or a pastry blender until is resembles coarse meal.  Add milk, stirring until mixture just forms a dough, then gather into a ball.

Divide dough in half and roll out 1 piece on a lightly floured surface, into a 12-inch round.  The dough is pretty sticky, so be sure to keep moving it around the surface and sprinkling lightly with flour as needed.  Roll the dough over the rolling pin and unroll it into a 9-inch pie plate.  Pat into place with your fingers and trim any overhang.

Whisk together mayonnaise and lemon juice.  You want a thick pourable consistency, so add more lemon juice if necessary.

Arrange half of the tomatoes in crust, overlapping, and sprinkle with half the corn half the herbs, ½ tsp. salt, and a few grinds of pepper.  Repeat with another layer of the same.  Sprinkle with half the cheese.  Pour lemon mayonnaise over filling and sprinkle with remaining cheese.

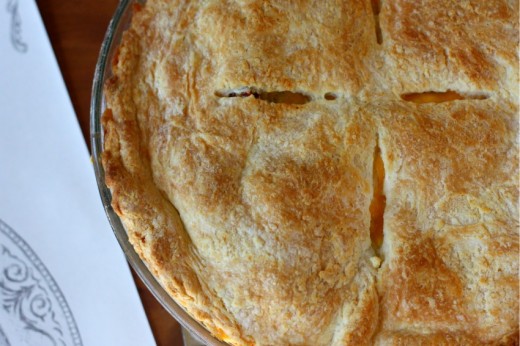
Roll out remaining piece of dough into a 12-inch round in same manner, then fit over filling, folding overhang under edge of bottom crust and pinching edge to seal.  Cut 4 steam vents in top crust and brush crust with melted butter (2 tsp).

Bake pie until crust is golden and filling is bubbling, 30 to 35 minutes, then cool on a rack.  Serve warm or at room temperature.


Bittersweet Chocolate Pudding Pie

October 7, 2010

Five years ago this month, I joined a preschool co-op with my older son Graham.  He was 11 months old at the time.  I had been told, by multiple friends, that co-op was the way to go.  Not so much for the children but for the community with other moms.  To all my friends who made this recommendation – thank you.  I now have lifelong friends because of the time we spent at that co-op.

We were extremely lucky to end up in a wonderful class.  Sometimes groups of people just gel and ours certainly did.  Most of us were new moms and we were all struggling through the same issues.  The group provided tremendous support and we actually really bonded through food.  The class met from 11am – 1pm once a week and we took turns bringing lunch.  I think the original intent was to provide food for the kids but it quickly morphed into a full blown lunch for the mommies as well.  (I wonder if I had anything to do with that…)

We were only in that co-op for two years but a small group of us still gets together on a regular basis.  We usually go out for dinner and sometimes we allow the husbands to come along with us.  Last week met up at someone’s house and the timing happened to coincide with our friend Kimrick’s birthday.  When I asked her what kind of dessert she wanted she said chocolate.  That’s my girl.

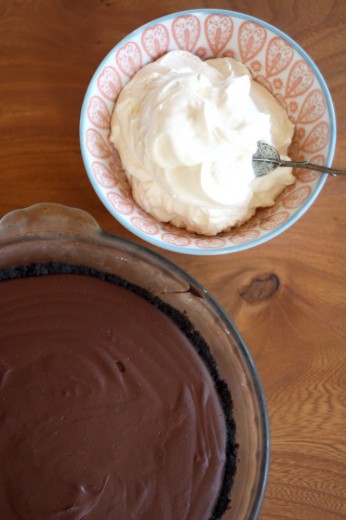
Because I had just made a cake, I opted to go the tart route this time.  This one features a chocolate cookie crust, a chocolate pudding middle, and a crème fraîche whipped top.  The only slightly negative thing I can say about his magical creation is that it isn’t all that easy to cut.  There are worse problems to have.  I’m a sucker for a chocolate cookie crust – even though it is nothing but chocolate wafers, sugar, and butter.  But the star here is the pudding.  As I was making it, I remembered the snack packs my mom used to put in my school lunch box.  I thought that chocolate pudding was the most delicious thing I had ever tasted.  I’m still a sucker for chocolate pudding especially with a topping as decadent as this one.

One Year Ago: Asian Coconut Noodle Soup

Bittersweet Chocolate Pudding Pie with Crème Fraîche Topping
Adapted from Bon Appétit
Serves 8-10

For some reason, those chocolate cookie wafers can be hard to find.  I have successfully used the Whole Foods brand of chocolate cookie grahams.

Crust
1 cup chocolate wafer cookie crumbs (about half of one 9-ounce package, finely ground in processor)
2 tbsp. sugar
5 tbsp. unsalted butter, melted
2 ounces bittersweet chocolate, finely chopped

Filling
1/3 cup sugar
1/3 cup unsweetened cocoa powder
2 tbsp. cornstarch
¼ tsp. salt
1¾ cups whole milk, divided
¼ cup heavy whipping cream
4 ounces bittersweet chocolate, finely chopped
1 tbsp. dark rum
1 tsp. vanilla extract

Topping
1 cup chilled crème fraîche
1 cup chilled heavy whipping cream
¼ cup sugar
1 tsp. vanilla extract

Bittersweet chocolate curls or chocolate sprinkles (optional)

Crust
Position rack in center of oven; preheat to 350°F.  Blend cookie crumbs and sugar in processor.  Add melted  butter; process until crumbs are evenly moistened.  Press crumb mixture onto bottom and up sides (not rim) of 9-inch-diameter glass pie dish.  Bake until crust begins to set and no longer looks moist, pressing gently with back of fork if crust puss, about 12 minutes.  Remove crust from oven, then sprinkle chopped chocolate over bottom of crust.  Let stand until chocolate softens, 1 to 2 minutes.  Using offset spatula or small rubber spatula, spread chocolate over bottom and up sides of crust to cover.  Chill crust until chocolate sets, about 30 minutes.

Filling
Whisk sugar, cocoa, cornstarch, and salt to  blend in heavy medium saucepan.  Gradually add 1/3 cup milk, whisking until smooth paste forms.  Whisk in remaining milk, then ¼ cup cream.  Using flat-bottom wooden spoon or heatproof spatula, stir mixture constantly over medium heat, scraping bottom and sides of pan until pudding thickens and begins to bubble at edges, about 5 minutes.  Add chocolate; stir until mixture is smooth.  Remove from heat; stir in rum and vanilla.  Pour hot pudding into crust and spread evenly.  Cool 1 hour at room temperature.  Cover with plastic wrap; chill overnight.  (Can be made 2 days ahead.  Keep refrigerated.)

Topping
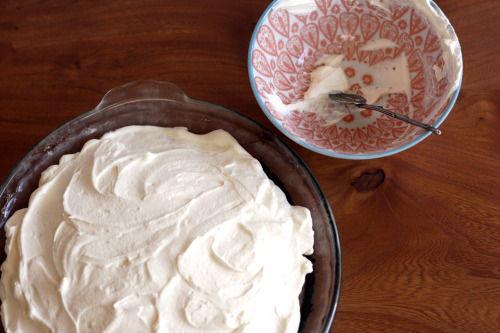
Using electric mixer, beat crème fraîche, whipping cream, sugar, and vanilla in medium bowl just until stiff peaks form and mixture is thick enough to spread (do not overbeat or mixture may curdle).  Spread topping decoratively over top of pie, swirling to create peaks, if desired.  (Can be made 6 hours head.  Cover with cake dome (DT: or foil) and refrigerate.)

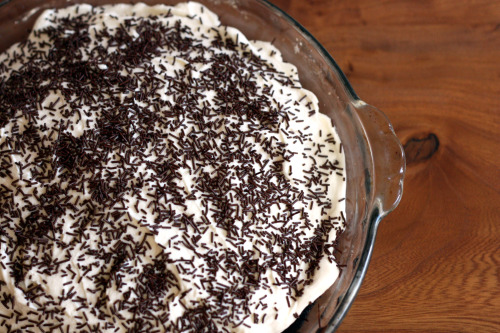
Sprinkle chocolate shavings or sprinkles decoratively atop pie.


Using Up Winter Vegetables

January 15, 2010

IMG_4438

Last weekend was the end of our CSA.  We joined in June and have gotten lovely produce almost every week since.  I chose this one because it went all the way through the fall and into winter.  Fall produce is my favorite (at least in terms of vegetables), so I didn’t want one that ended in September.

Now that it is over, I wonder if I will join again next year.  Or if I will choose another farm.  Or if I will just shop the farmer’s market, selecting what I want rather than resigning myself to what they give me.  I loved the quality – vegetables so fresh! – and the challenge of using what was completely seasonal.  I didn’t love week after week (after week) of carrots and greens.  So I don’t know.  Something to ponder in the dark days ahead before the days of kale end and the days of asparagus begin.

IMG_4442

I do love that of the many vegetables in this pot pie, half were from my CSA.  The parsnips, carrots, brussels sprouts, and beets were all in that last box.

If you take a look at the side bar to your right, you will notice a new category.  My friend Kelly suggested I create one for “quick and easy” recipes.  I went back through my archives and tagged the ones I would describe that way.  Everyone has a different idea of what is quick and easy so you may not always agree with me.  For instance, something that bakes in the oven for a while but only took you a few minutes of hands-on time would count in my book.  Or something that simmers on the stove with just a stir from you every ten minutes or so.  I know that getting dinner on the table can sometimes be a Herculean effort, so I hope you find this category helpful.

I would not qualify this pot pie as quick – easy yes, but not quick.  Look at this as a chance to practice your knife skills.  You will be richly rewarded by something extremely tasty and hearty without being heavy.  Feel free to play around with the vegetables and their amounts.  Everything gets roasted for the same amount of time with the exception of the zucchini, so if you have two beets and one parsnip – go for it.  Or if the idea of using half a butternut squash seems fussy to you, use the whole one and don’t use the beets.  You can see where I am going with this.  My final note is to not pile up the biscuit dough as high as I did because they didn’t cook all the way through by the time they were starting to brown.  Next time, I will dollop more delicately.

IMG_4449


Chunky Vegetable Pot Pie
Adapted from The Martha Stewart Living Cookbook – The Original Classics
Serves 6

1/2 medium (about 8 ounces) butternut squash, peeled and cut into ¾-inch cubes
1 small head celeriac, cut into ½-inch cubes
2 medium carrots, peeled and cut into thick 1-inch long matchsticks
1 cup cauliflower florets (from ½ of a cauliflower)
8 ounces brussels sprouts, cleaned and trimmed and sliced lengthwise
1 medium beet, trimmed and scrubbed, cut into ½-inch cubes
2 parsnips, peeled and cut into thick 1-inch long matchsticks
Olive oil
Kosher salt and freshly ground black pepper
3 garlic cloves, minced
2 medium shallots, minced
½ cup dry white wine
1½ cups vegetable stock
1 cup plus 2 tbsp. flour
2 tsp. baking powder
2 tbsp. plus 2 tsp. chopped fresh tarragon
3 tbsp. unsalted butter
1/2 cup milk
2 tbsp. freshly grated Parmesan cheese
1 medium zucchini, cut into 1-inch long matchsticks

1.  Preheat the oven to 425°F.  Place squash, celeriac, carrots, cauliflower, brussels sprouts, beet and parsnips in a roasting pan.  Toss with 2 tablespoons olive oil; season with salt and pepper.  Roast for 35 to 40 minutes, stirring twice during the cooking.  Remove; reduce oven to 375°F.

2.  Heat a medium skillet over medium heat.  Add just enough olive oil to coat the bottom, then add the garlic and shallots; cook until soft, about 5 minutes.  Raise the heat to high, and add the wine.  Let the wine reduce by half, about 2 minutes.  Add the vegetable stock and simmer over medium-high heat for 5 minutes.  Set aside.

3.  Combine 1 cup flour, the baking powder, 2 tsp. tarragon, and a sprinkling of salt in the bowl of a food processor.  Pulse in the butter until mixture resembles coarse meal.  Add the milk and Parmesan, process until combined, and set aside.

4.  Transfer vegetables to a large bowl.  Add zucchini and the remaining two tablespoons flour and two tablespoons tarragon; toss to combine.  Stir in the stock mixture; season with salt and pepper.  Transfer to a shallow ovenproof glass pie dish; bake for 15 minutes.  Remove from the oven and drop heaping tablespoons of the biscuit dough over the vegetables, leaving some of the vegetables exposed.  Place the pie dish in the oven and bake until the biscuits are golden, about 25 minutes.  Serve hot.


Apple Pie Bars

October 30, 2009

IMG_3679

Sometimes you need a lot of treats.  Maybe you are having a big party or have a weekend’s worth of events coming up and want to bring something to each one.  Or perhaps you are incredibly well-organized and want to stock your freezer full for the family that is coming over the holidays, plus still have something to give to your kids’ teachers.

If any of the above fits you, I would advise you to make these Apple Pie Bars.  If you like the look of them but don’t know what you would do with 48 of them, I would not advise you to make them.  I made them for last weekend’s yoga retreat and I only brought about half of them and then only about half of them got eaten.  I felt like everywhere I looked in my life there were apple pie bars.  They were like little bunnies, just multiplying and multiplying.

This is not to take anything away from what is a really lovely treat.  It’s really like a slice of apple pie but in pick-up-and-eat bar form.  Aside from the task of peeling and slicing 12 apples, it’s not a lot of work for a lot of bars.  I didn’t freeze mine, but the recipe says you can and wouldn’t it be nice to have a big batch to pull from now and then?  The recipe also says you can make them up to four days ahead and keep them at room temperature but I will tell you that the crust gets a little soggy after a day or two.  No flavor is compromised, just not as crisp.

IMG_3684

One Year Ago:  Zucchini Soup

Apple Pie Bars
Adapted from Food and Wine
Makes 48 large bars

Whenever I bake with apples, I almost always use Granny Smith.  They are readily available and while they are not what I would choose to eat out of hand, they are wonderful for baking.  I like that they keep their structure more than other apples (i.e. don’t become mush) and I also like that they are on the tart side.  To me, apple desserts should have some play on sweet and sour.

Crust
3 sticks unsalted butter, softened
3/4 cup sugar
3 cups flour
1/2 tsp. kosher salt

Filling
6 tbsp. unsalted butter
1/2 cup light brown sugar
12 Granny Smith apples (about 6 pounds) – peeled, cored and thinly sliced
1 tbsp. cinnamon
1/4 tsp. freshly grated nutmeg
1 cup water, as necessary

Topping
3/4 cup walnuts
3 cups quick-cooking oats
2 cups flour
1 1/2 cups light brown sugar
1 1/4 tsp. cinnamon
1/2 tsp. baking soda
1/2 tsp. kosher salt
3 sticks unsalted butter, cut into 1/2-inch cubes and chilled

1.  Make the crust.  Preheat the oven to 375°F.  Line a 15-by-17-inch rimmed baking sheet with parchment paper.  In a standing electric mixer fitted with a paddle, beat the butter with the sugar at medium speed until light and fluffy, about 2 minutes.  At low speed, beat in the flour and salt until a soft dough forms.  Press the dough over the bottom of the prepared pan and 1/2 inch up the side in an even layer.  Bake in the center of the oven for about 20 minutes, until the crust is golden and set.  Let cool on a rack.

2.  Meanwhile, make the filling.  In each of 2 large skillets, melt 3 tablespoons of the butter with 1/2 cup of the light brown sugar.  Add the apples to the skillets and cook over high heat, stirring occasionally, until softened, about 10 minutes.  Stir half of the cinnamon and nutmeg into each skillet.  Cook until the apples are caramelized and very tender and the liquid is evaporated, about 10 minutes longer; scrape up any bits stuck to the bottom of the skillet and add up to 1/2 cup of water to each pan to prevent scorching.

3.  Make the topping.  Spread the walnuts in a pie plate and toast until golden and fragrant, about 8minutes.  Let cool, then coarsely chop the walnuts.  In a large bowl, mix the oats with the flour, light brown sugar, cinnamon, baking soda and salt.  Using a pastry blender or two knives, cut in the butter until the mixture resembles coarse meal.  Stir in the walnuts and press the mixture into clumps.

4.  Spread the apple filling over the crust.  scatter the crumbs on top, pressing them lightly into an even layer.  Bake in the center of the oven for 1 hour, until the topping is golden; rotate the pan halfway through baking.  Let cool completely on a rack before cutting into 2-inch bars.

Make ahead: The bars can be stored in an airtight container at room temperature for 4 days or frozen for a month.


« Older Posts