Category: Quick and Easy

Spring Vegetable Egg Drop Soup

May 30, 2013

I lived almost my entire life in Seattle and I will tell you that winter is not the cruelest season. Winter can be terrible in most parts of the country but in the Northwest, I never had to worry that my kids would actually freeze if they forgot their coat at school. As long as you had the right gear, you could be outside all season. I was thankful for no biting wind, almost no snow, and none of the electric shock you get in colder climates when you take off your overcoat. (And you don’t really have to wear an overcoat.)  Winter was no walk in the park but it was much milder and much better than many other places.

Spring is when I would start to go nuts. Because most years, there isn’t really a spring in Seattle. The winter just drags on and on. You will get a week or so of nice weather and everyone and their mother/grandmother/uncle/dog will be outside and everyone will be oh so optimistic that winter is over only to have it return, with a vengeance. Some people say if you are going to live in Seattle, you have to plan to get away in February, but I would change that month to May. February is when you can take refuge in the fact that you aren’t shoveling snow out of your driveway, or wondering if your car is going to start, or hoping your pipes don’t freeze. May is when you can’t quite understand why people are talking about spring and grilling and eating outside.  It is also when you might be cursing the fact that it is light until almost 10pm but you can’t enjoy it because it is raining. May is when I would question my choice to live in that city. May is when I would long for spring but never really feel it.

To add insult to injury, the spring produce would take forever to come in. Seattle markets, when they are in their prime, are a thing of beauty and glory. Early spring is not that time. Early spring, spring at all really, is meager and frustrating. While seemingly the rest of the country is enjoying all the lovely springy green things, Seattle has just not quite caught up.

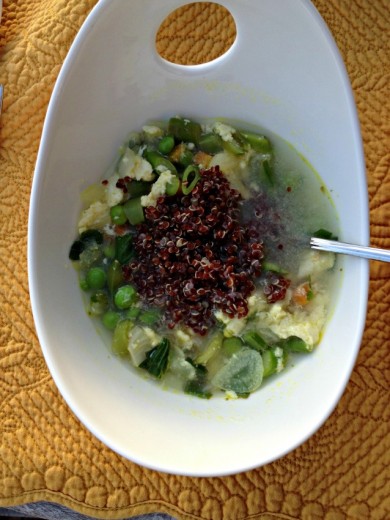
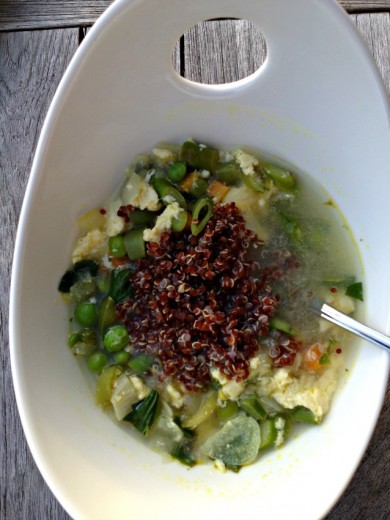
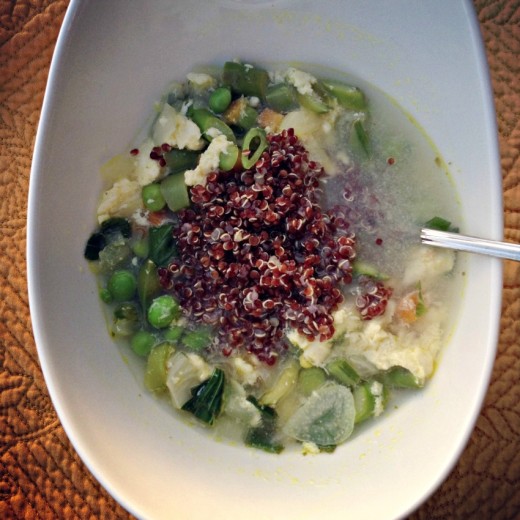
Because I shop at the farmers markets and because I cook seasonally, I am very in tune to seasonal transitions in produce. At no time are those transitions more remarkable than going from winter to spring. You essentially go from root-type vegetables that need to be roasted or stewed or braised to make them tasty, to gorgeous green things that only need a minute on the grill or in the oven or on the stovetop – or no cooking at all! – to make them tasty.  I found this soup on Epicurious when I was searching for a recipe for garlic scape pesto (it was actually in the May 2013 Bon Appétit).  It immediately brought back memories of my childhood because my mom used to make me egg drop soup all the time.  The one she made me was very kid friendly, i.e. no vegetables, and I loved it.  In this version, the vegetables are definitely the star of the show but the egg saves it from just being, you  know, a vegetable soup.  I served this as a main course and thought it needed a little something to make it more substantial, so I included a dollop of red quinoa.

One Year Ago:  Tartines with Gruyère and Greens
Two Years Ago:  Shaved Spring Vegetable Salad
Three Years Ago:  Rhubarb Bette
Four Years Ago:  Rosemary Raisin Pecan Crisps
Five Years Ago:  Roasted Potatoes and Onions with Wilted Greens (also the story of when I stopped eating meat)

Spring Egg-Drop Soup
Bon Appétit
Serves 4

The only changes I made to the recipe below is that I used less olive oil to sauté and served the quinoa on top.  I would say it serves 3 as a main course.  I spring garlic cloves instead of the garlic scapes only because I used all mine in the pesto.

¼ cup olive oil
2 medium carrots, peeled, chopped
6 small spring onions, bulbs only, coarsely chopped (about 1 ½ cups)
3 medium spring garlic bulbs, 1-2 garlic scapes, or 2 regular garlic cloves, thinly sliced
Kosher salt
4 cups low-sodium chicken broth
½ pound asparagus, sliced on a diagonal ½” thick
¼ pound sugar snap peas, sliced on a diagonal ¼” thick
2/3 cup shelled fresh peas (from about 2/3 pound pods)
2 large eggs
1 tablespoon grated Parmesan plus more for serving
¼ cup torn fresh basil leaves
¼ cup torn fresh mint leaves
1 ½  teaspoons (or more) fresh lemon juice
Cooked red quinoa (optional)

Heat oil in a large heavy pot over medium heat. Add carrots, spring onions, and garlic and season with salt. Reduce heat to medium-low, cover, and cook, stirring occasionally, until vegetables are soft, 15-20 minutes.

Add broth and bring to a boil. Add asparagus, sugar snap peas, and peas and cook until vegetables are crisp-tender, about 3 minutes.

Meanwhile, beat eggs in a small bowl with 1 tablespoon Parmesan, a pinch of salt, and 1 tablespoon water.

Reduce heat to low and stir basil and mint into soup. Drizzle in egg mixture in 4 or 5 spots around pot. Let stand for 1 minute so egg can set, then gently stir in 1 ½ teaspoons lemon juice. Season soup with salt and more lemon juice, if desired. Serve soup topped with more Parmesan and a dollop of quinoa, if desired.
Crushing on Salad

January 24, 2013

I have always liked boys.  When I was in first grade, I was head of the “kisser girls”, the club whose duty it was to run after boys on the playground, catch them, and kiss them.  With all the boys to choose from, some of whom slowed down noticeably so we could catch them, it was hard to settle on one for a “boyfriend”.  Once I started second grade, I fell for a sweet boy who was taller than me and lived in a blue house with an eagle over the door.  He was my crush in third grade too and again in sixth grade after I spent fourth and fifth pining over a boy who wouldn’t give me the time of day.  I had my first serious boyfriend in seventh grade and from there things got a little more complicated. But throughout my single life, I always had crushes.  Some of them turned into relationships, others didn’t.

These days, I am happily married and crushes on guys are a thing of the past. So now I crush on salads. Sometimes the crushes turn into full blown love affairs as in the case of this salad (my spring stand-by) and this one (my fall stand-by).

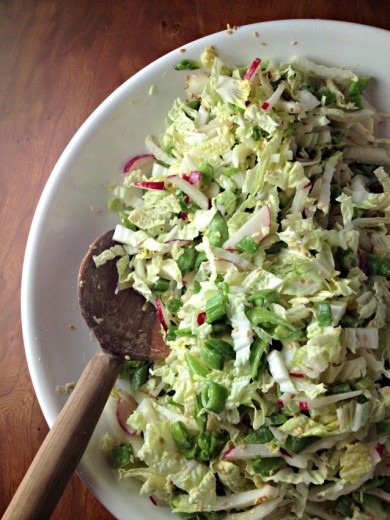
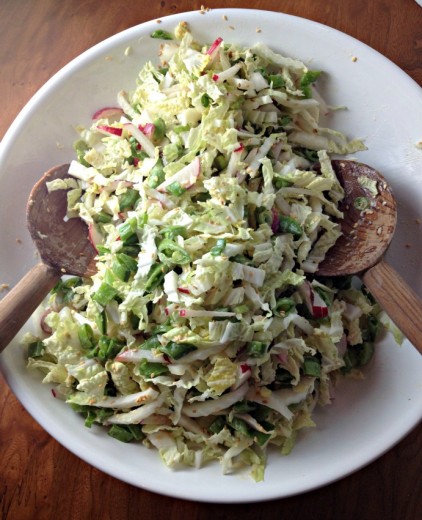
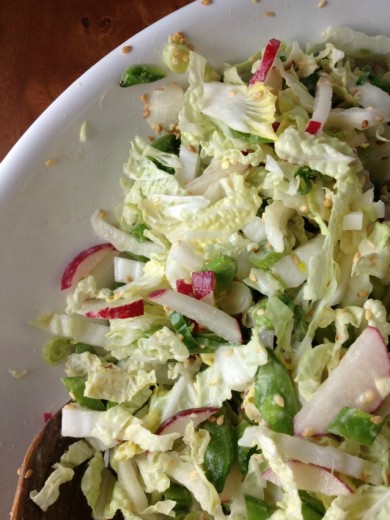
Meet my new crush. Or, seeing as I have made it countless times in the past month, my new love. There are so many things to fall for here. Even though the dressing has vaguely Asian flavors, it goes with any meal you want to serve from soba noodles to linguine. I should know because I’ve served it with just about everything. It is the rare salad that can actually be dressed ahead of time and does not get wilty. The core ingredients are things that keep well in your refrigerator so you could theoretically make it at a moment’s notice. The dressing keeps well too. You can scale it up easily to feed a crowd, it is crunchy and light but satisfying with lots of umami (thank you miso paste) and all in all, it would make a great boyfriend if it was, you know, a person.

As written, this is a terrific recipe. I’ve changed a few things in the way I make it to reflect personal taste. (I’ll give you the recipe the way Deb wrote it.) I prefer to make it with raw snap peas rather than blanched. It saves a step and I like the crunch and intense sweetness of those pods when they are raw. Blanching gives them a bit of a funky flavor in my opinion. Also, I cut back on the amount of scallions because I don’t enjoy the taste of raw onion, especially in salad. For the dressing, I do use the sesame oil but not the vegetable oil. Instead, I use water for the liquid, 2 – 4 tablespoons depending on how it is coming together. I’ve made the dressing in both my mini food processor and my blender and it came out great both ways. I would recommend doubling it.

One Year Ago:  Celery Root Soup, Apple Cheddar Quick Bread
Two Years Ago:  Roasted Tomato Salad with Croutons, Meyer Lemon Risotto Cakes
Three Years Ago:  Peanut Butter Cookies with Milk Chocolate Chunks, Chickpea , Chard, and Couscous Soup, Soba Noodles with Crispy Tofu
Four Years Ago:  Sliced Eggplant Spread with Crostini, Lemon Bars

Snap Pea Salad with Miso Dressing
The Smitten Kitchen Cookbook
Serves 4-6

I made this dressing with peanut butter when I was out of tahini and it tasted great.  Please don’t skip the step of toasting the sesame seeds.  Like most nuts and seeds, their flavor really comes out when they are given some heat.  Just keep a close eye on them so they don’t burn.

Table salt for the pot
½ pound sugar snap peas, untrimmed
½ pound Napa cabbage, in thin ribbons (about 3 cups)
4 ounces radishes (4 medium-large) julienned, or quartered and thinly sliced
3 large scallions (about ½ bundle), white and green parts only, thinly sliced on bias
3 tbsp. sesame seeds, well toasted (300-degree oven for 5 to 8 minutes)

Sesame-Miso Dressing
1 tbsp. minced fresh ginger
1 large garlic clove, minced
2 tbsp. mild yellow or white miso, plus up to 1 tbsp. more
2 tbsp. sesame seed paste or tahini
1 tbsp. honey
¼ cup rice vinegar
2 tbsp. toasted sesame oil
2 tbsp. vegetable or olive oil

Blanch sugar snap peas:
Bring a large pot of salted water to a boil, and prepare a small ice-water bath.  Boil the sugar snaps for about 2 minutes, or until just barely cooked but still crisp.  Scoop them out with a large slotted spoon, and drop them in the ice-water bath.  Once they’re cool, drain and pat dry.  Tim ends and cut sugar snaps on bias into thin slices.  Toss in large bowl with cabbage radishes, scallions, and 1 tablespoon sesame seeds.

Make the dressing:
Whirl all ingredients, using the smaller amount of miso, in a blender until smooth.  Taste and adjust the ingredients – use the extra tablespoon of miso if desired.  Don’t fret if it is a tad salty, and try to resist the urge to compensate with extra honey.  The sugar snaps have a mellow sweetness to them that balances well with a saltier-than-normal dressign.

Assemble the salad:
Toss salad with half of dressing, and taste.  Use more if you desire.  Sprinkle with remaining sesame seeds.


Veggies and Dip

September 3, 2012

Where do you stand on the term “foodie”?  How about “fridge”?  And “veggies”?  These are all words that food people frown upon.  I find myself refraining from using them when in reality none of them bother me and “fridge” is much easier to type than “refrigerator”.  So I’m going to talk about veggies and dip.  Not vegetables and dip.

You might think that years of going to parties where the only thing I could eat was veggies and dip might have soured me on that combo.  The opposite is true.  I zero in on that platter.  If I parked myself next to it, I might be able to eat the whole thing.  And taking a few veggies on your plate with a spoonful of dip just doesn’t taste as good as standing at the table and eating from the platter.  The same is true of chips and salsa.  Am I right?

I like making dips that keep well and having them easily accessible for friends and relatives who might stop by.  A casual weeknight dinner feels just a little bit more fancy if there is an appetizer involved.  I always keep good olives in my fridge (not refrigerator) for that same reason.  And then no one minds if it takes you a little longer to get dinner on the table.

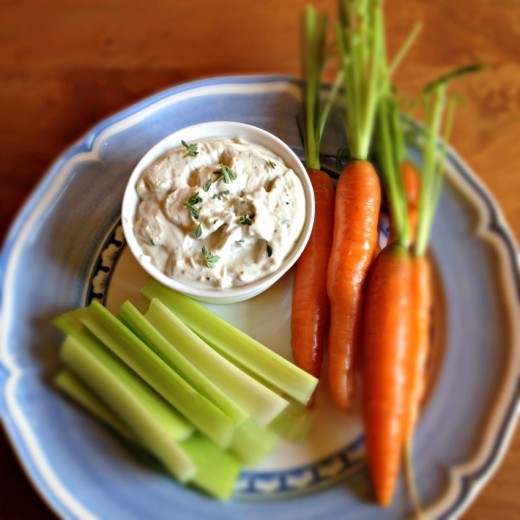
This dip is just a bit unexpected with the smoked blue cheese.  I’m sure it would be great with regular blue cheese too but I have always been a fan of any smoked cheese.  I served this one night with these beautiful vegetables from Oxbow Farm and on another night with pita chips.

One Year Ago:  Yogurt and Oregano Pesto Soup,
Two Years Ago:  Savory Scones
Three Years Ago:  Mint Filled Brownie Cupcakes
Four Years Ago:  Fresh Summer Rolls with Hoisin Peanut Dipping Sauce 

Blue Cheese Dip

Bon Appétit
8-10 servings

Kosher salt
1 garlic clove, coarsely chopped
2½ tsp. red wine vinegar
1 tsp. finely chopped fresh thyme
½ pound smoked (or regular) blue cheese, crumbled
1 cup sour cream
2/3 cup mayonnaise
Freshly ground black pepper

Sprinkle salt over garlic and chop, occasionally smearing mixture with blade of knife, until paste forms.  Whisk garlic paste, vinegar, and thyme in a medium bowl.  Add cheese; mash with the back of a fork until cheese in finely crumbled.  Stir in sour cream and mayonnaise.  Season dip to taste with salt and pepper.  Serve with assorted vegetables.  (Can be made 2 days ahead.  Cover and chill.)


From the Magazines

August 2, 2012

Ever since my early 20’s, I have been getting food magazines in the mail.  The subscriptions have varied over the years but I have received at least one every month for 20 years.  (Current ones are Food & Wine, Cook’s Illustrated, and Saveur.  How about you?)

The magazines tend to pile up for months before I attack them with scissors, cut out the recipes that I want, and tape them into four binders that I have with 20 years worth of magazine recipes.  It is a long process and since the past few years have been pretty busy, it has literally been two years since I last did a scissor attack.  Two years worth of magazines is a lot of magazines.  There is no way I am moving those along with the other 9 billion things we have in our house so it was time to start whittling them down.

In the past, when I have started this process, I have just gone through them chronologically.  But that often meant I was paging through Christmas issues in July, or BBQ special issues while the Thanksgiving turkey was in the oven.  Reading about food that is completely out of season is not all that inspiring.  So this time, I decided to sort them out into season and start with the summer issues.  I was looking for some inspiration anyway and I certainly found it within the pages of June, July, and August magazines.

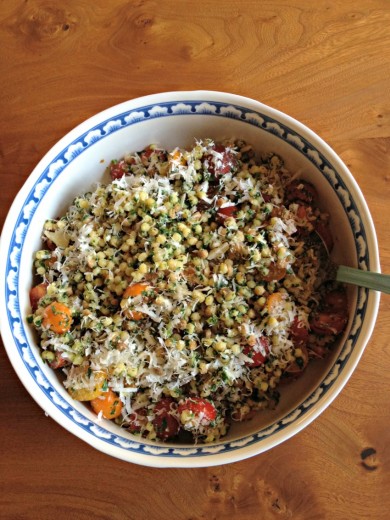
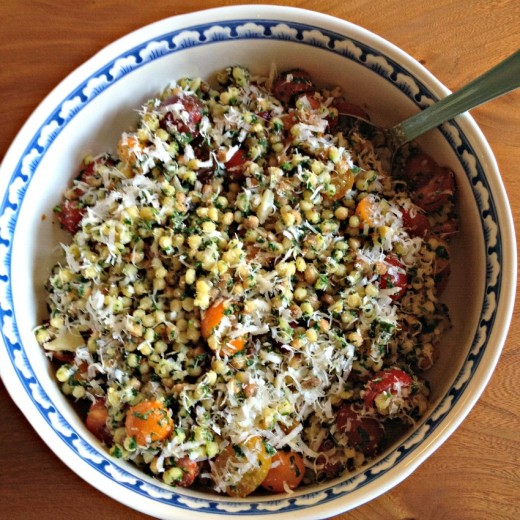
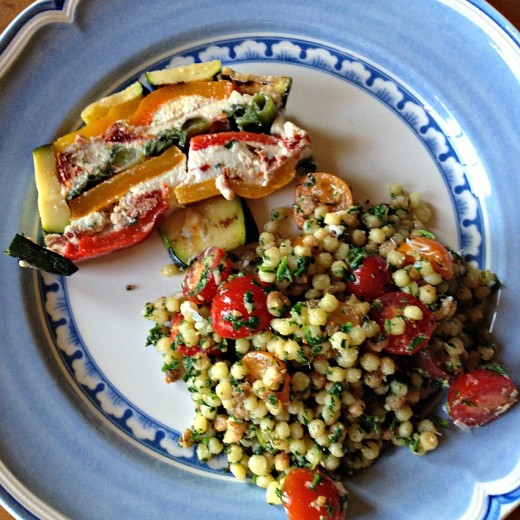
This recipe will surely become a favorite around here.  I’ve always been a fan of Israeli couscous – so much so that I had no fewer than three bags of it in my pantry.  Here it gets tossed with a pesto made from arugula and lots and lots of tomatoes.  I like basil pesto as much as the next person, but arugula is such a nice change.  It tastes brighter than its green cousin and just a tantalizing hint of bitterness.  The cooking time is minimal so it is a great choice for a hot night.  It is best served room temperature so it is great to bring to a potluck or a picnic (it also makes a lot and scales up easily.)  And if you are one of those lucky people who has tomatoes coming out of their ears, now you have a wonderful place to park them.

I served this salad along side a beautiful vegetable terrine that I was really excited about.  All of us picked at the terrine and had seconds of the couscous.

One Year Ago:  Tomato and Corn Pie
Two Years Ago:  Yeast Bread Sticks
Three Years Ago:  Grilled Potato Slices with Salt and Vinegar

Israeli Couscous and Tomato Salad with Arugula Pesto

Adapted from Food & Wine
6-8 servings

One of the things I don’t like about pesto is how oily it is.  I use a bit less oil in mine here.  If you like you can add a full ½ cup or you can drizzle additional over the finished salad if it seems too dry.

6 ounces arugula, plus additional leaves for garnish
2 cups Israeli couscous
1/3 cup olive oil
¼ cup pine nuts
1 garlic clove, chopped
¼ cup freshly grated Parmesan cheese, plus additional for garnish
Kosher or sea salt and freshly cracked black pepper
2 pints multi-colored cherry tomatoes, halved

Bring a large pot of salted water to a boil.  Add the 6 ounces of arugula and blanch for 10 seconds.  Using a slotted spoon, transfer the arugula to a colander.  Rinse under cold water to stop the cooking, then drain thoroughly.

Add the Israeli couscous to the boiling water and cook over moderately high heat, stirring occasionally, until it is al dente, about 10 minutes.  Drain the couscous and put it in a large wide bowl.  Drizzle lightly with olive oil and toss to prevent it from clumping.  Let the couscous cool to room temperature.

In a small skillet, toast the pine nuts over moderate heat, tossing, until golden brown, about 2 minutes.  Let cool.

Squeeze the excess water from the blanched arugula and coarsely chop it.  Transfer the arugula to a food processor.  (DT:  I used my mini food processor for this job.)  Add the pine nuts, garlic, cheese and the 1/3 cup of olive oil and process until the pine nuts are finely chopped.  Season the arugula pesto with salt and pepper.

Using a spatula, stir the pesto into the cooled couscous until well combined.  Gently fold in the tomatoes.  Garnish the salad with the remaining arugula leaves and some freshly grated Parmesan cheese.

(I didn’t try it but I’m sure you could make this salad earlier in the day.  Cover and refrigerate it but allow it to come to room temperature before you serve it.)


Editing is Important

April 25, 2012

Part of cooking well, like dressing well, is knowing when to edit.  There is a point where the dish is close to being just right and you can either just trust that it is good, or you can keep adding to it and potentially ruin it.  I think this is a particular danger with vegetarian food.  Without the protein anchor, sometimes it might feel like you need to keep adding layers of flavor to make up for what is “missing”.  Too many layers of flavor is my main critique of Seattle’s vegetarian restaurants and why I almost never frequent them.

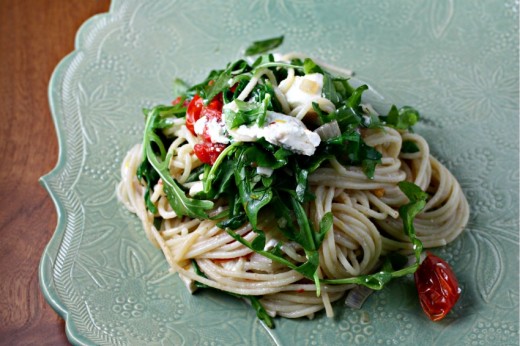
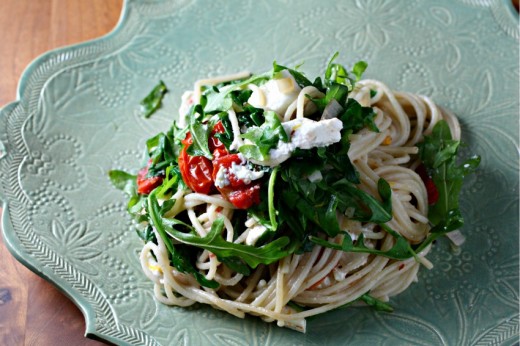
A dish doesn’t have to have a whiz! bang! pop! to be lovely.  I first got this idea from Tracy and her Angel Hair Pasta with Arugula and Lemon.  Every so often a dish sticks in my overstuffed brain and lately it has been this one.  As we were driving back from our decadent weekend in Walla Walla, I started dreaming of superfine pasta stuffed to the gills with arugula.  I had recently bought some angel hair in a lovely package and we were lucky enough to visit a goat cheese farm while in Walla Walla and had purchased some delightful mild feta.  I decided that, rather than make Tracy’s dish to the letter, I would just riff on it.

As it turns out, my dish is not much like hers.  That is what you get when you don’t actually consult a recipe you are trying to riff on!  But we loved this light and sunny pasta and it came together in no time.  I put some small cherry tomatoes in the oven to roast, got my pasta going, then satuéed shallots and red pepper flakes in a bit of olive oil.  I grated in the zest of a Meyer lemon and then waited for the pasta to cook.  Once it was just shy of al dente, I scooped it into the pan with the shallots and added lemon juice, lots of arugula, small cubes of feta, and the roasted tomatoes.  I used the pasta cooking water to loosen the sauce.  As I was tossing it all together, my mind was saying, “Olives! Pine Nuts! Parmesan!”, but I was able to edit and keep it simple.

One Year Ago:  Brown Sugar Pound Cake (I’ve probably made this cake more than any other)
Two Years Ago:  Zucchini and Olive Salad
Three Years Ago:  Ricotta Calzones with Sausage and Broccoli Rabe

Pasta with Lemon, Arugula, and Roasted Tomatoes
Dana Treat Original (but thanks Tracy for the inspiration)
Serves 2-3

My noodles were actually more like a cross between angel hair and spaghetti, so I’m suggesting you use spaghettini in the recipe below (it’s a thinner spaghetti).

Olive oil
20 small cherry tomatoes
Kosher or sea salt and freshly ground black pepper
1 large shallot, finely diced
½ tsp. red pepper flakes
Zest and juice of 1 Meyer lemon
4 ounces feta cheese, cut into small cubes
4 ounces arugula, plus more for garnish
8 ounces spaghettini

Preheat the oven to 375ºF.  Place the tomatoes on a small baking sheet.  Drizzle with olive oil and sprinkle with salt and pepper.  Roast in the oven until they soften, brown in spots, and start to collapse a bit, about 20 minutes.  Set aside.

Meanwhile, place a large skillet over medium heat.  Drizzle in just enough olive oil to coat the bottom of the pan, then add the shallots, red pepper flakes, and a large pinch of salt.  Sauté, stirring frequently, until the shallots soften and start to brown in spots, about 5 minutes.  Grate in the lemon zest and turn off the heat.

Meanwhile, bring a large pot of salted water to boil, then add the pasta.  Cook according the package directions until just al dente.  Taste it to make sure.  Using tongs, transfer the pasta to the skillet with the shallots.  Turn the heat to low and stir to coat the pasta with the shallots and pepper flakes.  Ladle in some pasta cooking water to loosen the sauce.  Add half of the arugula and keep tossing the pasta so that the arugula wilts.  Add the other half of the arugula along with the lemon juice, feta cheese, and the tomatoes.  Add more cooking water if the pasta seems too dry.  (You can also use olive oil if you prefer.)  Toss carefully.  Serve each portion topped with more of the arugula.


« Older Posts