Category: Yoga Retreat Food

Tomato Leek Soup

October 29, 2009

IMG_3660

The season for comfort food has started.  Just as comfort means different things to different people, comfort food is different for everyone.  For me, the thing that jumps to the top of my list is grilled cheese sandwiches and tomato soup.  Yes, I remember my mom making this for us (I now have the electric griddle she used to use) but when I really remember eating it was in camp.  I was always ravenous on those summer days; days that, living in the Pacific Northwest, weren’t always so summery.  The lunches where grilled cheese and tomato soup was served were some of my favorites.  The soup was just Campbell’s and the sandwiches were mostly bread with just a bit of cheese, and every single one of them was slightly burned.  But I didn’t care.  Dipping the sandwich in the hot soup was something that gave me great pleasure.

IMG_3655

Just after I started cooking for myself, I found a recipe for Tomato and Leek soup.  They suggested serving the soup with a grilled goat cheese sandwich made on egg bread.  A Dana Treat classic meal was born.  Over the years, I have served this soup with sandwiches on homemade challah probably 20 times.  It is Randy’s number one most favorite meal.  The soup is so good, it doesn’t need the sandwich, but it sure is a nice food memory for so many people.  You can, of course, make a regular grilled cheese sandwich with cheddar cheese and white bread and still have fun dipping.

Last weekend, I did another yoga retreat with my incredible friend Jen.  (You can see previous posts here and here.)  This time, unlike the past two, I was able to stay for the whole day – no brothers in the hospital and no birthday dinner waiting for me.  And what a treat it was.  From the moment I stepped in my car to head to the ferry, to the moment I drove off the ferry back in Seattle, it was an amazing day.  (There was a Sounders soccer game that evening, so the traffic-filled drive home was not amazing.)  The weather was beautiful, all the women there were so welcoming and wonderful, the yoga was intoxicating, and it was such an incredible treat to spend the day on myself.  Every busy person out there knows what I am talking about.

I didn’t have to think too hard about what to make for everyone’s lunch.  The trick was keeping it from Randy that I was making his favorite food and he wasn’t going to be able to have any of it.  He found out after the fact and made a big show of being the victim.  I make all this wonderful food for other people and not for him.  He said this as his leftover choices were roasted pear galette, a leek frittata, or a tomato and goat cheese tart.  Poor guy.

By the way, here is me and my new haircut.

IMG_3612

Tomato Leek Soup
Adapted from Bon Appétit
Serves 6-8

I almost always use an immersion blender when puréeing any kind of soup and it works great here.  So if you have one, use that.  I always use canned tomatoes in this soup.

2 tbsp. olive oil
1 cup coarsely chopped leeks
4 pounds chopped tomatoes
3 1/2 cups vegetables stock
1 1/2 cups white wine
1 7-ounce jar roasted red peppers, drained and chopped
1/2 cup chopped fresh basil
1/3 cup chopped fresh parsley
2 tbsp. fresh thyme leaves, or 2 tsp. dried
1/3 cup whipping cream
6 tbsp. tomato paste
4 tsp. minced garlic

Heat olive oil in large saucepan over medium heat.  Add chopped leeks; sauté until tender, about 10 minutes.  Add all the other ingredients.  Simmer one hour, stirring occasionally.  Coarsely purée using a food processor, blender, or immersion blender.  (Can be made one day ahead.  Cover and chill.)


Some of the Best Bread You Will Ever Eat

October 27, 2009

IMG_3590

Everyone who is afraid of making bread, please raise your hand.

Well, I wish I could see you and then I wish I could come into your kitchen, hold your hand, and make this bread with you.  There are a few reasons for this.  One, after my experience last week, I’d love to meet more people who read this blog.  Two, I would like to help dispel the myth that bread is scary and hard to make.  Three, I would love to share the joy and wonder that is bread baking.  And four, maybe you would let me take some of the bread home because mine is all gone.

IMG_3589

I know – yeast.  Eeeek!  But it does. not. have. to. be. so!  I have made this bread countless times and it always turns out perfectly.  It has nothing to do with my experience or any kind of “magic” – it’s just a terrific recipe and it’s easy.  Really.

The one thing you will need here is time.  This bread has four rising times, the longest being two hours and the shortest being ten minutes. The process will take five hours from beginning to end but almost all of that is rising time.  Your hands-on time (like with most bread) is maybe half an hour and even that is split into small increments.  Take advantage of one of those rainy days where you are just home and take the leap.  Maybe you are also making a big pot of soup or a lasagna or something that is going to keep you in the kitchen for a few hours.  The dough will keep you company while you work.

IMG_3653

And at the end of it all you get two gigantic loaves of the most fragrant, soft yet dense, and slightly sweet bread you can imagine.  It freezes incredibly well so you can enjoy one loaf and save the other for another time.  My very favorite way to eat it is completely plain – it’s that good.  But it also makes terrific french toast, bread pudding and grilled goat cheese sandwiches which you then serve with homemade Tomato and Leek soup.  Recipe for that one coming soon.

A couple of notes.  I use my Kitchen Aid mixer to make this dough.  I use the paddle attachment to mix everything together, and about halfway through adding the flour, I switch to the dough hook.  Once all the flour is added (and I think 6 cups is just about spot-on), I let it mix for about 5 minutes.  Dough that is sufficiently kneaded should feel like your ear lobe. A perfect place to let your dough rise is in the oven.  Turn it on to it’s lowest setting and then turn it off after just a few minutes.  Just that little bit of heat (plus no draft) will make it nice and cozy in there.  When you need to heat the oven to bake the bread, place the loaves on the stovetop where they will still get residual heat.

IMG_3598

Braided Challah
Adapted from Food and Wine
Makes 2 large loaves

2 packages active dry yeast
1/2 cup lukewarm water (about 110°)
1/3 cup sugar, plus a pinch
1 stick (4 ounces) unsalted butter, thinly sliced, plus 2 tablespoons, melted
1 cup milk
1 tbsp. honey
2 1/2 tsp. salt
4 large eggs, at room temperature
About 6 cups bread flour
1 large egg plus 1 large egg yolk and 1 tbsp. water

1.  In a small bowl, dissolve the yeast in the lukewarm water with the pinch of sugar and let stand until creamy and starting to bubble.  In a medium saucepan, combine the sliced butter and the milk.  Warm over low heat just until the butter melts. Stir in the remaining 1/3 cup of sugar and the honey and slat.  Pour the milk mixture into a large bowl and stir in the dissolved yeast and the 4 eggs.

2.  Stir in just enough of the flour, 1/2 cup at a time, to form a dense dough that doesn’t stick to the side of the bowl.  Turn the dough out onto a lightly floured surface and knead until smooth and elastic, adding only as much flour as necessary to keep the dough from sticking.

3.  Brush a large bowl with 1 1/2 tablespoons of the melted butter.  Transfer the dough to the buttered bowl and brush the top with the remaining 1/2 tablespoon of melted butter.  Cover the bowl with plastic wrap and a kitchen towel and let rise in a warm, draft-free spot until the dough is doubled in bulk, about 2 hours.

4.  Punch down the dough, then cover and let rise again until doubled in bulk again, about 1 1/4 hours.

5.  Line 2 large rimmed baking sheets with parchment paper.  On a lightly floured surface, divide the dough in half.  Cover one half with plastic wrap and divide the other half into  3 equal pieces.  Using lightly floured hands, roll each piece into a 10-inch long rope with tapered ends.

6.  Arrange the 3 ropes side by side pointing toward you and just touching.  Starting in the middle and working toward your body, braid the ropes together, bringing the outside ropes over the center one.  Pinch the ends to seal and tuck them under.  Turn the loaf around and repeat with the other half, this time braiding the outer ropes under the center one.  Seal the ends, tuck them under and transfer the loaf to a prepared baking sheet; gently plump the loaf with your hands.  Repeat with the remaining dough.  Cover the loaves with kitchen towels and let rise for 35 minutes.

7.  Preheat the oven to 375°F.  Mix the remaining egg, egg yolk, and tablespoon of water together to make a glaze.  Brush the loaves with the egg glaze.  Let stand uncovered for 10 minutes, then brush again with the glaze.  Bake the loaves in the upper and lower thirds of the oven, switching the pans halfway through baking, for 35-45 minutes, or until they are golden, feel light when lifted and sound hollow when tapped on the bottom.  Loosely cover the loaves with foil if they become too brown during baking.  Transfer to a rack and let cool thoroughly before slicing.


That’s a Wrap

July 31, 2009


img_2929

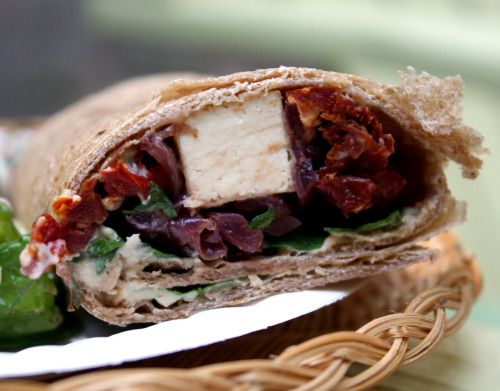
When I was putting together the menu for last weekend’s yoga retreat, there were a couple of things that were clear to me.  I wanted to take part in the morning session of yoga, so I needed to make things that could be mostly done ahead of time.  And I wanted to be sure to have some kind of sandwich.  Salads only after 2 hours of hot yoga was not going to satisfy this group.  Last time, I made three giant sandwiches on ciabatta bread which were very well received, but those took a lot of last minute time.  For this retreat, because I wanted to take part in the class, I needed to simplify.

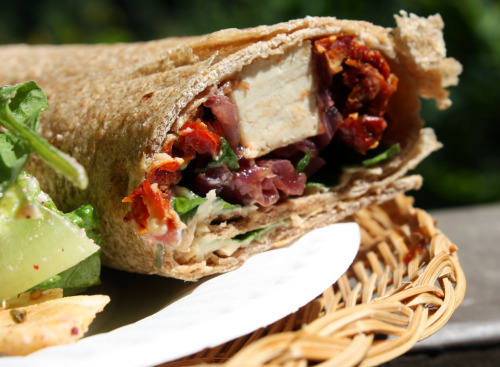
Enter one of my favorite sandwiches ever.  I first made these about 7 years ago and have made them countless times since.  Wraps of any kind are the perfect portable food and these are no exception.  I’ve made them for road trips and for picnics and for dinner when I am craving something healthy with a flavor explosion.

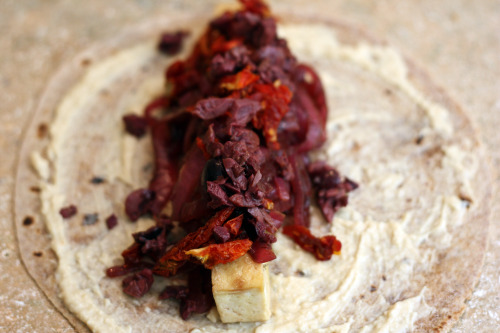
I would have made them in advance but there was a 7:55am ferry to catch and I wasn’t prepared to wake up any earlier than necessary.  Instead, I had all the components ready (hummus made…well, Trader Joe’s made it, olives chopped, sundried tomatoes sliced, balsamic red onions made, tofu sautéed) and put together the wraps in the hour of prep time allotted to me.

img_2910

The recipe orginally came from Cooking Light but I have made significant changes to it over the years.  The one thing I have kept the same is the ingredients and method for cooking the tofu.  This time I did pan fry it first as the recipe states, but I have also made it by just cooking raw tofu in the sauce.  It’s delicious both ways but the second option is healthier.  Finally, you may want to make extra balsamic onions.  They are spectacular and taste amazing in salads, pastas, you name it.

img_2936

One Year Ago:  Raspberry Cake and Blueberry Cobbler – both amazing summer desserts.

Zesty Tofu Wraps
Inspired by Cooking Light
Makes 4 wraps

If you are able to find sundried tomatoes that are not packed in oil, but are soft and supple, this is the place to use them.  If you can only find the brittle kind, reconstitute them in hot water for about 30 minutes.  Drain and chop.  You can easily vegan-ize this recipe by leaving out the honey.

1 cup sun-dried tomatoes, not packed in oil, thinly sliced
1 cup Kalamata olives, pitted and coarsely chopped
1 pound extra-firm tofu
Olive oil
1 large red onion, cut in half and thinly sliced
3 tbsp. balsamic vinegar
2 tbsp. fresh lemon juice
1 tbsp. red wine vinegar
1 tbsp. honey
1 tbsp. chopped fresh rosemary
2 tsp. Dijon mustard
1/2 tsp. kosher salt
4 (10-inch) flour tortillas
Hummus
4 cups arugula

Cut the tofu lengthwise into quarters.  Dry the tofu well on all sides with paper towels.

Heat a large skillet over medium heat.  Add just enough olive oil to coat the bottom.  Add onions and a pinch of salt.  Sauté until very soft and beginning to brown, 10-15 minutes.  Add balsamic vinegar and cook until most of the liquid has evaporated, about 10 minutes more.  Set aside.

Combine lemon juice and next 5 ingredients in a small bowl.  Heat pan over medium high heat.  Add just enough olive oil to coat the bottom and then add tofu.  Cook about 6 minutes, browning on all sides.  Stir in lemon juice mixture and cook 1 minute, or until sauce thickens.  (Alternatively, pour sauce into warm pan and immediately add tofu.  Turn on all sides to coat with sauce.)

Warm tortillas, if desired.  Spread about 2 tablespoon of hummus over tortilla.  Top with 1 piece of tofu, 1/4 of the onions, 1/4 of the olives, and 1/4 of the sundried tomatoes.  Add a small handful of arugula and roll up.

UPDATE:  Beth had a good question in the comment section.  She noticed that the tofu in these photos is more log-like than slab-like.  If you follow the recipe as written above, you will get slabs, which work out better for the wraps.  I quadrupled this recipe and actually needed to make 18 wraps, I made my pieces a little smaller.  Hence the logs.


Muhummara Dip

July 29, 2009


img_2956

There are certain dishes that just pop up for me again and again.  Things that I love and I keep trying variations until I find the one that becomes “my” version.  I’m thinking of things like baba ghanoush and gazpacho.  I tried endless variations before I settled on the Greens cookbook’s and Cook’s Illustrated’s versions respectively.

Muhummara is one of those things.  What?  Something you may have not even heard of and here I am tracking down the perfect recipe?  Here is the thing.  I love dips.  Not like chips and dip (although I love those too), I mean like warm grilled pita bread and dip.  If a restaurant has some kind of Middle Eastern platter, I will without question order it.  I love hummus, baba ghanoush, tzatziki, and I love muhummara.  Well, now I do.

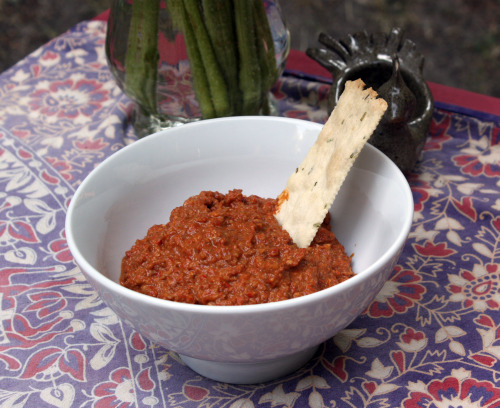
I have made four or five versions of this dip and always liked it.  It just never popped for me.  Eralda at The Split Pea recently posted a recipe that looked a little different from the ones I have tried.  I decided to make for last weekend’s lunch and everyone who tried it loved it.  I served it with crackers, but it would be great with pita and Eralda says it’s terrific with cucumber.  This is my new go-to recipe.

img_2950
One Year Ago:  Creamy Eggplant with Green Peas


Smokey Muhammara

Adapted from The Split Pea

I made a few changes here, mostly in method.  I also cut down on the amount of garlic because I don’t like a lot of raw garlic in my dips.  You can find pomegranate molasses at Whole Foods and at Middle Eastern markets – if you are lucky enough to have one of those where you live.  It’s flavor adds so much to this dip, so it is worth seeking out.  Along those same lines, the smoked paprika is essential here.  The flavor will just not be the same with regular paprika.

3  red bell peppers
1 cup of walnuts
¾ cup of pecans
1 ½ tsp. cumin
2 tsp. sweet smoked paprika
1 1/2 tsp. ground Chipotle Chile powder (or regular chile powder)
2 cloves garlic
1 ½ tsp.  salt
2 tsp. olive oil
Juice of 1 lemon
1 tsp. of honey
2 -3 tbsp. pomegranate molasses (substitute balsamic vinegar)

Preheat the oven to 500°F.  Place the peppers on a baking sheet and roast, turning occasionally, until beginning to blacken in spots, about 15 minutes total.  Remove sheet from the oven and carefully wrap it in foil.  Allow to sit for 10 minutes, then remove the foil.  When the peppers are cool enough to handle, peel away the skin and remove the membranes, stems, and seeds from each pepper.  Slice and place in food processor.

Lower the oven temperature to 350°F. Place the walnuts and pecans in a rimmed cookie sheet and toast for about 3-5 minutes until fragrant (oven temperatures vary, so make sure to keep an eye on them).  Set a timer so you don’t forget about them.  Remove from the oven and allow to cool.  Once cool, add to the food processor along with all the other ingredients.  Process until smooth, scraping the sides of the bowl as necessary.  Taste for balance of flavor, adding more salt, honey, or lemon juice as necessary.  If the dip seems too thick, add more olive oil.

Keeps refrigerated for up to 3 days.


Chickpea Goodness

July 28, 2009


img_2943

A heartfelt thanks for all of the birthday wishes!  My year of yoga is underway.  It actually started the day before my birthday at a retreat on Bainbridge Island.  My friend Jen, yoga instructor extraordinaire, plans to host one of these a quarter and I am already excited about the next one.  I have known Jen since 7th grade and she is one of my favorite people.  She is a part of the supper club I put together 4 1/2 years ago, and she is one of the best listeners I know.  I have done so many things with Jen at all different phases of my life, but I had never taken a yoga class with her.  I now, more than ever, wish she was much closer than a ferry ride away.  I would be at that studio everyday if I could be.

Oh yes, the food.  Because I wanted to take part in the morning class, I needed to make most everything in advance.  Last time, I spent about 2 hours putting it all together.  This time, I only had an hour.  I decided to make some tofu wraps, a dip, a trio of salads, and two kinds of cookies.  When I got to her house, everything was done except assembling the wraps and tossing the green salad.

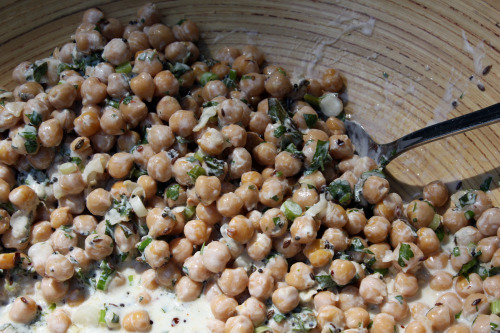
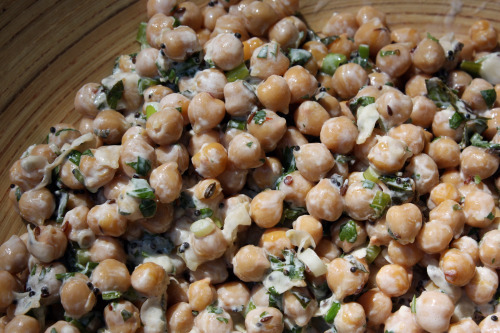
The most talked about dish, aside from these cookies, was the chickpeas.  Women after my own heart.  If you are new here, let me tell you that I love chickpeas.  I love them every which way.  If you do too, this is an especially nice dish because the dish truly stars the humble chickpea.  There is not a lot to distract you from how wonderful they are, but with lots of flavor to boost them up.  Chickpeas are poured into a bowl, a spice oil is made and poured over the beans, then yogurt, green onions, lemon juice, and lots of herbs are folded in.  It is a quick and simple dish that does not suffer from an overnight visit to the refrigerator.  Just be sure to serve it at room temperature so the flavors bloom as they should.

For the rest of this week, I will most likely be posting recipes from the retreat.  You see, it is too hot to cook here in the Pacific Northwest.  If you are the type who watches the weather, or if you are on Twitter (are you?  Follow me!), you will know that we are experiencing a heat wave here in Seattle.  It is going to be above 90 degrees all week.  If I make anything, it will most likely be a giant salad, but I predict we will be eating takeout and ice cubes until this is over.
img_2945

One Year Ago:  Birthday Weekend

Indian-Spiced Chickpea Salad with Yogurt and Herbs
Adapted from Food and Wine
Serves 6

Two 15-ounce cans chickpeas – rinsed, drained, and patted dry
2 tbsp. peanut oil
1 tsp. mustard seeds
3/4 tsp. cumin seeds
3/4 tsp. fennel seeds
1/4 tsp. crushed red pepper
3/4 cup low fat plain yogurt
1 1/2 tbsp. fresh lemon juice
2 scallions, thinly sliced
1/4 cup chopped cilantro
1/4 cup chopped mint
1 tsp. kosher salt

Pour the chickpeas into a large bowl.  In a small skillet, heat the peanut oil until shimmering.  Add the mustard seeds, partially cover the skillet and cook over moderately high heat until the mustard seeds stop popping, about 1 minute.  Add the cumin and fennel seeds and the crushed red pepper and cook until the mixture is fragrant, about 30 seconds.  Pour the hot oil and spices over the chickpeas.  Stir in the yogurt, lemon juice, sliced scallions, chopped cilantro and mint and salt.  Serve the chickpea salad at room temperature.


« Older Posts Newer Posts »