Category: Holly B’s

Holly B’s Peanut Butter Brownies

September 29, 2009

IMG_3364

(If you are new here, I am baking my way through a wonderful local baking cookbook.  For more info and more recipes from this treasure, click “Holly B’s” on the sidebar to your right.)

My neighbor and friend Julie just visited Lopez Island for the first time with her husband.  Before they left, we sat down for coffee so I could give her the down low on what to do.  I gave her directions on how to find Watmough Beach, a spot so hidden that my parents were unable to locate it all the years that their children were campers on the island.  (They were starting to wonder if the camp directors were putting funny things in our food.)  I told her that it was absolutely imperative that they order for Chocolate Gateau for dessert at the Bay Cafe since it is the single most perfect chocolate dessert I have ever had.  (And no, they won’t give me the recipe.  I ask every time we are there.)  But I didn’t have to tell her to visit Holly B’s.  She reads my blog.  My posts about the bakery were one of the primary reasons she wanted to visit the island.

I just heard from her in a brief email that they visited the bakery three times in 24 hours.  That is impressive, even by my standards.  She told me they had the cinnamon rolls, the almond butterhorns, the Mexican pizza, and I can’t wait to hear what else.  I wonder if they got a peanut butter brownie.

IMG_3363

Brownies, in this chocolate lover’s opinion, should be chocolate.  Not only should they be chocolate but they should be all chocolate with no nuts.  Then why am I crazy for this peanut butter brownie?  I don’t know.  That Holly B works magic.  There is plenty of chocolate here and if you take yours out of the oven a little too early, as I did, you might think you are eating a gooey Reese’s peanut butter cup.  As tempting as that might sound, I would encourage you to let them bake a little longer and allow them to get a little more cakey.

IMG_3360

To buy Holly B’s cookbook, please visit this site.

Peanut Butter Brownies
With Love and Butter
Makes 12 huge squares or 24 small ones

You have your choice here of creamy or chunky peanut butter and I used chunky.  When baking with peanut butter, you almost always want to use something like Jif or Skippy, not the all-natural kind.

2 eggs
2 cups brown sugar, firmly packed
1 cup peanut butter, at room temperature
1 cup (2 sticks) butter, melted
2 tbsp. molasses
2 tbsp. honey
2 tsp. vanilla extract
1/2 tsp. salt
2 cups flour
2 cups semisweet chocolate chips

Preheat oven to 375°F and move the rack to the middle position.  Butter a 9×13-inch pan.

Whip the eggs and brown sugar together with an electric mixer.  Add the peanut butter, melted butter, molasses, honey, vanilla, salt, and flour.  Mix.  Stir in 1 cup of the chocolate chips by hand.

Spread the batter evenly in the pan.  Strew the remaining 1 cup of chocolate chips over the surface.  Bake 10 minutes, rotate the pan, and bake 15 minutes more or until the brownies turn golden and the center is set (doesnt’ jiggle when you shake the pan firmly).  Cool and cut into squares.


Camp Memories and Holly B’s Almond Butterhorns

September 22, 2009

IMG_3333

I’ve mentioned it in my two love letter to Lopez posts, but my brothers and I went to camp each summer on that magical island.  I started at the age of 10 and went for 6 years.  My brothers started younger and went longer.  It was a perfect place.  Camp Nor’wester was on a 365 acre peninsula anchored to Lopez by a narrow spit of land just wide enough for a road.  The very youngest kids lived in wood frame cabins (with canvas tops) and the rest of the camp population – including all the staff – lived in teepees.  The only electricity was found in the showerhouses, the infirmary, the craft shop, and the lodge.  We had to heat water by fire to take showers.  It was rustic and at times very very cold.  I learned how to get dressed in a sleeping bag and how to take the fastest shower possible in addition to other valuable things.

We spent our days on the water in sailboats, canoes, or rowboats or riding on the trails on horses, or learning how to shoot a bow and arrow in the sunny fields.  We spent our meals sitting at tables of eight scarfing down filling (and not all terrible) food, “bletching” the leftovers into buckets for the pigs to eat, and hoping the dessert would be cut in large pieces.  Evenings we were playing capture the flag or soccer, going to a square dance where you hoped a cute boy or girl would ask you to be their partner, or sitting around a campfire listening to someone sing and play the guitar.  We spent a lot of time singing from the much beloved camp songbook and we also learned about the Northwest Coast Native American tribe whose beautiful totem poles, art, dances and long house were such a big part of the camp.

After years of being a camper there, it would come time be a member of the staff.  You spend a week at staff training where you do all the things the kids will do.  You have an overnight, you go to a square dance, you try your hand at all the activities and you go to chapel (which is non-denominational).  Then the kids come and you work really hard.  There are two big things you get to do that the kids don’t.  One is that you get to go to Rice Krispie Hour which is a gathering time in the kitchen after the kids are in bed.  That is where you get to eat all the leftover dessert and vent about your teepee-mate.  The other is that you get to take turns leaving camp during rest hour and head to Holly B’s for home-baked provisions.

IMG_3338

Why would you leave a perfect idyll and head to town?  A place so beautiful and special many people have been married there and others have requested that their ashes be spread somewhere over the 365 acres (myself included)?  Well, it depends on what you mean by idyll.  For some people, a perfect bakery in a perfect little town might be about as idyllic as it gets.

My brother Alex went to town every single afternoon of every year that he worked there (except Tuesdays when the bakery is closed).  And every single time he got the same thing.  An Almond Butterhorn.  Often he got several other things but he had to have the Butterhorn first and foremost.  All the people in the bakery knew him and they would put one aside for him if the supply started getting low.  For someone who is not really a sweets person, he would consume a huge amount of baked goods each summer, but only from Holly B.

I have had her cookbook for 8 years now and I just made the Almond Butterhorns for the first time on Sunday.  I’ve approached the recipe many times and have been scared off.  Not for any good reason – I have made much “harder” recipes in my time – but something about it just intimidated me.  I’m happy to say that there was no reason to be scared because they turned out absolutely terrific and were not hard to make at all.  Our brunch guests went crazy over them.  Sadly, Alex had a preschool event for his daughter that day so he didn’t get one, but I promised him I’ll make them again.  And soon.

IMG_3331

To order Holly B’s cookbook, click here.
One Year Ago:  Roasted Pepper Stuffed with Chickpea and Eggplant Purée and Mushrooms

Almond Butterhorns
With Love and Butter
Makes 12 butterhorns

Keep in mind that the dough needs to be prepared a day before you want to bake and serve them.

Dough
1/2 cup warm water
4 tsp. (2 packages) quick-rise yeast
2 eggs, plus 1 egg yolk
1/2 cup brown sugar, firmly packed
1 1/2 cups milk
3/4 cup (1 1/2 cubes) butter, melted
1 1/2 tsp. vanilla extract
1 1/2 tsp. salt
5 cups unbleached flour
1 cup whole wheat flour

Filling
1 cup brown sugar, firmly packed
1 cup whole natural almonds
1/4 cup (1/2 cube) butter, melted

Blend the water and yeast in a mixer bowl fitted with the dough hook.  Add the eggs and egg yolk, brown sugar, milk, butter, vanilla, and salt.  Mix until combined, then add the flours.  Mix until the flour disappears – just a few turns of the hook – and scrape down the sides of the bowl.  Sprinkle a handful of unbleached flour over the dough and mix until the dough starts to form a ball.  The dough will be very soft.  Scrape into an oiled bowl or plastic container about 3 times as large as the ball of dough.  Cover with plastic wrap and refrigerate overnight.

The next morning, line 3 cookie sheets with baking parchment or grease lightly.  In a food processor fitted with the steel knife blade, chop the brown sugar and almonds together until the almond pieces are about the size of peas.  Reserve 3/8 cup filling for the glaze and set the rest aside.

Remove the dough from the refrigerator and turn ont a lightly floured work surface.  Sprinkle the top of the dough with a little flour and shape into a rectangle with your hands.  Now roll out the dough into a rectangle approximately 12 by 24 inches and 1/4 to 1/2-inch thick.  Check the underside of the dough frequently for sticking and sprinkle on more flour as needed.

Position the dough with the short sides at top and bottom, and brush the entire surface with the 1/4 cup melted butter.  Distribute the almond filling over the lower 2/3 of the buttered dough, covering all the way to the edges and pressing gently into the dough to hold in place.  Fold the top (uncovered) portion of the dough to cover 1/2 the almond filling.  Fold once more to cover all the filling.

Now roll the dough to about 3/4-inch thickness, keeping the rectangular shape but with the long sides at top and bottom.  Use a pizza cutter or sharp knife to cut the dough into 12 even strips along the short dimension.

Take up a strip of dough, one end in each hand, and twist 3 or 4 times in opposite directions.  (Or, place the strip on your work surface and use the palms of your hands to roll the ends in opposite directions.)  Now gather both ends in one hand, maintaining the twist, and loop the middle of the dangling strip up over the ends.  Place the butterhorn on one of the prepared cookie sheets.  Repeat with the remaining pastries, spacing them at least 1 1/2 inches apart.  Cover loosely with plastic wrap and let rise in a warm place until puffy and 50 percent larger.  This may take 5 minutes on a hot day or a half-hour or longer on a cold day.

Before the pastries finish rising, preheat the oven to 350 F with the rack in the center position.  One pan at a time, bake the butterhorns 10 minutes, rotate the pan, and bake another 5 minutes or until the tops are barely brown and the bottoms golden.  Don’t overbake – they’re much better moist.

While the butterhorns bake, combine the glaze ingredients in a small saucepan.  Heat on medium-low until just warm, stirring constantly.  (DT: I reheated the glaze as each pan came out of the oven because it tends to get too thick if too cool.)  Dribble the glaze onto the butterhorns as they come out of the oven.  Let them cool a bit before serving.


Holly B’s Bruschetta

September 15, 2009

IMG_3276

Last Tuesday I wrote about Holly B’s French Bread. I still had some of the biga in the refrigerator (it lasts up to 2 weeks there), so I decided it made sense to make the other bread in the book that uses a biga. I have seen the Pugliese loaves on the bakery’s shelves and they are a sight to behold. Large, round, and covered with flour they are a tribute to the powers of yeast. In the book, Holly says that she uses the Pugliese loaves to make the Bruschetta that is always on offer in the bakery. I needed an appetizer last week and I figured this was the perfect option.

Alas, I had a baking failure. I have heard from countless people that they are afraid to make bread. I get it that yeast can be scary but up until very recently, I have never baked a bread that didn’t turn out. I have had moments of doubt where I think I have killed the yeast and then, lo and behold, all rises as it should and the bread turns out great.

As I was preparing this dough, it seemed awfully wet and sticky. The recipe says, in several places, that the dough will be sticky and needs to be floured well and often. I followed those directions, I let it rise for the required time (3 hours!), attempted to shape the loaves, and realized that it was not going to turn out well. The dough was the consistency of sludge. I don’t know where I went wrong but I persevered, baked the bread, and threw it away when it came out about as risen as a pancake.

Onward. Instead of a home-baked Pugliese, I used a large round loaf from the grocery store and proceeded with this recipe. This is not rocket science. Take a few very good ingredients, mix them together, put them on toasted bread. But like many simple things, this tastes like so much more than the sum of its parts.

When I decided to take on my own personal Holly B’s challenge, I decided to not change the recipes at all. What good is it to praise a book, bake your way through it, and then deliberately alter the recipes? With this one though, I just had to. Holly advises you to make a garlic infused oil which you liberally slather over the bread before baking. I know olive oil is a healthy fat and all that, but I just can’t eat bread that has been soaked in oil. And if I can’t eat it, I can’t ask my guests to. Instead, I lightly drizzled the bread with olive oil, baked it until starting to brown, and then ran a raw garlic clove over the surface of each piece. I’ve left the recipe as it appears in the book below.

IMG_3278

To buy Holly B’s book, With Love & Butter, visit this site.

One Year Ago: Rosemary Aïoli

Holly B’s Bruschetta
With Love & Butter
6 Servings

Of course, you could really use any kind of bread to make these. I think cutting slices from a large round loaf gives you more of a wow factor.

6 1/2-inch thick slices from a large round loaf of bread
3 cloves garlic
6 tbsp. extra virgin olive oil
6 ripe Roma tomatoes
6 large, fresh basil leaves
Salt

Preheat the oven to 375°F with the rack in the middle. Arrange the bread on a cookie sheet. Press the garlic into a small bowl containing 3 tablespoons of the olive oil. Stir the garlic into the oil and smear the mixture evenly onto the top sides of the bread slices with your fingertips.

Toast the garlic bread until crisp and golden brown, about 20 minutes, turning the pan halfway through the baking. Remove from the oven and cool.

Pare the ends of the tomatoes and cut into 1/4-inch slices. Place them in a medium bowl and drizzle with the remaining 3 tablespoons of olive oil. Sprinkle with salt. Medium chop the basil and throw into the bowl with the tomatoes. Toss everything around until it’s all oil-coated.

Arrange the tomato slices artfully atop the bread slices. Scrape the bowl with a spatula and make sure any remaining juice makes it onto the Bruschetta. Serve with wine, some good cheese, or just solo – any time of day.


Holly B’s French Bread

September 8, 2009

img_3191

Today is Tuesday and for the foreseeable future, that means it’s Holly B’s day.  If you didn’t read this post, Tuesdays are the days I will be baking a treat from the Holly B’s bakery on Lopez Island.  And this week, it’s bread.
img_3195

The only reason I have even tried Holly B’s bread is because I have been there literally countless times.  I have sampled at least one of just about everything and in the case of the cinnamon rolls, I have sampled at least 100 of those.  So there comes a time when maybe you are feeling a little virtuous so instead of making a lunch out of four different kinds of cookies, you decide to pick up some cheese from the grocery store across the street and figure a loaf of the olive bread sounds good.  Then you take that olive bread and cheese to the beach and proceed to completely ignore the cheese because the bread is some of the best you have ever tasted.  And when all is said and done, you might as well have eaten the four cookies because the loaf of bread is almost gone and your husband only had a few bites.  I wouldn’t know anything about this, it’s an imaginary scenario.

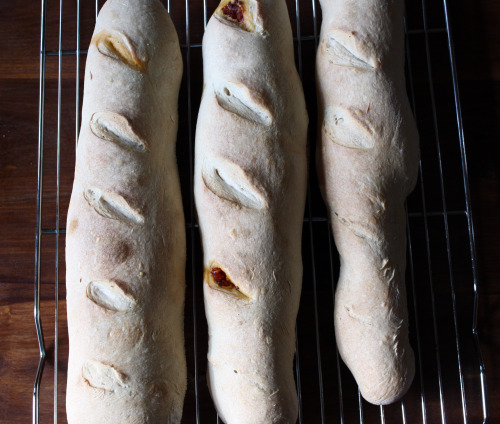
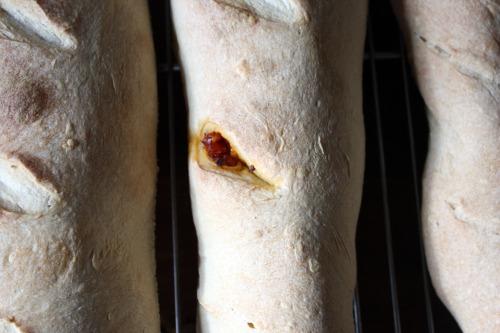
Last week I invited a fellow food blogger and her fiance to dinner.  I always like to make good food when we have guests but there was definitely added pressure – it was like inviting a chef to dinner.  I decided to go all out and make bread to accompany our meal.  There was never a doubt as to which one I would make. https://luxlifemiamiblog.com/   But because olives figured prominently in something else on the table, I went with the sun-dried tomato filling instead of the olive.img_3197
The basic premise is this.  You make a biga which is nothing more than flour, yeast, and water which is then allowed to sit out at room temperature for at least 2 hours.  The beauty of it is that you can put it in the refrigerator for up to 2 weeks so this bread and another in the book can be made quite easily.  The biga is mixed together with other ingredients and left to rise to double it’s size.

bread-collage

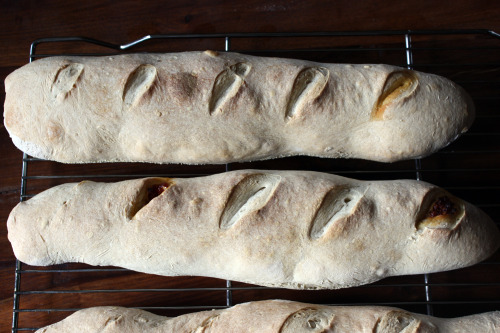
The dough is then rolled out to a rectangle, the filling is spread down the middle, the dough is folded in half and then rolled into a snake, seam side down.  A glaze is brushed on the breads, their tops are slashed 5 times and into the oven they go.  No second rising time necessary.

This bread has what you might call a fine crumb.  In other words, it’s dense and soft.  There are no large air pockets like you find in traditional baguettes.  I’m not sure I would flip over the plain version of this bread, but flip I did for the sundried tomato version and flip I will when I make the olive version.  One of these loaves was plain (the recipe makes three) and I used it to make delicious croutons for this salad.

img_32111

Purchase Holly B’s cookbook by visiting this site.
One Year Ago:  Pomodori al Forno – a greatest hits appetizer

French Bread
With Love and Butter
Makes 3 loaves

Biga
1/2 cup water
1/8 tsp. quick-rise yeast
7/8 cup unbleached flour

Dough
2 3/4 cup warm water
1/4 cup biga (stir down before measuring)
1 3/4 tsp. quick-rise yeast
7 cups unbleached flour
4 tsp. salt
Cornmeal for baking sheet

Cornstarch Glaze
1/2 cold water
1 1/2 tsp. cornstarch

Note:  You will need to prepare the biga for the French Bread at least 2 hours in advance.  I recommend doing this step the night before.  Also note that this dough does not rise a second time.

At least 2 hours before you wish to start your French Bread, mix together the water, yeast and flour for the biga.  The biga should have the consistency of thick pancake batter.  If too stiff or loose, adjust by adding a touch more water or flour.  Mix until smooth.  Scrape into a lidded container at least twice the volume of the batter.  Let the biga stand to room temperature at least 2 hours and up to overnight.  The biga can now be used for French Bread or stored up to 2 weeks in the refrigerator.

Place the water, 1/4 cup biga, yeast, 4 cups of flour, and salt, in that order, in a big bowl.  Stir with a wooden spoon until well blended.  Add the remaining 3 cups of flour and continue mixing until stiff, then continue with your floured hands to mix and knead the dough into a ball.  Continue kneading for 5 to 10 minutes adding flour as needed until the dough forms a smooth ball.  (HB: I always try to do this within the big bowl to cut down on cleanup, but you can turn everything onto a clean counter and do your kneading there.  DT: I used the dough hook of my stand mixer.)  You should end up with a smooth round ball about the firmness of a baby’s bottom (or anyone’s bottom who isn’t very thin).  If the dough is too stiff, work in some water; if too sticky, work in some extra flour.

Lightly oil the bowl and place the dough back inside.  Cover with plastic wrap or a dishtowel and let rise in a warm place until doubled in size.

Preheat the oven to 425°F with the oven rack in the middle position, and sprinkle a large baking sheet with cornmeal.  Prepare the glaze by whisking water and cornstarch together in a small saucepan and heating on medium-high heat until the mixture thickens and comes to a boil.  Remove from the heat and set aside.

Punch the dough down and turn onto a lightly floured surface.  Using floured hands, divide the dough into 3 pieces.  Don’t work the dough – leave it puffy.

Place one of the pieces of dough before you on your lightly floured work surface.  using the heel of your hands, flatten the dough into a rectangle with the long side running left to right.  Now fold the dough lengthwise and seal the seam with the heels of your hands.  Roll and snake out the loaf to fit the length of the pan, and place seam-down on the cornmealed baking sheet.  Slash each loaf five times with a sharp knife and brush the tops with the cornstarch glaze.  (No, this dough does not rise again before baking!)

Bake the loaves 10 minutes, then rotate the pan and bake another 10 minutes.  When done the leaves will be golden brown and crisp.  If blond and limp, bake an additional 5 minutes.  Remove from pan and cool on a rack.

Greek Olive or Sun-Dried Tomato Tapenade
Makes 1 1/2 cups

1 cup pitted Greek Kalamata olives or sun-dried tomato halves (not packed in oil)
Salt (Sun-Dried Tomato Tapenade only)
2 tbsp. olive oil
2 tbsp. lemon juice
1 tbsp. minced garlic
1 1/2 tsp. brandy
1/4 tsp. ground black pepper

If using sun-dried tomatoes, put them in a small bowl and cover with boiling water.  After 5 minutes, drain off the water and pat the tomatoes dry with paper towels.  Sprinkle with salt and proceed with the recipe.

Place the olives or tomatoes and all the ramaining ingredients into a food processor fitted with the steel knife blade.  Pulse until chopped and combined, but leave the tapenade somewhat chunky.  You want some texture, not a smooth paste.  Tapenade will keep several week in the refrigerator or several months in the freezer.

Using in the bread:
Before folding and sealing your loaves, smear 3 tablespoons of tapenade down the center of the rectangle of flattened-out dough.  Then fold over the dough, pinch together, and snake out the loaf to the appropriate length.

Before folding and sealing


Homage to Holly B

September 4, 2009

img_30721

In the middle of August, we took one last trip to Lopez Island for this year.  As crazy as the summer is, our fall appears to be even busier so I don’t think we’ll be able to squeeze in another weekend before the weather turns ugly.

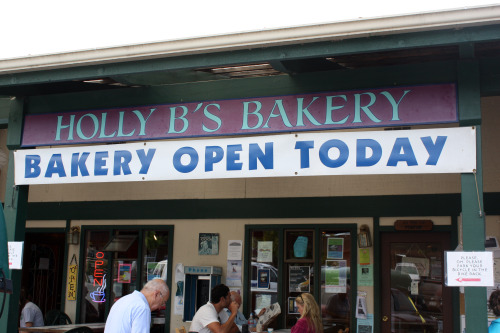
When I turned 39 back in July, I wrote about some of the things I would like to accomplish in the coming year before the big 4-0.  I told you this would be the year of yoga and so far that part of it is shaping up well.  I have been going to class 3 times a week and am feeling more and more that I would like to get back to teaching.  Slow and steady though – I need to get my own practice back on track before I start teaching others.  I also mentioned some of the cooking challenges I wanted to tackle and included in that list was working on Holly B’s cinnamon rolls and almond butterhorns.  (If you are new here, I’ve raved about Holly’s cookies here and here and I’ve written love letters to Lopez here and here.)

img_3071
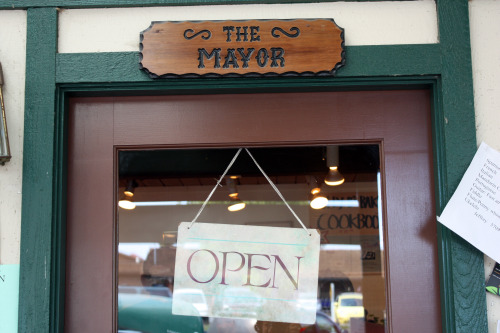
(She is not really the mayor of Lopez, but she should be.)

What I didn’t say is that what I really wanted to do was bake my way through her amazing cookbook.  I know, we are all over this approach, right?  Julie and Julia and all that.  There are groups all over the food blog world who are slowly cooking or baking their way through books.  I am so 2008.  But I’m not wanting to start another group, I’m just wanting to make every recipe in her book and become a better baker along the way.

Because Holly B’s is a bakery close to my heart and because she is essentially a one woman operation, I decided I would ask her permission before starting and certainly before posting any more of her recipes here.  I wasn’t sure of the response I would get but before I could get the words out, she cried out, “Sure, I’d love it!  Do you want to take pictures?”

holly-b-collage

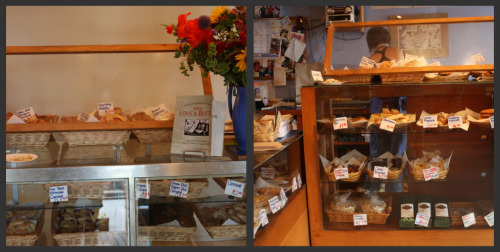
So, my Holly B’s baking adventure begins.  I plan to post a recipe from her book each Tuesday which is the day the bakery is closed during the summer.  I am not going to go recipe by recipe because I know it will bore me to make bread for weeks, cookies for weeks, etc.  A little jumping around will make it more interesting but I do plan to make everything at least once.  I will also always post a link to her web site where you can buy the book for yourself.  Believe me when I say it is a treasure!  Click here to order a copy (you will need to send her a check.)

img_3056

In addition to eating things like this amazing pizza at the bakery (recipe coming someday soon!), we went to a beautiful park.  It’s called Spencer Spit and we hadn’t been in a long time.  I love it there for the ever present beauty, for the ferry views, and for the driftwood sculptures.

img_3120

But these days I think I especially love the park because Spencer is also the name of this guy.

spencer

And while I’m posting pictures of my sweet boys, here is one more.  To me, these guys do not look like brothers.  Graham is long and lean with dark skin and gray eyes.  Spencer is thick and stocky, pale and blond with hazel eyes.  But in this photo, with them both laughing, they do look alike to me.

boys-on-lopez

For a great recipe, check out what I posted a year ago – Chocolate Toffee.


« Older Posts Newer Posts »