Category: Dessert

Giving Apples Their Due

March 31, 2011


I want to thank those of you who left such thoughtful comments on my last post.  I truly appreciate you sharing your own struggles and ideas with me.  I love having such thoughtful, interesting, and intelligent readers!

I have started to feel a bit like June Cleaver lately.  At 3:45 each day, Graham comes off the school bus from kindergarten and most of those days I open the door for him fresh off some baking project.  I (sometimes) have an apron on and there is some kind of treat cooling on the kitchen counter.  Graham (bless him) always takes a deep breath and says, “It smells so good Mommy!”  I differ from good old June in that I have flour in my hair and my kitchen looks like a train just went through it at high speed.

My sweet Graham has a sense that I make special things.  That maybe not everyone else’s mommy keeps a cookie jar full of homemade treats or has things like apple cakes lying around the house.  He will tell me, unprompted, “You are a good cooker Mommy.”  He is eager to try whatever I have out on the cooling rack and is heartbroken when I tell him it is for “friends” – students in my classes, Randy’s office mates, or catering clients.  I do a lot of that type of baking, baking for “friends”, but I often just like to have a treat on hand for my husband, kids, and whoever happens to come over during the week.

I’ve been seeing a lot of apple cakes around the blogosphere lately as we prepare to say goodbye to them for a season or two.  This has made me realize that I haven’t been seeing a lot of apple cakes coming out of my kitchen lately.  I figured I had better remedy that while the weather is still fall/winter-esque.  Truthfully, I love apple desserts and would have no problem serving them all year, but once the berries come start in June, apples start to look a little, um, homely.

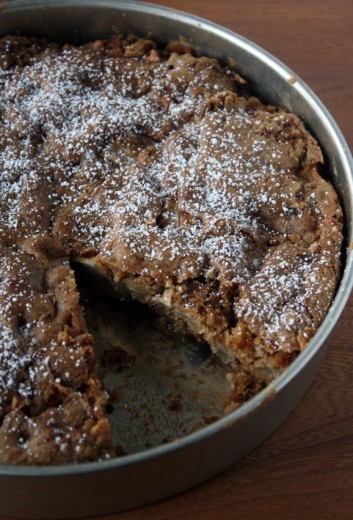
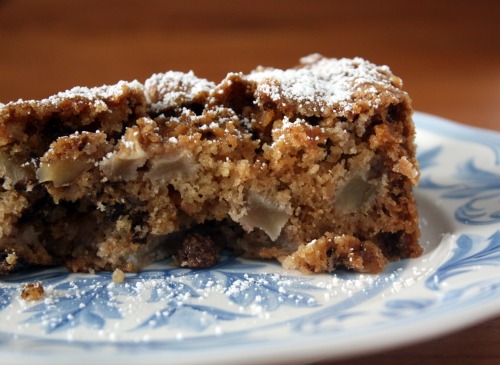
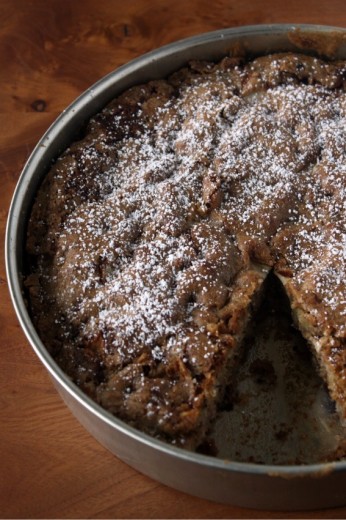
I think of this cake as “have a little cake with your apples”.  Actually, I hate that type of expression.  Like when someone says, “Have a little french fries with your ketchup!”  Who are they to say how much ketchup is the right amount for a french fry? In my world, it’s a lot.  So who am I to say how much batter should be mixed together to hold all these apples?  I quite like this proportion.  Big chunks of apple and walnuts (I didn’t mind the nuts here) with a spicy cake batter keeping it honest.

The name of this cake is Apple Snacking Spice Cake which suits it perfectly.  Not fancy, not really all that sweet.  It would be great for a brunch or just for a special after-kindergarten treat.

One Year Ago: Fideos with Pasilla Chiles, Avocado, and Crema
Two Years Ago: Mediterranean Roasted Vegetable Salad

Apple Snacking Spice Cake
Flour
Makes one 10-inch round cake

I am including Chang’s instructions for turning the cake out onto a platter, but it was very clear to me that this cake was not going to leave my pan in one piece.  I opted to forgo the heartbreak that is a broken cake and just serve this out of the pan.

1 cup all-purpose flour
¾ cup cake flour
1½ tsp. baking soda
½ kosher salt
¼ tsp. ground cinnamon
¼ tsp. ground ginger
1/8 tsp. ground cloves
1½ cups granulated sugar
¾ cup (1½ sticks) unsalted butter, at room temperature
2 eggs
4 cups peeled, cored, and chopped Granny Smith apples (2 to 3 apples)
½ cup raisins
1 cup pecan halves, toasted and chopped (I used walnuts)
Confectioners’ sugar for dusting

Position a rack in the center of the oven, and heat the oven to 350 degrees F.  Butter and flour a 10-inch round cake pan.

In the bowl of a standing mixer, sift together the all-purpose flour, cake flour, baking soda, salt, cinnamon, ginger, and cloves.  (Or, sift together into a medium bowl if using a hand-held mixer.)  Fit the mixer with the paddle attachment.  Add the granulated sugar and butter to the flour mixture and beat on medium speed for about 1 minute, or until the butter is fully incorporated into the dry ingredients.  Stop the mixer several times to scrape the paddle and the sides of the bowl to make sure all of the butter is mixed in.  Add the eggs and mix on low speed for 10 to 15 seconds, or until fully incorporated.  Then turn the mixer to medium-high speed and beat for about 1 minute, or until the batter is light and fluffy.

Using a rubber spatula, fold in the apples, raisins, and pecans.  The batter will be very stiff and thick.  It will look like too many apples and not enough batter, but that’s okay.  Scrape all of the batter into the prepared pan, then spread it evenly to fill the pan.

Bake for about 1 hour and 20 minutes, or until the cake feels firm when you press it int he middle and the top is dark golden brown.  (DT: Mine was done at 1 hour.  Be sure to check!) Let the cake cool completely in the pan on a wire rack.

Invert the cake onto a serving plate, lifting away the pan, and then invert the cake again so it is right-side up.  Slice and plate, then dust the slices with confectioners’ sugar.

The cake can be stored in an airtight container at room temperature for up to 3 days.  Or, it can be well wrapped in plastic wrap and frozen for up to 2 weeks.  Thaw overnight at room temperature before serving.


Good for Brunch, Good for Dessert

March 17, 2011


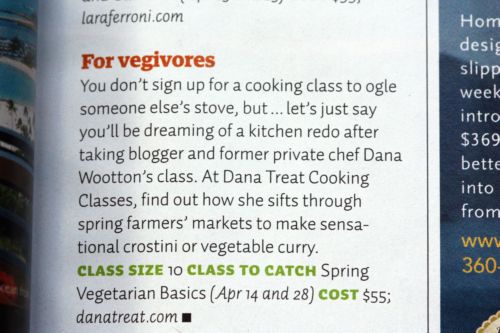
Hey, guess what?  I’m in the April issue of Sunset magazine. They did an article on boutique cooking classes and I am in there!  Cool, huh?

On the whole, mine is a family of savory eaters.  No one turns up their nose at my sweets but everyone is happier with dinner than dessert.  Each person, however, has their thing they cannot resist.  As a good treat maker, I know each person’s Achilles heel.  For my dad, it is coconut.  My brother Alex – anything lemon and he also will eat almost an entire batch of my mom’s snickerdoodles in one sitting.  Michael will eat cookies until he is sick and then eat another one.  Randy’s weakness is white chocolate and he also loves carrot cake (which I have yet to make for him because I hate carrot cake).  I want my last meal on earth to include a brownie.  (This one is my current favorite.)  My mom loves nuts – she would love these bars.  But she also loves a good old fashioned coffee cake.

Last week, my parents and Michael came over for dinner.  I was fresh out of cookies so decided to make a quick cake that I found in my Baked Explorations book.  This book is a mystery to me.  I have looked at it so many times and have also made many things from it.  I feel like the recipes reproduce overnight or something because every time I open it, I feel like there is something new in there.  Some new treasure.

Anyway, as I have written about many times here, I am a big fan of a simple cake.  Not simple as in boring, simple as in not a three layer cake with fillings and buttercream frosting on a Tuesday night simple.  A good simple cake is gold for me.

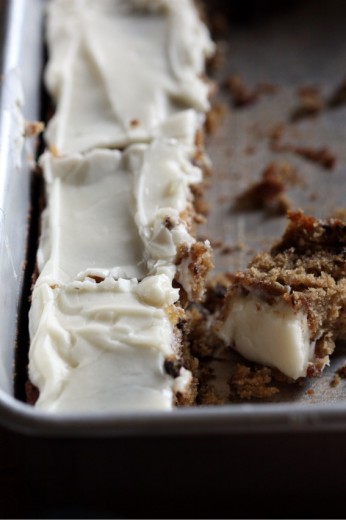
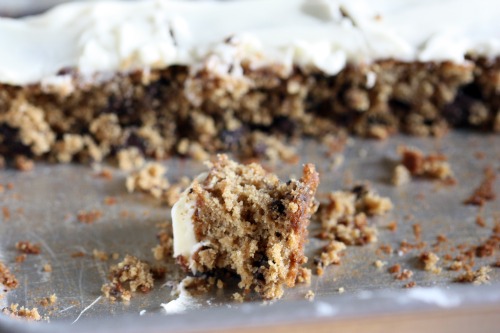
This is no beauty contest winner.  But as I brought it out, my  mom said, “That is my favorite kind of cake.”  And, seeing as this recipe is found under the Breakfast chapter, it really is a coffee cake.  But it is great at night as well.  Spencer surprised me by wanting me to scrape off his frosting.  He only wanted to eat the cake.  This from a child who licks the frosting off his cupcakes and discards the cake part.  I guess it is a testament to how tasty this simple cake is.  But do make the frosting.  Easy and yummy.

One Year Ago: Golden Split Pea Soup
Two Years Ago: Peanut Brittle and Caramel Crunch Ice Cream Pie

Oatmeal Chocolate Chip Cake with Cream Cheese Frosting
Baked Explorations
Makes one 9×13-inch cake

For the cake
8 ounces chocolate chips
½ tsp. Scotch or bourbon
1½ cups plus 2 tbsp. all purpose flour
1 cup rolled oats
½ cup (1 stick) unsalted butter, cut into small cubes, at room temperature
2 eggs, slightly beaten
¾ cup granulated sugar
1¼ cups firmly packed dark brown sugar
½ tsp. salt
1 tsp. baking soda
1 tsp. baking powder
1½ tsp. cinnamon

For the cream cheese frosting
5 tbsp. unsalted butter, softened
5½ ounces cream cheese, softened
2 cups confectioners’ sugar, sifted
¾ tsp. pure vanilla extract

Make the cake
Preheat the oven to 375ºF and position the rack in the center.  Butter the sides and bottom of 9-by-13-inch glass or light-colored metal baking pan.  Heat 1¼ cups water to boiling.

Place the chocolate chips in a small bowl and toss them with the bourbon until covered.  Sprinkle 2 tablespoons of the flour over the chips and toss until coated.  This will keep them from settling at the bottom during baking.  Set aside.

Place the oats and butter cubes in a large bowl.  Pour the boiling water over the oat mixture, wait 30 seconds, and stir to moisten all the oats and melt the butter.  Set the mixture aside for 25 to 30 minutes.

In a separate bowl, whisk together the eggs, both sugars, salt, baking soda, baking powder, and cinnamon until combined.  Fold in the cooled oatmeal and stir until well combined.  Gently fold in the remaining flour and then the chocolate chips.  Pour the batter into the prepared pan.

Bake the cake for 40 to 45 minutes, or until a toothpick inserted in the center comes out clean.  Let the cake cool on a wire rack for at least 30 minutes.

Make the cream cheese frosting
In the bowl of a standing mixer fitted with the paddle attachment, beat the butter until it is completely smooth.  Add the cream cheese and beat until combined.

Add the confectioners’ sugar and vanilla and beat until smooth, about 1 minute.  Cover the bowl tightly and refrigerate for at least 30 minutes.  (DT: I skipped this step.  It did not seem necessary to me.)

Assemble the cake
Spread a thin even layer of frosting over the cake.  Chill it for 15 minutes so that it can set.  Slice and serve.  The frosted cake can be keep, refrigerated and tightly covered, for up to 3 days.  Bring the cake back to room temperature before serving.


My First Cannoli

February 9, 2011

Here is where I admit that up until a couple of days ago, I had never eaten a cannoli.  My parents were both born and raised in New York and they had the luxury of eating things like real bagels, good profiteroles, late summer tomatoes, and cannoli.  My mom has a cousin who used to come visit us every summer and they would bring 4 dozen bagels with them to store in our garage freezer.  I’m sure that if the other things on that list weren’t so perishable, my mom would have requested she bring those too.

So, cannoli were not a part of my childhood.  If I were the type to go nuts over cheese in my desserts, I would have made them long ago.  But truthfully, this is not my kind of treat.  If you are a regular here I think you know what my kind of treat is.  But I am telling you about these cannoli for several reasons.

1)  Someone at Saturday’s yoga retreat sat me down and said, “If you do not post the recipe for these cannoli, I will never speak to you again.”  Strong words.

2) One of my new favorite “Food and Graham” stories happened while preparing these.  I don’t mention this often enough but Graham is a great eater.  He has a huge appetite and really loves food.  He is eager to try new things.  Something he hasn’t seen before makes him wonder what it tastes like.  Spencer‘s response is the opposite.  Anyway, I was chopping crystallized ginger for the filling and Graham asked for a taste.  I gave him a cube of it, he took a little bite, and then asked for three more pieces.

3)  I got this recipe off Epicurious.  Our computer is in our study which is not right next to the kitchen.  I was the end of a LONG cooking day when it came time to prepare these.  I took a quick glance at the recipe and then went back to my food processor to finish it.  I had a nagging suspicion that I had forgotten something in the filling but was too lazy to go back and double check.  Finally, once the filling was in the bowl, I took a quick taste and thought it was fine for, you know, a cheese filling, and into the refrigerator it went.  Then I checked the recipe.  Sugar.  I didn’t add the full 2 cups of powdered sugar that the recipe called for. I tasted again.  I’m no expert, but cannoli are not supposed to be super sweet, right?  It tasted just about right to me and everyone loved this without the sugar.

So there you go.  Cannoli.  Discuss.

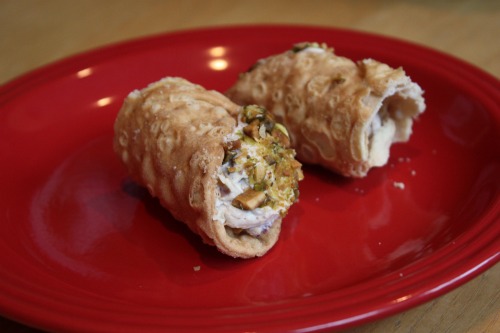
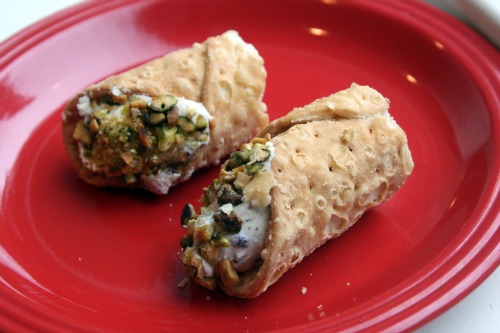
Now.  The recipe makes enough filling for 25 regular size cannoli.  For reasons that are too boring to explain, I only bought 12 shells.  I cut each cannoli in half so everyone could have one but I still had tons of leftover filling.  I brought it back home with me, wondering what I was going to do with it.  And then, an unexpected opportunity came my way.

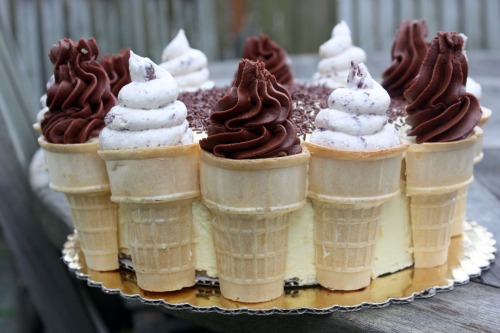
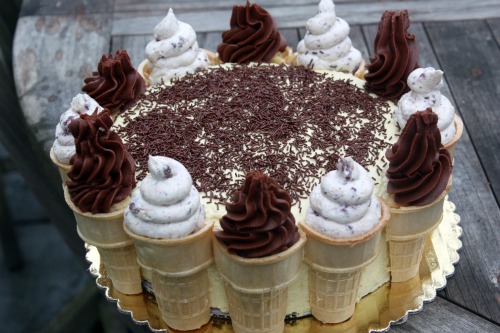
This is Spencer’s birthday cake.  Once again for reasons that are too boring to explain, I did not make enough frosting.  I was left with just enough to very lightly frost the outside of the cake but  not enough to frost all of the cones.  (The chocolate you see is the buttercream mixed with melted chocolate.)  As I was contemplating driving to the store to buy some frosting in a can (shudder), I remembered my leftover filling.  So that is what is adorning half the cones.

This cake is pretty darn cute and the cake part itself, which is the part I care about, was super moist and flavorful.  If you are interested in making it, I direct you to this recipe.  In the comments, most people hated the frosting, so I made a simple buttercream from The Cake Bible.  Just do yourself a favor and make sure you have enough frosting…

And now, back to the cannoli.

One Year Ago: Olivetta Loaf and Spicy Smoky Chili
Two Years Ago: Broccoli and Red Pepper Pie

Dried Cranberry and Ginger Cannoli
Adapted from Bon Appétit
Makes 25

This recipe originally called for dried cherries but I only had cranberries.  If you would like to add the sugar that I forgot, add two cups – one in each batch.

4 cups (2 pounds) fresh ricotta cheese
1 cup mascarpone cheese
Zest of 1 orange
½ tsp. vanilla extract
¾ cup minced crystallized ginger
¾ cup minced dried cranberries (or cherries)
4 ounces bittersweet chocolate, finely chopped
25 purchased cannoli shells
Chopped pistachios

Working in 2 batches, blend first 4 ingredients in processor until smooth; add ginger and cranberries and process until finely chopped and well incorporated.  Using on/off turns, mix in chocolate just until blended (do not purée).  Transfer filling to a large bowl.  (Filling can be prepared 1 day ahead.  Cover and refrigerate.  Bring to room temperature before continuing.)

Working in batches, transfer filling to pastry bag without tip.  Pipe into shells.  Dip ends in chopped pistachios.  Chill at least 2 hours and up to 6 hours.


White Chocolate Tiramisù

February 7, 2011

Do you need a dessert that feeds at least 18 people?  Do you have a stand mixer (preferably with an extra bowl and paddle) and a handheld mixer?  Do you have at least five mixing bowls – six if your white chocolate seizes like mine did?  Then have I got the dessert for you!

Saturday was our seasonal yoga retreat and to change things up a bit, Jen decided to do an afternoon session followed by dinner.  It seemed like the right thing to do.  Winter is dark and gray here and hunkering down for a cozy dinner with friends after an invigorating yoga session – what could be better?  In past yoga retreats (this was our eighth!), we have always felt a bit of let down at the end of the day.  It has felt like all participants, Jen and I included, were not ready for the party to end.  Re-entry into chaotic lives was difficult.  So, having a dinner with wine and no real end to the evening sounded wonderful.

I was challenged to find a meal that would serve 24 people without a lot of last minute prep.  My mind went in many different directions but ultimately settled on an Italian theme.  I made two different kinds of pasta, Caesar salad and a roasted tomato caprese.  I made garlic bread and an antipasto platter starring these peppers.  And I made 2 desserts – White Chocolate Tiramisù and some cannoli.

The first and only other time I made this Tiramisù (or any Tiramisù for that matter) was years ago, soon after Randy and I were first married.  We went to a party and the hosts requested that I make dessert.  I was never a big fan of Tiramisù but this recipe caught my eye because it said that it served 18 and I knew the party would be on the large side.  This dessert is always at the back of my mind because of that fact, that it serves a lot of people, and because one of our hosts absolutely fell in love with the dessert.  We see him only about once a year now but he always asks me, “Hey, have you made that amazing Tiramisù lately?”

Now, if you are going to follow my suggestion to K.I.S.S., then don’t make this recipe.  There are others which are much simpler, that take fewer bowls, that don’t make your kitchen look like a tornado touched down.  I was hating hating this dessert as I was making it.  When I have plenty of time to get things done, I am very Zen in the kitchen.  I work methodically and smoothly and things seem to fall into place easily.  When I am crunched for time, as I was in the case of this Tiramisù, I start getting sloppy and making stupid mistakes.  Lesson learned: leaving the somewhat time consuming, dish heavy, and multiple steps dessert until the end of a cooking day is not a good idea.

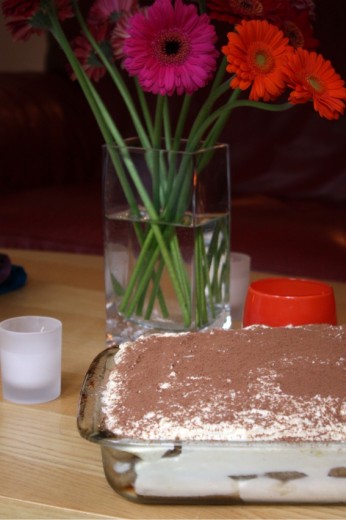
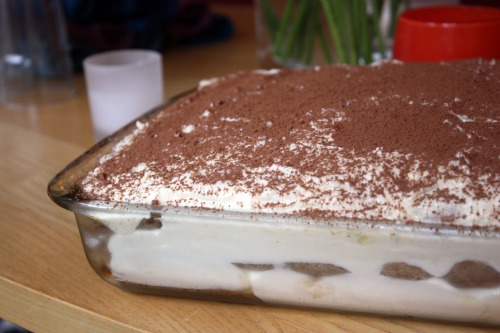
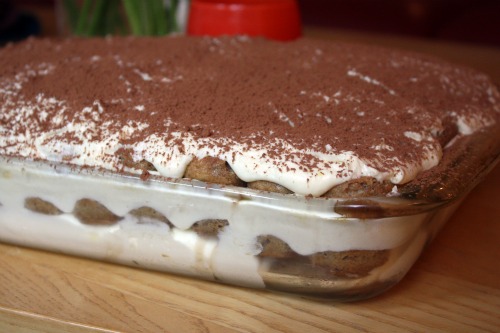
But as I started to assemble it, tasting each piece as I went, I was pretty happy that I endured the mess.  This is a very impressive dessert.  The pan itself weighed more than the lasagne I made.  Three layers of coffee and booze soaked ladyfingers and an incredibly rich white chocolate and ricotta cheese custard is pretty hard to beat.

One Year Ago: Caramel Cake
Two Years Ago: Roasted Orange Pepper Soup

White Chocolate Tiramisù
Adapted from Bon Appétit
Serves at least 18

I made this, as the recipe suggests, in a 13×9-inch Pyrex pan.  The filling extends well beyond the pan and kind of sticks to the foil that you use to cover it.  It turns out fine, but I thought next time I would add another 6 ounces of ladyfingers and make the whole dessert in a bigger pan.  I used my hand mixer for the egg yolks, my stand mixer for the cream cheese, then my hand mixer again for the egg whites and also for the cream.

2½ cups hot water plus 2 tbsp. water
¼ cup instant espresso powder
6 tbsp. dark rum
8 ounces good-quality white chocolate, chopped
8 large egg yolks
1¼ pounds cream cheese (two and a half 8-ounce packages), room temperature
4 large egg whites
¾ cups sugar
1½ cups chilled whipping cream
90 soft ladyfingers from four 3-ounce packages
2 tbsp. unsweetened cocoa powder

Pour 2½ cups hot water into medium bowl.  Add espresso powder; stir to dissolve.  Stir in rum.  Cool espresso mixture.  Place chocolate in medium bowl.  Set bowl over saucepan of simmering water and stir until melted and smooth.

Combine egg yolks, powdered sugar, and remaining two tablespoons of water in medium bowl.  Set over saucepan of simmering water and whisk constantly, until mixture thickens slightly and reaches 160ºF, about 6 minutes.  Remove bowl from over water.  Using electric mixer, beat egg yolk mixture until cool and thick, about 5 minutes.  Using electric mixer, beat cream cheese in large bowl until smooth.  Beat barely lukewarm melted chocolate into cream cheese.  Fold egg yolk mixture into cream cheese mixture.

Using electric mixer fitted with clean dry beaters, beat egg whites in another large bowl to soft peaks.  Gradually add ¾ cup sugar, beating until stiff peaks form.  Fold 1/3 of beaten egg white mixture into cream cheese mixture to lighten.  Fold in remaining egg white mixture.  Beat whipping cream in medium bowl to medium-stiff peaks.  Gently fold whipped cream into cream cheese mixture, creating mousse.

Lightly dip 1/3 of ladyfingers 1 at a time in espresso-rum mixture and place in single layer in bottom of 13-9-2-inch glass baking dish.  Spoon 1/3 of mousse over ladyfingers, spreading evenly.  Dip next 1/3 of ladyfingers in espresso mixture and place atop mousse.  Top ladyfingers with another 1/3 of mousse.  Repeat with remaining ladyfingers, espresso mixture and mousse.  Sift cocoa powder over top of tiramisù.  Cover; chill overnight.


Gingerbread with Maple Cream Cheese Frosting

January 11, 2011

On Saturday night, we had a little party.  It was to celebrate Randy’s birthday, the new year, and some fairly big news in our family (once again, I am not pregnant).  We have some friends who own a very cool art gallery.  Over dinner with them one evening, we threw out the idea of having a gathering there.  Being the lovely and accommodating people they are, not to mention the fact that they are both gorgeous and ridiculously talented, they thought it was a great idea.  We invited our nearest and dearest, I got some catering and organizational assistance from my good friend Julie, and a lovely time was had by all.  I hope.

The gallery has a kitchenette but does not have an oven or stove.  That means that all the food served has to be room temperature or cold.  Since we didn’t have seating, we wanted everything to be pick-up-and-eat food so that people did not have to worry about how to manage plate, fork, napkin, and drink.  Add to that, party time was 7pm.  People need to have dinner if it is 7pm.  5:30, appetizers are fine but by 7 folks are hungry.  I have to say I struggled with my menu.

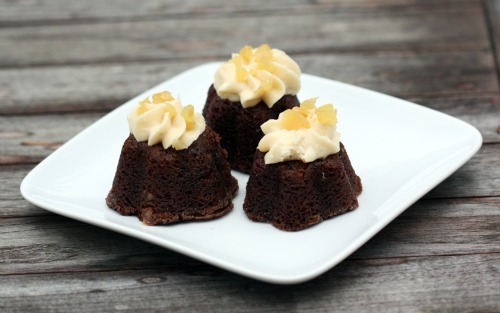
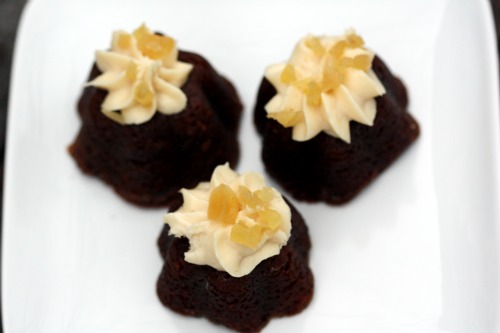
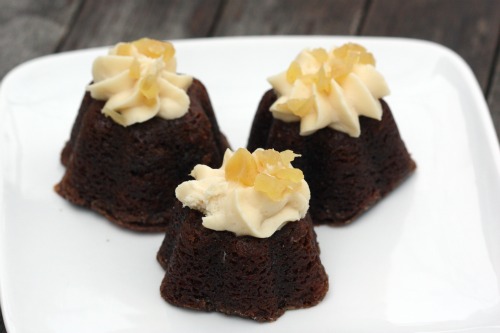
But!  There is always dessert.  I toyed with the idea of doing a big cake, but decided in the end to keep the easy to pick up food theme going.  I made small versions of those amazing chocolate chip cookies (and was told by more than one person that it was the best they had ever tasted), mini lemon tartlets, and these mini gingerbread bundt cakes.  One of Randy’s favorite things in the world is ginger.  He loves ginger cookies and his favorite cake is gingerbread.  I have a few mini bundt cake pans and a terrific recipe for gingerbread, so it seemed like a no-brainer to make these little guys.

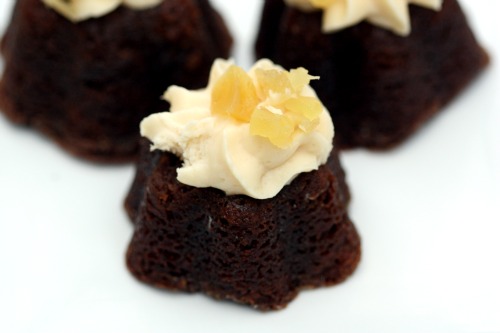
When I make the gingerbread in a standard bundt pan, I just dust the finished cake with powdered sugar.  For this party, I felt we needed something a little fancier.  I made a maple cream cheese frosting – super simple and a nice compliment to the ginger.  Each cake was garnished with some chopped candied ginger.  Now, this is some serious gingerbread.  There is a full cup of Guiness and a full cup of molasses in there, along with a very healthy amount of spices.  I would call it “grown-up” gingerbread if my six year old hadn’t inhaled a left over piece this evening.  Ahem.  If your eyes have glazed over at any point during this post, now would be the time to perk up.

Grease and flour your pan(s).  I know this.  I know the batter is thin and incredibly sticky and I know you can never trust a non-stick coating when it comes to bundt cakes.  I got lazy.  Everyone has their kitchen tasks that they hate and one of mine is greasing pans.  The idea of coating 24 mini-bundts with shortening and flour (my method of choice) was too much to contemplate so I crossed my fingers.  And guess what?  Prying completely stuck-on cake from 24 mini-bundts, washing each of them thoroughly to remove all traces of said cake, and remaking the entire recipe is much more time consuming than just greasing the pans to begin with.  Trust me.

Grammercy Tavern Gingerbread
Gourmet

Since most people probably do not have 24 mini bundt pans (it’s really just two pans with 12 slots each), I’m just giving the original recipe.  It says that the cake serves 8-10 but that can’t be right if I was able to get 24 individual servings (plus a mini-loaf pan) without even doubling the recipe.  And I apologize that the directions in this recipe are running together.  Not quite sure what is going on there.

1 cup oatmeal stout or Guinness Stout
1 cup dark molasses (not blackstrap)
1/2 teaspoon baking soda
2 cups all-purpose flour
1 1/2 teaspoons baking powder
2 tablespoons ground ginger
1 teaspoon ground cinnamon1/4 teaspoon ground cloves
1/4 teaspoon freshly grated nutmeg
Pinch of ground cardamom
3 large eggs
1 cup packed dark brown sugar
1 cup granulated sugar
3/4 cup vegetable oil
Powdered sugar or Maple Cream Cheese Frosting (recipe follows)

Preheat the oven to 350ºF.  Generously butter a 10-inch (10 to 12 cup) bundt pan and dust with flour, knocking out excess.
Bring stout and molasses to a boil in a large saucepan and remove from the heat.  Whisk in baking soda, then cool to room temperature.
Sift together flour, baking powder, and spices in a large bowl.  Whisk together eggs and sugars.  Whisk in oil, then molasses mixture.  Add to flour mixture and whisk until just combined.
Pour batter into bundt pan and rap pan sharply on counter to eliminate air bubbles.  Bake in middle of oven until a tester comes out with just a few moist crumbs adhering, about 50 minutes.  Cool cake in pan on rack for 5 minutes.  Turn out onto rack and cool completely.  Either serve dusted with powdered sugar or with Maple Cream Cheese Frosting.
Maple Cream Cheese Frosting
1 8-ounce package cream cheese, room temperature
¼ cup (½ stick) unsalted butter, room temperature
¾ cup powdered sugar
¼ cup maple syrup
¾ tsp. vanilla extract
Beat cream cheese and butter in large bowl until smooth.  Add powdered sugar, maple syrup, and vanilla extract; beat until smooth.


« Older Posts Newer Posts »