Category: Dessert

Reunion

June 16, 2011

When I was about 8 months pregnant with Graham, my oldest child, Randy and I did a Lamaze weekend out of town.  Most OB’s recommend you do some kind of class to prepare you for childbirth and the hospital where we ultimately delivered offered a six week course.  Randy had just started working at Microsoft and was spending a ridiculous number of hours there trying to get up to speed.  The thought of trying to get back across the lake in time for a class stressed him out, so we opted to cram all those classes into one weekend instead.

Sometimes things happen for a reason and I think we ended up going this Lamaze route so we could meet an incredible group of people.  There were 12 couples, all due within a few months of each other, and over the course of the weekend and talking about things like contractions and bed-rest and colostrum, we got to know each other.  We were all in this incredibly heady time in our lives – about to have our first baby.  Scared, excited, scared and um, scared.  The weekend ended and we drifted away from each other and back to our lives.

The first couple had their baby just days before we had Graham.  The husband emailed their news out to the group and, now that we were connected, all the rest of the couples followed suit.  Through this email connection, the women started bonding.  Once all of us had our babies, we began to get together with our brand new babies.

At the time I was in a PEPS group (Program for Early Parenthood Support), an organization I believe in and support.  I even lead a group myself when Graham was a year old.  But my particular group was a little funny.  Everyone was nice but there were some big overachievers in there and everyone seemed to have it together.  No one cried, everyone’s baby seemed to be sleeping, nursing was going well for all the moms – in short, no one was real.  I went to those meetings making sure I had showered, did not cry, bit my lip the whole time, and left feeling like a failure.  It was the weekly gathering of Lamaze ladies where I could be myself.  It was my lifeline.  Being able to walk out of the house unshowered, crying baby in tow, get to a friend’s house who was in a similar mental and emotional space as me, and be able to cry myself – out of exhaustion, frustration, fear, and hormones – is what saved me in those first few months.  One in our group gave us this quote: “You make friends for a reason, a season, or a lifetime.”  It seemed we had made lifelong friends.

Sadly, within a couple of years, 6 of the 12 couples moved away.  We all got busy with our lives, husbands, work, second children.  I have remained extremely close with two of the women – I consider them two of my closest friends.  I wish I saw everyone else more frequently but busy lives and distance makes it difficult.  Donna was one of our true gems and she had the nerve to North Carolina before we knew it.  Donna and I have been keeping in intermittent touch on Facebook and I will occasionally get a comment from her on this blog.  She emailed last week to say that she and the family were heading to town and could we gather?  Of course!

6 adults, 10 kids, 2 pizzas, 2 salads, and 1 cake makes for a rocking good time.  Graham was in heaven because all the six-year-olds were girls.  Spencer was in heaven because there were so many people to play with.  It was so nice seeing them all as such big kids and seeing how truly far we have come.  In true Lamaze group fashion, we shared some of the joys and some of the frustrations we are experiencing.  And we got to sing “Happy Birthday” to one of our group whose birthday is Friday.

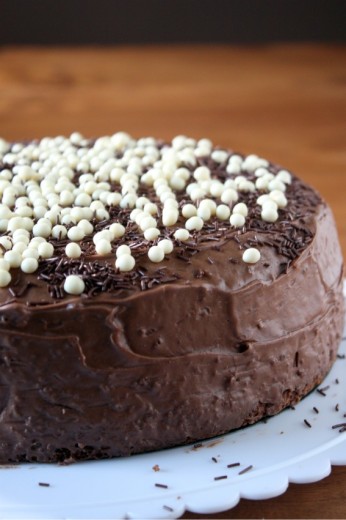
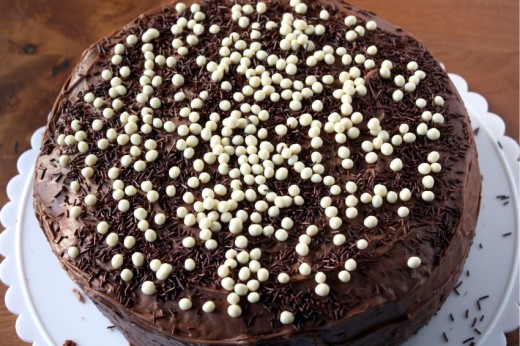
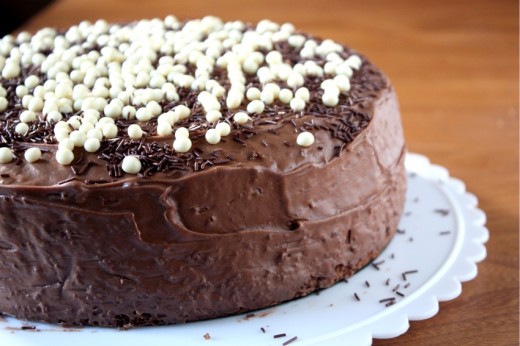
I have been wanting to practice my layer cake technique ever since watching this incredibly helpful video.  A friend’s birthday is the perfect excuse for practice.  This is a Holly B’s recipe and it’s hard for me to believe I have never made it.  Holly mentions in her book that this is the standard birthday cake in her family and now I know why.  It’s a perfect chocolate cake.  The cake itself is moist, the frosting is to die for and the whole thing is incredibly easy and quick to make.  Yes, really.  My only quibble is that there was not enough frosting.  The cake is very crumbly so it needs a crumb coat, but there was not enough for me to do that.  No matter, sprinkles cover a lot of error.  But next time I will one and a half the frosting recipe to make sure there is enough to really cover the cake and for little fingers to dip into.

One Year Ago: Chile Cheese Gratin Sandwiches
Two Years Ago:
Grilled Vegetable Quesadillas
Three Years Ago:
Feta and Ricotta Cheese Pie (ignore the bad photo, this is a terrific recipe)

Sour Cream Chocolate Cake

With Love & Butter

Makes a 9-inch double layer cake

I‘m giving you the recipe as written in the book.  Remember, I would at least one and a half the frosting recipe – even double it and do a crumb coat.  To do so, spread a thin layer of frosting all over the cake and place it in the freezer for about 15 minutes.  Then frost the rest of the cake.  This will keep little crumbs from marring the smooth appearance of your masterpiece.

Cake
1 cup (2 sticks) unsalted butter, at room temperature
½ cup unsweetened cocoa
½ cup boiling water
1 cup granulated sugar
2/3 cup brown sugar, firmly packed
2 tsp. vanilla extract
3 eggs
1 cup sour cream
2 cups flour
1½ tsp. baking powder
1 tsp. baking soda
¼ tsp. salt

Chocolate Sour Cream Frosting
¾ cup sour cream
4 cups powdered sugar
1 tsp. vanilla extract
¼ tsp. salt
1/3 cup (2/3 stick) unsalted butter, melted
¾ cup unsweetened cocoa powder

Make the cake
Preheat the oven to 375ºF with the rack in the center position.  Butter and flour 2 9-inch round cake pans.

Melt ¼ of the butter (½ of one stick) and combine with the cocoa powder and boiling water in a small bowl.  Stir until smooth and set aside.

In the large bowl of an electric mixer, cream the remaining butter with the granulated and brown sugars and vanilla.  Add the eggs and beat until smooth.  Mix in the sour cream, then the reserved cocoa mixture.  Finally, dump in the flour, baking powder, baking soda, and salt and mix just until combined.  Divide the batter between the 2 pans and smooth the tops with a rubber spatula.

Bake the layers for 10 minutes, rotate the pans and bake for 10 to 15 minutes more or until a toothpick just comes out clean.  Don’t overbake – moistness is your goal.  Cool the cakes on a rack.

Make the frosting
Put the sour cream, powdered sugar, vanilla, and salt in the bowl of a mixer.  Whip to combine.  Stir the melted butter and cocoa together.  If the mixture begins to harden, dribble in a little more melted butter and beat until free of lumps.  Add to the sour cream mixture and beat until smooth.

Put one cake layer top-side-up on a serving plate and spread frosting generously to within ½-inch of the edge.  Place the second layer on top, bottom-side-up.  Smooth the remaining frosting over top and sides.

(DT: I made this cake a day ahead frosted and all.  I waited until the frosting had hardened slightly and loosely covered the whole thing with foil.  I think it improved both the flavor and texture of the cake so don’t hesitate to do the same.  You could probably even make it two days ahead, but then I would refrigerate it, covered, and bring it to room temp before serving.)
Pedestrian Tastes

May 16, 2011

The other day I was talking with my friend Julie about pedestrian tastes.  Like, no matter how much you love food and no matter how great your palate is, there are some pedestrian things that you just love.  Pedestrian as in low-brow, even a little trashy perhaps.  I remember reading that Jeffrey Steingarten – food columnist for Vogue, judge on Iron Chef, and food snob extraordinaire – always travels with a stash of Milky Way bars because they are his favorite and he wouldn’t want to be stranded somewhere without one.  Now, I am not a food columnist or a judge for a TV show but I can be kind of a food snob.  But boy, do I love Chex Mix.  And Kettle Korn.  And while I have not stepped foot in a McDonalds in probably 15 years, I still remember their fries as being some of the best I have ever tasted.  And speaking of fries  – Red Robin.  Love them.

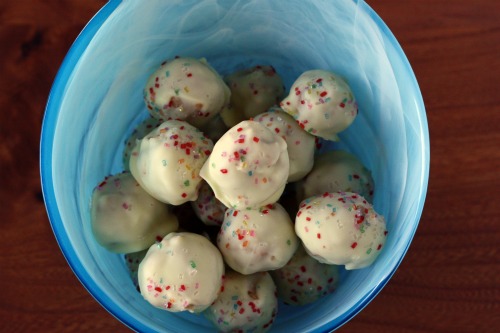
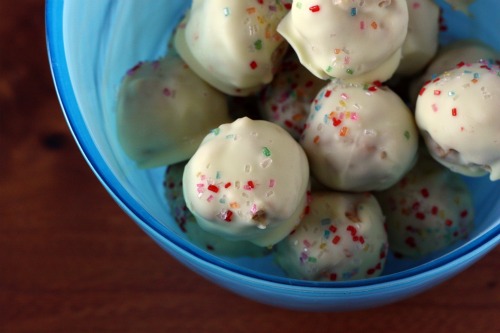
So here we are.  This is a no-bake slightly white-trash morsel disguised as something fancier.  Rice Krispies made round with peanut butter (Jif brand if you are me) and sugar, rolled in melted white chocolate and dusted with sprinkles.  I made a double batch of them so I would have enough for last weekend’s yoga retreat and for various treat-needing functions.  My boys eyed them in a “I don’t know what that is but it has sprinkles on it, so I will try it” kind of way and then gave me their highest praise.  “You’re a good cooker Mommy!”

By the way, check back Tuesday and Thursday this week for more giveaways.  And you have one more day to enter to win the Guy Fieri cookbook.

One Year Ago: Chickpeas with Lemon and Pecorino Romano and Potato Salad with Snap Peas
Two Years Ago: Moroccan Carrot and Hummus Sandwiches and Quinoa with Grilled Zucchini, Chickpeas, and Cumin

White Bark Balls
The Essential New York Times Cookbook
Makes about 3 dozen balls

1½ cups Rice Krispies
1 cup crunchy peanut butter
1 cup confectioners’ sugar
2 tbsp. unsalted butter, softened
¾ pound white chocolate
Colored sugar for sprinkling (optional)

1.  Combine the Rice Krispies, peanut butter, confectioners’ sugar, and butter in a medium bowl, and mix until very well combined.  Firmly compress into balls 1½ inches in diameter.  Place on a baking sheet, cover, and refrigerate until well chilled, at least 4 hours, or overnight.

2.  Line a baking sheet with wax paper.  Melt the white chocolate in a double boiler over medium-low heat, stirring until completely smooth.  Pour the chocolate into a wide shallow bowl.  Working quickly, in small batches, roll the chilled balls in the chocolate, turning gently with a fork.  Transfer to wax paper.  If desired, sprinkle the tops of the cookies with colored sugar.

3.  Place the baking sheet in the refrigerator long enough for the chocolate to become firm, 30 minutes to 1 hour, then transfer the ball to an airtight container.  (The balls can be stored in a cool place for up to 3 days or refrigerated for up to 3 weeks.)


Butterscotch Pudding Tarts

April 20, 2011

Remember Snack Pack pudding?  I guess that question isn’t a huge stretch because it is still around.  The packaging looks nothing like it did when it sat in my Donny and Marie lunchbox, just waiting to be eaten with a plastic spoon.  I thought that pudding, chocolate flavor only please, was the best thing about  bringing lunch to school.  I didn’t get it every day but it was a happy day when I did.

Graham, my kindergartner, has never heard of Snack Pack pudding and I’m pretty sure, up until recently, he had never had pudding at all.  In case you think that is because I don’t give him sweets, or I only give him whole grain treats or even just homemade treats, you would be mistaken.  I am liberal with my sweet giving.  This is another post for another time, but suffice it to say that while I prefer him to eat things that I have made, the lure of Halloween/Valentine’s Day/Easter candy can be great.  I do try to draw the line at certain things (which would probably seem arbitrary to a more strict mother), and pudding that does not have to be refrigerated and is full of things I can’t pronounce is one of those lines.

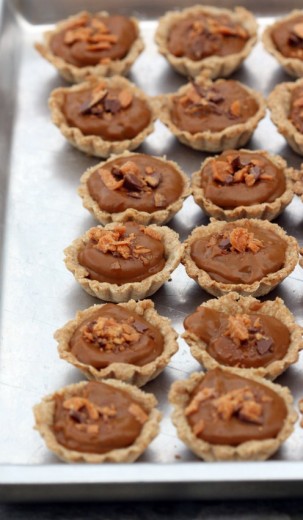
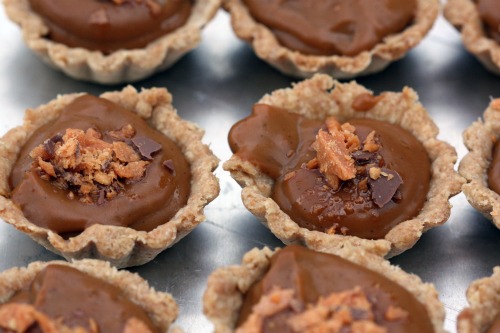
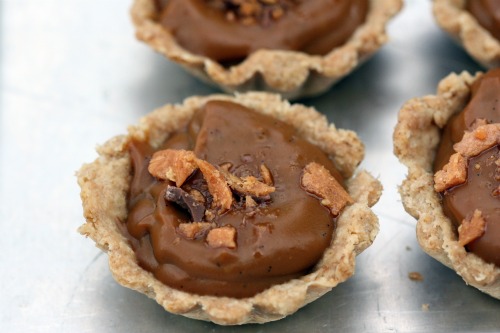
While pudding is not a dessert that pops into my mind with any regularity, it certainly has its place.  Comfort food at its most comfortable.  And how about if the pudding is butterscotch and sitting inside a tart shell?  Mini tart shells?  Not long ago, I purchased 24 mini tart pans.  At 79 cents a pop this was not a huge investment.  And they have allowed me to make super cute appetizers and desserts.  I had no problem getting 24 rounds of dough out of the recipe and I actually had some pudding left over once they were all filled.  I filled two small bowls with the butterscotch pudding and gave it to my boys.  Neither of them liked it.

By the way, who was on your favorite lunchbox?

One Year Ago:  Zucchini and Olive Salad
Two Years Ago:  Mississippi Mud Cupcakes

Butterscotch Pudding Tarts
Baked
Makes 8 (4-inch) tarts or 24 mini tarts

Below is the recipe as written for the larger tarts.

For the oat wheat pie crust
1 cup rolled oats
½ cup whole wheat flour
1 cup all-purpose flour
¼ cup firmly packed dark brown sugar
½ tsp. salt
¾ cup (½ stick) cold, unsalted butter, cut into cubes
¼ cup milk

For the butterscotch pudding
6 large egg yolks
¾ cup granulated sugar
¼ cup heavy cream
½ cup firmly packed dark brown sugar
1/3 cup cornstarch, sifted
1 tsp. salt
3 cups whole milk
1 vanilla bean
1 tbsp. unsalted butter
2 tbsp. whiskey

To assemble
1 Butterfinger candy bar, broken into small pieces

Make the oat wheat pie crust
Put the rolled oats in a food processor and process for about 30 seconds, until ground but not powdered.  Add the flours, brown sugar, and salt and pulse until combined.

Add the butter and pulse until the butter pieces are small and the dough looks crumbly, like coarse sand.  Add the milk and pulse for a few seconds..

Scoop the dough out of the food processor and form it into a large disk.  Wrap tightly in plastic and refrigerate for at least 1 hour and up to 3 hours.

Dust a work surface with a sprinkling of flour.  Unwrap the disk of chilled dough and put it directly on the work surface.  Cut the dough into eight equal pieces, about 2 ounces each, and gently shape each piece into a smooth disk.  The dough will be sticky.  Make sure to turn the dough over (use a spatula or a bench knife) as needed and keep the working surface floured.  Put the dough disks in the refrigerator for 10 minutes.

Using a rolling pin, roll each dough ball into a 6-inch round just over 1/8-inch thick.  Place a round over a 4-inch tart pan and very gently press the dough into the pan.  Roll the rolling pin over the pan to trim off excess.  Repeat with the remaining dough rounds.

Preheat the oven to 325ºF.  Put the tarts pans in the freezer for 30 minutes.

Remove the tarts pans from the freezer and arrange on a baking sheet and gently prick the dough with a fork.  Bake on the baking sheet until golden brown, 12 to 15 minutes, rotating the baking sheet halfway through the baking time.  Transfer the tart pans to wire racks and let cool completely.

Make the butterscotch pudding
Put the egg yolks in a large heatproof bowl and set aside.  (DT: I find it helpful here to put a damp paper towel under the bowl with the yolks.  That way, when you go to whisk it later, the bowl stays still on your counter.  I do the same thing when making ice cream.)

In a small saucepan, combine the granulated sugar and ¼ cup water and stir gently with a heatproof spatula; do not splash the sides of the pan.  Cook over medium heat until the sugar is dissolved, then increase the heat to medium-high and cook until the mixture begins to turn a dark amber color.  Swirl the pan, if necessary, to create an even color, but do not stir.  Remove from the heat, let stand for 1 minute, then use the heatproof spatula to stir in the cream.  Pour the caramel into a small bowl.  Set aside.

In another small saucepan, combine the brown sugar, cornstarch, and salt.  Stir in the milk and whisk to combine.

Cut the vanilla bean in half lengthwise, and, using the tip of the knife or a small teaspoon, scrape the seeds into the saucepan with the milk.  Add the vanilla bean to the milk as well.  Cook over medium-high heat, whisking occasionally, until the mixture comes to a boil.  Remove from heat and add the caramel.  Whisk together until combined, then pour one third of the mixture over the eggs.  Keep whisking the egg mixture and add another third of the hot milk mixture.  Transfer the egg mixture back to the saucepan with the milk mixture and, whisking constantly, bring to a boil over medium-high heat.  Boil for 2 to 3 minutes, or until very thick.

Remove from the heat and add the butter and whiskey.  Keep whisking vigorously for about 1 minute to cool the pudding slightly.  Let the pudding sit for about 15 minutes, then remove the vanilla bean.

Assemble the tarts
Whisk the pudding one more time until smooth.  Divide the pudding equally among the tart shells and sprinkle the crumbled candy bar over the pudding.  Cover the tarts with plastic wrap and put the in the refrigerator for about 2 hours before serving.

The tarts can be stored, tightly covered, in the refrigerator for up to 2 days.


Brown Sugar Pound Cake

April 18, 2011

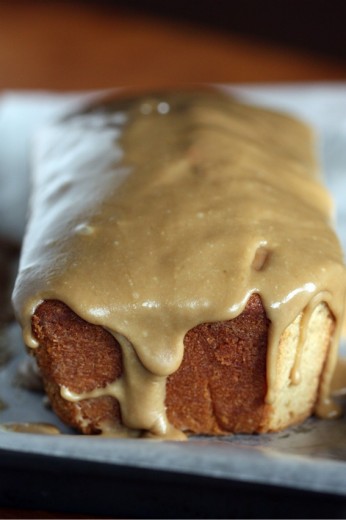
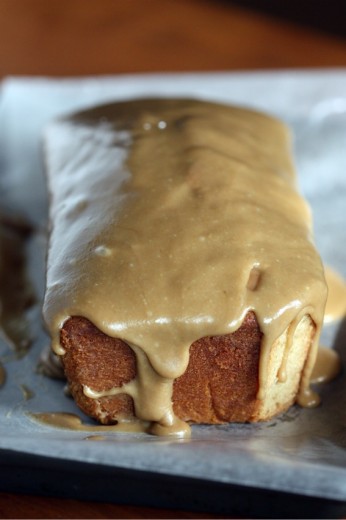
It is a shame I didn’t get a shot of a slice of this cake.  I could have, should have, but I didn’t.  Sorry about that.  If I had, you would have seen the glorious tight and dense crumb.  In my opinion, it is a tight and dense crumb that makes a pound cake great.  That and lots of butter.

This recipe comes by way of a memoir.  Normally, I am a little suspect of recipes in memoirs (unless we are talking about a food memoir like Cooking for Mr. Latte or A Homemade Life).  My thoughts are along the lines of “who is this person and why does he/she think she can just include a recipe at the end of each chapter?”  My friend Cheryl gave me a copy of Cakewalk last summer and it has been sitting on my “to read” pile for far too long.  It  is the story of a very interesting and troubled family.  It is well-written and although food is not the subject, the author does write about tantalizing treats.  Many of the end-of-chapter recipes spoke to me but I made this one because I had all the ingredients on hand.

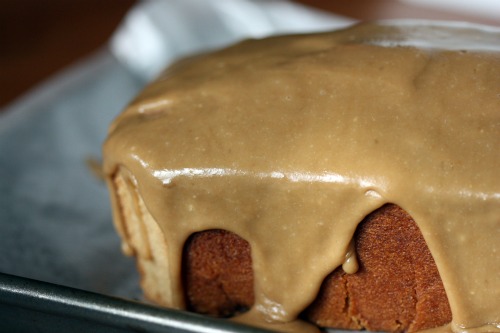
(OK, so you may notice a small bit of the corner cut off.  For scientific purposes only!)

Sometimes I just want to bake.  If you like to bake, I’m sure you are familiar with this feeling.  For me, it isn’t even so much for the end result although ending up with a homemade baked good is nice.  Sometimes it is just the act of pulling out the flour and sugar, turning on the mixer, preheating the oven, anticipating the smells that will soon perfume my house…  When I just want to bake, I don’t want to fuss.  Cookies are too much trouble – all that shaping and switching baking sheets in the oven.  This is why I love simple cakes.

I did a little dessert party last night – a reception for a very moving play currently running at the New City Theatre in Seattle.  Sick tells of one woman’s struggle with pain and medication and the cracks we can all fall through in the American medical system.  You can read more about the play here.  Randy and I wanted to support the playwright and actress and we decided to invite some of our friends to attend.  We lured them with the promise of a compelling story and with treats afterward.

I made butterscotch pudding tarts and chocolate friands (recipes coming soon).  I made the most favorite chocolate chip cookies.  But several people pulled me aside to tell me this cake was their favorite.  It is comfort food at its most comfortable.  And the glaze!  Swoon.


Brown Sugar Pound Cake
Adapted from Cakewalk
Makes two 8×4-inch loaves

You can make this cake in one 9 or 10-inch tube pan, but I love the idea of having two cakes out of one recipe.  I served one cake the day I made it and wrapped and froze the other one.  The cake should be frozen unglazed, so if you do this, be sure to cut the glaze recipe in half.

3 cups all-purpose flour
1 tsp. baking powder
½ tsp. salt
1½ cups (3 sticks) unsalted butter, at room temperature
3 cups firmly packed light brown sugar
5 large eggs, at room temperature
1 cup whole milk
1 tsp. vanilla

Preheat oven to 325ºF.  Butter and flour two 8×4-inch loaf pans, knocking out excess flour.  Mix the flour, baking powder, and salt together in a bowl.  Set aside.

Beat the butter in the bowl of an electric mixer on medium speed for 3 minutes, until whipped looking.  Slowly add the sugar and beat for another 3 minutes, increasing the speed to medium-high.  The mixture should look very light and fluffy.  Add the eggs one at a time, beat well after each one.  Scrape down the sides of the bowl and beat again.

Combine the milk with the vanilla.  Add the flour in 3 portions alternately with the milk, beginning and ending with the flour.  Fold the last flour addition in by hand with a rubber spatula.  Turn the batter into the prepared pans.  Bake for 1 to 1½ hours, checking after 55 minutes and every 5 to 10 minutes thereafter, until a toothpick inserted near the center of the cake comes out with just moist crumbs attached.  If the cake is very brown after 55 minutes but not yet fully baked, cover the top with a sheet of aluminum foil.  When done, the cake will be springy to the touch and pulling away from the sides of the pan.  Let cool in the pan for 10 minutes, then turn out onto a wire rack to cool completely before glazing.

Brown Sugar Glaze

Remember, this amount will glaze both cakes.  If you are only glazing one, cut the recipe in half.

½ cup (1 stick) unsalted butter
½ cup firmly packed light brown sugar
¼ cup whole milk
¼ tsp. salt
1 tsp. vanilla
1 to 1½ cups confectioners’ sugar

Melt the butter in a heavy-bottomed saucepan over low heat, then add the brown sugar and raise the heat to medium.  Boil, stirring constantly, for 2 minutes.  Add the milk and return to a boil, stirring constantly.  Remove from heat and stir in the salt and vanilla.  Let cool for 10 minutes.

Sift 1 cup of the confectioners’ sugar over the mixture, stirring with a whisk until smooth.  If the glaze is thick enough for your liking, you can stop there.  If not, sift the additional ½ cup sugar in.  Place the cake (still on the wire rack) over a wax paper lined baking sheet.  Pour the glaze over the cooled cake and allow it to drip down the sides.  Allow the glaze to set completely before slicing and serving.  Wrapped carefully, this cake will keep for several days at room temperature.  If you happen to have some homemade caramel sauce on hand, it is amazing poured over top.


Why I Made Dinner (and Dessert)

April 10, 2011

Thank you all for your sympathy over my challenging week.  First let me tell you that my kids are fine.  I took Graham to the ER at 4am on Tuesday because he had been complaining for days of a tummy ache and woke up in the middle of the night crying.  Since that is completely unlike him, I started to really worry.  After many hours and tests, he is fine and fond of telling anyone who will listen how brave he was with the doctor.

Second, I have to be honest and tell you the only reason that I persevered and made that Pasticcio and this most favorite lemon tart is because I had friends coming over for dinner.  If it had just been Randy and me, I would not have hesitated to punt on cooking and ordered in.  I even considered take-out for my dinner guests but I already had all the ingredients on hand and we needed to celebrate one in our midst.

This small group is friends from a co-op preschool.  We attended for two years when Graham was one and two years old.  I met an amazing group of women there and a few of us have remained close.  We try to get together at least monthly and our evening usually (ok, always) revolve around food and drink.  I will often offer to host when Randy is out of town because I do so love these women and it gives me something to look forward to.

One of our group is about to give birth to her fourth child.  Yes, fourth.  She, more than almost anyone I know, is equipped with the energy, the boundless love, and the sense of humor that four children requires.  It is just a couple of weeks before her due date and I thought a special dinner was in order before all hell breaks loose in her house.  Again.

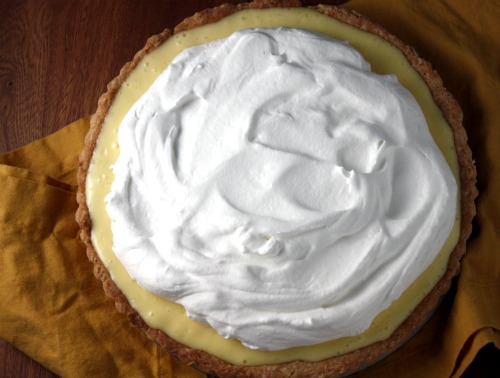
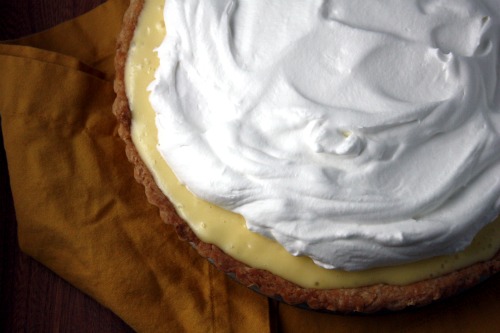
So you see, I had to make dinner.  And dessert.  I can’t send a dear friend off to infant-land on a dinner of takeout pizza and boxed cookies, right?  Plus I needed an excuse to make this lemon tart.  A few weeks ago, I received an email from a reader saying she had a plethora of Meyer lemons and wondered what to do with them.  I didn’t hesitate to tell her she should make this tart from the Tartine cookbook.  And then I realized that I had not posted the recipe.  I wrote about it, way back in May of 2008, the second post ever on this blog, but there was no photo and no recipe.  Considering this a fall-back recipe, one I make over and over, it really needs to be here in all its glory.

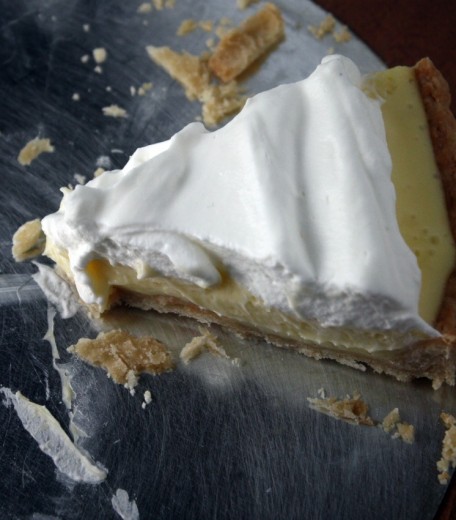
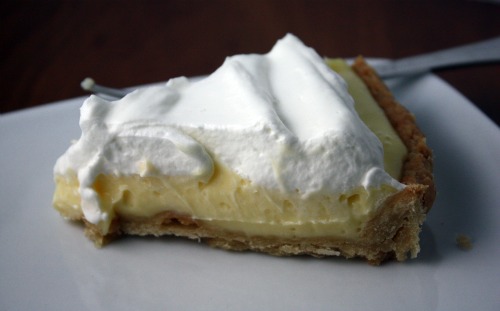
Until I started making this particular tart, all the other lemon tarts in my life featured lemon curd as a filling.  I like lemon curd as much as the next person, but something about all those tarts just did not taste right.  A little metallic, a little funky.  This tart uses lemon cream and the addition of butter makes all the difference.  The cream is silky smooth but with over a half cup of lemon juice, it has the perfect amount of pucker.  The sour marries perfectly with the Tartine sweet crust.  For last week’s tart, I had a round of my favorite tart dough in the freezer and a hole in my ceiling, so I decided to save myself the step of making the Tartine crust.  But truthfully, for this tart, theirs is better.  It is sweeter and the balance against the sour lemon is intoxicating.

A few notes.  This dough recipe will yield 4 tart crusts.  They freeze beautifully, so don’t be tempted to scale down the recipe.  Just set one aside in the fridge and wrap the other three, separately, in plastic wrap and then foil.  Put them in a Ziploc bag, date it, and put in the freezer.  They will keep at least one month and possibly two.  You can use this crust for any sweet tart that goes in a 9-inch tart pan (which is the most common size).  Also, I use my immersion blender to mix the butter into the lemon cream and while that might sound strange, it works really well.

One Year Ago:  Baked Rice with Chiles and Pinto Beans
Two Years Ago:  Pasta with Broccoli Rabe and Chickpeas

Lemon Cream Tart
Adapted from Tartine
Makes one 9-inch tart, 8 to 12 servings

I made a few changes in the recipe just in terms of streamlining and personal taste.

For the crust
9 ounces (1 cup + 2 tbsp.) unsalted butter, at room temperature
1 cup sugar
¼ tsp. salt
2 large eggs, at room temperature
3½ cups all purpose flour

For the lemon cream
½ cup + 2 tbsp. fresh lemon juice
3 whole large eggs
1 large egg yolk
¾ cup sugar
Pinch salt
1 cup (2 sticks) unsalted butter, room temperature

To finish the tart
1 cup heavy cream, very cold
2 tsp. sugar

Make the crust
Using a stand mixer fitted with the paddle attachment, combine the butter, sugar, and salt and mix on medium speed until smooth.  Mix in 1 egg.  Add the remaining egg and mix until smooth.  Stop the mixer and scrape down the sides of the bowl with a rubber spatula.  Add the flour all at once and mix on low speed just until incorporated.

On a lightly floured work surface, divide the dough into 4 equal balls and shape each ball into a disk ½ inch thick.  Wrap well in plastic wrap and chill for at least 2 hours or overnight.  (At this point, unless you are planning to make four lemon tarts, make sure three of your crusts are well-wrapped in plastic and then foil, then put them in the freezer.)

Place the dough on a lightly floured work surface and roll out to 1/8-inch thick round, rolling from the center toward the edge in all directions.  Lift and rotate the dough a quarter turn after every few strokes, dusting underneath as necessary to discourage sticking, and work quickly to prevent the dough from becoming too warm.  Roll the dough out to an 11-inch circle.  If the dough becomes too soft to work with, place it in the refrigerator briefly.  Loosely roll the dough onto the rolling pin and then unroll it into a 9-inch tart pan.  Carefully coax the dough into the pan without stretching it, but making sure it is touching the whole bottom of the pan and is in the “corners”.  Fold the excess dough over to double the thickness of the sides.  Dock (make small holes in) the bottom of the pan with a fork or a knife and place the pastry shell in the freezer for 15 minutes.

Preheat oven to 325ºF.  Place in the oven and bake for 12 to 15 minutes, or until golden brown.  Let cool completely on a wire rack.

Make the lemon cream
Pour water to a depth of about 2 inches into a saucepan, place over medium heat, and bring to a simmer.  Combine the lemon juice, whole eggs, egg yolk, sugar, and salt in a stainless-steel bowl that will rest securely in the rim of saucepan over, not touching, the water.  Whisk the lemon juice, eggs, yolk, sugar, and salt together.  (Never let the egg yolks and sugar sit together for more than a moment without stirring; the eggs will “cook” the yolks and turn them granular.)  Place the bowl over the saucepan and continue to whisk until the mixture becomes very thick and registers 180ºF on a thermometer.  This will take 10 to 12 minutes.  Remove the bowl from over the water and let cool to 140ºF, stirring occasionally from time to time to release the heat.

Meanwhile, cut the butter into 1 tablespoon pieces.  When the cream is ready, leave it in the bowl if using an immersion blender, or pour it into a counter top blender.  With the blender running, add the butter 1 tablespoon at at time, blending after each addition until incorporated before adding the next piece.  The cream will be pale yellow and opaque and quite thick.  You can use the cream immediately, or pour it into a storage container with a tight-fitting lid and refrigerate for up to 5 days.  To use after refrigeration, gently heat in a stainless-steel bowl set over simmer water until it has softened.

Finish the tart
Make sure the tart shell is completely cool.  Pour the lemon cream filling into the crust and smooth the top.  Chill the tart until firm, about 2 hours, before serving.  It will keep for up to 3 days in the refrigerator.

To serve the tart, in a mixing bowl, whip the cream with a whisk until thickened.  (DT: I used my hand mixer.)  Add the sugar and whip until the cream holds soft peaks.  Top the tart with the whipped cream.  Serve the tart cool.


« Older Posts Newer Posts »