Category: Bars

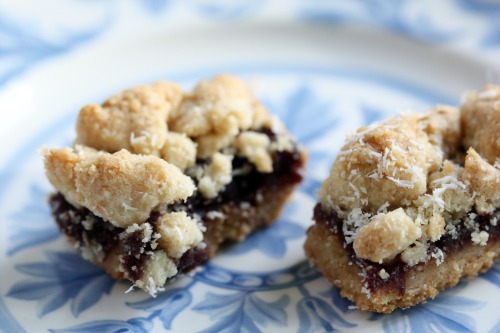
Date Bars Gone Bad, Or Maybe Not

March 22, 2011

You know what I hate?  Poorly written recipes.  You know what else I hate?  Wasting quality ingredients.  Which is why I will never make these bars again.*

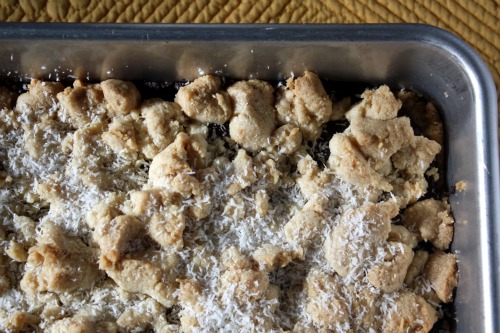
In searching fora different book, I came across my copy of Sticky, Chewy, Messy, Gooey.  I wondered, “Why haven’t I been using this book more?”  Now I know.  First there was the unclear directions about refrigerating the dough and then there was the fact that there was a full third too much of that dough.  I essentially threw out 10 tablespoons of butter.  Add to that the fact that the final baking time was off.  Way off.  Like the recipe said the bars would be done at 30 minutes.  Mine were done at 60.  I understand accommodating for oven differences and add 10 minutes here and there.  But double the amount of time?  Did anyone test this recipe?

This was the weekly treat and I’m sure the crew will enjoy them and might even request the recipe.  But my math skills would need to be much better in order to tell you how to either successfully cut the recipe for the dough by a third, or to increase the amount of date filling for an additional set of bars in a smaller pan to accommodate the leftover dough.  Ahem.  Too. Much. Trouble.

*But here is the thing.  I wrote the above paragraphs as I was checking the pan in the oven and while I was waiting for the bars to cool.  I was fully prepared to hate them.  I sheepishly have to tell you they are delicious.  A totally wonky, poorly written, proportionately-off delicious recipe.  What do you do with that?

I’m going to give you the recipe as written.  If one of you out there in Internet land can figure out a better way to make these bars, of if one of you makes them successfully using this recipe as written, will you let me know?  Please and thank you.

(UPDATE: I just want to clarify that the book in question is Sticky, Chewy, Messy, Gooey by Jill O’Connor – NOT Chewy, Gooey, Crispy, Crunchy.  The latter is the most recent book by Alice Medrich and has been celebrated by everyone who has used it.  Note to self: do not use a four adjective title for any future cookbooks.)

One Year Ago: Baked Pasta with Tomatoes and Mozzarella
Two Years Ago: Pasta with Roasted Cauliflower and Parsley Pesto

Chewy Date Bars
Sticky, Chewy, Messy, Gooey
Makes 24 bars

A couple of hints.  I was not clear on whether I was supposed to refrigerate the dough pressed into the pan as well as the topping dough.  I did just to be safe.  You will need a stand mixer for the dough.  I have the “professional” size Kitchen Aid and it struggled.  Do not attempt to mix it on medium.

1 pound (4 sticks) unsalted butter, at room temperature
1 cup granulated sugar
1½ cups confectioners’ sugar
2 tsp. vanilla extract
1½ tsp. salt
4 cups all-purpose flour
2 tsp. baking powder
1 1/3 cups desiccated coconut

For the date filling
1 pound dates, preferably Medjool, pitted and coarsely chopped
1½ cups water
¼ cup granulated sugar

Combine the butter and sugars in a large bowl.  With an electric mixer set at medium speed, beat the butter and sugars together until creamy.  Add the vanilla and salt and beat to combine.  Beat in the flour, baking powder, and 1 cup of the coconut just until a soft dough forms.

Spray a 9-by-13-inch pan with nonstick cooking spray.  Press one-third of the dough into the pan to form a bottom crust.  Wrap the remaining dough in plastic wrap and refrigerate until firm, at least 30 minutes.

Meanwhile, make the filling.  Combine the dates, water, and granulated sugar in a heavy-bottomed saucepan over medium heat.  Cover the pan and cook the dates, stirring occasionally, until they are very soft and have turned into a glossy brown mass, 10 to 15 minutes.  There still may be chunks of dates in the mixture.  Remove from the heat and let cool slightly.  Transfer the date mixture to a food processor fitted with a metal blade and, using short pulses, grind the dates to a fine paste.

Position a rack in the middle of the oven and preheat to 325ºF.  Bake the bottom crust until firm and just beginning to turn golden around the edges of the pan, 20 to 25 minutes.  Let cool slightly.  Spread the date filling evenly over the crust.  Crumble the remaining dough over the date filling to form a pebbly, crumbled topping.

Return the pan to the oven and continue baking until the topping is firm and crisp and just beginning to color, about 30 minutes.  Remove the pan from the oven and sprinkle with the remaining 1/3 cup coconut.  Let cool to room temperature on a wire rack.  Using a sharp knife, cut into 24 bars.


Macaroon Brownie Bars

January 31, 2011

I went to a college where we had self-scheduled exams.  After classes were over, there was a 10 day period when exams were held at three different times of day.  When you were ready to take your European History exam for example, you showed up to the appointed place in the morning, afternoon, or evening and took the test.  If you decided you weren’t quite ready, you could wait until you were.  Whenever I tell people about this phenomenon, they always ask if people cheated.  Of course they did.  But we all signed an honor code at the beginning of our freshman year saying we wouldn’t.

For me, exam week was a very interesting exercise in time management.  Because I went to college 3,000 miles away from home, I always had a plane ticket limiting my time.  I would get to the end of the semester, look at all the papers I still had to write, all the studying I had to do, and the exams I had to take, I would panic, and then I would realize that I just simply had to get it all done.  Regardless of how overwhelming the work, how many all-nighters I was going to have to pull, I had a deadline with wings.

I am reminded of that time in my life because I have a lot to get done in the next couple of weeks.  I am teaching two Seasonal Feast classes, a private class, cooking a yoga retreat dinner for 24 people, and making a birthday cake for my younger son.  All before February 12th.  And classes aren’t just teaching, there is tons of prep involved and recipe testing, shopping, and typing up of recipes.

This would be the time to ask for a hall pass on the weekly treat idea.  But I can’t.  I went to Randy’s new office for the first time last week and there was a white board outside his cube.  On that board was written, “More cookies please” and it was signed the Cookie Monster.  I mean, I can’t let the cookie monster down, right?  No matter how busy I am.

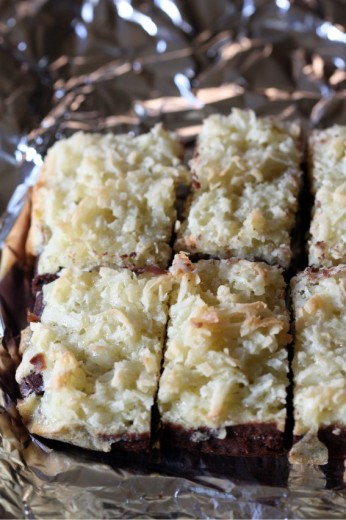
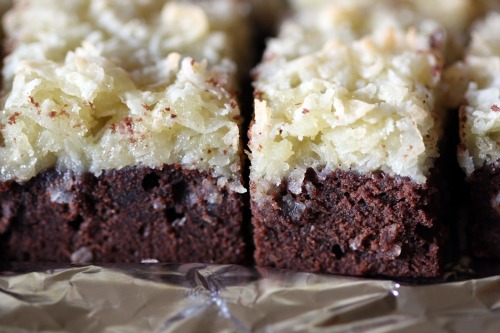
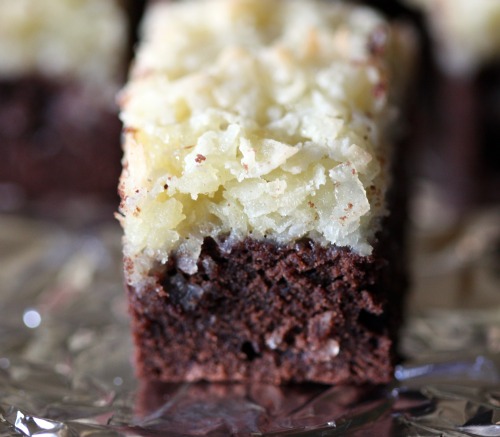
So this week it is Coconut Brownie Bars.  I’m actually surprised this recipe spoke to me.  The two candy bars that were always left in my Halloween bag were Almond Joy (because of the nuts) and Mounds (because of the dark chocolate).  And both of them were also left in there because of the coconut.  My parents were thrilled about this fact because they are both huge coconut fans.  Nuts I still don’t like in my sweets but dark chocolate and I are much better friends.  Coconut – hmmmm.  I’m still on the fence.  Sometimes I like it and sometimes I don’t.  This  bar is a nice mix of a brownie and a macaroon and I actually really liked the contrast of tastes and textures.

Chocolate and Coconut Previously on Dana Treat: Coconut Bars
One Year Ago: Baked White Bean Purée
Two Years Ago: Lentils with Capers, Walnuts, and Mint

Macaroon Brownie Bars
The Greyston Bakery Cookbook
Makes 16

For the Brownie Base
2/3 cup flour
1/3 cup unsweetened cocoa powder
¼ tsp. salt
½ cup (1 stick) unsalted butter, softened to room temperature
2/3 cup sugar
3 eggs
1 tsp. pure vanilla extract
½ tsp. pure almond extract
4 ounces good quality bittersweet chocolate, chopped into chunks

For the Coconut Topping
2 eggs
2/3 cup sugar
¼ tsp. pure almond extract
1/3 cup flour
2 ¼ cups (7 ounces) sweetened flaked coconut

Prepare the brownie base
Place a rack in the center of the oven and preheat the oven to 350ºF.  Grease a 9-inch baking pan and line it with parchment paper, leaving about 1 inch of paper overhanging the two long sides.

In a bowl, whisk together the flour, cocoa powder, and salt until well blended.

In the bowl of a stand mixer, cream the butter and sugar on medium speed.  Add the eggs, one at a time, mixing well after each addition.  Stir in the vanilla and almond extracts.  Gradually mix in the dry ingredients until well combined.  Stir in the chocolate.

Spread the batter evenly in the prepared pan.  Bake for 20 minutes, or until the sides begin to set but the center is still soft.  Remove the pan from the oven and set on a wire rack to cool slightly.

Prepare the coconut topping
In a bowl, whisk together the eggs and sugar.  Stir in the almond extract.  Gradually stir in the flour, mixing thoroughly.  Stir in the coconut.

Using two spoons, gently place spoonfuls of the mixture over the partially baked brownie base and spread evenly with the back of a spoon for a rubber spatula.

Return the pan to the oven and bake for 30 minutes, or until the topping is golden brown and a wooden skewer inserted in the middle come out almost clean.  (Some crumbs will still be attached.  Do not overbake.)  Remove the pan from the oven and set it on a wire rack to cool completely.  Remove the brownies by grasping and lifting the edges of the parchment paper.  Cut into bars.


The Best (?) Brownie

December 18, 2010

Okay.  Allllllll right.  Deep breath.

Ever since I can remember, I have adored the combination of chocolate and caramel.  I grew up in a house where my mom cooked good and healthy food almost every night.  But there were also cabinets that housed candy bars, chips, and cookies, and there were always several kinds of ice cream in the freezer.  For dessert each night, we could have candy if we chose and I knew where my priorities lay.  My favorite was a Marathon bar (whatever happened to those?) but I would gladly settle for Rolos, or the Rice Krispie studded $100,000 Bar.  Once in a great while, there would be a gigantic Carmello from which I was allowed to break off a row.  My mom favored Cadbury chocolate with nuts (something I still don’t understand), so the Carmello was mine and I loved every square of it.

Now, I don’t know who started the salted caramel frenzy but I think it might have been Fran.  Do you have Fran’s chocolate where you live?  She of the Gold Bar or the truffles or the simple salted caramels.  Fran started her empire in a small shop located in the neighborhood where I went to school.  There was no bus service and both my parents worked, so I had to wait until about 5pm if my mom could pick me up and until after 7pm if it was my dad.  On those long days, more often than not, I would walk up to Fran’s and treat myself to something.  Sometimes it was just a truffle (although nothing is ever just a truffle in my world) and when I was feeling flush, I had a mini chocolate torte.  This mound of heaven was a crisp chocolate shell with a layer of dark chocolate ganache inside and topped with a generous amount of chocolate mousse.  It was garnished with the most delicate of candied violets and it was served on the cool side so you could eat it out of hand without leaving tell-tale traces of mousse on your face.

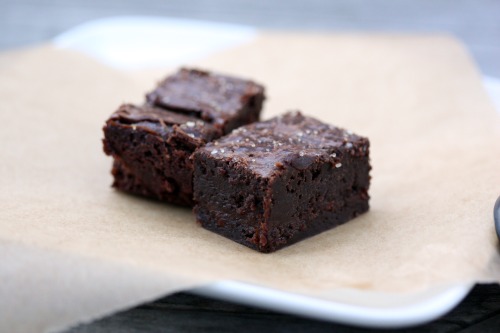
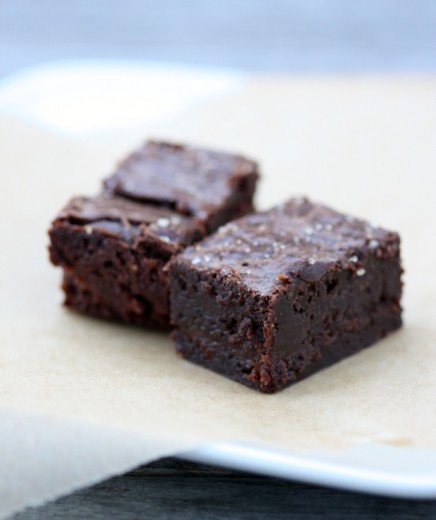
Ahem.  Let’s bring it back around to the brownies, shall we?  I find brownies difficult to photograph.  And there is no way to make you understand through pictures how amazing these are.  Are they so very different than the original Baked brownies?  Not very.  But different enough for me to make them, write about them, and plan on making them again next week.  The caramel is subtle here but so welcome against the backdrop of the rich chocolate.  Maybe I’m not clear.  If I were to be offered a last meal, I would have a bit of a hard time deciding an entrée but dessert would be a brownie.  I love chocolate cake but there is something pure about a brownie.  And this brownie is the best.  At least I think it is.  Maybe I should have another one to make sure.

Oh, and by the way.  I have a back log of things I need to tell you about.  I’m thinking a post a day until Christmas.  What do you think?

One Year Ago: Chocolate Gingerbread Bundt Cake
Two Years Ago: Jalapeño Cheddar Cornbread

Sweet & Salty Brownie
Baked Explorations
Makes 12 large brownies or 24 small ones

For the filling
1 cup sugar
2 tbsp. light corn syrup
½ cup heavy cream
1 tsp. fleur de sel
¼ cup sour cream

For the brownie
1¼ cups flour
1 tsp. salt
2 tbsp. dark unsweetened cocoa powder
11 ounces quality dark chocolate (60 to 72%), coarsely chopped
1 cup (2 sticks) unsalted butter, cut into 1-inch cubes
1½ cups sugar
½ cup firmly packed light brown sugar
5 large eggs, at room temperature
2 tsp. vanilla extract

For the assembly
1½ tsp. fleur de sel
1 tsp. coarse sugar

Make the caramel
In a medium saucepan, combine the sugar and corn syrup with ¼ cup water, stirring them together carefully so you don’t splash the sides of the pan.  Cook over high heat until an instant-read thermometer reads 350ºF, or until the  mixture is dark amber in color (keep a close eye on the caramel at all times, as it goes from golden brown to black and burnt very quickly), 6 to 8 minutes.  Remove from the heat, and slowly add the cream (careful, it will bubble up) and then the fleur de sel.  Whisk in the sour cream.  Set aside to cool.

Make the brownie
Preheat the oven to 350ºF.

Butter the sides and bottom of a glass or light-colored metal 9-by-13-inch pan.  Line the bottom with a sheet of parchment paper, and butter the parchment.

In a medium bowl, whisk together the flour, salt, and cocoa powder.

Place the chocolate and butter in the bowl of the double boiler set over a pan of simmering water, and stir occasionally until the chocolate and butter are completely melted and combined.  Turn off the heat, but keep the bowl over the water of the double boiler, and add both sugars.  Whisk until completely combined and remove the bowl from the pan.  The mixture should be at room temperature.

Add three eggs to the chocolate mixture and whisk until just combined.  Add the remaining eggs and whisk until just combined.  Add the vanilla and stir until combined.  Do not overbeat the batter at this stage or the brownies will be cakey.

Sprinkle the flour mixture over the chocolate.  Using a spatula, fold the dry ingredients into the wet ingredients until there is just a trace amount of the flour mixture visible.

Assemble the Sweet & Salty Brownie
Pour half of the brownie mixture into the pan and smooth the top with a spatula.  Drizzle about ¾ cup of the caramel sauce over the brownie layer in a zigzag pattern, taking care to make sure the caramel does not come in contact with the edges of the pan or it will burn.  Use your offset spatula to spread the caramel evenly across the brownie layer.  In heaping spoonfuls, scoop the rest of the brownie batter over the caramel layer.  Smooth the brownie batter gently to cover the caramel layer.

Bake the brownies for 30 minutes, rotating the pan halfway through the baking time, and check to make sure the brownies are completely done by sticking a toothpick into the center of the pan.  The brownies are done when the toothpick comes out with a few moist crumbs.

Remove the brownies from the oven and sprinkle with the fleur de sel and coarse sugar.  Cool the brownies completely before cutting and serving.  The brownies can be stored, tightly wrapped at room temperature, for up to 4 days.  (DT: I find them easier to get out of the pan neatly when they have rested a bit in the refrigerator.)


Sometimes You Feel Like a Nut (Sometimes You Don’t)

March 2, 2010

IMG_4837

It’s been a while since I last talked about how I don’t like nuts in baked goods.  So, if you are new here, I don’t like nuts in baked goods.  I like nuts, I like baked goods but I don’t like them together.

And yet, I like people.  I like cooking and baking for people and some people do like nuts in baked goods.  Hence these bars.

For just about every yoga retreat, I have made some kind of cookie and some kind of bar for dessert.  I was leaning heavily toward lemon bars this time but to me, lemon screams spring and this was a winter retreat.  So along came the nuts.

Several years ago, when I was eight months pregnant with my second child and we had just moved into a new house, I thought it was a great idea to tell my then clients that I was making gift bags for the holidays.  One client ordered five large bags and 20 small bags.  Do you call that nesting?  Or maybe you call it being a crazy person?  Either way, every night I was in my brand new kitchen baking my pregnant little heart out.  I made these bars and I filed the recipe away in the “I would never eat this but they sure do look good” category.  Honey.  Mmmm.  I love honey.  Almost enough to eat it with nuts.

IMG_4844

One Year Ago:  Rosemary Flatbread with Blue Cheese Grapes and Honey

Honey Nut Squares
Adapted from Gourmet
Makes 25 1-inch squares

For crust
1 1/4 cups all-purpose flour
2 tablespoons sugar
1/2 teaspoon baking powder
1/4 teaspoon salt
1 stick (1/2 cup) cold unsalted butter, cut into pieces
1 large egg, lightly beaten

For topping
1/3 cup plus 1 tablespoon mild honey
1/4 cup packed light brown sugar
1/8 teaspoon salt
3 tablespoons cold unsalted butter, cut into pieces
1 tablespoon heavy cream
1/2 cup whole almonds with skins, toasted
3/4 cup hazelnuts, toasted and any loose skins rubbed off in a kitchen towel
1/4 cup pine nuts, lightly toasted

Make crust:
Butter a 9-inch square metal baking pan (2 inches deep) and line with 2 crisscrossed sheets of foil, leaving a 2-inch overhang on all sides. Butter foil.

Blend together flour, sugar, baking powder, salt, and butter with your fingertips or a pastry blender (or pulse in a food processor) until most of mixture resembles coarse meal with small (roughly pea-size) butter lumps. Add egg and stir with a fork (or pulse) until a crumbly dough forms.

Turn out dough onto a work surface and divide into 4 portions. With heel of your hand, smear each portion once or twice in a forward motion to help distribute fat. Gather dough together with scraper.

Preheat oven to 375°F.

Press dough evenly onto bottom (but not up sides) of baking pan and bake in middle of oven until edges are golden and begin to pull away from sides of pan, 15 to 20 minutes. Cool in pan on rack.

Make topping:
Bring honey, brown sugar, and salt to a boil in a 2-quart heavy saucepan over moderate heat, stirring until sugar is dissolved, then boil, without stirring, 2 minutes. Add butter and cream and boil, stirring, 1 minute. Remove from heat and stir in all nuts until completely coated.

Pour nut mixture over pastry crust, spreading evenly, and bake in middle of oven until topping is caramelized and bubbling, 12 to 15 minutes. Cool completely in pan on a rack. Lift dessert out of pan using foil overhang and cut into 25 squares.

(Honey nut squares keep, layered between sheets of wax paper, in an airtight container at room temperature 1 week.)


Holly B’s Oatmeal Carmelitas

January 12, 2010

IMG_4478

One thing I really hate about winter is the light.  Last year at this time, I was still cooking for my families so if I raced, I could catch a bit of afternoon light and take a decent photo.  These days, I’m never done with cooking dinner until dinnertime at which point it has been dark for hours.  I’ve had to rely on my special light to make photography possible and I sure am tired of the photos all having the same look.  Hence this somewhat different composition today.

Now wait.  Don’t call me a hypocrite.  I know I wrote a post talking about low fat cooking yesterday.  Did you also read that I only do high fat baking?    And boy, this is high fat.  So much so that in the introduction for the recipe, Holly wrote, “This would be a good treat for someone wanting to gain weight.”  Ahem, not really my problem but it’s a nice thought.

IMG_4462

As if it wasn’t enough to have a shortbread base with nuts and chocolate chips strewn over the top, a combination of honey and cream is poured over the whole pan which is then baked until golden brown.  The result is similar to an oatmeal chocolate chip cookie but denser and, thanks to the honey, sweeter.  I love honey, so for me the flavor was welcome here.

IMG_4470

One Year Ago: Milk Chocolate Layer Cake

Oatmeal Carmelitas
With Love & Butter
18 big bars

1½ cups (3 sticks) butter, at room temperature
2/3 cup brown sugar, firmly packed
2 cups flour
2 cups oats (quick or old-fashioned)
1 tsp. baking soda
¼ tsp. salt
1½ cups chocolate chips
½ cup coarsely chopped walnuts (DT: I used pecans)
1 cup honey
½ cup half-and-half (DT: I used cream)

Preheat oven to 375° with the rack in the center position.  Butter a 9×13-inch baking pan.

Cream the butter and brown sugar together with an electric mixer.  Add the flour, oats, baking soda, and salt and combine.  Reserve 1/3 of the dough.  Press the remaining dough evenly into the buttered baking pan.  Bake for 5 minutes, rotate the pan, and bake 5 to 10 minutes longer.  The crust should be barely brown.  Leave the oven on.

Scatter the chocolate chips and walnuts over the hot crust.  Now blob the reserved dough as evenly as you can on top of the chocolate and nuts.

Combine the honey and half-and-half.  Heat in the microwave or on the stove until hot but not boiling.  Pour the honey cream sauce over the dough and bake 15 to 20 minutes.  The bars will be done when they turn a uniformly rich golden color.  Cool and cut.


« Older Posts Newer Posts »