Archive for April, 2009

Why You Should Make Miso Soup

April 24, 2009

img_1918

So it’s not the loveliest photo.  But it is the loveliest soup.  There is one very good reason why you should make your own miso soup, and if you are a vegetarian, there are two very good reasons.  Did you know, in most restaurants, miso soup is made with bonito flakes in the broth?  Bonito = fish.  I cannot tell you how bummed I was to learn that fact.  My favorite lunch in all the world was to go to a sushi joint, get the miso to start, salad with that delicious sesame dressing, and a vegetable roll and a futomaki.  Now no more miso for me.

Unless I make it myself.  And, now that I have been making it for years, I like mine better than the restaurants anyway.  It’s fast, delicious, and healthy.  And here is the other reason you should make your own – whether you are vegetarian or not – miso paste is very good for you, but it loses it’s nutritional value as it heats.  So that soup you get in restaurants, where the miso has been sitting for hours, has lost most of it’s good-for-you-ness.  If you make your own, you can add the miso right before you serve it and get all the benefits.

The miso soup I make comes from Deborah Madison’s Vegetarian Cooking for Everyone.  She has a two page spread on the stuff with different broth options, different soup options, and a whole list of optional garnishes.  It can be as simple or as complex as you like based on what you add to it.  Here is what I usually do.  I make a more complex broth which stars, in addition to the required kombu (a type of seaweed), dried mushrooms and carrots among other flavorings.  I set aside half the broth and the now cooked mushrooms and carrots for the next night.  For that night, I make a simple soup with just the broth, miso, small cubes of tofu, wakame (another kind of seaweed), and scallions.  Usually I serve it with a sushi rice salad (recipe coming soon), and a green salad with this dressing.  The next night, I heat up the remaining broth, add more miso, the carrots and mushrooms, more tofu, and some cooked noodles – Udon are particularly delicious.  Two great meals out of one simple broth.  And lots of not overheated miso goodness.

Kombu Stock with Dried Mushrooms
Adapted from Vegetarian Cooking for Everyone
Makes about 8 cups

If you want to do as I do, use half the stock for a simple miso soup (recipe follows), refrigerate the other half, and use it as described above.  Don’t fear the seaweed!  Any grocery store with a decent Asian section should have both kombu and wakame.  While you are buying those, pick up some nori for the recipe coming in the next post!

8 dried Chinese black or shiitake mushrooms
1 bunch scallions, including most of the greens, chopped
2 carrot, thinly sliced
1- 6 inch strip dried kombu
1/3 cup soy sauce
2 tsp. dark sesame oil
3 tbsp. rice wine (mirin)
Salt and sugar to taste

Shake the mushrooms in a strainer to loosen any dirt, then put them in a pot along with 9 cups of water and the rest of the ingredients except the salt and sugar.  Bring to a boil, then lower the heat and simmer, covered, for 20 minutes.  Taste and add a pinch of salt and/or sugar to bring up the flavors.  Adjust the balance of soy sauce to miring if needed.  Strain the stock, but retrieve the mushrooms and carrots to use in soup.

Miso-Tofu Soup with Wakame

If you are new to Miso Soup, I would suggest buying white miso which is more mellow than some of the other varieties.  If you want a stronger flavor, try the barley miso.

8 leaves dried wakame “leaves”
4 cups kombu stock
3 tbsp. miso
1/2 – 1 cup finely diced silken tofu, soft or firm
3 scallions, including a little bit of the greens, thinly sliced

Soak the wakame in lukewarm water until soft, about 15 minutes.  Feel for any tough parts and cut them away – there’s usually kind of a core.  Tear the rest into smaller pieces or slice them into thin ribbons.  Bring the stock to a boil.

Dilute the miso with 1 cup of the stock.  Whisk it around so that all the miso dissolves.  Add the wakame and tofu to the remaining stock and simmer until the tofu has risen to the surface, 4 – 5 minutes.  Stir the diluted miso back into the pot and bring nearly to a boil.  Add the scallions and serve.


Two Nights, Two Yeasts

April 22, 2009

picnik-collage-2

Many people I know are intimidated by yeast.  And with good reason.  The whole rising and sometimes second rising thing can seem kind of daunting.  But here is the thing you should remember when working with yeast.  It does most of the work for you.  You just do some mixing, let it sit, and it rises for you.  Timing can be tricky, especially if, say, you have two little boys who need wrangling and transporting to and from preschool.  But if you think ahead a little bit and plan your rising times, you can be golden.

Two nights ago, a high school friend of Randy’s came for dinner.  They hadn’t see one another in 20+ years and I, of course, had never met him.  When cooking for a stranger, I usually try to make something fairly “normal”.  I decided to make calzones.  I made them once long long ago, when I was not as good a cook, and found the whole process exhausting.  I found this recipe while I was looking for the Gougères recipe in Baking Illustrated and I thought it seemed perfect because who doesn’t like what is essentially pizza?

img_1946

There is the golden rule of entertaining which says you don’t make something new for a dinner party.  As I have said here, I don’t subscribe to that rule.  My golden rule states that you don’t make something that takes a lot of last minute preparation for a dinner party.  When I realized that the calzones had to be assembled and baked right before eating, I told Randy I was going to make pasta instead.  He was crestfallen – so I broke my rule.  Let me tell you, it is very difficult to carry on a conversation with someone while you are rolling out, filling and crimping 6 calzones, not to mention fighting with the pizza peel and stone and trying to make sure you don’t burn your arm off.

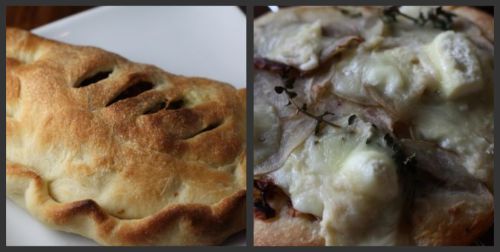
All that being said, they were really really good.  When I could finally sit down and focus on the conversation and on eating the food rather than preparing it, I was very pleased with the result.  The dough was a dream to work with, very easy to roll out, and has the perfect consistency when baked.  I never order calzones in a restaurant because they seem to be just a cheese bomb.  This filling was creamy but not overly cheesy – the perfect balance of mozzarella, ricotta, and Parmesan.  I added the optional addition of sausage and broccoli rabe (I used veg sausage) which gave the whole thing a wonderful savory and bitter quality.

img_1974

For my clients last night, I made one of my favorite dinners.  I make it every spring because it stars fresh artichokes in a salad where there are also chickpeas and sundried tomatoes.  It also has rice/quinoa/corn cakes topped with an intoxicating jalapeño tofu cream and olive tapenade.  Because it is fairly light, I decided to make an asparagus soup and a focaccia.

The focaccia I decided on starred caramelized onions, very thinly sliced potatoes, and an intense creamy Brie-like cheese.  This dough was also easy to work with and I had high hopes for the result.  I have to say, for the work involved (and the pans to wash), these were not such a home run.  I would potentially make them again using a different cheese, perhaps a Gorgonzola – the cheese here didn’t add enough zing.

Given the choice between the two, I am going to give you the recipe for the calzones.  You will  love them, your friends and family will love them.  You will be impressed with yourself that you made them.  I’m not as sure about the focaccia.

img_1959

Ricotta Calzones with Sausage and Broccoli Rabe
Adapted from Baking Illustrated
Makes 6

Dough

4 cups bread flour, plus more for dusting work surface
1 envelope (about 2 1/4 tsp.) instant yeast
1 1/2 tsp. table salt
2 tbsp. olive oil
1 1/2 cups plus 1 tbsp. warm water (about 110 degrees)

Filling

1 (15 oz.) container whole milk ricotta cheese (DT: I used part-skim)
8 oz. shredded mozzarella cheese (about 2 cups)
1 1/2 oz. finely grated Parmesan cheese (about 3/4 cup)
1 large egg yolk
1 tbsp. chopped fresh oregano leaves
1/4 tsp. table salt
1/4 tsp. freshly ground black pepper
8 oz. sausage or vegetarian sausage (such as Gimme Lean!)
12 oz. broccoli rabe, stalks trimmed to 1 inch and roughly chopped into 1 inch pieces
1 tbsp. minced or pressed garlic
1/4 tsp. hot red pepper flakes

1.  For the dough: In the bowl of a standing mixer, whisk the flour, yeast, and salt to combine.  Attach the bowl and dough hook to the mixer; with the mixer running at medium-low speed, add the olive oil, then gradually add the water, continuing to mix until the mixture comes together and a smooth, elastic dough forms, about 10 minutes.  Lightly spray a large bowl with nonstick cooking spray; form the dough into a ball, transfer it to the bowl, cover the bowl with plastic wrap lightly sprayed with nonstick cooking spray, and let rise in a warm spot until doubled in size, 1 1/2 to 2 hours.

2. For the filling: In a medium bowl, stir together the cheeses, egg yolk, oregano, salt, and black pepper.  Cover with plastic wrap and refrigerate until needed.  Remove the casings from the sausage (or, if veg, remove sausage from wrapping).  Cook the sausage in a 12-inch non-stick skillet over high heat, stirring constantly with a wooden spoon and breaking the sausage into 1/2-inch pieces, until no longer pink, about 4 minutes; stir in the garlic and red pepper flakes and cook until fragrant, about 10 seconds.  Stir in the broccoli rabe, 1 tablespoon water, and a pinch of salt.  Cook, stirring constantly, until the broccoli rabe is crisp-tender and the water has evaporated, about 4 minutes.  Transfer the mixture to a large paper towel lined plate (DT: I used a baking sheet) and cool to room temperature; once cooled, pat it with paper towels to absorb excess moisture.

3.  Adjust the oven rack to the lowest position, set a pizza stone on the oven rack, and heat the oven to 500 degrees for at least 30 minutes.  Line a baking sheet with parchment paper and spray the parchment lightly with nonstick cooking spray.  Turn the risen dough out onto an unfloured work surface.  Divide the dough in half, then cut each half into thirds.  Gently reshape each piece of dough into a ball.  Transfer to the baking sheet and cover with plastic wrap sprayed lightly with nonstick cooking spray.  Let the dough rest at least 15 minutes, but no more than 30 minutes.

4.  Cut eight 9-inch squares of parchment paper.  Working with one piece of dough at a time and keeping the other pieces covered, roll the dough into a 9-inch round.  Set the dough round onto a parchment square and cover it with another parchment square; roll out another dough ball, set second dough round on top of first, and cover with parchment square.  Repeat to form a stack of 3 dough rounds, covering the top round with a parchment square.  Form a second stack of 3 with the remaining dough balls and parchment squares.

5.  Remove the top parchment square from the first stack of dough rounds and place the rounds with parchment beneath the work surface; if the dough rounds have shrunk, gently and evenly roll them out again to 9-inch rounds.  Place a scant 1/2 cup filling in the center of the bottom half of the dough round.   Using a small spatula, spread or pres the filling in an even layer across the bottom half of the dough round, leaving a 1 inch border uncovered.   Top with 1/6th of the sausage filling.  Fold the top half of the dough over the cheese covered bottom half, leaving a 1/2 inch border of the bottom layer uncovered.  With your fingers, lightly press around the silhouette of the filling and out to the edge to lightly seal the dough shut.  Beginning at one end of the seam, place your index finger diagonally across the edge and gently pull the bottom layer of the dough over the tip of your index finger; press into the dough to seal.  Repeat the process until the calzone is fully sealed. With a very sharp knife, cut 5 slits, about 1 1/2 inches long, diagonally across the top fo the calzone, making sure to cut thorough only the top layer of dough and not completely through the calzone.

6. With a pastry brush, brush the tops and sides of the calzones with olive oil and lightly sprinkle with kosher salt.  Trim the excess parchment paper; slide the calzones on the parchment onto a pizza peel or rimless baking sheet, then slide the calzones with parchment onto the hot pizza stone, spacing them apart evenly.  Bake until the calzones are golden brown, about 11 minutes; use a pizza peel or rimless baking sheet to remove the calzones with the parchment to a wire rack.  Remove the calzones from the parchment, cool 5 minutes,and serve.  While the first batch of calzones bakes, form the second batch and and bake them after removing the second batch from the oven.


Cupcake Scrooge

April 21, 2009

img_1922

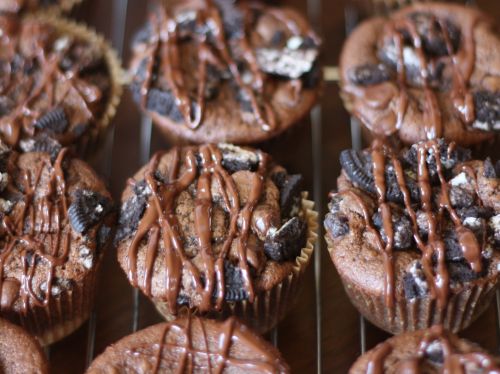
I’m going to sound like a huge party pooper here, but I’m over the whole cupcake thing.  I subscribe to many a blog and when they post about cupcakes, I just hit delete.  I’m over the multitudes of new cupcake shops opening all over this and every other town.  I’m just over it.  About the only place I like to see cupcakes is in these illustrations.

But I have children and children love cupcakes.  I hit up the local shops and I bake them for my boys.  My boys love sweets but nothing makes them happier than a cupcake.  Just seeing their faces makes me feel over my “over it” attitude.

This week, I need several desserts.  We had a high school friend of Randy’s over for dinner last night, I am teaching a cooking class on Thursday, and we need to celebrate the birthday of our incredible babysitter.  I made one big batch to satisfy all needs.

A word about Erika, our babysitter.  She watches the boys two mornings a week and has babysat for us over two separate weekends.  She is amazing for many reasons.  First of all, I like her.  I feel comfortable around her and enjoy her company.  She cleans up around the house, does laundry, takes the boys outside to the park and to the local doughnut shop, and she plays all kinds of crazy games with them.  Most importantly, she loves them.  She really truly does and tells them so.  I have informed her that she can never move and she can never get married because I can’t imagine our life without her.

This Friday is her birthday and I know the boys will want to celebrate with her, seeing as “Happy Birthday” is one of their favorite songs.  I know they will enjoy sharing these!

The cupcakes come from a book my husband (who will never be over the cupcake thing) bought me a couple of years ago.  It is entitled, imaginatively, Cupcakes! and it has become my go-to for this type of dessert.  There are lots of good recipes, from the basic to the fancy.  If you have cupcake lovers in your house, I highly recommend it.

img_1942

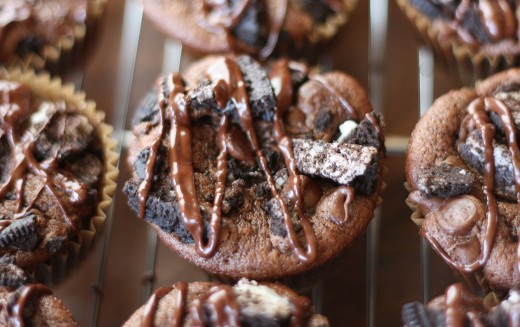
Mississippi Mud Cupcakes
Adapted from Cupcakes!
Makes 18-24 regular cupcakes

I used Newman’s Own for the cookies.  The recipe says the yield is 18, but I got 24 – never a bad thing!

2 1/4 cups crushed chocolate sandwich cookies , in 1/2 inch to 1/4 inch pieces
1 cup (6oz.) semisweet chocolate chips
Chocolate Sour Cream Cupcake Batter (recipe follows)
3 oz. semisweet chocolate, chopped

Position a rack in the middle of the oven.  Preheat the oven to 350 degrees.  Line 18 muffin tin cups with paper cupcake liners.

Spoon 1 tbsp. of the cookie pieces into the bottom of each paper liner, then spoon about 8 chocolate chips over the cookie pieces in each liner.  Spoon a scant 1/4 cup of batter over the chocolate chips.  Sprinkle the remaining chocolate chips and cookie pieces over the  tops, pressing them gently into the batter.

Bake just until the tops feel firm and a toothpick inserted in the center comes out clean, about 22 minutes.  Cool the cupcakes for 20 minutes in the pans on a wire rack.

Carefully lift the cupcakes from the pan and place them on a wire rack to cool completely.  Put the chopped chocolate in a heatproof bowl and place it over, but not touching, a saucepan of barely simmering water.  Stir until the chocolate is melted and smooth.  Remove from the water and set aside to cool slightly.

Use a small spoon to drizzle thin lines of melted chocolate over the top of each cooled cupcake.  The cupcakes can be covered and stored at room temperature for up to 3 days.

Chocolate Sour Cream Cupcake Batter

This is a great basic cupcake to have in your repetoire.  All kinds of frosting taste great on top.

3 oz. unsweetened chocolate, chopped
1 cup flour
1/2 tsp. baking powder
1/2 tsp. baking soda
1/4 tsp. salt
1/2 cup (1 stick) unsalted butter, at room temperature
1 1/4 cups sugar
2 large eggs
1 tsp. vanilla extract
1/2 cup sour cream
1/2 cup water

Put the chocolate ina heatproof bowl and place it over, but not touching, a saucepan of barely simmering water.  Stir until the chocolate is melted and smooth.  Remove from the water and set aside to cool slightly.

Sift the flour, baking powder, baking soda, and salt into a medium bowl and set aside.

In a large bowl, using an electric mixer on medium speed, beat the butter and sugar until smoothly blended and creamy, about 2 minutes.  Stop the mixer and scrape the sides of the bowl as needed during mixing.  On low speed, mix in the melted chocolate.  On medium speed, add the eggs one at a time, mixing well until each is blended into the batter.  Add the vanilla and beat until the mixture looks creamy and the color has lightened slightly, about 1 minute.  Mix in the sour cream until no white streaks remain.  On low speed, add half of the flour mixture, mixing just to incorporate it.  Mix in the water.  Mix in the remaining flour mixture unil it is incorporated and the batter looks smooth.  Proceed with above recipe.


Gruyère Gougères

April 17, 2009

img_1899

If you are new to baking or cooking, it might make you feel better that a fairly experienced person – I’m talking about myself here – gets kitchen jitters.  Now, if I got nervous every time I made something new, I would be nervous all the time and we all know that’s not healthy.  But if I am going to venture into relatively new territory, I get a few butterflies.

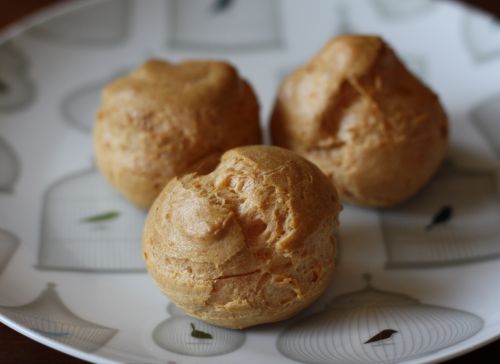
For example, these gougères.  Gougères are made from pâte à choux which is the same dough used to make profiteroles and éclairs.  It has the amazing ability to bake up a firm, slightly crunch exterior while maintaining a soft airy interior.  I first encountered this dough a few years ago when I decided to make profiteroles for my parents’ anniversary dinner.  They both love them and everything I read about pâte à choux was that it was easy to make and easy to work with.

When I am making something new or something unfamiliar to me, it is extremely important to me to go to a cookbook that I trust.  In this case, I turned to Baking Illustrated by the publishers of the magazine Cook’s Illustrated.  These people test recipes to death and make all the mistakes you or I would as they work to find the foolproof recipe.  I feel safe in their hands and in their detailed recipes.

I am catering a dinner party on Saturday and wanted to have a couple of nibbles for guests to eat before they sit down for the five course meal.  Gougères are something I have been wanting to try for a long time and I figured this was a good opportunity.  In addition to being easy to pop in the mouth, they can be made in advance and frozen – always a huge bonus in my book.

img_1901

In the above photo you can see what they look like inside.  This is courtesy of my two small taste testers, neither of whom liked the gougères, but mama is proud that they tried them!

Gougères
Adapted from Baking Illustrated
Makes about 16

2 large eggs, plus 1 large egg white
5 tbsp. butter, cut into 10 pieces
2 tsbp. whole milk
6 tbsp. water
1/4 tsp. salt
1/2 cup all-purpose flour, sifted
3 oz. Gruyère cheese, shredded (about 3/4 cup)
Pinch cayenne pepper

1.  Beat the eggs and egg white in a measuring cup or small bowl; you should have 1/2 cup (discard the excess).  Set aside.

2.  Bring the butter, milk, water, and salt to a boil in a small saucepan over medium heat, stirring once or twice.  When the mixture reaches a full boil (the butter should be fully melted), immediately remove the saucepan from the heat and stir in the flour with a heatproof spatula or wooden spoon until combined and the mixture clears the sides of the pan.  Return the saucepan to low heat and cook, stirring constantly, using a smearing motion, until the mixture is slightly shiny, looks like wet sand, and tiny beads of fat appear on the bottom of the saucpan, about 3 minutes.

3.  Immediately transfer the mixture to a food processor and process with the feed tube open for 10 seconds to cool slightly.  With the machine running, gradually add the eggs in a steady stream, followed by the Gruyère and the cayenne pepper.  When everything has been added, scrape down the sides of the bowl, then process for 30 seconds until a smooth, thick, sticky paste forms. (Can be made two hours ahead.  Transfer to a medium bowl, press a sheet of plastic wrap that has been sprayed with nonstick cooking spray directly on the surface, and store at room temperature.)

4.  Adjust an oven rack to the middle position and heat the oven to 425 degrees.  Spray a large (18 by 12 inch) baking sheet with nonstick cooking spray and line with parchment paper; set the pan aside.

5.  Fold down the top 3 or 4 inches of a large pastry bag fitted with a 1/2-inch plain tip to form a cuff and fill the bag with the paste.  Unfold the cuff, lay the bag on the work surface, and, using your hands or a bench scraper, push the paste toward the tip of the pastry bag.  Twist the top of the bag and pipe the paste onto the prepared baking sheet into sixteen 2-inch mounds spacing about an inch and a half apart.  Use the back of a teaspoon dipped in water to even out the shape and smooth the surface of the mounds.

6.  Bake 15 minutes (do not open oven door), then reduce the oven temperature to 375 degrees and continue to bake until golden brown and fairly firm, 12-14 minutes longer.  Remove the baking sheet from the oven.  With a paring knife, cut a 3/4 – inch slit into the side of each puff to release steam; return puffs to the oven, turn off the oven, and prop the oven door open with the handle of a wooden spoon.  Dry the puffs in the turned-off oven until center is just moist (not wet) and the surface is crisp, about 45 minutes.  Transfer puffs to a rack and cool until just warm.  Serve warm.  (Puffs can be cooled completely and stored at room temperature for 24 hours or frozen in a zipper-lock plastic bag for up to 1 month.  Before serving, crisp the room temperature puffs in a 300 degree oven 5-8 minutes; crisp the frozen puffs 8-10 minutes.)


Southwestern Sweet Potato Gratin

April 15, 2009

img_1880

There are friends you trust and those you don’t.  There are co-workers you trust and those you don’t.  There are probably even family members you trust and those you don’t.  And for me, there are cookbook authors I trust and those I don’t.  In case you are curious, I trust Deborah Madison, Jeanne Lemlin, Ina Garten, the people at Cook’s Illustrated, and I trust Martha Stewart.

Let me say this, I am not a Martha Stewart kind of gal.  I am not neat, or crafty, and I have never been to jail.  (Both my brothers have though.  Another story for another time.)  But I do love to cook and I very much appreciate a well-written cookbook with well-tested recipes.

There is the theory that, when cooking for guests, you should only make familiar recipes.  Being a personal chef for three years (!) who very rarely repeats menus has forced me to make all kinds of things I have never made before.  Every so often I make something and wonder – is this going to be any good?  If it has come from one of my trusted books, it always is.

Two books I use on a regular basis are the two volumes of The Martha Stewart Living Cookbook.  Some of my favorites have come from these huge tomes.  Everything I have made turns out well.  The recipes are clear and concise and many of them are truly delicious.

img_18781

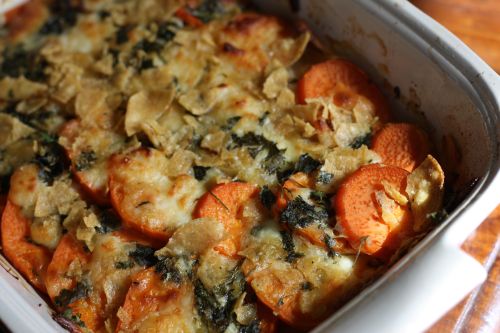
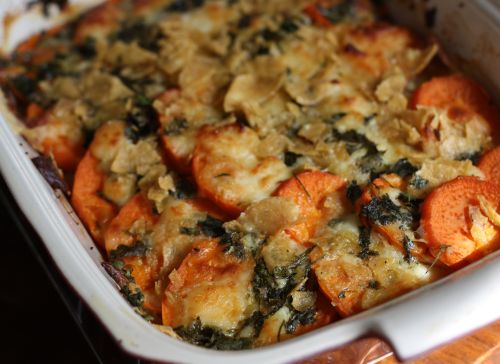
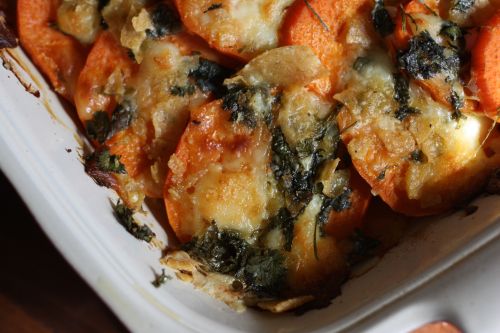
I made this gratin last night for my clients and for my friend John who came to dinner.  When I pulled it out of the oven, I wasn’t sure.  It smelled good and I knew I liked all the ingredients in it, but I just didn’t know how it would come together.  But, because it came from Martha – or from the people who write her cookbooks – I didn’t worry.  And it was delicious – smoky and sweet, cheesy but not too rich, and just a bit of spice.  I served this as a main course with red beans and rice and a citrus salad, but it would be lovely as a side dish as well.

img_1871

A few words about the recipe.  The next time I make it (and there will be a next time), I will make three layers instead of two.  This will no doubt require a bit of squishing because the pan was quite full with just two layers, but it bakes down considerably and I would have loved another layer.  Even if you do not like spicy food, do not skip adding the chipotle chile.  Martha says it is optional but I say the smokiness that it lends to the dish is essential and it is not too spicy.  If you like spice, add another one.

img_1884

Southwestern Sweet Potato Gratin
Adapted from The New Classics
Serves 8-10 as a side, 4-6 as a main

4 large sweet potatoes (about 4 pounds), peeled and thinly sliced into rounds
1 1/2 cups grated Chihuahua or Monterey Jack cheese, 6 oz. (DT: I used Monterey Jack)
1 1/2 cups crumbled Cotija or French feta cheese, 6oz. (DT: I used Queso Fresco)
1 small onion, thinly sliced
1 tsp. finely chopped canned chipotle chile in adobo
1/3 cup vegetable stock, or water
1/4 cup finely chopped cilantro leaves
1 cup crushed tortilla chips
Lime wedges, for garnish
Mexican crema or sour cream, for garnish (optional)

1. Preheat oven to 350 degrees.  Arrange half of the potatoes in a 9 x 13 baking dish, overlapping the slices.  Sprinkle with half of each cheese.  Top with onion.

2. Stir the chipotle into the stock or water; drizzle over the onion.  Sprinkle with half the cilantro.  Top with the remaining potatoes; sprinkle with the remaining cheeses and cilantro.  Scatter the chips on top.

3. Cover with foil; bake 30 minutes.  (DT: I sprayed my foil with non-stick spray so the cheese wouldn’t stick too much.)  Remove the foil; bake until very tender and top is well browned, about 30 minutes more.  Let cool slightly before serving.  Serve with limes and crema, if desired.


« Older Posts Newer Posts »