Search Results:

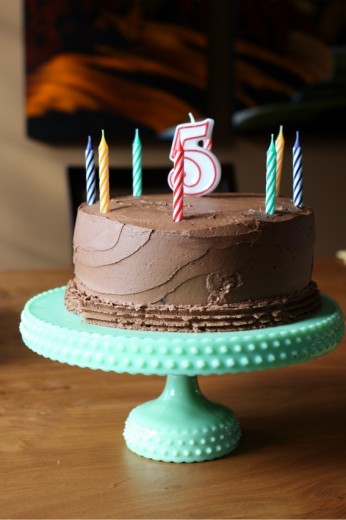
Birthday Cake for the Birthday Boy

February 7, 2012

By many peoples’ standards, we spoil our children.  We have a basement full of toys, bikes in the garage, an X-Box and other gaming things, and lots of movies to watch.  We go on nice vacations.  Both boys have plenty of clothes to wear and ski gear (though we rent skis and boots).  Their chores consist of bringing over their plate after dinner and cleaning up their rooms.  They get a lot of hugs and kisses and treats after dinner.

But.  We are sticklers about manners and being polite and respectful to adults and kids both older and younger.  We try to encourage awareness about how lucky they are without being morbid about it.  About once a year we go through our toys and clean out things they are not using to give to children who are less lucky.  They are old enough to understand that we can go look in a toy store but we are not going to buy anything.  (Unless they are with dad, who usually caves.)

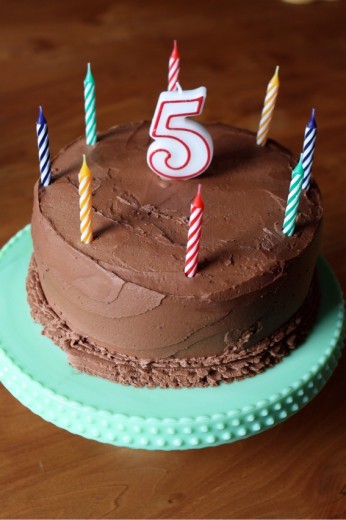
This year Spencer is getting two birthday cakes.  This is the first year that we are having a real true party for him.  I’m not the mom who treasures throwing themed birthday parties for my kids complete with perfect invitations and favors.  I try and farm the party part out.  Seeing as Spencer is the second child, we tried to get away with just doing family for as long as possible.  There have been years where we have been in Sun Valley over his birthday (spoiled!).  But this year we are home, he turned five, and we are doing a trampoline party (spoiled!).

Spencer wants a Batman cake for the party which we will be getting from the same bakery as Graham’s cake.  Mommy doesn’t do Batman cakes.  Or she could, but it would end up looking like a gerbil cake or a blob cake which wouldn’t make him very happy.  For his “real” birthday cake, we sat down with several of my baking books and paged through options.  “I want that one!  Or wait, I want that one!  No, that one!”, is kind of how the conversation went.  I thought we were going with a lemon cake with a meringue frosting when he spied a cake in Flour that sealed the deal.  I guess to him it just looked like a birthday cake.  That may have been because there are birthday candles on the cake in the photo.  At any rate, I was glad to make a traditional cake that I knew he would like.

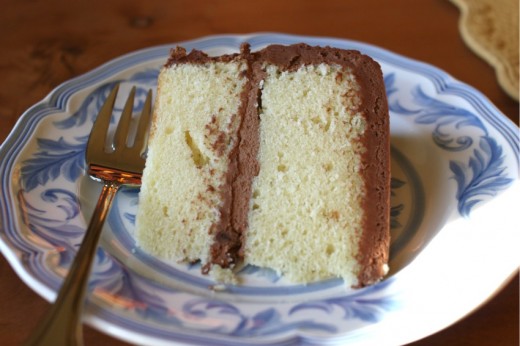
I feel like some of my cookbooks are kind of like the good guy friend in college who patiently listens to your love life failures, all the while secretly hoping you will actually notice him.  Flour has been sitting on my shelf for about a year now.  I made a couple ho hum things from it in the first few weeks after purchase and then moved on to brighter shinier things.  I knew it would house some good birthday cake ideas and this perfect birthday cake was in there waiting for me all this time.  Actually, not perfect, but pretty darn good.  The cakes themselves were very crummy and the frosting kind of set up too much after I put the cake in the refrigerator with the crumb coat, but the taste and the look was pretty close to perfect.  According to the birthday boy, that is.

One Year Ago:  Macaroon Brownie Bars, White Chocolate Tiramisu, Red, White, and Green Lasagne
Two Years Ago:  Olivetta Loaf, Spicy Smoky Chili
Three Years Ago:  Roasted Orange Pepper Soup, Mushroom Enchiladas, Broccoli and Red Pepper Pie, Chocolate Chip Cupcakes

Yellow Birthday Cake with Fluffy Chocolate Ganache Frosting
Flour
Makes one 8-inch layer cake (serves 8-12)

I’m giving you the (very wordy) recipe as written in the book.  A couple of tips.  The cake cools completely in the pans, presumably because it is large and thick, so be sure to grease them well and use a parchment round in the bottom of the pan.  I always refrigerate my cakes with a crumb coating for about 30-60 minutes, but I think the frosting hardened up too much during the waiting time.  So be sure to follow her advice and just frost the cake right after the crumb coating.  She recommends using non-fat buttermilk but I can never find that so I just used low fat.

1½ cups (3 sticks) unsalted butter, room temperature
2 cups granulated sugar
3 eggs
3 egg yolks
1 tsp. vanilla extract
3 cups cake flour
1 tsp. baking powder
½ tsp. baking soda
½ tsp. kosher salt
1 cup buttermilk

Fluffy Chocolate Ganache Frosting
12 ounces semisweet chocolate, finely chopped
1 cup heavy cream
1 cup (2 sticks) unsalted butter, at room temperature
1 cup confectioners’ sugar
¼ tsp. kosher salt
½ tsp. vanilla extract

Position a rack in the center of the oven and heat the oven to 350ºF.  Butter and flour two 8-inch round cake pans.  (DT:  Don’t forget the parchment here!)

Using a stand mixer fitted with the paddle attachment (or a handheld mixer), cream together the butter and granulated sugar on medium speed for 3 to 4 minutes, or until light and fluffy.  (This step will take 8 to 10 minutes if using a handheld mixer.)  Stop the mixer a few times  and use a rubber spatula to scrape the sides and bottom of the bowl and the paddle to release any clinging butter or sugar.

In a small bowl, whisk together the eggs, egg yolks, and vanilla just until combined.  On low speed, slowly pour the egg mixture into the butter mixture and mix just until incorporated.  Scrape the bowl and paddle again, then beat on medium speed for 20 to 30 seconds, or until the mixture is homogeneous.

In a medium bowl, sift together the flour, baking powder, baking soda, and salt.  On the lowest speed, add about one-third of the flour mixture to the egg-butter mixture and mix just until barely combined.  Immediately pour in about half of the buttermilk and continue to mix on the lowest speed until the buttermilk is almost thoroughly incorporated.  Stop the mixer and scrape the sides and bottom of the bowl well.  Again on the lowest speed, add about half of the remaining flour mixture and mix just until barely combined.  Add the rest of the butter milk and mix just until combined.  Be careful not to overmix.

At this point, it is best to finish the mixing by hand.  Remove the bowl from the  mixer stand and, using a rubber spatula, fold in the remaining flour mixture until the batter is just homogeneous.  As you fold, be sure to incorporate any batter clinging to the sides and bottom of the bowl.  Divide the batter evenly between the prepared cake pans.

Bake for 40 to 50 minutes, or until the ops are golden brown and the cakes spring back when pressed in the middle with a fingertip.  Let cool completely in the pans on wire racks.  (The cooled cakes can be tightly wrapped in plastic wrap and stored  in the freezer for up to 1 week.  Thaw at room temperature, still wrapped tightly in plastic wrap.)

To make the ganache frosting:  While the cake layers are cooling, put the chocolate in a medium heat-proof bowl.  In a small saucepan, scald the cream over medium-high heat (bubbles start to form around the edge of the pan, but the cream is not boiling).  Pour the hot cream over the chocolate and let sit for about 1 minute, then slowly whisk together the chocolate and cream until the chocolate is completely melted and mixture is smooth.  Let sit at room temperature for 1 to 2 hours, or until completely cool.  (Or refrigerate the ganache until cool, about 30 minutes, whisking every ten minutes.)

Fit the stand mixer with the paddle attachment (or use a handheld mixer) and beat the butter on medium-low speed for 10 to 15 seconds, or until smooth.  Add the confectioners’ sugar, salt, and vanilla and continue to beat on medium-low speed for about 2 minutes, or until the mixture is fluffy and smooth.  Stop the  mixer a few times and use a rubber spatula to scrape the bowl and paddle to release any clinging butter or sugar.  On medium speed, add the cooled ganache and beat for about 2 minutes, or until completely combined.  Stop to scrape the sides and bottom of the bowl.  Turn up the mixer speed to medium-high and beat for about 1 minute, or until the frosting lightens in color and thickens.  You should have about 4 cups.

Remove the cooled cakes from their pans.  (Be sure they are completely cool.  If they are even the slightest bit warm, the frosting will melt and you will have a mess.)  Using a long, serrated knife, trim the top of each cake to level it (the layers will have rounded a bit in the oven; the trimmed scraps make great nibbles).  Place one cake layer on a cake plate or cake pedestal (if you have a revolving cake stand, use it.)  Spoon about 1 cup of the frosting on top and use an offset spatula to spread it evenly to the edges.

Carefully place the second layer top-side down (so the even sharp edges will be on the top of the finished cake), on top.  Spoon about 1 cup of the frosting on top and spread it over the top and down the sides of the cake, smoothing the frosting as well as you can and covering the entire cake with a thin layer.  This the crumb coat which will keep any loose crumbs from migrating to the surface of the finished cake.  Spoon a heaping cup of frosting on top of the cake, an spread it evenly across the top and down the sides.  This is the finishing layer of frosting.  If desired, spoon any remaining frosting into a pastry bag fitted with a small round or star tip and pipe a decorative line along the top and/or bottom edge of the cake.

The cake can be stored in an airtight container at room temperature for up to 2 days.


600 Posts

February 6, 2012

Is there a point where you pass being proud of having written so many posts and move into “Am I really still doing this?”  No?  OK good because I’m still happy writing and still enjoying my blog.  I hope you are too.  I decided for this milestone to share my 5 Tips to Greatly Improve the Taste of Your Food and 9 Thrilling Facts About Me.

But first!  I have received requests and I have listened.  Now, at the end of each post, you have the option to email the recipe.  You can send it to yourself, your friend, your mom.  Hopefully someone who appreciates being emailed recipes.  Thanks, as always, to my amazing designer Kaytlyn who was able to figure this out and implement the change in less than 24 hours.   Also, this is the third non-food related post I’ve written in a row.  Yes, I remember this is a food blog.  So to thank you for your patience and endurance, I promise to talk about food – with emailable recipes! –  Monday through Friday of this upcoming week.  Deal?  Hope you enjoy.

5 Tips to Greatly Improve the Taste of Your Food

1)  Always make your own salad dressing.  I know store-bought is easy and it keeps forever.  It is also expensive and contains ingredients that I can’t pronounce.  Making your own, once you get in the habit of doing it, is super quick and easy and you most likely always have the ingredients on hand.  You can make it to your taste (I like mine with a lot of bite), it will keep for a week or more, it tastes much better, and is much less expensive.

2)  Whenever you can, use fresh herbs.  And a lot of them.  There is a time and place for dried herbs.  Something that is simmering for a long time on the stove (like a sauce or a stew) is a great place to use dried.  The subtlety of fresh would be lost in that case.  Same goes with roasting in the oven.  But other than that, the flavor is fresh herbs is so lovely and adds so much to your food.  Fresh rosemary and fresh oregano are strong, so you might want to use a light hand with those two, but otherwise you can be generous with your fresh herbs.

3)  Throw out your spices.  I touched on this when I wrote about my favorite gingerbread cookies.  Spices have a shelf life.  Most people agree it’s about a year.  They don’t spoil, they just lose their oomph.  As we were packing up from the year we spent in London, I found out that we were not allowed to bring any food stuffs back into the U.S.  Not even canned goods.  So I had to give away everything in my little kitchen, including my considerable spice collection.  I saved all my jars and, once back home, I restocked everything.  I was blown away by how much better my food, savory and sweet, tasted with new spices.

4)  Always use fresh citrus.  Those little plastic lemon shaped bottles of lemon juice?  Don’t buy them.  Or do and then taste that juice next to the juice of a fresh lemon.  No comparison.  Fresh lemons (and limes and oranges) keep very well in the crisper drawer of your refrigerator and they also have the added benefit of possessing zest which is super flavorful.  I don’t think a Microplane would work on a plastic bottle.

5)  Never buy bagged cheese or cheese in a tub.  I know, again, the convenience is tempting.  Grating cheese is one of the kitchen tasks I like the least.  But grated cheese has been mixed with things like flour or cornstarch so that it doesn’t stick together and who knows how long that cheese has been sitting in a bag.  Buy a hunk of cheese and grate or slice it yourself.  It is one extra step for a lot more flavor.  Do the same with feta or blue cheese and the increase in taste will be more than worth the work.

And now, 9 Thrilling Facts About Me.  I did this once before for my 300 Posts post.

1)  In my life I have owned six cars and they have all been different colors.  Red, dark gray, green, silver, blue, and black.  It looks like yellow is next, huh?

2)  My favorite color is purple.  My least favorite is yellow.  (See above.)

3)  My name and my husband’s name are both unisexual (is that a word?)  Meaning that a guy or girl can be named Dana or Randy.  In fact, before I met him, the only other Randy I ever knew was a girl in my grade school whose sister, coincidentally, was named Dana.  The only other Dana that Randy ever knew was a giant African American man.

4)  I have been practicing yoga for 14 years, taking a couple years off while I was having my kids, nursing, dealing with infants, etc.  You might think that means I can put both my feet behind my head but I am very very far from that.  I started off doing Bikram yoga for a year and it almost destroyed my back.  Fortunately, I found my way to the Yoga Tree, a wonderful studio in Seattle, where they teach Iyengar based yoga.  Iyengar is the yoga of alignment so I really learned how to do the poses correctly.  I now try and practice 3 times a week and it is truly what my body likes best.  If you are tempted to try yoga and are scared off because you are “not flexible”, know that strength is equally important to flexibility.  Being tight allows you to learn to use your body’s own strength to open up, rather than just flopping into poses.

5)  I am a big reader.  I subscribe to the New Yorker and I always have a book going.  I like modern fiction, the good stuff, and have read some really terrific things in the last year.  Lord of Misrule, A Visit from the Goon Squad, The Wind-Up Bird Chronicles, Land of Marvels.  I’m currently reading The Marriage Plot.

6)  I sometimes suffer from crushing self-doubt when it comes to this blog and this food-related job that I have created for myself.  I start to feel some of the same insecurities that rocked me in middle and high school – not pretty enough, not smart enough, not working hard enough, not getting invited to the right parties.  Sometimes I just want to back away from it all – blog, Facebook, Twitter.  It is during those moments that I honestly ask myself why I am writing this blog – why I have been writing it for all these years.  And the truth is that it is for me.  I love that people read and share, I love that I have met some amazing people and have made some lifelong friends.  I love that I have been able to start teaching classes and that a big driver for those classes is my blog.  But ultimately, I am keeping a record of my life through food so that someday, we as a family can look back and see what our life was in these years.  I don’t say this as a cry for sympathy or a request for praise.  I just want to put it out there that, at times, I feel very inadequate in this space.

7)  My 20th college reunion is this year in June.  I’m alternating between excitement and horror.  Randy and I went for my 10th.  We were about to be married, we stayed in the same dorm where I lived my freshman year, and I had a blast.   I remember looking at the tables of 20th year people thinking that would probably be the next reunion I would attend.  Early 40’s, married and kids seemed far away.  And here I am.

8)  People ask me, at least several times a week, if my hair is naturally curly.  Yes, my hair is naturally curly.  Then they say that they always wanted naturally curly hair.  I’m confused by this.  Why do straight irons, Brazillian blow-outs, and places whose sole point of business is to blow out curly hair exist if curly hair is so desirable?  I, in keeping with the tradition that the grass is always greener, have always wanted straight hair, but at the ripe old age of 41, I have made peace with my curls.

9)  In March, Randy and I are going on a trip to the country that is about as far away from Seattle as you can get.  Guesses?  Book recommendations?


Apple Cheddar Quick Bread

January 23, 2012

I just counted my cookbooks.  You see, we bought this table to go behind the couch in our great room (we have an open floor plan), and there is a shelf on the bottom of the table.  I thought it was perfect for my cookbook overflow.  It started with just a few books, and then a few more were added and so on and so on.  Before I knew it, the shelf was full and sagging alarmingly in the middle.  So I reorganized.  I pulled the most used and loved of all my books and placed them strategically around my kitchen and sent the rest to the basement – where they will still be loved and used and accessed easily.  So while I was up to my neck in cookbooks, I figured I would count.  Grand total: 156.

156 cookbooks makes me a bit of freak among the people I know.  It’s a crazy amount of cookbooks.  But ever since working at Book Larder, I have had conversations with people who own thousands of cookbooks.  One charming woman who I have chatted with at length owns over 1,000 baking books alone.  So owning 156 really just makes me a novice in the cookbook ownership department.  Or so I tell my husband.

Anyway, in addition to having recipes in all of these books, I also get food magazines.  And I read food blogs.  I get monthly recipes sent to my inbox from a favorite local bakery, and I also get a daily recipe from Chow.  It is recipe overload for sure.  Most of the time, it’s just too much to process but sometimes, my foggy brain fixates on something and dinner is born.

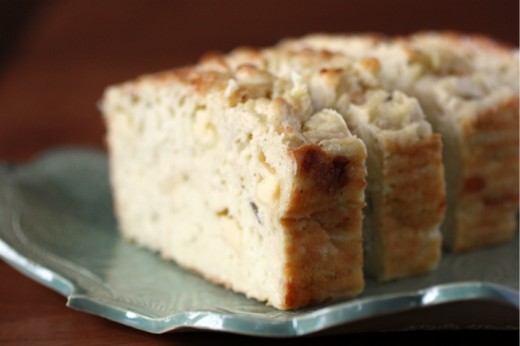
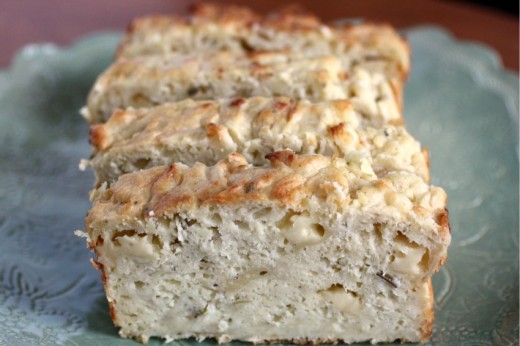
This happened last week just before the snow made getting around impossible.  Chow’s offering was Apple and Cheddar Quick Bread.  Sounded intriguing.  But in the body of the email they mentioned that it is delicious served with Celery Root Soup and that is what sold me.  The two together just sounded like dinner.  Not fussy but not boring.  Just good dinner.  Sometimes we need just good dinner, am I right?

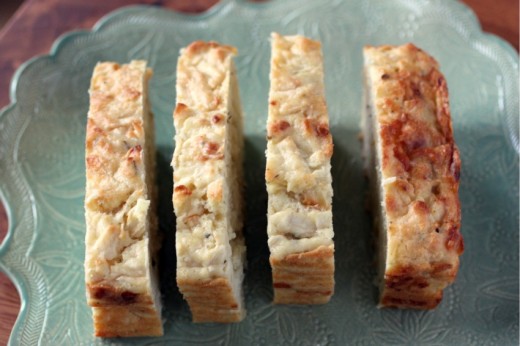
I love savory quick breads.  I have several on this site that I will direct you to at the end of this post.  I love their ease, taste, texture, and I love how they turn soup and salad into something really special.  I like to make them when the soup is on the simpler side.  This one uses a new-to-me cheese – Irish Cheddar.  It is described as having Cheddar flavor but more of a Parmesan texture.  I would say that is pretty spot on.  Some of it is grated and melts into the bread.  Some of it is cubed so you get bites of actual cheese as well.  It’s pretty awesome.  As with the soup, the apple is there for sweetness but it isn’t identifiable as apple, just as yum.  Next time I’m doubling and putting one of these babies in the freezer.

Savory Quick Breads Previously on Dana Treat:  Quick Olive and Cheese Bread, Chile Cheese Gratin Sandwiches, Pull-Apart Cheesy Onion Bread (not really quick but savory and amazing)
One Year Ago:  Cowboy Cookies
Two Years Ago:  Peanut Butter Cookies with Milk Chocolate Chunks
Three Years Ago:  Lemon Bars

Apple and Cheddar Quick Bread
Adapted from Chow
Makes one 9×5-inch loaf

2 cups all-purpose flour
1 tablespoon baking powder
1 teaspoon fine salt
½ teaspoon ground sage
¾ cup medium-dice Irish cheddar cheese, such as Dubliner (about 3 ounces)
¾ cup grated Irish cheddar cheese, such as Dubliner (about 1½ ounces), grated on the large holes of a box grater
3 large eggs
2/3 cup whole milk
4 tablespoons unsalted butter (½ stick), melted, plus more for coating the pan
1 ½ cups grated Granny Smith apples (about 2 medium), grated on the large holes of a box grater

Heat the oven to 350°F and arrange a rack in the middle. Generously coat a metal 9-by-5-inch loaf pan with butter.

Whisk the flour, baking powder, salt, and sage together in a large bowl until aerated and any large lumps are broken up. Add the diced and shredded cheese and toss until the pieces are separated and evenly coated with the flour mixture; set aside.

Place the eggs, milk, and melted butter in a medium bowl and whisk until smooth. Add the apples and stir until combined. Add the egg mixture to the flour-cheese mixture and stir until the flour is just incorporated, being careful not to overmix (a few streaks of flour are OK). The batter will be very thick.

Using a rubber spatula, scrape the batter into the prepared pan, pushing it into the corners and smoothing the top. Bake until the bread is golden brown all over and a toothpick inserted into the center comes out clean (test several spots because you may hit a pocket of cheese), about 45 to 50 minutes.  (DT:  Do make sure the top of the bread is brown.  I pulled mind when it was a bit pale but the toothpick came out clean.  It was still a little doughy in the center.)

Place the pan on a wire rack to cool for 15 minutes. Run a knife around the perimeter of the bread and turn it out onto the rack. Let it cool for at least 30 minutes more before slicing.


For the Cilantro Lovers

November 30, 2011

How do you feel about cilantro?  If you think about it, it’s a fascinating herb.  You will find it in many culture’s food that is quite different from one another.  Indian, Mexican, and Southeast Asian cooking, for example.  Being a huge fan of Indian, Mexican, and Southeast Asian food, I can’t imagine my life without cilantro.  It is probably the herb I use most in my cooking, with the possible exception of thyme, and that is because I have thyme growing at the bottom of the stairs to my house.

I understand that some people don’t like cilantro.  And by not liking it, I mean they have a true aversion to it.  I had a doctor in one of my Thai cooking classes and she said that is indeed true that some people carry a gene that makes cilantro taste like soap.  So if you carry that gene, my apologies and seeing as this recipe has an entire bunch of cilantro in it, this dish is not for you.  Sorry.

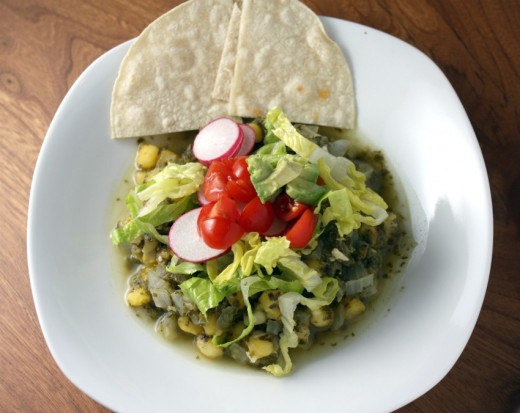
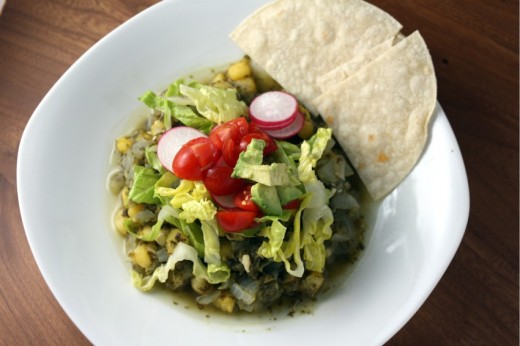
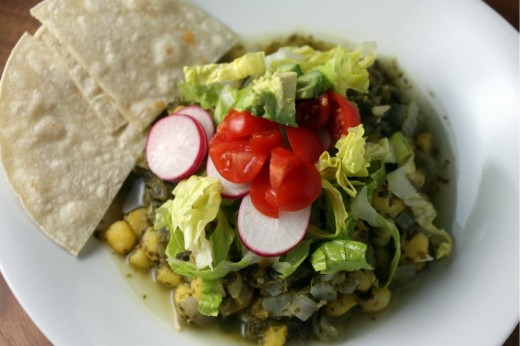
This is a favorite dish from Jack Bishop’s A Year in a Vegetarian Kitchen.  It is one of those recipes that takes next to no time and yet produces a seriously tasty result.  You start an onion sautéing on the stove, whir together some tomatillos, jalapeños, oregano, and a lot of cilantro in a blender, mix it all together with some hominy, and let it cook for about 15 minutes.  While it cooks, you thinly slice some romaine lettuce, radishes, quarter some cherry tomatoes, and cube some avocado.  Ladle the hominy mixture in a bowl, top it with the fresh stuff, and dinner is served.  Randy and I like heat so I seeded one of the jalapeños and left the seeds and membranes in the other one.  It was perfect for us but if you are unsure – go ahead and seed both of them.

Finally, just to answer some questions about hominy.  Hominy is a type of corn but it is much starchier and larger than the corn kernels that we know and love.  Its texture and size is necessary here – regular corn would make this a rather anemic stew.  I found mine in canned vegetable aisle near the corn.  White or yellow works.

One Year Ago:  Brown Rice Bowl with Soy Sauce Marinated Tofu and a Fried Egg
Three Years Ago:  Potato Fennel Gratin

Posole Verde
Adapted from A Year in a Vegetarian Kitchen
Serves 4

My only word of warning is that the cilantro mixture, which is vibrantly green in the blender, will turn a mossy shade of green as it cooks.  Do not be alarmed, the vegetable mixture on top is nice and colorful.

1 bunch coarsely chopped cilantro stems and leaves (about 2½ cups)
¼ cup fresh oregano leaves
6 ounces tomatillos, husked, washed, and halved
2 medium jalapeños, stemmed and seeded
2½ cups water
Canola oil
1 large onion, chopped
4 medium garlic cloves, minced
2 15-ounce cans white or yellow hominy, rinsed and drained
Sea salt

Garnishes
1 medium head romaine lettuce, thinly sliced crosswise
Handful cherry tomatoes, quartered
4 medium radishes, thinly sliced
1 small avocado, diced
Flour or corn tortillas, warmed

Place the cilantro, oregano, tomatillos, chiles, and 1 cup of the water in a blender and purée, scraping down the sides of the jar as necessary, until smooth, about 1 minute.

Place a sauté pan over medium heat.  Drizzle in just enough canola oil to coat the bottom then add the onion along with a large pinch of salt.  Cook until golden, about 6 minutes.  Add the garlic and cook until fragrant, another minute or so.  Add the cilantro mixture, hominy, remaining 1½ cups water, and bring to a boil.  Reduce the heat and simmer to blend the flavors, about 15 minutes.  Adjust the seasoning, adding salt to taste.

Ladle the posole into bowls and serve immediately, passing the lettuce, tomatoes, radishes, avocado, and tortillas at the table.


New Classes/Old Recipes

November 7, 2011

So, my posting has been a little light for the past few weeks.  It is not as though I haven’t been cooking.  I just haven’t been photographing, writing, or posting.  And there was an accident.  No excuses though!

Since I am so very far behind in telling you what I was making 3 falls ago, 2 falls ago, and last fall, I thought I would take my favorites and link you directly to them.

But first!  Classes!  I am happy to announce my cooking classes through the end of the year.

Tuesday, November 15th, I will be teaching a Holiday Side Dishes class at Book Larder.  In our family, Randy and I host Thanksgiving and we do have a turkey.  I don’t make a separate main course for myself and the other vegetarians, I just make sure we have plenty of hearty side dishes to enjoy.  I will be teaching three dishes from three of my favorite books.  Whether you have a turkey at your house or not, Wild Rice and Celery Root Gratin, Roasted Parsnips and Sweet Potatoes with Caper Vinaigrette, and the Ultimate Green Bean Casserole would be most welcome at your table.  If you would like to attend this class, you actually need to buy tickets from Brown Paper Tickets by clicking here.  This class will run from 6:30-8:30 and costs $50.

Saturday, December 3rd, I will be teaching my Holiday Brunch class at our house.  If you have people coming to town for the holidays, chances are there is going to be a need for brunch.  Why not make it instead of going out?  In this class we will learn how to make delicious (and easy) Currant Scones, Petits Pains au Chocolat, a Mediterranean-Inspired Frittata, Perfect Roasted Potatoes, and a Roasted Tomato Caprese Salad.  Oh!  And there will be a Make-Your-Own-Bloody-Mary station.  This class will go from 10am-1pm and costs $65.

Thursday, December 8th, I will be teaching my 4 Doughs and 1 Batter class.  So many people are afraid of working with different kinds of dough and I want to help.  In this class, we will learn how to work with filo dough, puff pastry, bread dough, tart dough, and cake batter.  If you have taken this class before, the doughs we work with will be the same but some of the recipes will be different!  We will make Filo Pastry with Goat Cheese and Spinach, Puff Pastry Tarts with Butternut Squash and Grapes, the amazing No-Knead Bread, Chantarelle Tart with Roasted Garlic Custard, and, one of my most-requested recipes, Brown Sugar Pound Cake.  I think I always feed people well, but this class is truly a feast!  This class will run from 6-9:30 and costs $70.

I’d love to see you!

From Three Years Ago:

This is Harira Soup.  It stars lots of wonderful veggies, chickpeas, and thin noodles.  It is thick and hearty.  It will warm you.

These are pita bread halves that are sprinkled with za’atar – a mind blowing spice mix starring fresh thyme, sesame seeds, salt and sumac.  These guys get broken into pieces and become one of my favorite salads – Fattoush.

I feel like there has been a lot of talk about chocolate chip cookies here recently.  Please, let’s take a break and all bake these amazing ones instead.  Butterscotch chips, oatmeal, cashews.  Cowgirl Cookies from the beloved Holly B’s Bakery.

Such a bad photo (all these are pre camera upgrade), such a good dish.  Great for company because it can be made in advance and is super hearty.  Eggplant Rollatini with Capellini.

From Two Years Ago:

IMG_3537

You will surprise and delight anyone you love (or even like) with these homemade Petits Pains au Chocolat.  Very easy too!

IMG_3569

I am very partial to brownies.  They are probably my favorite dessert.  I like this one, from the Baked cookbook, and awful lot.

IMG_3577

I make a lot of savory galettes.  I think they are beautiful, tasty, and a nice anchor for a vegetarian meal.  This one stars pears and goat cheese and is garnished with pretty pomegranate seeds.

IMG_3590

I’m currently enamored with the No-Knead Bread, but this classic Challah will always always be in my repertoire.  It takes a lot of time but most of it is just rising and it always turns out.

IMG_3660

I have a few recipes that I have been making for twenty years and this Tomato Leek Soup is one.  It’s Randy’s favorite soup.

IMG_3746

Holly B’s Orange Swirls.  I don’t need to say more.

From Last Year:

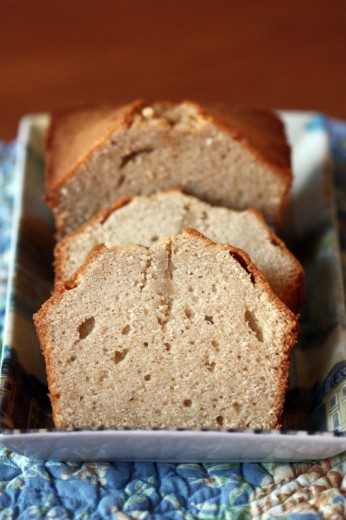
Sometimes you just want a really good pound cake.  This one stars graham crackers.  I also tell the story about how my son Graham got his name.

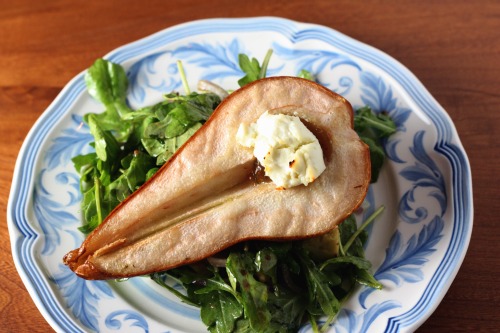
I can’t say enough good things about this Roasted Pear Salad.  I taught it in my October classes.  I also tried substituting blue cheese for the goat cheese and oh my, it was good.  50 people ate this class (5 classes x 10 people each) and every one cleaned their plate.

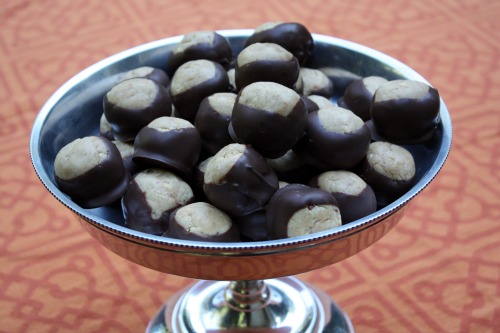
Up until last year, I had never heard of Buckeyes.  Then I made them for a yoga retreat.  Then I made a double batch of them for a client.  I haven’t made them since and now I want one.

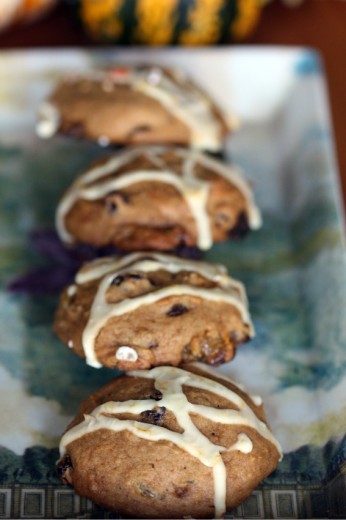
As far as fall cookies go, these Pumpkin Spice Cookies are a classic.  Nice and soft.

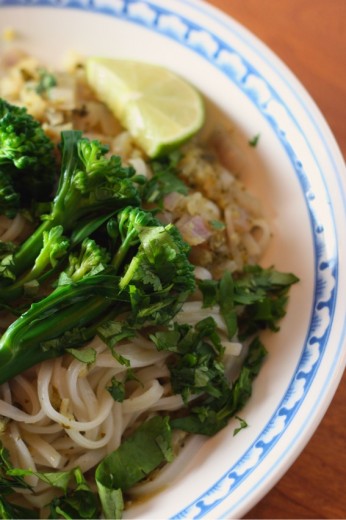
Rice noodles and I are bff’s.  I love them.  I loved this dish and it’s from one of my very favorite cookbooks.

I often think of this Fregola with Minted Cauliflower when I hear people talking about vegetarian food being boring.  I made this for my dear friend Karen who I have known since my freshman year in college.  As soon as I finish up this post, I’m heading down to the airport to pick her up for her annual November visit.

Happy cooking!


« Older Posts Newer Posts »