Category: Super Healthy

(Someday) Retirement Plans

December 14, 2011

My parents are living the retirement that we all dream of.  They deserve it.  My dad had a busy oncology practice for over 30 years that had him leaving the house at 7am every morning and coming home at 7pm every night.  There was evening call and weekend call and when you are an oncologist, you get a lot of calls in the middle of the night.  He worked with extremely ill people and their families and had many people he grew to truly care for pass away.  He also had other patients who should have passed away but did not because he is a terrific doctor and an all around smart man.  He is also, as I have said here, kind and compassionate – a doctor that the nurses loved.

My mom also worked very hard.  She spent the first eight years of motherhood staying home with us and then, soon after my youngest brother was born, decided that she was tired of spending the day waiting for Sesame Street to come on (pre-DVR days) and then waiting for my dad to come home, so she went back to school (with three children) and got a nursing degree.  She spent worked full time on a evolving range of shifts (including night shift) for a number of years before settling in to a half time job in the recovery room of our University hospital.

Eight years ago, while still working full time, my dad, the cancer specialist, developed cancer himself.  Bladder cancer.  Randy and I were living in London at the time and we had just returned from a weekend away in Dublin.  Once back in our flat, I picked up a voice mail from my dad asking me to call when I got a chance.  Even though it was the middle of the night in Seattle, I called right away.  If I get a voice mail from my mom saying “call when you get a chance” it usually means she just want to chat.  I had probably never gotten a voice mail from my dad period, let alone one asking for a call back, so I knew something was up.  Calmly, he told me that he had a tumor in his bladder and they were hoping to be able to remove just the tumor and leave his bladder intact.  More tests were imminent and he was thankful that he had had symptoms so that they could catch it early.

A couple of weeks later, the phone call that I didn’t want to receive came across the ocean.  The tumor was invasive and they were going to have to remove his bladder.  His surgeon would make him a new bladder (called a neo-bladder) out of a piece of his own intestine.  Since the intestine is a long tube and the bladder is essentially fist-shaped, many cuts would need to be made to make the new bladder.  It would be hooked up according to the laws of anatomy and we would all hope for the best.  My dad, entering into surgery, contemplated retirement.  He would need to take a couple of months to recuperate from the surgery, he was near retirement age, so why not just retire?  But in the months following the surgery, he realized he needed something to work toward.  He wanted to go back to work.  And so, after a successful surgery and a rocky but successful recovery, he went back to treating patients full time.

Now eight years cancer free, my dad is a success story.  About three years ago, he decided to finally retire.  I worried about him a bit.  He identified very much with his job, with his role as doctor (although he never introduced himself that way), and I had trouble imagining him as a retiree.  Also, the fact that both my parents are very youthful, in shape, and active, did not fit with the picture in my mind of retirement.  I thought they both would be bored.

I was wrong.  They threw themselves headlong into life after work.  They took birding classes, yoga classes, did continuing education classes in art history and aviation history.  They exercise everyday and are traveling nearly constantly.  They are not sitting still for more than a moment.  They had always liked to travel but with my dad’s busy practice, it was hard for them to take consecutive weeks off.  Now their time is their own and they have discovered going on tours and cruises as a way to see parts of the world they have been meaning to visit.  These are not the groups with the blue hairs and senior water aerobics classes.  These are the trips I would go on right this minute if I could.

My parents recently returned from a cruise that left from Istanbul and ended up in Cairo.  They stopped in Israel and Jordan along the way and went through the Suez Canal.  They saw Luxor and the pyramids and Petra in Jordan.  In the past couple of years, they have taken a trip to Paris (with me for my birthday) followed by a week in Budapest and Prague, a cruise throughout Croatia, a group trip to Austria, but they recognize that this Middle Eastern cruise was truly a trip of a lifetime.

My parents don’t really shop when they travel.  It’s just not their thing.  But this time they brought me back something special.  Saffron.

If you aren’t familiar with saffron, it is the world’s most expensive spice.  It is probably one of the priciest food items period if just considering price per pound.  The reason it costs so much is that saffron is actually the stamen of the crocus flower and it is harvested by hand.  I can’t imagine the number of flowers and the number of (wo)man hours it takes to get an ounce of saffron.  Consequently, much of what we can buy in this country is not true saffron, but the stamens of other flowers.  Nothing compares to true saffron, in taste, aroma, and color, so be sure to buy yours from a reputable place.  And if it’s not super expensive for a very small amount, it’s probably not real saffron.

The stuff my parents brought me is Iranian saffron and it is shockingly red and the strands are nice and long.  It is gorgeous.  It is the kind of thing I might be tempted to put away and save for something special, but I believe in using gifts and besides, they brought me three small envelopes of it.  While saffron does have a very distinctive flavor, that flavor is subtle.  The color that it gives to food is truly extraordinary.  When I found this recipe for red lentil soup in a well-loved cookbook and it mentions that saffron rice would be a great accompaniment, I knew I had my first dish with my new spice friend.

So yes, you need three different pots to make this soup.  Do not let that deter you!  One pot makes the soup, one pot separately sautés the onion and spices and then the greens, and one pot makes the rice.  It  may sound like a pain but please believe me when I tell you that this is a very easy dish to make and you get a LOT of soup for your effort.  Red lentils are one of my favorite ingredients on earth and this is a fabulous way to make the most of them.  Red lentils love things like mustard seeds, cumin, and tumeric – all present in this flavorful soup.  I had never used lime juice with them before and was hesitant to add as much as the recipe called for.  But I loved the subtle sour flavor paired with the savory soup.  I made the soup for Randy and I to enjoy, brought leftovers over for dinner with friends, and then made another pot to eat with my parents so they could see how much I’m loving the saffron.

One Year Ago:  Olive Oil Granola with Dried Apricots and Pistachios (I just made a quadruple batch of this stuff)
Two Years Ago:  Blackberry Rugelach, Frittata with Carmelized Onions, Goat Cheese, and Sage

Red Lentil Soup with Lime
Adapted (barely) from Vegetarian Cooking for Everyone
Serves 6-8

You certainly don’t need saffron to make this dish and actually, you don’t need the rice if you want to save that step.  You can make this a super thick soup by adding less water or make it thinner by adding more.  If you make it in advance, know that it will thicken up as it sits but you can always add more water as necessary.  For this rice, I used ½ cup raw basmati rice in 1 cup of water and a pinch of both saffron and salt.  This might be more than you need for the soup, or make more as needed.

2 cups split red lentils, picked over and rinsed several times
1 tbsp. tumeric
3 tbsp. butter
Kosher salt
1 large onion, diced
2 tsp. ground cumin
1½ tsp. brown mustard seeds
½ bunch cilantro, chopped
Juice of 3 limes, or to taste
1 bunch kale, or other leafy green, chopped into small pieces (I’ve also used beet greens)
1 cup cooked rice
Plain yogurt

Put the lentils in a soup pot with 2 quarts (8 cups) of water, the tumeric, 1 tablespoon of the butter, and 1 tablespoon of salt.  Bring to a boil, then lower the heat and simmer, covered, until the lentils are soft and falling apart, about 20 minutes.  Purée for a smoother texture (an immersion blender is great here).

While the soup is cooking, prepare the onion flavoring:  Heat a medium skillet over medium heat and throw in 1 tablespoon of butter.  Once it is melted, add the onions and a large pinch of salt.  Cook for another five minutes, until soft, then add the cumin and mustard seeds.  Turn the heat to medium-high and allow the onions to brown slightly, stirring occasionally.  This slight bit of char will add great flavor to the soup.  Add the cilantro and cook just until it wilts.

Add the onions mixture to the soup, then add the juice of two of the limes.  Taste, then add more if needed to bring up the flavor.  The soup should be a tad sour.

Just before serving, add the last tablespoon of butter to the same skillet the onions were cooked in.  Once melted, add the kale and a large pinch of salt, and cook just long enough to wilt.  Add to the soup and let all the flavors blend for a couple of minutes.  Even though you have added salt several times along the way, you will probably need to add more to your taste at this point.  If the rice is warm, place a spoonful in each bowl.  If it’s leftover rice, add it to the soup and let it heat through for a minute.  Serve each portion with a dollop of plain yogurt if desired.


Weeknight Curry

November 27, 2011

So, how was it?  Thanksgiving, I mean.  And if you are in a country other than the U.S., how was your Thursday?  Our feast was lovely.  We had a much smaller group than in years past – just our core group and both Randy and I decided that we like smaller better.  (With no offense to those out there who have joined us in years past.)  Aside from the turkey, the food at Thanksgiving doesn’t stress me out.  The dishes are all fairly simple and when you do a lot of dinner parties, as we do, you get good at making lots of food for lots of people.  It is the all-the-food-coming-out-of-the-oven and every-sitting-down-at-once part that is stressful.  But when you only have one table full of people, as opposed to the two we had last year, it all comes together quite nicely.

If I was a turkey eater, I would most likely still be posting some kind of turkey soup or, who know, turkey lasagne during this weekend after Thanksgiving.  Can I say a word about turkey?  If I were ever to go back to eating meat, turkey is probably the last thing that I would add in to my diet.  I would eat a hamburger before I would eat turkey – I’d probably eat a geoduck before I ate turkey.  The guys in our group smoke cigars after the big meal, a tradition that goes way back, and I prefer the lingering smell of stale cigar smoke in my house to the smell of turkey.  So, suffice it to say, this is not turkey soup.  It actually has nothing to do with Thanksgiving and, if you read a lot of food blogs and have been inundated with Thanksgiving posts, you are probably glad to know that.

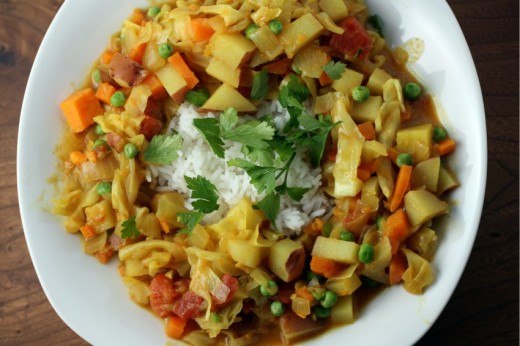
This is a simple weeknight curry.  I have been craving curry lately and I thought about doing an Indian feast using my Rasa books, but just a stroll through the table of contents made my eyes flutter in exhaustion.  The recipes in my books are not difficult but decisions and pairings had to be made and some days, that is too much to ask of me.  So I went a simpler route.

Weeknight curry can cure a lot of dinner ills in this world.  It is easy, it is adaptable, it is inexpensive, and it can feed many.  It is also satisfying and tasty and filling and doesn’t need much else beyond rice to make a full meal.  I have made this recipe many times and while I still buy the main ingredients (potatoes, sweet potatoes, cabbage), I now tailor it more to what I have in the house and the amount and type of spice that I am accustomed to.  I never make it the same way twice and I encourage you to add and subtract based on what you have already and what you like.

One Year Ago:  Burnt Sugar Bundt Cake
Three Years AgoBreton Apple Pie

Potato and Vegetable Curry
Adapted from Simple Vegetarian Pleasures
Serves 4

Olive oil
1 onion, diced
3 garlic cloves, minced
1 1-inch piece fresh ginger, peeled and minced
2 tsp. curry powder
1 tsp. cumin
1 tsp. coriander
1 cinnamon stick
Pinch of cayenne
1 15-0unce can diced tomatoes, drained
4 medium red-skinned potatoes, cut into ½-inch pieces
1 large sweet potato, cut into ½-inch pieces
½ a head green cabbage, cored, cut in half lengthwise, and thinly sliced
1 15-ounce can “lite” coconut milk
1 cup frozen peas
Sea salt and freshly ground black pepper
Cilantro leaves, for garnish (optional)

Place a large skillet over medium heat.  Drizzle in just enough olive oil to coat the bottom of the pan, then add the onions and a large pinch of salt.  Cook, stirring often, for 5 minutes.  Add the garlic and ginger and cook for another two minutes.  Add the spices and cook for another minute, stirring constantly.

Stir in the tomatoes, followed by the potatoes, sweet potatoes, and cabbage.  Allow to cook for several minutes, then pour in the coconut milk.  Bring to a boil, then reduce the heat so the curry simmers, then cover the pan.  Cook about 20 minutes, or until the vegetables are tender.  Stir in the peas and cook for another few minutes, or until the peas are hot throughout.  Remove the cinnamnon stick and serve with basmati rice.


Squash Hummus and Homemade Flatbread

November 16, 2011

If you have been reading here for any time at all, then you know I have two children.  Boys.  First grade and pre-K.  If you have been reading for a bit of time, you might know that those two boys are vegetarian.  Like me.  I’m sure they will eat meat at some point but for now, I am the cook in the family and I only cook vegetarian.  And to keep things uncomplicated and black and white, the boys are veg.

What you may not know is that my boys, the ones who are, ahem, vegetarians, don’t really eat vegetables.  Not for lack of trying.  We offer, they decline.  They like carrots and will eat an alarming amount of celery if it has peanut butter and raisins on it, but that is pretty much it.  And actually, I really should say that Graham (older) will eat broccoli and peas but Spencer (younger, pickier) will not.  We went to a friends’ house recently and they served the boys peas and Spencer put one in his mouth at a time and washed it down with a gulp of milk.  Just like he was taking a pill.

Do I worry about this lack of vegetable eating?  No.  I remember my pediatrician saying that ideally a child eats both fruits and vegetables but as long as they eat one or the other, there is no need to worry.  Considering that my boys eat fruit at all three meals and sometimes for a snack, and considering that I prefer not to worry if worrying is not necessary, I don’t worry.  I also don’t believe in hiding vegetables to try and trick my kids into eating them.  If I put a vegetable in something, like this mac and cheese, I tell them it’s there.

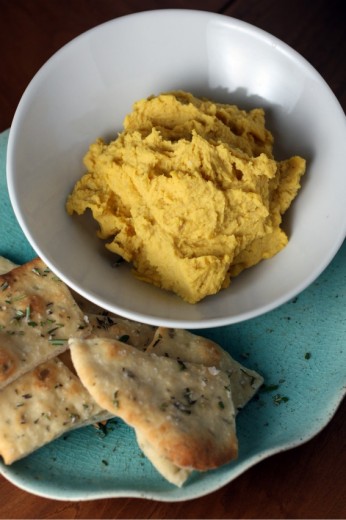
So last night, I made squash hummus.  My timing was good – Graham’s school is starting a new program where each grade works with a certain vegetable and the rest of the school has an assignment to actually eat that vegetable.  This week it is squash.   He was actually assigned to eat squash.  He was telling me this as I was literally taking it of the oven and he looked at me with that sweet almost 7 year-old wonder of, “My mom is magic!”

Normally, I would have to say I’m a hummus purist.  Hummus is chickpeas, tahini, lemon juice, a small clove of garlic, salt, pepper, olive oil, and maybe a sprinkle of cumin.  That is how I make it, that is how I like it.  Calling something that does not have chickpeas or tahini in it “hummus” bothers me.  But adding something, a vegetable I happen to love, to hummus can still be called hummus, according to the Dana Treat rules.

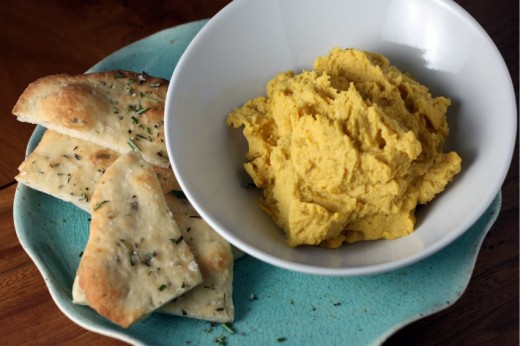
So how was it?  Good.  Sweeter and more yellow than my regular hummus.  Thicker too.  Most importantly, my kids loved it.  I called it squash hummus – there was no trickery going on here.  Spencer requested that I keep his squash separate and when I told him that was impossible, he just dug in anyway.  I was helped by the fact that I made flatbreads to go with it which fascinated the boys.  They scooped, ate, and scooped again.  The other boy in my family – that would be my husband – was equally smitten with both the flatbreads and the hummus, the latter of which he started eating with a spoon when the bread ran out.

Two notes.  The hummus recipe calls for a 2/3 pound butternut squash.  I know we live in squash country and they grow nice and big in our climate, but I have never seen anything close to a squash that small.  In many grocery stores, they sell pre-cut and seeded chunks of squash which is what I bought.  It doesn’t matter what type it is.  And if you suffer from yeast/dough fear, this flatbread is a great place to start.  It is foolproof and if you roll it into shapes that are other than circles, it will look extra cool.


Squash Hummus
Adapted from Fresh from the Garden
Makes about 3 cups

All food should be done to your taste but I think this is especially true of things like hummus and salad dressing.  Start with this recipe and then add more olive oil (or more water) if you want a looser consistency and be sure to add more salt if it needs it.  I added a bit more lemon juice to mine too.

1 small squash (about 2/3 pound)
1 15-ounce can chickpeas, rinsed and drained
1 small garlic clove, minced
2 tbsp. tahini paste
Juice of 1 lemon
2 tbsp. olive oil
2 tbsp. water
Sea salt and coarsely ground black pepper

Preheat the oven to 375ºF.  Cut the squash in half and scrape out the seeds.  Drizzle the cut surfaces with olive oil, then wrap it in foil.  Bake for about an hour – until a knife easily pierces the flesh.  Set aside to cool enough to handle.

Scrape out the squash flesh into the bowl of a food processor fitted with the steel blade.  Add the chickpeas, garlic, tahini, lemon juice, a large pinch of salt and a few grinds of pepper.  Pulse to combine.  With the machine on, pour the olive oil and then the water through the feed tube.  Stop and scrape down the sides, then continue to process until you have a nice smooth consistency.  Adjust the seasoning to your taste.

Rosemary Flatbread
Makes 6 medium-sized breads

I make bread often and it is rare, unless I am making the no-knead version, to have the dough actually double in size in a short period of time.  Don’t worry about it, just continue with the recipe.

1½ cups all-purpose flour
½ tsp. dried yeast
2 tbsp. fresh rosemary, finely chopped, plus extra for topping
1 tbsp. olive oil plus extra for brushing
Sea salt

Place the flour in a medium bowl and add the yeast.  Add 2/3 cup tepid water, the rosemary, olive oil, and a pinch of salt, and start mixing it all together to form a rather sloppy dough.  If your mix is too dry, add a bit more water.  If the mix is too wet, add a little more flour.

Once you have a ball of dough, take it out of the bowl and knead on a floured surface for 5 minutes, until it is elastic and slightly tacky.  Leave the dough to rest in a warm place under a damp kitchen towel for 1 hour; until it has about doubled in size.

Preheat the oven to 400ºF.  Line two baking sheets with parchment paper.

Break off about 1/6th of the dough and, using your hands, roll it into a ball.  Place on a floured surface and roll out to a thickness of about 1/8th of an inch.  Repeat until you have used all the dough.  Transfer to the prepared sheets and brush each flatbread with olive oil.  Sprinkle with a little salt and more rosemary.

Place the sheets in the oven for 12 to 15 minutes, until the surface of the breads starts to bubble and turn golden brown.  Don’t cook them too long or they will turn into cardboard.  Serve immediately.


Mellow Yellow

October 4, 2011

I’m going to keep this short because, you know, it’s October and I’m still talking about corn.  On Saturday, my little family went apple picking and we passed farm stand after farm stand advertising corn.  It occurred to me, after the fifth one or so, that I had yet to make corn chowder.  And even though what I really wanted to make is butternut squash soup, I can’t deny corn when there is corn to be had.

Chances are, if there are still a few ears to be bought where you live, you might want to get right on making this soup and not read a rambling post from me.  But a few notes.  I love this version.  I don’t like super creamy soups so this has just a hint and it comes from puréed corn kernels and coconut milk.  Big chunks of potatoes are key, I used some with a lovely pink skin and a while flesh and I kept fishing them out of the pot long after I was full.  And I think tarragon is really important here.  Basil would be good too if you want to defy me.

One Year Ago:  Savory Rugelach
Two Years Ago:  Smoky Chard Over Grilled Bread
Three Years Ago:  Fruit and Spice Granola

Corn Chowder with Coconut Milk
Dana Treat Original
Serves 4-6

4 ears of corn
1 cup of coconut milk, divided
Olive oil
1 large leek, washed well, trimmed, cut into quarters, and thinly sliced
1 medium carrot, finely diced
1 stalk celery, finely diced
1 tsp. dried thyme
Sea salt and freshly ground black pepper
1 pound red skinned potatoes, scrubbed well, cut into 1-inch chunks
4 cups vegetable stock
2 tbsp. fresh tarragon leaves, coarsely chopped

Shuck the ears of corn and set aside two ears.  Cut the kernels off the other two and place the kernels in a blender along with ¾ of a cup of the coconut milk.  Add a pinch of salt and purée until smooth.  Set aside.

Set a soup pot over medium heat.  Add just enough olive oil to coat the bottom of the pot and then add the leeks, carrots, celery, and a large pinch of salt.  Stir well, then add the dried thyme.  Cook, stirring often, until the vegetables are fragrant and starting to soften, about 8 minutes.  Stir in the potatoes and cook for another 3 minutes.  Pour in the corn/coconut milk mixture and stir to coat the vegetables well.  Pour in the vegetable stock and bring to a boil.  Reduce the heat to a simmer and cover the pot.  Cook until the potatoes are tender, about another 10 minutes.

Cut the kernels off the other two ears of corn.  Add to the soup pot and cook for another 2-3 minutes, until the corn is just cooked through.  Stir in the remaining ¼ cup of coconut milk.  Season to taste with salt and pepper.  Serve in soup bowls garnished with tarragon.


Favorite Colors

October 3, 2011

When I was a little girl, my favorite colors were pink, purple, and red.  In that order.  Tomboy I was not.  I wasn’t overly froufy but I did love to wear dresses and pretend jewelry, I begged my mom to let me get my ears pierced when I was six (she let me), and I could not wait until the day when I could wear makeup.

In seventh grade, I changed schools and it was suddenly not cool at all to wear dresses or skirts.  Jeans only and those jeans had to be Levi 501’s – the kind that you bought indigo blue and stiff as a board, and had to wash a million times to get them to look cool at all.  I pretended, in those years, that I liked wearing jeans that were clearly cut for male bodies and that my favorite color was blue.  I got a blue ski jacket and painted my bedroom blue and all the while I missed pink.  And purple.  And red.  And dresses.

Somewhere along the line, in high school, I reclaimed myself and my girly ways.  I wore dresses again and became known for my love of purple because, at some point in those blue years, purple overcame pink as my true favorite.

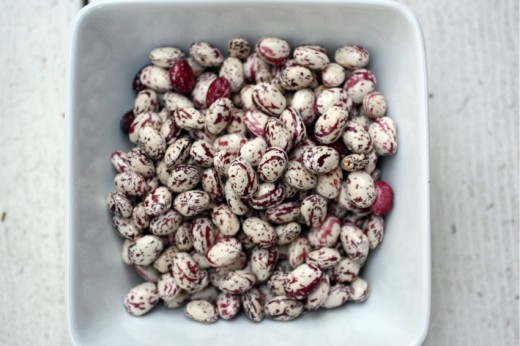
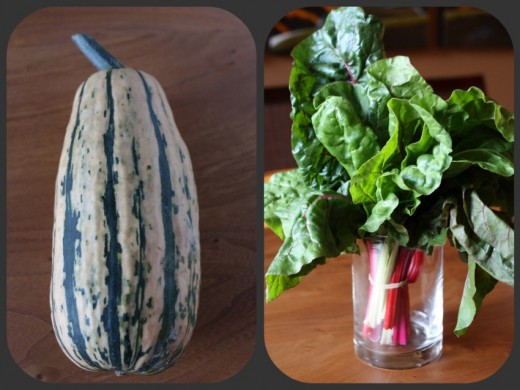
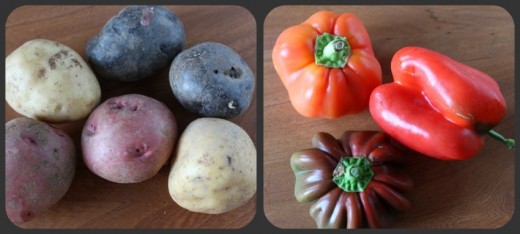
The only way this ties back to food is beans.  This is the time of year when school starts and when I start seeing fresh shelling beans at the markets.  Do these cranberries beans look like something found nature?  Or something that might be found, say, in my closet.  Or something that my kids would color for me because they are now aware of the concept of having a favorite color and they know what mine is.   I gathered all the ingredients for a stew at my farmers’ market and it all is so beautiful, is it not?

Sometimes cooking is just assembling really great ingredients and doing just a bit to bring out their flavors.  When you are using peak of the season produce, it’s easy to make something delicious.  This is not to say that this stew makes itself.  I took the time to roast the squash because I like it best that way but you could certainly just add it raw along with the potatoes to save yourself a step and a baking sheet to wash.  You also need to cook the beans separately but seeing as these are fresh, it only takes a half hour or so.  At my markets, you will often see the beans pre-shelled for you.  It is nice that someone did the dirty work for you and I used to buy them that way.  But the truth is that the beans in the pods are much fresher, they are cheaper, and shelling them is even easier to do than shelling peas.

One Year Ago:  Braised Purple Cabbage with Apples, Pecan Molasses Bundt Cake with Bourbon Glaze
Two Years Ago:  Carrot Soup with Ginger and Lemon, Soba Noodles with Mushrooms and Bok Choy, Holly B’s Peanut Butter Brownies
Three Years Ago:  Dimply Plum Cake

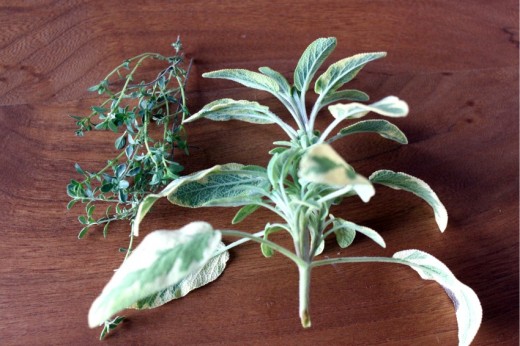
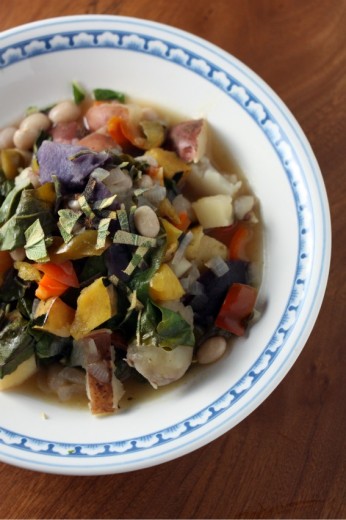
Cranberry Bean Stew with Maple Roasted Delicata Squash and Sage
Dana Treat Original
Serves 4

1½ pounds delicata squash, cut in half, seeded, and cut into ¾-inch chunks
Olive oil
Sea salt and freshly ground black pepper
4 tbsp. maple syrup
1 cup fresh shelling beans
1 medium red onion, diced
2 garlic cloves, minced
2 tsp. fresh thyme leaves
1 pound new potatoes, cut into 1-inch chunks
½ cup dry white wine
1 red bell pepper, seeded, diced
2 cups vegetable broth
½ bunch Swiss chard, leaves only, chopped
4 sage leaves, slivered, for garnish

Preheat the oven to 400ºF.  Place the squash chunks on a baking sheet and drizzle with about 2 tablespoons olive oil, a large pinch of salt, a few grinds of pepper, and the maple syrup.  Using your hands, toss well.  Place in the oven for 10 minutes.  Remove and flip the pieces over, return to the oven and bake for another 10 minutes, or until completely tender and browning in spots.  Remove and set aside.

Bring a medium saucepan of water to a boil.  Pour in the beans and cook, keeping the water at a mellow boil, until the beans are tender but not mushy, about 25 minutes.  Drain and set aside.

Heat a large soup pot over medium heat.  Add just enough olive oil to coat the bottom and then add the onion along with a large pinch of salt.  Sauté until starting to soften, about 5 minutes, then add the garlic.  Give it a stir, then add the thyme leaves.  Stir in the potatoes and cook, stirring occasionally, until the potatoes are browned in spots, about 8 minutes.  Things will start to stick but don’t worry about it.

Pour in the wine and scrape up any browned bits on the bottom of the pot.  Stir in the red pepper.  Pour in the broth and bring to a boil, then lower the heat to a simmer and cover.  Cook until potatoes are just tender, about 10 minutes.  Remove the cover and add the squash and the beans.  Stir well, then add the chard.  Continue to cook, covered, stirring occasionally, until the stew is heated through, the chard has wilted slightly, and the potatoes are fully cooked, about another 10 minutes.  Season to taste with salt and pepper.  Serve in shallow bowls garnished with fresh sage leaf slivers.


« Older Posts Newer Posts »