Category: Main Course

Feels Like the First Time

August 19, 2012

I don’t know about you, but I feel like the first time I cook something is always the best.  Not bake, cook.  When I bake something more than once, it is almost always better the second or third time than it was the first.  Baking can be tricky and I usually am able to fix any little glitches in a recipe or my technique after I have already made a dessert or a bread.

There have been so many times that I have repeated a recipe merely for the sake of this blog.  I cook first and foremost so that I can eat and feed family and friends.  Photographing and blogging about food is secondary.  But often I am midway through a meal and I think to myself, “I really should write about this” or someone at the dinner table asks me, “Are you going to write about this?”  So then I repeat the recipe the next week and I can say, almost without exception, that it was better the first time.

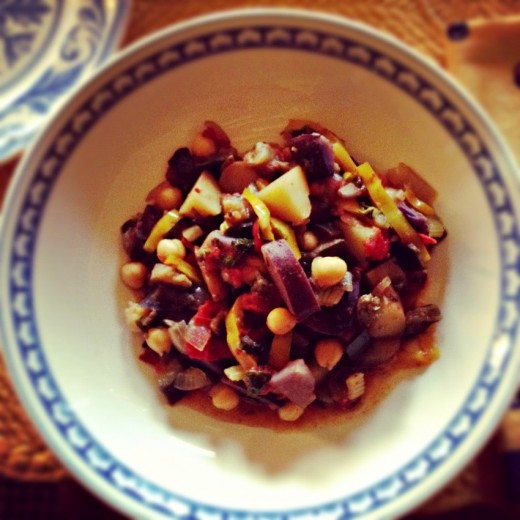
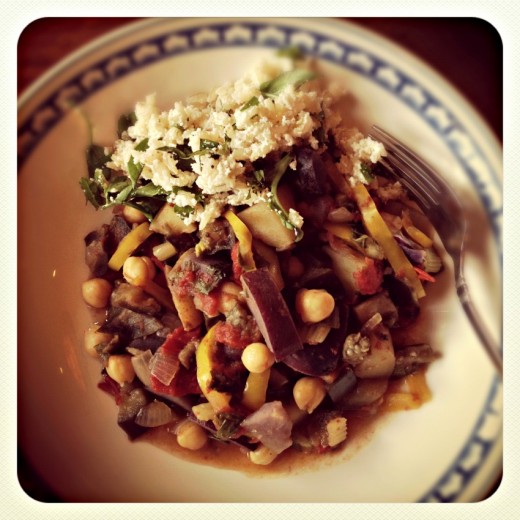
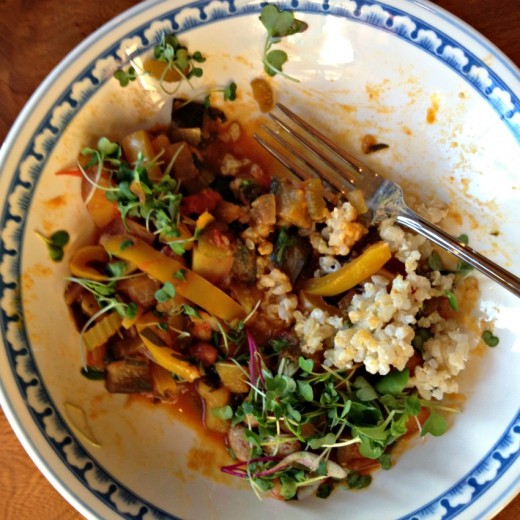
This was a lovely Italian stew the first time I made it.  I was thinking about how good it tasted and my parents and brother were ooohing and aaahing and asking when it would be on the blog, so I stood up and snapped a photo with my phone.  And then I realized that that photo would not do and I was going to have to make it again.

So I made it again.  And I didn’t pay as careful attention to the recipe, I forgot the saffron, and I used dried beans because I didn’t have any more fresh shelling beans stashed away in my freezer and the stew that was so mind blowingly tasty – the kind of thing where you sit back and ask yourself how vegetables can taste so good and maybe there is something to that vegan thing after all – was just a good dinner.

Make it.  Follow the recipe.  Use fresh shelling beans if you can, this is their season and they can pretty easily be found at farmers’ markets.  If you don’t have access to fresh, soak some dried beans overnight and cook them separately from the stew, then add them once they are cooked.  As much as I love their convenience, this is not the place for canned beans.

One Year Ago:  Double Chocolate Peanut Butter Pie, Corn Pudding
Two Years Ago:  Green Bean Salad with Mustard Seeds and Tarragon,
Three Years Ago:  Tortellini Skewers, Bocconcini (Marinated Mozzarella)

Country-Style Vegetable Stew (Cianfotta)
Adapted from Verdura, Vegetables Italian Style
Serves 4

Whenever I use saffron, I always allow it to “bloom” in liquid before adding it to the dish.  It helps bring out the delicate flavor of the saffron.  I served the stew, both times, with a brown rice tossed with ricotta and lots of herbs.  It was nice but not necessary.

1 small pinch of saffron
Olive oil
1 onion, peeled and chopped
2 celery stalks, sliced crosswise
2 garlic cloves, minced
1 tbsp. thyme leaves
1 small eggplant, trimmed and cut into medium dice
1 large yellow pepper, seeded, membranes removed, cut into medium dice
4 medium peppers, a mix of colors if possible, cut into medium dice
4 ripe tomatoes, seeded, cut into chunks
1 pinch red pepper flakes
Kosher or sea salt and freshly ground black pepper
8 ounces cooked beans
2 tbsp. chopped fresh parsley
2 tbsp. chopped fresh basil

Pour a few tablespoons of hot water into a bowl.  Add the saffron and set aside.

Place a wide shallow pan over medium heat.  Drizzle in just enough olive oil to coat the bottom, then add the onion and celery and a large pinch of salt.  Sauté until starting to soften, then add the garlic, saffron, and the thyme.  Cook for another 2 minutes, then add the rest of the vegetables.  Add another pinch of salt and a few grinds of pepper, stir well, and cover.  Turn the heat down to low.  Stir the mixture occasionally and if it seems too dry, add a few tablespoons of water.  Repeat if necessary.  Add the beans during the last 5 minutes of cooking.  Stir in the herbs just before serving and season to taste with salt and pepper.


Fennel Freak

July 24, 2012

Tell me if this happens to you.  You taste something delicious and then suddenly, your homing device is set to that thing.  I had burrata for the first time several years ago at Pizzeria Mozza while visiting a friend in L.A. and when I got back, I scoured my cookbooks for recipes using burrata.

On Sunday night, I went to a wine tasting, featuring Walla Walla wines, at Tom Douglas’ amazing space Palace Ballroom.  They had platters of food set out so we could make sure there was a cushion for the 13 (!) wines we were slated to taste.  One of those platters held roasted vegetables and I may have scoffed.  So imaginative!  Roasted vegetables as a vegetarian option!  But they were roasted in a wood-fired oven and they had fennel included in the mix and I could have eaten an entire plate of that roasted fennel.  I included a roasted fennel dish in one of my classes last winter – fennel, red peppers, grapes, and herbes de Provence – so I knew how good that vegetable is blasted at high heat.  But this was something else.

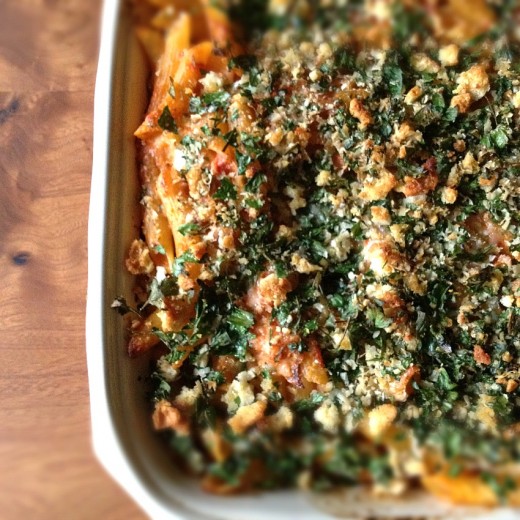
(Pre-baking.)

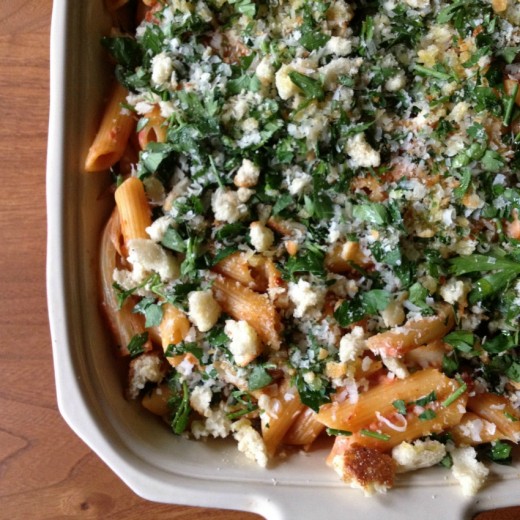
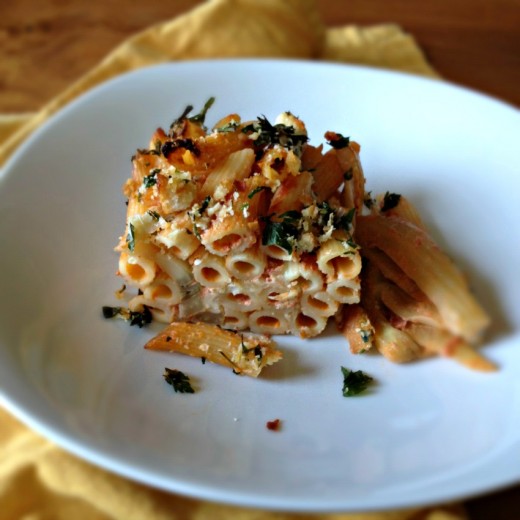
So, off I went in search of fennel recipes.  I did not have to look far.  I just got a new cookbook (surprise!) called The Fresh & Green Table.  It is a lovely book with so many a very nice variety of mostly vegetarian recipes.  Baked Penne with Silky Fennel in Hot Pink Sauce – how could you not want to make that?

I’m no stranger to baked pasta recipes (like this onethis one, and this one).  They are one of my favorite things to make on a cold day and I also love making them for large groups.  You can scale up easily.  I understand that it is actually summertime and many of the people in this country might not want to turn their oven on to 425º and then eat hot pasta.  So save this recipe for another time.  But make it and you won’t be sorry.  I sort of expected this to taste like other tomato based baked pasta dishes I’ve made but no.  No no no no.  I give full credit to the fennel (browned in a pan first – almost a little smoky) and the bread crumbs (crunch!).  I made a lot of changes, some of them intentional – lightening up the dish with less cheese, less oil, and no butter, and some of them unintentional – making about 100 mistakes in the process of getting it in the oven.  The recipe below reflects what I did.

One Year Ago:  Chesapeake Bay Snack Mix, Vegetable Enchiladas
Two Years Ago:  Mini Pissaladière, Lavender Honey Ice Cream
Three Years Ago:  Chocolate Chip Ice Cream

Baked Penne with Silky Fennel in Hot Pink Sauce
Adapted (liberally) from The Fresh & Green Table
Serves 4

I sometimes have a hard time finding 14-ounce cans of crushed tomatoes.  They seem to always come in the 28-ounce size.  I just stick my immersion blender directly into a 14-ounce can of diced tomatoes and crush them that way.  You could just use a blender.  Please, by all means, make your own breadcrumbs for this dish.  If you don’t have stale bread on hand, throw a few slices of good bread in the oven until crisp and then grind it up (tearing into small pieces first) in the food processor.

¾ cup fresh breadcrumbs
¾ cup freshly grated Parmesan, divided
Olive oil
3 tbsp. chopped parsley
Kosher or sea salt
3 medium fennel bulbs
1 tbsp. minced garlic
½ tsp. red pepper flakes
2 tbsp. vodka
1 14-ounce can crushed tomatoes
½ pound penne rigate
½ cup heavy cream
4 ounces diced fresh mozzarella cheese

Preheat the oven to 425ºF.  In a small bowl, combine the breadcrumbs, ¼ cup of the Parmesan, 2 tsp. of olive oil, the parsley, and a large pinch of salt.  Set aside.

Trim the stalks from the fennel.  Trim any brown spots from the outside of the fennel and halve the bulbs.  Cut most of the core from both halves, leaving a bit of it to hold some of the wedges together (some will fall naturally apart into slices).  Cut the fennel lengthwise (rotating your knife as you go, so that you are cutting on a radial angle always toward the center) into ¼-inch thick slices.  Place a large pot over medium-high heat.  Drizzle in about 2 tablespoons of olive oil, then add the fennel slices.  Cook, stirring occasionally, until the fennel is very tender and well browned, 12 to 14 minutes.

Reduce the heat to medium-low, add the garlic and red pepper flakes, and cook, stirring, until fragrant, about 30 seconds.  Add the vodka and cook, stirring and scraping the bottom of the pot while it simmers down (this will take just a few seconds).  Add the crushed tomatoes and cook, stirring and scraping the bottom of the pot, until well mixed, about 30 seconds.  Turn the heat down to low.

Meanwhile, bring a large pot of salted water to a boil.  Add the pasta and cook until just shy of al dente (the pasta will continue to cook in the oven, so be sure to not overcook it).  Pour the cream into a 2 cup measuring cup and keep it by the stove.  When the pasta is ready, ladle out ¾ cup of the cooking liquid and add it to the cream.  Drain the pasta and add it to the tomato fennel mixture.  Pour in the cream mixture and stir well to combine.  Stir in the mozzarella cheese and the remaining ½ cup of Parmesan.  Season to taste with salt.

Turn the mixture out into a 8×12-inch casserole dish.  Using a spatula, press down on the top.  Scatter the breadcrumbs over the top.  Bake, uncovered, until the top is browned and crusty and the casserole is bubbling vigorously, about 25 minutes.  Let it sit for a few minutes while the bubbling subsides, then serve right away.

(Make ahead tips:  You can make the sauce part (brown the fennel all the way through adding tomatoes) several hours ahead.  Just leave the pot on the stove and warm it up before you proceed with the recipe.  As with most casseroles, this can be made early in the day that you plan to serve it.  Cover the whole thing with foil and store it in your refrigerator.  You will need to add about 10 minutes to your cooking time.)


Last Day of Work Dinner

May 5, 2012

About a year and a half ago, Randy started a new job.  He had spent 6½ years at Microsoft – a company known for their innovation, excellent benefits, fair pay, exciting opportunities, and grueling schedules.  Randy had a great career there but the work/life balance was out of whack.  When he had the opportunity to join a start-up, working with two close friends, he jumped.  (I wrote more about the job and the decision to take it here.)

Almost immediately, our lives changed for the better.  In the Microsoft days, Randy would leave before 6am and return home around 7:30pm.  He did this to avoid sitting in traffic which is epic on the 520 bridge – the span that connects Seattle to Redmond where the Microsoft headquarters are.  He was pretty good about not working on the weekends or in the evenings, but the job was ever-present.  Like the big elephant in the room that everyone tries to ignore.  He traveled nearly constantly toward the end of his time there.  When he was home, he was exhausted from time zone changes and the stress.  It was not a life that was sustainable for our family.  Fortunately he understood that and together we decided it was time to make a change.

The start-up was 2.1 miles from our house.  It had a more relaxed atmosphere – more work/life balance.  Randy is a self-described “type triple A” personality, so it’s not like he slacked off, but I truly felt like he put family first.  He was home around 6 every night and was able to help with drop-offs and pick-ups which allowed me to create my career and take the job as culinary director at Book Larder.

There were several scenarios for how the job at the start-up would play out and we talked about them from time to time.  Maybe the company would get bought.  Maybe he would get recruited for another job at another company.  Maybe the three friends would get hired as a power team to build something new.  I’m not sure that either of us thought that the company would just implode.  But sadly, that is what happened.

Fortunately, we had some warning.  A couple of months ago, we found out that, unless someone bought the company, the leadership team would be laid off at the end of May.  Randy was incredibly busy looking for a job, networking, taking recruiting calls, while simultaneously helping get the company get acquired and also just doing his day job.  And then, the last ditch effort didn’t work.  His last day was Tuesday.  The company is still there and there are a few people still working on business but Randy is officially unemployed.  We both feel sad about this for many reasons.  He poured a lot into that company both in sweat equity and money.  There are friends who no longer have jobs.  He is a little unmoored being without a job for the first time since he was 18 years old.  Our life and our future is very uncertain right now.
We are extremely lucky in that we have just about 100% certainty that he will get a great job.  He has been interviewing like crazy and has about 10 opportunities that are possible at the moment.  We have enough money stashed away that we don’t have to worry about this little interim period until the next job starts.  He is trying to enjoy having a bit of time and being able to focus on just talking to people and finding the right job.

Almost everyday for the past few weeks I have gotten calls from him about opportunities.  “Would you move to Boise?”  “Would you move to San Francisco?”  “LA?”  “Denver?”  “New Jersey?”  “Luxembourg?”  “South Korea?”  My answers to those questions are complicated.  I don’t want to move.  I want to stay in Seattle.  I want to continue to teach my classes at home and work cool events at Book Larder and stay near my incredible network of friends and my family.  After working so hard to find the right school for Graham, I don’t want to have to start that whole process again.  At the same time, I appreciate that the right job might not be in Seattle.  Randy is a fairly senior guy and those jobs are not a dime a dozen.  He is an amazing man – so smart, so successful, so hardworking.  He should be running a company – if not now then soon.  I can’t hold him back from the next step just because I don’t want to move.  He is respectful of my feelings and is trying hard to keep us here.  But neither of us knows what is next.
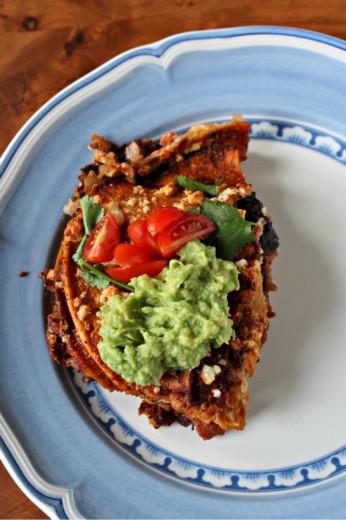
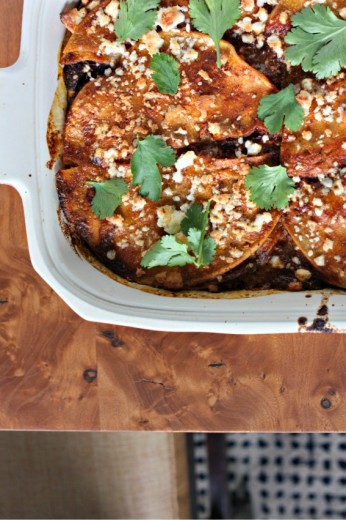
(Pardon the intense color on this photo.)

I went on a great blogging trip this week to Monetery with Dole to learn more about their salad greens.  I thought I was leaving on Tuesday but when when I went to print out my boarding pass on Monday night, I realized that the trip was actually Wednesday – Friday.  I was relieved.  I would be able to be home on Tuesday night and have dinner with Randy after his last day of work.  An emotional day for us both.  In order to keep the mood light, I asked him what he wanted me to make for dinner.  Of course he said Mexican.

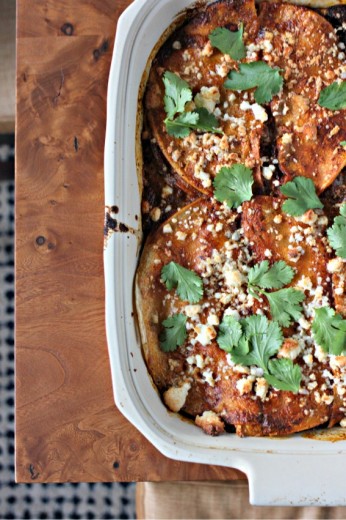
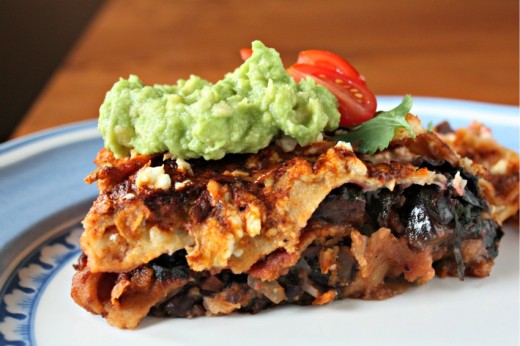
I taught a class at Book Larder last month using some recipes from some of Rick Bayless’ books.  I love his recipes and decided to do a riff on one for Randy’s Last Day of Work Dinner.  I wasn’t sure what he would think – Randy is kind of a burrito/enchilada/quesadilla guy.  I wasn’t sure this “other” type of dish would fly.  I hate to say it was like a Mexican lasagne because that does a disservice to both Mexican food and lasagne.  But you make a sauce (a salsa really), you layer tortillas with yummy things like sautéed mushrooms and chard and beans cheese, and you bake it.  We loved it.  Like really loved it.  I’m glad that, along with a bottle of special wine and a big salad, we were able to toast the end of this chapter, and begin thinking about the next.
One Year Ago:  Roasted Sesame and Panko Coated Asparagus with Soy-Ginger Drizzle
Two Years Ago:  Chocolate Truffles, Gianduja Gelato
Three Years Ago:  Rhubarb Streusel Tart, Bean Tostadas with Sofrito, Niçoise Salad

Layered Pasilla-Tortilla Casserole with Black Beans, Mushrooms, and Chard
Adapted from Mexican Kitchen
Serves 4-6

I made a lot of changes to this recipe, added in some things, swapped out others, changed the size of the baking dish, but this is still a Rick Bayless recipe.  I used canned beans here because I was short on time but ideally, dried would be best.  This recipe has a lot of components but they come together quickly.  You can always make the sauce the day before.  I would imagine, like lasagne, the whole thing can be assembled earlier in the day and just kept in the refrigerator until you want to bake it.  Add another 5-10 minutes to the baking time if you do so.

For Pasilla Sauce:
½ head of garlic, broken apart but not peeled
6 medium (about 2 ounces) dried pasilla chiles, stemmed and seeded
1 tsp. dried oregano
½ tsp. ground cumin
Olive oil
1 cup vegetable broth
Kosher or sea salt

For the mushroom layer:
2 medium portabello mushrooms, black gills scraped out, thinly sliced
2 garlic cloves, minced
½ bunch of chard, leaves stripped off the stalks, roughly chopped

For the casserole:
1 small white onion, diced
2 cups cooked black beans (I used 1 15-ounce can, drained)
8 corn tortillas
½ cup sour cream or crème fraîche thinned with a little cream or milk
6 ounces cotija cheese

Make the sauce:
Roast the unpeeled garlic on an ungreased griddle or heavy skillet over medium heat, turning occasionally, until soft (they will blacken in spots), about 15 minutes; cool and peel.  While the garlic is roasting, toast the chiles on another side of the griddle or skillet.  Do 1 or 2 at a time:  open them first and press down firmly on the hot surface with a spatula; in a few seconds, when they crackle, even send up a wisp of smoke, flip them and press down to toast the other side.  In a small bowl, cover the chiles with hot water and let rehydrate 30 minutes, stirring frequently to ensure even soaking.  In a food processor or blender, combine the chiles, garlic, oregano, cumin, and about 1/3 cup of the soaking liquid.  Blend to a smooth purée, scraping down and stirring frequently.  (If necessary, add a little more broth to get the blades moving.)

With a rubber spatula, working the pasilla paste through a medium-mesh strainer into a bowl.  Heat about a tablespoon of oil in a medium saucepan, then add the paste and a pinch of salt.  Cook, stirring constantly, until dark and very thick, about 4 minutes.  Stir in the broth and simmer, partially covered, for 30 minutes.  Taste and season with salt.  Keep warm over very low heat.

Preheat the oven to 350ºF.

Make the  beans:
Heat about a tablespoon of oil in a medium skillet over medium heat.  Add the onion and a large pinch of salt.  Cook until brown in spots, about 10 minutes, then add the beans.  Using a potato masher or the back of a large spoon, mash to a coarse purée.  Add water or bean broth to thin the beans, if necessary, to an easily spreadable, but not runny, consistency.  Taste and season with salt.  Cover and keep warm.

Make the mushroom filling:
Heat another tablespoon of oil in a large skillet over medium-high heat.  Add the mushrooms and a large pinch of salt and sauté, stirring occasionally, until the mushrooms start to give off their liquid.  Add the garlic and continue to cook, stirring occasionally, until most of the liquid has evaporated.  Add the chard leaves and sauté until the chard is nice and soft and the pan is mostly dry, about 10 minutes.  Taste for salt and season as needed.

Assemble the casserole:
Spread about 1/3 of the sauce in the bottom of an 8×12-inch baking dish.  Put down a layer of tortillas, just barely overlapping.  Top with the beans, another layer of tortilla halves, another 1/3 of the sauce, half the cream, and half the cheese.  Top with the mushroom mixture.  Add a final layer with the remaining tortilla halves, remaining sauce, cream, and cheese.  Bake, uncovered, until bubbly, about 20 minutes.  Let stand for a few minutes to firm up, then cut into squares.


Editing is Important

April 25, 2012

Part of cooking well, like dressing well, is knowing when to edit.  There is a point where the dish is close to being just right and you can either just trust that it is good, or you can keep adding to it and potentially ruin it.  I think this is a particular danger with vegetarian food.  Without the protein anchor, sometimes it might feel like you need to keep adding layers of flavor to make up for what is “missing”.  Too many layers of flavor is my main critique of Seattle’s vegetarian restaurants and why I almost never frequent them.

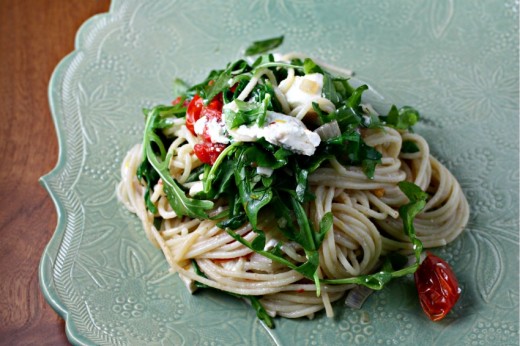
A dish doesn’t have to have a whiz! bang! pop! to be lovely.  I first got this idea from Tracy and her Angel Hair Pasta with Arugula and Lemon.  Every so often a dish sticks in my overstuffed brain and lately it has been this one.  As we were driving back from our decadent weekend in Walla Walla, I started dreaming of superfine pasta stuffed to the gills with arugula.  I had recently bought some angel hair in a lovely package and we were lucky enough to visit a goat cheese farm while in Walla Walla and had purchased some delightful mild feta.  I decided that, rather than make Tracy’s dish to the letter, I would just riff on it.

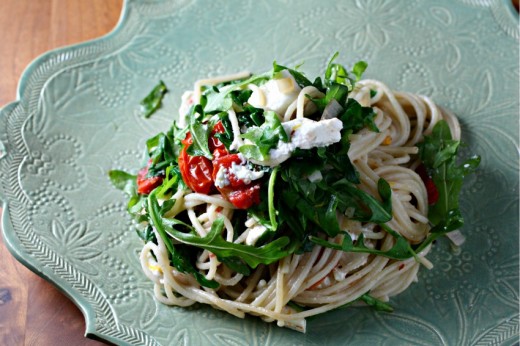
As it turns out, my dish is not much like hers.  That is what you get when you don’t actually consult a recipe you are trying to riff on!  But we loved this light and sunny pasta and it came together in no time.  I put some small cherry tomatoes in the oven to roast, got my pasta going, then satuéed shallots and red pepper flakes in a bit of olive oil.  I grated in the zest of a Meyer lemon and then waited for the pasta to cook.  Once it was just shy of al dente, I scooped it into the pan with the shallots and added lemon juice, lots of arugula, small cubes of feta, and the roasted tomatoes.  I used the pasta cooking water to loosen the sauce.  As I was tossing it all together, my mind was saying, “Olives! Pine Nuts! Parmesan!”, but I was able to edit and keep it simple.

One Year Ago:  Brown Sugar Pound Cake (I’ve probably made this cake more than any other)
Two Years Ago:  Zucchini and Olive Salad
Three Years Ago:  Ricotta Calzones with Sausage and Broccoli Rabe

Pasta with Lemon, Arugula, and Roasted Tomatoes
Dana Treat Original (but thanks Tracy for the inspiration)
Serves 2-3

My noodles were actually more like a cross between angel hair and spaghetti, so I’m suggesting you use spaghettini in the recipe below (it’s a thinner spaghetti).

Olive oil
20 small cherry tomatoes
Kosher or sea salt and freshly ground black pepper
1 large shallot, finely diced
½ tsp. red pepper flakes
Zest and juice of 1 Meyer lemon
4 ounces feta cheese, cut into small cubes
4 ounces arugula, plus more for garnish
8 ounces spaghettini

Preheat the oven to 375ºF.  Place the tomatoes on a small baking sheet.  Drizzle with olive oil and sprinkle with salt and pepper.  Roast in the oven until they soften, brown in spots, and start to collapse a bit, about 20 minutes.  Set aside.

Meanwhile, place a large skillet over medium heat.  Drizzle in just enough olive oil to coat the bottom of the pan, then add the shallots, red pepper flakes, and a large pinch of salt.  Sauté, stirring frequently, until the shallots soften and start to brown in spots, about 5 minutes.  Grate in the lemon zest and turn off the heat.

Meanwhile, bring a large pot of salted water to boil, then add the pasta.  Cook according the package directions until just al dente.  Taste it to make sure.  Using tongs, transfer the pasta to the skillet with the shallots.  Turn the heat to low and stir to coat the pasta with the shallots and pepper flakes.  Ladle in some pasta cooking water to loosen the sauce.  Add half of the arugula and keep tossing the pasta so that the arugula wilts.  Add the other half of the arugula along with the lemon juice, feta cheese, and the tomatoes.  Add more cooking water if the pasta seems too dry.  (You can also use olive oil if you prefer.)  Toss carefully.  Serve each portion topped with more of the arugula.


Sunday Night Chinese Food

April 17, 2012

My parents are both Jewish and both from New York.  That means that, on a lot of Sundays, we ate Chinese food.  There were different places we went, some in Seattle proper, some on the little island suburb where I grew up.  No matter which restaurant we went to, several things remained constant.

First it was the tea.  My parents would let us drink tea with as much sugar as we wanted in it.  I think it was the late 70’s/early 80’s version of an iPad.  Something to distract us three kids so that they could attempt to have a conversation.  We would pour and pour and pour that sugar until it was a thick slurry at the bottom of the little tea cups, and then we would spoon it up like soup.  And then there was soup – wonton soup to be exact.  Those little perfect parcels in burn-your-tongue hot broth, just waiting for my teeth to burst them open.  I was always disappointed by the small ratio of wontons to broth.  I could have eaten 50 of them.  My parents always ordered “bean curd” which only they enjoyed since we three thought it was disgusting.  If only my ten-year old self had known how much I would grow to love tofu!  And finally, pork fried rice.  (Yes, Jews eating pork.  We were far from the only ones.)

Here is where I admit that I had never, until last night, made fried rice.  Here is also where I admit that the word “fried” scares me.  You will not find much fried stuff here.  I don’t make donuts and I can count on one hand the number of times I have deep fried.  I am scared of the technique, the mess, and the amount of fat in the food that is fried.  That last reason is why I never order fried rice in a Chinese restaurant, truthfully why I don’t often eat in Chinese restaurants.  (This is a gross generalization but I find Chinese food, in Seattle anyway, to be much greasier than other Asian food.)

Here is why I went for it.  I’ve been making this tempeh for my Spanish cooking classes.  It goes in the paella.  It is so good that, after the class is over and I am washing countless dishes, my fingers keep sneaking into the almost empty pot, hoping that some previously uncovered piece of tempeh will appear.  Doing this search reminded me of the pork fried rice of my childhood and how I would clumsily attempt to get as much of that pink-hued pork with my chopsticks.  I also realized that I sometimes have cold rice in the refrigerator and making something new with it is much more interesting than sprinkling it with water and microwaving it.  And finally, when you make something yourself, you can control how much oil goes into it.

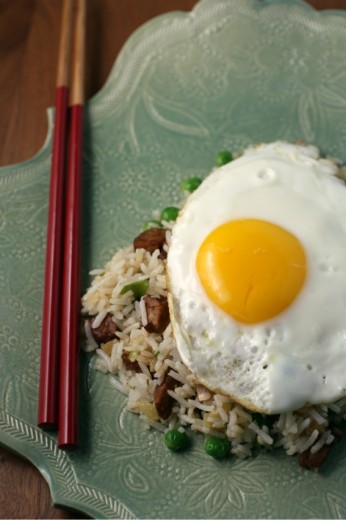
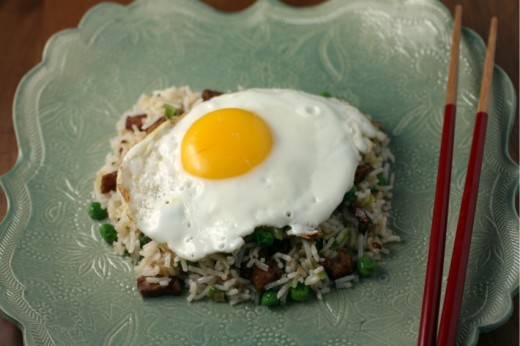
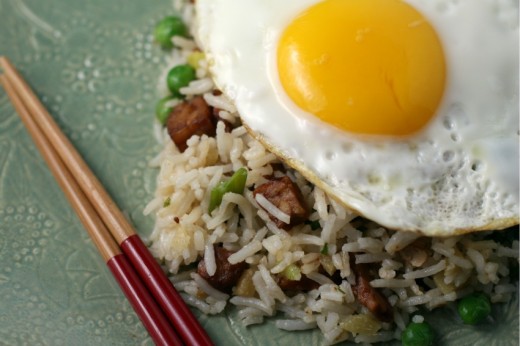
I made this version with a bunch of scallions, a much-more-than-what-you-might-think amount of ginger, cold rice (every recipe you look at will tell you it has to be cold), my magical tempeh, frozen peas, a bit of sesame oil, and a fried egg on top.  The fried rice I remember had bits of scrambled-then-cut eggs throughout the rice, but I have finally realized that, since I go a little swoony every time a dish is described as being topped with a poached/fried/soft-boiled egg, it’s time to do more topping with eggs.

Want to know a little more about tempeh?  Check out this post.
One Year Ago:  Pane con Formaggio (Cheese Bread), Banana-Date Tea Cake
Two Years Ago:  Cinnamon Chocolate Ribbon Cake (I really like this post), Tabasco and Asparagus Quinoa
Three Years Ago:  Orange Cinnamon Biscotti, Southwestern Sweet Potato Gratin

Ginger Fried Rice with Roasted Tempeh
Dana Treat Original
Serves 3-4

I know some people like to grate their ginger on a microplane rasp, but I think it works best here to just chop it really fine.  Don’t skip the steaming step for the tempeh, it can taste bitter if it is not steamed first.

For the tempeh:
1 8-ounce package of tempeh (any flavor)
2 tbsp. soy sauce
1 tsp. sesame oil
2 tbsp. olive oil
1 tsp. smoked paprika

For the rice:
3 tbsp. canola or peanut oil, divided
1 bunch of scallions, white and green parts, thinly sliced
¼ cup fresh ginger, peeled and minced
Kosher or sea salt
About 4 cups cold rice
2 tsp. sesame oil
½ cup frozen peas, unthawed
3-4 eggs

Make the tempeh:
Preheat the oven to 375ºF.  Cut the tempeh into ½-inch dice.  Place in a steamer and steam for 10 minutes.  Meanwhile, whisk the soy sauce, the oils, and the paprika together in a small baking dish.  Pour the steamed tempeh into the same pan and place in the oven.  Roast, stirring occasionally, until the tempeh has absorbed all the marinade and it is starting to get browned in spots, about 25 minutes.  Set aside.  (The tempeh can be made up to 1 day ahead.  Allow to cool, then store in the refrigerator.)

Make the rice:
Place a large shallow pan over medium heat.  Drizzle in 2 tablespoons of the canola or peanut oil, then add the scallions, ginger, and a large pinch of salt.  Sauté until softened and starting to brown, about 4 minutes.  Add the rice, breaking up any clumps with your hands.  Cook, stirring occasionally, for 5 minutes.  Drizzle in the sesame oil, give the rice a good stir, then add the peas and the tempeh (you may not want to add all the tempeh).  Cook for another 5 minutes while you make the eggs.

Place a large non-stick pan over medium heat.  Drizzle in the last tablespoon of the oil.  Crack the eggs one at a time into the pan and cook until the whites are set but the yolks are still soft, about 4 minutes.

Serve the rice in bowls and top each with a fried egg.


« Older Posts Newer Posts »