Category: Chocolate

3 Cupcakes for $11

September 20, 2011

Now that the school year has started, we have a new weekly schedule in place.  Graham is in first grade so, obviously, he is in school five days a week.  Spencer goes to preschool four days a week and spends Wednesdays with me.  As much as I try to keep those days fun and Spencer-centered, they are often days full of errands.  He is a great sport and happily accompanies me as I drive around town getting the necessary ingredients for cooking classes or catering jobs.  I like to make sure those trips aren’t pure drudgery for him so there is often some kind of treat incentive.

Last week, we were near a cupcake shop and I suggested we stop in for cupcakes for the “boys” in our family.  (Me?  If I am going to eat cake, I am going to eat cake.  My cake.  Not store-bought cupcakes.)  I asked for three, the nice lady behind the counter boxed them up, rang me up, and told me I owed her $11.

$11.  For three cupcakes.  Really?  In my brain a little switch went off.  That “I will never buy into this crazy-ness again” switch.  As much joy as those cupcakes bring my children – it’s over.  Cupcakes in the Dana Treat household are homemade from now on.

But here is the thing.  I get it.  If I make cupcakes, it’s about 1 million times cheaper.  I can probably make 50 cupcakes for $11.  They will taste much better and be made with love.  But what am I going to do with 50 cupcakes?  Or even 12?  There are three people in my family who eat them.  Even if we have cupcake loving friends with cupcake loving kids over, we will only get through just over half a dozen.  What do I do with the rest of them?  They only keep for a day or so.  I can’t exactly put them in the cookie jar, right?  (Note to self:  Invent a cupcake jar!)

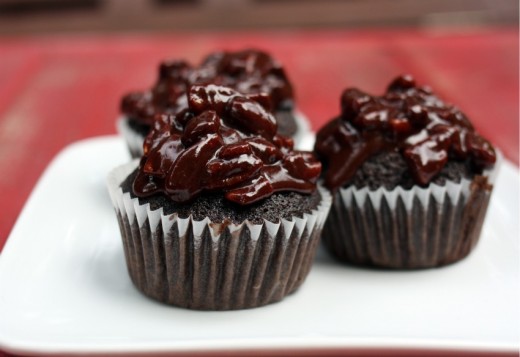
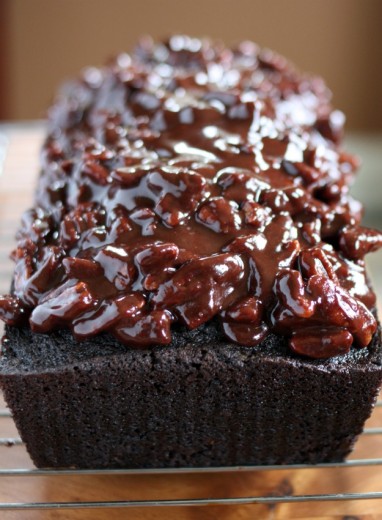
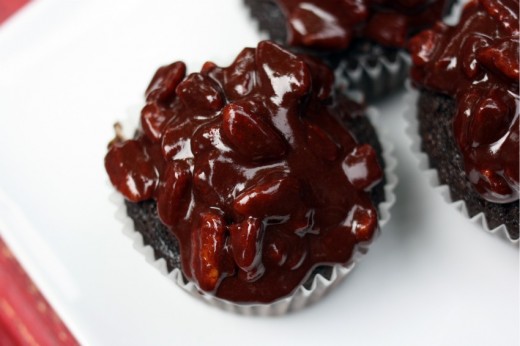
Once in a while my addled brain comes up with something surprisingly clear.  Post store-bought cupcake horror, I was extremely motivated to make my own.  I also realized that I needed a dessert for a special class I was teaching.  Mexican Chocolate Cake actually.  What if I made the cake smaller and used the rest of the batter for cupcakes?  It could have been a disaster but it worked great.  From one recipe, originally intended for a bundt pan, I made a 9×5-inch loaf cake and six cupcakes.  The boys were pleased, the babysitter was pleased, my students were pleased, Randy was pleased, and I was pleased.  Success!

One Year Ago:  Double Chocolate Layer Cake
Two Years Ago:  Grits Frittata
Three Years Ago:  Frittata with Feta, Sun-Dried Tomatoes, and Basil (apparently this is the time of year I make a lot of eggs)

Mexican Chocolate Cake
Gourmet

To make things simpler, I’m giving you the cake as originally written, for a 12-cup bundt pan.  (This is the standard size for a bundt pan in the US.)  You can play around with what pans you want or if you just want to make all cupcakes.  A site I find very useful when trying to figure out what pans to use is Joy of Baking.  You can look up your pan size, find out how many cups it holds by volume, and then reconfigure.  Sound complicated?  It’s actually really easy.

For cake
2 sticks (1 cup) unsalted butter
½ cup Dutch-process unsweetened cocoa powder
¾ cup water
2 cups granulated sugar
2 large eggs
½ cup well-shaken buttermilk
2 tablespoons vanilla
2 cups all-purpose flour
1 teaspoon baking soda
½ teaspoon cinnamon
¼ teaspoon salt

For glaze
2 cups chopped pecans (7½ ounces)
½ stick (¼ cup) unsalted butter
½ cup half-and-half
½ cup confectioners sugar
5 ounces fine-quality bittersweet chocolate (not unsweetened), finely chopped
¼ teaspoon salt

Make cake:
Put oven rack in middle position and preheat oven to 350°F. Butter cake pan well and dust with flour, knocking out excess.

Melt butter (2 sticks) in a 3-quart heavy saucepan over moderately low heat, then whisk in cocoa. Add water and whisk until smooth, then remove from heat. Whisk in separately sugar, eggs, buttermilk, and vanilla.

Sift together flour, baking soda, cinnamon, and salt into a bowl, then sift again into cocoa mixture and whisk until just combined (don’t worry if there are lumps).

Pour batter into cake pan and bake until a wooden pick or skewer comes out with a few crumbs adhering, 45 to 55 minutes. (Leave oven on.)

Cool cake in pan on a rack 20 minutes, then loosen edges with a thin knife and invert onto a plate.

Make glaze:
Spread pecans in 1 layer in a shallow baking pan (1 inch deep) and bake until fragrant and a shade darker, 6 to 8 minutes. Cool pecans slightly in pan on a rack, about 5 minutes.

Melt butter in a 2-quart heavy saucepan over low heat, then stir in half-and-half and confectioners sugar. Add chocolate and cook, stirring, until smooth. Remove from heat and stir in pecans and salt. Cool glaze until slightly thickened, about 5 minutes.

Spoon glaze over top and sides of cake (cake will still be warm) and spread with a small offset spatula or knife to cover completely.

(Cake (with glaze) can be made 2 days ahead and kept at room temperature in a cake keeper or covered with an inverted bowl.)
Yep, Me Too

August 15, 2011

If you read any food blogs other than this one, chances are you have had your fill of posts about peanut butter pie.  If you have no idea what I am talking about, food bloggers around the world have spent the past few days making peanut butter pie, and writing about it, because one in our midst lost her husband unexpectedly.  When someone experiences tragedy, our natural reaction is to want to help – even if we don’t know the person who is suffering.  I always offer food to people in need but seeing as Jennie lives clear across the country, cooking dinner for her and her daughters was not realistic.

Jennie took to her blog and wrote a heartbreaking post about her husband’s love for peanut butter pie and that, if we wanted to help her, we should all make one in his honor.  She said that she never made it often enough for him, that there was always tomorrow or the next week and other dishes, or even just plain old life, got in the way.  I think this emotion resonated with so many people and it is the reason that there is peanut butter pie everywhere you look.  We all assume that if our families are intact today, the same will be true tomorrow.  We all know life is fragile, relationships are tenuous, and yet we soldier on as if everything will last forever.  Of course we do.  If we didn’t, we would be living in a state of constant fear and that isn’t good for anyone.

Randy travels frequently for work, I send my kids off to school/preschool/camp, where they are in the hands of airline captains, teachers, and counselors.  If I wondered every single day whether that plane ride or bus ride or car ride was going to be their last, I would not be able to get out of bed in the morning.  But hearing of the death of a beloved spouse and father of two young children certainly gives me pause and makes me reflect on what I have and how fortunate we are.

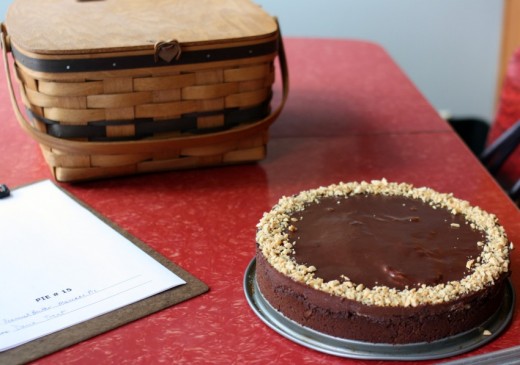
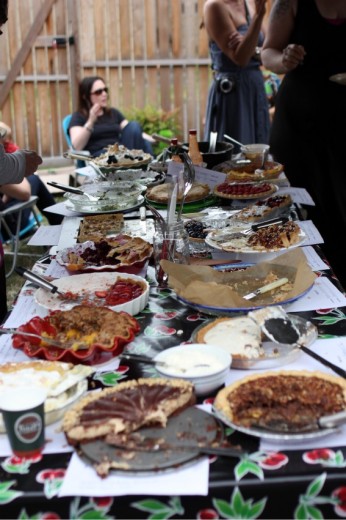
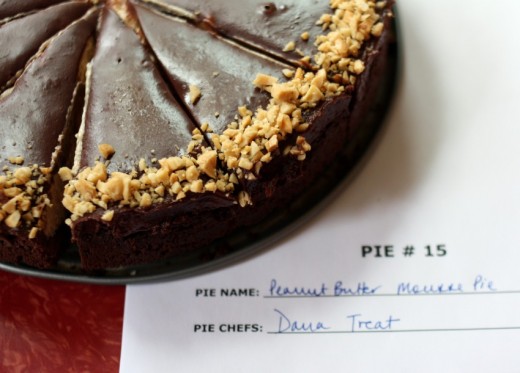
Anyway, more eloquent writers than me have done a much better job of writing about Jennie, about loss, about this amazing community of food bloggers who rally around our own.  I’m a little late to the party but I did make a peanut butter pie.  I didn’t make Mikey’s version, I made one that has been in my “to make” file forever and I brought it to a pie party.  Every year, our friends Matt and Jessica throw a pie party where there are categories, judging, and prizes.  I am not a competitive type but I do have a reputation to uphold and truthfully, I had plans to bring a different kind of pie.  One that celebrates summer in Seattle with nectarines and blackberries or apricots and raspberries.  But I couldn’t make a pie and not make a peanut butter pie.  I didn’t win and I didn’t care – the pie was delicious.  Bittersweet though.

Double-Chocolate Peanut Butter Pie
Food & Wine
Makes one 9-inch pie

Chocolate Crust
4 ounces semisweet chocolate, chopped (½ cup)
½ stick unsalted butter, cut into tablespoons
8 ounces chocolate wafer cookies (from a 9-ounce package), finely ground (2 cups)

Peanut Butter Filling
8 ounces cream cheese, softened (1 cup)
1 cup chunky peanut butter
½ cup sugar
2 tsp. pure vanilla extract
1 cup well-chilled heavy cream
¾  cup salted roasted peanuts, chopped
Kosher salt

Chocolate Topping
4 ounces semisweet chocolate, chopped (½ cup)
½ cup heavy cream

Make the chocolate crust
Preheat the oven to 375ºF.  In a medium glass bowl, combine the chocolate and butter and microwave at high power in 20-second intervals until the chocolate is melted.  Stir well, then stir int eh cookie crumbs.  Press the cookie crumbs over the bottom of a 9-inch springform pan and 1½ inches up the side.  Bake the crust for 10 minutes, or until set; the crust will continue to firm up as it cools.

Make the peanut butter filling
In a large bowl, using a handheld mixer, beat the cream cheese with the peanut butter, sugar, and vanilla extract until blended.  In another large bowl, using the same beaters, whip the chilled cream until firm.  Fold one-third of the whipped cream into the peanut butter mixture to loosen it, then fold in the remaining whipped cream and ½ cup of the chopped peanuts.  Spoon the filling into the crust, smoothing the surface.  Sprinkle lightly with salt and refrigerate until set, about 3 hours.

Make the chocolate topping
In a medium glass bowl, combine the chocolate with the heavy cream and microwave at high power in 20-second intervals until the chocolate is melted and the cream is hot.  Stir the chocolate topping until blended and then cool to barely warm, stirring occasionally.

Spread the chocolate topping over the peanut butter filling and refrigerate until just firm, 15 minutes.  Sprinkle with the remaining ¼ cup of chopped peanuts around the edge of the pie.  Carefully run a thin knife around the edge of the pie, then remove the springform ring.  Using a sharp knife, cut the pie into wedges.  Run the knife under hot water and dry between each cut.

Make ahead
The pie can be covered and refrigerated overnight.  Garnish with chopped peanuts right before serving.  Serve the pie chilled or slightly cooler than room temperature.


Ganache-Filled Brown Sugar Bars

June 30, 2011

Friends, it’s that time of year.  It seems that ever since I have kept this blog, I go out of town around the end of June/beginning of July.  Last year, I went to Cannes/Paris/London.  This year, I am going to Delaware.  Ahem.  Not that there is anything wrong with Delaware it’s just not, well, um, Cannes, Paris, or London.  I don’t think I will be shopping for copper pots or taking a train underneath the English Channel.  What I will be doing is getting quality time with Randy’s huge extended family.

Here is what I expect: a plane ride complete with ridiculous amounts of technology and lots of usually-forbidden snacks, two boys spending a week covered in sand and smelling of sunscreen and Popsicles, eating lots and lots of carbs, getting forced to sing and play guitar in front of  50+ family members, roller coasters and cotton candy on the boardwalk, and truly enjoying a vacation.

This has been a busy month.  I taught six classes in three weeks.  I didn’t do much cook-for-my-family cooking.  But I did manage to squeeze some yummy things in.  I have time to share the food but I don’t have time to write super witty and topical posts to accompany the recipes.  Forgive me?  I think after this treat you just might.

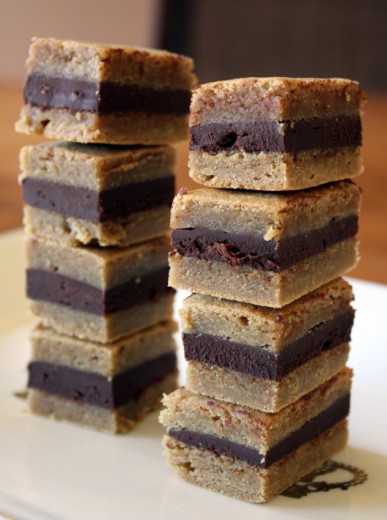
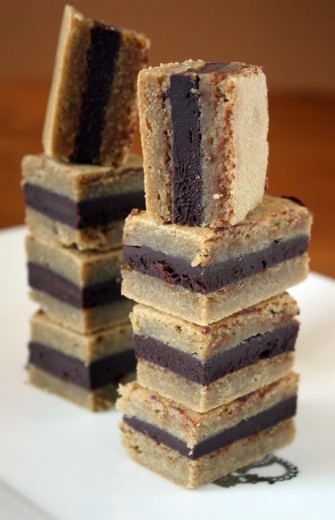
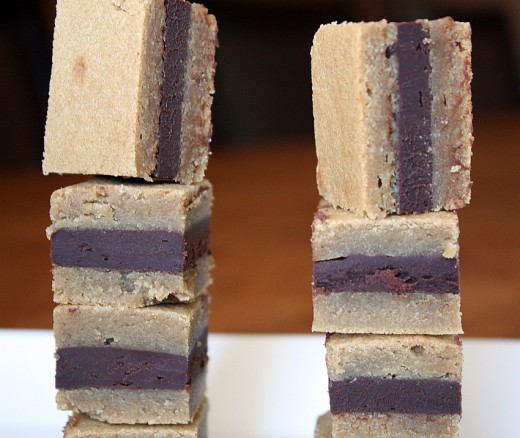
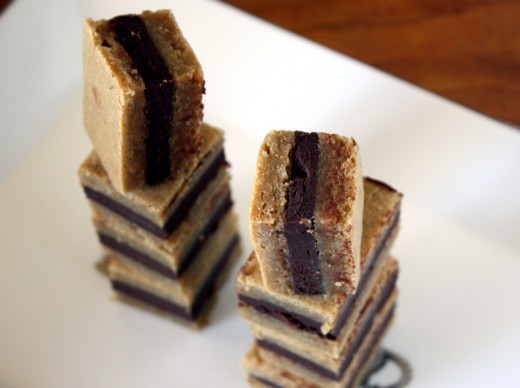
Sometimes I look at a recipe with few ingredients and scoff.  A “how could this be good?” kind of thing.  I’ll tell you how this can be good – brown sugar bars with chocolate ganache sandwiched in the middle.  The components of these bars are super easy to make.  Assembly is a little tricky.  Learn from my experience and mistakes:

Do butter and flour the pan well and definitely use the wax paper that is suggested.
Do dollop the batter all over the pan, this will make it easier to spread.
Do use a palette knife to smooth the top.
Don’t underbake.  Or overbake.
Do use a palette knife to coax the wax paper away from the pan before turning out onto a rack.
Don’t move the cake part around too much, this will make it crack.
Do make sure you put the cake on a cutting board that will fit in your refrigerator.
Do wipe your knife off in between cuts so you don’t get chocolate residue on the edges.  If you care about that sort of thing.  (I didn’t do this.)
Do use a ruler to make sure you get all your pieces the same size.  If you care about that sort of thing.  (See above.)
Do cut these in small pieces and be prepared for children in your life to go absolutely nuts for them.

Ganache-Filled Brown Sugar Bars
Adapted from Food & Wine
Makes 32 bars (or more if you cut them smaller)

½ cup heavy cream
½ pound bittersweet chocolate, very finely chopped
1¾ cups all-purpose flour
¼ tsp. salt
2 sticks (½ pound) unsalted butter, at room temperature
1 2/3 cups packed dark brown sugar
2 large eggs, at room temperature
1½ tsp. pure vanilla extract

Place the chocolate in a mixing bowl.  Bring the cream to a boil over moderate heat.  Pour the cream over the chocolate and allow to sit for one minute.  Using a rubber spatula, gently stir the two together until smooth.  Let stand until firm, 30 minutes to 1 hour.

Preheat the oven to 350ºF.  Lightly butter a 10-by-15-inch baking pan.  Line the pan with wax paper; butter and flour the paper.

Whisk the flour with the salt.  In a large bowl, using an electric mixer, beat the butter and brown sugar at medium speed for 3 minute.  Beat in the eggs 1 at a time.  Beat in the vanilla.  At low speed, beat in the flour in 3 additions; the batter will be fairly stiff.  Spread the batter in the pan.  Bake for 18 to 20, or until a cake tester inserted in the center comes out clean.  Transfer to a rack to cool completely.

Cover the baking pan with a large wire rack and invert.  Remove the pan and peel off the wax paper.  Invert the cake onto a large cutting board.  Using a serrated knife, halve the cake crosswise.  Spread the ganache evenly over one of the cake halves, leaving a 1/8-inch border.  Top with the other cake half.  Cover and refrigerate until the ganache is set, at least 2 hours.

Trim the edges of the cake.  Cut the cake lengthwise into 4 strips, then cut each strip crosswise into 8 bars.  Serve chilled or at room temperature.


Reunion

June 16, 2011

When I was about 8 months pregnant with Graham, my oldest child, Randy and I did a Lamaze weekend out of town.  Most OB’s recommend you do some kind of class to prepare you for childbirth and the hospital where we ultimately delivered offered a six week course.  Randy had just started working at Microsoft and was spending a ridiculous number of hours there trying to get up to speed.  The thought of trying to get back across the lake in time for a class stressed him out, so we opted to cram all those classes into one weekend instead.

Sometimes things happen for a reason and I think we ended up going this Lamaze route so we could meet an incredible group of people.  There were 12 couples, all due within a few months of each other, and over the course of the weekend and talking about things like contractions and bed-rest and colostrum, we got to know each other.  We were all in this incredibly heady time in our lives – about to have our first baby.  Scared, excited, scared and um, scared.  The weekend ended and we drifted away from each other and back to our lives.

The first couple had their baby just days before we had Graham.  The husband emailed their news out to the group and, now that we were connected, all the rest of the couples followed suit.  Through this email connection, the women started bonding.  Once all of us had our babies, we began to get together with our brand new babies.

At the time I was in a PEPS group (Program for Early Parenthood Support), an organization I believe in and support.  I even lead a group myself when Graham was a year old.  But my particular group was a little funny.  Everyone was nice but there were some big overachievers in there and everyone seemed to have it together.  No one cried, everyone’s baby seemed to be sleeping, nursing was going well for all the moms – in short, no one was real.  I went to those meetings making sure I had showered, did not cry, bit my lip the whole time, and left feeling like a failure.  It was the weekly gathering of Lamaze ladies where I could be myself.  It was my lifeline.  Being able to walk out of the house unshowered, crying baby in tow, get to a friend’s house who was in a similar mental and emotional space as me, and be able to cry myself – out of exhaustion, frustration, fear, and hormones – is what saved me in those first few months.  One in our group gave us this quote: “You make friends for a reason, a season, or a lifetime.”  It seemed we had made lifelong friends.

Sadly, within a couple of years, 6 of the 12 couples moved away.  We all got busy with our lives, husbands, work, second children.  I have remained extremely close with two of the women – I consider them two of my closest friends.  I wish I saw everyone else more frequently but busy lives and distance makes it difficult.  Donna was one of our true gems and she had the nerve to North Carolina before we knew it.  Donna and I have been keeping in intermittent touch on Facebook and I will occasionally get a comment from her on this blog.  She emailed last week to say that she and the family were heading to town and could we gather?  Of course!

6 adults, 10 kids, 2 pizzas, 2 salads, and 1 cake makes for a rocking good time.  Graham was in heaven because all the six-year-olds were girls.  Spencer was in heaven because there were so many people to play with.  It was so nice seeing them all as such big kids and seeing how truly far we have come.  In true Lamaze group fashion, we shared some of the joys and some of the frustrations we are experiencing.  And we got to sing “Happy Birthday” to one of our group whose birthday is Friday.

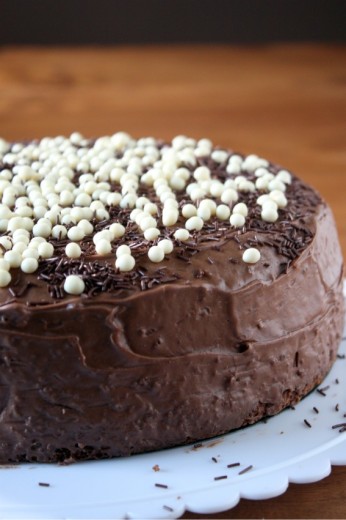
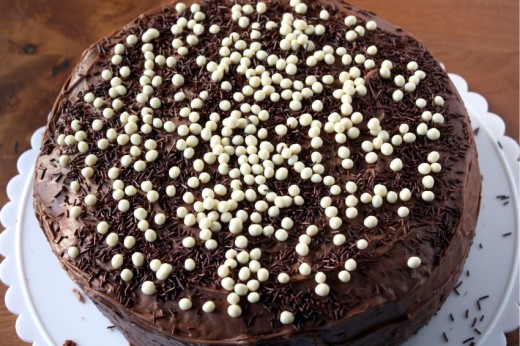
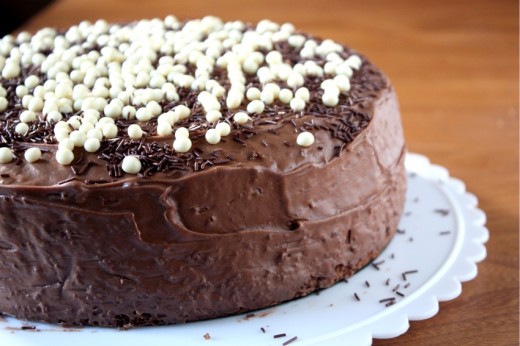
I have been wanting to practice my layer cake technique ever since watching this incredibly helpful video.  A friend’s birthday is the perfect excuse for practice.  This is a Holly B’s recipe and it’s hard for me to believe I have never made it.  Holly mentions in her book that this is the standard birthday cake in her family and now I know why.  It’s a perfect chocolate cake.  The cake itself is moist, the frosting is to die for and the whole thing is incredibly easy and quick to make.  Yes, really.  My only quibble is that there was not enough frosting.  The cake is very crumbly so it needs a crumb coat, but there was not enough for me to do that.  No matter, sprinkles cover a lot of error.  But next time I will one and a half the frosting recipe to make sure there is enough to really cover the cake and for little fingers to dip into.

One Year Ago: Chile Cheese Gratin Sandwiches
Two Years Ago:
Grilled Vegetable Quesadillas
Three Years Ago:
Feta and Ricotta Cheese Pie (ignore the bad photo, this is a terrific recipe)

Sour Cream Chocolate Cake

With Love & Butter

Makes a 9-inch double layer cake

I‘m giving you the recipe as written in the book.  Remember, I would at least one and a half the frosting recipe – even double it and do a crumb coat.  To do so, spread a thin layer of frosting all over the cake and place it in the freezer for about 15 minutes.  Then frost the rest of the cake.  This will keep little crumbs from marring the smooth appearance of your masterpiece.

Cake
1 cup (2 sticks) unsalted butter, at room temperature
½ cup unsweetened cocoa
½ cup boiling water
1 cup granulated sugar
2/3 cup brown sugar, firmly packed
2 tsp. vanilla extract
3 eggs
1 cup sour cream
2 cups flour
1½ tsp. baking powder
1 tsp. baking soda
¼ tsp. salt

Chocolate Sour Cream Frosting
¾ cup sour cream
4 cups powdered sugar
1 tsp. vanilla extract
¼ tsp. salt
1/3 cup (2/3 stick) unsalted butter, melted
¾ cup unsweetened cocoa powder

Make the cake
Preheat the oven to 375ºF with the rack in the center position.  Butter and flour 2 9-inch round cake pans.

Melt ¼ of the butter (½ of one stick) and combine with the cocoa powder and boiling water in a small bowl.  Stir until smooth and set aside.

In the large bowl of an electric mixer, cream the remaining butter with the granulated and brown sugars and vanilla.  Add the eggs and beat until smooth.  Mix in the sour cream, then the reserved cocoa mixture.  Finally, dump in the flour, baking powder, baking soda, and salt and mix just until combined.  Divide the batter between the 2 pans and smooth the tops with a rubber spatula.

Bake the layers for 10 minutes, rotate the pans and bake for 10 to 15 minutes more or until a toothpick just comes out clean.  Don’t overbake – moistness is your goal.  Cool the cakes on a rack.

Make the frosting
Put the sour cream, powdered sugar, vanilla, and salt in the bowl of a mixer.  Whip to combine.  Stir the melted butter and cocoa together.  If the mixture begins to harden, dribble in a little more melted butter and beat until free of lumps.  Add to the sour cream mixture and beat until smooth.

Put one cake layer top-side-up on a serving plate and spread frosting generously to within ½-inch of the edge.  Place the second layer on top, bottom-side-up.  Smooth the remaining frosting over top and sides.

(DT: I made this cake a day ahead frosted and all.  I waited until the frosting had hardened slightly and loosely covered the whole thing with foil.  I think it improved both the flavor and texture of the cake so don’t hesitate to do the same.  You could probably even make it two days ahead, but then I would refrigerate it, covered, and bring it to room temp before serving.)


Pedestrian Tastes

May 16, 2011

The other day I was talking with my friend Julie about pedestrian tastes.  Like, no matter how much you love food and no matter how great your palate is, there are some pedestrian things that you just love.  Pedestrian as in low-brow, even a little trashy perhaps.  I remember reading that Jeffrey Steingarten – food columnist for Vogue, judge on Iron Chef, and food snob extraordinaire – always travels with a stash of Milky Way bars because they are his favorite and he wouldn’t want to be stranded somewhere without one.  Now, I am not a food columnist or a judge for a TV show but I can be kind of a food snob.  But boy, do I love Chex Mix.  And Kettle Korn.  And while I have not stepped foot in a McDonalds in probably 15 years, I still remember their fries as being some of the best I have ever tasted.  And speaking of fries  – Red Robin.  Love them.

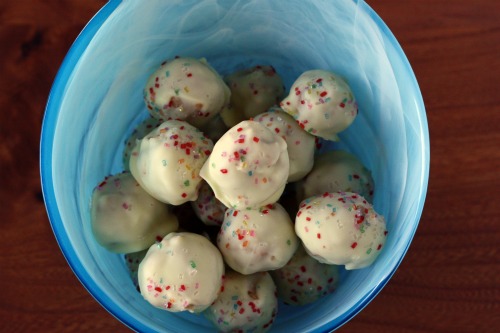
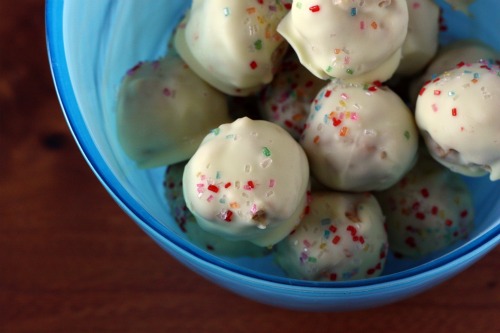
So here we are.  This is a no-bake slightly white-trash morsel disguised as something fancier.  Rice Krispies made round with peanut butter (Jif brand if you are me) and sugar, rolled in melted white chocolate and dusted with sprinkles.  I made a double batch of them so I would have enough for last weekend’s yoga retreat and for various treat-needing functions.  My boys eyed them in a “I don’t know what that is but it has sprinkles on it, so I will try it” kind of way and then gave me their highest praise.  “You’re a good cooker Mommy!”

By the way, check back Tuesday and Thursday this week for more giveaways.  And you have one more day to enter to win the Guy Fieri cookbook.

One Year Ago: Chickpeas with Lemon and Pecorino Romano and Potato Salad with Snap Peas
Two Years Ago: Moroccan Carrot and Hummus Sandwiches and Quinoa with Grilled Zucchini, Chickpeas, and Cumin

White Bark Balls
The Essential New York Times Cookbook
Makes about 3 dozen balls

1½ cups Rice Krispies
1 cup crunchy peanut butter
1 cup confectioners’ sugar
2 tbsp. unsalted butter, softened
¾ pound white chocolate
Colored sugar for sprinkling (optional)

1.  Combine the Rice Krispies, peanut butter, confectioners’ sugar, and butter in a medium bowl, and mix until very well combined.  Firmly compress into balls 1½ inches in diameter.  Place on a baking sheet, cover, and refrigerate until well chilled, at least 4 hours, or overnight.

2.  Line a baking sheet with wax paper.  Melt the white chocolate in a double boiler over medium-low heat, stirring until completely smooth.  Pour the chocolate into a wide shallow bowl.  Working quickly, in small batches, roll the chilled balls in the chocolate, turning gently with a fork.  Transfer to wax paper.  If desired, sprinkle the tops of the cookies with colored sugar.

3.  Place the baking sheet in the refrigerator long enough for the chocolate to become firm, 30 minutes to 1 hour, then transfer the ball to an airtight container.  (The balls can be stored in a cool place for up to 3 days or refrigerated for up to 3 weeks.)


« Older Posts Newer Posts »