Archive for August, 2011

Corn Pudding and a Rant

August 18, 2011

And now, for a bit of a rant.

Like most parents, my mom and dad tried to teach my brothers and I certain things.  There was a long list but some were more non-negotiable than others.  One was Clean Up Your Room.  And Always Be On Time.  Also If Someone Extends an Invitation Do Your Very Best to Be There.  The first one didn’t stick with me but the other two did.  Randy and I are always on time and we also make a big effort to attend any event/party/gathering to which we are invited.  I’m always amazed when people don’t follow suit.  Occasionally, I send out an invitation to something and most people take forever to respond if they do at all.  Is this a Seattle thing?  Does our casual lifestyle mean that we don’t need to RSVP?  Does this happen in your city?  The only thing that bothers me more than the people who don’t respond is the people who decide, on the day of the event, that they can’t make it.  Manners, people.

Done!  Moving on.

The fabulous Jen Yu breezed into town this week.  Do you know Jen?  Her site is one of the very first blogs I read.  Her talent, strength, determination, and her serious cooking and baking chops have made Use Real Butter a must read for me for years.  Jen and her husband were in town for a very limited time and I suggested a potluck at our house to gather the people she wanted to see.  She gave me her list, I sent an evite, and I was surprised by the quick response.  Apparently, Jen rates highly.  I decided to make several dishes to highlight our spectacular produce but, as per usual, on the day of the potluck, I got several cancellations.  I opted to be realistic and bag one of the planned dishes, a corn pudding I have been wanting to try since the corn left the markets last fall.  There was plenty of delicious food for everyone and we had a truly wonderful evening.

But I still had a bag of corn waiting to be used.  My good friend Deb came for dinner last night with her kids and I thought it was time to try out that pudding.  The original recipe uses four ears of corn and feeds 10 people.  I cut the recipe in half and microwaved the other two ears (it’s ok! Melissa Clark does it!) for the kids to eat straight off the cob.  My Graham is now missing both his front teeth so I cut his off the cob for him.  As I watched the corn tumble onto his plate, I had one of those memories that nearly knock you off your feet of my mom doing the same for me at a long-ago kitchen table in a long-ago house.

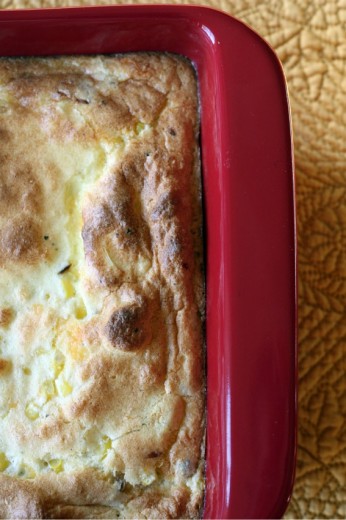
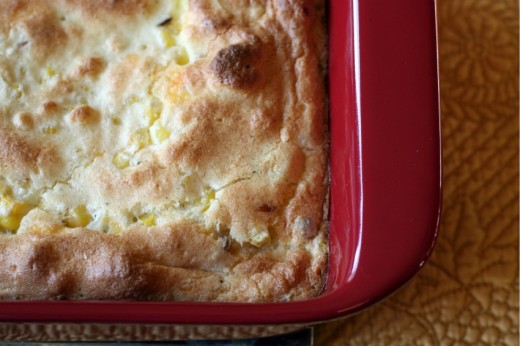
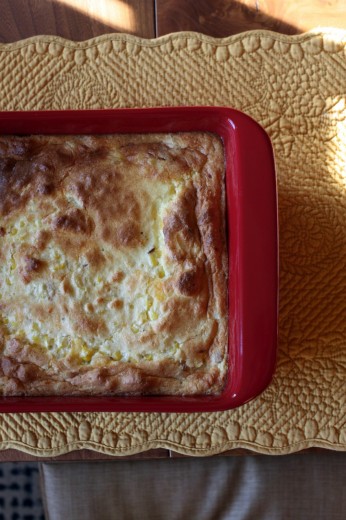
Anyway, this is not the kind of recipe you usually find here unless you are baking.  Butter, cream, milk, cheese, eggs.  I eat all those things, just not usually all together in one dish.  I thought it might be too heavy, a gut bomb.  But it wasn’t at all.  This is a dish where everything works together in harmony so that you don’t taste too much of any one thing and the only true standout is the summer’s pitch perfect corn.  The only bad thing I can say about this recipe is that it doesn’t look like much on the plate.  But looks aren’t everything.

One Year Ago:  Lavender and Honey Tea Cakes and (more corn in my red baking dish! and much prettier on the plate!) Polenta Baked with Corn, Basil, and Tomatoes
Two Years Ago:  Mushroom, Walnut, and Rosemary Pâté
Three Years Ago:  Chilled Roasted Tomato Soup with Mint

Corn Pudding
Adapted from Food & Wine
Serves 4-6  (4 as a main, 6 as a side)

1 cups milk
¼ cup heavy cream
2 ears of corn, shucked
1 tbsp. olive oil
1 large shallot, finely chopped
½ stick of unsalted butter (4 tablespoons)
¼ cup cornmeal
3 large eggs, separated
½ cup grated sharp Cheddar cheese
½ tsp. plus a pinch of salt
Black pepper

Preheat the oven to 350ºF.  Butter an 8-inch square baking dish.  In a saucepan, bring the milk and cream to a simmer over moderate heat.  Add the corn, cover, and cook over moderately low heat, turning a few times, until tender, about 10 minutes.

Meanwhile, in a medium skillet, heat the olive oil.  Add the shallot and cook over moderate heat until softened, about 4 minutes.

Transfer the corn to a plate and let cool.  Remove the saucepan from the heat and swirl in the butter until melted.  Let cool to room temperature.  Using a large knife, cut the kernels off the cobs and add to the saucepan.  Scrape the shallot into the saucepan.  Whisk in the cornmeal, egg yolks, Cheddar, and the ½ teaspoon of salt along with a few grinds of pepper.

In a large stainless steel bowl, beat the egg whites with the pinch of salt at high speed until firm peaks form.  Fold the whites into the corn mixture and pour into the prepared baking dish.  Bake for about 30 minutes, until the corn pudding is puffed and golden brown.  Let the pudding rest for about 5 minutes before serving.  (DT:  I served this about 30 minutes after it came out of the oven.  It had fallen slightly but the texture was still nice and light.)


Yep, Me Too

August 15, 2011

If you read any food blogs other than this one, chances are you have had your fill of posts about peanut butter pie.  If you have no idea what I am talking about, food bloggers around the world have spent the past few days making peanut butter pie, and writing about it, because one in our midst lost her husband unexpectedly.  When someone experiences tragedy, our natural reaction is to want to help – even if we don’t know the person who is suffering.  I always offer food to people in need but seeing as Jennie lives clear across the country, cooking dinner for her and her daughters was not realistic.

Jennie took to her blog and wrote a heartbreaking post about her husband’s love for peanut butter pie and that, if we wanted to help her, we should all make one in his honor.  She said that she never made it often enough for him, that there was always tomorrow or the next week and other dishes, or even just plain old life, got in the way.  I think this emotion resonated with so many people and it is the reason that there is peanut butter pie everywhere you look.  We all assume that if our families are intact today, the same will be true tomorrow.  We all know life is fragile, relationships are tenuous, and yet we soldier on as if everything will last forever.  Of course we do.  If we didn’t, we would be living in a state of constant fear and that isn’t good for anyone.

Randy travels frequently for work, I send my kids off to school/preschool/camp, where they are in the hands of airline captains, teachers, and counselors.  If I wondered every single day whether that plane ride or bus ride or car ride was going to be their last, I would not be able to get out of bed in the morning.  But hearing of the death of a beloved spouse and father of two young children certainly gives me pause and makes me reflect on what I have and how fortunate we are.

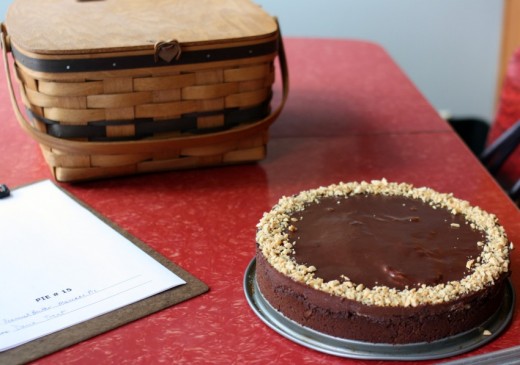
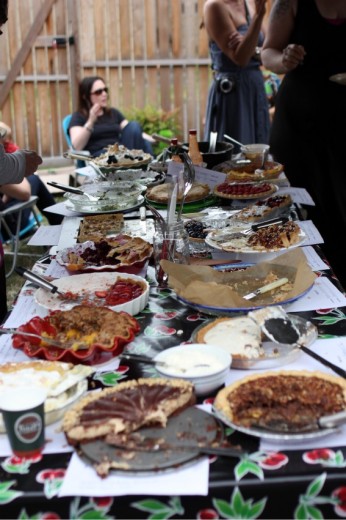
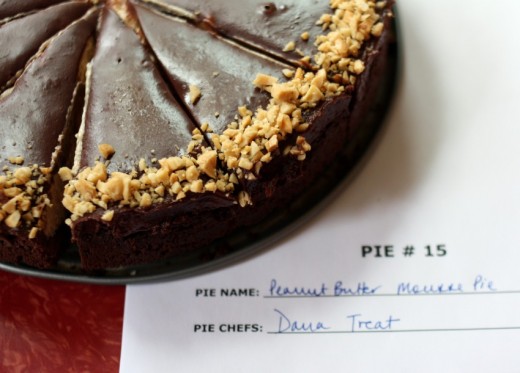
Anyway, more eloquent writers than me have done a much better job of writing about Jennie, about loss, about this amazing community of food bloggers who rally around our own.  I’m a little late to the party but I did make a peanut butter pie.  I didn’t make Mikey’s version, I made one that has been in my “to make” file forever and I brought it to a pie party.  Every year, our friends Matt and Jessica throw a pie party where there are categories, judging, and prizes.  I am not a competitive type but I do have a reputation to uphold and truthfully, I had plans to bring a different kind of pie.  One that celebrates summer in Seattle with nectarines and blackberries or apricots and raspberries.  But I couldn’t make a pie and not make a peanut butter pie.  I didn’t win and I didn’t care – the pie was delicious.  Bittersweet though.

Double-Chocolate Peanut Butter Pie
Food & Wine
Makes one 9-inch pie

Chocolate Crust
4 ounces semisweet chocolate, chopped (½ cup)
½ stick unsalted butter, cut into tablespoons
8 ounces chocolate wafer cookies (from a 9-ounce package), finely ground (2 cups)

Peanut Butter Filling
8 ounces cream cheese, softened (1 cup)
1 cup chunky peanut butter
½ cup sugar
2 tsp. pure vanilla extract
1 cup well-chilled heavy cream
¾  cup salted roasted peanuts, chopped
Kosher salt

Chocolate Topping
4 ounces semisweet chocolate, chopped (½ cup)
½ cup heavy cream

Make the chocolate crust
Preheat the oven to 375ºF.  In a medium glass bowl, combine the chocolate and butter and microwave at high power in 20-second intervals until the chocolate is melted.  Stir well, then stir int eh cookie crumbs.  Press the cookie crumbs over the bottom of a 9-inch springform pan and 1½ inches up the side.  Bake the crust for 10 minutes, or until set; the crust will continue to firm up as it cools.

Make the peanut butter filling
In a large bowl, using a handheld mixer, beat the cream cheese with the peanut butter, sugar, and vanilla extract until blended.  In another large bowl, using the same beaters, whip the chilled cream until firm.  Fold one-third of the whipped cream into the peanut butter mixture to loosen it, then fold in the remaining whipped cream and ½ cup of the chopped peanuts.  Spoon the filling into the crust, smoothing the surface.  Sprinkle lightly with salt and refrigerate until set, about 3 hours.

Make the chocolate topping
In a medium glass bowl, combine the chocolate with the heavy cream and microwave at high power in 20-second intervals until the chocolate is melted and the cream is hot.  Stir the chocolate topping until blended and then cool to barely warm, stirring occasionally.

Spread the chocolate topping over the peanut butter filling and refrigerate until just firm, 15 minutes.  Sprinkle with the remaining ¼ cup of chopped peanuts around the edge of the pie.  Carefully run a thin knife around the edge of the pie, then remove the springform ring.  Using a sharp knife, cut the pie into wedges.  Run the knife under hot water and dry between each cut.

Make ahead
The pie can be covered and refrigerated overnight.  Garnish with chopped peanuts right before serving.  Serve the pie chilled or slightly cooler than room temperature.


Art, Trade, and Guacamole

August 11, 2011

Thank you all for the sweet comments on my one, two, and three years ago posts.  I will keep on keeping on!  Today I have a recipe for a most special, and very different, guacamole.  If you visit here regularly, you know there is sometimes a story that must be told.  Feeling impatient?  Feel free to scroll down to the bottom – I don’t mind.

The story goes a little something like this.  Four years ago, we met an artist named Erik Hall.  We were looking for a painting to fill a large wall in our dining room and we stumbled upon him (in the old-fashioned way, not the internet way) at an art fair.  We were struck by the beauty in his work and learned that he took commissions for paintings.  Over the course of several dinners, we became friends with him and his then-girlfriend/now-wife Amy, who is a talented artist in her own right.  And we got the most beautiful painting, one that makes me happy every time I step foot in the dining room.

Erik and Amy are not only talented artists, they are good business people with an eye for the talent of others.  They have opened a beautiful gallery where, once a month, they do an opening  for an artist they represent.  Last year, we attended several of those openings – lovely all of them.  Amazing art, nice wine – but the foodie in me thought they needed a nibble.  When you invite people somewhere between the hours of 5 and 7pm, there needs to be at least cocktail nuts.  So I offered my services.  I told them I would cater one of their parties pro bono and if they and everyone else liked having food there, we could figure out some kind of deal.

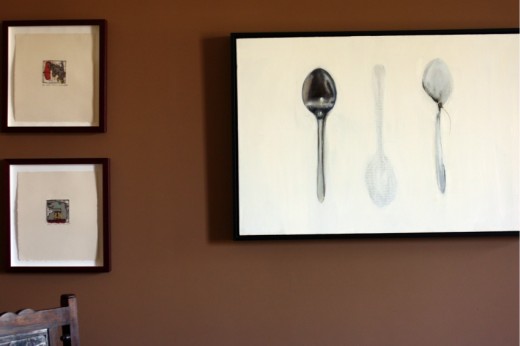
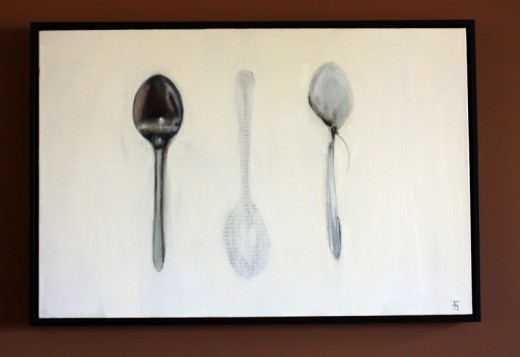
At that party, where gallery owners and visitors alike really did like having food there, I fell in love with some spoons.  Not just any spoons.  This simple beautiful painting of a trio of spoons.  In a gallery full of stunning art, I was immediately drawn to this lovely piece.  It was on a back wall, not even the star of the show, but I just stood in front of it, mesmerized.  Which, as it turns out, did not go unnoticed by Erik.

The day after the opening he called with a proposition.  We could pay a bit of money for the painting and do the rest in trade.  Food trade.  I didn’t even ask for details before I said yes.  What we ultimately agreed to was I would cater six of the year’s openings which I thought was a very fair deal.  I have done five so far, Erik’s show in November is the last one, and all have been so much fun and more than worth having those spoons hang on my dining room wall ever since January.

(A beautiful woman makes beautiful art.)

I catered last Thursday’s show and it was a special one for us.  Gretchen Gammel is an artist that we have had our eye on ever since we have known Erik and Amy.  Around the time that Erik finished our commissioned painting, we saw our first Gretchen show in their gallery.  Gretchen features a theme each year and that year it was people in boats.  Randy, having been in the Navy, got it in his head that he would like, some day, to commission Gretchen to do a family portrait of us in a boat.  The timing was tricky.  She was ready, we weren’t.  We were ready, she moved to France.  Finally early last summer, we had her over so she could get to know us, meet the boys, get a better sense for who we are as a family.  Gretchen started reading my blog too.  Just before Thanksgiving, she brought us this.

There are so many reasons I love this painting.  The obvious of course – it’s our family.  But there are so many special things she did here.

She put me in purple (my favorite color) and got my tattoo (and made me look quite glamorous, I must say).  She put Randy in, what we now call, a “Daddy shirt”, totally his style.  Seeing Spencer, my little somewhat-tyrant, in a Napoleon hat totally cracked me up.

And I think of all of us, she got Graham’s face just right.  That flag he is flying behind us – well, Gretchen copied what his handwriting looked like from the photo in this post.  Amazing, huh?

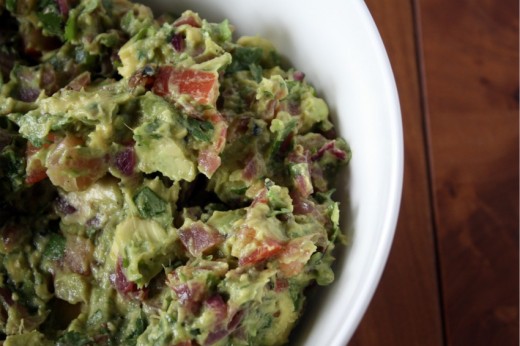
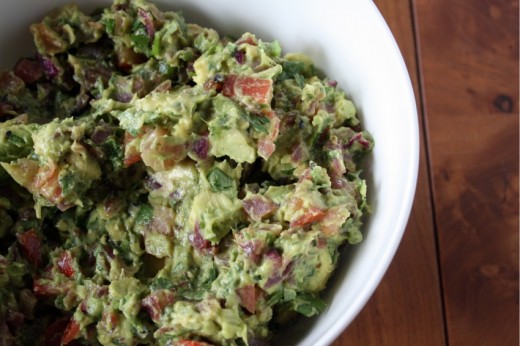
So let’s see.  Art, artists, spoons, people in boats, Napoleon hats, and now finally guacamole.  I was paging through The Essential New York Times Cookbook looking for ideas for the show when I saw this recipe.  I am a guacamole purist.  Avocados, lime, salt, pepper, cilantro.  Nothing else needed.  Sometimes I will add tomatillos but even then, I feel like they are just helping out the limes with sour and acidity.  Here we have onions that have been marinated and grilled, tomatoes, jalapeño peppers – all things that of course go with avocados and lime but for a moment I wondered, would it just be too much?  Amanda Hesser, in her head note to the recipe, put me at ease.  She is also a purist but really liked the flavors here and if it’s good enough for Amanda Hesser…  Obviously, it was fabulous.  A little more work but worth it for a little more oomph in something is already basically perfect.  Finally, I have a theory that no matter how much guacamole you make it will all get eaten.  I put that theory to the test for this party and it turns out that if you make a serious ton of the stuff, there will be some left over.  Oh darn.

Guacamole Previously on Dana Treat:  Simple Guacamole
One Year Ago:  Israeli Couscous with Olives and Roasted Tomatoes
Two Years Ago:  Cheese Balls Three Ways
Three Years Ago:  Farro with Green Beans and Corn

Grilled Onion Guacamole
Adapted from The Essential New York Times Cookbook
Serves 4-6

2 tbsp. vegetable oil
2 tbsp. fresh lemon juice
1 tbsp. red wine vinegar
1 tsp. ground cumin
¾ tsp. salt, plus more to taste
1 tsp. cracked black pepper
1 large red onion, cut into ¼-inch-thick slices
3 avocados
1 large tomato
1 garlic clove, minced
2 serrano chiles, seeded and chopped
¼ cup fresh cilantro, chopped
Juice of 2 limes

Combine the oil, lemon juice, vinegar, cumin, salt, and pepper in a small bowl.  Pour into a shallow dish, add the onion, and let marinate for 1 hour.

Heat a charcoal or gas grill until hot (or heat the broiler, with the rack 6 to 8 inches from the flame).

Drain the onion and place on the grill (or on the broiler pan under the broiler).  Grill for 3 minutes per side (4 minutes per side if broiling).  Let cool slightly, then coarsely chop, discarding any bits that have charred.

Peel, halve, and pit the avocados, and cut into ½-inch dice.  Seed and dice the tomato.

Combine the grilled onion, avocado, tomato, garlic, chiles, and cilantro in a bowl, mashing the avocado slightly as you go.  Season with salt and lime juice.

(As we all know, guacamole starts to turn brown as it oxidizes.  You can stall this process slightly by place a piece of plastic wrap directly on the surface of the guac, trying not to trap any air.  You can store it like this in the refrigerator for several hours.  Bring it to room temperature before serving and stir gently before doing so.)


Fall Classes Announced!

August 9, 2011

I have a long story and an amazing guacamole recipe heading your way later today, but wanted to let you all know that I have added new classes for September and October.  You can read about them below and they will also be on under the Classes tab.  If you would like to reserve a spot, send me an email.  Hope to see some of you!

Fall Classes 2011

September – Weeknight Dinners
Wednesday*, September 21st 6:30-9:30pm  $60
Thursday, September 29th 6:30-9:30pm  $60  Class sold out – Email me to be put on the waiting list

As much as I love to entertain and make dinner party worthy fare, we all need to eat  regular food every night.  For me, a recipe that is quick and easy, but also tasty and satisfying, is worth its weight in gold.  In this class, we will make four different main course options along with a classic salad that goes with just about everything.  From a dressed-up version of grilled cheese and tomato soup to a spicy baked Chilaquile dish (no frying involved!), these are healthy tasty meals you and your family will enjoy with no fuss.  Recipes will include:

Leek and Tomato Soup with Ricotta Toasts
Broccoli, Rice, and Feta Cheese Sauté
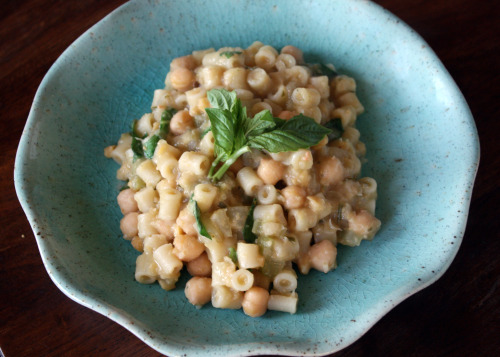
Pasta with Chickpeas, Chile, and Rosemary
Black Bean Chilaquiles
Weeknight Salad with Red Wine Vinaigrette

October – Fall Seasonal Feast
Thursday, October 13th 6:30-9:30pm  $65
Thursday, October 27th 6:30-9:30pm  $65

While the summer farmers’ markets are pretty exceptional with their tables of berries, stone fruits, and summer squashes, it is the fall markets that make my heart go pitter-pat.  October is a true time of bounty in our corner of the world.  Our growing season gets started late and goes late which means that you can still find eggplants and peppers of all types while the mushrooms and winter squashes are starting to make their appearances.  In this class, we will make a bit of the best of everything from a rich gorgeous Eggplant Caponata to say goodbye to summer, to an Apple and Candied Ginger Crisp to welcome in the beautiful fall fruit.  Recipes will include:

Eggplant Caponata
Roasted Pear Salad with Fig Vinaigrette
Chanterelle Mushroom Risotto
Cider Braised Red Cabbage with Apples
Maple Roasted Delicata Squash
Apple Crisp with Candied Ginger

Coming in November – Favorites from My Family’s Thanksgiving Table
Coming in December
– Special Holiday Brunch and the 4 Doughs and 1 Batter baking class


Another Look at a Favorite

August 6, 2011

At the bottom of each of my posts, just before the recipe, I offer to you what I was making one, two, and three years ago.  Why do I do this?  Partly because other blogs I like do it, partly because I want to offer you other seasonal recipes that you might not have seen when I originally wrote about them, partly as a reminder to myself of the things I have made.  Truthfully, it’s kind of a pain in the neck.  Do you care?  Do you click back to those old recipes?

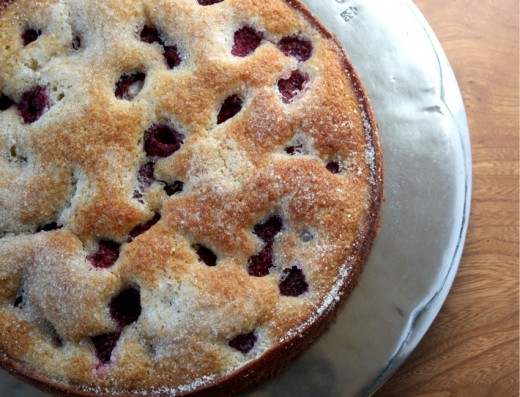
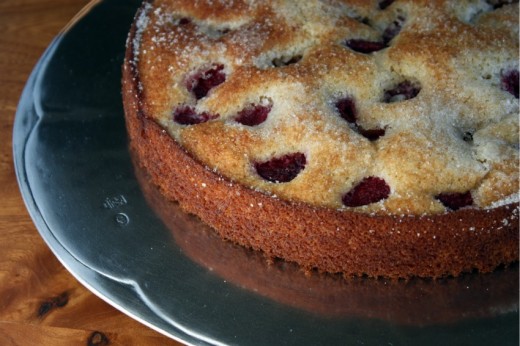
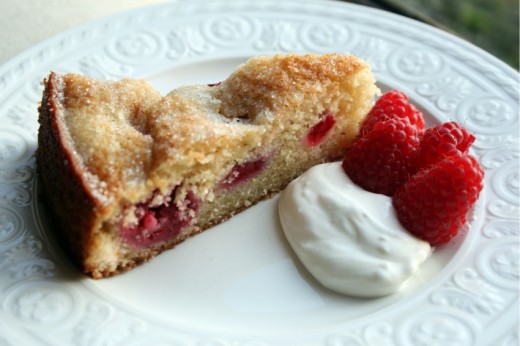
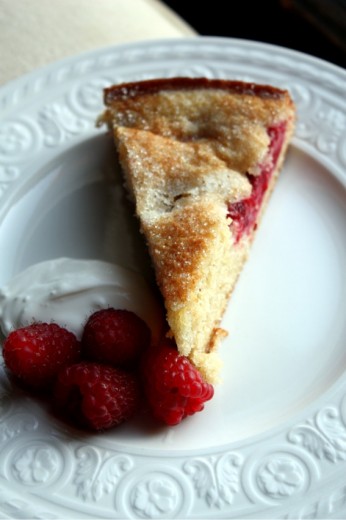
In my last post, as I was scrolling through my three years ago recipes, I came across this cake.  It was no surprise to see it there – I make it every August and have for the past nine years.  As soon as decent raspberries show up in the market, I make this cake, usually multiple times.  Looking at the old sad photo from that three years ago post, I knew I had to write about it again, this time with a better photo.

This cake is so simple and it shows off the raspberries beautifully.  I find raspberries to be a delicate berry, you don’t want to overwhelm them in either taste or texture.  This cake is sturdy but not dry and it has a subtle and yet diffrent (from the Marsala) flavor that allows the berries to shine.  I’ve made the delicious side cream with both crème fraîche and sour cream and I have to say, unless you have made your own crème fraîche, save yourself a few bucks and just use sour cream.

One Year Ago:  Rice Noodles with Marinated Tofu and Shiitake Mushrooms
Two Years Ago:  Grilled Potato Slices with Salt and Vinegar
Three Years Ago:  Olive and Jarlsberg Sandwich

Raspberry Cake with Marsala
Bon Appétit
Makes one 10-inch cake

I have made this cake in both a 9-inch and a 10-inch springform pan.  Both work fine.  I usually bake with a superfine sugar but used a coarser one for this cake and really liked how the top got a little crunchy.

1 ½ cups all purpose flour
1 teaspoon baking powder
1 teaspoon salt
¼ teaspoon baking soda
¼ teaspoon ground nutmeg
½ cup Marsala
¼ cup fresh orange juice
14 tablespoons (1 ¾ sticks) unsalted butter, room temperature, divided
1 cup plus 4 tablespoons sugar
2 large eggs
1 teaspoon vanilla extract
1 teaspoon grated lemon peel
4 cups fresh raspberries, divided

2 cups crème fraîche or sour cream

Position rack in center of oven and preheat to 400°F.  Butter 10-inch-diameter springform pan.  Whisk first 5 ingredients in medium bowl to blend.  Combine Marsala and orange juice in small bowl.  Beat 12 tablespoons butter and 1 cup sugar in large bowl until well blended.  Beat in eggs, vanilla, and lemon peel.  Beat in Marsala mixture in 2 additions alternately with flour mixture in 3 additions.  Transfer batter to prepared pan.  Sprinkle with 1 1/2 cups raspberries.

Bake cake until top is gently set, about 20 minutes.  Reduce oven temperature to 375°F.  Dot top of cake with 2 tablespoons butter and sprinkle with 2 tablespoons sugar.  Continue baking until tester inserted into center of cake comes out clean, about 15 minutes.  Cool in pan on rack.  Release pan sides; transfer cake to platter.  Cool to room temperature.

Mix crème fraîche and 2 tablespoons sugar in small bowl.  (Cake and crème fraîche mixture can be made 8 hours ahead. Let cake stand at room temperature. Cover and chill crème fraîche mixture.)  Cut cake into wedges.  Top each with dollop of crème fraîche and fresh raspberries and serve.


« Older Posts Newer Posts »