Archive for December, 2010

Six

December 22, 2010

On November 28th, Graham turned six.  Six??  It seems that just in the last six months or so, he has shot up and started looking like a bona fide boy.  His build is exactly like that of my brothers who are 6’4″ and 6’1″ and slim.  He looks less like the baby he was and more like the boy he will become.  I’m not sure I’m ready for that.  (See his right ear?  How it sticks out just a bit?  My brother Michael has been saying, since he was a baby, that girls will go crazy over that ear.)

Life with Graham has felt different in the time that he has become a big boy.  He is more defiant – something he has never ever been.  He is still incredibly compliant and eager to please, but we are getting more attitude.  Considering he is still just about the happiest person I have met, that he still has never had a melt-down that lasted longer than 10 seconds, and that in the past 10 days he has lived through stomach flu, an ear infection severe enough to puncture an eardrum (without ever telling us his ear hurt), and a pneumonia diagnosis with a smile on his face all the while, I think we are due a little attitude.

We have so much to be thankful for and so much to be proud of.  Graham is thriving in kindergarten.  Randy and I could not have dared hope for the success he is having.  Because he often struggles with things that other kids seem to grasp effortlessly, we kind of thought that school – the reading, writing, math – would be hard for him.  In fact, according to his teacher, his resource room teacher, and his report card (!), he is right on track, even for the typical kids in the class.  And he is excelling in some areas.  True to his nature, those areas are “works well on a team” and “respectful and kind to others”.  He is starting to read and to do addition and subtraction.  It is incredible to see him do so well.  And perhaps most importantly, he is loving school.  He loves the kids, he loves going to the library and checking out books and he loves loves loves Mr. Roberts, the P.E. teacher.

To have him do so well in school and yet still be the child who can drive me to distraction by not understanding the difference between his birthday party day and his actual birthday day, or who cannot comprehend that is is not night time even though it is dark, is a continual source of frustration for me.  I tend to hear the same question over and over again, or respond to a question only to have him say the exact opposite.  Every conversation I have with him, every request I make of him, I can feel myself gathering my patience, steeling myself, because so much of what I say he doesn’t get.  He hears me – his hearing is fine – he just doesn’t process what I say in the same way that a typically developing child would.  Often I feel that he still needs so much from me and that sometimes makes me want to bang my head against the wall.

And there in, once again, lies the problem.  Me.  I feel like my patience is constantly at the breaking point and my tolerance for the noise level of these two oh-so-very-noisy boys is constantly low.  Is this Graham’s problem?  Of course not.  He is doing the very best he can, just as he always has.  It is not his fault that he doesn’t process language the way that, say, his brother does.  If anything, he is trying extra hard, being a child who is so eager to please.  I have spent so much time thinking about my reactions to him and even writing about them here on this blog, and I feel like I am doing worse with him rather than better.  It is a terrible way to feel.

Of course, I know I am a good mother.  I tell him regularly how wonderful he is.  I tell him how proud I am at least ten times a day.  I applaud his efforts in school and cheer him on when he tells a mean kid, “I don’t like that!”.  I kiss and hug him and hold him and I read to him and feed him healthy snacks.  I beam with pride when he tells the grocery check-out person to be careful with the eggs because they are fragile, and then praises her with a heartfelt, “Good job!” once they are in the bag.  I feel so very fortunate to have such a nice and delightful child filled with kindness, someone who adults beam at as he yells hello to them and introduces himself as Graham Cracker.  I take him places and I try very hard to bite my tongue when he loses yet another jacket or says something that makes absolutely no sense.  But I get in bed each night and feel guilty about how I have not really stuck to my guns and tried to be patient.  And I have yelled – a thing I promised myself, in my days before kids – that I would never do.

It’s not that I want a mother of the year award.  I certainly don’t want a different child.  I think what I really want is to raise a child who is kind, self-confident, and generous.  A child who gives back to the world, forms bonds and friendships with all different people, and I can definitely see that Graham, already at age six, is that kind of person.  This past spring, I attended an amazing birthday party where the birthday girl asked each of us to submit our favorite poem.  Her sister’s choice is the one you will see below.  I cry every time I read it.  I want to be that mother.  The one who inspires a poem as beautiful and moving as this one.

The Lanyard
by Billy Collins

The other day I was ricocheting slowly
off the blue walls of this room,
moving as if underwater from typewriter to piano
when I found myself in the L section of the dictionary
where my eyes fell upon the word lanyard.

No cookie nibbled by a French novelist
could send one into the past more suddenly-
a past where I sat at a workbench at a camp
by a deep Adirondack lake
learning how to braid long thin plastic strips
into a lanyard, a gift for my mother.

I had never seen anyone use a lanyard
or wear one, if that’s what you did with them,
but that did not keep me from crossing
strand over strand again and again
until I had made a box
red and white lanyard for my mother.

She gave me life and milk from her breasts,
and I gave her a lanyard.
She nursed me in many a sick room,
lifted spoons of medicine to my lips,
laid cold face-cloths on my forehead,
and then led me out into the airy light

and taught me to walk and swim,
and I, in turn, presented her with a lanyard.
Here are thousands of meals, she said,
and here is clothing and a good education.
And here is your lanyard, I replied,
which I made with a little help from a counselor.

Here is a breathing body and a beating heart,
strong legs, bones and teeth,
and two clear eyes to read the world, she whispered,
and here, I said, is the lanyard I made at camp.
And here, I wish to say to her now,
is a smaller gift – not the worn truth

that you can never repay your mother,
but the rueful admission that when she took
the two-tone lanyard from my hand,
I was as sure as a boy could be
that this useless, worthless thing I wove
out of boredom would be enough to make us even.


“Did You Make That Cake?”

December 21, 2010

(So, did you hear?  I’m posting each day until Christmas.  If you are one of those people who doesn’t check in with your favorite blogs over the weekend (what?), I actually need to send you back so you can see the amazing salted caramel brownies, braided cranberry walnut bread, and holiday biscotti that I talked about over the past couple of days.)

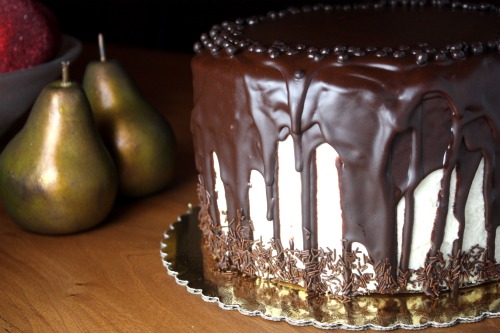
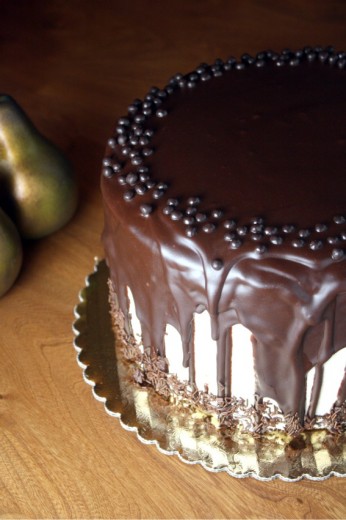
“Did you make that?”  The phrase is music to a baker’s ears.  Presenting a dessert and having people think that maybe you bought it at a bakery because it looks so good is the ultimate compliment.  Especially for a baker who makes delicious things that don’t always look all that great.  Layer cakes are not necessarily difficult but they can still be exasperating.  You can have the best intentions, you can follow the recipe to a “t”, and the thing can still not turn out right.  But.

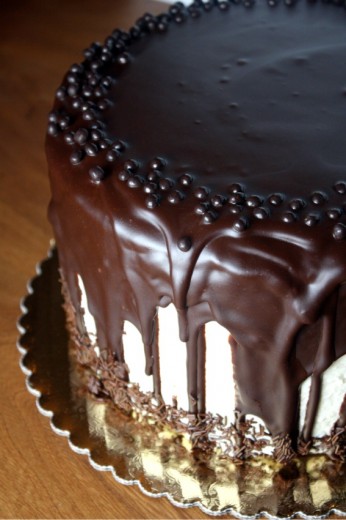
Fact: I brought this cake to a solstice party this weekend.  Fact: I did make it.  Fact: Even thought I am my own worst critic, I was really proud about how it looked.  Fact: I may have used a little too much chocolate ganache on the top.  Fact: I was a little nervous about the flavor of the frosting due to using cappucino oil rather than the coffee extract called for in the recipe (I ordered some coffee extract from an Amazon vendor and, 8 days later, it had still not arrived).  Fact: I opted out of paying $9 for chocolate covered espresso beans that were supposed to garnish this beauty.  Fact: I did not taste this cake.

Lame, huh?

Our lovely babysitter Catherine, who was watching our kids while we went to said solstice party, requested that we get home no later than 10pm so she could catch her red-eye flight home for the holidays.  Because of this fact, we got to the party early so we could maximize our enjoyment.  There was a wonderful cocktail.  They served turducken (which fascinated Randy), there were vegan rice krispie treats which made me want to weep with joy, and there was a tour of the now beautiful house that used to be, um, not quite as beautiful.  It was toward the end of the tour that I looked at my watch and realized that our coach was about 1 minute away from turning into a pumpkin.

I ran to the kitchen, I opened the box that I had brought the cake in.  There may have been ooohs and aaaahs.  I may have knocked over a bottle of vermouth in my hurry to open the box.  I may have cut large and not-even slices in my haste.  I may have licked frosting off my fingers.  But I did not get a taste of this cake.  Furthermore, my coffee-hating, supposedly chocolate-disliking husband has been moaning about how he didn’t get a piece of cake since the party.

I asked my solstice friend to send me a report on how it was and how people liked it.  Normally, I would wait for the dispatch before writing about it.  But the cake recipe came from my new BFF baking cookbook so I know, I just KNOW it was good.  It was nice to hear that the cake was the talk of the party.

So, I almost never do this, but I am not going to post this recipe.  It is, as you can imagine, quite long and I am on my second week of having sick kids in the house.  It comes from the Baked Explorations cookbook which I think I would just copy out recipe by recipe and give to you all if I could – it is that amazing.  If anyone is DYING to make it, email me.  I will photocopy and send you the recipe.

UPDATE: Of course, I ended up getting a lot of email requests for the recipe, so here it is!

Chocolate Coffee Cake
Baked Explorations
Make an 8-inch 3-layer cake

For the classic chocolate cake
¾ cup unsweetened cocoa powder
2/3 cup sour cream
2 2/3 cups flour
2 tsp. baking powder
1 tsp. baking soda
½ tsp. salt
¾ cup (1½ sticks) unsalted butter, softened
½ cup vegetable shortening
1½ cups granulated sugar
1 cup firmly packed dark brown sugar
3 large eggs, at room temperature
1 tbsp. vanilla extract

For the coffee buttercream
1½ cups granulated sugar
1/3 cup flour
1½ cups whole milk
1/3 cup heavy cream
1½ cups (3 sticks) unsalted butter, softened, cut into small pieces
1 tsp. vanilla extract
3 tbsp. coffee extract

For the chocolate glaze
8 ounces good-quality (60 to 72%) dark chocolate, coarsely chopped
¾ cup (1½ sticks) unsalted butter, softened, cut into pieces
1 tbsp. light corn syrup

Make the classic chocolate cake
Preheat the oven to 325ºF.  Butter three 8-inch round cake pans, line them with parchment paper, and butter the parchment.  Dust the parchment with flour and knock out the excess flour.

In a medium bowl, mix the cocoa powder and sour cream with 1¼ cups hot water and set aside to cool.

In a large bowl, sift the flour, baking soda, baking powder, and salt together and set aside.

Using a standing mixer fitted with the paddle attachment, beat the butter and shortening together on medium speed until light and fluffy, about 5 minutes – the mixture will appear to string or ribbon throughout the bowl.  Add the sugars and beat on medium speed until light and fluffy, about 5 more minutes.  Add the eggs, one at t time, mixing about 10 to 15 seconds after each addition until the egg is incorporated into the mixture.  Then turn the mixer to low, add the vanilla, and beat until incorporated.  Scape down the sides of the bowl and mix again for 30 seconds.

Beginning with the dry ingredients, add the dry mixture and the cocoa mixture to the mixer bowl in three alternating parts, ending with dry.  Divide the batter among the prepared pans.  Use an offset spatula to level the batter.  Bake the cakes for 35 to 40 minutes, rotating the pans halfway thorough the baking time, until a toothpick inserted in the center comes out clean.  Transfer the pans to a wire rack and cool for 30 to 45 minutes.  Turn the cakes out onto the rack and let them cool completely.  Remove the parchment.  (DT: I made these cakes 2 days ahead, wrapped them well in foil and left them out at room temperature.)

Make the coffee buttercream
In a medium, heavy-bottomed saucepan, whisk the sugar and flour together.  Add the milk and cream and cook over medium heat, whisking occasionally, until the  mixture comes a boil and has thickened, about 10 to 15 minutes.

Transfer the mixture ot the bowl of a standing mixer fitted with the paddle attachment.  Beat on high speed until cool (this takes about 7 to 9 minutes of mixing; however, you can speed up the process by pressing bags of frozen berries or frozen corn around the sides and bottom of the mixing bowl).  Reduce the speed to low and add the utter; mix until thoroughly incorporated.  Increase the speed to medium-high and beat until the frosting is light and fluffy, about another 1 to 2 minutes.

Add the vanilla and coffee extracts and continue mixing until combined.  If the frosting is too soft, put the bowl in the refrigerator to chill slightly, then beat again until it is the proper consistency.  If the frosting is too firm, set the bowl over a pot of simmering water and beat with a wooden spoon until it is the proper consistency.

To assemble the cake
Place one cake layer on a serving platter.  Trim the top to create a flat surface, and evenly spread about 1¼ cups frosting on top.  Add the next layer, trim and frost it, then add the third layer.  Spread a very thin layer of frosting over the sides and top of the cake and put it in the refrigerator for about 15 minutes to firm up.  Spread the sides and top of the cake with the remaining frosting.  Refrigerate it for 15 minutes to firm up.

Make the chocolate glaze
Place the chocolate, butter, and corn syrup in the top of a double boiler.  Using a rubber spatula, stir the mixture until the chocolate and butter are completely melted and smooth.  Remove the pan from over the heat and stir the glaze to release excess heat.

Glaze the cake
Line a rimmed baking sheet with parchment paper.  Place your cake on a wire rack over the baking sheet.  Slowly pour ¾ cup of the glaze over the cake.  Use a small offset spatula to smooth it out to the edges.  Place the cak in the refrigerator for 5 minutes to set the glaze.  Remove from the refrigerator and slowly pour the rest of the glaze over the cake.  It should run down the edges in thick streams.  (DT: I didn’t use all the glaze and I would use even less next time.)  Chill the entire cake for 20 minutes, or until the glaze is set, then transfer the cake to cake plate.  Serve at room temperature.

The cake can be stored, covered in a cake dome or cake saver, at room temperature for up to 3 days.


Holiday Biscotti

December 19, 2010

If you have not noticed, I’m not a big recipe round-up person.  Some food bloggers are really good about going back through their old posts and listing out, say, all the recipes that would work well for Christmas cookies.  I love reading those posts.  But me?  Writing one of my own?  Not so much.  I often get asked how I have time to keep up with this blog and the truth is that I have time because I make time.  Writing here and connecting with all of you is important to me, and so I make time.  It’s not that coming up with the perfect list of Christmas cookies isn’t important to me, but I’d rather use my precious blogging time to just write.  And avoid doing laundry.

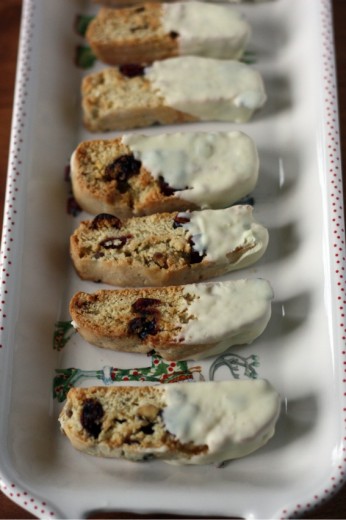
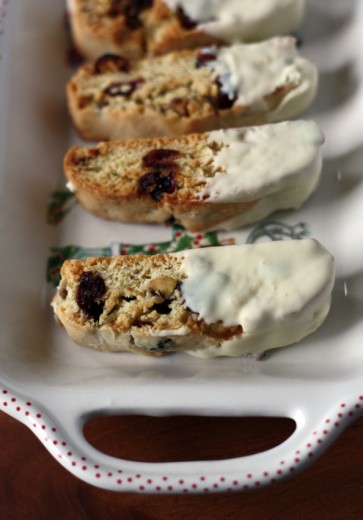
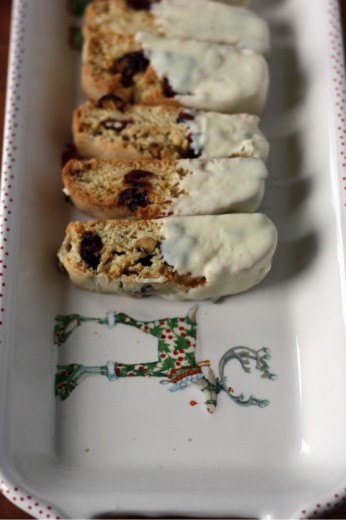
You are most likely up to your eyeballs in cookie recipes these days but I thought I would send just one your way.  These are a favorite of mine.  I like that they look holiday-ish but aren’t the traditional cut-outs with frosting and sprinkles.  (I hate making those but my kids and husband love decorating and eating those, so guess who wins that battle?)  I made these a few years back for a cookie exchange with my preschool co-op friends and I was surprised at how quickly they flew off my tray.  They have been a staple ever since.  I have always dipped one end in the white chocolate but feel free to dip the whole bottom part in as Gaby did.  Much prettier.  And speaking of dipping, white chocolate can be a little temperamental.  I suggest buying the good stuff, like Lindt, which melts up better.


Holiday
Biscotti with Cranberries and Pistachios
Adapted from Bon Appétit
Makes about 3 dozen

2 ¼ cups flour
1 ½ tsp. baking powder
¾ tsp. salt
6 tbsp. (3/4 stick) unsalted butter, room temperature
¾ cup sugar
2 large eggs
Grated zest of 1 lemon
1 ½ tsp. vanilla extract
1 tsp. whole aniseed
1 cup dried sweetened cranberries
¾ cup natural unsalted pistachios (salted and roasted work fine too)
6 oz. white chocolate, chopped

Preheat oven to 325 degrees.  Line two baking sheets with parchment paper.  Sift first three ingredients into a medium bowl.  Using electric mixer, beat butter and sugar in large bowl to blend well.  Beat in eggs one at a time.  Mix in lemon peel, vanilla, and aniseed.  Beat in flour mixture just until blended.  Stir in cranberries and pistachios – dough will be sticky.

Turn dough out onto a lightly floured surface.  Gather dough together; divide in half.  Flour your hands and pat each half into a 15-inch log, about 1 ¼ inches wide.  Carefully transfer logs to one of the prepared sheets, spacing 3 inches apart.  Bake logs until almost firm to touch but still pale, about 28 minutes.

Cool logs on baking sheet 10 minutes.  Maintain oven temperature.  Carefully transfer logs to cutting board, leaving the parchment paper on the baking sheet.  Using a serrated knife, cut logs crosswise into generous ½-inch slices.  Use a sawing motion to start each cut and then apply gentle pressure to finish, this will minimize crumbling.  Place slices, 1 cut side down, on the paper lined sheets.  Bake until firm and pale golden, about 12 minutes per side.  Transfer cookies to racks and cool.

Place the white chocolate in a tall deep bowl and place the bowl over simmering water.  Do not let the bottom of the bowl touch the water.  Melt the chocolate, stirring occasionally, and do not let any steam get into the bowl (that would make the chocolate seize.)  Remove from over water.  Dip 1 end of each cookie into melted chocolate, tilting bowl if necessary; shake off excess chocolate.  Place cookies on a waxed paper lined baking sheet and refrigerate until chocolate is firm, about 30 minutes.  (Can be made 5 days ahead.  Store airtight between sheets of waxed paper at room temperature.)


Our Holiday Bread

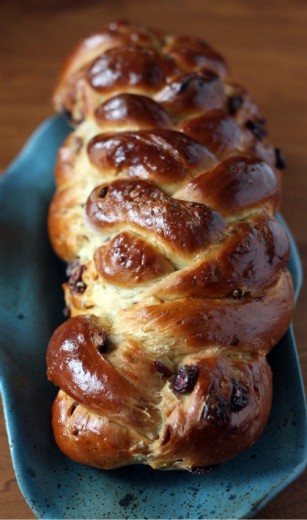
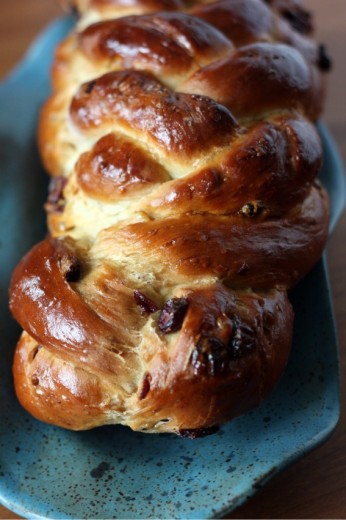
It might seem like cheating that I am kicking off my post-a-day-until-Christmas with something I have already written about.  But here is the thing.  I wrote about this incredible bread back in November of 2008.  I had about 12 readers back then, probably 6 of whom live within a mile of me.  The photo was taken with my old point and shoot camera and it is a terrible photo.  I would just re-direct you to that post, but I have new photos and I have more to say.  I can’t let another holiday season go by without talking about it again.

I have made this bread every Thanksgiving for the last 11 years.  I only know the year I started making it (1999) because our Thanksgiving was remarkable that year.  Not remarkable in that it was so wonderful but in that it was so different.  My parents were in the midst of remodeling their house and so we did the dinner at my grandmother’s which felt weird.  But what felt weirder is that my divorce from my first husband had just been finalized and I was at the family feast alone.  A good distraction from the sadness of that fact was to bake bread.

I was not a great bread baker at the time (I’m still not) but this turned out beautifully.  Both in looks and taste.  The sweetness of it complimented the rest of the meal so well and I have been making it ever since.  Thanksgiving is at our house now and Randy and I have spent ten of them together.  Thanks to a special request, this bread will now be on the Christmas table every year going forward.  It is wonderful at the holidays but I think it would also be terrific at just about any meal.

If you needed any more reason to make this (and please do, you will be astounded by how easy it is and how delicious it is), my brother Michael, who loves good food, asked me to make him two loaves as a holiday gift.  Nothing else – just bread.  He wants to be able to slice it and keep it in the freezer for a special treat.

One Year Ago:  Chocolate Caramel Treasures

Cranberry-Walnut Braid
Adapted from Bon Appétit
Makes 1 Loaf

I have had trouble finding orange extract so I use Simply Organic’s Orange Flavor which is essentially orange flavored oil.

3 cups (or more) bread flour
1/4 cup sugar
2 envelopes quick-rising yeast
1 1/2 tsp. salt
1/2 cup buttermilk
2 large eggs
2 tbsp. (1/4 stick) unsalted butter, melted
1 1/2 tbsp. orange extract
1/3 cup (about) hot water (120-130 degrees F)
1 cup dried cranberries
1/2 cup coarsely chopped walnuts
1 large egg, beaten to blend (for glaze)

Stir 3 cups flour, the sugar, yeast and salt in large bowl to blend. Add buttermilk, 2 eggs, melted butter and orange extract and stir vigorously until well blended. Gradually stir in enough hot water to form soft, slightly sticky dough. Transfer dough to floured work surface. Knead dough until smooth and slightly tacky but not sticky, adding more flour if necessary, about 7 minutes. Knead in dried cranberries 1/3 cup at a time; then knead in walnuts. Form dough into ball.

Oil large bowl. Add dough to bowl, turning to coat with oil. Cover bowl with plastic wrap, then towel. Let dough rise in warm draft-free area until doubled in volume, about 1 1/2 hours.

Lightly oil large heavy baking sheet (or line with parchment paper). Punch down dough. Turn dough out onto floured surface. Divide dough into 4 equal pieces; then divide 1 piece of dough into 3 equal pieces and reserve. Using palms of hands, roll out each of remaining 3 large pieces on work surface to 13-inch long ropes. Braid ropes together. Tuck ends under and pinch together. Transfer braid to prepared baking sheet. Roll out each of the reserved 3 small dough pieces to 10-inch long ropes. Braid ropes together. Tuck ends under and pinch together. Brush large braid with some of egg glaze. Place small braid atop center of large braid. Brush small braid with some of egg glaze. Let rise uncovered in warm area until almost doubled in volume, about 1 hour 15 minutes.

Preheat oven to 325 degrees. Brush loaf again with egg glaze. Bake until loaf is deep golden brown and sounds hollow when tapped on bottom, about 45 minutes. Transfer loaf to rack and cool at least 45 minutes before slicing. (Can be made ahead. Cool completely. Wrap tightly in foil and a plastic bag and freeze for up to 2 weeks. Thaw at room temperature.)


The Best (?) Brownie

December 18, 2010

Okay.  Allllllll right.  Deep breath.

Ever since I can remember, I have adored the combination of chocolate and caramel.  I grew up in a house where my mom cooked good and healthy food almost every night.  But there were also cabinets that housed candy bars, chips, and cookies, and there were always several kinds of ice cream in the freezer.  For dessert each night, we could have candy if we chose and I knew where my priorities lay.  My favorite was a Marathon bar (whatever happened to those?) but I would gladly settle for Rolos, or the Rice Krispie studded $100,000 Bar.  Once in a great while, there would be a gigantic Carmello from which I was allowed to break off a row.  My mom favored Cadbury chocolate with nuts (something I still don’t understand), so the Carmello was mine and I loved every square of it.

Now, I don’t know who started the salted caramel frenzy but I think it might have been Fran.  Do you have Fran’s chocolate where you live?  She of the Gold Bar or the truffles or the simple salted caramels.  Fran started her empire in a small shop located in the neighborhood where I went to school.  There was no bus service and both my parents worked, so I had to wait until about 5pm if my mom could pick me up and until after 7pm if it was my dad.  On those long days, more often than not, I would walk up to Fran’s and treat myself to something.  Sometimes it was just a truffle (although nothing is ever just a truffle in my world) and when I was feeling flush, I had a mini chocolate torte.  This mound of heaven was a crisp chocolate shell with a layer of dark chocolate ganache inside and topped with a generous amount of chocolate mousse.  It was garnished with the most delicate of candied violets and it was served on the cool side so you could eat it out of hand without leaving tell-tale traces of mousse on your face.

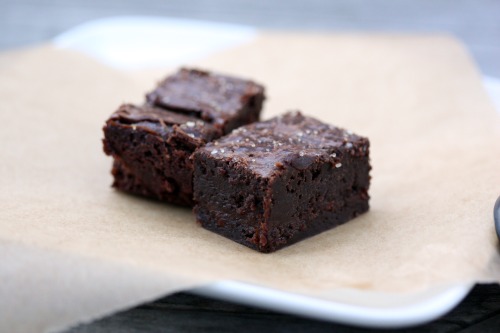
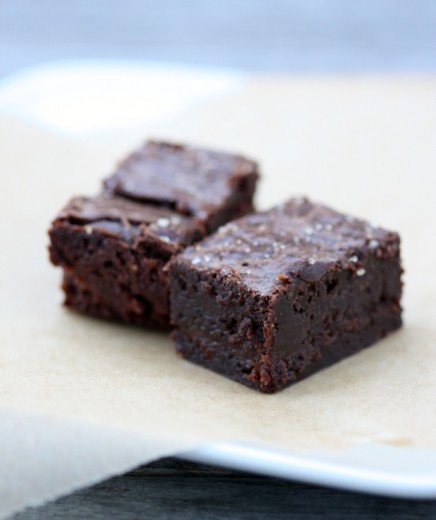
Ahem.  Let’s bring it back around to the brownies, shall we?  I find brownies difficult to photograph.  And there is no way to make you understand through pictures how amazing these are.  Are they so very different than the original Baked brownies?  Not very.  But different enough for me to make them, write about them, and plan on making them again next week.  The caramel is subtle here but so welcome against the backdrop of the rich chocolate.  Maybe I’m not clear.  If I were to be offered a last meal, I would have a bit of a hard time deciding an entrée but dessert would be a brownie.  I love chocolate cake but there is something pure about a brownie.  And this brownie is the best.  At least I think it is.  Maybe I should have another one to make sure.

Oh, and by the way.  I have a back log of things I need to tell you about.  I’m thinking a post a day until Christmas.  What do you think?

One Year Ago: Chocolate Gingerbread Bundt Cake
Two Years Ago: Jalapeño Cheddar Cornbread

Sweet & Salty Brownie
Baked Explorations
Makes 12 large brownies or 24 small ones

For the filling
1 cup sugar
2 tbsp. light corn syrup
½ cup heavy cream
1 tsp. fleur de sel
¼ cup sour cream

For the brownie
1¼ cups flour
1 tsp. salt
2 tbsp. dark unsweetened cocoa powder
11 ounces quality dark chocolate (60 to 72%), coarsely chopped
1 cup (2 sticks) unsalted butter, cut into 1-inch cubes
1½ cups sugar
½ cup firmly packed light brown sugar
5 large eggs, at room temperature
2 tsp. vanilla extract

For the assembly
1½ tsp. fleur de sel
1 tsp. coarse sugar

Make the caramel
In a medium saucepan, combine the sugar and corn syrup with ¼ cup water, stirring them together carefully so you don’t splash the sides of the pan.  Cook over high heat until an instant-read thermometer reads 350ºF, or until the  mixture is dark amber in color (keep a close eye on the caramel at all times, as it goes from golden brown to black and burnt very quickly), 6 to 8 minutes.  Remove from the heat, and slowly add the cream (careful, it will bubble up) and then the fleur de sel.  Whisk in the sour cream.  Set aside to cool.

Make the brownie
Preheat the oven to 350ºF.

Butter the sides and bottom of a glass or light-colored metal 9-by-13-inch pan.  Line the bottom with a sheet of parchment paper, and butter the parchment.

In a medium bowl, whisk together the flour, salt, and cocoa powder.

Place the chocolate and butter in the bowl of the double boiler set over a pan of simmering water, and stir occasionally until the chocolate and butter are completely melted and combined.  Turn off the heat, but keep the bowl over the water of the double boiler, and add both sugars.  Whisk until completely combined and remove the bowl from the pan.  The mixture should be at room temperature.

Add three eggs to the chocolate mixture and whisk until just combined.  Add the remaining eggs and whisk until just combined.  Add the vanilla and stir until combined.  Do not overbeat the batter at this stage or the brownies will be cakey.

Sprinkle the flour mixture over the chocolate.  Using a spatula, fold the dry ingredients into the wet ingredients until there is just a trace amount of the flour mixture visible.

Assemble the Sweet & Salty Brownie
Pour half of the brownie mixture into the pan and smooth the top with a spatula.  Drizzle about ¾ cup of the caramel sauce over the brownie layer in a zigzag pattern, taking care to make sure the caramel does not come in contact with the edges of the pan or it will burn.  Use your offset spatula to spread the caramel evenly across the brownie layer.  In heaping spoonfuls, scoop the rest of the brownie batter over the caramel layer.  Smooth the brownie batter gently to cover the caramel layer.

Bake the brownies for 30 minutes, rotating the pan halfway through the baking time, and check to make sure the brownies are completely done by sticking a toothpick into the center of the pan.  The brownies are done when the toothpick comes out with a few moist crumbs.

Remove the brownies from the oven and sprinkle with the fleur de sel and coarse sugar.  Cool the brownies completely before cutting and serving.  The brownies can be stored, tightly wrapped at room temperature, for up to 4 days.  (DT: I find them easier to get out of the pan neatly when they have rested a bit in the refrigerator.)


« Older Posts Newer Posts »