Category: Pasta

Greek Mac and Cheese

September 23, 2013

Five years ago this month, I went to the first BlogHer Food in San Francisco.  It was an amazing experience.  I didn’t really learn anything about blogging, but I finally got to meet so many people whose blogs I read then (and still read now) and people I knew only from Twitter.  A group of us bonded quickly and many of those people are now friends who I treasure.  One of those people is Allison, who used to write the blog Local Lemons and now is the co-owner of Homeroom in Oakland.

Here is a little story.  Four years ago, while still living in Seattle, Randy and I stole away to San Francisco for a weekend away from our kids.  He had to work one of the days and Allison, one of my favorite blogging friends, met me at the Ferry Building for a day of exploring.  She lives in Oakland, a place that, at the time, I knew next to nothing about.  I wasn’t even quite sure where it was.  Maybe kind of “over there”.  Bay Bridge?  Golden Gate Bridge?  Not sure.  We shared an amazing day of wandering.  We had terrific pizza and shared a bottle of wine at Delfina and I bought my copy of Plenty, then only available in the British version and costing $65, at Omnivore Books.  Along the way, Allison mentioned to me that might be opening a restaurant.  She went on to tell me the incredible story of meeting a like minded person while waiting for a table in a coffee shop, and they were thinking of doing a restaurant serving mac and cheese.  I listened to and supported her.  And in my head I kept thinking, “There are restaurants in Oakland?”

I often think of that day with Allison for many reasons.  One is that she did open that restaurant and they have been incredibly successful from day one.  Another is that Allison is still a close friend of mine and now that we live close to one another, we love spending time with her, her awesome husband Alejandro and their beautiful baby Nico.  And another is how amazing it is to me that I had no perception of Oakland, other than it was “over there”, and now I live here.  And yes, there are lots of restaurants in Oakland!

Recently, Allison and her partner Erin came out with a cookbook and I was lucky enough to get a review copy.  We have enjoyed eating at the restaurant many times and have been to parties where their stellar mac and cheese was on the menu.  I wondered how the restaurant recipes would translate to the home cook.  I am here to tell you this is a winner of a book.  It totally captures the sweet spirit of the restaurant and all the favorite dishes, mac and cheese and sides alike, are in there.  You get a feeling for what it is like to eat at Homeroom and you also get to read about their unlikely partnership.  I never really thought that I had passionate feelings about whether mac and cheese should be served creamy from the pot, or topped with crunchy breadcrumbs from the oven, but in fact I do have extremely strong feelings about this important distinction.  (The latter.  And the book allows you to make most of the macs both ways.)  I made two of the mac and cheese recipes and they were, dare I say it?, better than the restaurant.  Mac and cheese is special, of course.  It is comfort food at its highest level.  Some people would say that there is no reason to get fancy.  That plain ol’ regular mac and cheese is perfect.  I challenge those people to make the Macximus.

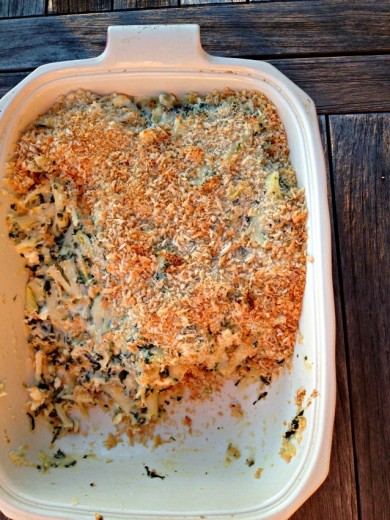
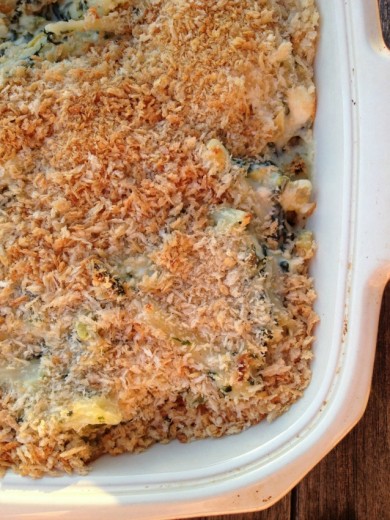
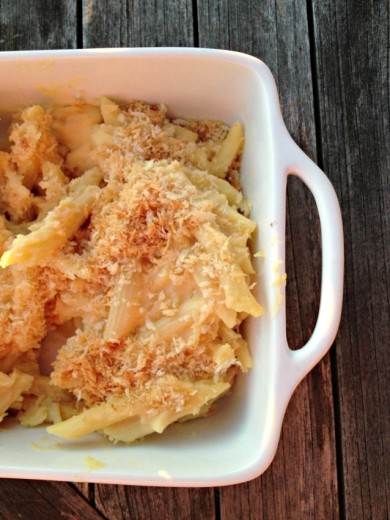
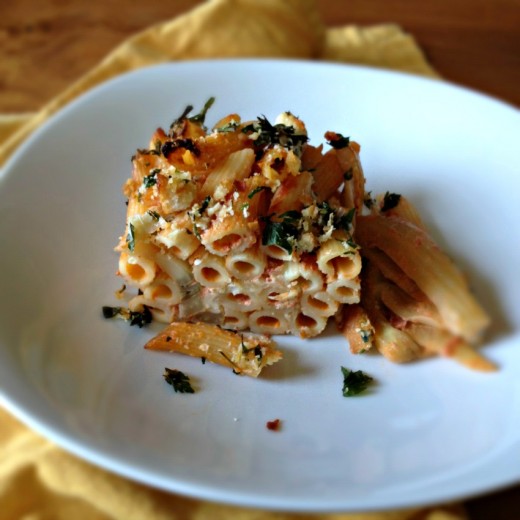
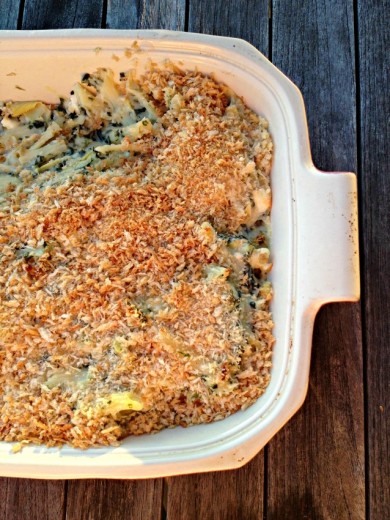
This is deliciousness comes from the “International Relations” chapter of the book where you will find other stunners like Croque Madame Mac and Shepherd’s Mac.  In this one, we have spinach, artichoke hearts, and three cheeses (feta! Pecorino! Jack!) that go so well together that the end result might stun you a bit.  I love mac and cheese as much as the next person but sometimes I find it can get a bit monotonous.  All that creaminess in one dish and my palate gets kind of tired.  This dish gave my taste buds something else to think about with the added vegetables and the tangyness of the cheese.  This is not to say that the Basic Baked Mac and Cheese, which I made for, ahem, the kids, was not amazing.  I may have dipped my fork into that dish a time or two.  Or three.

(The anything-but-basic version.)

Two Years Ago:  Yogurt and Oregano Pesto Soup, Chocolate Dipped Ice Cream Sandwiches, Corn with Tons of Herbs, Heirloom Tomato Tart
Three Years Ago:  Savory Scones, Stuffed Summer Squash with Goat Cheese and Mint, Tomato, Semolina, and Cilantro Soup, Double Layer Chocolate Cake
Four Years Ago:  Mint Filled Brownie Cupcakes, Corn and Zucchini Timbale, Nectarine and Mascarpone Tart, Chickpeas and Chard with Cilantro and Cumin, Nutella Pound Cake,
Five Years Ago:  Summer Rolls (I make these all the time), Chocolate Peanut Toffee (ditto), Pomodori Al Forno (double ditto), Pissaladière

Macximus
Adapted from The Mac and Cheese Cookbook
Serves 6-8

I made a couple of small changes.  I added twice the amount of spinach in the original recipe, more shallots, and more artichoke hearts.  I also quartered those hearts.  The recipe says this serves 4 but we got almost 8 servings out of it.  It is rich!

½ pound dried elbow pasta
1 cup crumbled feta cheese
½ cup grated Jack cheese
½ cup grated Pecorino cheese
2 small shallots, minced
1 cup thawed frozen chopped spinach, thoroughly drained
¾ cup canned artichoke hearts, drained and quartered
2 cups Mac Sauce (recipe follows)
½ cup panko (Japanese bread crumbs)

1.  Cook the pasta in salted boiling water until a little less than al dente.  Drain, rinse with cold water, and drain the pasta again.

2.  Preheat the oven to 400ºF.  Add the feta, Jack, Pecorino, shallots, spinach, artichokes, and sauce to a large, heavy-bottomed pan over medium heat.  Stir until the cheeses begin to melt, about 4 minutes (the feta will not melt, so you are just looking for the Pecorino and Jack to melt and the mixture to get hot).

3.  Slowly add the cooked pasta and stir until hot.  Pour into a 12-inch baking dish and top with the panko.  Bake until bubbly, 10 to 15 minutes.

4.  Spoon into bowls and serve hot.

Mac Sauce
Makes 3 cups

Note that this recipe makes 3 cups of sauce but you only need 2 for the Macximus recipe.  Allison and Erin suggest using the leftover cup to make biscuits and gravy or chicken à la king.

3 cups whole milk
½ cup unsalted butter
½ cup all-purpose flour
1 tsp. table salt

1.  Heat the milk in a pot over medium heat until it just starts to bubble, but is not boiling, 3 to 4 minutes.  Remove from the heat.

2.  Heat the butter over medium heat in a separate, heavy-bottomed pot.  When the butter has just melted, add the flour and whisk constantly until the mixture turns light brown, about 3 minutes.  Remove from the heat.

3.  Slowly pour the warm milk, about 1 cup at a time, into the butter-flour mixture, whisking constantly.  It will get very thick when you first add the milk, and thinner as you slowly pour in the entire three cups.  This is normal.

4.  Once all the milk has been added, set the pot back over medium-high heat, and continue to whisk constantly.  In the next 2 to 3 minutes the sauce should come together and become silky and thick.  Dip a metal spoon int the sauce – if the sauce coats the spoon and doesn’t slide off like milk, you’ll know the sauce is ready.  You should be able to run your finger along the spoon and have the impression remain.  Add the salt.

5.  The Mac Sauce is ready to use immediately and does not need to cool.  Store in the fridge for a day or two if you want to make it ahead of time – it will get a lot thicker when you put it in the fridge, so it may need a little milk to thin it out a bit when it comes time to melt in the cheese.  Try melting the cheese into the sauce first, and if it is too thick then add milk as needed.


Celebrating the Unusual

August 12, 2013

Sometimes making dinner decisions is really easy for me.  I crave something and I make it.  Maybe I get the recipe from one of my many sources, sometimes I make it up.  Often times I am inspired by produce at the markets, or by a dish I had in a restaurant, or something I saw on a menu, or a dish described to me by my mother or a friend.  And then there are times when I get stuck.  I page through my books and nothing pops out for me.  Cooking dinner looms as a chore, not the thing I look forward to each evening.  That is when I turn to Heidi Swanson.

If you read my blog, chances are you also read Heidi’s as well and you might even have one or both of her cookbooks.  She is a very talented woman from whom I have pulled inspiration for years.  An amazing photographer and a healthy and inventive cook is a pretty compelling combination.  The reason I turn to her when I am stuck is her tendency toward the unusual.  I’m a good cook and I often create my own recipes but I don’t think I have the flair that Heidi does.  I often find things in her ingredient lists that I would never think to put together and what I have found is that the unusual, when left to her capable hands, always works.

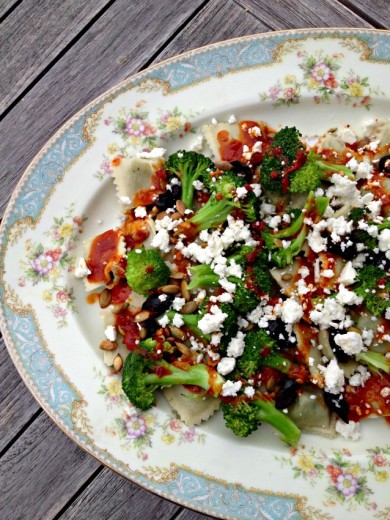
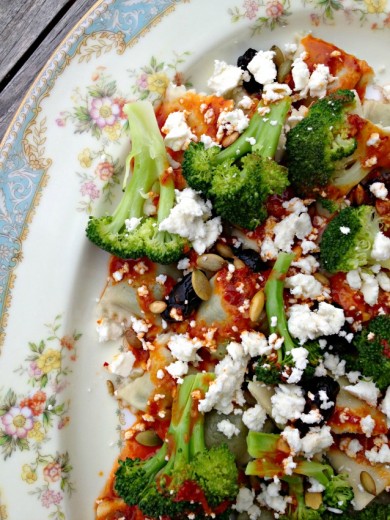
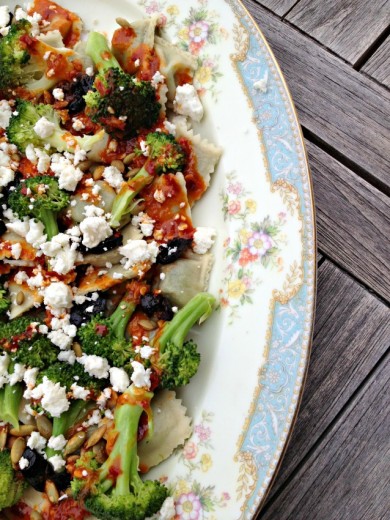
This dish takes ravioli and Middle Eastern harissa and marries them together with some of my favorite ingredients – broccoli, oil-cured olives, and good feta.  I bought some plump fresh spinach and ricotta mini ravioli (raviolini?) and patted myself on the back for being a good wife and making a dish that provide leftovers for Randy’s dinner the next night.  Except that, between the two of us, we finished the whole platter.  Two notes on the platter.  First, use one instead of a bowl.  Heidi instructs you to mix the cooked pasta with the broccoli and the harissa oil in a bowl, but mine were tiny and delicate and I just knew a toss would destroy too many of them.  On the platter, everything can be laid out and the sauce drizzled over top.  Second, the one you see in the photos belonged to my great-grandmother Lena.  I always thought I would name a daughter after her but alas, I have two boys.

A few notes on ingredients.  Harissa can be found in well-stocked grocery stores.  It usually comes in a jar and can be found on either the international food aisle or the condiment aisle near the olives.  Speaking of olives – oil cured olives can sometimes be found in jars but are easier to seek out at an olive bar.  They are very black and wrinkly and are my favorite olive.  You could always substitute kalamata.  Finally, as I will say whenever I talk about feta cheese, buy the good stuff in a brick, not the pre-crumbled stuff.  I’ve always been happy with Mt. Vikos brand but there are other good ones out there.

One Year Ago:  Blackberry Buttermilk Cake, Cilantro Scallion Bread
Two Years Ago:  Grilled Onion Guacamole, Double Chocolate Peanut Butter Pie
Three Years Ago:  Lavender and Honey Tea Cakes, Polenta with Corn, Tomatoes, and Basil,
Four Years Ago:  Cheese Balls Three Ways, Rosemary and Walnut Paté, Melon Soup with Cucumber Chile Ice
Five Years Ago:  Olive and Jarlsberg Sandwich, Farro with Green Beans and Corn

Harissa Ravioli
Adapted from Super Natural Everyday
Serves 4 (not in my house)

This is super close to the recipe in the book.  My little tweaks were more lemon and less oil in the dressing and more olives, plus the platter and not bowl.

1 clove garlic, smashed
¼ tsp. fine-grain sea salt
Juice of 1 lemon
2 tbsp. harissa
3 tbsp. extra-virgin olive oil
12 ounces fresh or frozen ravioli or tortellini
8 ounces broccoli florets, trimmed into bite-size pieces
¼ cup pepitas, sliced almonds, or pine nuts, toasted
Scant ¼ cup crumbled feta cheese
8 oil-cured black olives

Bring a large pot of water to boil.  In the meantime, make the harissa oil.  Sprinkle the smashed garlic clove with the salt and chop into a paste.  Transfer it to a small bowl and stir in the lemon juice, harissa, and olive oil.  Taste and add more salt, if needed.

When the water boils, salt it generously, add the ravioli, and boil until they float and are cooked through, usually 1 or 2 minutes.  About 30 seconds before the ravioli has finished cooking, add the broccoli to the pot, boil for the remaining time, then drain.

Lay the ravioli and broccoli out on a platter and drizzle generously with the harissa oil.  Scatter the pepitas over top, followed by the olives and feta cheese.  Drizzle with more oil if desired.


From the Magazines

August 2, 2012

Ever since my early 20’s, I have been getting food magazines in the mail.  The subscriptions have varied over the years but I have received at least one every month for 20 years.  (Current ones are Food & Wine, Cook’s Illustrated, and Saveur.  How about you?)

The magazines tend to pile up for months before I attack them with scissors, cut out the recipes that I want, and tape them into four binders that I have with 20 years worth of magazine recipes.  It is a long process and since the past few years have been pretty busy, it has literally been two years since I last did a scissor attack.  Two years worth of magazines is a lot of magazines.  There is no way I am moving those along with the other 9 billion things we have in our house so it was time to start whittling them down.

In the past, when I have started this process, I have just gone through them chronologically.  But that often meant I was paging through Christmas issues in July, or BBQ special issues while the Thanksgiving turkey was in the oven.  Reading about food that is completely out of season is not all that inspiring.  So this time, I decided to sort them out into season and start with the summer issues.  I was looking for some inspiration anyway and I certainly found it within the pages of June, July, and August magazines.

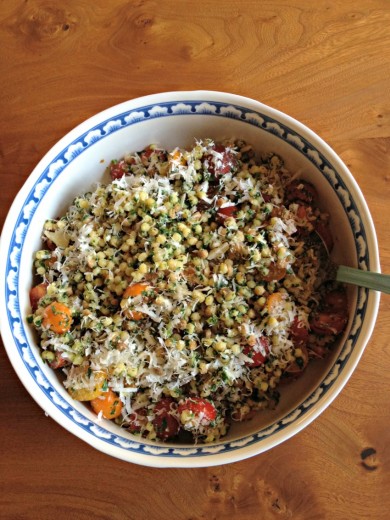
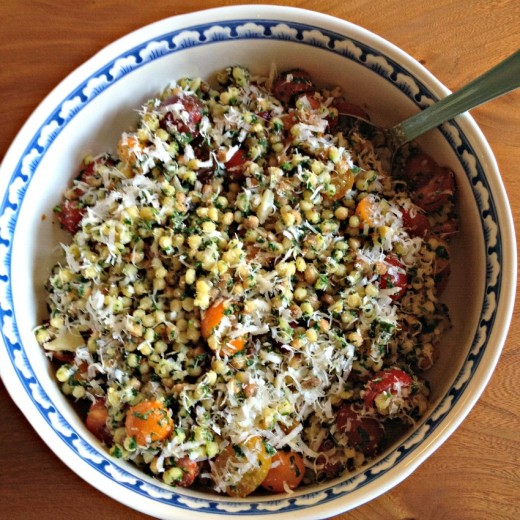
This recipe will surely become a favorite around here.  I’ve always been a fan of Israeli couscous – so much so that I had no fewer than three bags of it in my pantry.  Here it gets tossed with a pesto made from arugula and lots and lots of tomatoes.  I like basil pesto as much as the next person, but arugula is such a nice change.  It tastes brighter than its green cousin and just a tantalizing hint of bitterness.  The cooking time is minimal so it is a great choice for a hot night.  It is best served room temperature so it is great to bring to a potluck or a picnic (it also makes a lot and scales up easily.)  And if you are one of those lucky people who has tomatoes coming out of their ears, now you have a wonderful place to park them.

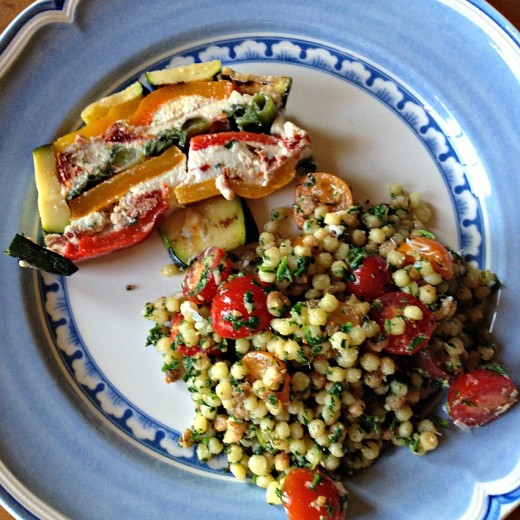
I served this salad along side a beautiful vegetable terrine that I was really excited about.  All of us picked at the terrine and had seconds of the couscous.

One Year Ago:  Tomato and Corn Pie
Two Years Ago:  Yeast Bread Sticks
Three Years Ago:  Grilled Potato Slices with Salt and Vinegar

Israeli Couscous and Tomato Salad with Arugula Pesto

Adapted from Food & Wine
6-8 servings

One of the things I don’t like about pesto is how oily it is.  I use a bit less oil in mine here.  If you like you can add a full ½ cup or you can drizzle additional over the finished salad if it seems too dry.

6 ounces arugula, plus additional leaves for garnish
2 cups Israeli couscous
1/3 cup olive oil
¼ cup pine nuts
1 garlic clove, chopped
¼ cup freshly grated Parmesan cheese, plus additional for garnish
Kosher or sea salt and freshly cracked black pepper
2 pints multi-colored cherry tomatoes, halved

Bring a large pot of salted water to a boil.  Add the 6 ounces of arugula and blanch for 10 seconds.  Using a slotted spoon, transfer the arugula to a colander.  Rinse under cold water to stop the cooking, then drain thoroughly.

Add the Israeli couscous to the boiling water and cook over moderately high heat, stirring occasionally, until it is al dente, about 10 minutes.  Drain the couscous and put it in a large wide bowl.  Drizzle lightly with olive oil and toss to prevent it from clumping.  Let the couscous cool to room temperature.

In a small skillet, toast the pine nuts over moderate heat, tossing, until golden brown, about 2 minutes.  Let cool.

Squeeze the excess water from the blanched arugula and coarsely chop it.  Transfer the arugula to a food processor.  (DT:  I used my mini food processor for this job.)  Add the pine nuts, garlic, cheese and the 1/3 cup of olive oil and process until the pine nuts are finely chopped.  Season the arugula pesto with salt and pepper.

Using a spatula, stir the pesto into the cooled couscous until well combined.  Gently fold in the tomatoes.  Garnish the salad with the remaining arugula leaves and some freshly grated Parmesan cheese.

(I didn’t try it but I’m sure you could make this salad earlier in the day.  Cover and refrigerate it but allow it to come to room temperature before you serve it.)


Fennel Freak

July 24, 2012

Tell me if this happens to you.  You taste something delicious and then suddenly, your homing device is set to that thing.  I had burrata for the first time several years ago at Pizzeria Mozza while visiting a friend in L.A. and when I got back, I scoured my cookbooks for recipes using burrata.

On Sunday night, I went to a wine tasting, featuring Walla Walla wines, at Tom Douglas’ amazing space Palace Ballroom.  They had platters of food set out so we could make sure there was a cushion for the 13 (!) wines we were slated to taste.  One of those platters held roasted vegetables and I may have scoffed.  So imaginative!  Roasted vegetables as a vegetarian option!  But they were roasted in a wood-fired oven and they had fennel included in the mix and I could have eaten an entire plate of that roasted fennel.  I included a roasted fennel dish in one of my classes last winter – fennel, red peppers, grapes, and herbes de Provence – so I knew how good that vegetable is blasted at high heat.  But this was something else.

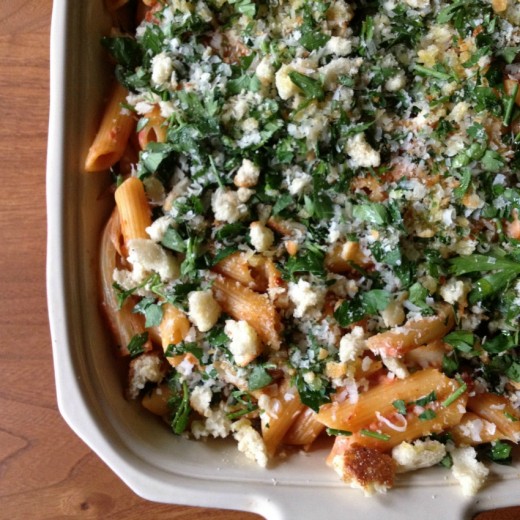
(Pre-baking.)

So, off I went in search of fennel recipes.  I did not have to look far.  I just got a new cookbook (surprise!) called The Fresh & Green Table.  It is a lovely book with so many a very nice variety of mostly vegetarian recipes.  Baked Penne with Silky Fennel in Hot Pink Sauce – how could you not want to make that?

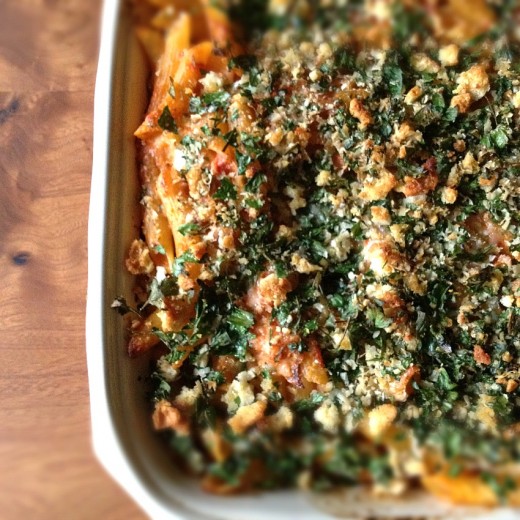
I’m no stranger to baked pasta recipes (like this onethis one, and this one).  They are one of my favorite things to make on a cold day and I also love making them for large groups.  You can scale up easily.  I understand that it is actually summertime and many of the people in this country might not want to turn their oven on to 425º and then eat hot pasta.  So save this recipe for another time.  But make it and you won’t be sorry.  I sort of expected this to taste like other tomato based baked pasta dishes I’ve made but no.  No no no no.  I give full credit to the fennel (browned in a pan first – almost a little smoky) and the bread crumbs (crunch!).  I made a lot of changes, some of them intentional – lightening up the dish with less cheese, less oil, and no butter, and some of them unintentional – making about 100 mistakes in the process of getting it in the oven.  The recipe below reflects what I did.

One Year Ago:  Chesapeake Bay Snack Mix, Vegetable Enchiladas
Two Years Ago:  Mini Pissaladière, Lavender Honey Ice Cream
Three Years Ago:  Chocolate Chip Ice Cream

Baked Penne with Silky Fennel in Hot Pink Sauce
Adapted (liberally) from The Fresh & Green Table
Serves 4

I sometimes have a hard time finding 14-ounce cans of crushed tomatoes.  They seem to always come in the 28-ounce size.  I just stick my immersion blender directly into a 14-ounce can of diced tomatoes and crush them that way.  You could just use a blender.  Please, by all means, make your own breadcrumbs for this dish.  If you don’t have stale bread on hand, throw a few slices of good bread in the oven until crisp and then grind it up (tearing into small pieces first) in the food processor.

¾ cup fresh breadcrumbs
¾ cup freshly grated Parmesan, divided
Olive oil
3 tbsp. chopped parsley
Kosher or sea salt
3 medium fennel bulbs
1 tbsp. minced garlic
½ tsp. red pepper flakes
2 tbsp. vodka
1 14-ounce can crushed tomatoes
½ pound penne rigate
½ cup heavy cream
4 ounces diced fresh mozzarella cheese

Preheat the oven to 425ºF.  In a small bowl, combine the breadcrumbs, ¼ cup of the Parmesan, 2 tsp. of olive oil, the parsley, and a large pinch of salt.  Set aside.

Trim the stalks from the fennel.  Trim any brown spots from the outside of the fennel and halve the bulbs.  Cut most of the core from both halves, leaving a bit of it to hold some of the wedges together (some will fall naturally apart into slices).  Cut the fennel lengthwise (rotating your knife as you go, so that you are cutting on a radial angle always toward the center) into ¼-inch thick slices.  Place a large pot over medium-high heat.  Drizzle in about 2 tablespoons of olive oil, then add the fennel slices.  Cook, stirring occasionally, until the fennel is very tender and well browned, 12 to 14 minutes.

Reduce the heat to medium-low, add the garlic and red pepper flakes, and cook, stirring, until fragrant, about 30 seconds.  Add the vodka and cook, stirring and scraping the bottom of the pot while it simmers down (this will take just a few seconds).  Add the crushed tomatoes and cook, stirring and scraping the bottom of the pot, until well mixed, about 30 seconds.  Turn the heat down to low.

Meanwhile, bring a large pot of salted water to a boil.  Add the pasta and cook until just shy of al dente (the pasta will continue to cook in the oven, so be sure to not overcook it).  Pour the cream into a 2 cup measuring cup and keep it by the stove.  When the pasta is ready, ladle out ¾ cup of the cooking liquid and add it to the cream.  Drain the pasta and add it to the tomato fennel mixture.  Pour in the cream mixture and stir well to combine.  Stir in the mozzarella cheese and the remaining ½ cup of Parmesan.  Season to taste with salt.

Turn the mixture out into a 8×12-inch casserole dish.  Using a spatula, press down on the top.  Scatter the breadcrumbs over the top.  Bake, uncovered, until the top is browned and crusty and the casserole is bubbling vigorously, about 25 minutes.  Let it sit for a few minutes while the bubbling subsides, then serve right away.

(Make ahead tips:  You can make the sauce part (brown the fennel all the way through adding tomatoes) several hours ahead.  Just leave the pot on the stove and warm it up before you proceed with the recipe.  As with most casseroles, this can be made early in the day that you plan to serve it.  Cover the whole thing with foil and store it in your refrigerator.  You will need to add about 10 minutes to your cooking time.)


Editing is Important

April 25, 2012

Part of cooking well, like dressing well, is knowing when to edit.  There is a point where the dish is close to being just right and you can either just trust that it is good, or you can keep adding to it and potentially ruin it.  I think this is a particular danger with vegetarian food.  Without the protein anchor, sometimes it might feel like you need to keep adding layers of flavor to make up for what is “missing”.  Too many layers of flavor is my main critique of Seattle’s vegetarian restaurants and why I almost never frequent them.

A dish doesn’t have to have a whiz! bang! pop! to be lovely.  I first got this idea from Tracy and her Angel Hair Pasta with Arugula and Lemon.  Every so often a dish sticks in my overstuffed brain and lately it has been this one.  As we were driving back from our decadent weekend in Walla Walla, I started dreaming of superfine pasta stuffed to the gills with arugula.  I had recently bought some angel hair in a lovely package and we were lucky enough to visit a goat cheese farm while in Walla Walla and had purchased some delightful mild feta.  I decided that, rather than make Tracy’s dish to the letter, I would just riff on it.

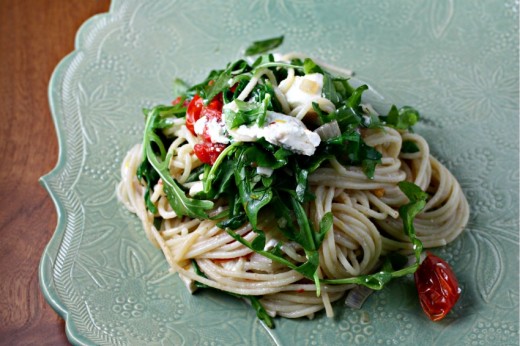
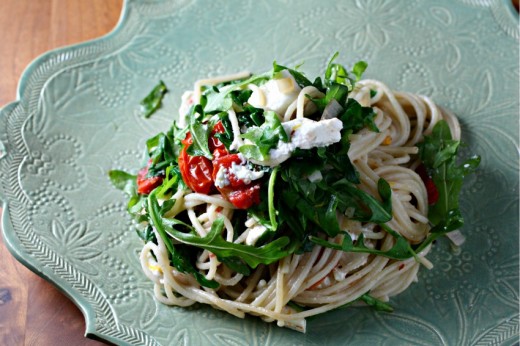
As it turns out, my dish is not much like hers.  That is what you get when you don’t actually consult a recipe you are trying to riff on!  But we loved this light and sunny pasta and it came together in no time.  I put some small cherry tomatoes in the oven to roast, got my pasta going, then satuéed shallots and red pepper flakes in a bit of olive oil.  I grated in the zest of a Meyer lemon and then waited for the pasta to cook.  Once it was just shy of al dente, I scooped it into the pan with the shallots and added lemon juice, lots of arugula, small cubes of feta, and the roasted tomatoes.  I used the pasta cooking water to loosen the sauce.  As I was tossing it all together, my mind was saying, “Olives! Pine Nuts! Parmesan!”, but I was able to edit and keep it simple.

One Year Ago:  Brown Sugar Pound Cake (I’ve probably made this cake more than any other)
Two Years Ago:  Zucchini and Olive Salad
Three Years Ago:  Ricotta Calzones with Sausage and Broccoli Rabe

Pasta with Lemon, Arugula, and Roasted Tomatoes
Dana Treat Original (but thanks Tracy for the inspiration)
Serves 2-3

My noodles were actually more like a cross between angel hair and spaghetti, so I’m suggesting you use spaghettini in the recipe below (it’s a thinner spaghetti).

Olive oil
20 small cherry tomatoes
Kosher or sea salt and freshly ground black pepper
1 large shallot, finely diced
½ tsp. red pepper flakes
Zest and juice of 1 Meyer lemon
4 ounces feta cheese, cut into small cubes
4 ounces arugula, plus more for garnish
8 ounces spaghettini

Preheat the oven to 375ºF.  Place the tomatoes on a small baking sheet.  Drizzle with olive oil and sprinkle with salt and pepper.  Roast in the oven until they soften, brown in spots, and start to collapse a bit, about 20 minutes.  Set aside.

Meanwhile, place a large skillet over medium heat.  Drizzle in just enough olive oil to coat the bottom of the pan, then add the shallots, red pepper flakes, and a large pinch of salt.  Sauté, stirring frequently, until the shallots soften and start to brown in spots, about 5 minutes.  Grate in the lemon zest and turn off the heat.

Meanwhile, bring a large pot of salted water to boil, then add the pasta.  Cook according the package directions until just al dente.  Taste it to make sure.  Using tongs, transfer the pasta to the skillet with the shallots.  Turn the heat to low and stir to coat the pasta with the shallots and pepper flakes.  Ladle in some pasta cooking water to loosen the sauce.  Add half of the arugula and keep tossing the pasta so that the arugula wilts.  Add the other half of the arugula along with the lemon juice, feta cheese, and the tomatoes.  Add more cooking water if the pasta seems too dry.  (You can also use olive oil if you prefer.)  Toss carefully.  Serve each portion topped with more of the arugula.


« Older Posts