Category: Brunch

Time to Share

July 24, 2013

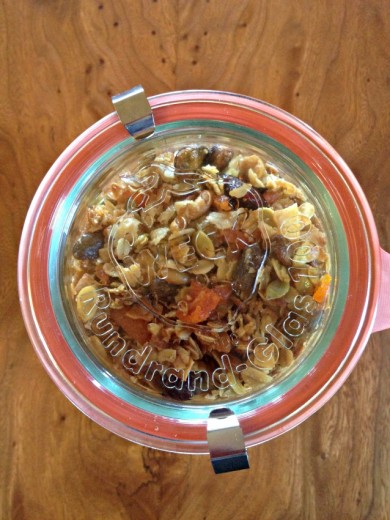
This is my go-to granola recipe.  I have been using it for about three years.  I had a go-to granola recipe before that that I used for many many years, but I like this one better.  I make huge batches of it and eat some, freeze some, and give some away.  Everyone loves it.  Why have I not shared this recipe until now?  Here are some reasons.

1) A part of me thinks that everyone has their own favorite granola recipe.
2) A part of me thinks I have seen 12 million granola recipes in the food blogosphere.
3) A part of me doesn’t want to take business away from this lovely lady.  (And if you are buying granola instead of making your own, you should buy it from her.)

My old favorite starred a lot of butter and honey and had lots of whole nuts in it.  I liked the flavor of it, butter and honey will do that to a person, but not the things in it as much.  If I am going to eat granola, and let’s face it – it’s not exactly health food – it has to be perfect.  This is pretty close and oh so easy to make.  You are really just measuring things out, mixing them all together in a big bowl, and waiting.  Your kitchen smells even better than when you make brownies.  Why am I sharing the recipe now?  Here are some reasons.

1) It’s just time I shared something that I make so often, regardless of reasons 1-3 above.
2) I brought giant bags of this granola with us to Bethany Beach a few weeks ago.  We kept one bag in the purple house and I brought the other over to the blue house, where much of the extended family was staying.  They all went crazy for it (people always do) and wondered when the recipe would be on my blog.  These are special lovely people.  So how could I not share?

A brief story.  I met Randy’s family, immediate and extended, twelve years ago this month.  We had just moved in together and he brought me back to a big family gathering in Baltimore.  Randy’s mom is the oldest of five and three of her siblings have children.  Some of them have children.  Even twelve years ago, there were a lot of White’s for me to meet.  I was nervous.  I knew Randy and I were headed for marriage and he had been married before (as had I).  His ex-wife had been a part of these gatherings and I did not know how I would fit in to that dynamic.

As it turns out, Randy’s ex-wife was not super popular with the family, some of the more tell-it-like-it-is members were very clear about this, and I was thought to be a breath of fresh air.  The fact that I come from a nice family, sing and play the guitar, and was clearly over the moon about this guy brought me a big thumbs up from everyone.  Phew!  Now all the times I have spent time with this group has been so wonderful.  I always have long and meaningful conversations with so many of them.  I’m lucky to have this large extended family.  So it is with great pleasure that I share this granola recipe!

A few notes.  This recipe comes from Melissa Clark’s book In the Kitchen with a Good Appetite.  As may be clear, I have made it countless times.  I pretty much follow it as written but have a few opinions (always!).

*It is very easy to double this recipe as long as you have a large mixing bowl and two large rimmed baking sheets.  Why not just double it and have lots of granola?  I would freeze some since it does, eventually, go stale.

*You can use salted, roasted pistachios instead of raw, I always do.  I buy them in huge shelled bags because I make this so often.

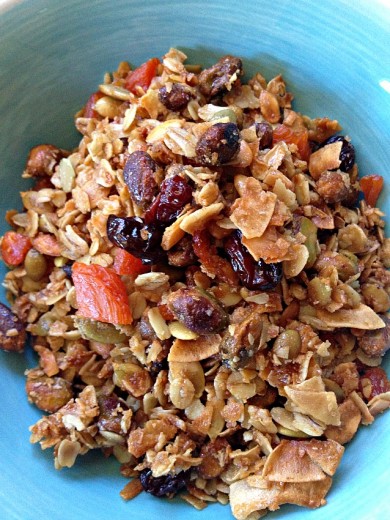
*You will need to seek out coconut chips.  It is just big shavings of coconut, not the powdery flaky kind that you use to make coconut bars.  Bob’s Red Mill has it in bags usually in the baking section.

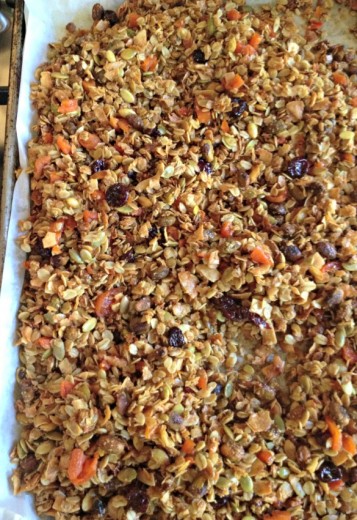
*I add both dried apricots and dried cherries to mine.  Better color.  I’ve added all kinds of dried fruit to this granola.  The only thing I would avoid are regular raisins.  They don’t look appetizing.  Golden are better.  Be sure to add the fruit right when it comes out of the oven.  The granola is still soft and easily mixable.  As it cools, it crunches up and the fruit is more difficult to stir in.

*Be sure to allow the granola to bake long enough that it really is golden, a touch darker is better than a touch lighter in my opinion.  If you let it become truly brown, it cools up nice and crunchy.  If you don’t bake it enough, it can be a little greasy and not crunchy.

One Year Ago:  Quinoa with Red Lentils and Mint, Baked Penne with Silky Fennel
Two Years Ago:  Savory Muffins, Salted Caramel Squares, Vegetable Enchiladas
Three Years Ago:  Roasted Cauliflower with Tomato and Dill, Best Tart Dough, Lavender Honey Ice Cream
Four Years Ago:  Honeyed Goat Cheese Tart, Blasted Broccoli, Gnocchi with Mushroom Sauce, Asparagus Ragout

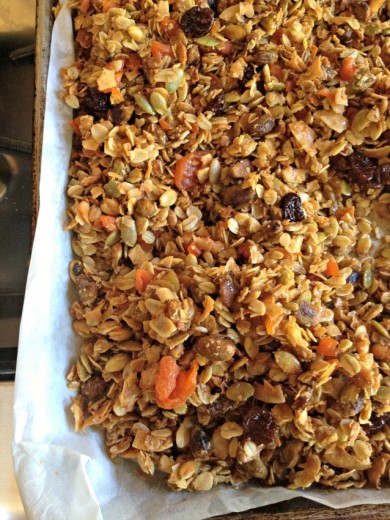
Olive Oil Granola with Dried Apricots and Pistachios
Adapted from In the Kitchen with a Good Appetite
Makes about 9 cups

Clark serves her granola with ricotta cheese and fresh berries.  I usually put out milk and plain yogurt with berries.

3 cups old-fashioned rolled oats
1½ cups raw pistachios, hulled
1 cup raw pumpkin seeds, hulled
1 cup coconut chips
¾ cup pure maple syrup (you can use 2/3 cup, but the granola will be drier_
½ cup extra-virgin olive oil
1/3 cup packed light brown sugar
1 tsp. kosher salt
½ tsp. ground cinnamon
½ tsp. ground ginger
½ cup chopped dried apricots
½ cup dried tart cherries

Preheat the oven to 300ºF.

In a large bowl, combine the oats, pistachios, pumpkin seeds, coconut chips, maple syrup, olive oil, brown sugar, salt, cinnamon, and ginger.  Spread the mixture on a large rimmed baking sheet in an even layer and bake for about 45 minutes, stirring every 10 minutes, until golden brown and well toasted.

As soon as you pull it out of the oven, stir in the dried fruit, combining it carefully.  Allow to cool completely, then store in an airtight bag or jar.


Corn Muffins with Raspberry Jam

February 17, 2012

I’ve been debating about how to start this post.  I taught two classes back to back this week and the prep was pretty awesome.  Whenever I had a moment to think about something other than what vegetable I needed to chop next, I started to think about all the events I have on my calendar for next week and the week after.  So what is a food blogger to do?  Just not post and then write a “sorry I haven’t been here” post in a couple days?  Take valuable prep time away to write a clear cohesive emotional post about a muffin?  I don’t know.  I seem to have temporarily lost my mojo.

So I will just say this.  I love a good muffin and, in my opinion, if you want a good muffin these days, you have to make it yourself.  Muffins have suffered the same fate as scones in recent years.  That is, they have been plumped up, sweetened up, super-sized, and flavor downgraded.  Go into any coffee shop and you will find huge muffins with the same uniform look and flavor.  To me, they taste of flour and sugar and not much else.

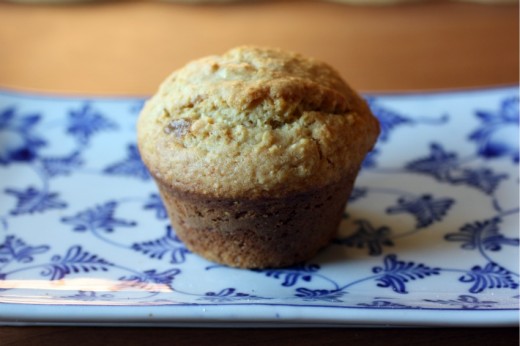
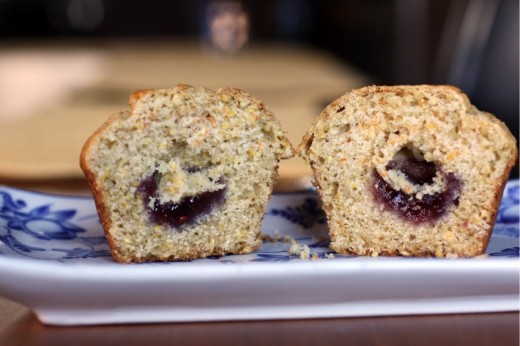
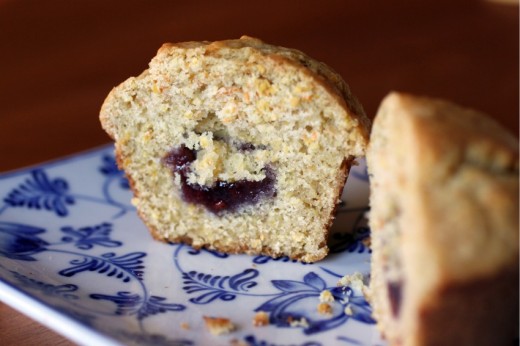
This muffin, which comes from the Flour cookbook, is not too sweet, has an interesting crunch texture (thanks to some cornmeal), and is the perfect size to share or not, as you see fit.  The little bit of jam inside each muffin is such a sweet surprise and this the first muffin I have ever made that puffed up perfectly without running all over the pan.

Two Years Ago:  Chocolate Spice Bread
Three Years Ago:  Double Baked Chocolate Cake

Corn Muffins with Raspberry Jam
Flour
Makes 12 muffins

2¾ cups all purpose flour
1 cup medium-coarse yellow cornmeal
2 tsp. baking powder
1 tsp. baking soda
1 tsp. kosher salt
¼ cup (½ stick) unsalted butter, melted
¾ cup packed light brown sugar
3 eggs
1 cup milk, at room temperature
1/3 cup canola oil
¾ cup crème fraîche, at room temperature
¾ cup raspberry jam

Position a rack in the center of the oven and heat oven to 350ºF.  Butter a standard 12-cup muffin tin, coat with nonstick cooking spray, or line with paper liners.

In a large bowl, stir together the flour, cornmeal, baking powder, baking soda, and salt until well mixed.  In a small bowl, whisk together the butter and sugar until it forms a thick slurry.  In a second large bowl, whisk the eggs until well blended.  One at a time, whisk the milk, then the oil, then the crème fraîche, and finally the butter-sugar slurry into the eggs.  Pour the wet mixture into the dry mixture and fold carefully just until the dry and we ingredients are well combined.  The batter will be thick and pasty.

Spoon about ¼ cup batter into each prepared muffin cup.  Spoon 1 tablespoon jam on top of the batter in each up, then top off each cup with another ¼ cup batter, making sure the cups are evenly filled.  They should be filled to the rim.

Bake for 25 to 28 minutes, or until the edges of each muffin are golden brown and the center springs back when pressed with a fingertip.  Let cool in the pan on a wire rack for 20 minutes, then remove the muffins from the pan.

The muffins taste best the day they are baked, but they may be stored in an airtight container at room temperature for up to 3 days.  If you keep them longer than 1 day, refresh them in a 300ºF oven for 4 to 5 minutes.  Or, you can freeze them, wrapped tightly in plastic wrap, for up to 1 week.  Reheat, directly from the freezer, in a 300ºF oven for 8 to 10 minutes. https://saladsup.com/


Spinach Cheddar (and Egg!) Casserole

January 5, 2012

Eggs for one is easy.  You poach, scramble, fry, hard boil, soft boil, or make an omelet.  Whatever suits you.  Eggs for two is the same.  Even eggs for four, although the poaching might get a little tricky and you might feel like a buffet cook at a bad hotel with the omelets.  Eggs for eight really necessitates a frittata, a Mediterranean style one or a frittata made with grits, or perhaps onions that have been cooked long and slow.  But more than eight people means you need to start thinking egg casserole.

We attended a New Year’s Day brunch with a group of my favorite people.  Five couples with kids, all of whom had celebrated New Year’s Even in some way or another.  In other words, we needed plenty of eggs and the cheesy grits that our hosts make and make so very well.  I have made a savory bread pudding for this gathering before but with the grits and biscuits and muffins, I thought something without bread added it to it would be a better option.

Epicurious had plenty egg casseroles but most of them had giant huge tremendous amounts of cheese.  One notable recipe had 8 cups, that is two pounds, of cheese for four eggs.  I’m sorry.  That is a cheese casserole, not an egg casserole.

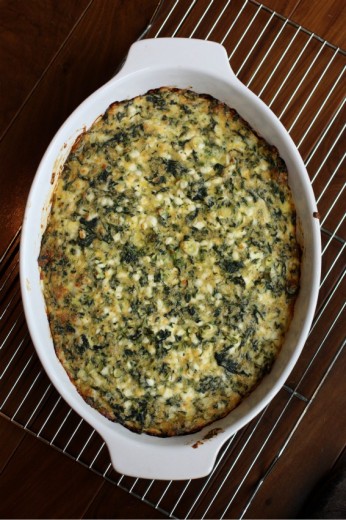
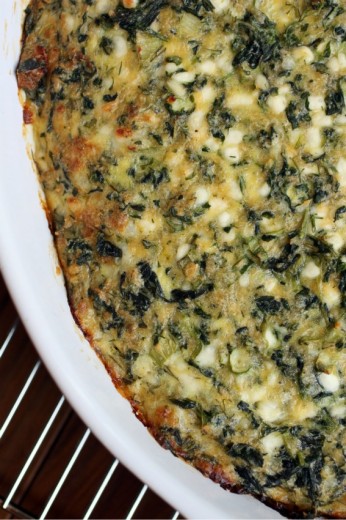
The one I eventually decided on is not exactly spa food but there are some vegetables and herbs and much of the cheese is actually cottage cheese.  Because we were a large group, I tripled this recipe and split it between two large dishes.  As it baked and I could smell the mingling of the scallions, cheese, and dill, I realized that I had made a very good choice and the taste proved me right.  We ate a full one and a half which was a lot of egg casserole.  I even sacrificed some of the stomach room I had reserved for cheesy grits and filled it with egg casserole.  The next time you are making eggs for a group, this is a surefire hit, but you can also enjoy it on a much smaller scale by making the recipe as written and not tripling it.

One more note.  I know some of you are new here so I thought I would put this out there.  I cook a lot of food and a large percentage of that food never sees this blog.  Sometimes it is because I just can’t get a decent photo (there is a gorgeous Beet Tart that I made four times in a month and just can’t seem to get my photography ducks in a row).  Sometimes it is because the food is not blog worthy.  In other words, I don’t put up every single thing I cook – only the things that I really like or think you would really like.  Occasionally, I will talk about something that didn’t work but I really do that to air out my frustration or to demonstrate that, although I have been cooking for almost 20 years and have made somewhat of a career out of it, I can make mistakes just as easily as a newbie.  All this to say, I’m not just telling you about egg casserole because it was something I made.  It’s good.

One Year Ago:  Tofu and Shiitake Noodle Soup
Two Years Ago:  Bruce and Dana’s Pasta Sauce

Spinach Cheddar Casserole
Adapted from Bon Appétit
Serves 4-6

4 eggs
¾ tsp. kosher salt
½ tsp. pepper
1 10-ounce package frozen chopped spinach, thawed, squeezed dry
1 16-ounce container cottage cheese
1 bunch green onions, chopped
1 cup packed grated sharp cheddar cheese
¼ cup all purpose flour
3 tablespoons chopped fresh dill

Preheat oven to 350°F. Butter 8x8x2-inch glass baking dish. Beat eggs, salt and pepper to blend in large bowl. Mix in spinach. Add remaining ingredients and stir until well blended. Transfer mixture to prepared dish.

Bake casserole until center is firm and top is golden, about 45 minutes.  Give the dish a shake, the center should not wobble.  Allow to cool 10 minutes, then serve.  This dish can sit and be served at room temperature.


Roasted Banana Muffins

January 3, 2012

How do you feel about bananas?  I am ambivalent about them.  They are neither my favorite fruit (nectarines) nor my least favorite (papayas).  They fall somewhere toward the bottom third of my fruit list.  I don’t hate them but I don’t seek them out either.  My children, on the other hand, love bananas.  Spencer especially.  And so I buy a lot of bananas and always think to myself that I can bake banana bread if they start to go bad.  But then, no matter how many I buy, my guys eat them and so no banana bread is made.  And then I realize that all is well in the banana world because I don’t really like banana bread anyway.  Now really, was that the most fascinating paragraph you have ever read?

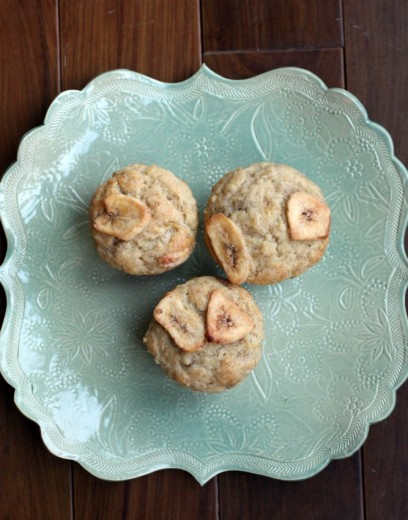
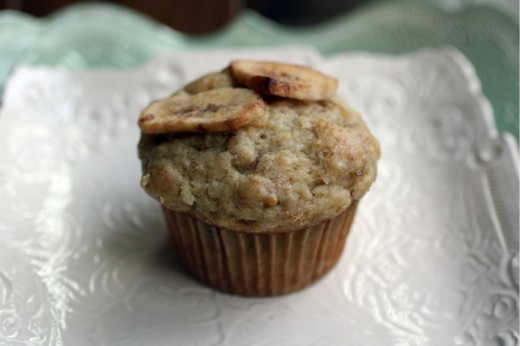
Recently I found myself with a few bananas and a recipe that sounded surprisingly interesting to me.  Roasted Banana Muffins.  You take 2 bananas, drizzle them with brown sugar, vanilla, and rum, wrap them up in foil, and roast them for about 20 minutes.  What you get is soft bananas swimming in an incredibly fragrant bath and you know just by smelling them that these muffins won’t taste like that old tired banana bread you make to use up old bananas.  (For the record, “banana” is a really fun word to type.)

This recipe comes from a cookbook with the unfortunate name of Cake Boy.  It is a book that I would have undoubtedly passed by if the charming French author hadn’t made a stop at Book Larder.  I didn’t get to meet him, although I hear he smelled like expensive cologne and was extremely handsome, and those facts made me take a second look at his book.  An extremely decadent cream cheese brownie and a blueberry muffin that you fill and top with a blueberry compote were enough to make me buy it.  (Note: I can’t wait for blueberry season.)  Cake Boy lived up to his promise for big flavor with these muffins – my family inhaled them.

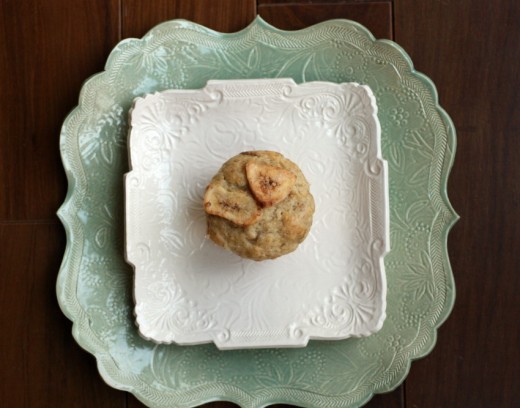
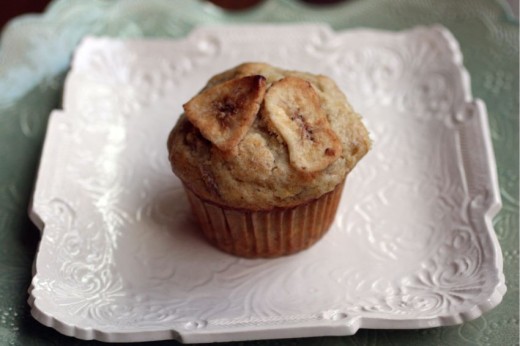
And how about those plates!  I don’t have any sisters, but I am fortunate enough to have three wonderful sisters-in-law.  Two of them, Randy’s sisters (hi Susie!  hi Lois!), conspired to send me these beautiful plates from Cat’s Paw Pottery as a holiday gift.  Don’t you love them?  I hope so because you will be seeing a lot of them…

One Year Ago:  Linzer Tart
Two Years Ago:  Orecchiette with Fennel, Beets, and Toasted Almonds

Roasted Banana Muffins
Adapted from Cake Boy
Makes 12 muffins

This recipe calls for self-rising flour – an ingredient used frequently in Europe but not as much in the States.  You can easily make your own by adding ½ tsp. of salt and 1½ tsp. of baking powder to each cup of flour.  Because this recipe calls for 2¼ cups self-rising flour, I just made 2 cups of the self-rising flour and then added another ¼ cup of all-purpose flour.  I thought with the additional baking powder already in the recipe that these muffins might balloon out of control but they did not.

I always buy superfine sugar (C&H makes it and you can find it on the baking aisle) but if you only have regular, you can grind it in a food processor.  Or, I imagine, you can just use it as is.  Report back if you do.

2 large ripe bananas
¼ cup dark brown sugar
1 tsp. vanilla extract
1 tsp. ground cinnamon
2 tsp. dark rum
6 tbsp. (¾ of a stick) unsalted butter
½ cup milk (I used 2%)
2¼ cups self-rising flour
1½ tsp. baking powder
½ cup superfine sugar
2 eggs
Dried banana chips (for topping)

Preheat the oven to 350ºF.  Line a 12-cup muffin pan with paper liners.

First, roast the bananas.  Peel them, then place them on a large sheet of foil on a baking sheet.  Sprinkle them with the dark sugar, vanilla extract, cinnamon, and rum.  Wrap in a loose but secure package and cook in the preheated oven for 20-25 minutes.  Allow to cool.

Melt the butter and allow to cool.  In a bowl, mash the roasted bananas well.  With a fork, beat the eggs, melted butter, and milk in a second bowl.  Add the mashed bananas and stir through.

Sift the flour, baking powder, and superfine sugar into a large bowl.  Make a well in the center and add the egg and banana mixture, stirring roughly with a fork (don’t overmix) until it is a lumpy paste.

Spoon the mixture into the paper cups to the rims (I use a large ice cream scoop for this).  Top each one with some banana chips.  Bake in the preheated oven for 20 minutes.  Rest the muffins on a wire rack too cool down.


Perfect Pumpkin Bread

November 14, 2011

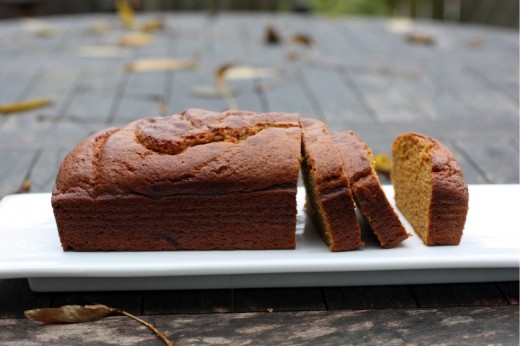
Sometimes I have a moment when I am in line at a coffee shop.  I’m usually a little hungry (I use coffee as my mid-morning snack) and things in the pastry case start to look very tasty.  I never actually purchase any of those things though because I know how deeply disappointing they can be.  For some reason, scones, quick breads, and muffins go through some kind of metamorphosis when they are mass produced, and something that is lovely in the home becomes nothing more than sugar and air.  How can something that looks like pumpkin bread have none of that subtle squashiness and spice that real pumpkin bread has?

The dreary days have just started here in Seattle.  After a crummy winter, a terrible spring, and a summer that didn’t really get going until August, we were due a nice fall and we got one.  It has been lovely.  I don’t remember every having much sun in November and this year, there have been more sunny days than rainy.  But once the rain starts, it stars and those damp days combined with very little daylight make things like pumpkin bread all the more sweet.  Without really realizing it, I have been searching my whole baking life for the perfect pumpkin bread.  Of all the quick breads, it is my favorite.  I have made many in my life and, while all have been tasty, not one of them has been quite right in my book.  I’ve made them with fresh steamed pumpkin, fresh roasted pumpkin, canned pumpkin, nuts, bran cereal, raisins – even chocolate chips.  I liked them all but either the flavor or texture, or both, was not what I wanted.

I’m happy to say I found my perfect recipe and even happier to tell you that it comes from a Seattle source.  Grand Central Bakery has been a Seattle fixture since 1972.  I remember it from my childhood as one of the few places in town that my New Yorker parents thought you could find a decent sandwich.  We used to go down to Pioneer Square almost every weekend and sit at a balcony table eating sandwiches and pickles.  Grand Central has grown as our city has and now there are several locations here and in Portland.

Last summer I went to a baking class in Grand Central’s south Seattle bakery, and one of the perks of doing so was receiving a copy of their book, The Grand Central Baking Book.  The baking department of my cookbook collection is large, and growing, but I have to say that most of my books are kind of on the fussy side.  I get lured in by pretty pictures and delicious sounding recipes only to realize, once I have bought the book, I don’t really bake that way.  I am a home baker – I love simple and delicious things best.  There is a time and a place for terrific chocolate cakes but most often what I want is something on the simpler side.  Like pumpkin bread.

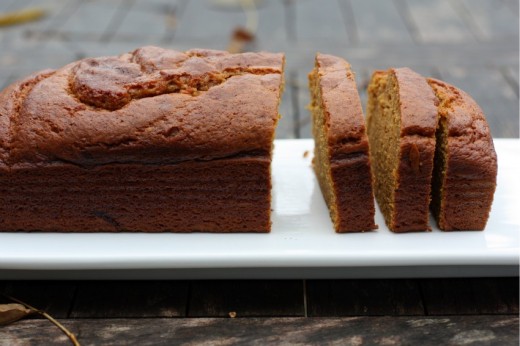
This bread really tastes of pumpkin, it is incredibly moist, and it has a wonderful spiciness to it.  I actually bumped up the spices a bit since I love the flavors of cinnamon and ginger in baked goods.  In addition to all of those wonderful things to recommend it, I was delighted to realize that you only use 1/3 cup of vegetable oil for two loaves.  If you have ever made a quick bread, you know it is usually an oil bomb.  Over the years, I have started the practice of substituting ½ of the oil with applesauce in an attempt to make a morning or afternoon treat not be a dessert’s worth of calories and fat.  Here, no substitution is necessary.  Perfect recipe found.

One Year Ago:  Three Cheese Mini Macs
Two Years Ago:  Gianduja Mousse
Three Years Ago:  Pumpkin Whoopie Pies

Pumpkin Bread

Adapted from The Grand Central Baking Book
Makes 2 loaves

This recipe is written for two 9×5-inch pans.  I have also made it in two 8×4-inch pans.  The smaller pans will give you a taller loaf but can also be a little difficult to remove.

3¼ cups flour
1½ tsp. baking soda
1 tsp. salt
1½ tbsp. pumpkin pie spice (recipe follows)
1/3 cup vegetable oil or canola oil
1 2/3 cups granulated sugar
1 1/3 cup packed light brown sugar
2 cups pumpkin puree (1 15-ounce can)
4 eggs
1/3 cup water
1/3 cup buttermilk

Preheat the oven to 350 degrees.  Lightly grease and flour two loaf pans (either 9×5-inch or 8×4-inch).

Measure the flour, baking soda, salt and pumpkin pie spice into a bowl and whisk to combine.

Using a stand mixer with the paddle attachment, mix the oil, granulated and brown sugars, and pumpkin puree on medium-low speed until well-blended, about 2 minutes.

Crack the eggs into a liquid measuring cup and whisk together.  With the mixer on low speed, slowly pour in the eggs, incorporating each addition completely before adding the next.  Scrape the bottom and sides of the bowl.

Add one-third of the dry ingredients and mix briefly on low speed, then add the water.  Mix well and repeat, using half of the remaining dry ingredients and all of the buttermilk.  Add the remaining dry ingredients and mix just until combined.  Scrape the sides of the bowl and then divide batter between the prepared pans.

Bake for 60 to 75 minutes, rotating the pans every 20 minutes or so.  The loaves should be dark golden brown with cracked tops, and a skewer inserted in the center should come out clean.


Pumpkin Pie Spice

¼ cup ground cinnamon
2 tbsp. ground ginger
1 tbsp. ground nutmeg
1 tbsp. ground cloves
1 tbsp. ground allspice

Combine all of the ingredients in a small bowl and stir with a fork until well combined.  Store in a cool, dry place for up to 3 months.


« Older Posts