Archive for July, 2010

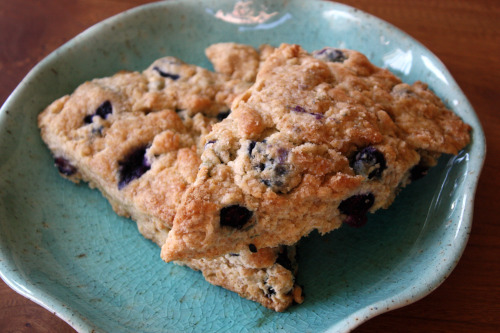
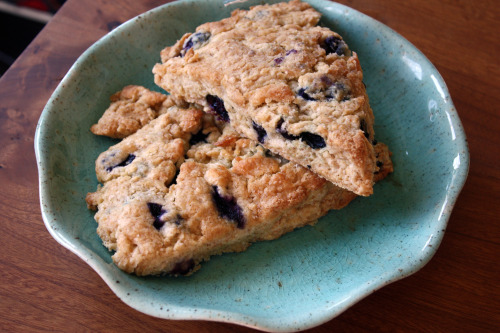
Holly B’s Fruit Scones

July 30, 2010

We have an interesting phenomenon in our house.  If you are a parent, perhaps you are familiar with this one.  It’s the “whenever I don’t have much of something the kids want tons of it, but when I buy tons of it, the kids want nothing to do with it” phenomenon.  There is an additional part to it which is the “whatever the kids love and adore at their friends’ houses, they will not eat at home”.

Blueberries.

Last Friday, I brought the boys to a favorite farmers market and I needed some berries for a dessert for the next day.  I bought a half flat – three boxes of blueberries, two of raspberries, and one of strawberries.  The boys were literally eating the blueberries by the handful, shoveling them in their mouths like I had never given them fruit before.  But I had to cut them off because I needed some of those blueberries and they acted like I had just taken ice cream cones away from them.

So on our way home from a family birthday celebration on Lopez Island, as we passed farm stand after farm stand full of berries, we pulled off and I bought a full half flat of blueberries.  They had a few and now are over it.  Which leaves me with precisely almost a full half flat of blueberries.  Only one thing to do with them.

Actually, there are lots of things I could do with them and considering I still have lots left over, I will be doing something else.  (Suggestions?)  The reason I went right to scones is because of good old Holly B.  We left for Lopez on Sunday and my sister-in-law Amy, who was leaving the island just as we were arriving, was kind enough to text me that Holly B’s would be closed on Monday, my birthday, for an “over-the-hump” day.  WHAT?? The nerve!  So we made sure to stop off on the way to the house.  Usually, when we go for the weekend, I have at least two visits to the bakery.  This time there was only one and if you can only go once, you have to get a cinnamon roll.  At least if you are me.  Oh yes, I could have gotten multiple things but there is such a thing as OD’ing on baked goods (oh yes there is!) and I’d rather than have a little than too much.  So I baked scones instead of buying them at the bakery.

Truth be told, I’m not a big scone girl.  Or muffin or pancake girl.  I like my breakfasts on the savory side and if I am going to eat something with loads of butter, I would rather have a brownie.  But when fruit is calling you and you have just seen gorgeous scones in a favorite bakery that you didn’t get a chance to sample, it’s time to make scones.

Now I have to tell you about my new favorite flour.  Over the past couple of months, I have gotten numerous emails from companies offering me free things with the idea that I will blog about them.  Many of the products are things I would never use but occasionally something catches my attention.  One of the first offers I got was for some flour from a company called Stone-Buhr.  Stone-Buhr works with wheat farmers in Washington, Oregon, and Idaho and has a web site (www.findyourfarmer.com) where you can find out where your bag’s wheat came from.  Cool, huh?  I’ve been a loyal King Arthur flour user for years but I love the idea of supporting local farmers and I have now officially made the switch.  After using up my free bag in a hurry (I go through a lot of flour), I was thrilled to find Stone-Buhr in my local grocery store.

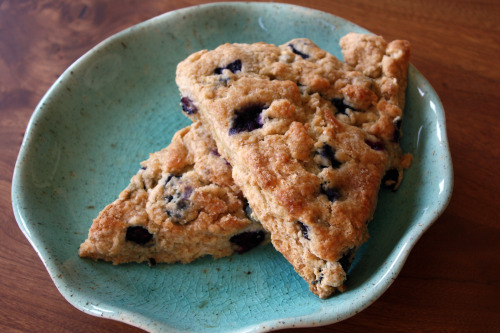
Back to the scones.  I really liked these because they are not too sweet so that the fruit can shine through.  There are all kinds of combinations you could use here and just about everything would be good.  Holly’s original recipe has you make a giant amount of scone mix which, although it keeps well, is not something I feel like storing in my refrigerator.  I cut it in half which is why some of the measurements might sound a little odd.  You will still have enough for two batches of scones.

One Year Ago: Indian Spiced Chickpea Salad
Two Years Ago: Raspberry Cake with Marsala

Holly B’s Fruit Scones
Adapted from With Love & Butter
Makes 8 large scones

Scone Mix
4½ cups all-purpose flour
1 cup plus 2 tbsp. whole wheat flour
2 tbsp. sugar
1½ tbsp. baking powder
1¼ tsp. baking soda
¾ tsp. salt
2¾ sticks cold butter, sliced

Place all the ingredients except the butter in a large bowl and mix.

Fit your food processor with the steel knife blade.  Put half the butter in the bowl and top with half the dry ingredients.  Pulse until the butter is reduced to pearl-sized bits.  Don’t over process or it will turn into a dough, you want a dry mix.  Pour the processed mixture into another large empty bowl.  Repeat this process with the remaining dry ingredients and butter.  Be sure to break up any large lumps of butter and, when through, toss thoroughly with your fingers.

Transfer the scone mix to an airtight container and store it in the refrigerator for up to 2 months, or in the freezer for up to 6 months.

Fruit Scones
3¼ cups scone mix
¼ cup sugar
1 cup fresh or frozen fruit, berries left whole, other fruit cut into ½-inch cubes
¾ cup buttermilk
Sugar for topping the scones

Preheat the oven to 375ºF with the rack in the center position.

In a medium bowl, toss the Scone Mix and sugar together with your fingers.  Add the fruit and toss again until just-mixed.  Frozen fruit will begin to melt and bleed at bit – this is OK.  Drizzle the buttermilk over the mixture and stir gently.  The mixture should be just wet enough to make a ball when pressed together.  If too dry, drizzle on more buttermilk.  Dryer is better than wetter.

Turn the dough onto a lightly floured surface and form into a disk 1½ inches thick.  Sprinkle generously with sugar.  Cut the circle into 8 wedges.  Place the scones at least 1 inch apart on a baking sheet.

Bake 10 minutes, rotate the pan, and bake 5 to 10 minutes more or until the scones are brown on the bottom (check with a spatula) and slightly brown on top.  The baking time maybe shorter if you are using fresh fruit.  Cool, or serve warm.

(DT: These get a bit soggy after a day or so, but still taste delicious.  You can always freeze them.)


Soft Tacos

July 28, 2010

The time – mid-1980’s.  The place – Camp Nor’wester, Lopez Island, WA.  The meal – tacos.

Dinner was always family style at our camp and on taco night, each table of eight got a bowl with ground beef in it, slightly-stale taco shells, and a platter filled with cheese, tomatoes, and lettuce.  Maybe there was a sour cream – I don’t remember because I’ve never been a big sour cream person.  Taco night was big at camp because the food was so filling – just what we needed after a long day of being outside in the sunshine.  I will never forget that sensation of having taco meat grease run down my chin and the disappointment I would feel when the kitchen ran out of taco fixings.  No matter how much they made, there was never enough.  Somehow however, there were an almost infinite number of taco shells and we would try and content ourselves by licking them and then sprinkling them with salt to eat as chips.

I’m not sure how this is possible but I have not had a taco since then.  I’ve had plenty of enchiladas and quesadillas.  I’ve probably eaten my weight several times over in guacamole.  But no tacos.

Until now!

I’ve always loved the idea of a soft corn tortilla filled with grilled vegetables and cheese.  It seems like precisely the time that I get a craving for them is on a dark and stormy winter night and it just feels all wrong to eat something summery.  Of course, I could fill a soft taco with lots of things but for my first go around, grilled vegetables sounded right.

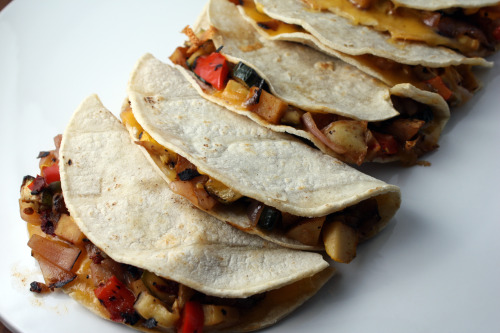
I turned to Annie Sommerville’s Fields of Greens and a recipe I have looked at longingly on many a winter night.  As with many of the recipes in this book, she kind of overcomplicates something that is actually quite simple.  So I have streamlined in the recipe that you see below.  The good news about these tacos is that a) they are delicious, b) you can make a lot of tacos, c) the filling keeps really well for a couple of days so you can make them again if you have leftovers, and d) both my boys devoured them.  When I made them using the leftovers, I also threw in some refried beans for the boys.  Graham ( 5½ )ate two whole ones and Spencer (3) finished his, albeit having picked out every last vegetable.


Grilled Summer Vegetable Soft Tacos
Inspired by Fields of Greens
Serves 6-8

The diced potato in here does give the dish more body but it’s also an extra step and more dishes to wash.  You can omit it if you like.  Substitute cotija cheese for the Cheddar if you prefer.

1 jalapeño chile, sliced in half and de-seeded
1 red bell pepper, cut lengthwise into thick strips
1 yellow pepper, cut lengthwise into thick strips
1 red onion, peeled and cut into ½-inch thick rings
1 zucchini, cut in half lengthwise and scored
1 yellow summer squash, cut in half lengthwise and scored
Olive oil
Kosher salt and freshly ground black pepper
1 chipotle pepper, minced, plus 2 tsp. of the sauce
1 medium Yukon Gold potato, cut into ½-inch cubes
¼ cup water
¼ cup chopped cilantro
12 thick corn tortillas
About 1½ cups grated Cheddar cheese

Prepare the grill.

Place the onions, peppers, and squashes on a large sheet pan.  Drizzle with olive oil and liberally sprinke with salt and pepper.  Place the vegetables on the grill and cook, turning as needed, until completely tender.  Remove from the grill and set aside.

Heat a bit of olive oil in a medium-size skillet and add the potatoes.  Sprinkle with a pinch of salt and a few grinds of pepper.  Lightly brown the potatoes over medium-high heat, using a spatula to loosen them as needed.  Add the water, cover the pan, lower the heat, and simmer until completely tender, about 5 minutes.  Tranfer to a medium size bowl.

Peel and seed the jalapeño.  Finely chop and add to the potatoes.  Chop the rest of the grilled vegetables into ½-inch pieces and add to the potatoes along with the chipotle and sauce.  Stir in the cilantro.  Taste for seasoning and add more chipotle sauce if it is not spicy enough for you.

Heat a little oil in a skillet and add a tortilla.  When it is soft and heated through, flip it over and heat the other side.  Sprinkle a bit of cheese over and spread about 1/3 cup filling across the center.  Fold the tortilla in half and keep them warm in a low oven while you repeat with the rest of the tortillas.  Serve with salsa, guacamole and sour cream if desired.


Forty

July 27, 2010

Yesterday was my birthday.  I turned 40.  I’ve been talking about this for a long time so I won’t go on and on about it.

Last year, I decided this was going to be the year of yoga.  I wanted to start slowly and get my practice back on track so that, on my 40th I could do 40 sun salutations.  I am not a big goal-setter.  But I did set this goal and I accomplished it.  Without really even breaking a sweat.

Yep.  40 of those.

Last year I also set some food goals for myself.  I haven’t gotten around to making my own pasta yet (I bought the Kitchen Aid attachment though!), or crèpes, and I’ve given up on the idea of a sourdough starter because the truth is, I don’t really like sourdough bread.  I did make Holly B’s cinnamon rolls and almond butterhorns, I’ve made lots of ice cream, and I’ve gotten more practice with layer cakes.  I’m not sure I could say I’ve gotten better at them.  I feel they still control me rather than me controlling them.  After another year of practice perhaps.

My 30’s were quite a decade.  I started them untangling myself from a disastrous relationship and working at a job that I hated.  Just a few short months later, I met Randy and everything changed.  In the last 10 years I have…

gotten married
had two children
trained to teach yoga
taught yoga
moved to London and back again
traveled a fair amount
bought and sold two houses
started a personal chef business
stopped my personal chef business
started my blog

And countless other little and big things.  I’ve been busy.  I wonder what the next 10 years holds.


Lavender-Honey Ice Cream

July 23, 2010

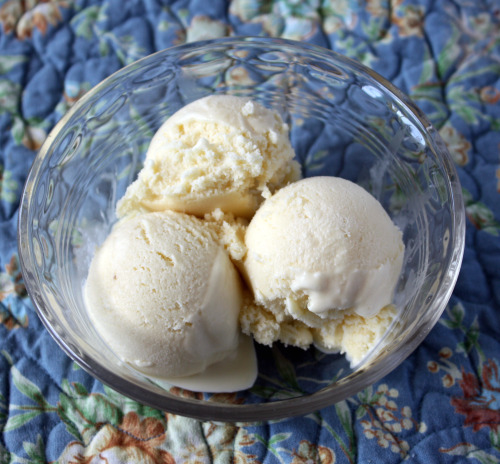
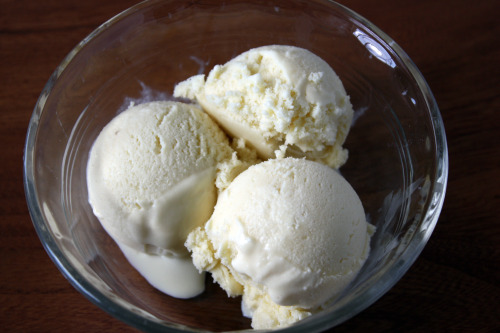
In a moment, I am going to show you a photo of some ice cream.  The ice cream is white and it kind of looks like vanilla.  Actually if it were homemade vanilla, at least the way I make it, there would be black flecks in it from the vanilla bean.  So, the ice cream I am going to show you looks even more vanilla than vanilla – if you catch my drift.

This is my garden.  I posted about it in May and, as you can see if you compare the photos, it has exploded.  Our study, where I do all my writing and emailing, faces this garden.  As I gaze out the window in January, it seems impossible that plants will every bloom again.  Everything is cut back and looks completely dead.  But then, right on schedule this happens.

And this.

And this.

Back to the ice cream.  You see those plants up there?  Lavender.  As you walk up to our front steps, you get a tremendous whiff of lavender.  I used to think I didn’t like the scent.  I still don’t if you are talking about a perfume, an essential oil, or a sachet.  But fresh is something else all together.  At the risk of sounding like one big cliché, I first smelled fresh lavender in Provence.  On our way home, after our year in London, we spent a week at a special little villa with some friends.  The English couple who owned the villa harvested the lavender and left it out to dry around the property.  It was there that I learned that the scent of those purple flowers is much more delicate and much sweeter than the potpourri in a bad B&B would leave you to believe.

Still, lavender in ice cream?  When I told my brother I had made Lavender-Honey Ice Cream, he immediately yelled, “Soap!”.  But no.  It tastes of cream and honey with just the slightest and most subtle floral undertone – and I mean that in the most flattering way possible.  This is actually the second time I have made this flavor and the first time Randy told me it was the best ice cream he had ever eaten.  Randy is not a big food person but he loves ice cream.  He loves it enough that if I said I couldn’t live without one of those $500 ice cream makers which take up a tremendous amount of room but don’t require the bowl to be frozen for 24 hours before using it, he’d probably run right out and buy me one.  But then I would be making ice cream constantly so it’s probably best that I stick with my $50 Krups model.

In my head this is also known as the ice cream that almost burned my house down.  The first time I made it, I was steeping the honey with the lavender.  This is accomplished by putting the honey and lavender flowers in a small pot, bringing the heat up so the honey is hot, and then turning off the heat and allowing the flavors to meld together.  Right as I turned the heat on under the burner, I got a phone call.  I ran into the study to check something on the computer while still on the phone and proceeded to forget about the honey.  I also forgot that I had left a rubber spatula (heat resistant to 650ºF!) in the pot and by the time I smelled my error, the entire pot was burned (my one quart!), the spatula was non-existent and there was smoke throughout the house.  Just as I ran upstairs to try and furiously fan the smoke away from the detectors so my boys wouldn’t wake up, alarms all over the house went off.  This is a long story.  All I’m really trying to say is – don’t walk away from the honey.

One Year Ago: What do you know?  Chocolate Chip Ice Cream

Lavender-Honey Ice Cream
The Perfect Scoop

Makes about 1 quart

½ cup good-flavored honey
¼ cup dried or fresh lavender flowers
1½ cups whole milk
¼ cup sugar
Pinch of salt
1½ cups heavy cream
5 large egg yolks

Heat the honey and 2 tablespoons of the lavender in a small saucepan.  Once warm, remove from the heat and set aside to steep at room temperature for 1 hour.

Warm the milk, sugar, and salt in a medium saucepan.  Pour the cream in a large bowl and set a mesh strainer on top.  Pour the lavender-infused honey into the cream through the strainer, pressing on the lavender flowers to extract as much flavor as possible, then discard the lavender and set the strainer back over the cream.

In a separate medium bowl, whisk together the egg yolks.  Slowly pour the warm mixture into the egg yolks, whisking constantly, then scrape the warmed egg yolks back into the saucepan.

Stir the mixture constantly over medium heat with a heatproof spatula, scraping the bottom as you stir, until the mixture thickens and coats the spatula.  Pour the custard through the strainer and stir it into the cream.  Add the remaining 2 tablespoons lavender flowers and stir until cool over an ice bath.

Chill the mixture overnight in the refrigerator.  The next day, before churning, strain the mixture, again pressing on the lavender flower to extract their flavor.  Discard the flowers, the freeze the mixture in your ice cream maker according to the manufacturer’s instructions.


Tender Tart Dough

July 20, 2010

“You can’t teach an old dog new tricks.”

We are all familiar with that saying, right?  I have to say that I don’t agree.  Especially when it comes to cooking.  I have spent a lot of years in the kitchen working as a personal chef for three years, catering parties, teaching a few classes along the way, and I still feel like I have things to learn.  I love taking a cooking class here and there.  Besides getting great food to eat, I usually learn a thing or two.  (And sometimes I walk away with the best chocolate chip cookie recipe ever.)

A few weeks ago, I took a class at Delancey.  You know about Delancey, right?  If you read Molly’s blog, then you surely do.  Molly and Brandon have a friend named Olaiya who is a talented chef and caterer.  She teaches cooking classes all around town and a few Mondays a month, she teaches there when the restaurant is closed.  I took a sweet and savory tart making class partly because the timing worked for me, and partly because I could always use some pointers when it comes to tart dough.

If you look at recipes for either pie or tart dough, they often come across as overly finicky and sometimes even alarmist.  Like if you overwork the dough, or allow it to become too warm, or add too much water the sun will suddenly start rising in the West and setting in the East.  At least, that is how I always read them.  Consequently, I have always been nervous working with tart and pie dough.  I do it, but I don’t like it.  After years of practice, my dough almost always comes out fine but I dread the process.  Watching Olaiya handle her dough with such confidence boosted mine a bit.  She also sent around samples of the dough at its “ready” point and it was much wetter than I have every allowed my dough to become.  I don’t know if you have ever tried to roll out dough that was too dry, but let me tell you that having dough crack all over your board and not hold together is not a pleasant experience.

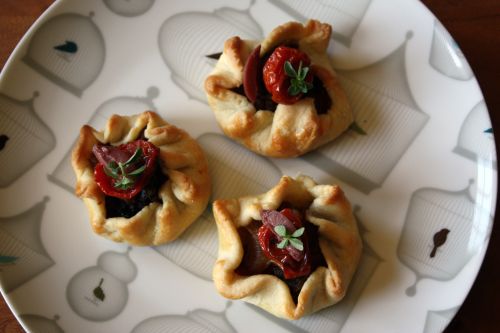
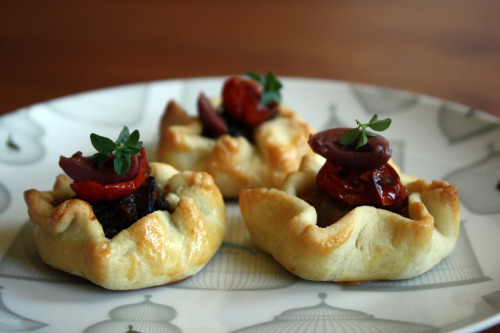
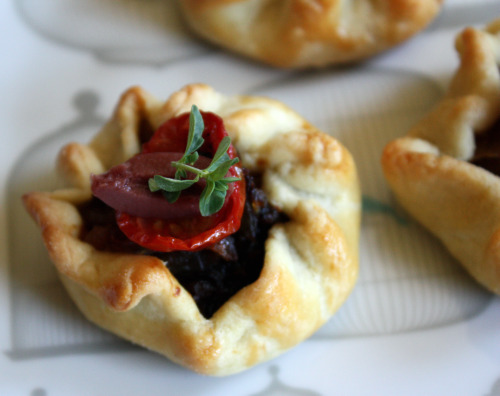
For last Friday’s party, I wanted to make Pissaladière but I wanted to use dough rather than the puff pastry I have used in the past.  I wanted to make bite-size tarts and, while I could have made something work with my old method, I was eager to try out my new-found dough confidence.  Forgetting that I just bought adorable tartlet molds in Paris, I opted for mini-galettes.  The dough was as dreamy to work with as I hoped and these tarts came together quickly.  The next day, I made a double batch, wrapped the four disks of dough well, and put them in the freezer to have at the ready for next time(s).

I have to admit – I didn’t taste these bad boys.  Brooke sent me an email about two hours before the party was set to begin saying that their numbers jumped from 20 to 30.  (Maybe because their studio is air-conditioned and it was 94 degrees that day.)  She understood that there was nothing I could do but if I had anything extra to please bring it.  I had 28 galettes and I brought all of them.  But I feel pretty confident that these were good.

One Year Ago: Asparagus Ragout

Mini Pissaladiere
Dana Treat Original
Makes 24-28 mini tarts

You can easily cut this recipe or you can opt to make one large tart rather than the small ones.

Olive Oil
24-28 cherry tomatoes
Kosher salt and freshly ground black pepper
8 large yellow onions, peeled, cut in half, and thinly sliced
2 tbsp. fresh lemon thyme (or regular thyme), plus more for garnish
About 20 Kalamata olives
1 recipe Olaiya’s Tender Tart Dough
1 egg beaten together with 1 tsp. water

Preheat the oven to 400ºF.  Place the cherry tomatoes on a baking sheet and drizzle them with olive oil, then give them a sprinkle of salt and a few grinds of pepper.  Using your hands, toss well.  Place the sheet in the oven until the tomatoes are very soft and starting to brown, about 20 minutes.  Turn the heat down to 375ºF and set the tomatoes aside.

Meanwhile, heat two large skillets over medium heat.  Add about 2 tablespoons of olive oil to each one, then add the onions – splitting them between the two skillets.  Give each one a healthy sprinkle of salt and cook, stirring occasionally, until the onions soften.  Turn the heat down to medium-low, add the thyme, and continue to cook, stirring occasionally and scraping up any brown bits, until the onions are very soft and a deep brown, about 45 minutes.  (If you have a cast iron skillet, use it!)  If the onions seem very wet, allow them to drain.  Set aside.

Remove your dough from the refrigerator.  Working with one half at a time, and on a lightly floured surface, pat the dough into a slightly larger and flatter disk.  Cut the circle in half and then each half into either 6 or 7 pieces.  Using your hands, coax each piece into a circle, then roll it out to about 1/8-inch thick using a rolling pin.  Repeat with the other dough pieces.  Brush each piece with some of the egg wash and place on a parchment paper-lined baking sheet.

Spoon about 2 tbsp. of onions into the middle of each circle, leaving a 1½-inch border.  (You will need to continually eyeball your onions to make sure you have enough for all the dough.)  Pull one side of the dough up, then turn it a bit and pleat the dough all the way around the circle.  This will happen quite naturally, just go with it.  Once you have finished with all the dough, brush each tart with a bit more of the egg was and then place in the freezer for 10 minutes.  Repeat with the other half of the dough, and then with the other disk of dough and the remaining onions.

Bake the Pissaladiere, one sheet at time in the oven until the pastry is a nice golden brown, about 20-25 minutes.  Remove and allow them to cool on a rack.  Before serving, top each one with a tomato and a couple of olive pieces.  Garnish with thyme if desired.

Olaiya Land’s Tender Tart Dough

3 cups all-purpose flour
2 tbsp. sugar
1¾ tsp. salt
1 cup plus 2 tbsp. (2¼ sticks) chilled unsalted butter, cut into ½-inch cubes
8 tbsp. (or more) ice water
1½ tsp. apple cider vinegar

Blend flour, sugar, and salt in a food processor.  Add butter; using on/off turns, process until coarse meal forms.  Add 8 tablespoons ice water and cider vinegar; blend until moist clumps form, adding more ice water by the teaspoon if dough is dry.

Gather dough together.  Turn out onto work surface; divide dough in half.  Form each half into ball and flatten into disk.  Wrap disks separately in plastic and refrigerate 1 hour.  (Can be made ahead.  Keep dough refrigerated up to 2 days, or enclose in a resealable plastic bag and freeze up to 1 month.  Thaw in the refrigerator overnight.)  Soften slightly at room temperature before rolling out.


« Older Posts