Archive for October, 2010

Pumpkin Spice Cookies for Fall

October 31, 2010

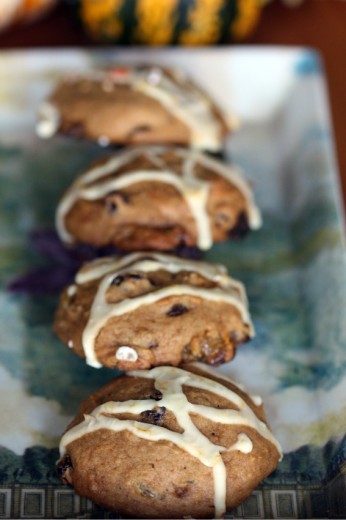
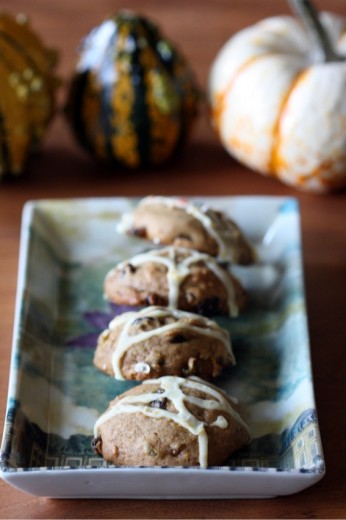
When I mentioned to Graham that I was making pumpkin cookies for his kindergarten class Halloween party, I don’t think this is what he had in mind.  Say “pumpkin cookies” to an almost six year old and there are visions of giant round cookies with orange frosting and sprinkles.  I realized this later.

So no, this pumpkin cookie is not what Graham had in mind, but that did not stop him from devouring several.  And I have to say, they were a hit in the classroom with kids and adults alike.  Although we are just hours from trick or treating, I wanted to share this recipe because it really isn’t a Halloween recipe, it’s more of just a good fall recipe.  The cookies are really more like little cakes – very soft with the raisins providing bits of sweetness and a little texture.  The cookie itself is not all that sweet but that little bit of (easy) frosting really makes them a treat.

I have made these cookies for lots of different people over the years and everyone always seems to be delighted by them.  My only criticism is that they don’t keep well, so be sure to eat them within a day or so.  In my house, that is not a big problem.

Pumpkin Cookies Previously on Dana Treat: Pumpkin Whoopie Pies
One Year Ago: Braided Challah (I’m making it this week!)
Two Years Ago: Zucchini Soup

Pumpkin Spice Cookies
Adapted from Bon Appétit
Makes about 2 dozen

I make my cookies on the large side using a release-mechanism ice cream scoop.  If you choose to make yours smaller, you will – of course – get more cookies.

Cookies
½ cup (1 stick) unsalted butter, room temperature
½ cup (packed) light brown sugar
½ cup sugar
1 large egg
2 tbsp. pure maple syrup
1 cup canned solid pack pumpkin
1 tsp. grated orange peel
1 tsp. maple extract
1 tsp. ground cinnamon
½ tsp. ground allspice
2 cups flour
1 tsp. baking soda
½ tsp. salt
1 cup raisins

Orange Glaze
1 cup powdered sugar
4 tsp. orange juice
1 tsp. grated orange peel

For the cookies
Preheat oven to 350ºF.  Line large heavy baking sheets with parchment paper.  Beat first 5 ingredients in large bowl until well blended.  Add pumpkin, orange peel, maple extract, cinnamon and allspice and beat to blend.  Mix flour, baking soda and salt in small bowl.  Add to pumpkin mixture and beat until just combined.  Mix in raisins.

Drop batter by rounded tablespoonfuls onto prepared sheets.  Bake cookies until edges are golden brown and centers are firm to touch, about 10 to 12 minutes.  Transfer to racks and cool completely.

For the Glaze
Whisk all the ingredients for the glaze together in a small bowl.  You want a thick glaze but it should still be drizzle-able.  If it is too thick, add drops of orange juice to thin it out slightly.  Drizzle Orange Glaze over cookies.  Let stand until glaze sets, about 30 minutes.


Spicy Squash Salad

October 28, 2010

Deb beat me to it.  I’ve been wanting to tell you about this amazing salad ever since I made it for the yoga retreat a few weeks ago.  But there were Buckeyes to mention and photos of boys in pumpkin patches that I needed to share.  There was also a weekend of being whisked off to New York City and amazing food to be eaten and then I opted to write about cupcakes before salad.  Silly me.

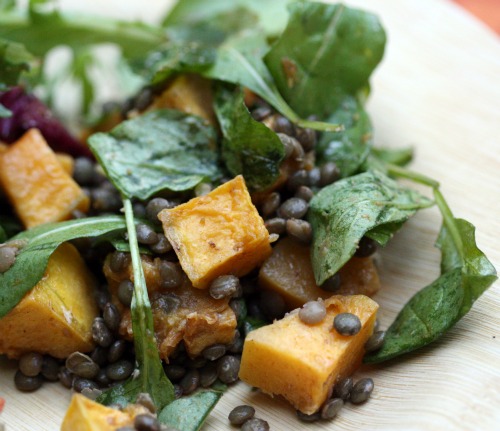
In case you don’t read Smitten Kitchen (you should) or you just really want to know more about this terrific salad, I’m still going to post about it.  When I first looked at the recipe, I figured it must be a home run.  I love all the components separately – winter squash, Le Puy lentils, goat cheese, arugula – but I had never had them all together.  I figured if I loved them individually, I’d love them collectively.  Then, as I was pulling the salad together, doubts started to creep in.  Do these things really go together?  Is this a salad or a side dish?  Is the small amount of olive oil I used to roast the squash really going to make enough of a dressing?  Is anyone going to eat this?

Answers: Yes, doesn’t matter, yes, and yes until the bowl is empty.  This salad was the first to go.  It surprised me.  On a day where I made lots of good food, I took a small amount thinking I just needed to taste it so that I could write about it.  Then I took another taste.  Then I pushed aside another salad to make more room for this one.  Aside from the Buckeyes, I got more comments about this salad than any other dish I made that day.

Just before I left for New York, a very cool opportunity presented itself.  A lovely woman, fellow yogi and food lover, asked me to prepare some salads for an advisory committee that she heads.  She is interested in healthy food and helping to influence what that means in our country.  Of course this is near and dear to my heart so I said yes.  She had requests.  My Israeli couscous salad and the squash salad.  She requested two other salads as well.  (And 140 Buckeyes but that is another story.)  Again the squash got the most comments of the day.

One Year Ago:  Roasted Pear Galette with Chevre and Pomegranates

Spiced Squash, Lentil, and Goat Cheese Salad
Adapted from Bon Appétit
Serves 6-8

¾ cup French green lentils
2 pounds butternut squash, peeled, seeded, and cut into 1-inch pieces
3 tbsp. olive oil, divided
1 tsp. ground cumin
1 tsp. smoked Spanish paprika
½ tsp. kosher salt
4 cups baby arugula
1 cup soft goat cheese, crumbled
¼ cup mint leaves, chopped
1 tbsp. red wine vinegar

Place lentils in a small bowl.  Cover with cold water and let soak 10 minutes.  Drain.

Cook lentils in boiling salted water until tender but firm, about 30 minutes.  Drain and rinse under cold water.  Drain again.

Preheat oven to 375ºF.  Place squash on a baking sheet and toss with 2 tablespoons oil, cumin, paprika, and salt.  Roast 20 minutes.  Turn squash over.  Roast until tender, about 10 minutes.  Cool.

Combine lentils, squash, and oil from baking sheet with arugula, half of goat cheese, mint, vinegar, and 1 tablespoon oil.  Season with salt and pepper.  Sprinkle remaining goat cheese over.

(My make-ahead tips are as follows.  I made the squash and the lentils one day ahead and stored them separately.  I made sure they came to room temperature before mixing everything together I also chopped the mint the day before and stored it wrapped in a paper towel and then a ziploc bag.)


Maple Cupcakes with Maple Cream Cheese Frosting

October 26, 2010

I’ve mentioned this before but cupcakes are not really my thing.  In Seattle, like many other cities, there is no shortage of places to buy them.  What I find is that, in addition to them costing upwards of $3 a piece, the cake part tastes like sweetened air and the frosting tastes of moist powdered sugar.

Let me say a word about frosting.  I was never really a frosting person.  I remember requesting the corner piece of the birthday cake, the one with the greatest proportion of flowers and where the frosting was piled high, and then, after a few bites, scraping it off to get to the cake underneath.  My kids, of course, are the opposite which works out well since I get to just eat their cake.

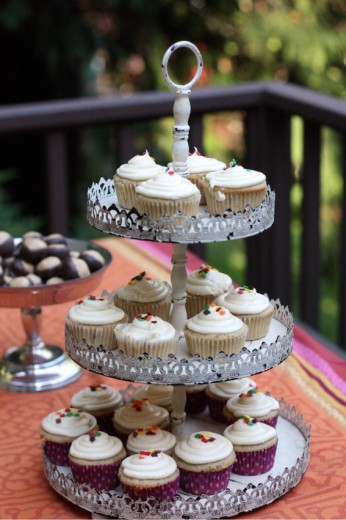
So, a cupcake has two very different things going on.  If both of those things are good, tasty moist cake and frosting with a flavor, you have a good cupcake.  If both of those things are great, you have a great cupcake.  What if one is very good and one is great?  Is it a reallygoodalmostgreat cupcake?

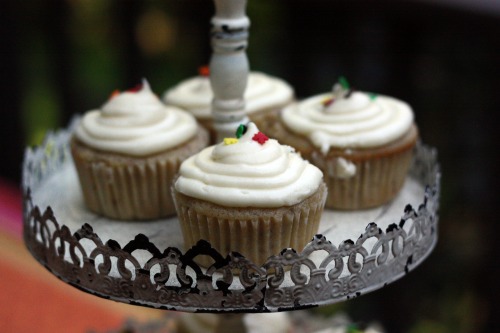
Cake – very good.  Frosting – great.  I know.  High praise from the person who doesn’t like frosting.  I made these cupcakes because I was intrigued by the ingredients for the cake but ended up being seduced by the frosting.  There is nothing magic going on here, just butter, cream cheese, a bit of maple syrup, and a lot of sugar, but the proportions are perfect so that it doesn’t overwhelm you with sweet.  Instead, your quite sweet and very nice cake gets topped with a bit of tang and richness.  Oh all right – all right, it’s a great cupcake.

Cupcakes previously on Dana Treat: Mississippi Mud Cupcakes, Mint Filled Brownie Cupcakes
One Year Ago: The Big Brownie Smackdown
Two Years Ago: Gnocchi with Winter Squash and Seared Radicchio

Maple Cupcakes with Maple Cream Cheese Frosting
Baked Explorations
Makes 24 cupcakes

For the Maple Cupcakes
3 cups flour
3 tsp. baking powder
1 tsp. salt
½ cup (1 stick) butter, slightly softened, cut into chunks
2 tbsp. vegetable shortening, at room temperature
2 cups pure maple syrup
3 egg yolks
1 large egg
1¼ cups whole milk
1 cup walnuts, toasted and coarsely chopped

For the Cream Cheese Maple Frosting
¾ cup (1½ sticks) unsalted butter, softened
12 oz. cream cheese, softened
4 cups confectioners’ sugar, sifted
2 tbsp. maple syrup

Make the Maple Cupcakes
Preheat the oven to 325°F.  Line two 12-cup cupcake pans with paper liners.

In a medium bowl, sift together the flour, baking powder, and salt.

In the bowl of a standing mixer fitted with the paddle attachment, beat the butter and shortening until ribbonlike.  Turn the mixer to low and stream in the maple syrup.  Increase the speed to medium-high and beat until the mixture is nearly uniform in color, about 3 minutes.

Add the egg yolks and egg, one at a time, and beat until just incorporated.  Scrape down the sides and bottom of the bowl.  Add half of the flour mixture and mix on low speed until incorporated.  Stream in the milk.  Stop the mixer, add the rest of the flour, then turn the mixer on until just combined.  Scrape down the sides and bottom of the bowl and fold in the walnuts.

Fill the prepared cupcake pan about three-quarters full.  Bake the cupcakes for about 20 to 25 minutes, rotating the pans halfway through the baking time, until a toothpick inserted in the center of a cupcake comes out clean.  Note:  These cupcakes take long to bake than traditional cupcakes due to the maple syrup.

Allow the cupcakes to cool for 15 minutes in the cupcake pan, then turn them out onto wire racks to cool completely.

Make the Cream Cheese Maple Frosting
In the bowl of a standing mixer fitted with the paddle attachment, beat the softened butter until it is completely smooth.  Add the cream cheese and beat until combined.

Add the sugar and the maple syrup and beat until smooth.  Be careful not to overbeat the frosting or it will lose structure.  (At this point, if you want to, you can tightly cover the frosting and refrigerate it for one day.  Let it soften to room temperature [DT: which takes a long time] before using.)

Assemble the cupcakes
There are many ways to frost a cupcake.  If you have a pastry bag, simply fit with the largest tip, fill the bag with frosting, and pipe enough to cover the cupcakes in a big mound.  If you do not have a pastry bag, use an ice cream scoop with a release mechanism to scoop the frosting and dispense it onto the top of the cupcake.  you can also use an offset spatula to frost the cupcakes.  Top with toasted walnuts (DT: or sprinkles).

Refrigerate any leftover cupcakes in an airtight container for up to 3 days.  Bring cupcakes to room temperature before serving.


Pumpkins, Cookies, and Vitamin D

October 22, 2010

Some October news.

First, did you notice the carrots are gone from my header?  If you wonder why there are chives there instead, read this post.  In other housekeeping news, my recipe index is totally updated.  If you are searching for something, now it should be easier to find.

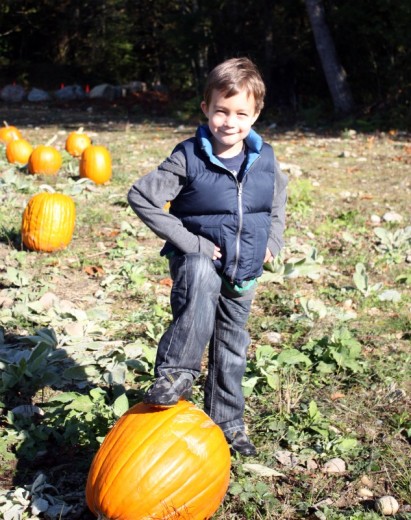
Last weekend, it was time to hit the pumpkin patch.  Every Halloween has been fun with our kids but as they get older, it becomes more exciting.  Graham came up with this pose on his own.

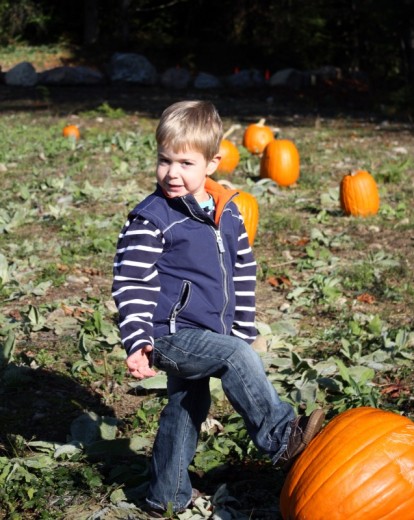
So of course, Spencer had to copy it.

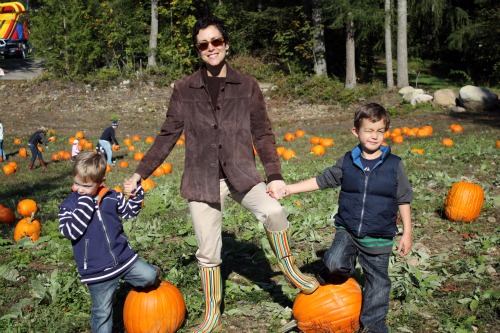
And then I had to give it a try.  (Like my wellies?  I got them in London.)

Did you know that most people are vitamin D deficient in Seattle?  I think your level is supposed to be between 33 and 100 and at my last physical, mine was 18.  Our lack of sunlight might explain why my boys look as though they have never seen that strange round object in the sky.

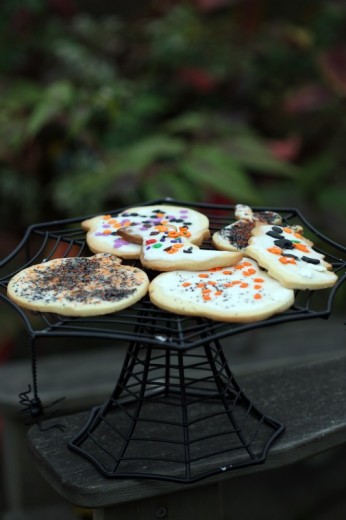
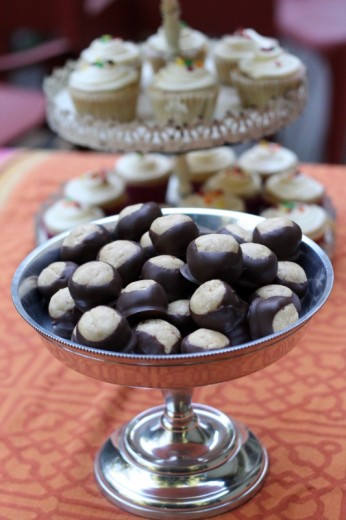
Halloween means candy but it also means cookies.  Our amazing friend Denise sent us some great new cookie cutters, black sprinkles and that awesome cake/cookie stand.  (And yes, those are spiders hanging off it it.)

As this post goes live, I am off to New York for a couple of days of eating and catching up with friends both old and new.  I hope you all have a great weekend.


Buckeyes

October 20, 2010

One of the most wonderful things about our truly amazing babysitter Erika, is the friends she has brought into our lives.  Basically every single person who has every babysat for my kids is a friend of Erika’s.  Catherine is our other regular and our boys love her as much as Randy and I do.  She is a southern girl making a fulfilling life for herself in Seattle.

Catherine brings her sweet spirit, cute accent, and beautiful smile to our house about every other Friday for a date night.  She is a very enthusiastic eater of my food so I love having little things hidden away for her in the refrigerator or in the cookie jar.  When Catherine turned 30 last fall, she asked me to cater a dinner for her.  I was very touched that she asked and had a lot of fun deciding on a menu.  Graham loved sharing his house with 20 beautiful women dressed in their best party clothes.  After the holidays, Catherine brought me two huge bags of pecans from her parents’ tree.  Yes, we love her.

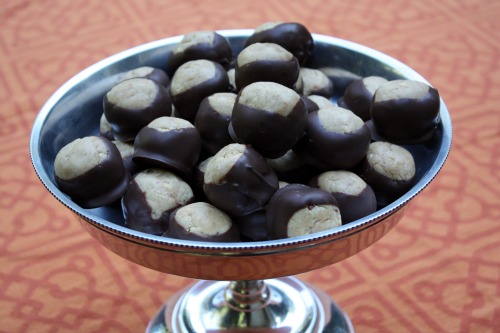
I made these crack-like concoctions the other day for our yoga retreat and, since Catherine babysat on Friday night, I saved her a few.  She walked in and really, before saying hello to me or the boys said with wide eyes, “Are those Buckeyes?”  A Southern girl who knows her treats.

Being an almost lifelong Pacific Northwesterner, I had never heard of Buckeyes.  My loss!  These over-the-top treats are a mixture of cream cheese, graham crackers, butter, and peanut butter dipped in chocolate.  It may not surprise you to know that I got the recipe from the new Baked cookbook.  It may also not surprise you to know that the other treat I made for the retreat also came from that cookbook.  And if neither of those things surprise you, then you probably know that I want to make every single thing in that book, like, tomorrow.  I think it may even surpass the first one in terms of decadence and all around yuminess.

One Year Ago: Fettucine with Oil-Cured Olives, Tomatoes and Goat Cheese
Two Years Ago: Gnocchi with Winter Squash and Seared Radicchio

Buckeyes
Baked Explorations
Makes 36 to 42 buckeyes

¼ cup cream cheese, softened
1½ cups peanut butter
1 cup graham cracker crumbs (about 9 full graham crackers)
3 cups confectioners’ sugar
10 tbsp. (1¼ sticks) unsalted butter, melted and cooled
12 ounces good quality dark chocolate, coarsely chopped

Make the candy
In the bowl of a standing mixer fitted with the paddle attachment, beat the cream cheese and peanut butter until combined.  Add the graham cracker crumbs and beat on medium speed for 10 seconds.  Add the confectioners’ sugar and butter.  Beat at low speed for 20 seconds to prevent the sugar from spilling over, then gradually increase the speed until the mixture is completely combined.  Scrape down the sides and bottom of the bowl and beat again.  The mixture will feel slightly dry.  Set the peanut butter filling aside while you melt the chocolate.

In the top of a double boiler set over hot water, melt the chocolate, stirring frequently until it is completely smooth.  Pour the chocolate into a small, deep bowl.  Let cool to tepid (about 100ºF, body temperature) while you shape the peanut butter centers.

Assemble the Buckeyes
Line a sheet pan with parchment paper.  Scoop out slightly more than 1 tablespoon’s worth of filling and use your hands to form it into a ball.  Place the ball on the prepared sheet pan and repeat the process until all the filling has been shaped.  The balls can sit fairly close to each other, just make sure they are not touching.

One by one, using a fork or large skewer, dip each ball into the chocolate.  Roll the ball around from side to side to cover almost the entire peanut butter center, leaving a small amount uncovered.  Manipulate the buckeye so that the dripping chocolate covers the holes made by the fork.  Let the excess chocolate drip back into the bowl and return each chocolate-covered buckeye to the pan.  Refrigerate the entire sheet pan for about 30 minutes to set the chocolate before serving.

(Buckeyes will keep for up to 3 days, tightly covered, in the refrigerator.)


« Older Posts