Category: Bread

Cilantro-Scallion Bread

August 8, 2012

This was one of those composing-the-blog-post-in-my-head-as-I-bake recipes.  I started pulling the ingredients from my pantry and thought about all those poor people out there who are afraid to make bread because they are afraid of yeast or dough or yeasted dough.  I’ve done yeast pep talks before, both here on the blog and in my cooking classes, and I figured it was time for another one.  The dough was incredibly quick to mix together and had a short rise time.

But!  The dough did not double, as the recipe said it would after an hour, nor did it even rise a little.  I know from bread baking experience that I could just persevere and all would be fine.  But!  The dough was really sticky.  Like so sticky that I probably used about a cup of flour to just make sure it didn’t stick to the rolling pin and the board.  But!  The dough was also so fragile that I tore it a couple of times trying to roll it so I gave up and floured my hands really well and started pressing it into the desired rectangle.  Except that my rectangle ended up looking more like the state of Nevada than a rectangle and that is when I reminded myself that this – THIS – is why people are afraid of yeast or dough or yeasted dough.

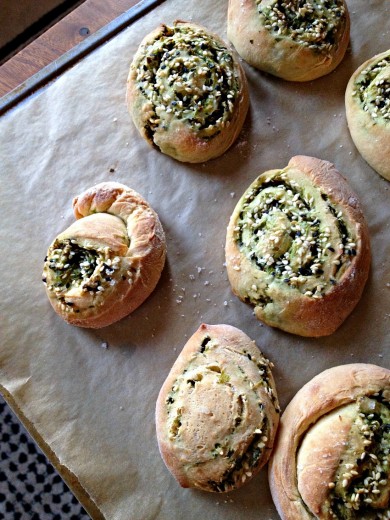
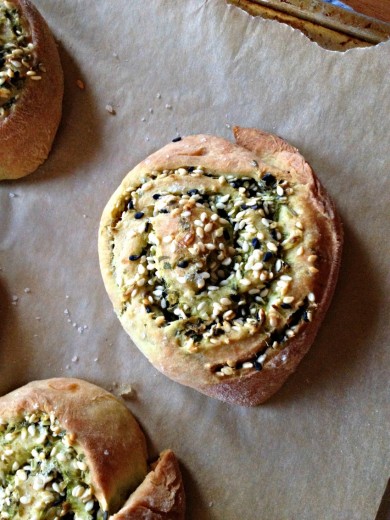
As soon as the scent of baking bread mingled with the filling of puréed scallions and cilantro mixed with a liberal amount of sesame seeds began wafting out of my oven, I had moved beyond my frustration.  I cleaned the flour off the counter and out of my hair, and was ready to give these rolls another chance.  Randy, having seen none of the drama, proclaimed these “oh wow, super yum” which is as close to an A+ as I can get.  And truly, for how impressive they look and for how tasty they are, the stress is more than worth it.  The texture of the dough is slightly flaky and they are just the slightest bit sweet, but also nice and herbal and savory and a bit nutty from the sesame seeds.  I sprinkled a good French sea salt over the top of them before going into the oven and I would suggest you do the same.  The recipe ends with the dreaded words “best served warm”.  I did happen to time their exit from the oven with dinnertime.  We ate four of them, I allowed the other eight to cool and then wrapped them in foil and stuck them in the freezer.  Several nights later I pulled a few out and heated them in a 325º oven for about 10 minutes and they tasted as good as the day I made them.

Two Years Ago: Israeli Couscous with Olives and Roasted Tomatoes

Cilantro Scallion Bread
Bon Appétit
Makes 12

If you don’t have black sesame seeds, just add another tablespoon of white to the mix.

2 tsp. active dry yeast
2 tsp. kosher salt, divided
2 tsp. sugar, divided
1¾ cup plus 3 tbsp. all-purpose flour
4 tbsp. unsalted butter, chilled, cubed
1 large egg plus 1 yolk
1¼ cup coarsely chopped scallions
½ cup coarsely chopped fresh cilantro
½ cup sesame seeds
1 tbsp. black sesame seeds
3 tbsp. olive oil plus more for bowl and brushing
Sea salt, for sprinkling

Line a baking sheet with parchment paper.  Pour ½ cup warm water (105º – 115º) into a small bowl.  Sprinkle yeast, 1 tsp. salt, and 1 tsp. sugar over; let stand until mixture bubbles, about 10 minutes.

Place flour, butter, remaining 1 tsp. salt, and remaining 1 tsp. sugar in bowl of a stand mixer with dough hook attached.  Rub in butter with fingertips until mixture resembles coarse meal.  Beat in egg, yolk, and yeast mixture, scraping down sides.

Knead on medium speed until dough is soft and smooth, about 5 minutes.  Form dough into a ball; transfer to a large, lightly oiled bowl.  Cover and let rise until doubled in size, about 1 hour.

Meanwhile, combine scallions and cilantro in a food processor and pulse to finely chop.  (DT:  I used my mini food processor for this one.)  Transfer mixture to a medium bowl; stir in all sesame seeds and 3 tbsp. olive oil and set aside.

Preheat oven to 350º.  Roll dough into a 18×9″ rectangle.  Spoon scallion mixture evenly onto center and spread mixture to corners of dough.  Working from one short edge, roll dough rectangle into a cylinder.  Cut cylinder into ¾” dough swirls.  Transfer dough swirls to prepared baking sheet; brush each with oil and sprinkle with sea salt.  Bake until golden brown, about 30 minutes.


Holly B’s Savory Brioches

April 9, 2012

When you walk into Holly B’s, the beloved bakery on the beloved island of Lopez, it can be a little overwhelming.  What to choose?  I’ve said this before about that amazing place, but this is not a bakery of wonders.  There are no perfectly shaped chocolate domes with pearled sugar placed just so, no clean cuts of multi-layered cakes, no puff pastry marvels with flawless custard and fruit cut in exactly the same size slices.  What you will find is time-tested and time-honored treats.  Rustic, homemade, generous, imperfect in the perfect way.  Kind of like if you were a really good home baker and you just happened to open a bakery on a rural island (which is just what Holly B did).

Here is the catch.  We often hit Holly B’s at lunch time and at lunch time, I want lunch.  Yes, a cinnamon roll or an orange swirl or an almond butterhorn can make a very nice lunch.  Especially when followed by a peanut butter brownie or a cappuccino bar.  But the truth is that, being a savory person, I want something savory for lunch.  Holly B’s sometimes has pizza (and if you ever go, and they have the Mexican pizza, buy two pieces and eat one for me) but more often than not, the savory options are only a few.  There is almost always a ham and cheese croissant (no thanks) and there is always a savory brioche.

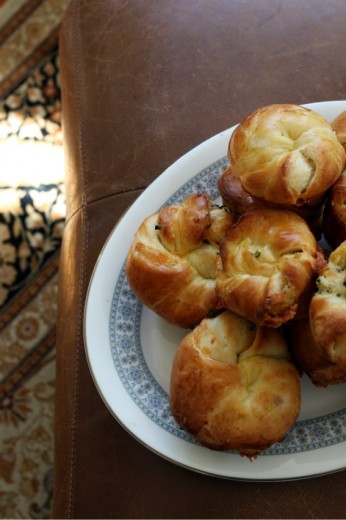
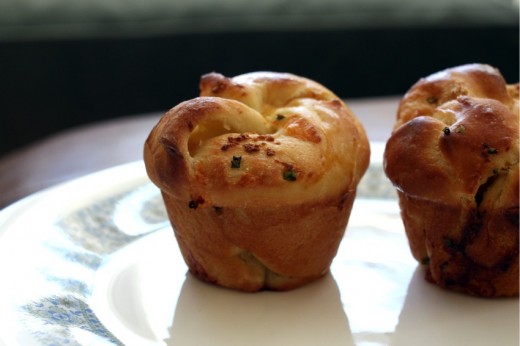
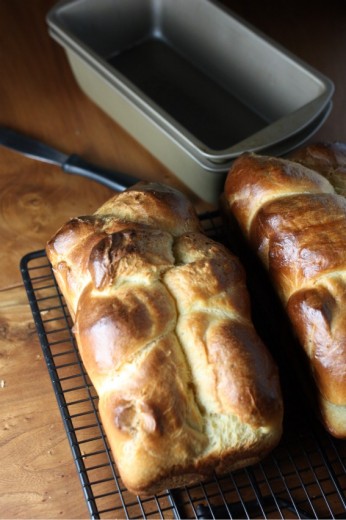
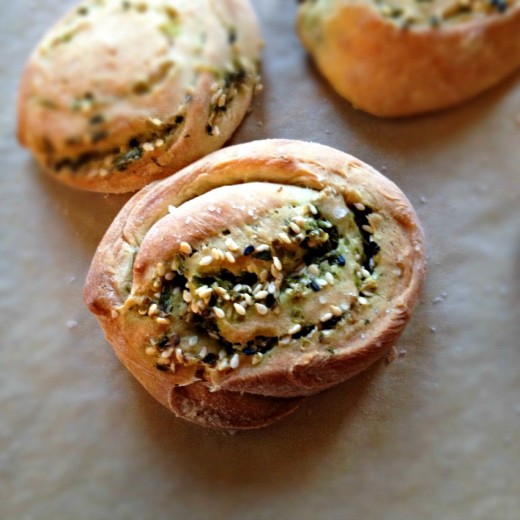
Having enjoyed her brioches for so many years, it is a little surprising that I haven’t made them yet.  Up until recently, I was a little intimidated by brioche.  Then I made some for Patricia Wells and I realized that it isn’t hard at all, there is just a lot of mixing, and you need to start the dough the night before you need it.  This recipe is really very easy – not too much mixing, and super dreamy easy-to-work-with dough.  There are many options in the book for fillings, most of them savory.  All sounded good to me (Pesto and Parmesan, Cheddar and Salsa, among others) but I opted for Cheddar, Garlic, and Chive Brioches because I had all the ingredients on hand.

I made these beauties for our annual Easter egg hunt with friends that happens the Saturday of Easter weekend.  I have made many things over the years for this celebration but this is my first time making something savory (I also made something sweet).  I liked having the option and these were terrific.

One Year Ago:  Apple Snacking Spice Cake, Snickerdoodles, Eggplant and Mushroom Pasticcio
Two Years Ago:  Blueberry Sour Cream Torte, Fideos with Pasilla Chiles, Avocado, and Crema, Swiss Chard Tart with Goat Cheese, Currants, and Pine Nuts, Baked Rice with Chiles and Pinto Beans
Three Years Ago:  Spicy Sweet Potatoes with Lime (have you made these?), Marinated Chickpea Salad with Radishes and Cucumber, Pasta with Broccoli Rabe and Chickpeas

Cheddar-Garlic-Chive Brioches
With Love & Butter
Makes 10

¼ cup warm water
2¼ tsp. (1 packet) quick-rise yeast
1 egg plus 1 yolk for dough, plus 1 yolk for wash
2 tbsp. honey
¾ cup whole milk
6 tbsp. unsalted butter, melted, for dough, plus 2 tbsp. for brushing surface
¾ tsp. salt
3+ cups all-purpose flour
2 tbsp. pressed garlic
¼ cup minced chives
1 cup grated extra sharp Cheddar cheese

Put the water and the yeast in a mixer bowl and swish around with a spoon.  Attach the dough hook.  Add the 1 egg plus 1 yolk and the honey and mix briefly.  Add the milk, 6 tablespoons melted butter, salt, and 3 cups flour and mix until smooth.  (This will take about 5-10 minutes.)  Scrape down the sides of the bowl with a rubber spatula and mix again.  Toss a handful of flour on top of the dough and mix for a couple of seconds or until the dough balls up, but stop mixing before the flour disappears.  The dough will be soft and sticky.  Turn into a well-oiled bowl or tub with enough room for the dough to triple in size.  Cover with plastic wrap and refrigerate overnight.

The next morning, butter the rims and cups of 2 standard-sized 12-hole muffin cups.  Turn the dough onto a lightly floured surface and shape into a rough rectangle with your hands.  Lightly flour the top of the dough, then flip and flour the bottom.  Roll the dough into a rectangle about 8 by 16 inches and ½-inch thick.  Regularly check the underside of the dough for sticking and scatter on a bit more flour.  The dough should be free from the surface but not too floury.

Position the rectangle of dough on your work surface with the short sides at the top and bottom and the long sides left and right.  Brush the entire surface with the remaining two tablespoons of melted butter.  Scatter on the garlic, chives, and Cheddar cheese.  Press the toppings lightly into the surface.

Fold the top 1/3 of the dough to the center of the bottom 2/3, as if you were folding a letter.  Fold again to close the bundle.  The dough will now be folded in thirds.  Use the rolling pin to gently flatten the dough to about ¾-inch thick.  Now use a pizza cutter or sharp knife to cut the dough into 10 event strips along the short dimension.

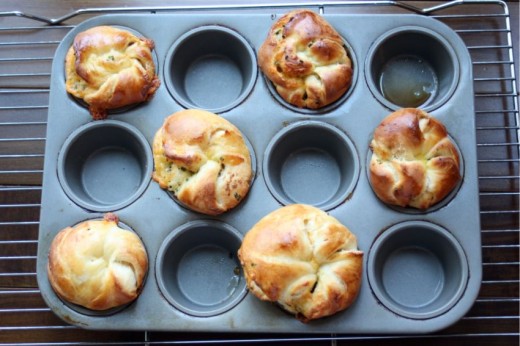
Take up a strand of dough, one end in each hand.  Stretch the dough slightly and twist 3 or 4 times in opposite directions.  (Or, you can place the strip on your work surface and use the palms of your hands to roll the ends in opposite directions.)  Now gather both ends in one hand, maintaining the twist, and grasp the loop that’s hanging down with your other hand.  Place the ends in one of the muffin cups and arrange the loop around the rim on top of the cup.  (It will seem like there is a lot of empty space but the dough will fill it when it rises and bakes.)  Repeat with the remaining strips of dough, filling every other cup to give the brioches plenty of room to expand.

Whisk the remaining egg yolk with 1 teaspoon of water and brush the tops of the brioches.  Cover with plastic wrap and set to rise in a warm place until puffy and roughly doubled in size, 30 to 90 minutes.

Preheat the oven to 375ºF with the rack in the center position.  Remove the plastic and bake the brioches 10 minutes, then rotate the pans and bake another 5 to 10 minutes longer, or until golden brown and not doughy in center.  Cool.


Apple Cheddar Quick Bread

January 23, 2012

I just counted my cookbooks.  You see, we bought this table to go behind the couch in our great room (we have an open floor plan), and there is a shelf on the bottom of the table.  I thought it was perfect for my cookbook overflow.  It started with just a few books, and then a few more were added and so on and so on.  Before I knew it, the shelf was full and sagging alarmingly in the middle.  So I reorganized.  I pulled the most used and loved of all my books and placed them strategically around my kitchen and sent the rest to the basement – where they will still be loved and used and accessed easily.  So while I was up to my neck in cookbooks, I figured I would count.  Grand total: 156.

156 cookbooks makes me a bit of freak among the people I know.  It’s a crazy amount of cookbooks.  But ever since working at Book Larder, I have had conversations with people who own thousands of cookbooks.  One charming woman who I have chatted with at length owns over 1,000 baking books alone.  So owning 156 really just makes me a novice in the cookbook ownership department.  Or so I tell my husband.

Anyway, in addition to having recipes in all of these books, I also get food magazines.  And I read food blogs.  I get monthly recipes sent to my inbox from a favorite local bakery, and I also get a daily recipe from Chow.  It is recipe overload for sure.  Most of the time, it’s just too much to process but sometimes, my foggy brain fixates on something and dinner is born.

This happened last week just before the snow made getting around impossible.  Chow’s offering was Apple and Cheddar Quick Bread.  Sounded intriguing.  But in the body of the email they mentioned that it is delicious served with Celery Root Soup and that is what sold me.  The two together just sounded like dinner.  Not fussy but not boring.  Just good dinner.  Sometimes we need just good dinner, am I right?

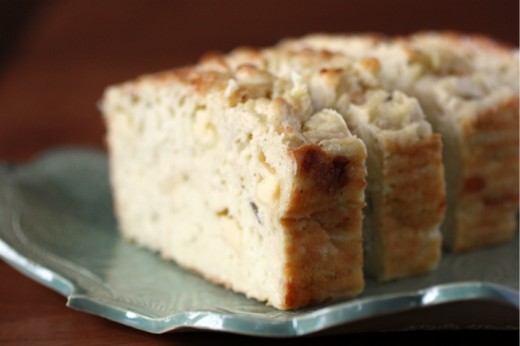
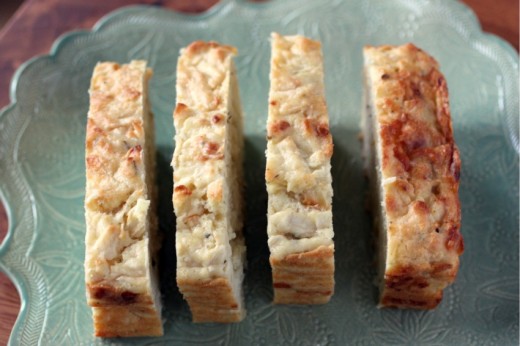
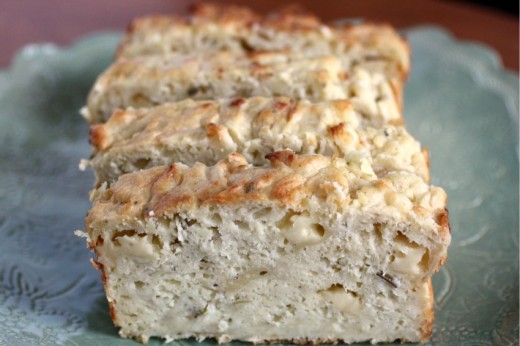
I love savory quick breads.  I have several on this site that I will direct you to at the end of this post.  I love their ease, taste, texture, and I love how they turn soup and salad into something really special.  I like to make them when the soup is on the simpler side.  This one uses a new-to-me cheese – Irish Cheddar.  It is described as having Cheddar flavor but more of a Parmesan texture.  I would say that is pretty spot on.  Some of it is grated and melts into the bread.  Some of it is cubed so you get bites of actual cheese as well.  It’s pretty awesome.  As with the soup, the apple is there for sweetness but it isn’t identifiable as apple, just as yum.  Next time I’m doubling and putting one of these babies in the freezer.

Savory Quick Breads Previously on Dana Treat:  Quick Olive and Cheese Bread, Chile Cheese Gratin Sandwiches, Pull-Apart Cheesy Onion Bread (not really quick but savory and amazing)
One Year Ago:  Cowboy Cookies
Two Years Ago:  Peanut Butter Cookies with Milk Chocolate Chunks
Three Years Ago:  Lemon Bars

Apple and Cheddar Quick Bread
Adapted from Chow
Makes one 9×5-inch loaf

2 cups all-purpose flour
1 tablespoon baking powder
1 teaspoon fine salt
½ teaspoon ground sage
¾ cup medium-dice Irish cheddar cheese, such as Dubliner (about 3 ounces)
¾ cup grated Irish cheddar cheese, such as Dubliner (about 1½ ounces), grated on the large holes of a box grater
3 large eggs
2/3 cup whole milk
4 tablespoons unsalted butter (½ stick), melted, plus more for coating the pan
1 ½ cups grated Granny Smith apples (about 2 medium), grated on the large holes of a box grater

Heat the oven to 350°F and arrange a rack in the middle. Generously coat a metal 9-by-5-inch loaf pan with butter.

Whisk the flour, baking powder, salt, and sage together in a large bowl until aerated and any large lumps are broken up. Add the diced and shredded cheese and toss until the pieces are separated and evenly coated with the flour mixture; set aside.

Place the eggs, milk, and melted butter in a medium bowl and whisk until smooth. Add the apples and stir until combined. Add the egg mixture to the flour-cheese mixture and stir until the flour is just incorporated, being careful not to overmix (a few streaks of flour are OK). The batter will be very thick.

Using a rubber spatula, scrape the batter into the prepared pan, pushing it into the corners and smoothing the top. Bake until the bread is golden brown all over and a toothpick inserted into the center comes out clean (test several spots because you may hit a pocket of cheese), about 45 to 50 minutes.  (DT:  Do make sure the top of the bread is brown.  I pulled mind when it was a bit pale but the toothpick came out clean.  It was still a little doughy in the center.)

Place the pan on a wire rack to cool for 15 minutes. Run a knife around the perimeter of the bread and turn it out onto the rack. Let it cool for at least 30 minutes more before slicing.


Brioche for Patricia Wells

December 11, 2011

One of the best things about my job at Book Larder, besides being surrounded by beautiful cookbooks, is getting to meet  amazing cookbook authors.  Some people who have come through the store are new to me and some are true culinary heroes of mine.  If you asked me to draw up a list of ten people I would want to meet, Patricia Wells would definitely be high on that list.  And I got to meet her.

Let me set the scene.  There is a kitchen area at the back of the shop which is where I often spend some of my working hours.  We like to have things coming out of the oven to taste and I am also often prepping for events or classes.  On a day I was working, a man came up to me and we started chatting about books, events, etc.  He asked whether we would be getting Patricia Wells’ new book, one on truffles, and I said we were just waiting for it to arrive.  Then he said, nonchalantly, “You know, I’m friends with Patricia Wells and she is coming to town for an event on Whidbey Island – would you maybe want to do a signing with her here?”  And this is where my theatre major came in handy.  I did not freak out and scream, “Of course we would!”  I said, calmly, that we were all fans of hers and we would love to have her if we could make the dates work.  Clodagh, our wonderful manager, got involved to talk specifics, and he left saying he would be in touch.  “Thank you!” our voices chorused as we closed the door behind him.  Then we turned to each other and freaked out like little girls who were told that they would meet Justin Bieber (or whoever the freak-out-able boy of the moment is).

You know that old saying “never make something for the first time for company”?  I’ve never subscribed to that theory.  I love to try out new things on guests.  But how about for Patricia Wells?  How about working with a new-to-me ingredient (truffles) and making a new-to-me bread (brioche)?  For one of the most respected cookbook authors of all time and one of my true culinary heroes?  NO PRESSURE.

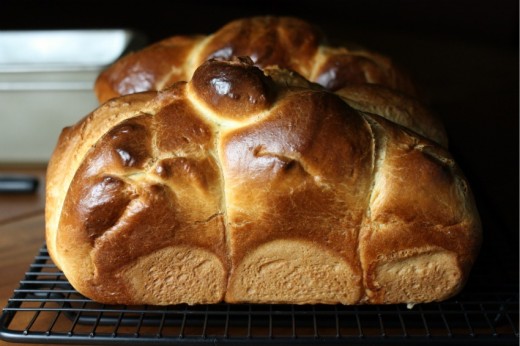
Fortunately, there is a reason she is one of the most respected cookbook authors of all time and one of my true culinary heroes.  Her recipes work.  They are well-tested, clearly written, and they taste exactly as they should – delicious.  Even if you are new to something, like making brioche, she makes it clear enough with the written word.  For our morning together, along with 35 lucky ticket holders, I made the inside out oreos from the new book – that is a beautiful thin truffle slice sandwiched between two slices of soft goat cheese and laying atop the aforementioned brioche which has been slathered with a truffle butter and broiled until crispy.  Wowza.  I won’t lie – my hands were shaking a bit as Denise and I assembled the nibbles, with Patricia looking on.  But she approved and everyone though they were delicious.  I even had several people ask me where I bought the bread.

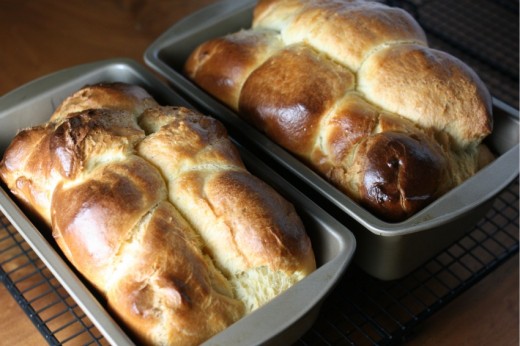
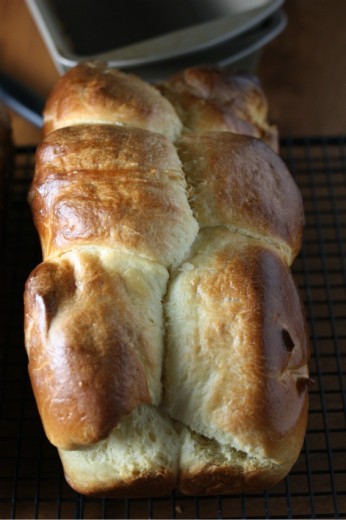
I’m not going to assume that you have access to fresh French truffles so I’m just going to share the brioche recipe.  It’s a long one but no part of it is hard.  A few pieces of of advice.  No pan size is specified but I would definitely use two 8×4-inch pans.  While I don’t think you need a stand mixer to make most cake or cookie recipes, you do need one for this bread.  It mixes for a very long time and I can’t imagine the arm muscle you would need to accomplish that without help.  There is quite a bit of rising time associated with the bread, including an overnight in the refrigerator, so read the recipe through first and plan accordingly.

One Year Ago:  White Bean Braise with Delicata Squash, Parsnips, and Purple Cabbage
Two Years Ago:  Sweet and Salty Cake (still my favorite cake)
Three Years Ago:  Middle Eastern Lentil Rice Rolls

Brioche
Simply Truffles
Makes 2 rectangular loaves

Sponge
1/3 cup milk
1 package (2¼ teaspoons) active dry yeast
1 teaspoon sugar
1 large egg, at room temperature
2 cups all-purpose flour

Dough
1/3 cup sugar
1 teaspoon fine sea salt
4 eggs, at room temperature, lightly beaten
1½ cups all-purpose flour
12 tablespoons (6 ounces) unsalted butter, at room temperature
Butter, for buttering the bread pans
1 large egg, at room temperature, beaten with 1 tablespoon cold water

1.  Prepare the sponge:  In the bowl of a heavy-duty mixer fitted with the dough hook, combine the milk, yeast, and sugar and stir to blend.  Let stand until foamy, about 5 minutes.  Then add the egg and 1 cup of the flour, and stir to blend.  The sponge will be sticky and fairly dry.  Sprinkle with the remaining 1 cup flour to cover the sponge.  Set aside to rest, uncovered, for 30 to 40 minutes.  The sponge should erupt slightly, cracking the flour.

2.  Prepare the dough:  Add the sugar, salt, eggs, and 1 cup of the flour to the sponge.  With the dough hook attached, mix at low speed for 1 or 2 minutes, just until the ingredients come together.  Still mixing, sprinkle in the remaining ½ cup flour.  When the flour is incorporated, raise the mixer speed to medium and beat for 15 minutes, scraping down the hook and bowl as needed.

3.  To incorporate the butter into the dough, it should be the same consistency as the dough.  To prepare the butter, place it on a flat work surface and with a dough scraper, smear it bit by bit across the surface.  When it is ready, the butter will be smooth, soft, and still cool – not warm, oily, or greasy.  (DT:  I did not do this step.  I just cut the butter into tablespoons.)

4.  With the mixer on medium-low speed, add the butter a few tablespoons at a time.  When all of the butter has been added, raise the mixer speed to medium-high for 1 minute.  Then reduce the speed to medium and beat the dough for 5 minutes.  The dough will be soft and sticky.

5.  First rise:  Cover the bowl tightly with plastic wrap.  Let the dough rise at room temperature until doubled in bulk, 2 to 2½ hours.

6.  Chilling and second rise:  Punch down the dough.  Cover the bowl tightly with plastic wrap and refrigerate the dough overnight, or for at least 4 hours, during which time it will continue to rise and may double in size again.

7.  After the second rise, the dough is ready to use.  If you are not going to use the dough immediately, deflate it, wrap it airtight, and store it in the freezer.  The dough can remain frozen for up to 1 month.  Thaw the dough, still wrapped, in the refrigerator overnight and use it directly from the refrigerator.

8.  To bake the brioche:  Butter 2 8×4-inch pans.  Divide the dough into 12 equal pieces, each weighing about 2½ ounces.  Roll each piece of dough tightly into a ball and place 6 pieces side by side in each bread pan.  Cover the pans with a clean cloth and let the dough rise at room temperature until doubled in bulk, 1 to 1½ hours.

9.  Center a rack in the oven.  Preheat the oven to 375ºF.

10.  Lightly brush the dough with the egg wash.  Working quickly, use the tip of a pair of sharp scissors to snip several crosses along the top of the dough.  (This will help the brioche rise evenly as it bakes.)  Place the pans in the oven and bake until the loaves are deeply golden and an instant-read thermometer plunged into the center of the bread reads 200ºF, 30 to 35 minutes.  Remove the pans from the oven and place on a rack to cool.  Turn the loaves out once they have cooled.

(You can store the bread, tightly wrapped, at room temperature for a day or two.  To freeze, wrap it tightly and store for up to one month.  Thaw, still wrapped, at room temperature.)


Perfect Pumpkin Bread

November 14, 2011

Sometimes I have a moment when I am in line at a coffee shop.  I’m usually a little hungry (I use coffee as my mid-morning snack) and things in the pastry case start to look very tasty.  I never actually purchase any of those things though because I know how deeply disappointing they can be.  For some reason, scones, quick breads, and muffins go through some kind of metamorphosis when they are mass produced, and something that is lovely in the home becomes nothing more than sugar and air.  How can something that looks like pumpkin bread have none of that subtle squashiness and spice that real pumpkin bread has?

The dreary days have just started here in Seattle.  After a crummy winter, a terrible spring, and a summer that didn’t really get going until August, we were due a nice fall and we got one.  It has been lovely.  I don’t remember every having much sun in November and this year, there have been more sunny days than rainy.  But once the rain starts, it stars and those damp days combined with very little daylight make things like pumpkin bread all the more sweet.  Without really realizing it, I have been searching my whole baking life for the perfect pumpkin bread.  Of all the quick breads, it is my favorite.  I have made many in my life and, while all have been tasty, not one of them has been quite right in my book.  I’ve made them with fresh steamed pumpkin, fresh roasted pumpkin, canned pumpkin, nuts, bran cereal, raisins – even chocolate chips.  I liked them all but either the flavor or texture, or both, was not what I wanted.

I’m happy to say I found my perfect recipe and even happier to tell you that it comes from a Seattle source.  Grand Central Bakery has been a Seattle fixture since 1972.  I remember it from my childhood as one of the few places in town that my New Yorker parents thought you could find a decent sandwich.  We used to go down to Pioneer Square almost every weekend and sit at a balcony table eating sandwiches and pickles.  Grand Central has grown as our city has and now there are several locations here and in Portland.

Last summer I went to a baking class in Grand Central’s south Seattle bakery, and one of the perks of doing so was receiving a copy of their book, The Grand Central Baking Book.  The baking department of my cookbook collection is large, and growing, but I have to say that most of my books are kind of on the fussy side.  I get lured in by pretty pictures and delicious sounding recipes only to realize, once I have bought the book, I don’t really bake that way.  I am a home baker – I love simple and delicious things best.  There is a time and a place for terrific chocolate cakes but most often what I want is something on the simpler side.  Like pumpkin bread.

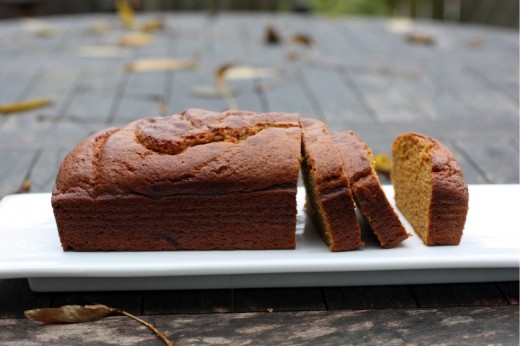
This bread really tastes of pumpkin, it is incredibly moist, and it has a wonderful spiciness to it.  I actually bumped up the spices a bit since I love the flavors of cinnamon and ginger in baked goods.  In addition to all of those wonderful things to recommend it, I was delighted to realize that you only use 1/3 cup of vegetable oil for two loaves.  If you have ever made a quick bread, you know it is usually an oil bomb.  Over the years, I have started the practice of substituting ½ of the oil with applesauce in an attempt to make a morning or afternoon treat not be a dessert’s worth of calories and fat.  Here, no substitution is necessary.  Perfect recipe found.

One Year Ago:  Three Cheese Mini Macs
Two Years Ago:  Gianduja Mousse
Three Years Ago:  Pumpkin Whoopie Pies

Pumpkin Bread

Adapted from The Grand Central Baking Book
Makes 2 loaves

This recipe is written for two 9×5-inch pans.  I have also made it in two 8×4-inch pans.  The smaller pans will give you a taller loaf but can also be a little difficult to remove.

3¼ cups flour
1½ tsp. baking soda
1 tsp. salt
1½ tbsp. pumpkin pie spice (recipe follows)
1/3 cup vegetable oil or canola oil
1 2/3 cups granulated sugar
1 1/3 cup packed light brown sugar
2 cups pumpkin puree (1 15-ounce can)
4 eggs
1/3 cup water
1/3 cup buttermilk

Preheat the oven to 350 degrees.  Lightly grease and flour two loaf pans (either 9×5-inch or 8×4-inch).

Measure the flour, baking soda, salt and pumpkin pie spice into a bowl and whisk to combine.

Using a stand mixer with the paddle attachment, mix the oil, granulated and brown sugars, and pumpkin puree on medium-low speed until well-blended, about 2 minutes.

Crack the eggs into a liquid measuring cup and whisk together.  With the mixer on low speed, slowly pour in the eggs, incorporating each addition completely before adding the next.  Scrape the bottom and sides of the bowl.

Add one-third of the dry ingredients and mix briefly on low speed, then add the water.  Mix well and repeat, using half of the remaining dry ingredients and all of the buttermilk.  Add the remaining dry ingredients and mix just until combined.  Scrape the sides of the bowl and then divide batter between the prepared pans.

Bake for 60 to 75 minutes, rotating the pans every 20 minutes or so.  The loaves should be dark golden brown with cracked tops, and a skewer inserted in the center should come out clean.


Pumpkin Pie Spice

¼ cup ground cinnamon
2 tbsp. ground ginger
1 tbsp. ground nutmeg
1 tbsp. ground cloves
1 tbsp. ground allspice

Combine all of the ingredients in a small bowl and stir with a fork until well combined.  Store in a cool, dry place for up to 3 months.


« Older Posts