Category: Cookies

Salted Brown Butter Crispy Treats

August 7, 2013

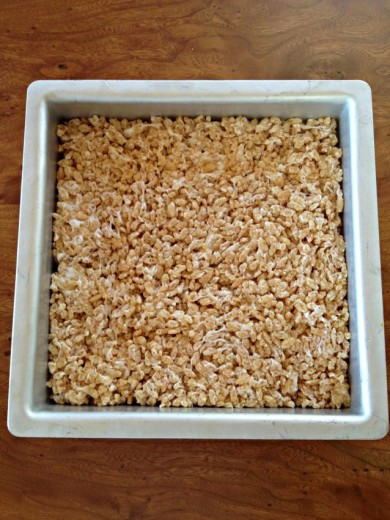
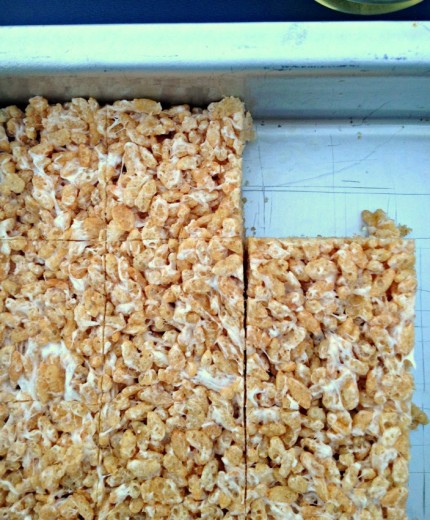
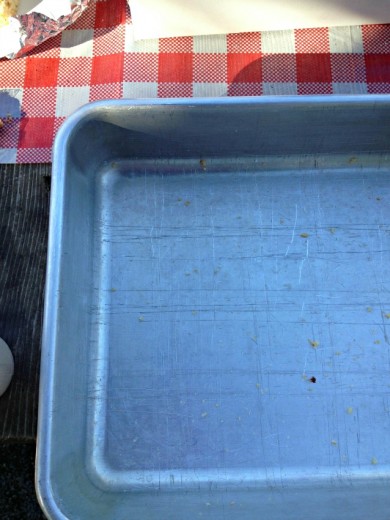
If you have ever brought a pan of Rice Krispe Treats to a gathering, your pan probably looks like the one above within a few minutes of arriving.  Right?  It doesn’t matter the age or the palate of the people at said gathering – people love Rice Krispie Treats.  I brought a 9×13-inch pan to our end of school potluck and in the time it took me to get my phone out of my bag, they were gone.  I get it.  I too am powerless in front of a pan of these, especially if they are doctored up a bit and made extra special.

Like most of us, my mom used to make them for us when we were kids and next to chocolate chip cookies and brownies, they were my favorite.  Awful college dinners were made better by my bastardized version made in the microwave using cereal from the cereal bar, marshmallows from the sundae bar, and a hunk of butter.  And then I learned that marshmallows are not vegetarian – they contain gelatin – so for a long time, including the early years of my kids childhoods, Rice Krispie Treats were not a part of my repertoire.  And then I found vegan marshmallows and all was right with the world again.  (Side note – my kids are obsessed with marshmallows.  I mean obsessed.  Is this because it is the one candy I won’t let them eat unless they are the “special” kind?  Or are all kids obsessed?)

Now, not all Treats are good.  They seem to pop up in coffee bars in truly gargantuan squares that seem to contain a lot of air.  How would I know?  Sometimes you have a child who really really must have a Rice Krispie Treat and even though you know that thing does not contain vegan marshmallows, and probably does not even contain real butter, sometimes you just need to be a good mom and buy your kid that treat they are so desperate for.  And then, because it is there and it is so gargantuan that your small child couldn’t finish it, you taste it and you realize that they can, in fact, be mediocre.

Not these.  When I saw this recipe for Salted Brown Butter Crispy Treats, I thought, “Really?”  Is this necessary?  I mean, the plain old regular ones using the recipe off the box is pretty darn good.  This one is not all that different, except there is more butter and that butter is browned and there is an all-important pinch of salt.  (For the record, I am vegetarian, not vegan, so butter is ok in my diet.)  Deb makes hers in small pan so they are nice and tall and I do that too sometimes.  If I need to serve more people, I make them in my 9×13.  Whichever size, I always make sure really pack them into the pan, using at first a spatula and then an offset palette knife to press and smooth.  I don’t like airy treats, I prefer them to be dense and this step will get you that result.

One Year Ago:  Israeli Couscous and Tomato Salad with Arugula Pesto
Two Years Ago:  Tomato and Corn Pie (so good),
Three Years Ago:  Rice Noodles with Marinated Tofu, Israeli Couscous with Olives and Roasted Tomatoes
Four Years Ago:  Grilled Potato Slices with Salt and Vinegar
Five Years Ago:  Pasta with Cauliflower and Walnut Pesto

Salted Brown Butter Crispy Treats
Adapted (only in language) from The Smitten Kitchen Cookbook
Makes never enough

If you are looking for vegan marshmallows, Dandies is the brand I have used.  You should be able to find them in a natural-ish grocery store.  Whole Foods for sure.    For the East Bay Area people, I have also found them in Berkeley Bowl.

8 tbsp. (1 stick) unsalted butter, plus more for the pan
Heaping ¼ tsp. flaky sea salt
One 10-ounce bag large or miniature marshmallows
6 cups puffed rice cereal (about half a 12-ounce box)

Butter (or coat with non-stick spray) an 8-inch square cake pan with 2-inch sides.

In a large pot, melt 1 stick butter over medium-low heat.  It will melt, then foam, then turn clear golden, and finally start to turn brown and smell nutty.  Stir frequently, scraping up any bits from the bottom as you do.  Don’t take your eyes off the pot: You may be impatient for it to start browning, but the period between the time the butter begins to take on color and the point where it burns is often less than a minute.

As soon as the butter takes on a nutty color, turn the heat off, sprinkle salt over the butter, and stir in the marshmallows.  The residual heat from the melted butter should be enough to melt them, but if it is not, turn it back on over low heat until the marshmallows are smooth.  (DT: If you are using vegan marshmallows, they will take a long time to soften and you will need to keep them over low heat.  Keep stirring them and mash them into the bottom of the pan to get them softer.  In my experience, they will never get 100% smooth but it all seems to work out when you add the cereal.)

Remove the pot from the stove, and stir in the cereal, folding it gently with the marshmallow mixture until the cereal is evenly coated.  Quickly spread into prepared pan.  Use the back of your stirring spatula to get the top even and press down to make them compact.  Let cool, then cut into squares.


New Cookies and New Cooking Classes

July 16, 2013

Before I tell you about these cookies, I need to tell you something else.  I know you aren’t supposed to capitalize in posts or emails.  That it means you are yelling.  But I need to yell this.

I’M TEACHING COOKING CLASSES IN OAKLAND!!!!!!!!

Excessive exclamation points are gauche too but I don’t care!  (!!!!)  It has been almost a year since we moved to the Bay Area and I have missed teaching so much.  I am not able to do it in my home kitchen because it is too small.  I looked into multiple opportunities to teach elsewhere but nothing felt right.  Recently, a dinner out with a friend turned into a partnership and now my classes, at long last, have a home.  Want to join us?  We’ve got some terrific things coming up – a Warm Weather Soups and Salads class in August, an End of Summer Classics in September, and a Knife Skills class also in September.  Much more information can be found on the Classes page of this site.  I’d love to see some new faces in class!

Onward.  Recently Randy gave me a look.  A deeply disappointed look.  Sorrowful even.  It could only mean one thing.  The cookie jar had been empty for far too long.

It’s true.  I went on a little cookie baking hiatus.  The last cookie recipe I posted here was back in March (Chocolate Truffle Cookies with Crackly Crust – they are terrific).  They aren’t the last cookies I made but truthfully, there haven’t been many since those..  Sorry to the cookie lovers.  I hope these make up for it.

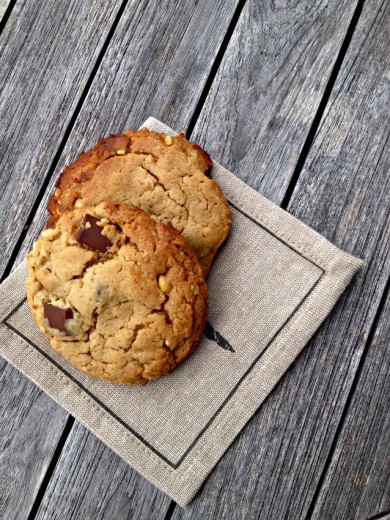
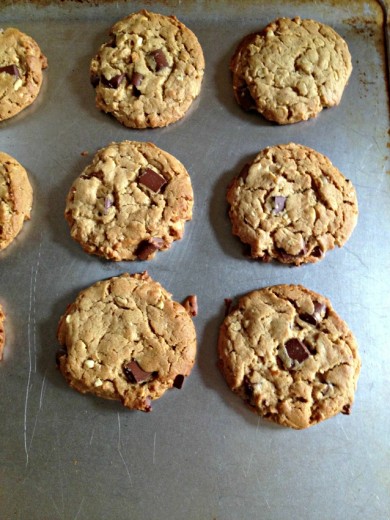
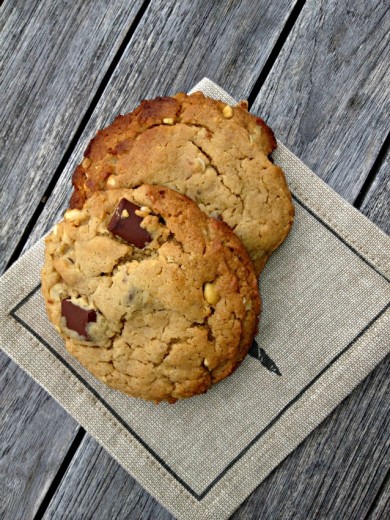
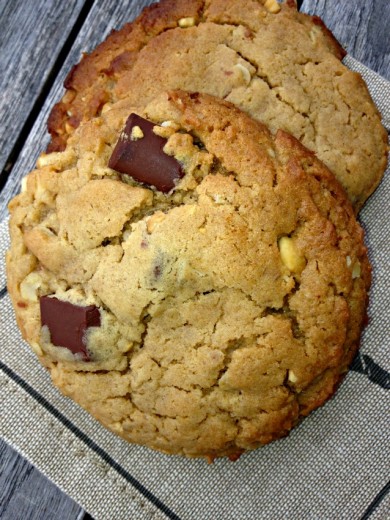
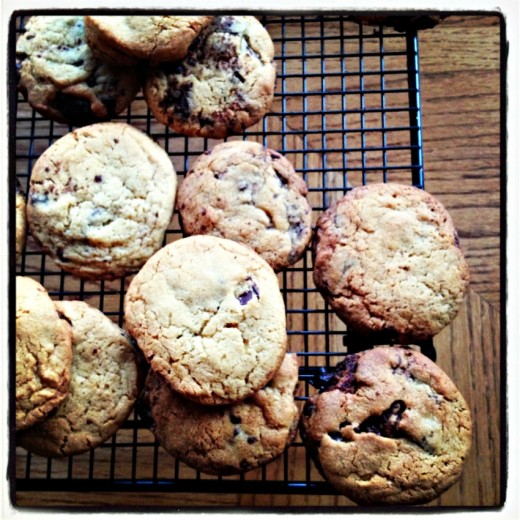
I was remembering Randy’s look as I headed into the grocery store yesterday.  I hadn’t had time to page through my new cookie books to find something to make, so I turned to the trusted Epicurious app and typed in “peanut butter cookies”.  Why peanut butter?  Good question.  I wanted to go a little different direction than usual.  There aren’t many peanut butter recipes on this site – cookies with milk chocolate chunks, peanut butter cup brownies, Holly B’s peanut butter brownies.  Wait.  Is that a lot?  I don’t think in over five years of writing that is a lot of peanut butter recipes but maybe I’m wrong.  In any case, as I said in one or all of those posts, peanut butter cookies are not my first choice.  There must be chocolate.  I found these to be especially charming because they have a bit of honey in them and the chocolate, while delicious, is restrained.  It is first and foremost a peanut butter cookie but the chocolate, semi-sweet this time, helps keep it from being too monotonous.  The texture can only be described as pillowy which feels just right for a peanut butter cookie.

Yes, I baked these for my family, but I doubled the recipe so I can give them out as a treat at the end of my class this week.  Oh, I didn’t mention that I give out Dana Treats at the end of each class?  Another reason you should join us!

Two Years Ago:  Ganache Filled Brown Sugar Bars, Soba Noodle Bowl, Lemony Chickpea and Sun-Dried Tomato Stew
Three Years Ago:  Asparagus and Leek Bread Pudding, Big French Salad, Kosheri, Chocolate Pavé
Four Years Ago:  Grilled Vegetable Salsa, Coconut Bars, Vegetarian Bahn Mi, Chocolate Chip Pretzel Bars, Roasted Tomato and Olive Galette with Fontina
Five Years Ago:  Leek Frittata

Peanut Butter Cookies with Chocolate Chunks
Epicurious
Makes about 24 cookies

I doubled this recipe (why not?) and made my cookies on the larger side.  I used an ice cream scoop to portion out the batter and patted the scoops down lightly with the palm of my hand.  The batter is extremely soft so do take the time to refrigerate it.  Lastly, I almost never grease or line my cookie sheets – the amount of butter in cookies makes them kind of non-stick, so I skipped that step of the recipe.

1 ½ cups unbleached all purpose flour
1/3 cup old-fashioned oats
1 teaspoon baking soda
¼ teaspoon salt
1 cup old-fashioned chunky peanut butter (about 9 ounces)
1 cup (packed) golden brown sugar
½ cup (1 stick) unsalted butter, room temperature
¼ cup honey
1 large egg
1 teaspoon vanilla extract
5 ounces semisweet chocolate, coarsely chopped

Mix flour, oats, baking soda and salt in medium bowl. Using electric mixer, beat peanut butter, brown sugar, butter, honey, egg and vanilla in large bowl until well blended. Stir dry ingredients into peanut butter mixture in 2 additions. Stir in chopped chocolate. Cover and refrigerate until dough is firm and no longer sticky, about 30 minutes.Preheat oven to 350°F. Butter 2 heavy large baking sheets. With hands, roll 1 heaping tablespoonful of dough for each cookie into 1 3/4-inch-diameter ball. Arrange cookies on prepared baking sheets, spacing 2 1/2 inches apart. Bake cookies until puffed, beginning to brown on top and still very soft to touch, about 12 minutes. Cool cookies on baking sheets 5 minutes. Using metal spatula, transfer cookies to rack and cool completely. (Can be made 2 days ahead. Store in airtight container at room temperature.)


Chocolate Truffle Cookies with Crackly Crust

March 7, 2013

When I was pregnant with Graham, over eight years ago, I discovered the perfect chocolate biscotti. It was sliced very thin, had nice height, crunched with a lovely snap but not so much that you hurt your teeth, and a beautiful subtle cocoa flavor studded with tiny chocolate chips. Because I was pregnant, the craving for that biscotti became a necessity. My perfect biscotti could be found at the then newly opened Dahlia Bakery, just next door to the Dahlia Lounge, a longtime favorite restaurant in Seattle. The duo sit side by side on 5th Avenue just under the monorail. It is just far enough away from the department stores that parking is not terrible, especially if you go around 3pm which I did, just about every day.

I am pretty careful about my weight and don’t allow myself afternoon treats – unless I am pregnant. (There is a post brewing on this topic.) After I delivered Graham, I continued to eat the biscotti during the first few months of nursing, seeing as chocolate was a requirement both times I nursed, and then I gave up the habit. Soon after getting the positive pregnancy test with Spencer, I trudged downtown to the bakery, toddler Graham in tow, only to find that they no longer made my precious biscotti. I was heartbroken but, of course, found other things in that lovely bakery to enjoy. The problem was none of them satisfied me in the same way. I was looking for a sweet treat – crunch, snap, chocolate. Too many of their goodies where of the dinner-ruining variety. I carried both of my babies really high, and I am not all that tall to begin with, so as I got into my third trimester, the amount of room I had in my body for food diminished.  Every day it was a choice between dinner and snacks and dinner always won out.

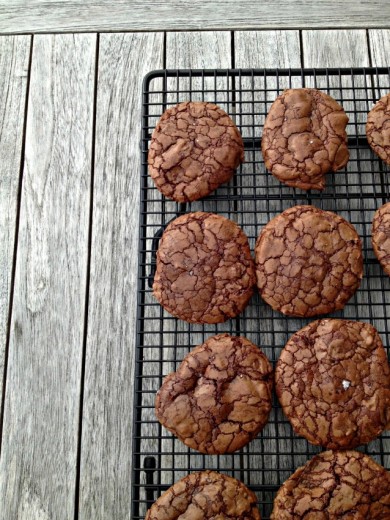
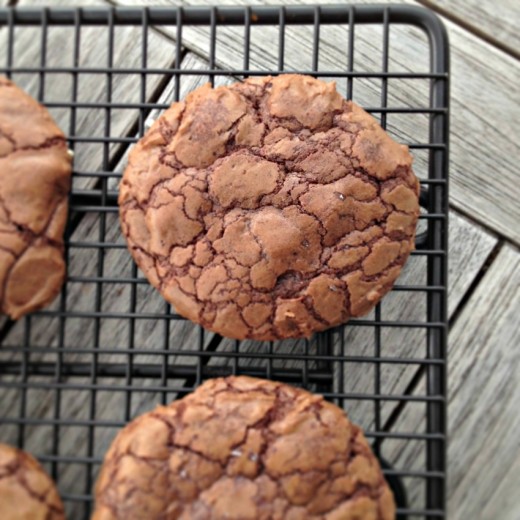
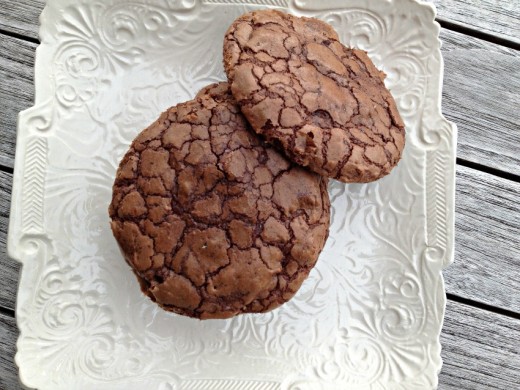
All this to say that when I received a copy of the Dahlia Lounge Bakery Cookbook, the first thing I did was look to see whether the biscotti recipe was in there. Sadly, the answer is no. There are many treasures inside though and the things I have made have been lovely. Not exactly subtle though. These cookies, which boast a whopping 2 pounds of chocolate, are pretty much the opposite of those delicate biscotti. They are large, heavy for their size, and fully of pure chocolate flavor. The texture is great, soft enough but with some crisp on the outside, and the whole cookie is punctuated with bits of more chocolate. My husband, who continues to profess that he does not like chocolate, inhaled these. By the way, if you have a recipe that you like for chocolate biscotti, one that more or less fits the description above, will you send it my way?

One Year Ago:  Yellow Birthday Cake with Chocolate Frosting, Sesame Snap Peas, Green Curry Noodles, Wasabi Dip, Corn Muffins with Raspberry Jam, Watercress Salad with Marinated Figs, Sambal Talur
Two Years Ago:  White Chocolate Tiramisu, Red, White, and Green Lasagne, Somen Noodle Soup with Spring Vegetables, Asparagus Risotto
Three Years Ago:  Apple Torte, Honey Roasted Pear Salad, Paparadelle with Lemon, Herbs, and Ricotta Salata, Red Lentil Dhal, Grilled Haloumi Cheese and Lemon
Four Years Ago:  Mushroom Enchiladas, Winter Thai Curry, Palmiers, Rosemary Flatbread with Blue Cheese and Grapes, Smoky Cashews,

Chocolate Truffle Cookies with Crackly Crust
The Dahlia Bakery Cookbook
Makes about 30 cookies

I have made these a couple of times now and I will give two tips.  One is to sprinkle a little fleur de sel over the top of the unbaked cookies, just after you have flattened them.  That much chocolate needs a little salt.  Also, they are easy to underbake.  They will start to look crackly early but let them have the full 14 minutes in the oven – at least. 

1 1/4 cups all-purpose flour
3 tbsp. plus 1 tsp. unsweetened cocoa powder
1/2 tsp. baking powder
1/2 tsp. salt
1 pound plus 4 ounces bittersweet chocolate, chopped
1/2 cup plus 2 tbsp. unsalted butter, softened
2 1/4 cups sugar
6 large eggs, at room temperature
1 tbsp. pure vanilla extract
Generous 2 cups (12 ounces) bittersweet chocolate chips

Preheat the oven to 350F.

In a bwol, sift together the flour, cocoa, and baking powder. Stir in the salt and set aside. Place the chopped chocolat ein a heaproof bowl over a saucepan of very hot water (the bottom of the bowl should not touch the water), stirring occasionally until the chocolate is melted and smooth. Remove the bowl from the water and allow to cool for 5 to 10 minutes.

Combine the butter and sugar in the bowl of an electric mixer with the paddle attachment and cream on medium speed until well combined. Add the eggs, one at a time, mising on medium speed unti the eggs are incorporated.

Increase the speed to high and beat for a few minutes until the mixture is very light, creamy and pale in color, scraping the bowl down as needed. Add the melted chocolate and the vanilla extract and mix just until combined. Remove the bowl form the mixer and fold in the dry ingredients using a rubber spatula. Fold in the chocolate chips.

Start scooping the cookies as soon as you finish making the batter. The batter is very soft at first, but it starts firming up quickly as it sits, which will make it more difficult to portion. The easiest way to portion the cookies is with a 2-ounce ice cream scoop. Pack the scoop only about three-quarters full. Or use a scant 1/4 cup of cookie dough for each cookie.

Scoop the cookies onto parchment-lined baking sheets, placing them about 2 inches apart. Flatten each mount of dough slightly with your hand. (Tip: You can use a dampened hand, because the dough is sticky.)

Soon after the cookies are scooped, put them in the oven and bake them. If you are baking in batches, don’t refrigerate the scooped dough, but leave them at room temperature. These cookies will not spread properly if the dough is chilled first.

Bake the cookies until they are evenly cracked all over the tops and softly set, 14 to 16 minutes, rotating the pan about halfway through the baking time. If you have 2 pans of cookies in the oven at the same time, also switch them between racks.

Remove pans from the oven and cool on a wire rack. Allow the cookies to cool completely before removing them from the baking sheets with a metal spatula. They stick to the paper a bit, but you can scrape them off with a sturdy metal spatula easily enough.


Why Mess with Perfection?

October 10, 2012

In the 28 months that I have been making what I consider to be the best chocolate chip cookie in the universe, I have rarely considered making another.  Recipes come my way all the time, via books and the internet, and the only time I was tempted to stray was for this recipe.  We liked that one very much too.  But after they cleared out of the cookie jar, I went back to my favorite.  I make a lot of cookies and I have many that I like, but Ashley’s are my the tippy top favorite.

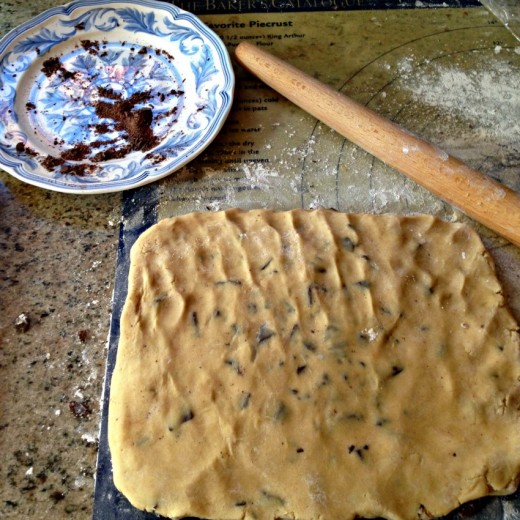
So why stray?  Why mess with perfection?  I am a recent subscriber to Saveur and it only comes out 10 times a year so it feels like a pleasant surprise when it arrives in my mailbox.  The most recent issue is terrific, 101 Classic Recipes.  Of course there is a chocolate chip cookie.  I would have just turned the page, chuckling that they got their recipe so wrong.  But when I saw how different it is from any other I have made, I decided to give it a try.  Unlike Ashley’s there is only one kind of sugar and unlike the New York Times (another very good cookie), there is only one kind of flour.  But there are four egg yolks and a completely different method for shaping the cookies.  Rather than scooping the dough out of the bowl and onto cookie sheets, you essentially roll out three sheets of dough, sprinkling chocolate in between them, and then use a biscuit or cookie cutter to cut them out.  Revolutionary or ridiculous?

I’m on the fence.  I found the method to be a royal pain in the butt.  I don’t like rolling out cookie dough.  The only cookie dough I roll out on a regular basis is for holiday cookies and that is because there would be a coup in my house if I didn’t make them.  There is a lot of chocolate and not a lot of dough in this recipe which means they make for lovely eating but are a little difficult to manhandle while you are stamping them out.  I like a cookie with some height and those three layers of dough work wonders for the height of the cookie.  They are soft in the middle and crisp around the edges and if I had remembered to sprinkle sea salt on top of each one, I might have been tempted to introduce this cookie into our family permanently.  Why don’t you bake up a batch of Ashley’s and a batch of these and bring them both over for an official taste test.

And at the end of this post, I have to say one thing.  As I was sitting here, writing about dough and cookies and the quest for the best, I pulled away to get inspiration.  It is something I often do when I get stuck.  I go to my favorite blogs to check in.  See what they are cooking, photographing, and writing about.  I read this post and I laughed and sobbed in the space of a few paragraphs.  And I came back here, feeling silly that I was writing about cookies.  My kids are growing so fast – why am I writing about cookies??  But in the end, cookies are important, especially to my little guys who love them so deeply.

One Year Ago:  Corn Chowder with Coconut Milk, Cocoa Nib Brownies
Two Years Ago:  Savory Rugelach, Ratatouille, Mushroom and Herb Polenta, Bittersweet Chocolate Pudding Pie
Three Years Ago:  Smoky Chard over Grilled Bread, Asian Coconut Noodle Soup, Pasta with Tomato Sauce and Arugula, Almond Praline Scones
Four Years Ago:  Five Lentil and Chard Soup, Quick Olive and Cheese Bread

Chocolate Chip Cookies
Saveur
Makes about 2 dozen

The recipe suggests you use a hand mixer, I used my stand mixer.  It also suggests you roll the dough into the desired shape, I thought it was easier to smoosh (technical term) and pat it into shape.  I kept patting the scraps out over and over again to maximize the number of cookies and they lost their height but not their taste.

2¼ cups flour
¾ tsp. baking soda
¾ tsp. kosher salt
16 tbsp. (2 sticks) unsalted butter, softened
¾ cup packed dark brown sugar
¾ cup sugar
1 tsp. vanilla extract
4 egg yolks
9 ounces bittersweet chocolate, roughly chopped

Preheat the oven to 375ºF.  Whisk together the flour, baking soda, and salt in a bowl; set aside.  Combine butter, both sugars, and vanilla in a large bowl; beat on medium-high speed with a hand mixer until smooth and fluffy, about 3 minutes.  Add yolks two at a time, beating after each addition; add dry ingredients; beat on low speed until just combined.  Transfer dough to a work surface; divide into 3 equal pieces.  Flatten each into a 4″ x 6″ rectangle; wrap in plastic wrap.  Chill for 30 minutes.

Place one dough rectangle on flour work surface; sprinkle with half the chocolate.  Top with another rectangle, sprinkle with remaining chocolate, and cover with last rectangle.  Using a floured rolling pin, flatten rectangles into a 9″ x 6″ x 1½” rectangle.  Using a 2″ round cutter, cut out cookies; transfer to parchment paper-lined baking sheets, spaced 3″ apart.  Gather scraps, reroll into a 1½” thick disk; cut out more cookies.  (See headnote.)  Bake, rotating baking sheets halfway through cooking, until lightly browned and set, about 15 minutes.


No Special Equipment Needed

August 1, 2012

Let me say this, I love my KitchenAid mixer.  It has a permanent home on my counter in this house and will in the next house.  I got my first one in my mid 20’s and it saw me through countless cookies, cakes, and confections of all sorts.  Once I started working as a personal chef, I decided to upgrade and get the professional one.  It is larger and has a different way of uniting the bowl and the paddle, but otherwise it is the same machine.  To tell you the truth, I kind of miss my old one.  I can’t recommend a KitchenAid mixer highly enough.  I can also tell you that most recipes that tell you to use a stand mixer can also be made by hand.  An exception would be something like brioche which requires long periods of mixing at high speeds.

Once in a while, I find it nice to bake with minimal equipment.  I am drawn to recipes that tell you to stir things in a bowl.  This is just one of those recipes.  It comes from Alice Medrich – an undisputed genius baker and cookbook author.  We had her at Book Larder and I loved what she had to say about her new book Sinfully Easy Delicious Desserts.  She wrote it for cooks – not bakers.  So it is heavy on play and options and light on hard fast rules.  I loved that idea.

And now, in case you haven’t been reading along for 4+ years on this blog, a short summary of my feelings about cookies.  I love chocolate!  I like white chocolate!  Cookies should be chocolate!  Most of the time!  I don’t like nuts in my sweets! 

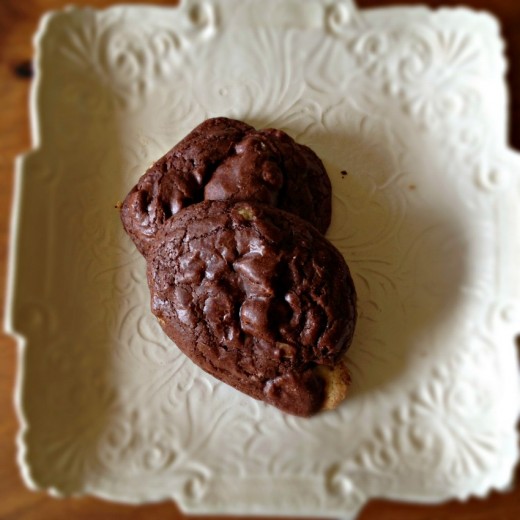
I think that about does it.  My brother Michael, an avid reader of this site and someone who has been eating cookies with me for his whole life, said, after gulping one of these down, “I thought you don’t like nuts in cookies.”  True.  But these are very rich little buggers and for some reason that little crunch and nuttiness is welcome for me here.  I had some odd bits and bobs of chocolate so I used a variety, including these huge white chocolate disks.  I really liked what they did for the cookie.

One Year Ago:  Soft Lettuces with Herbs and Avocado,
Two Years Ago:  Soft Tacos, Holly B’s Fruit Scones
Three Years Ago:  Indian Spiced Chickpeas with Yogurt and Herbs, Muhummara Dip, Zesty Tofu Wraps

Bittersweet Brownie Drops
Sinfully Easy Delicious Desserts
Makes about 30 cookies

This is one of the very few recipes where my yield matched the expected yield.  And the title is perfect, these taste like brownies in cookie form.  Thank you Ms. Medrich!

4 tbsp. (2 ounces) unsalted butter, cut into chunks
8 ounces bittersweet chocolate (70 to 72% cacao), coarsely chopped
1/3 cup plus 1 tbsp. (1.75 ounces) unbleached all purpose flour
1/8 tsp. baking soda
Scant 1 cup (6.5 ounces) sugar
¼ tsp. salt
½ tsp. vanilla extract
2 large eggs
1 cup (3.5 ounces) walnut or pecan pieces
6 ounces bittersweet, semisweet, milk, or white chocolate, coarsely chopped or 1 cup (6 ounces) chocolate chips

Position the racks in the upper and lower thirds of the oven and preheat the oven to 350ºF.  Line the cookie sheets with parchment paper.

Put the butter and bittersweet chocolate in a medium heatproof bowl, preferably stainless steel, set in a wide skillet of barely simmer water, and stir frequently until the mixture is melted, smooth, and fairly hot to the touch.

Meanwhile, whisk the flour and baking soda together.

When the chocolate mixture is ready, remove the bowl from the water bath and stir in the sugar, salt, and vanilla.  Add the eggs one at a time, stirring until incorporated.  Add the flour mixture and stir vigorously with a wooden spoon or spatula until the batter is smooth and glossy and comes away from the sides of the bowl; it is critical that the batter pull itself together, so don’t stop mixing until it does.  Make sure that the batter is completely cool, then stir in the nuts and chopped chocolate or chocolate chips.

Scoop slightly rounded tablespoons of the batter 2 inches apart onto the lined sheets.  Bake for 10 to 12 minutes, or until the cookies are puffed and crackled on the surface but feel slightly soft when touched with a fingertip; rotate the sheets from top to bottom and front to back halfway through the baking time to ensure even baking.  Set the pans on racks to cool completely or slide the pan liners onto racks.  The cookies keep in an airtight container for 2 to 3 days.


« Older Posts