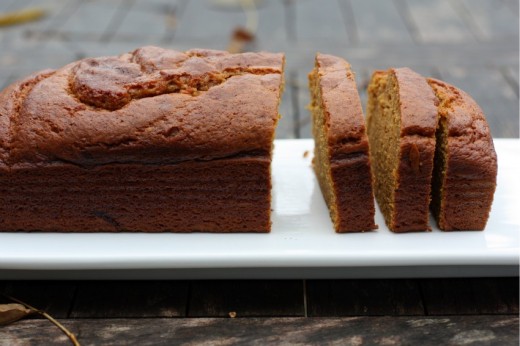
Category: Baked Goods

Sugar Buns

January 10, 2013

(Like my shoes?)

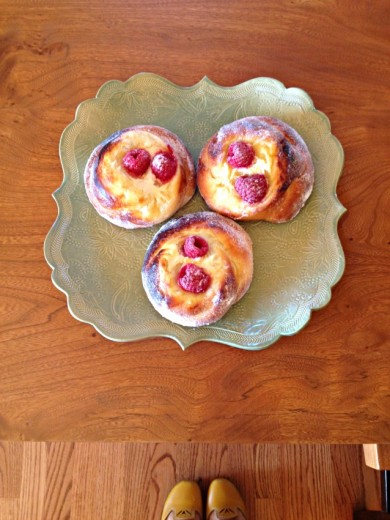
Friends, I know it is January. I know this is the month when food bloggers pull out all their healthy recipes and do end of year recaps. This is when everyone talks about whole grains, more fruits and vegetables, less excess. I know! This is my fifth January as a food blogger. Like many of you, I ate too much in the month of December and will be toning it down a bit in January but really, if you are a regular here, you know that most of my savory posts are, in fact, healthy. I even have a “Super Healthy” category (with 50 recipes!) you can refer to. So if you want to talk about quinoa, head over to the healthy side. I want to talk about these buns. A bun made with brioche dough, filled with fromage blanc, topped with berries, brushed with butter, and then rolled in sugar. That is what I want to talk about.

Whenever I make something that is a big hit, someone always invariably asks me, “Is it easy to make?” Well, I say define “easy”. Easy like you could make it in an Easy Bake Oven? In this case, no. Easy like you can whip it up in an hour? Again, no. Easy like you don’t really have to touch the dough and it just ends up looking like that? Um, no. Baking and working with dough, especially yeasted dough, requires time, patience and a tiny bit of finesse. It is not hard per se but it does require really reading and following the recipe, and a bit of practice. If I had never made any kind of baked good, would I attempt these buns? Probably not. But I think if you have been around a few different kinds of dough a handful of times you are probably safe. Nothing is too tricky here.

This recipe comes from the new Macrina cookbook. Macrina is a bakery in Seattle that is very special to me for many reasons. (Cue the story music!) In early 2000, I happened to see an ad in the paper that Macrina was hiring bakers. I had separated from my ex-husband a year before and our divorce was final a few months prior. I was working a job that had been fun and exciting at one point (selling advertising on a radio station) but after a couple of years, it was draining me. As much as it was not my dream job, the commission I made allowed me to keep the small house that my ex-husband and I had bought. I was desperate to keep that house but also desperate to do something I loved. After seeing the ad, I called and made an appointment to talk to the owner about the job. Leslie Mackie was lovely and extremely passionate about her bakery. I think she sensed something in me because, in spite of my lack of experience beyond home baking, she offered me the job on the spot. I asked about pay and she said they could offer me $8/hour. At that rate, I would have had to work about 175 hours every month just to make my mortgage, not to mention things like utilities and food. As soon as she said it, I knew I would not be able to take the job. I was crestfallen but I’m sure I knew it was impossible even before I walked in the door. I just wanted to believe it could work.

Leslie was kind to me that day and she runs a very fine bakery with multiple locations. I have eaten lunch at the one in Belltown so many times with friends. (I miss that mezze plate!) I have a soft spot in my heart for a place that, from the moment I walk in, makes me want to go home and bake. I walk into a lot of bakeries and I don’t often feel that way. So I have loved baking from her first book. And I was incredibly excited for the second one. I have only made two things from it so far but both were hit it out of the park home runs. Even if you have never heard of Macrina or been to Seattle, I would still say both of her books should be on your shelf.

I made these buns for a brunch where I knew they would be appreciated. Good eaters are the most fun people to feed, are they not? I thought they would be a huge hit with the kids but the adults were the biggest fans. I made the dough the night before and allowed it a slow rise in my garage (there was no room in my refrigerator). If you are going to do the same, I would definitely allow two hours in a warm kitchen for the dough to come to room temperature before proceeding with the recipe.

One Year Ago:  Carrot Cake, Two Potato Vindaloo
Two Years Ago:  Tofu and Shiitake Noodle Soup, Herbed and Spiced Goat Cheese Balls
Three Years Ago:  Petites Pissaladières, Black Bean Chilaquile
Four Years Ago: Poblano and Cheddar Stuffed Portabello Mushrooms

Sugar Buns

More From More from Macrina
Makes 12 buns

The initial part of this recipe, for the dough, is a great master brioche recipe. The book includes tantalizing things like Cocoa Puffs (like a pain au chocolat but with brioche dough), Kugelhopf, and Apple Cinnamon Pull-Aparts that you can make with this dough. You could also form it into a loaf pan, bake it off, and have an incredible vehicle for your favorite salted butter and jam.

For the Sweet Brioche Dough:
¼ cup lukewarm water (about 80F)
½ cup sugar, divided
1 ½ tsp. active dry yeast
¾ cup lukewarm whole milk (about 80F)
1 tsp. pure vanilla extract
2 large eggs
3 ½ cups (1 pound) unbleached all-purpose flour
1 tsp. kosher salt
½ cup (1 stick) unsalted butter, at room temperature

Lightly oil a medium bowl with canola oil. Set aside.

In the bowl of a stand mixer fitted with the dough hook, combine the water with 2 teaspoons sugar (taken from the ½ cup sugar). Sprinkle the yeast over the surface of the water. Mix until the yeast is dissolved, then let the mixture sit for 5 minutes to activate the yeast.

Add the milk, vanilla, eggs, flour, and salt. Mix on low speed for 3 minutes to bring the dough together, stopping to scrape down the bowl as needed. Increase to medium speed; pinch off grape-size pieces of butter and drop them one at a time into the dough as it mixes (this should take no more than 2 minutes). Continue mixing for 2 to 3 more minutes. Now gradually add the remaining sugar (½ cup minus the 2 teaspoons) and continue mixing for a final 4 minutes. With floured fingers, pinch a big piece of dough and pull it away from the mass. It should stretch about 3 inches without tearing – it will feel a bit like a rubber band. If it tears, mix for another 1 to 3 minutes.

Using a rubber spatula, transfer the dough from the bowl onto a floured work surface. For the dough into a ball and place it in the prepared bowl. Cover with plastic wrap and let the dough rise at room temperature until it has doubled in size, 2 ½ to 3 hours. (If you are making the dough ahead – either for convenience or to develop more complex flavors – simply deflate it after this initial rise, then re-cover it with plastic wrap and refrigerate overnight. The next day, pull it out 2 hours before you want to use it, and allow it to come to room temperature. The dough should be doubled in size and feel slightly warm to the touch. This dough is best used by the second day. If you’d like to freeze brioche dough, it’s best to form it into the desired shape, brush it with egg wash, wrap it well, and freeze for up to a week.)

For the Sugar Buns:
1 recipe Sweet Brioche Dough
1 large egg beaten with 1 tbsp. water, for egg wash
6 ounces (¾ cup) fromage blanc
1 large egg
2 tbsp. sugar, plus about ½ cup for topping buns
2 cups fresh berries
2 tbsp. unsalted butter, melted

Line 2 rimmed baking sheets with parchment paper and set aside.

Using a rubber spatula, pull the brioche dough onto a floured work surface. Using your hands, flatten and shape the dough into a 7-by-12-inch rectangle. (Do your best to keep the dough an even thickness.) Using a bench knife or plastic scraper, divide the dough into 12 equal pieces by first cutting the rectangle in half lengthwise, then cutting each long piece in half vertically, and finally, cutting each half into 3 pieces.

Roll each piece into a 12-inch rope: First roll it into a log. Coil the rope (starting from the center and working out), forming a circle that ends up being about 3 inches in diameter. Tuck the ends under. (DT: I found the dough was really fighting me at first, so I let it rest for 10 minutes. Then it was much easier to work with.) Put 6 buns on each prepared baking sheet, spacing them about 2 inches apart – they will expand when proofing. Brush the buns with the egg wash, cover the baking sheets with plastic wrap, and let them rise until they are 4 inches in diameter, about 1 hour at room temperature.

Meanwhile, whisk together the fromage blanc, egg, and the 2 tablespoons sugar in a medium bowl. Set aside.

About 20 minutes before baking, position 2 racks in the center of the oven and preheat to 375ºF.

Flatten a 1½-inch circle in the center of a bun and spoon a heaping tablespoon of the cheese mixture into the indentation. Top with a few berries (you may need to quarter large berries such as strawberries). Repeat with the remaining buns. Bake for 10 to 15 minutes, or until they are deep golden brown. Halfway through baking, rotate the pans to ensure the buns bake evenly. Cool on the baking sheet for 20 minutes.

Put the ½ cup sugar in a pie pan. Lightly brush the melted butter on the top and sides of the buns. Roll each bun in the sugar, coating the buttered area first and then sprinkling a little sugar on the berries.

(DT: While I will tell you to absolutely eat these the day they are made, they are still pretty darn good the next day if you wrap them in foil and leave them out at room temp.)


Holly B’s Savory Brioches

April 9, 2012

When you walk into Holly B’s, the beloved bakery on the beloved island of Lopez, it can be a little overwhelming.  What to choose?  I’ve said this before about that amazing place, but this is not a bakery of wonders.  There are no perfectly shaped chocolate domes with pearled sugar placed just so, no clean cuts of multi-layered cakes, no puff pastry marvels with flawless custard and fruit cut in exactly the same size slices.  What you will find is time-tested and time-honored treats.  Rustic, homemade, generous, imperfect in the perfect way.  Kind of like if you were a really good home baker and you just happened to open a bakery on a rural island (which is just what Holly B did).

Here is the catch.  We often hit Holly B’s at lunch time and at lunch time, I want lunch.  Yes, a cinnamon roll or an orange swirl or an almond butterhorn can make a very nice lunch.  Especially when followed by a peanut butter brownie or a cappuccino bar.  But the truth is that, being a savory person, I want something savory for lunch.  Holly B’s sometimes has pizza (and if you ever go, and they have the Mexican pizza, buy two pieces and eat one for me) but more often than not, the savory options are only a few.  There is almost always a ham and cheese croissant (no thanks) and there is always a savory brioche.

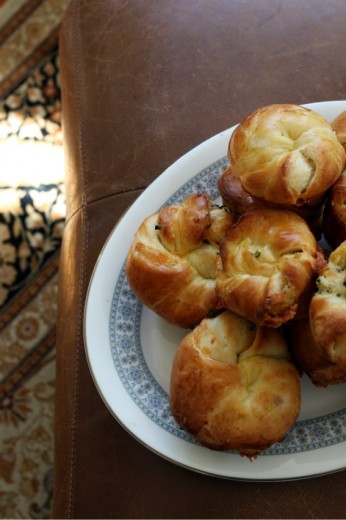
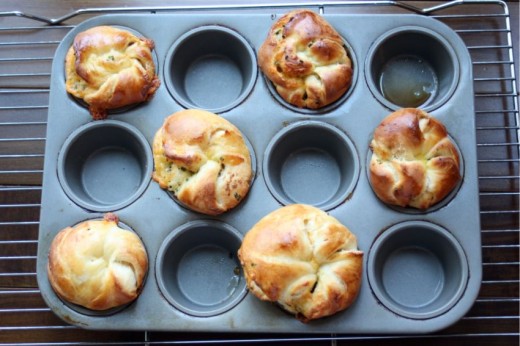
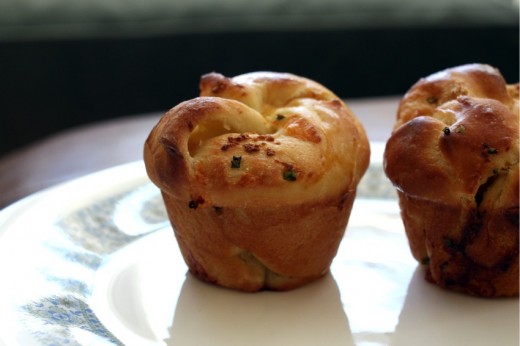
Having enjoyed her brioches for so many years, it is a little surprising that I haven’t made them yet.  Up until recently, I was a little intimidated by brioche.  Then I made some for Patricia Wells and I realized that it isn’t hard at all, there is just a lot of mixing, and you need to start the dough the night before you need it.  This recipe is really very easy – not too much mixing, and super dreamy easy-to-work-with dough.  There are many options in the book for fillings, most of them savory.  All sounded good to me (Pesto and Parmesan, Cheddar and Salsa, among others) but I opted for Cheddar, Garlic, and Chive Brioches because I had all the ingredients on hand.

I made these beauties for our annual Easter egg hunt with friends that happens the Saturday of Easter weekend.  I have made many things over the years for this celebration but this is my first time making something savory (I also made something sweet).  I liked having the option and these were terrific.

One Year Ago:  Apple Snacking Spice Cake, Snickerdoodles, Eggplant and Mushroom Pasticcio
Two Years Ago:  Blueberry Sour Cream Torte, Fideos with Pasilla Chiles, Avocado, and Crema, Swiss Chard Tart with Goat Cheese, Currants, and Pine Nuts, Baked Rice with Chiles and Pinto Beans
Three Years Ago:  Spicy Sweet Potatoes with Lime (have you made these?), Marinated Chickpea Salad with Radishes and Cucumber, Pasta with Broccoli Rabe and Chickpeas

Cheddar-Garlic-Chive Brioches
With Love & Butter
Makes 10

¼ cup warm water
2¼ tsp. (1 packet) quick-rise yeast
1 egg plus 1 yolk for dough, plus 1 yolk for wash
2 tbsp. honey
¾ cup whole milk
6 tbsp. unsalted butter, melted, for dough, plus 2 tbsp. for brushing surface
¾ tsp. salt
3+ cups all-purpose flour
2 tbsp. pressed garlic
¼ cup minced chives
1 cup grated extra sharp Cheddar cheese

Put the water and the yeast in a mixer bowl and swish around with a spoon.  Attach the dough hook.  Add the 1 egg plus 1 yolk and the honey and mix briefly.  Add the milk, 6 tablespoons melted butter, salt, and 3 cups flour and mix until smooth.  (This will take about 5-10 minutes.)  Scrape down the sides of the bowl with a rubber spatula and mix again.  Toss a handful of flour on top of the dough and mix for a couple of seconds or until the dough balls up, but stop mixing before the flour disappears.  The dough will be soft and sticky.  Turn into a well-oiled bowl or tub with enough room for the dough to triple in size.  Cover with plastic wrap and refrigerate overnight.

The next morning, butter the rims and cups of 2 standard-sized 12-hole muffin cups.  Turn the dough onto a lightly floured surface and shape into a rough rectangle with your hands.  Lightly flour the top of the dough, then flip and flour the bottom.  Roll the dough into a rectangle about 8 by 16 inches and ½-inch thick.  Regularly check the underside of the dough for sticking and scatter on a bit more flour.  The dough should be free from the surface but not too floury.

Position the rectangle of dough on your work surface with the short sides at the top and bottom and the long sides left and right.  Brush the entire surface with the remaining two tablespoons of melted butter.  Scatter on the garlic, chives, and Cheddar cheese.  Press the toppings lightly into the surface.

Fold the top 1/3 of the dough to the center of the bottom 2/3, as if you were folding a letter.  Fold again to close the bundle.  The dough will now be folded in thirds.  Use the rolling pin to gently flatten the dough to about ¾-inch thick.  Now use a pizza cutter or sharp knife to cut the dough into 10 event strips along the short dimension.

Take up a strand of dough, one end in each hand.  Stretch the dough slightly and twist 3 or 4 times in opposite directions.  (Or, you can place the strip on your work surface and use the palms of your hands to roll the ends in opposite directions.)  Now gather both ends in one hand, maintaining the twist, and grasp the loop that’s hanging down with your other hand.  Place the ends in one of the muffin cups and arrange the loop around the rim on top of the cup.  (It will seem like there is a lot of empty space but the dough will fill it when it rises and bakes.)  Repeat with the remaining strips of dough, filling every other cup to give the brioches plenty of room to expand.

Whisk the remaining egg yolk with 1 teaspoon of water and brush the tops of the brioches.  Cover with plastic wrap and set to rise in a warm place until puffy and roughly doubled in size, 30 to 90 minutes.

Preheat the oven to 375ºF with the rack in the center position.  Remove the plastic and bake the brioches 10 minutes, then rotate the pans and bake another 5 to 10 minutes longer, or until golden brown and not doughy in center.  Cool.


Corn Muffins with Raspberry Jam

February 17, 2012

I’ve been debating about how to start this post.  I taught two classes back to back this week and the prep was pretty awesome.  Whenever I had a moment to think about something other than what vegetable I needed to chop next, I started to think about all the events I have on my calendar for next week and the week after.  So what is a food blogger to do?  Just not post and then write a “sorry I haven’t been here” post in a couple days?  Take valuable prep time away to write a clear cohesive emotional post about a muffin?  I don’t know.  I seem to have temporarily lost my mojo.

So I will just say this.  I love a good muffin and, in my opinion, if you want a good muffin these days, you have to make it yourself.  Muffins have suffered the same fate as scones in recent years.  That is, they have been plumped up, sweetened up, super-sized, and flavor downgraded.  Go into any coffee shop and you will find huge muffins with the same uniform look and flavor.  To me, they taste of flour and sugar and not much else.

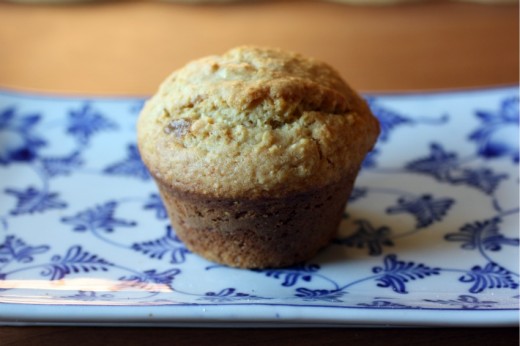
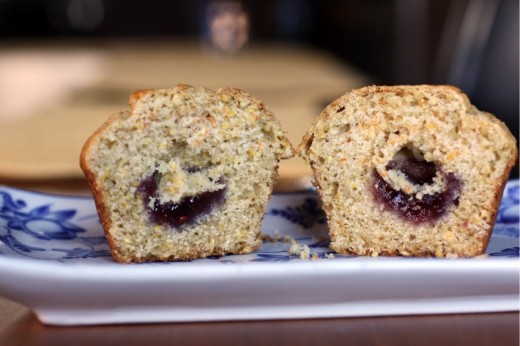
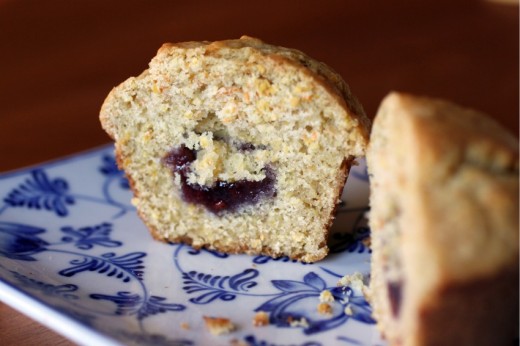
This muffin, which comes from the Flour cookbook, is not too sweet, has an interesting crunch texture (thanks to some cornmeal), and is the perfect size to share or not, as you see fit.  The little bit of jam inside each muffin is such a sweet surprise and this the first muffin I have ever made that puffed up perfectly without running all over the pan.

Two Years Ago:  Chocolate Spice Bread
Three Years Ago:  Double Baked Chocolate Cake

Corn Muffins with Raspberry Jam
Flour
Makes 12 muffins

2¾ cups all purpose flour
1 cup medium-coarse yellow cornmeal
2 tsp. baking powder
1 tsp. baking soda
1 tsp. kosher salt
¼ cup (½ stick) unsalted butter, melted
¾ cup packed light brown sugar
3 eggs
1 cup milk, at room temperature
1/3 cup canola oil
¾ cup crème fraîche, at room temperature
¾ cup raspberry jam

Position a rack in the center of the oven and heat oven to 350ºF.  Butter a standard 12-cup muffin tin, coat with nonstick cooking spray, or line with paper liners.

In a large bowl, stir together the flour, cornmeal, baking powder, baking soda, and salt until well mixed.  In a small bowl, whisk together the butter and sugar until it forms a thick slurry.  In a second large bowl, whisk the eggs until well blended.  One at a time, whisk the milk, then the oil, then the crème fraîche, and finally the butter-sugar slurry into the eggs.  Pour the wet mixture into the dry mixture and fold carefully just until the dry and we ingredients are well combined.  The batter will be thick and pasty.

Spoon about ¼ cup batter into each prepared muffin cup.  Spoon 1 tablespoon jam on top of the batter in each up, then top off each cup with another ¼ cup batter, making sure the cups are evenly filled.  They should be filled to the rim.

Bake for 25 to 28 minutes, or until the edges of each muffin are golden brown and the center springs back when pressed with a fingertip.  Let cool in the pan on a wire rack for 20 minutes, then remove the muffins from the pan.

The muffins taste best the day they are baked, but they may be stored in an airtight container at room temperature for up to 3 days.  If you keep them longer than 1 day, refresh them in a 300ºF oven for 4 to 5 minutes.  Or, you can freeze them, wrapped tightly in plastic wrap, for up to 1 week.  Reheat, directly from the freezer, in a 300ºF oven for 8 to 10 minutes. https://saladsup.com/


Roasted Banana Muffins

January 3, 2012

How do you feel about bananas?  I am ambivalent about them.  They are neither my favorite fruit (nectarines) nor my least favorite (papayas).  They fall somewhere toward the bottom third of my fruit list.  I don’t hate them but I don’t seek them out either.  My children, on the other hand, love bananas.  Spencer especially.  And so I buy a lot of bananas and always think to myself that I can bake banana bread if they start to go bad.  But then, no matter how many I buy, my guys eat them and so no banana bread is made.  And then I realize that all is well in the banana world because I don’t really like banana bread anyway.  Now really, was that the most fascinating paragraph you have ever read?

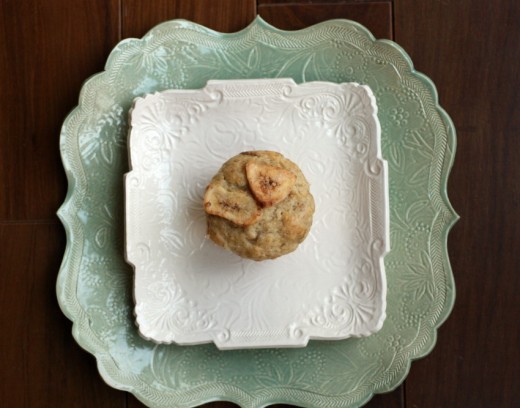
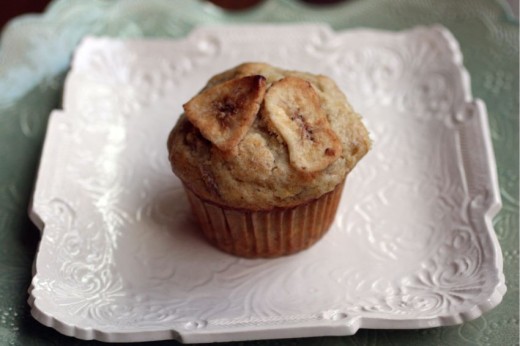
Recently I found myself with a few bananas and a recipe that sounded surprisingly interesting to me.  Roasted Banana Muffins.  You take 2 bananas, drizzle them with brown sugar, vanilla, and rum, wrap them up in foil, and roast them for about 20 minutes.  What you get is soft bananas swimming in an incredibly fragrant bath and you know just by smelling them that these muffins won’t taste like that old tired banana bread you make to use up old bananas.  (For the record, “banana” is a really fun word to type.)

This recipe comes from a cookbook with the unfortunate name of Cake Boy.  It is a book that I would have undoubtedly passed by if the charming French author hadn’t made a stop at Book Larder.  I didn’t get to meet him, although I hear he smelled like expensive cologne and was extremely handsome, and those facts made me take a second look at his book.  An extremely decadent cream cheese brownie and a blueberry muffin that you fill and top with a blueberry compote were enough to make me buy it.  (Note: I can’t wait for blueberry season.)  Cake Boy lived up to his promise for big flavor with these muffins – my family inhaled them.

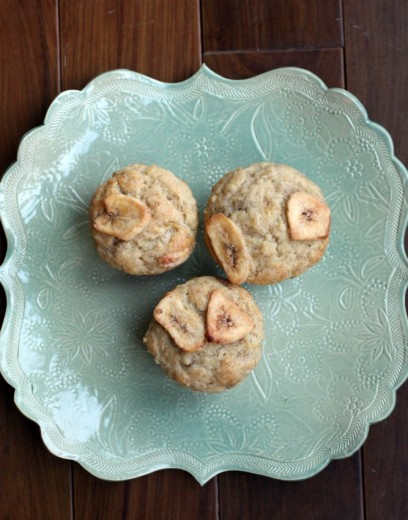
And how about those plates!  I don’t have any sisters, but I am fortunate enough to have three wonderful sisters-in-law.  Two of them, Randy’s sisters (hi Susie!  hi Lois!), conspired to send me these beautiful plates from Cat’s Paw Pottery as a holiday gift.  Don’t you love them?  I hope so because you will be seeing a lot of them…

One Year Ago:  Linzer Tart
Two Years Ago:  Orecchiette with Fennel, Beets, and Toasted Almonds

Roasted Banana Muffins
Adapted from Cake Boy
Makes 12 muffins

This recipe calls for self-rising flour – an ingredient used frequently in Europe but not as much in the States.  You can easily make your own by adding ½ tsp. of salt and 1½ tsp. of baking powder to each cup of flour.  Because this recipe calls for 2¼ cups self-rising flour, I just made 2 cups of the self-rising flour and then added another ¼ cup of all-purpose flour.  I thought with the additional baking powder already in the recipe that these muffins might balloon out of control but they did not.

I always buy superfine sugar (C&H makes it and you can find it on the baking aisle) but if you only have regular, you can grind it in a food processor.  Or, I imagine, you can just use it as is.  Report back if you do.

2 large ripe bananas
¼ cup dark brown sugar
1 tsp. vanilla extract
1 tsp. ground cinnamon
2 tsp. dark rum
6 tbsp. (¾ of a stick) unsalted butter
½ cup milk (I used 2%)
2¼ cups self-rising flour
1½ tsp. baking powder
½ cup superfine sugar
2 eggs
Dried banana chips (for topping)

Preheat the oven to 350ºF.  Line a 12-cup muffin pan with paper liners.

First, roast the bananas.  Peel them, then place them on a large sheet of foil on a baking sheet.  Sprinkle them with the dark sugar, vanilla extract, cinnamon, and rum.  Wrap in a loose but secure package and cook in the preheated oven for 20-25 minutes.  Allow to cool.

Melt the butter and allow to cool.  In a bowl, mash the roasted bananas well.  With a fork, beat the eggs, melted butter, and milk in a second bowl.  Add the mashed bananas and stir through.

Sift the flour, baking powder, and superfine sugar into a large bowl.  Make a well in the center and add the egg and banana mixture, stirring roughly with a fork (don’t overmix) until it is a lumpy paste.

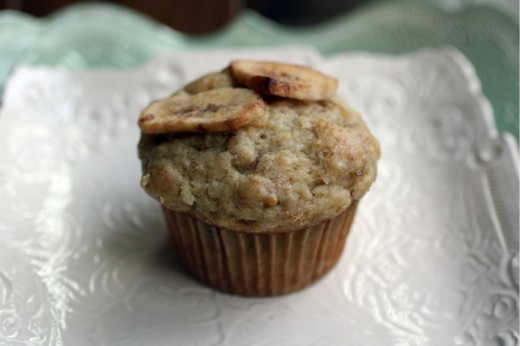
Spoon the mixture into the paper cups to the rims (I use a large ice cream scoop for this).  Top each one with some banana chips.  Bake in the preheated oven for 20 minutes.  Rest the muffins on a wire rack too cool down.


Perfect Pumpkin Bread

November 14, 2011

Sometimes I have a moment when I am in line at a coffee shop.  I’m usually a little hungry (I use coffee as my mid-morning snack) and things in the pastry case start to look very tasty.  I never actually purchase any of those things though because I know how deeply disappointing they can be.  For some reason, scones, quick breads, and muffins go through some kind of metamorphosis when they are mass produced, and something that is lovely in the home becomes nothing more than sugar and air.  How can something that looks like pumpkin bread have none of that subtle squashiness and spice that real pumpkin bread has?

The dreary days have just started here in Seattle.  After a crummy winter, a terrible spring, and a summer that didn’t really get going until August, we were due a nice fall and we got one.  It has been lovely.  I don’t remember every having much sun in November and this year, there have been more sunny days than rainy.  But once the rain starts, it stars and those damp days combined with very little daylight make things like pumpkin bread all the more sweet.  Without really realizing it, I have been searching my whole baking life for the perfect pumpkin bread.  Of all the quick breads, it is my favorite.  I have made many in my life and, while all have been tasty, not one of them has been quite right in my book.  I’ve made them with fresh steamed pumpkin, fresh roasted pumpkin, canned pumpkin, nuts, bran cereal, raisins – even chocolate chips.  I liked them all but either the flavor or texture, or both, was not what I wanted.

I’m happy to say I found my perfect recipe and even happier to tell you that it comes from a Seattle source.  Grand Central Bakery has been a Seattle fixture since 1972.  I remember it from my childhood as one of the few places in town that my New Yorker parents thought you could find a decent sandwich.  We used to go down to Pioneer Square almost every weekend and sit at a balcony table eating sandwiches and pickles.  Grand Central has grown as our city has and now there are several locations here and in Portland.

Last summer I went to a baking class in Grand Central’s south Seattle bakery, and one of the perks of doing so was receiving a copy of their book, The Grand Central Baking Book.  The baking department of my cookbook collection is large, and growing, but I have to say that most of my books are kind of on the fussy side.  I get lured in by pretty pictures and delicious sounding recipes only to realize, once I have bought the book, I don’t really bake that way.  I am a home baker – I love simple and delicious things best.  There is a time and a place for terrific chocolate cakes but most often what I want is something on the simpler side.  Like pumpkin bread.

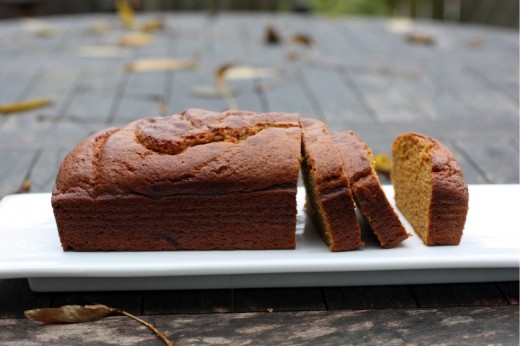
This bread really tastes of pumpkin, it is incredibly moist, and it has a wonderful spiciness to it.  I actually bumped up the spices a bit since I love the flavors of cinnamon and ginger in baked goods.  In addition to all of those wonderful things to recommend it, I was delighted to realize that you only use 1/3 cup of vegetable oil for two loaves.  If you have ever made a quick bread, you know it is usually an oil bomb.  Over the years, I have started the practice of substituting ½ of the oil with applesauce in an attempt to make a morning or afternoon treat not be a dessert’s worth of calories and fat.  Here, no substitution is necessary.  Perfect recipe found.

One Year Ago:  Three Cheese Mini Macs
Two Years Ago:  Gianduja Mousse
Three Years Ago:  Pumpkin Whoopie Pies

Pumpkin Bread

Adapted from The Grand Central Baking Book
Makes 2 loaves

This recipe is written for two 9×5-inch pans.  I have also made it in two 8×4-inch pans.  The smaller pans will give you a taller loaf but can also be a little difficult to remove.

3¼ cups flour
1½ tsp. baking soda
1 tsp. salt
1½ tbsp. pumpkin pie spice (recipe follows)
1/3 cup vegetable oil or canola oil
1 2/3 cups granulated sugar
1 1/3 cup packed light brown sugar
2 cups pumpkin puree (1 15-ounce can)
4 eggs
1/3 cup water
1/3 cup buttermilk

Preheat the oven to 350 degrees.  Lightly grease and flour two loaf pans (either 9×5-inch or 8×4-inch).

Measure the flour, baking soda, salt and pumpkin pie spice into a bowl and whisk to combine.

Using a stand mixer with the paddle attachment, mix the oil, granulated and brown sugars, and pumpkin puree on medium-low speed until well-blended, about 2 minutes.

Crack the eggs into a liquid measuring cup and whisk together.  With the mixer on low speed, slowly pour in the eggs, incorporating each addition completely before adding the next.  Scrape the bottom and sides of the bowl.

Add one-third of the dry ingredients and mix briefly on low speed, then add the water.  Mix well and repeat, using half of the remaining dry ingredients and all of the buttermilk.  Add the remaining dry ingredients and mix just until combined.  Scrape the sides of the bowl and then divide batter between the prepared pans.

Bake for 60 to 75 minutes, rotating the pans every 20 minutes or so.  The loaves should be dark golden brown with cracked tops, and a skewer inserted in the center should come out clean.


Pumpkin Pie Spice

¼ cup ground cinnamon
2 tbsp. ground ginger
1 tbsp. ground nutmeg
1 tbsp. ground cloves
1 tbsp. ground allspice

Combine all of the ingredients in a small bowl and stir with a fork until well combined.  Store in a cool, dry place for up to 3 months.


« Older Posts