Category: Vegan

Tofu Talk

September 9, 2021


Yes it’s me, your long lost vegetarian food blogger.  A year after I told you I was coming back to this space, I’m really back.  For real.  I had every intention of making this a more regular thing but I got stopped by technology.  I started this blog way back in May of 2008.  About a year after I started, I worked with a designer to move me over to WordPress and redesign the site.  And that’s the last time anything was updated.  I don’t really care that the site looks dated, but using a very old version of WordPress left me banging my head against a wall.  Because I am intimidated by the tech aspect of the blog, I just put it off.  I’ve had this post ready to go for months but couldn’t go anywhere with it.  I finally reached out to my friend network and someone suggested I post the job on Fiverr.  A few days and a little bit of money later, I’m back!

Now before I get to the tofu, I have to simultaneously apologize to and profusely thank those of you who left me such lovely comments on this post.  I was operating under the impression that no one really reads this blog anymore so I hadn’t bothered to check the comments.  In fact, that is not the case.  I am humbled by your welcomes back to this space and by your sharing your own difficult experiences with mental illness.  I have always been so grateful by the support of friends and strangers when I talk about the tough stuff here.  Thank you all so much for reading and supporting.  There is nothing more motivating than having wonderful readers.

Onward.  I’ve noticed that every time I post something about tofu on Instagram, I get questions.  Tofu, it seems, is not only a polarizing ingredient but also a perplexing one.  I’ve been cooking with it for well over 25 years and while I’m not an expert, I do have some Thoughts and Opinions, as well as a favorite way to prepare it.  I just read over my old tofu posts (some great recipes there!) and I have addressed most of these points in previous posts, but here are all my thoughts in one convenient place:

Tofu is not a meat substitute.  If you are looking to reduce your meat intake but also are looking for something to replace your steak or roast chicken, tofu is not your guy.  Tofu, while it can be delicious if treated the right way and nutritious, is not going to satisfy you if you want animal protein.  Treat tofu as its own unique thing and you will be more likely to accept and like it.

Always, always extra firm.  If you have gone looking for our soy friend and been overwhelmed by the choices, I can totally understand.  Silken, soft, medium, firm, extra firm, super firm, water packed, vacuum packed – did I miss any?  I occasionally buy silken tofu (the type that is shelf-stable and found on the Asian foods aisle) for using in miso soup or blending into desserts, but otherwise I always go extra-firm or super firm.  If possible, I also try to get the type that is shrink wrapped and NOT packed in water.  One of the keys to getting flavor into tofu is to remove excess water (more on that in a minute), so you have to work harder at this task if the whole block is sitting in water.  Wildwood makes a good one they label as super firm and if you are in the Bay Area, Hodo Tofu is made right here in Oakland and has a great texture.  Trader Joe’s also has a good one.

Get rid of excess water but don’t make yourself crazy. Many tofu recipes will tell you to “press” the tofu.  This involves laying it on a towel, placing a baking sheet over it, and then placing heavy cans on top for 20-30 minutes.  The idea is that you are pressing out the excess water which will allow the tofu to absorb more flavor and have better texture.  I agree with the end goals but in my experience, this is a time-consuming and unnecessary step.  If your tofu is too soft, it will sploosh apart under the weight and if it is extra-firm, it will just sit there and not really give off any water.  Your best bet is to lay the whole block on a clean kitchen towel and aggressively blot the outer edges dry.  You can even give it a bit of a squeeze.  Then, slice the tofu into planks and dry each of those, both sides, with the same towel.  Then you are good to go!

Flavor, flavor, flavor.  One of the biggest complaints I hear about tofu is that it doesn’t taste like anything.  (The other one is that it is mushy, which you can solve by buying extra firm.)  That complaint is pretty much true – tofu on its own doesn’t have much flavor.  But, if I remember correctly, neither do chicken breasts.  You do things to chicken to make it taste better, like season and/or marinate it, and so you should do the same with tofu.  If you are simply stir frying it and adding it to another dish, be sure to season it well with salt and pepper before sautéing and even give it another sprinkle of salt after it is done.  But to get even better flavor (and texture) consider marinating and baking the tofu.  I think Asian profile flavors taste best so I lean toward ingredients like soy sauce, rice wine vinegar, and chile paste.  But you could certainly explore other options.

High heat is your friend.  To get great texture, you need to work with relative high heat and give it a bit of your attention.  If I am adding tofu to a stir fry or fried rice, I will stick with the season and then pan fry method I describe below.  Frying it will tighten it up a bit and give you a bit of a crust.  Do not expect fried chicken level of crunch but the texture is nice.   If the tofu is more of the star of the show, I marinate it for at least an hour, even longer if possible.  Then I bake it in the marinade in a 400 degree oven until the marinade has been absorbed.  Below you will find specifics on how to cook/bake the tofu.  I’m giving you a yield of 16-20 ounces because the Wildwood and Trader Joe’s super firm comes in a 16-ounce pack.  If you can find Hodo brand, it (annoyingly) comes in 10-ounce packs, so I buy two.

Pan-Fried Tofu
16-20 ounces of tofu

You will notice that I have you sautéing the tofu in slabs first, then cutting into cubes once they are golden brown.  There are few tasks I find more mind-numbing than turning individual cubes of tofu over four times but if that sounds like fun to you, cut each slab into cubes before frying.  Just don’t forget to season with salt and pepper.

Remove the plastic packaging from the tofu and using a clean kitchen towel (or paper towels), blot the brick(s) dry.  Cut the brick(s) into approximately 1-inch thick slabs and blot each slab dry on both sides.  You can give them a gentle squeeze too.  Lay out on a plate and sprinkle both sides with a generous pinch of kosher salt and a few grinds of black pepper.

Place a large non-stick sauté pan over medium high heat.  Drizzle in a couple of tablespoons of a flavorless oil (canola or grapeseed are my choices) and carefully lay the slabs of tofu in the pan.  They will tend to splatter a bit so watch your hands.  Allow the slabs to cook until they are a uniform golden brown, then carefully flip them over using tongs or a spatula.  Allow the second side to get golden brown.  If you are able to stand the slabs up on their ends without them falling over, allow those to get golden brown too.  If that doesn’t work for you, don’t worry about it.  Once you have golden brown tofu, remove the slabs to a paper towel lined plate.  If you were not able to cook all the tofu in one batch, repeat these instructions with the rest of the tofu.  Sprinkle all the slabs with another pinch of kosher salt.

Once the slabs are cool enough to handle, cut them each into the desired sized cubes.

Oven-Baked Tofu
16-20 ounces of tofu

1 package Wildwood Super Firm Tofu or two packages Hodo Extra Firm Tofu
3 tbsp. soy sauce
Juice of 1 lime
1 tbsp. unseasoned rice wine vinegar
2 tbsp. honey or brown sugar
1 tbsp. dark sesame oil
1 tbsp. canola oil
1 tsp. salem olek or other chili paste (optional)

Preheat the oven to 400 degrees with the rack in the middle position.  Remove the plastic packaging from the tofu and using a clean kitchen towel (or paper towels), blot the brick(s) dry.  Cut the brick(s) into approximately 1-inch thick slabs and blot each slab dry on both sides.  You can give them a gentle squeeze too.  Cut the slabs of tofu into approximately one-inch cubes.

In a large baking dish, whisk together all the marinade ingredients.  Taste and make sure the balance is right.  You want a nice salty/sweet/sour flavor but adjust until it tastes right to you.  Tumble the tofu cubes into the dish and stir to combine well.  Allow the tofu to sit out, stirring occasionally, for ideally 30-60 minutes.  The flavor gets better the longer it sits so you can also prepare this early in the day.  If it is going to sit out longer than an hour, cover the dish and place in the refrigerator.  Stir occasionally.

Place the uncovered dish in the oven and bake, stirring every 10 minutes or so, until the marinade is completely absorbed and the tofu is getting crispy, about 35-40 minutes.


The Dip You Can Serve with (Almost) Anything

July 3, 2020

Asian Avocado Dip 3

Friends, let me tell you, I am RUSTY at this food blogging thing.  I think I figured that when I finally sat down to get this old girl up and running again, the posts would just magically flow like they used to.  Except the reality is that they never magically flowed.  I worked hard on each post, reworking it over the course of several days, getting it to that point where I was making my story clear and enticing you to want to make the recipe.  Being away for six and a half years made those writing muscles really rusty.

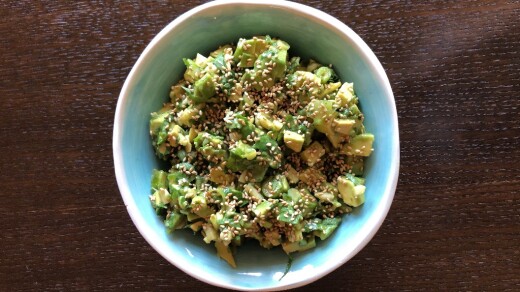
I posted about this Asian-Inspired Avocado Dip on Instagram recently, and got a bunch of people asking about it.  It became clear to me that this was the first food I would need to post.  I had other ideas but the more I thought about it, the more this dish makes sense as my first food post in a very long time.  I’ve been making it forever – in fact, I had to look back through my “dip” category to make sure I hadn’t already written about it.  It is one of those big wallop of flavor for little effort recipes, and every single time I’ve made it, the dip is demolished and several people ask me about it.

I started the first version of this post with a story about going to Las Vegas with my ex-husband and how my experience of eating every meal at a buffet made me realize that food needs to flow.  As in, you shouldn’t have sushi next to meatballs and spaghetti.  This was actually a seminal moment in my food journey.  I have ever since been cognizant of how dishes go together, whether it’s for a simple dinner, a big dinner party, or an even bigger catered party.  There doesn’t need to be a theme per se (July in Provence!), but some semblance of harmony within the dishes helps the food make sense.  You don’t have to scratch your head about it, you can just enjoy. I don’t think I take this to the extreme but I made a red Thai curry for dinner last week and served a cucumber salad that I am currently obsessed with alongside.  I was on the verge of apologizing that the cucumbers were really more of a Japanese recipe so probably shouldn’t have made them with a Thai dish, and then I realized my audience (my husband and two boys) probably wouldn’t even know what I was talking about, and closed my mouth.  But this is the legacy of that trip to Vegas.  Don’t serve sushi next to spaghetti and meatballs.

So allow me to kind of contradict myself when I tell you that while this dip definitely has ingredients often found in Asian cooking (soy sauce, wasabi, mirin, rice wine vinegar), it can be at home with just about anything.  I used to do a regular party for a friend who owns a jewelry shop where I did all different kinds of appetizers.  It was a little bit of everything and this dip was always at home.  I even (gasp!) serve it with tortilla chips.  I made it last week to bring to a socially distanced discussion about books and, unusually, had some left over.  I made pizza that night to eat with a friend and her two boys who came over.  Asian-Inspired Avocado Dip as an appetizer with pizza for dinner?  I wasn’t sure.  But do you know what?  No one cared.  It disappeared as it usually does and I realized that sometimes I need to get over myself.

A few notes about the recipe.  It calls for jicama which isn’t always that easy to find and when you do find it, they are often ginormous.  I have successfully used radishes as a substitute, although the jicama is better because it lends some nice sweetness.  When I have the time and patience, I will cut the rest of the jicama into batons and serve them with the dip.  A friend on Instagram asked if I had ever served it with rice crackers and no, I haven’t and yes, I will next time.  I buy S&B wasabi which comes in like a mini toothpaste tube which I store in the fridge pretty much just for this recipe.  It seems to be just fine in there for long-ish periods of time.  And finally, while you can technically make this ahead, I find it gives off a fair amount of liquid, so it’s really at its most appetizing soon after you make it.  You could certainly get all the components ready ahead of time and just chop the avocados and mix it right before serving.

Asian-Inspired Avocado Dip
Adapted from Bon Appétit
Makes about 3 cups

1 tbsp. sesame seeds
2 tbsp. unseasoned rice vinegar
1 tbsp. mirin
1 tbsp. soy sauce
1 tsp. toasted sesame oil
1 tsp. wasabi paste
1 bunch watercress, leaves only, coarsely chopped
4 scallions, thinly sliced
½ cup ½-inch cubes peeled jicama
2 large avocados, halved, pitted, cut into small pieces

Stir sesame seeds in dry skillet over medium heat until aromatic and light golden, about 2 minutes.  Allow to cool completely.  (DT: I buy pre-toasted sesame seeds which make this dip even easier.)

Whisk next five ingredients in large bowl to blend.  Add watercress, scallions, and jicama; toss to coat.  Gently stir in avocado.  Sprinkle dip with sesame seeds and serve.


I Do Not Love Kale

May 9, 2013

I’m thinking of starting a support group for People Who Do Not Love Kale. Would you join me? Are you, like me, sick of hearing/reading about kale?  I’d actually like someone to explain the kale phenomenon to me.  Why is it that this vegetable specifically has been singled out as the second coming? Why the special treatment? And really – kale? It’s not the sexiest of vegetables. Someone I know said they would like to hire the PR firm that is responsible for the kale explosion.

Not only do I not get the hype, I have to say I don’t really get kale.  I use it. I like it better than some of its other dark leafy siblings (although I love this chard dish and chard is also lovely in this tart, and collard greens are terrific in this curry). I have made kale chips and my kids spit them out and honestly, so did I.  Often I have a choking sensation when I eat kale. Does anyone else have this reaction? I’ve learned to chop it in small bite size pieces no matter what dish I am throwing it into. I don’t have to do this with broccoli. Broccoli never makes me choke. (I love you broccoli!)

I keep trying to love it. I keep trying to get excited about it. I keep buying it at the farmers’ market because it is always there and I must need some of that, right? I put it in soups and stews and sometimes I just let it languish in my crisper drawer.   Which is saying something because kale keeps well.  Then I feel guilty and so I sauté it in olive oil with minced garlic and red pepper flakes, let it cool, and then keep it in the refrigerator to eat with quinoa, avocado, and poached eggs. (My new husband-is-out-of-town dinner.)

Just as there is a lot of hype about kale, there is a lot of hype about Deborah Madison these days. (Nice segue, don’t you think? https://sbtreatment.com/ ) The difference is, in my opinion, Deborah Madison deserves every bit of it and then some. Her new book Vegetable Literacy is a beautiful and well-researched tome that every vegetable lover should own. Especially if you garden (which I don’t). The thing I find so incredibly inspiring about Ms. Madison is that after all these years and all these books, she still has the passion for food that she has always had, and the curiosity to do investigative journalism about produce. The book, as you have no doubt heard, is arranged by vegetable “families” and I had plenty of surprises seeing which vegetables and herbs are related.

The recipes are true Deborah Madison. If you own a few of her books (or six like I do), you might see some familiar things. Sometimes things are a little more complicated than they need to be, sometimes they are shockingly simple. In just a quick casual glance through the book, I saw no fewer than 15 things I wanted to try right away. I’ve already made one thing twice (a simple dip of all things), and I know that her recipes are tested to perfection and fairly portioned. You never have to wonder as you attempt one of her recipes whether it will turn out. And if it doesn’t, it is most certainly your fault, not hers.

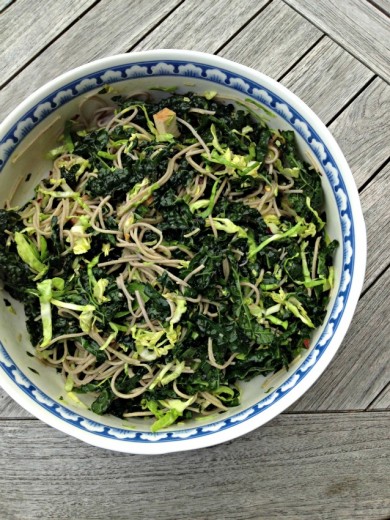
This dish spoke to me at a time when I was not eating many things. For three weeks, I ate fruits and vegetables, nuts and seeds, and lots of eggs. I was trying to see if my acid reflux had to do with a food intolerance.  You can used to a diet like that but it isn’t much fun. I decided that if I used 100% buckwheat soba noodles (which are gluten free) then this dish fit into my elimination diet. It is a testament to how tasty it is (even with the kale) that I would make it again, even now that I am eating normally again.

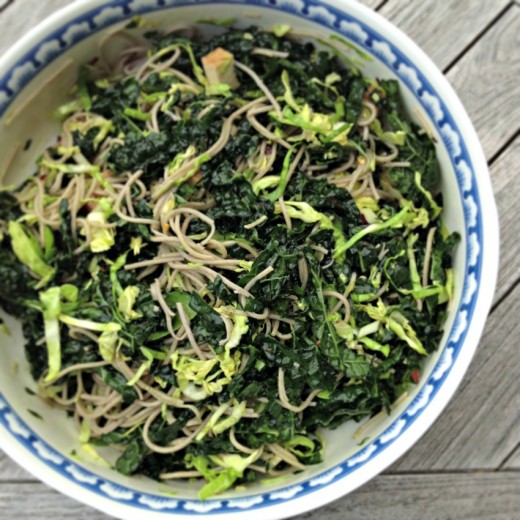
Buckwheat Noodles with Kale and Sesame Salad
Adapted from Vegetable Literacy
Serves 2 as a main course or 4 as a first course

While I will say that you should never rinse traditional Italian-style noodles, you should definitely rinse soba noodles.  They are very starchy and will clump together in one big lump if you don’t.  This recipe calls for both toasted and light sesame oils.  Toasted sesame oil is a tremendous flavor booster but you have to be careful with it as the flavor is very strong.  If you don’t have light sesame oil (I don’t), you can use peanut oil or even canola oil for that part of the recipe.

6 ounces soba noodles (make sure they are 100% buckwheat if you want gluten free)
Toasted sesame oil
1 bunch Tuscan kale (also called lacinato or dinosaur kale)
5 tsp. light sesame oil (not toasted)
Sea salt
4 brussels sprouts
1 plump garlic clove
1 tbsp. rice wine vinegar
1 tsp. soy sauce
1 tbsp. sesame seeds, toasted in a dry skillet until golden
2 pinches red pepper flakes
Slivered chives or green onions to finish

Cook the soba noodles in a large pot of boiling salted water.  Check the package for how they need to cook and taste a noodle to make sure they are not overdone.  Drain and immediately rinse with cold water, running your hands through the noodles to make sure they are cool.  Give them a good shake and then drizzle them with a bit of toasted sesame oil, mixing them with your hands.

Slice the kale leaves off their ropy stems and discard the stems.  Working in batches, stack the leaves, roll them up tightly lengthwise, and then thinly slice them crosswise into narrow ribbons.  Put the ribbons in a salad bowl with 1 teaspoon of the light sesame oil and a pinch of salt.  Squeeze the leaves repeatedly with your hands until they glisten.

Discard any funky outer leaves from the brussels sprouts.  Slice them paper thin on a mandoline (or with a very sharp knife), then toss them with the kale.

Pound the garlic with another small pinch of salt in a small mortar until smooth.  Stir in the vinegar then whisk in the remaining oil and the soy sauce.  Pour the dressing over the greens and toss well.  (If you don’t have a mortar and pestle, you can also chop it roughly on a cutting board, sprinkle the garlic with the salt, and then use the flat side of your knife to smoosh the salt into the garlic.  You are looking for a rough paste consistency.  Then just transfer the garlic to a bowl and continue.)

Just before serving, toss the greens with the soba noodles, the sesame seeds, pepper flakes, and the chives.


Indian Food Pep Talk

May 6, 2013

Let’s talk about Indian food.  Do you love it?  Are you making it at home?  If the answer to the first question is yes and the second is no, why not?  Why are you not making Indian food at home?  I’m guessing it is one of these reasons:

1) The recipes are too long.
2) The recipes have unfamiliar ingredients.
3) It’s too spicy!
4) Who has all those spices?

You might notice that reasons 1-4 actually have to do with spices.  #1 Sometimes Indian food recipes have long lists of ingredients but if you look carefully, many of those ingredients are actually spices.  Sometimes up to half of the list really just needs to be measured out of a jar.  #2 Once in a while, I will find a recipe that calls for bitter gourd or drumstick (not the kind that is on a chicken) but usually the unfamiliar ingredients are actually spices.  #3 “Spicy” and “spiced” are really too different things.  Yes, there are a lot of spices in Indian cooking and that is why it is so intoxicating.  Most of the spices are there to give the food flavor and color, not necessarily heat.  When you are cooking it yourself, you control the level of heat so what are you afraid of?  #4 needs a new paragraph.

If you cook regularly, you probably have jars of cumin, coriander, and cayenne at home, these are spices commonly used in Indian food but also in Thai, Mexican, and Middle Eastern food, among others.  Perhaps you even have turmeric and mustard seeds.  Maybe you don’t.  Maybe you want to make a recipe that calls for fenugreek and garam masala and when you see that you think to yourself, “Now this is why I don’t make Indian food.”  I’m here to tell you that you don’t have to go buy whole jars of things that you are not going to use on a daily basis.  Most grocery stores these days have a bulk spice section where you can buy a couple of teaspoons for less than a dollar.  An added bonus is that the bulk spices tend to be much fresher than those you get in a  jar because there is a lot of turnover.  Take a tip from me and clearly write on the bag which spice it is and then store all your little bits of spices in one Ziploc bag.  That way, you can pull out that one bag when you want to make Indian food.  If you are looking for online resources for spices, I can highly recommend World Spice Merchant and Penzey’s.  World Spice Merchant has a storefront in Seattle and Penzey’s has locations all over the U. S.

Now that we are not afraid anymore, can we continue?  I make Indian food often in my kitchen.  I was never a fan of the Indian restaurants in Seattle so when I craved it, I made it myself.  I turn to several trusted cookbooks over and over and although I am a person always wanting to try new recipes, I gravitate toward the same dishes.  They are that good.

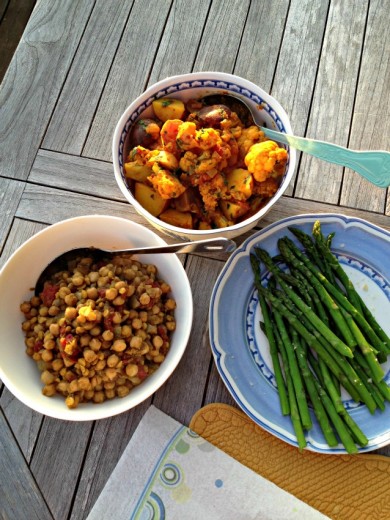
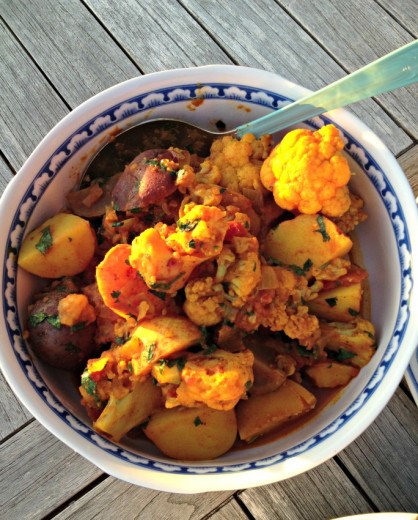
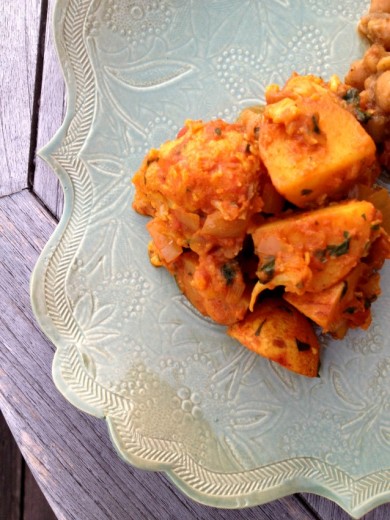
This Cauliflower and Potato Curry is a great place to start if you are apprehensive about cooking Indian food.  The recipe is easy, the ingredient list relatively short, ingredients are familiar, and it is not spicy (as in hot).  I have probably made this recipe 30 times and I change up little things each time.  Sometimes I use big tomatoes that I seed, sometimes I use cherry tomatoes, sometimes I use canned tomatoes.  I have made it with more cauliflower and fewer potatoes, and also with more potatoes and less cauliflower.  I’ve added frozen peas on more than one occasion.  I’ve used all coconut milk and also half coconut milk and half water.  I have made it soupier and drier.  My point is this is a very adaptable recipe.  How you see it below is how I like it best.

One Year Ago:  Flan, Layered Pasilla Tortilla Casserole
Two Years Ago:  Cheddar Crackers (I’ve made these about 1,000 times), Kaye Korma Curry
Three Years Ago:  Gianduja Gelato, Orange Grand Marnier Cake, Spaghetti with Mushrooms, Asparagus, and Tarragon
Four Years Ago:  Mexican Brownies, Noodles in Thai Curry Sauce with Tofu,

Cauliflower and Potato Curry
Adapted from The New Tastes of India
Serves 4

Coconut oil (or canola or peanut oil)
1 ½ tsp. fennel seeds
1 large onion, finely chopped
1 tsp. turmeric powder
1 tsp. chile powder
1 6-ounce can tomato paste
1 ¼ pound new potatoes (assorted colors are nice), cut into large chunks
1 small cauliflower, about 1 ¼ pounds, broken into florets
4 plum tomatoes, quartered and seeded
4 ounces coconut milk
4 ounces water
Kosher or sea salt
Handful of chopped cilantro

Heat a Dutch oven over medium heat.  Add just enough oil to coat the bottom of the pan.  Sprinkle in the fennel seeds and allow them to cook, stirring often, until they are toasted and fragrant, about 3 minutes.  Add the onion and cook until the onion is turning brown, about 10 minutes.  Add the turmeric and chile powder and stir for 2 minutes.  Stir in the tomato paste.

Add the potato, cauliflower, tomatoes, coconut milk, and another healthy pinch of salt.  Next stir in the water.  Bring the mixture up to a boil, then lower the heat to a simmer and cover the pot.  Allow to cook at a brisk simmer until the potatoes and cauliflower are tender, about 20 minutes.  Be sure to check with a fork or a paring knife.  If the mixture needs more liquid in your opinion, add more water or coconut milk.  Just before serving, taste for salt, and stir in the cilantro.


My Old Job

April 25, 2013

My first job working with food kind of fell in my lap.  I had a good friend who had recently hired a personal chef.  While she liked the convenience, she found the food heavy and not all that inspired.  Without thinking too carefully I said, “I’ll cook for you.”  Without thinking too carefully she said, “OK.”  And suddenly, poof!, I was a personal chef.  The arrangement worked out for both of us and my friend recommended me to another family.  Up until I had Spencer, I cooked for those two families three nights a week.

When all was said and done, I did that job for three years.  I had my two regular families for all that time and a few others who stopped and started.  Graham, who is now eight, was 17 months old when I started cooking for money and I did it through my pregnancy with Spencer and, after a short maternity leave, when he was an infant.  I was lucky to have had very flexible clients who were great eaters and were just happy to eat whatever I brought them.  I was able to be creative and make a serious dent in my “want to make” recipe file.

I kept notebooks with every menu I ever made.  It is amazing to look back and see the food I was able to produce in my kitchen with very small children and not a lot of time.  In all three years, I almost never repeated dishes and when I did, it was because someone had made a request.  I’ve been thinking about those days recently because I’ve been thinking about whether or not I’d like to start personal cheffing again.  I loved doing it and the only reason I stopped is because I found the work too solitary.  Teaching cooking classes allowed me to have prep time alone but then to share time and food with others.

Whenever I think about starting up again, I think of this dinner.  It was the first thing I made for my first client and I agonized over the choice.  I felt so much pressure (from myself) for the meal to be a hit.  I wanted so badly to succeed.  Because of that, I went to a no-fail cookbook, Vegetarian Suppers from Deborah Madison’s Kitchen, and made a favorite dish.

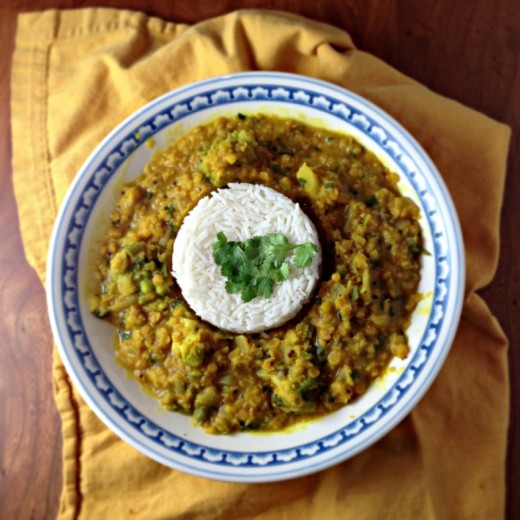
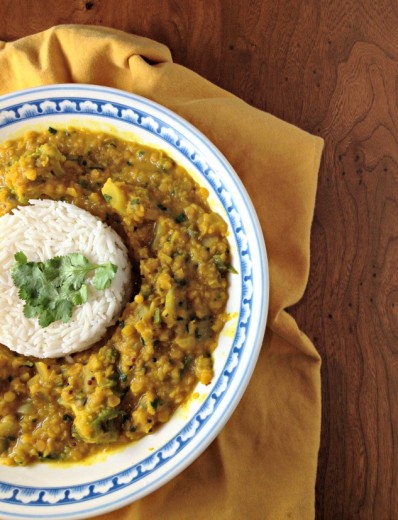
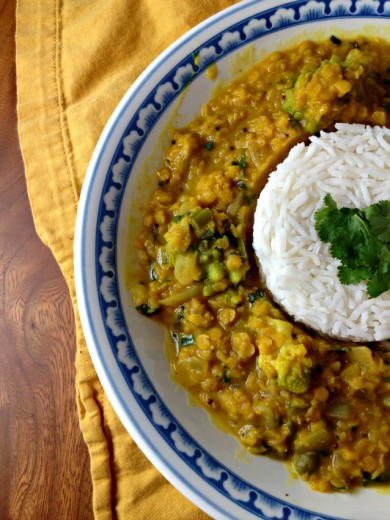
Over the years since I hung up the personal chef hat, I have made this dish many times.  I’ve made others like it too – I just really like my red lentils.  They are quick cooking and healthy and in about the time it takes for the rice to cook, you have a tasty and nutritious meal.  Recently I saw tables full of broccoli romanesco at the farmers’ market and whenever I see that beautiful vegetable, I always think of this dish.  After several years of making other versions of red lentil dhal, it was nice to come back to an old favorite.  There are a lot of steps to her recipe, and a little underseasoning, so I tweaked it to my current tastes.  Still, a classic is a classic.

One Year Ago:  Ginger Fried Rice with Roasted Tempeh, Maple Blueberry Tea Cake
Two Years Ago:  Butterscotch Pudding Tarts, Greek Salad
Three Years Ago:  Leek Frittata, Strawberry Ricotta Tartlets
Four Years Ago:  Ricotta Calzones with Broccoli Rabe, Miso Soup
[/donotprint]
Fragrant Red Lentils  with Broccoli Romanesco
Adapted from Vegetarian Suppers from Deborah Madison’s Kitchen
Serves 4

The final swirl of spices in oil might sound like an annoying extra step but it is really what makes this dish special.  I like to use coconut oil in this type of cooking but feel free to use butter, ghee, or another type of oil.

3 tbsp. coconut oil
1 small onion, finely chopped
1-inch piece fresh ginger, peeled and minced
3 cloves garlic, minced
1 large jalapeño chile, seeded and diced
2 tsp. ground cumin
1 tsp. ground coriander
1½ tsp. ground turmeric
¼ tsp. cayenne
2 cups red lentils
1 bay leaf
Kosher or sea salt
1 can coconut milk
1/3 cup finely chopped cilantro, plus extra for garnish
1 head broccoli romanesco or cauliflower, cut into bite sized pieces
1 tsp. mustard seeds
1 tsp. cumin seeds
Cooked basmati rice for serving

Place a large saucepan over medium heat.  Spoon in about 1 tablespoon of the coconut oil, then add the onion and a large pinch of salt.  When the onion is translucent and starting to brown, about 5 minutes, add the ginger, garlic and chile.  Sauté for a couple of minutes, then add the ground cumin, coriander, turmeric, and cayenne.  Stir for one minute, then add the lentils.  Stir to coat the lentils with the spices, then pour in 3 cups of water.  Turn up the heat so the mixture boils, then add the bay leaf, and turn the heat down so the mixture simmers.  Partially cover the pot and cook until the lentils are soft and most of the water is absorbed, about 15 minutes.

Add the coconut milk and simmer for another few minutes until the lentils are very soft and falling apart.  Remove from the heat and stir in the cilantro.  Cover and keep warm.

Steam the broccoli romanesco or cauliflower until tender.

To finish, heat another tablespoon of coconut oil in a small skillet over medium-high heat.  Add the mustard and cumin seeds and cook until they become very fragrant and the mustard seeds start to pop.  Immediately add to the red lentils and stir to combine.

To serve, pack the hot rice into ramekins and turn them upside down, one each, in a shallow pasta bowl.  Spoon a cup or more of the lentils around them, then lift off the ramekin, leaving the rice intact.  Top with the broccoli romanesco and garnish with cilantro sprigs.


« Older Posts