Archive for April, 2010

Make Your Own Truffles

April 29, 2010

Today – Chocolate Truffles.  But first an update and a piece of news.

Update – I want to thank all of you who responded with opinions and advice about my possible tattoo.  I got so many nice comments and emails, all of which helped me solidify my desire to get that chive but with some new perspective on what I want it to look like.  I have already met with one artist and have a couple more appointments.  What I’m realizing is that the good ones have schedules that are booked out pretty far in advance.  This is difficult for me because I am kind of an immediate gratification person.  But I do understand that if something is going to be tattooed on my forearm for the rest of my life, I had better to go to someone good.  I will keep you all in the loop and of course I will post photos once it is done.

News – I am thrilled to tell you that I will be writing a weekly post for Amazon Fresh (yes, that Amazon).  If you live in Seattle, you are one of the lucky ones who can order your groceries online from an immense selection, and have them delivered to you in bright green trucks within a one hour delivery window.  I have been using their service for a year and a half and have loved the quality, the customer service, and the convenience.  (Proof that I am not just a paid spokesperson can be found in this post.)  I will let you know when I post there so please, wander over a take a peek!  If you like what you see, let them know!   This new gig will not affect my blog.  You will still find me talking about chocolate and the joys of vegetarian cooking and eating here as usual.

Onward!  Did I mention chocolate?

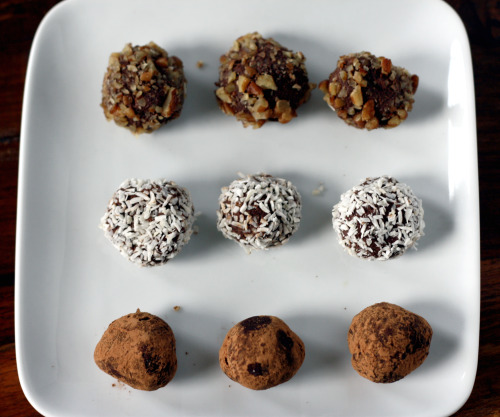
About a week ago, I found myself with a ridiculous amount of chocolate ganache.  I had planned to make a crazy fancy cookie – the kind I would never make if I didn’t have a food blog.  When push came to shove, I ran out of steam and abandoned the plan, but not before I had chopped two pounds of chocolate, made the ganache, and left it out overnight to thicken.  I panicked, put the ganache filled bowl in the refrigerator and pondered what to do for a few days.  Then I realized that I could just make truffles.  A lot of truffles.

Usually truffles are made with just chocolate, cream, and perhaps a flavoring liquor like Grand Marnier.  This recipe adds some honey and a vanilla bean but still, the flavor you are getting is pure chocolate yum.  You will want to use a bittersweet chocolate, semi-sweet would just be too sweet.  I chose to roll them in cocoa, unsweetened coconut, and pecans, but you can choose what you like.  There is nothing hard about making these.  Just keep your ganache cold (refrigerate if halfway through if need be) and if you have a small ice cream scoop – use that to scoop them out before rolling in your hand.  I halved the original recipe so you won’t be up to your eyeballs in them.  Not that that would be a bad thing.

I hate to get all Hallmark on you here, but Mother’s Day is coming up and your mom/wife/sister/daughter would be mighty impressed if you made your own truffles!

Chocolate Truffles
Adapted from The SoNo Baking Company Cookbook
Makes a lot

1 pound bittersweet chocolate, very finely chopped
2 cups heavy cream
2 tbsp. honey
¼ tsp. sea salt
½ vanilla bean, split in half lengthwise

Place the chocolate in a heatproof bowl; set aside.  In a medium saucepan, combine the cream, honey, and salt.  Scrape the tiny black seeds from the vanilla bean pod into the cream, and add the pod.  Bring the cream to a boil, our over the  chocolate and let stand for 5 minutes to melt the chocolate.  Whisk until smooth.  Discard the vanilla bean.  Allow to cool to room temperature.  Cover with plastic wrap and refrigerate for at least 4 hours, or until very firm and cold.

Line a baking sheet with parchment paper.  Using a small ice cream scoop or a teaspoon, scoop out the ganache and quickly roll between your palms to form a sphere.  Roll in toppings of your choice and place on the baking sheet.  Repeat with remaining ganache.  Keep the truffles cold until serving time.


One More Cookbook Down

April 27, 2010

As my overflow cookbook shelf is starting to overflow, I decided to go through my cookbooks and weed out a few that I never use.  Just out of curiosity, I decided to do a quick count and was a little surprised to find that I own 122 cookbooks.  How did that happen?

I do love them all, even the ones I never use, so the thought of getting rid of some was difficult.  In looking through them, I realized I was faced with a dilemma – what if a cookbook has one truly great recipe, but that one recipe is the only one I use or even like in the book?  Do I hang on to it or give it away?

One of my cookbooks in this category has an incredible Moroccan Tagine recipe that I have made countless times.  Everything else in the book feels so overwrought, so over-flavored that I have given up on the rest of the recipes.  Vegetarian food often has one of two faults – either it is severely under flavored (think brown rice and overcooked vegetables), or the food has 12 too many different tastes going on in any one dish.  This book’s recipes fall firmly in that second camp.

I decided to challenge myself.  Could I make a tagine based on my tastes, my knowledge of food, and my memory?  I have made that recipe and others like it many times, couldn’t I just re-create it?  If so, the book is out of here.

I was compelled to set this challenge for myself not only because of my cookbook real estate situation, but also because I ended up with a large amount of leftover couscous after Friday’s party.  I made the couscous to be served in endive spears.  The recipe actually suggested serving it in those Asian soup spoons but seeing as I don’t have 55 of those on hand, endive it was.  Each spear was topped with a scoop of buttery orange-scented and currant-studded couscous and a dollop of plain yogurt spiced up with curry powder.  The dish was a hit, I just ran out of endive so the leftover couscous came home with me.  I had no doubt about what to make to serve with it – a tagine.

A tagine is Moroccan in nature and is often made with lamb or chicken.  It can also be made with fish.  And it can, of course, be made vegetarian.  A tagine actually refers to the vessel in which the stew is traditionally cooked, one that is shaped kind of like an upside down funnel.  The thinking is that the broad base and the narrow top allows very little steam to escape so meat gets exceptionally tender and the flavors are allowed to really harmonize.

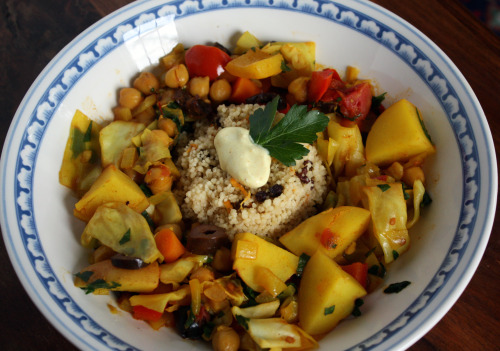
I don’t have a tagine (although don’t think I haven’t eyed them at Sur la Table) so I use a large heavy Dutch oven with terrific results.  For this one I used a mixture of carrots, potatoes, canned tomatoes, bell peppers, and chickpeas.  The spices I did by taste memory – cumin, coriander, tumeric, paprika and saffron.  I like heat so I added a bit of cayenne too.  One of the thing I love about tagines is their mixture of salty and sweet so I used a few Kalamata olives and chopped prunes.  You can use raisins, dates, or even dried apricots for that bit of sweetness.

I guess I don’t have to tell you that I love this tagine – otherwise I wouldn’t be writing about it, right?  It is just what I wanted so I suppose it’s time to ditch that cookbook.  Fresh fennel and sweet potatoes would be good substitutions or additions, I would just be sure to keep the carrots and potatoes.  I like my tagines to be on the brothy side so that the couscous gets a good soak, so add more water as necessary.  Like most stew-y things, the flavors here improve with age so don’t hesitate to make it a day ahead.  I would just wait to add the parsley until just before serving, or add more to get that green pop.

One Year Ago:  Sushi Rice Salad (a favorite of mine)

Tagine with Carrots, Potatoes, and Olives

Dana Treat Original
Serves 4

This may look overwhelming, but many of the ingredients are spices and really, it’s just a bunch chopping and a lot of letting the deliciousness happen on its own.

1 large onion, diced
2 tsp. ground cumin
1 tsp. ground coriander
½ tsp. tumeric
½ tsp. paprika
Large pinch of cayenne pepper
Pinch of saffron threads
2 large carrots, cut into ¼-inch thick slices
3 medium red potatoes, cut into 1-inch pieces
1 red pepper, seeded and cut into 1-inch pieces
1 yellow pepper, seeded and cut into 1-inch pieces
1 14-oz. can diced tomatoes
1 14-oz. can chickpeas, drained
1/3 cup Kalamata olives, coarsely chopped
3 large prunes, coarsely chopped
¼ cup chopped parsley

Heat a large Dutch oven over medium heat.  Add just enough olive oil to coat the bottom and then add the onions and a large pinch of salt.  Sauté until the onion starts to soften but not brown.  Add the spices and stir to coat the onions well.  Add the potatoes and carrots and give a good stir.

Cook for five minutes, stirring often so the spices don’t stick to the bottom and burn.  Add the peppers and the tomatoes.  Take the can the tomatoes were in, fill it halfway full of water and add that to the pot as well.  Stir and turn up the heat so the mixture comes to a boil.  Lower the heat to medium-low and cover.  Cook for 10 minutes, then add the chickpeas, olives, and prunes.  Cover again and cook until the vegetables are tender, about another 15 minutes.  About 5 minutes before serving, add the parsley.  Serve over couscous with a dollop or Curried Yogurt on top.

Orange-Scented Couscous with Curried Yogurt
Adapted from Bon Appétit

2/3 cup plain whole milk yogurt
½ – ¾  tsp. curry powder

1 cup vegetable broth
¾ cup couscous
1 tbsp. butter
Zest of ½ a large orange
2 tbsp. orange juice
¼ tsp. ground cinnamon
½ cup currants

Mix yogurt and curry in bowl.  Cover; chill.

Bring broth to a simmer in small saucepan.  Mix in couscous.  Cover; set aside until couscous is tender and broth is absorbed, about 10 minutes.  Use a fork to fluff up couscous, then mix in (using fork) butter, orange juice, orange zest, and cinnamon, then currants.  Season with salt and pepper.


Coming Full Circle

April 24, 2010

Every so often, I like to talk about my son Graham.  He has some special needs which I have written about here, and again here, and finally here.  Our very first venture into getting help for him started with his first speech assessment at about 22 months old.  Our pediatrician recommended a certain clinic and, because she had never steered us wrong, I took him there without hesitation.  We did not have a good experience and as I contemplated weekly visits for him, I knew we needed another option.

A friend told me about a place that helped children from birth through age 3, an amazing place called The Boyer Children’s Clinic.  I knew it sounded familiar and when I told my mom about it, she reminded me that she had brought my brother there over 30 years ago.  Dim memories of reading in a waiting room while eating a snack came back to me.

From the moment we stepped through the door at Boyer and continuing on to this day, our experience with those amazing people has been nothing short of incredible.  We started off just doing speech therapy but gradually joined in the preschool program that serves both typically developing and special needs children.

One day not long after we started, we rode up in the elevator with a little girl and her nanny.  The little girl was in Graham’s class and I had noticed how loving and sweet her nanny was with her.  I asked how long she had been working for the family and was surprised to hear that she was just filling in temporarily.  Because I had next to no childcare at that point with a toddler and a baby, I pounced.  Was she looking for more hours?  Yes, she was and that is how we got Erika, the most amazing babysitter on the planet.

Now that we have been working together for 2½ years, I can tell you that she is really just an amazing woman.  Babysitter is not the right term for her.  She has spent eight hours a week with my boys for all this time and their lives are richer because of it.  She is helpful to me in a million ways (she loves to fold laundry!  she is much neater than I am!) but the bottom line is that she adores my children and they adore her right back.  They do Dance Party USA in our basement, she takes them on walks to see the ducks and get doughnuts, she solves their squabbles kindly and firmly.  She has also introduced us to Jenna, Catherine, Steena, and Autumn – all lovely young women who have watched the boys on numerous occasions.  Erika is a treasure.  I am thankful to Boyer for all they have done for Graham, but I might just be most thankful to them for giving us Erika.

Graham left Boyer just after his third birthday (as all their children do) but we have stayed involved with them.  We go to their auction every year and, just recently, Randy was elected to their board.  They had a fundraiser last night and, when Randy told them that I cater occasionally, they asked me to do the food.  This party has been in the works for weeks as I planned the menu, got the shopping done, and cooked as far advance as I could.  The day before and day of were a little hectic, but I was so happy to be cooking for a place I believe in so deeply.

Early last week, I glanced at my calendar – my real one where the birthdays are written down in my handwriting, not my iPhone – and realized that today, Saturday, is Erika’s birthday.  Friday night I cater an event for Boyer and Saturday is the birthday of one of our favorite people, the woman we never would have met if it weren’t for Boyer.  Life is funny sometimes.

I took some of the batter I was using for cupcakes and made her a little cake.  I would have taken a photo along with the cupcakes but I had a frosting malfunction and therefore wouldn’t recommend the recipe.  She and the boys decorated it and she took the rest home.  I hope her celebration lasts for the next 24 hours straight.

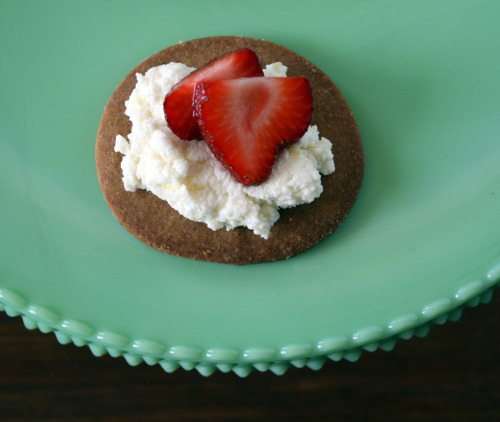
I got my April issue of Food & Wine right around the time I agreed to do the food.  The dessert on the last page jumped out at me as something I wanted to make without question.  Lovely cookies with just a bit of spice and a lot of crunch topped with sweetened lemon ricotta and strawberries.  It is such a nice combination and so pretty for spring.  I brought some mint as garnish but a giant slug had taken up residence in the package.  Next time.  I am always apprehensive about working with cookie dough that needs to be rolled out but I found this dough dreamy to work with.

One more note.  The party last night was at a place called GlassyBaby.  This is a store that sells the most beautiful hand-blown small glass cups, usually used as candle holders.  They come in about 70 different colors and make a wonderful gift.  They have certain lines where they donate 10% of the proceeds to different charities or non-profits.  For the next three months, they will be donating to Boyer as long as you mention them.  This is about how many I want.

Oh yes, the food!

One Year Ago:  Miso Soup

Strawberry-Ricotta Tartlets
Adapted from Food & Wine
Makes 16 tartlets

This recipe calls for an oval cookie cutter which I was not able to find.  I bought a cheap 3-inch round one and squished it into an oval.

1 cup plus 2 tbsp. flour, plus more for dusting
¼ cup graham flour
1 tsp. cinnamon
½ tsp. salt
Pinch of ground cloves
1 stick unsalted butter, softened
2 tbsp. light brown sugar
1/3 cup plus 2 tbsp. granulated sugar
2 tbsp. honey
1½ tsp. honey
¾  pound strawberries, thinly sliced
1½ tbsp. fresh lemon juice
1¼ cup fresh ricotta (10 ounces)
2 tbsp. confectioners’ sugar
1 tsp. finely grated lemon zest

1.  In a bowl, whisk together both flours with the cinnamon, salt, and cloves.  In a standing mixer, beat the butter, light brown sugar and 2 tablespoons of the granulated sugar at medium speed until fluffy, about 1 minute.  Beat in the honey and molasses, about 30 seconds.  Scrape down the side of the bowl and beat in the flour at low speed, just until incorporated.  Pat the dough into a disk, cover with plastic wrap, and refrigerate until firm, about 1 hour.  (DT: I refrigerated my dough overnight.  It took quite a while for it to warm up enough to roll, but suffered no ill effects.)

2.  Preheat oven to 350ºF.  On a lightly floured work surface, roll out the dough 1/8-inch thick.  Using a 3-inch oval cookie cutter, stamp out 16 ovals; reroll the dough scraps if necessary.  (DT: There is no need to re-chill the dough.)  Transfer the ovals to the baking sheets and bake for about 12 minutes, rotating the pans halfway through until lightly golden around the edges.  Let cool on the pans for 5 minutes, then transfer the ovals to racks to cool completely.

3.  In a bowl, toss the strawberries with the remaining 1/3 cup of sugar and the lemon juice.  Let stand until syrupy, about 20 minutes.

4.  In a medium bowl, mix the ricotta, confectioners’ sugar, and lemon zest.  Spread about 1 tablespoon of the ricotta mixture on each oval.  Arrange the strawberries over the ricotta and if there is syrup from the strawberries, drizzle over.


Leek Frittata and a Big Question

April 22, 2010

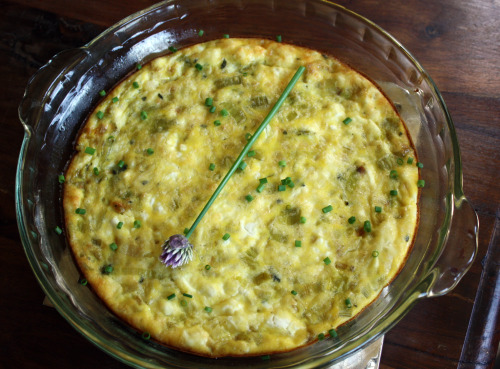
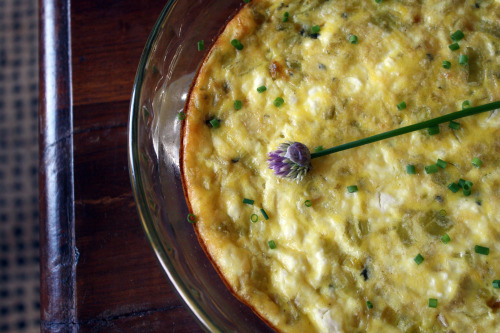
Yes, I want to tell you about this very good, very simple frittata I made for brunch on Sunday.  It uses those incredible leeks and it was delicate and delicious in a ladies-who-lunch kind of way.  It could probably be made more substantial with extra eggs, milk, and cheese – but our guests liked it just the way it was.  This morning I have been dreaming about putting it on a ciabatta roll slathered with aioli and topped with thin slices of tomato and peppery arugula.  For breakfast.  Or lunch, or dinner.  Or all three.

Seeing as it is a winner, I will most definitely share the recipe but first I have an important question to ask.

For a long time, I have been wanting another tattoo.  I have a small Leo symbol on the back of my left shoulder.  It’s about the size of a half dollar (remember those?) and I got it when I was 22.  At the time, I wanted something that I knew I could relate to the for the rest of my life.  I considered getting the Pearl Jam symbol but thought I may not be a Pearl Jam fan when I was 40 but would always be a Leo.  (As it turns out, I am 3 months away from 40 and still a Pearl Jam fan.)

Anyway, my tattoo is sideways (the guy made a mistake) but I have loved having it.  I feel like I have a special secret and I love those few months in Seattle when I can wear things that make it visible.  Now I feel like I am ready for something more out there, something that I can show on a daily basis.  For the past year or so, I have thought about getting something on my left forearm but haven’t been able to come up with the right thing.  I want something pretty and feminine – something that would look right with a short-sleeved shirt and jeans, and something that would look right with the amazing dress I will wear to celebrate my 40th birthday.

I had dinner with a friend recently who has a gorgeous spoon on her upper arm.  She is a chef and it is the perfect thing for her.  I love the idea of doing something related to food but I want something more feminine – more girlie.  I was telling Randy about it and he said, “Why don’t you get some kind of herb?”.  And then it hit me.  Chives.

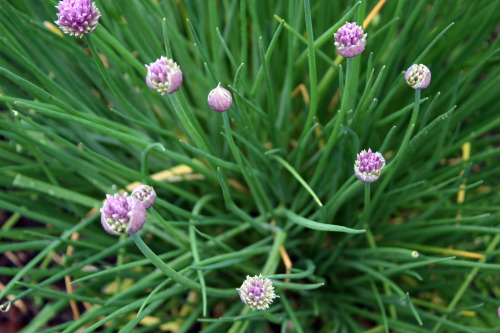
We have a gorgeous chive plant in our front yard.  It is the first of our plants to bloom and it produces all spring and summer.  I love the long green stem and the delicate yet substantial purple blossom.  I love purple.  I love purple and green together.  I love herbs and I love chives and, of course, I love to cook.  Doesn’t this seem like a natural fit?  It’s pretty, it relates to my life in food…I feel like it’s me.

So – here is where you come in.  Am I crazy?  Would this look beautiful or just weird?  Will I love it in 20 years or regret it?  This is, obviously, a big decision, and I am definitely looking for feedback, so tell me.  What do you think?  In the meantime, while you are pondering, make this frittata.  Delicate, lovely, delicious.

Leek Frittata
Dana Treat Original
Serves 4

¼ stick unsalted butter
2 large leeks, white and very pale green part only, cut in half lengthwise and then sliced into ¼-inch thick slices
1½ tsp. chopped fresh thyme leaves
1 tbsp. water
¼ tsp. salt
6 eggs
½ cup whole milk
1/2 cup soft goat cheese, such as Montrachet, divided
Salt and freshly ground black pepper
Chives, for garnish

Preheat the oven to 375ºF.  Spray a 9-inch pie plate with non-stick spray (or lightly coat it with oil).

Melt the butter in a large skillet over medium-low heat.  Add the leeks along with the salt and stir to coat.  Add the thyme and cook until starting to soften, about 4 minutes.  Add the water and reduce heat to low.  Cover the skillet and cook, stirring occasionally, until the leeks are meltingly tender, about 25 minutes.  If there is still liquid in the skillet, remove the top and allow it to cook off.  Remove from heat and set aside to cool for a few minutes.

Crack all of the eggs into a medium mixing bowl and give them a good whisk.  Add the milk and whisk again.  Add the leeks and mix together, then add half the goat cheese and stir carefully.

Pour the egg mixture into the pie plate and crumble the remaining goat cheese over top.  Place in the oven and allow to bake until the middle is set, and the edges are only very light brown, about 20 minutes.  Remove from the oven and allow to sit for 5 minutes before serving.  Can be eaten warm or at room temperature.  Or cold from the refrigerator the next day.


Not Just a Pretty Face

April 20, 2010

Last Friday, my husband invited some co-workers over for dinner.  He likes to brag about me and my cooking which is very sweet, but it puts a bit of pressure on.  Like when he says, “My wife is the best cook in Seattle”, I can’t just turn out some ho-hum meal, right?  Add to that that two people flew in for the dinner (not just because of my food) and all of them love to eat and, well – let’s just say I cooked for two days.

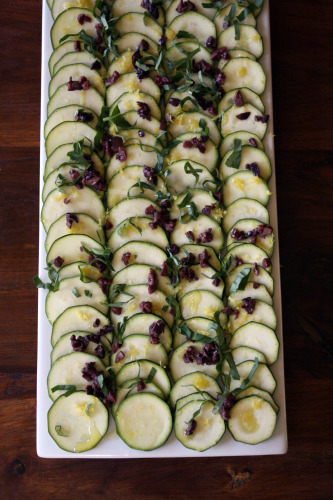
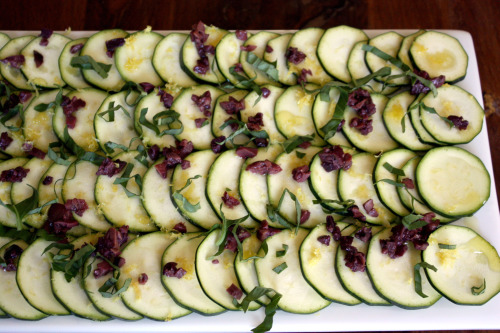
Serving a plain green salad just didn’t seem like it was in the cards so I decided on this one from a recent Bon Appétit.  It is a looker but is actually quite simple.  Just thinly sliced zucchini topped with olive oil, lemon juice, ricotta and basil.  It had a pretty face but I thought it was a little blah in the taste department.  So, when we had some friends over for brunch on Sunday (for whom I have cooked countless times, so really no pressure) I decided to re-make it with some changes.

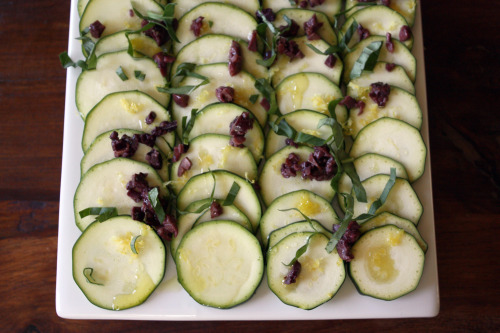
For more flavor pop, I added the zest of a lemon as well as more of its juice plus some minced up Kalamata olives.  I left off the ricotta because I don’t think it adds much, but I would definitely crumble some ricotta salata over it next time.  I also added more basil because – why not?  You could use a different cheese (goat cheese would be good) and different herbs as well – thyme or tarragon would work best I think.

I don’t have one of those fancy mandolines with the adjustable blade, just a $30 ceramic one with a fixed blade.  I initially started with that but half way through the first zucchini, I thought the slices were too thin.  I took my time, and a sharp knife, and did the rest by hand.  You can prepare the zucchini about two hours ahead of time and dress it right before you serve it.

One Year Ago: Ricotta Calzones with (Veg) Sausage and Broccoli Rabe (as soon as Randy sees this, he will ask me to make it again)

Zucchini and Olive Salad
Inspired by Bon Appétit
Serves 4

3 medium zucchini, ends trimmed, and sliced into 1/8-inch rounds
1 tbsp. lemon zest
½ cup Kalamata olives, pitted and very finely chopped
Olive oil
Juice of 1 lemon
½ cup basil, julienned
Sea salt

Arrange the zucchini in an overlapping pattern either on a rectangular or circular platter.  Scatter the lemon zest and olives evenly over top.  Carefully drizzle with olive oil (you will want a light hand here, otherwise it will get soggy), and then squeeze lemon juice over the zucchini.  Sprinkle with sea salt and scatter the basil over top.


« Older Posts