Category: Cookbooks

Not Mrs. Field’s Cookies

March 19, 2010

Remember Mrs. Field’s?  I know she is still around, I just passed one of her dated looking store-fronts in a mall the other day.  But does anyone still eat those cookies?

The first time I had one (and the second, third, fourth, fifth, etc.), I thought it was the most delicious thing I had ever tasted.  My mom is a good baker and we often had cookies in our house, but her cookies didn’t taste like Mrs. Field’s.  Maybe because Mrs. Field’s cookies are usually warm?  Maybe because of a high chocolate to cookie ratio?  Maybe because there was a “no nut” option for this no-nut-lover?  Maybe because there are things in those cookies that I don’t want to know about?  I think the real reason is because they are so incredibly sweet.  When you are a kid, sweet = good.  Now that my palate is a little more sophisticated, I like a better balance of flavor.  Even in my cookies.

I have to give the woman credit for introducing us all to the white chocolate and macadamia nut combination.  I’m sure someone made it before her, but my 10-year old self had never tried it.  Yes, I have gone on and on about how I don’t like nuts in my baked goods, but super salty macadamia nuts are another story.  Especially when combined with white chocolate which is so sweet.

I made these cookies as a potential peace offering to my husband.  I don’t usually push things he doesn’t like on him but I was dying to try that Golden Split Pea Soup.  So, I made a big salad, bought one of his favorite breads, and baked with white chocolate which, if you ask him, is the only chocolate he likes.  (Randy lives in a bit of a dream world where he thinks he doesn’t like chocolate but inhales anything chocolate that is put in front of him.  And while I am “taking the piss out of him” as he is fond of saying, I must tell you that he also inhaled this pasta salad and asked me what made it so good.  BEETS!  One of his most hated things!)

Anyway, fortunately the soup was a hit and so were the cookies.  My boys liked them too.  A cookbook note.  If you are a cookie baker and are looking for a good and comprehensive book, I have to recommend Nancy Baggett’s The All-American Cookie Book.  I always turn to this book when I need inspiration and it never disappoints.  Great photographs and well-researched and charming recipes.  Everything is clear, right down to the table of contents – something I can’t say about many of my baking books.

One Year Ago: Garlic Ciabatta Bread and Roasted Tomato Caprese Salad

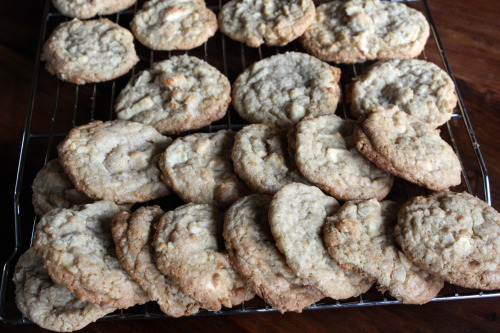
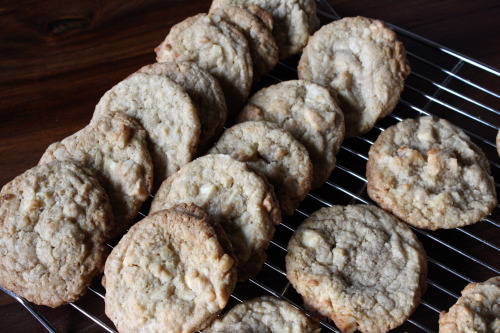
White Chocolate – Macadamia Nut Cookies
The All-American Cookie Book
Makes 25-30 cookies

Baggett suggests you wipe off the nuts if they are salted.  Because I love to taste salt in my baked goods, I opted not to take that step.  They were not overly salty.  She also recommends greasing the baking sheets or lining them with parchment – neither of which I did.  The cookies came off just fine.

1½ cups old-fashioned rolled oats
1 1/3 cups all-purpose white flour
¾ tsp. baking soda
¼ tsp. salt
1 cup minus 2 tablespoons (1¾ sticks) unsalted butter, slightly softened
1 cup sugar
1/3 cup packed dark brown sugar
1 large egg
1½ tbsp. milk
2½ tsp. vanilla extract
1/8 tsp. almond extract
8 ounces top-quality white chocolate, coarsely chopped, or 1 1/3 cups top-quality white chocolate morsels
1 1/3 cups (about 6 ounces) coarsely chopped macadamia nuts

Preheat the oven to 325°F.

In a food processor, process the oats in on/off pulses until ground to a powder.  In a medium bowl, thoroughly stir together the ground oats, flour, baking soda, and salt; set aside.  In a large bowl, with an electric mixer on medium speed, beat the butter until lightened, about 1 minute.  Add the sugar and brown sugar and beat until very fluffy and smooth.  Add the egg, milk, vanilla and almond extracts and beat until incorporated.  Beat or stir in the flour mixture until evenly incorporated.  Stir in the white chocolate and macadamia nuts until evenly incorporated.

Using an ice cream scoop or spoons, drop the dough onto the baking sheets in generous golf-ball-sized mounds, spacing about 3 inches apart.  Pat the mounds down slightly.

Bake the cookies, one sheet at a time, in the middle of the oven for 12 to 17 minutes, or until the tops are pale golden and the edges are just lightly browned; be very careful not to overbake.  Reverse the sheet half way through to ensure even browning.  Transfer the sheet to a wire rack and let stand until the cookies firm up slightly, 2 to 3 minutes.  Using a spatula, transfer cookies to wire racks.  Let stand until completely cooled.

Store in an airtight container for up to 1 week or freeze for up to 1 month.


Apple Torte from a Great Book

February 9, 2010

IMG_4655_picnik

When you are a cookbook addict and you have more than your fair share of vegetarian cookbooks, what do you do?  If you are me, you start buying baking books.

I don’t remember when I bought The Greyston Bakery Cookbook and I don’t remember why.  It is a fairly unassuming looking book.  It doesn’t feature any of the gravity defying desserts that seem so tempting from other gorgeous books I have been fooled into buying.  In a moment of unremembered inspiration, I brought home this sweet book and am I ever glad I did.

In spite of the draw toward architectural and difficult desserts, the truth is that I like my sweets on the simple side.  I like the challenge of making something involved but if I am going to sit down and eat a treat, simple is better for my taste buds.  I don’t mean simple as in plain; I mean simple as in unfussy.

IMG_4686_picnik

If you are with me, this cookbook is a treasure.  So often when I start opening my baking books looking for that elusive just-simple-but-still-delicious cake (like this one), I start to lose interest as page after page of time consuming sweets go by.  Last night I had some friends coming over and, after our vacation, I was ready to bake.  But I definitely wanted simple.  I first picked up Tartine, the dessert book I chose for my Top 10 Desert Island cookbooks.  Nope, nope, and nope.  Then I remembered this book.  Yep, yep, and yep.  Grapefruit Yogurt Cake, Orange Poppy Seed Cake, Chocolate Obsession Cake.  All tempting, all relatively simple.

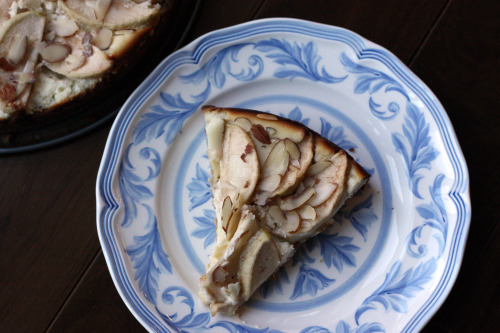
I decided on this Apple Torte.  I was a little nervous about it turning out.  I have made some of the bar recipes in the book and a fantastic cookie recipe but never any of the cakes.  It could have been a mess.  It was not a mess.  In fact, I think it was amazing.  The contrast in textures of the crunchy crust, the smooth cream cheese filling, and the soft but not mushy apples was amazing.  And taste.  The buttery richness of the crust, the fruity sweetness of the jam, the tang of cream cheese and the spiced and maple syruped apples was sublime.  This is coming from an avowed chocolate lover – it is a terrific dessert.  I’m officially changing that Top 10 list to include The Greyston Bakery Cookbook.

IMG_4681

One Year Ago: Broccoli and Red Pepper Pie

Apple Torte
Adapted from The Greyston Bakery Cookbook
Makes one 9″ Cake, 10-12 servings

Although this recipe is found in the cake section of the book, it is really more like a tart.

For the Crust
½ cup (1 stick) unsalted butter, at room temperature
1/3 cup sugar
¼ tsp. vanilla extract
1 cup flour
½ cup apricot jam

For the Filling
1 (8-ounce) package cream cheese, at room temperature
½ cup sugar
1 egg
¼ tsp. vanilla extract

For the Topping
3 medium Granny Smith apples, peeled, cored and thinly sliced
¼ cup sugar
¼ cup maple syrup
¼ tsp. ground cardamom
½ tsp. ground cinnamon
½ cup slivered almonds

Prepare the crust:
Position a rack in the center of the oven and preheat the oven to 400°F.  Grease a 9″ round springform pan.

In the bowl of an electric mixer, cream the butter, sugar and vanilla on medium speed.  Using a fork or your fingers, work in the flour until the mixture resembles coarse crumbs.  Press the mixture onto the bottom and 1″ up the sides of the prepared pan.  Pierce the bottom several times with the tines of a fork.  Chill at least 30 minutes.

Bake in the oven for 12-15 minutes, or until the pastry is set and golden.  Cool on a wire rack.  When the pastry is cool, spread the apricot jam evenly over the bottom of the crust and set aside.

Prepare the filling:
Using an electric mixer set on medium speed, beat the cream cheese with the sugar until light.  Beat in the egg and vanilla.  Spread the filling over the prepared crust.

Prepare the topping:
In a large bowl, combine the apples with the sugar, maple syrup, cinnamon, and cardamom.  Arrange the apples in concentric circles over the filling.

Bake for 10 minutes, then reduce the oven temperature to 350°F.  Remove the torte and sprinkle with the almonds.  Put the torte back in the oven and bake an additional 30 minutes, or until the apples are tender.  Cool on a wire rack at least 30 minutes.  Release and remove the pan sides.  Cool completely and then refrigerate until ready to serve.

(DN: I didn’t do this, but I would recommend brushing the apples with warmed apricot glaze.  It will make them shine.  Also, I had LOTS of leftovers which I refrigerated and they still look great, so I would imagine you can make this a day ahead.  Much more than that and the apples will start to look tired.)


Mexican Food for Randy

January 11, 2010

IMG_4414

Ask my husband what he wants for dinner and he will, without fail, say, “Mexican”.  I don’t even know why I ask, but I do.  Maybe someday he will surprise me and ask for a Morrocan tagine with cinnamon couscous…but I’m not holding my breath.

It’s really all right with me because I really like Mexican food too.  We have a good place in our neighborhood where we go on sunny Sunday evenings.  It’s a pleasant walk there and back plus they have terrific margaritas and salsa to die for.  But usually vegetarian Mexican food means lots of cheese which just isn’t my thing.  My margarita skills are lackluster but in all honesty, I prefer “my” Mexican food to most restaurants, inauthentic as it may be.

IMG_4419

This Black Bean Chilaquile recipe came to me via Twitter.  Some friends were tweeting about good low fat cookbooks and I threw in my two cents for the Moosewood version (the cookbook is called Moosewood Restaurant Low-Fat Favorites).  Kate said that this chilaquile recipe is a standby for her.  I’ve owned that cookbook for a good ten years – how did I miss making this?  Very easy and quick to put together, healthy, hearty, and adaptable.

Let’s talk for a moment about low fat cooking.  It’s the thing to do in January after all.  I’m kind of funny about this topic.  I am a healthy eater and I am careful with regards to my weight.  I honestly don’t like food that is super rich or made with lots of oil or butter.  My tastes naturally steer toward clean food.  But I don’t get Cooking Light or own any low fat cookbooks with the exception of the Moosewood one.  I prefer to take regular recipes and just lighten them up slightly.  I sauté with the bare minimum of oil, use less cheese than is called for, steer away from recipes that use lots of cream and butter.  Not all the time of course, there is a time for indulging.  But if a recipe uses cooking spray to sauté and fat-free cheese and fat-free sour cream, I go running in the other direction.  Baked Lay’s have a place in my pantry and I usually eat frozen yogurt instead of ice cream, but the line has to be drawn somewhere.  And when it comes to baking, I am strictly of the full-fat school.  I would rather have one bite of a perfect brownie than a box of “lite” cookies.

All this is a very long-winded way of saying that, while I cringe at most low fat cooking, I really like this cookbook.  I use it all the time.  It isn’t over-zealous it’s just healthy.  It highlights a lot of different cuisines that are healthier than our own and every single thing I have made from it has been delicious.  The book also thoughtfully includes menu suggestions using other recipes in the book.  And for the pescatarians out there, there are fish recipes.

IMG_4433


Black Bean Chilaquile
Adapted from Moosewood Restaurant Low-Fat Favorites
Serves 4 very hungry people or 6 less so

The original recipe calls for fat-free Cheddar cheese.  I just can’t do it so I used the good stuff and just used a lot less of it.  If you want it cheesy, add more.  I used Guiltless Gourmet baked corn chips which do faintly taste like cardboard but become delicious in this dish.  I topped it with this guacamole.

Olive oil
1 medium onion, diced
1 15-oz. can diced tomatoes, drained well
1½ cups frozen corn
1 15-oz. can black beans, drained
2 tbsp. fresh lime juice
1 tsp. salt
½ tsp. freshly ground black pepper
5 oz. fresh spinach or Swiss chard
2 cups crushed baked tortilla chips
¾ cup grated Cheddar cheese
2 cups red salsa of your choice

Preheat the oven to 350°F.  Heat a large sauté pan over medium heat and then add just enough olive oil to coat the bottom.  Sauté the onions for about 8 minutes, until translucent.  Stir in the tomatoes, corn, black beans, lime juice, salt and pepper and continue to sauté for another 5 -10 minutes, until just heated through.

Meanwhile in another pan, cook down the spinach until it is wilted, adding it to the pan in batches if necessary.  Set aside.

Prepare an 8 x 8-inch casserole dish or baking pan with a very light coating of oil.  Spread half of the crushed tortilla chips on the bottom.  Spoon the sautéed vegetables over the tortilla chips and sprinke on about two-thirds of the grated Cheddar.  Arrange the greens evenly over the cheese and spoon on half the salsa.  Finish with the rest of the tortilla chips and top with the remaining salsa and Cheddar.  Bake for about 35 minutes, until the cheese is bubbling and beginning to brown.


Cooking for Guys

August 10, 2009

img_2985

On Saturday night, I had the pleasure of cooking for 6 guys in their early 30’s.  It was a blast.  My brother Michael’s best friend is getting married on Labor Day and, rather than throw him a bachelor party with strippers and tequila shots, he asked me to cook the groom-to-be and some friends a dinner.  In the past, I have donated dinners to a couple of auctions and for this night I decided to do one of my “auction worthy” meals.  Five courses – appetizer, soup, salad, main, and dessert.  I thought I was getting six carnivores, but in fact I got two vegetarians, two carnivores, one not-eating-much-meat-these-days, and my brother whose friends once sent him a Bacon of the Month Club membership as a gift.  Enough said.

I recently saw someone on Twitter say something along the lines of, “Why would vegans have restaurants?  Clearly they hate to eat.”  Now, aside from just being nasty, that statement is so clearly not true.  If I knew that person I would invite them to check out The Millenium Restaurant in San Francisco – or at least their cookbook.  Their food is so exquisite, so lovingly and respectfully prepared, I’m sure it would make that person retract their statement.  Whenever I want to make something really, I pull out that cookbook or it’s follow-up, The Artful Vegan.  Vegan?  For a special dinner?  Yes.

For this dinner, I found inspiration from The Millenium Cookbook for the appetizer and soup recipes.   Normally, if I am going to make five courses, I really try to balance the food so there isn’t too much of it.  If I do a substantial appetizer, I make the salad lighter.  If I do a filling soup, I make sure the appetizer is small and simple.  Cooking for young men allowed me to just make what I want and not worry so much about appetites.  If anything,  I worried that I didn’t have enough food.  But I am Jewish and that worry is stamped on my DNA.

I had seen recipes for vegetarian pâté before and was always scared off by an ingredient that sounds like a character in the Star Wars movies – agar agar.  Now, gelatin, which is used in many ways to firm things up – you find it in panna cotta, some mousses, marshmallows, even some yogurts – is not vegetarian.  It is made from cow hooves so I avoid all things with it listed as an ingredient.  Agar agar is a type of seaweed and it has the same gelling properties of gelatin.  You can buy it in flake or powder form and I am here to tell you, the stuff really works.  I had my doubts but no more.  I found mine at Whole Foods.

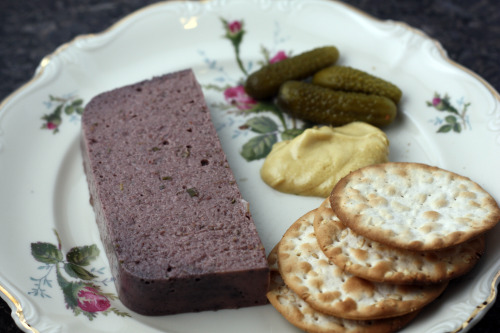
The Millenium Cookbook actually has four recipes for pâté, but I chose to make the one with mushrooms and walnuts.  It seemed the most pâté-like and also the most hearty.  As with any time I try a new recipe, I wasn’t sure it was all going to work but it did.  It came together as it was supposed to, it came right out of the pan as it was supposed to and it tasted great.  The only thing I changed is that I used pecans instead of walnuts because the guest of honor that night can’t do walnuts.  Hopefully this recipe doesn’t sound too “out there” for you because it’s really very good.  It makes a very special appetizer.

img_2982

One Year Ago:  Olive and Jarlsberg Sandwich

Mushroom, Walnut, and Rosemary Pâté
Adapted from The Millenium Cookbook
8-10 Servings

The only other slightly odd ingredient in this recipe is nutritional yeast.  You can find it in health stores or, my old standby, Whole Foods. home page   It’s in the bulk section or the spice section.

1 red onion, cut lengthwise into thin crescents
2 tsp. minced garlic
2 cup mixture of shiitake and cremini mushrooms
1 cup red wine
1 tsp. sea salt
2 tsp. coarsely chopped fresh sage
1 tsp. coarsely chopped fresh thyme
2 tsp. coarsely chopped fresh rosemary
1 tsp. ground nutmeg
1/2 tsp. ground pepper
1 tbsp. nutritional yeast
1 cup walnuts (or pecans), toasted
1 tbsp. soy sauce
2 tsp. balsamic vinegar
2 1/2 cups water
2 tsp. powdered agar agar, or 2 tbsp. agar agar flakes

In a large skillet, heat up just enough olive oil to coat the pan over medium heat.  Add the red onion, garlic, and mushrooms, sprinkle with salt, and sauté until starting to brown.  Add the red wine and continue to cook over medium heat until all the liquid has evaporated.  Remove from the heat.  Add the sage, thyme, rosemary, nutmeg, pepper, and yeast and stir well to incorporate.

Transfer to a blender.  Add the walnuts, soy sauce, vinegar, and 1 1/2 cups of the water.  Blend until smooth.

In a small saucepan, bring the remaining 1 cup of water to a boil.  Whisk in the agar agar and turn the heat to low.  Continue whisking until the agar agar is thoroughly dissolved, about 5 to 7 minutes.  Add agar agar mixture to the blender with the mushroom mixture and blend until incorporated.

Test the pâté to ensure that it sets up by refrigerating 1 tablespoonful for 10 minutes.  If the test pâté isn’t firm by then, dissolve another 2 teaspoons agar agar powder or 1 tbsp. agar agar flakes in boiling water and add to the pâté.  Refrigerate for at least 2 hours and up to 3 days.  Unmold and cut into slices.


Chocolate Chip Ice Cream

July 22, 2009

img_2894

I grew up on an island.  It sounds exotic, but it was anything but.  My island was a floating bridge away from Seattle and it was suburbia to the hilt.  It was safe and scenic, but it was also boring.  If you wanted to grocery shop, pick up your dry cleaning, eat bad Thai food, or check on your bank account, then you would never have had to leave the Island.  If you wanted any other kind of services – restaurants, shopping of any kind, movie theatres, you know…culture – then you had to head over the bridge to Seattle.

We did, however, have a Baskin and Robbins.  My mother, who is incredibly careful about her weight, actually has a serious thing for ice cream.  Most Sundays, we would head down to the shop and get my mom her Jamocha Almond Fudge while my brothers and I would get a scoop of our choice.  I always pretended to not be able to decide between two flavors so that she would say,”OK, you can get two scoops.”  Chocolate chip or mint chocolate chip were always in my bowl.  (I never did then, and I still don’t now, like eating my ice cream on a cone.  I’m a bowl girl.)

img_2897

I’ve been on a bit of an ice cream making kick lately.  Since discovering the wonder that is homemade, I have been making up for lost time with my ice cream maker.  When I brought dinner to my friend with a newborn last week, the gnocchi and the broccoli, I decided to bring ice cream.  I know I have said before that you must bring a nursing mother brownies.  But that was before my ice cream making days and besides, it was too hot to turn on my oven that day.

In all my years of subscribing to food magazines and dutifully cutting out recipes and carefully taping those recipes into my notebooks, I know I have thrown away many a recipe for ice cream.  Before I got over my fear of using my maker, I just passed all those delicious recipes by.  I don’t fret though because I have The Perfect Scoop which is, in my and many others much more esteemed than myself’s opinion, the last word when it comes to ice cream.  I’m pretty simple with my ice cream tastes.  Something with chocolate in it, please.  However, as I go through this book, things that have never appealed to me suddenly sound good.  Rum raisin?  Sure, why not?  Fresh Apricot?  Let’s make it!

So far, I’ve kept it pretty simple.  This chocolate chip ice cream is tears-in-your-eyes sublime.  It’s just super incredible vanilla ice cream with shards of bittersweet chocolate running through it.  It’s a million times better than Baskin and Robbins.

img_2892

Chocolate Chip Ice Cream
Adapted from The Perfect Scoop
Makes about 1 quart

This recipe is fairly simple, but read it carefully as you go.  The first time I made it, I followed it to the letter.  The second time, I had too many things going on in my kitchen and I forgot to add the milk to the custard.  Somehow, it still ended up being delicious.  Believe it or not, Costco is a great place to buy vanilla beans – they are incredibly affordable and very high quality.

1 cup whole milk
3/4 cup sugar
2 cups heavy cream
Pinch of salt
1 vanilla bean, split in half lengthwise
6 large egg yolks
3/4 tsp. vanilla extract
5 ounces bittersweet or semi-sweet chocolate (not chocolate chips), chopped

Warm the milk, sugar, 1 cup of the cream, and salt in a medium saucepan.  Scrape the seeds from the vanilla bean into the warm milk and add the bean as well.  Cover, remove from the heat and let steep at room temperature for 30 minutes.

Pour the remaining 1 cup cream into a large bowl and set a mesh strainer on top.  In a separate medium bowl, whisk together the egg yolks.  Slowly pour the warm mixture into the egg yolks, whisking constantly, then scrape the warmed egg yolks back into the saucepan.

Stir the mixture constantly over medium heat with a heatproof spatula, scraping the bottom as you stir, until the mixture thickens an coast the spatula.  Pour the custard through the strainer and stir it into the cream.  Put the vanilla bean into the custard, add the vanilla extract, and stir until cool over an ice bath.

Chill the mixture thoroughly in the refrigerator.  When ready to churn, remove the vanilla bean, rinsing and reserving it for another use, and then freeze the mixture in your ice cream maker according to the manufacturer’s instructions.

Meanwhile, melt the chocolate in a measuring cup in the microwave in 30-second intervals.  Remove from the microwave while there are still small chunks, the residual heat will melt those.  Right before you are ready to turn off the ice cream maker, carefully pour the warm chocolate in through the spout, avoiding the beater blade as best you can.  Turn off the machine and scrape any chocolate that has collected on the blade back into the bowl.  Either serve or scrape into a container and place in the freezer.


« Older Posts