Archive for April, 2011

Discrimination

April 28, 2011

Periodically, I like to take a break from the sweets and healthy vegetarian fare and give you updates on my sweet son Graham.  Just this year, he has learned to ski, swim, and ride a two-wheel bike.  There were times when I wondered if he would ever do any of those things, let alone all three.  We are proud parents.

I went in to his school recently to amend his IEP.  IEP stands for Individualized Education Plan, and each student with special needs has one.  Graham has met a lot of his goals that were set last year, and we just needed to draw up new goals and adjust the amount of time he spends with the resource room teacher and the speech therapist.  Graham is doing incredibly well in school.  He is learning to read, do addition and subtraction, and, as he always has in his short life, he is bringing joy to peoples’ lives.  The librarian in particular thinks the world of him – the enthusiasm Graham shows for books makes him happy.  The principal told me that he is delightful and that any teacher would be lucky to have him in their classroom.

Graham is attending our neighborhood school.  It is public, it draws from the area surrounding our house.  The permanent structure is under construction but when the school moves into that building, in the fall of 2012, it will be a very short walk from our home.  We did a lot of research last year and looked at several private schools and a parochial school.  What we found is that Graham would be best served in our local public school.

Recently, the school board made a decision that spells disaster for us.  With pressure from the neighborhood, the school has been designated a “language immersion” school.  This means that all children will spend every morning learning math and science in either Spanish or Japanese.  Immersion meaning that those languages will be the only ones spoken in the classroom for half the day.

What does that mean for a child who has a speech delay?  A child who tries with all his might, but who struggles with English?  A child who has been getting speech therapy since the age of 22 months?  It means that he cannot go to his neighborhood school.  It means that his neighborhood school, a public institution meant to serve the people in the neighborhood, those who reside in the area, does not serve our child.  Is this discrimination?  I think so.

I went to a meeting recently with other parents who are unhappy with the decision.  The goal was to let a school  board representative know how this decision affects our children.  It was an emotional meeting.  A woman, seven months pregnant with her third child, told of her typically developing child older child and her younger child with Downs’ syndrome and how they would not be able to attend the same school.  She was devastated as she was counting on the older daughter being able to look out for the younger.  Another woman, herself an immigrant and personally thrilled with the immersion decision for her own child, told the school board that her heart was breaking for the parents of special needs children and how unfair this decision was.  A kindergarten teacher who had taught special ed for seven years, told of her desire to teach all children and spoke of the importance of a diverse classroom, especially in a public neighborhood school.  Graham’s resource room teacher stood up and said that she has twins starting kindergarten in the fall and she wants them in a classroom with all kinds of kids, not just typically developing ones who are capable of learning math and science in another language.  A man wondered about the children who will be diagnosed with special needs later in their schooling – where will they go?

It all did no good.  The decision is made.  We have to find another alternative.  We are fortunate in that Graham’s wonderful resource room teacher is moving to an “option” school that will focus on technology.  She suggested even before the language immersion switch that this new school might be a good place for Graham.  Now it is our lifeline.  We applied during the open enrollment period and now we wait.  If he does not get in to that school, he will get bussed to another public school where the resource room teacher has the reputation of being lazy and very old school.  At this point in Graham’s life, the resource room teacher is almost more important than his actual teacher, so this prospect terrifies me.  But he can’t be in a classroom using another language for half the day.

I also wonder about Spencer, who will start kindergarten in the fall of 2012.  Although he is typically developing, I don’t like the idea of language immersion for him either.  I fully support foreign languages being taught in our schools, just not immersion style.  Will Spencer be able to get in to the option school?  Is there sibling priority?  If not, I will have kids at two different schools and that just makes me dizzy.

So, we wait.  We worry.  I remember being pregnant with Graham and being so worried about him.  I had had some bleeding about mid-way through my pregnancy and he sometimes seemed to be small for his size on ultrasound, and I was just so desperate to know that he was all right.  I remember saying to someone, “I just want him to be born so I can stop worrying.”

Ha.


It’s All About the Topping

April 26, 2011

Dessert at my summer camp was taken extremely seriously.  Actually, seeing as we were outside all day running around and breathing in good island air, food in general was taken seriously.  But dessert, well, fights broke out over dessert.  It is not that anything was particularly special, just that it was sweet.  We were each allowed 35 cents worth of candy a week at the camp’s little store and other than that, sugar came after dinner and you had to share it with the seven other people at your table.

Very often dessert was peach crisp.  Sounds good, right?  Knowing what I do now I can tell you that it was canned peaches covered with crushed up leftover granola mixed with maybe a tiny bit of butter.  I didn’t care.  I thought the topping – so crisp! so sweet! – was one of the most marvelous things I had ever tasted.  It is definitely camp that started me on a lifelong love of crumb topping.  There was once a time that I didn’t like pie because I had only ever tasted pumpkin (still don’t like) or pecan (ditto).  Then one summer, my mom made a blueberry pie with, you guessed it, a crumb topping and hey what do you know?  I like pie!

Crumb topping followed me into my first baking experiences.  As a newbie, I tried to keep it simple and I made a lot of apple crisps.  It turns out I am not alone in my love for crumb topping.  A good crisp is really just a pie without a bottom crust and I still like my fruit better this way.

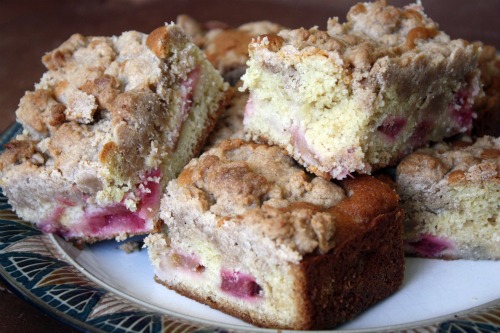
What I love about this cake is that it does not pretend to be something that it’s not.  It’s a crumb topping disguised as a cake.  The cake part is thin and nicely sweet, there is a layer of tart rhubarb on top of that, and then a thick ceiling of crumb topping.  Just the way it should be.

I brought this to a brunch for Easter and it really is perfect brunch cake.  It could also be pretty amazing after dinner with a big scoop of vanilla ice cream.  Whichever you choose, I would try to serve the cake the day it is made.  It loses a little bit of its crunch as it sits.

One Year Ago: Strawberry Ricotta Tartlets
Two Years Ago: Miso Soup with Wakame

Rhubarb “Big Crumb” Coffee Cake
In the Kitchen with a Good Appetite
Makes one 8-inch cake

For the rhubarb filling
½ pound rhubarb, trimmed
¼ cup granulated sugar
2 tsp. cornstarch
½ tsp. ground ginger

For the big crumbs
1/3 cup dark brown sugar
1/3 cup granulated sugar
1 tsp. ground cinnamon
½ tsp. ground ginger
1/8 tsp. salt
½ cup butter, melted
1¾ cup cake flour

For the cake
1/3 cup sour cream
1 large egg
1 large egg yolk
2 tsp. vanilla extract
1 cup cake flour
½ cup granulated sugar
½ tsp. baking soda
½ tsp. baking powder
¼ tsp. salt
6 tablespoons softened butter, cut into 8 pieces

1.  Preheat oven to 325ºF.  Grease an 8-inch-square baking pan.

2.  For the filling, slice the rhubarb ½-inch thick and toss with the sugar, cornstarch, and ginger.  Let macerate while you prepare the crumbs and cake.

3.  To make the crumbs, in a large bowl, whisk together the sugars, spices, salt, and butter until smooth.  Stir in the flour with a spatula.  It will look like a solid dough.

4.  To prepare the cake, in a small bowl, stir together the sour cream, egg, egg yolk, and vanilla.  Using a mixer fitted with the paddle attachment, mix together the flour, sugar, baking soda, baking powder, and salt.  Add the butter and a spoonful of the sour cream mixture and mix on medium speed until the flour is moistened.  Increase the speed and beat for 30 seconds.  Add the remaining sour cream mixture in two batches, beating for 20 seconds after each addition, and scraping down the sides of the bowl with a spatula.  Scoop out about ½ cup of the batter and set aside.

5.  Scrape the remaining batter into the prepared pan.  Spoon the rhubarb over the batter.  Dollop the remaining batter over the rhubarb (it doesn’t have to be even).

6.  Using your fingers, break the topping mixture into big crumbs, about ½-inch to ¾-inch in size.  They don’t have to be uniform; just make sure the majority are around that size.  Sprinkle the crumbs over the cake.  Bake the cake until a toothpick inserted into the center comes out clean of batter (it might be moist from the rhubarb), 45 to 55 minutes.  Cool completely before serving.


Tips for a Good Greek Salad

April 24, 2011


Just a warning.  I have been baking much more than cooking these days.  Sometimes it just works out that way.  Between parties I have cooked for, nights out, nights alone with the boys, classes, recipe testing, and all the other things that make up our busy lives, there hasn’t been a lot of dinner cooked here in the Dana Treat household.  I know some of you visit here for the treats – you’ll be getting plenty.  Those of you who visit for healthy fare, I’ll do my best to throw some things your way too.  If nothing else this week, I have salad for you.

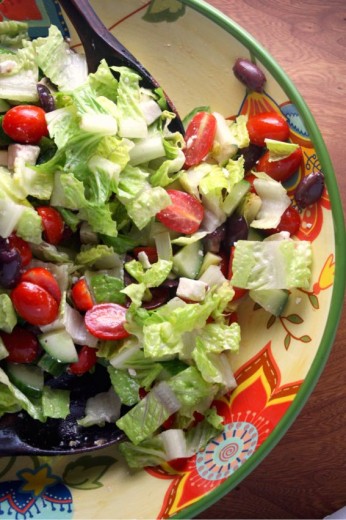
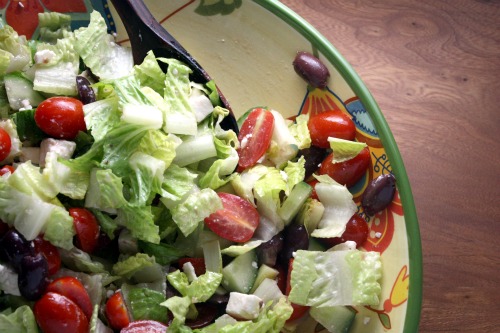
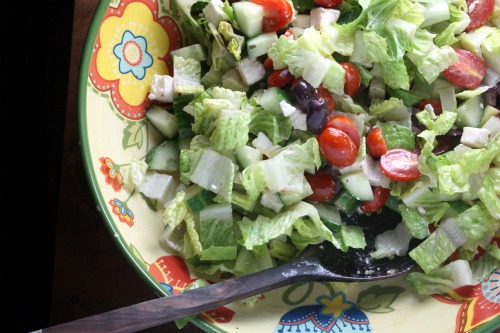
I wondered whether to post this.  It is not rocket science and do I need to share a recipe that you have probably made on your own?  But then I made it for friends and it got devoured as it always does.  Every time.  I realized that, having made about a million Green salads over the years, I have learned a couple of things and it is the tips that I want to share with you as much as the recipe.  You can make the recipe your own, obviously, but here are the tips.

Tomatoes – Use cherry tomatoes unless it is summer and you live in a state where that means tomato season.  (I’m looking at you New Jersey.)  We get a brand of cherry tomatoes here in Seattle called Nature Sweet Cherubs.  I find those to be reliably pretty good.  Taste your tomatoes and if they aren’t great, put them on a baking sheet with a drizzle of oil and a pinch each of kosher salt and pepper.  Roast at 400º for about 20 minutes and allow to cool.  The texture will be different than a traditional Greek salad but at least the tomatoes will taste good.

Cucumber – Use an English, sometimes called “seedless” cucumber.  I find these to be sweeter, less watery, and best of all – you don’t have to peel them.  I love the color and flavor that the peel brings.  If you can only find regular old cukes, do peel them and seed them, otherwise you will have tough skin and a watery salad.

Olives – Someone once told me that olives that have been pitted for you have less flavor than the ones that still have their pit.  I am here to tell you it is true.  I keep a jar of pitted olives on hand for recipes where a tiny dip in flavor won’t be noticed but for this salad, you want the best.  Many grocery stores have an olive bar these days and that is where I look for mine.  Use something nice and plump – it doesn’t have to be Kalamata.  To pit an olive, use the flat side of a large chef’s knife to press down on it and then simply peel the flesh away from the pit with your fingers.

Feta Cheese – Please do not use something that comes in a tub.  Those types of feta cheese taste like sawdust to me.  I can always find Mt. Vikos feta cheese at my grocery store and I really like the flavor and texture.  If you have a Greek or Mediterranean market near you, or a great cheesemonger, ask for the best.  It does make a difference.  Finally, cut the cheese (sorry) into small cubes.  I find if you crumble it in, it tends to turn the whole salad white.  Also, I prefer not to have cheese with every bite.  With cubes, you can pick and choose.

Oil and Vinegar – This salad does not need a dressing.  Use a drizzle of your best olive oil and another drizzle of red wine vinegar.  I used to use balsamic vinegar but now I think the sweetness is not welcome here and it also colors the salad an unattractive shade of brown.

One Year Ago:  Leek Frittata
Two Years Ago:  Ricotta Calzones with (veg) Sausage and Broccoli Rabe

Greek Salad

Dana Treat Original
Serves 4-6

Sometimes I make this without the lettuce but when I need to bulk it up a bit, I use the romaine.  Truthfully, I like it better this way.

1 pint cherry tomatoes, halved
1 small or ½ a large English cucumber
15 Kalamata olives, pitted and halved
1 heart of romaine
Olive oil
Red wine vinegar
6 ounces best-quality feta cheese

Place the tomatoes, cucumber, olives and lettuce in a large salad bowl.  Drizzle with approximately equal amounts of olive oil and red wine vinegar.  Toss well.  Add the cheese and very carefully, trying not to break up the cheese too much, toss again.


Butterscotch Pudding Tarts

April 20, 2011

Remember Snack Pack pudding?  I guess that question isn’t a huge stretch because it is still around.  The packaging looks nothing like it did when it sat in my Donny and Marie lunchbox, just waiting to be eaten with a plastic spoon.  I thought that pudding, chocolate flavor only please, was the best thing about  bringing lunch to school.  I didn’t get it every day but it was a happy day when I did.

Graham, my kindergartner, has never heard of Snack Pack pudding and I’m pretty sure, up until recently, he had never had pudding at all.  In case you think that is because I don’t give him sweets, or I only give him whole grain treats or even just homemade treats, you would be mistaken.  I am liberal with my sweet giving.  This is another post for another time, but suffice it to say that while I prefer him to eat things that I have made, the lure of Halloween/Valentine’s Day/Easter candy can be great.  I do try to draw the line at certain things (which would probably seem arbitrary to a more strict mother), and pudding that does not have to be refrigerated and is full of things I can’t pronounce is one of those lines.

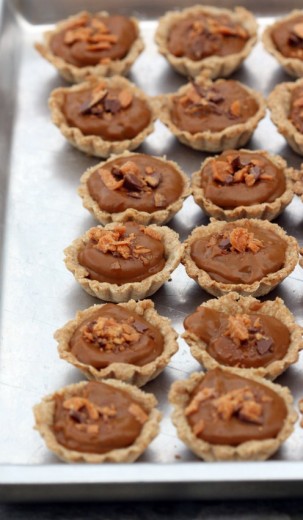
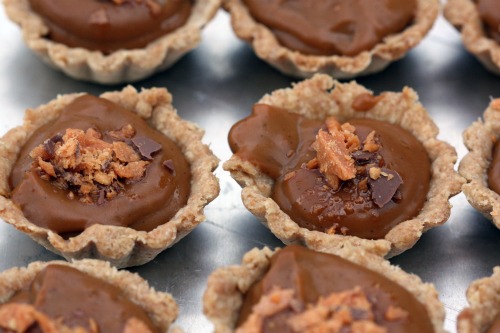
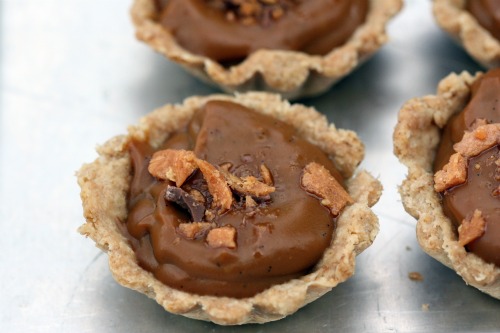
While pudding is not a dessert that pops into my mind with any regularity, it certainly has its place.  Comfort food at its most comfortable.  And how about if the pudding is butterscotch and sitting inside a tart shell?  Mini tart shells?  Not long ago, I purchased 24 mini tart pans.  At 79 cents a pop this was not a huge investment.  And they have allowed me to make super cute appetizers and desserts.  I had no problem getting 24 rounds of dough out of the recipe and I actually had some pudding left over once they were all filled.  I filled two small bowls with the butterscotch pudding and gave it to my boys.  Neither of them liked it.

By the way, who was on your favorite lunchbox?

One Year Ago:  Zucchini and Olive Salad
Two Years Ago:  Mississippi Mud Cupcakes

Butterscotch Pudding Tarts
Baked
Makes 8 (4-inch) tarts or 24 mini tarts

Below is the recipe as written for the larger tarts.

For the oat wheat pie crust
1 cup rolled oats
½ cup whole wheat flour
1 cup all-purpose flour
¼ cup firmly packed dark brown sugar
½ tsp. salt
¾ cup (½ stick) cold, unsalted butter, cut into cubes
¼ cup milk

For the butterscotch pudding
6 large egg yolks
¾ cup granulated sugar
¼ cup heavy cream
½ cup firmly packed dark brown sugar
1/3 cup cornstarch, sifted
1 tsp. salt
3 cups whole milk
1 vanilla bean
1 tbsp. unsalted butter
2 tbsp. whiskey

To assemble
1 Butterfinger candy bar, broken into small pieces

Make the oat wheat pie crust
Put the rolled oats in a food processor and process for about 30 seconds, until ground but not powdered.  Add the flours, brown sugar, and salt and pulse until combined.

Add the butter and pulse until the butter pieces are small and the dough looks crumbly, like coarse sand.  Add the milk and pulse for a few seconds..

Scoop the dough out of the food processor and form it into a large disk.  Wrap tightly in plastic and refrigerate for at least 1 hour and up to 3 hours.

Dust a work surface with a sprinkling of flour.  Unwrap the disk of chilled dough and put it directly on the work surface.  Cut the dough into eight equal pieces, about 2 ounces each, and gently shape each piece into a smooth disk.  The dough will be sticky.  Make sure to turn the dough over (use a spatula or a bench knife) as needed and keep the working surface floured.  Put the dough disks in the refrigerator for 10 minutes.

Using a rolling pin, roll each dough ball into a 6-inch round just over 1/8-inch thick.  Place a round over a 4-inch tart pan and very gently press the dough into the pan.  Roll the rolling pin over the pan to trim off excess.  Repeat with the remaining dough rounds.

Preheat the oven to 325ºF.  Put the tarts pans in the freezer for 30 minutes.

Remove the tarts pans from the freezer and arrange on a baking sheet and gently prick the dough with a fork.  Bake on the baking sheet until golden brown, 12 to 15 minutes, rotating the baking sheet halfway through the baking time.  Transfer the tart pans to wire racks and let cool completely.

Make the butterscotch pudding
Put the egg yolks in a large heatproof bowl and set aside.  (DT: I find it helpful here to put a damp paper towel under the bowl with the yolks.  That way, when you go to whisk it later, the bowl stays still on your counter.  I do the same thing when making ice cream.)

In a small saucepan, combine the granulated sugar and ¼ cup water and stir gently with a heatproof spatula; do not splash the sides of the pan.  Cook over medium heat until the sugar is dissolved, then increase the heat to medium-high and cook until the mixture begins to turn a dark amber color.  Swirl the pan, if necessary, to create an even color, but do not stir.  Remove from the heat, let stand for 1 minute, then use the heatproof spatula to stir in the cream.  Pour the caramel into a small bowl.  Set aside.

In another small saucepan, combine the brown sugar, cornstarch, and salt.  Stir in the milk and whisk to combine.

Cut the vanilla bean in half lengthwise, and, using the tip of the knife or a small teaspoon, scrape the seeds into the saucepan with the milk.  Add the vanilla bean to the milk as well.  Cook over medium-high heat, whisking occasionally, until the mixture comes to a boil.  Remove from heat and add the caramel.  Whisk together until combined, then pour one third of the mixture over the eggs.  Keep whisking the egg mixture and add another third of the hot milk mixture.  Transfer the egg mixture back to the saucepan with the milk mixture and, whisking constantly, bring to a boil over medium-high heat.  Boil for 2 to 3 minutes, or until very thick.

Remove from the heat and add the butter and whiskey.  Keep whisking vigorously for about 1 minute to cool the pudding slightly.  Let the pudding sit for about 15 minutes, then remove the vanilla bean.

Assemble the tarts
Whisk the pudding one more time until smooth.  Divide the pudding equally among the tart shells and sprinkle the crumbled candy bar over the pudding.  Cover the tarts with plastic wrap and put the in the refrigerator for about 2 hours before serving.

The tarts can be stored, tightly covered, in the refrigerator for up to 2 days.


Brown Sugar Pound Cake

April 18, 2011

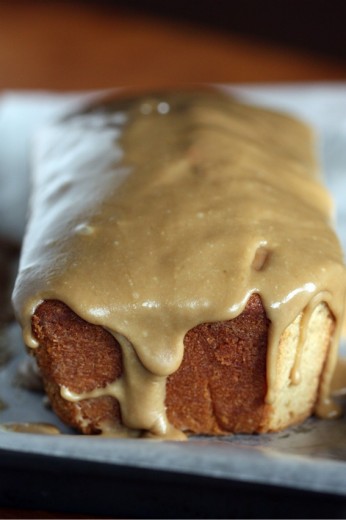
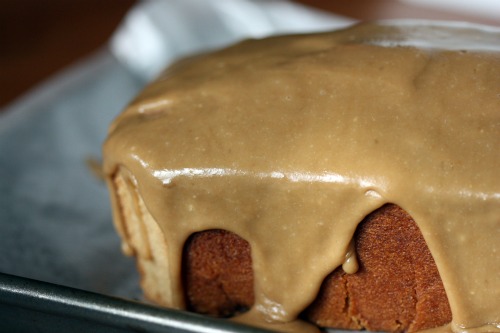
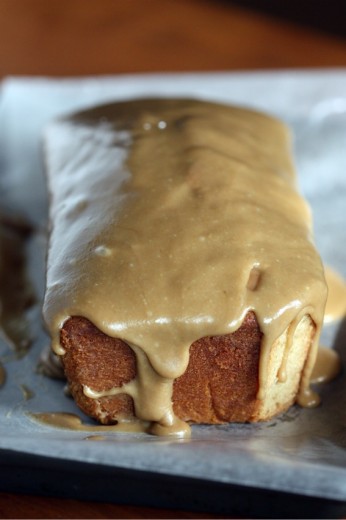
It is a shame I didn’t get a shot of a slice of this cake.  I could have, should have, but I didn’t.  Sorry about that.  If I had, you would have seen the glorious tight and dense crumb.  In my opinion, it is a tight and dense crumb that makes a pound cake great.  That and lots of butter.

This recipe comes by way of a memoir.  Normally, I am a little suspect of recipes in memoirs (unless we are talking about a food memoir like Cooking for Mr. Latte or A Homemade Life).  My thoughts are along the lines of “who is this person and why does he/she think she can just include a recipe at the end of each chapter?”  My friend Cheryl gave me a copy of Cakewalk last summer and it has been sitting on my “to read” pile for far too long.  It  is the story of a very interesting and troubled family.  It is well-written and although food is not the subject, the author does write about tantalizing treats.  Many of the end-of-chapter recipes spoke to me but I made this one because I had all the ingredients on hand.

(OK, so you may notice a small bit of the corner cut off.  For scientific purposes only!)

Sometimes I just want to bake.  If you like to bake, I’m sure you are familiar with this feeling.  For me, it isn’t even so much for the end result although ending up with a homemade baked good is nice.  Sometimes it is just the act of pulling out the flour and sugar, turning on the mixer, preheating the oven, anticipating the smells that will soon perfume my house…  When I just want to bake, I don’t want to fuss.  Cookies are too much trouble – all that shaping and switching baking sheets in the oven.  This is why I love simple cakes.

I did a little dessert party last night – a reception for a very moving play currently running at the New City Theatre in Seattle.  Sick tells of one woman’s struggle with pain and medication and the cracks we can all fall through in the American medical system.  You can read more about the play here.  Randy and I wanted to support the playwright and actress and we decided to invite some of our friends to attend.  We lured them with the promise of a compelling story and with treats afterward.

I made butterscotch pudding tarts and chocolate friands (recipes coming soon).  I made the most favorite chocolate chip cookies.  But several people pulled me aside to tell me this cake was their favorite.  It is comfort food at its most comfortable.  And the glaze!  Swoon.


Brown Sugar Pound Cake
Adapted from Cakewalk
Makes two 8×4-inch loaves

You can make this cake in one 9 or 10-inch tube pan, but I love the idea of having two cakes out of one recipe.  I served one cake the day I made it and wrapped and froze the other one.  The cake should be frozen unglazed, so if you do this, be sure to cut the glaze recipe in half.

3 cups all-purpose flour
1 tsp. baking powder
½ tsp. salt
1½ cups (3 sticks) unsalted butter, at room temperature
3 cups firmly packed light brown sugar
5 large eggs, at room temperature
1 cup whole milk
1 tsp. vanilla

Preheat oven to 325ºF.  Butter and flour two 8×4-inch loaf pans, knocking out excess flour.  Mix the flour, baking powder, and salt together in a bowl.  Set aside.

Beat the butter in the bowl of an electric mixer on medium speed for 3 minutes, until whipped looking.  Slowly add the sugar and beat for another 3 minutes, increasing the speed to medium-high.  The mixture should look very light and fluffy.  Add the eggs one at a time, beat well after each one.  Scrape down the sides of the bowl and beat again.

Combine the milk with the vanilla.  Add the flour in 3 portions alternately with the milk, beginning and ending with the flour.  Fold the last flour addition in by hand with a rubber spatula.  Turn the batter into the prepared pans.  Bake for 1 to 1½ hours, checking after 55 minutes and every 5 to 10 minutes thereafter, until a toothpick inserted near the center of the cake comes out with just moist crumbs attached.  If the cake is very brown after 55 minutes but not yet fully baked, cover the top with a sheet of aluminum foil.  When done, the cake will be springy to the touch and pulling away from the sides of the pan.  Let cool in the pan for 10 minutes, then turn out onto a wire rack to cool completely before glazing.

Brown Sugar Glaze

Remember, this amount will glaze both cakes.  If you are only glazing one, cut the recipe in half.

½ cup (1 stick) unsalted butter
½ cup firmly packed light brown sugar
¼ cup whole milk
¼ tsp. salt
1 tsp. vanilla
1 to 1½ cups confectioners’ sugar

Melt the butter in a heavy-bottomed saucepan over low heat, then add the brown sugar and raise the heat to medium.  Boil, stirring constantly, for 2 minutes.  Add the milk and return to a boil, stirring constantly.  Remove from heat and stir in the salt and vanilla.  Let cool for 10 minutes.

Sift 1 cup of the confectioners’ sugar over the mixture, stirring with a whisk until smooth.  If the glaze is thick enough for your liking, you can stop there.  If not, sift the additional ½ cup sugar in.  Place the cake (still on the wire rack) over a wax paper lined baking sheet.  Pour the glaze over the cooled cake and allow it to drip down the sides.  Allow the glaze to set completely before slicing and serving.  Wrapped carefully, this cake will keep for several days at room temperature.  If you happen to have some homemade caramel sauce on hand, it is amazing poured over top.


« Older Posts