Category: Ice cream

A Cake for Thursday

November 19, 2012

You may have noticed that I have been awfully quiet about Thanksgiving this year.  I’m feeling a little misty about it to tell you the truth.  For the last five years or so, Randy and I hosted Thanksgiving in our black house with a red door in Seattle.  We had large gatherings and small intimate dinners.  Most of the meal was the same from year to year with a few curveball side dishes to make things interesting.  Before those five years, my parents hosted every year in my memory with the exception of one trip to New York City and one trip to visit me in college.

This year, we no longer live in the same city as my family does.  When it came down to whether or not we would visit Seattle for Thanksgiving or Christmas, I didn’t hesitate to say Thanksgiving.  Because my mom is recovering from hip surgery, she will not be hosting.  It falls to family friends, with whom we have shared every Thanksgiving and Christmas dinner (with the exceptions noted above) since I was two years old, to host this year.  So I am not hosting, my mom is not hosting, and I will not really be cooking much.  My mom was given a couple of assignments which I will either be helping her with or cooking myself, depending on how she is feeling.  But it’s not the same.  I’m not making the bread that I have made every year for twelve years.  The excitement I usually feel at this time of year is missing.  I think it is partly that the sun and mild temperatures make it hard for me to believe it is November, let alone turkey day.

Wah wah, poor me.  I am grateful that my boys have the whole week off from school so we can spend a little extra time in my hometown.  I am grateful to a dear friend who is going to put us up and another who is going to host a get-together for me.  I am grateful to our family friends who are stepping in to host in this year of odd circumstances.  I am grateful that I get to celebrate the birthdays of my mom, Graham, my niece, and my sister-in-law in one fell swoop.  Wait – grateful?  No, I am thankful.  For this and so much more.

This cake will not have a place on our Thanksgiving table.  But if you are hosting and you haven’t already decided on dessert, you might want to consider this amazing treat.  I first made this cake years ago and I think the recipe came from Sunset.  My mom dictated it to me over the phone – she didn’t direct me to a web site or send it to me via email, so that will give you an idea of how long ago.  The note paper I scribbled it onto slipped behind other recipes in my notebook and I completely forgot about it until I was trying to decide on a dessert to make for special friends.  This just popped into my head.  It is the perfect fall cake and I think it would be terrific after Thanksgiving dinner.

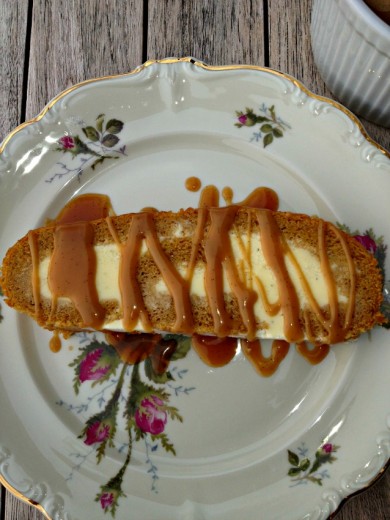
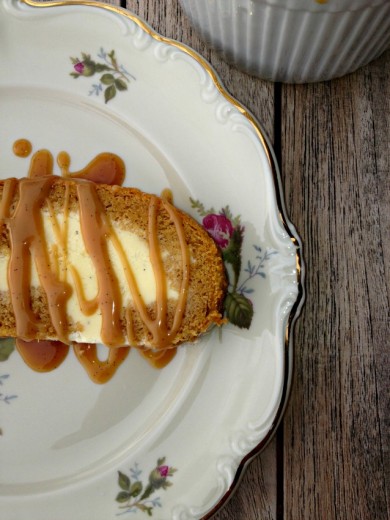
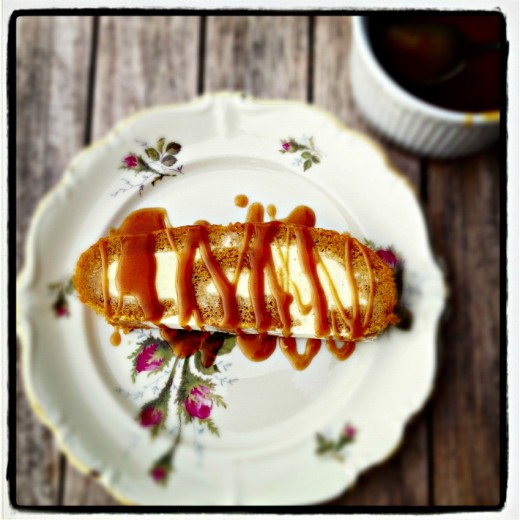
This is a simple jelly roll cake.  The cake itself is pumpkin and it is filled with vanilla ice cream.  I made it back when I was a pretty novice baker and it turned out perfectly, so don’t let the shape of it scare you.  In my more novice days, I bought a quality vanilla ice cream to fill the cake and a quality caramel sauce to drizzle over top.  Now that I am more experienced, I made the ice cream to fill it and a salted caramel sauce to drizzle over top.  Either way, what you have is a beautiful fragrant slice of fall that can be made in advance and brought out to a chorus of praise.  And thanks.  I wish you all the very best – whether you are making a big dinner, attending one, or Thursday is just another day.

One Year Ago:  Squash Hummus and Homemade Flatbread, Butternut Squash Soup with Ginger
Two Years Ago:  Three Cheese Mini Macs, Orecchiete with Creamy Leeks, Vegetarian Gravy, Burnt Sugar Bundt Cake
Three Years Ago:  Maple Roasted Delicata Squash, Naan, Peanut Curry with Sweet Potato and Collard Greens
Four Years Ago:  Pumpkin Whoopie Pies, Giant Chocolate Toffee Cookies, Brussels Sprouts Hash with Caramelized Shallots

Pumpkin Roll Cake
Adapted from Sunset (I think)
Makes 1 large roll, serving about 8-10

As I mentioned, you can certainly make this with store-bought ice cream and caramel sauce.  Use the best you can find.  My roll was more flat this time, my guests actually thought their slices were large biscotti, but I have gotten it to look more rounded in the past.  Patience helps as does ice cream that is soft but not too soft.

¾ cup flour
2 tsp. ground cinnamon
1 tsp. ground ginger
½ tsp. nutmeg
1 tsp. baking powder
½ tsp. table salt
3 eggs
1 cup sugar
2/3 cup canned pumpkin
Powdered sugar

1 quart vanilla ice cream (recipe follows)
Salted caramel sauce (recipe follows)

Preheat oven to 375ºF.  Grease a jelly roll pan, then line the pan with parchment paper.  Grease the paper.

Mix flour, cinnamon, ginger, nutmeg, baking powder, and salt together in a small bowl.  Beat eggs on high speed for 5 minutes, or until very thick.  Gradually beat in the sugar.  Using low speed, mix in the pumpkin, followed by the flour mixture.

Spread batter into prepared pan and smooth it well.  Bake for about 15 minutes, until the center of the cake springs back when touched.

Sprinkle a clean kitchen towel generously with powdered sugar.  Remove the cake from the oven and carefully invert the cake out onto the towel.  Remove the parchment paper.  Roll the cake up with the towel into a cylinder.  Cool completely.

Soften your ice cream for about 20 minutes in the refrigerator.  (If using homemade, you can use it directly out of the ice cream maker.)  Unroll the cake.  Spread the ice cream over the entire surface of the cake.  Roll the cake back up without the towel.  Working quickly, wrap the cake in parchment paper and then foil and immediately place in the freezer.  You can make this cake three days ahead, allow it to soften by pulling it out of the freezer about 10 minutes before you serve it.  Serve with caramel sauce.

Vanilla Ice Cream
The Perfect Scoop
Makes about 1 quart

1 cup whole milk
A pinch of salt
¾ cup sugar
1 vanilla bean, split lengthwise
2 cups heavy cream
5 large egg yolks
1 teaspoon pure vanilla extract

Heat the milk, salt, and sugar in a saucepan. Scrape the seeds from the vanilla bean into the milk with a paring knife, then add the bean pod to the milk. Cover, remove from heat, and infuse for one hour.

To make the ice cream, set up an ice bath by placing a 2-quart (2l) bowl in a larger bowl partially filled with ice and water. Set a strainer over the top of the smaller bowl and pour the cream into the bowl.

In a separate bowl, stir together the egg yolks. Rewarm the milk then gradually pour some of the milk into the yolks, whisking constantly as you pour. Scrape the warmed yolks and milk back into the saucepan.

Cook over low heat, stirring constantly and scraping the bottom with a heat-resistant spatula, until the custard thickens enough to coat the spatula.

Strain the custard into the heavy cream. Stir over the ice until cool, add the vanilla extract, then refrigerate to chill thoroughly. Preferably overnight.

Remove the vanilla bean and freeze the custard in your ice cream maker according to the manufacturer’s instructions.

Salted Caramel Sauce
Bon Appetit
Makes about 1 cup

¾ cup plus 2 tbsp. heavy cream
½ vanilla bean, split lengthwise
½ cup sugar
2 tbsp. light corn syrup
4 tbsp. (½ stick) unsalted butter, cut into ½-inch cubes
¼ tsp. kosher salt
Place cream in a small pitcher.  Scrape seeds from vanilla bean; add bean.  Set aside.
Stir sugar, corn syrup, and 2 tablespoons water in a heavy saucepan over medium heat until sugar dissolves.  Increase heat to medium-high; boil, occasionally swirling pan and brushing down sides with a wet pastry brush, until deep amber color forms, 506 minutes.  Remove from heat; gradually add vanilla cream (mixture will bubble vigorously).  Whisk over medium heat until smooth and thick, about 2 minutes.  Remove from heat; whisk in butter and salt.  Strain into a heatproof measuring cup.  Let cool slightly.  (Sauce can be made up to 3 days ahead.  Reheat in the microwave or in a saucepan over low heat.)


Starting with Ice Cream

November 9, 2012

Apologies.  Sincere and heartfelt apologies.  Want to hear something stupid?  One of the reasons that I have not been posting as much is because my computer is no longer on the same floor as my kitchen.  I have to walk down a whole 14 stairs to get to the room where I write.  What I realize now is that in Seattle, my blogging was usually done piecemeal over the course of a day or two.  I would stir something on the stove and run into the study and type a few sentences.  While waiting for the school bus to bring Graham home, I would type a few sentences.  While on hold with the cable company, I would type a few sentences.  Writing was a part of the daily rhythm of my life.  Now our set up has changed and while I can wrap my brain around the fact that my kitchen is smaller and laid out very differently, and the fact that my kids’ bedrooms are on a different floor than ours, and that I’m living in freaking California – I can’t get back in the swing of the blog post.  14 stairs.  Hmph.  I should also say that I am less busy in Oakland than I was in Seattle.  I had to say goodbye to my cooking classes (see smaller kitchen: above), and my job at Book Larder, and now both my kids are in school full time.  For some people that would mean putting more time into a food blog.  But the more I have to do, the better and more efficient I am at doing it.  If I have time on my hands, I can be good at wasting it.

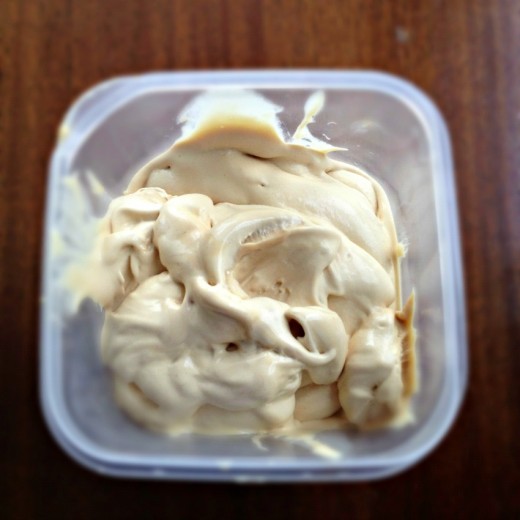
I’ve put it out there so now I’m going to change it.  I’m going to walk down those 14 stairs!  I’m going to use my time more wisely!  I’m starting with ice cream.  Two recipes.  One is Salted Caramel Ice Cream and is a bit of a process, and the other is Malted Vanilla Milk Shakes which are as easy as pie.  My boys are knee deep in Halloween candy infatuation but they will pull their heads out of their pumpkin shaped booty collectors if I mention that I have homemade ice cream or a milkshake for them.  Cookies won’t do it.  Cake won’t do it.  Homemade pumpkin seed brittle won’t do it.  Ice cream is the only thing that trumps Halloween candy in our house.  (By the way, the rule this year is that they can eat the candy for a month and then it gets tossed.  What is the rule in your house?)

Salted Caramel Ice Cream.  Maybe you think the whole salted caramel thing is overblown! overdone! trendy!  I’m here to tell you it none of those things. https://www.forbes.fr/   Caramel on its own is amazing, one of my very favorite things in the world.  Those little Kraft squares?  I still love those things even though they have a plastic-y waxy coating and they can be hard to swallow.  I will admit that there is no subtlety in those squares, they are really just sweet.  Real caramel has much more depth.  Some smoke and, if you are not afraid, a healthy dose of salt.  I love pricey fancy wrapped salted caramel squares, I love them with robes of bittersweet chocolate and even more salt on top.  But I do think that salted caramel ice cream is the best place to appreciate this amazing flavor.

This recipe comes from the folks at Bi-Rite Creamery and their terrific book Sweet Cream and Sugar Cones.  When I saw this book, I might have scoffed.  I have The Perfect Scoop and Jeni’s Homemade Ice Cream – why do I need a third ice cream book?  There are, as it turns out, many reasons.  Like recipes for ice cream cakes and homemade graham crackers, and if nothing else, this salted caramel ice cream.  I have made others.  This one is the best.  The directions are a little fussy.  If you are new to ice cream making, this is a nice and precise way of doing it with little room for error.  I will give you the recipe as written but I took some shortcuts because I have made caramel and ice cream many times before.

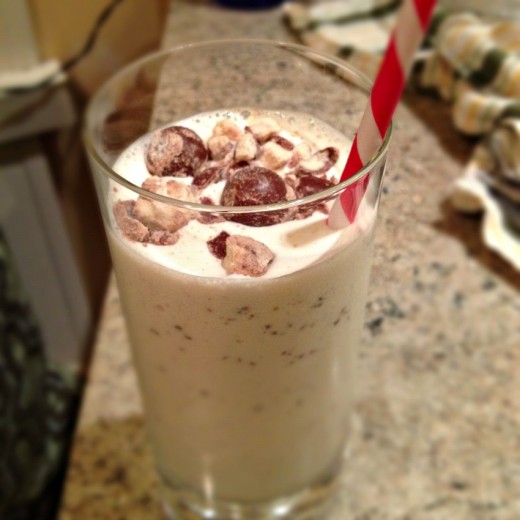
Sometimes when I am cooking or baking, I will suddenly get a big wallop of nostalgia.  A smell or taste or even the feel of an ingredient will take me back to my childhood.  That happened to me when I made these milk shakes.  My mom made us malteds when I was a kid and the smell of any blender working reminds me of those malteds.  In this case, it was not only the smell but the taste.  I love malted milk and so do the guys at the Baked bakery, bless them.  Their new book highlights their ten favorite ingredients or flavors and malt is one of them.  The beauty of these milkshakes is that you are basically just putting things in a blender and turning it on but they taste like everything is homemade.  I would say it is important to use super high quality ice cream, but I just used Dryer’s (did you know the headquarters is in Oakland?) and they were superb.

One Year Ago:  Old Fashioned Chocolate Layer Cake, Baked Pasta, Roasted Pepper Almond, and Cilantro Pesto
Two Years Ago:  2 delicious toasts, Buckeyes, Maple Cupcakes, Spicy Squash Salad, Broccolini with Rice Noodles, Fregola with Minted Cauliflower,
Three Years Ago:  2 kinds of brownies, Savory Roasted Pear Galette, Challah, Tomato Leek Soup, Apple Pie Bars, Tomato and Goat Cheese Tarts, Holly B’s Orange Swirls
Four Years Ago:  Harira Soup, Fattoush, Cowgirl Cookies, Eggplant Rollatini with Capellini

Salted Caramel Ice Cream
Sweet Cream and Sugar Cones
Makes about 1 quart

1¾ cups heavy cream, at room temperature
¾ cup granulated sugar
¾ 1% or 2% milk
1 tsp. kosher salt
5 large egg yolks

Make the caramel:
Set the cream by the stove so it’s at hand when you need it.  Measure out ½ cup of the sugar and set near the stove; you’ll use this for the caramel (the rest will go in the with the yolks).  Put 2 tablespoons of the sugar for the caramel in a heavy nonreactive saucepan over medium-high heat.  When the sugar is melted around the edges and starts to turn amber in places (about 2 minutes), stir the mixture gently and add another 2 tablespoons sugar to the pan.

Continue to add what remains of the ½ cup of sugar 2 tablespoons at a time, stirring frequently and allowing most of the sugar to melt before you add more.  Watch carefully as the sugar darkens, stirring gently to help it melt evenly.

When the caramel has become a dark mahogany color, remove the pan from the heat and immediately but slowly pour the cream into the pan.  (The  mixture will steam and bubble up, so wear oven mitts and be very careful to avoid splatters and steam burns.)  When the bubbling subsides, gently stir to completely blend the cream into the caramel.  If you have lumps of hardened caramel in your pan, simply put the pan over low heat and stir until the caramel is melted.

Make the base:
Once the caramel is completely smooth, stir i the milk along with the salt and pt the pan over medium-high heat.  When the mixture approaches a bare simmer, reduce the heat to medium.

In a medium heatproof bowl, whisk the yolk just to break them up, then whisk in the remaining ¼ cup of sugar.  Set aside.

Careful scoop out about ½ cup of the hot cream mixture and, whisking the eggs constantly, add the cream to the bowl with the egg yolks.  Repeat, adding another ½  cup of the hot cream to the bowl with the yolks.  Using a heatproof rubber spatula, stir the cream in the saucepan as you slowly pour the egg and cream mixture from the bowl into the pan.

Cook the mixture carefully over medium heat, stirring constantly, until it is thickened, coats the back of a spatula, and holds a clear path when you run your finger across the spatula, 1 to 2 minutes longer.

Strain the base through a fine-mesh strainer into a clean container.  Set the container into an ice-water bath, wash your spatula, and use it to stir the base occasionally until it is cool.  Remove the container from the ice-water bath, cover with plastic wrap, and refrigerate the base for at least 2 hours or overnight.

Freeze the ice cream:
When the base is completely chilled, freeze in your ice cream machine according to the manufacturer’s instructions.  While the ice cream is churning, put the container you’ll use to store the ice cream in the freezer.  Enjoy right away or, for a firmer ice cream, transfer to the chilled container and freeze for at least 4 hours.

Malted Vanilla Milk Shakes
Baked Elements
Makes 2 large or 6 mini milk shakes

¼ cup malted milk balls (such as Whoppers or Maltesers)
¾ cup very cold whole milk
1 vanilla bean
2¼ to 2½ cups premium vanilla ice cream, to taste
2 tbsp. malted milk powder

Freeze 2 large (12-ounce or larger) or 6 small (4-ounce) glasses for at least 30 inutes.

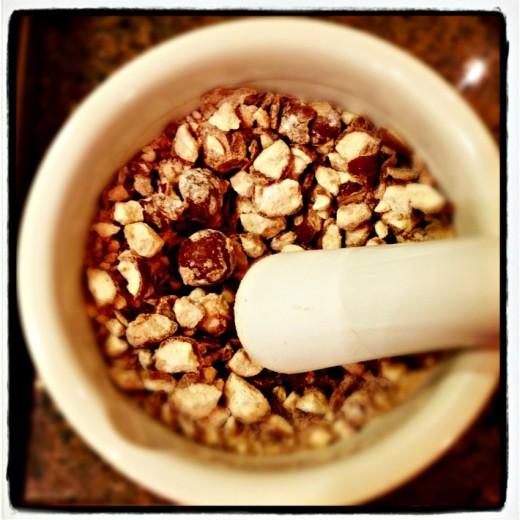
Crush the malted milk balls with a mortar and pestle until they are a chunks powder.

Pour the milk into a blender.  Cut the vanilla bean in half lengthwise and, using the tip of a knife or a small spoon, scrape the seeds into the milk.  Discard the vanilla bean pod or reserve it for another use.  Cover and blend for about 15 seconds.  Add 2¼ cups of the ice cream and the malted milk powder and blend until thick and creamy.  A good milk shake should be eaten with a spoon – so if the milk shake seems too thin, add another ¼ to ½ cup ice cream and blend again.  Divide the shake between the chilled glasses, garnish with the crushed malted milk balls, and serve immediately.


My First Buche de Noel

December 22, 2011

I’m going to keep this short and sweet because, chances are, if you are still looking for a dessert for your holiday table, you need it now and don’t have extra time to read a long post from me.  Am I right?

This is actually, technically, my second Bûche de Noël.  I made the first one, the exact same recipe, earlier this month for a party we hosted and I meant to take a photo of it then and post about it so you would have plenty of time to decide whether or not this was the dessert for you.  Alas, things don’t always happen as we plan.  And sometimes I write run-on sentences.  So I made it again for another party this past Saturday.  I meant to post about it on Sunday but then this bug hit our house and it seems to enjoy taking its time attacking us one by one.

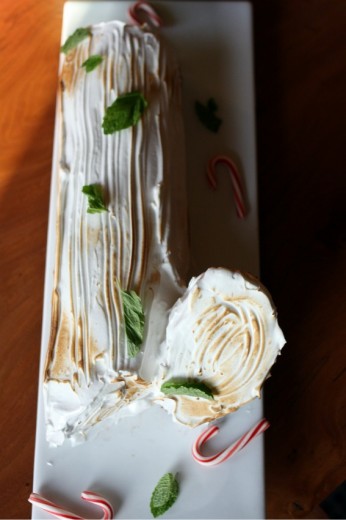
So here we are.  This is an easy cake – a very easy way to get lots of ooohs and aaaahs.  You will need a jelly roll pan and ideally a torch although the latter is not totally necessary.  If you have patience, you will be making chocolate leaves and if you don’t you will not.  (I chose not but I will include the how-to below).  Buy the best peppermint ice cream you can because that is the flavor that comes through most clearly.  The cake is very mild and the frosting is just sweet.  The chocolate sauce is divine though, of course.  Next year I will make a more involved Bûche, one with a chocolate ganache and homemade meringue mushrooms, and pistachio “moss”.  This was a good start though.

One Year Ago:  Holiday Biscotti with Pistachios and Cranberries
Two Years Ago:  Peanut Butter (or Caramel) Mini Candy Brownie Cups
Three Years Ago:  Ultimate Ginger Cookies (Ina calls them ultimate, I say not as my new favorites)

Frozen Chocolate-Peppermint Bûche de Noël
Bon Appétit
12 to 14 servings

Sauce
8 ounces bittersweet chocolate (do not exceed 61% cacao), chopped
¾ cup heavy cream

Chocolate leaves
3 ounces bittersweet chocolate (do not exceed 61% cacao), chopped
10 fresh camellia leaves or lemon leaves, wiped clean with a damp cloth

Cake
Nonstick vegetable spray
1 cup sugar, divided
¾ cup cake flour
¼ cup natural unsweetened cocoa powder
1 tsp. baking powder
¼ tsp. salt
4 large eggs, separated
2 tbsp. vegetable oil
2 tbsp. water
1 tsp. vanilla extract
1/8 tsp. cream of tartar
2 pints peppermint ice cream
1/3 cup coarsely crushed red-and-white peppermint candies or candy canes

Meringue and decorations
5 large egg whites
¼ tsp. cream of tartar
¾ cup sugar
½ tsp. vanilla extract
Fresh mint leaves
Small candy canes

Sauce
Place chocolate in medium microwave-safe bowl.  Bring cream to simmer in small saucepan.  Pour cream over chocolate.  Let stand 1 minutes, then whisk until melted and smooth.  (Can be made 1 week ahead.  Cool cover, and chill.  Rewarm, uncovered, in microwave in 15-second intervals and whisk before using.)

Chocolate leaves
Stir chocolate in small saucepan over low heat until melted and smooth.  Remove from heat.  Using pastry brush, brush chocolate on underside (veined side) of 1 leaf to coat completely (do not allow chocolate to drip over edge of leaf).  Place leaf, chocolate side up, on small foil-lined baking sheet.  Repeat with remaining leaves.  Chill, uncovered, until chocolate is cold and firm, at least 1 hour.  Working with 1 leaf at a time, carefully peel green leaf away from chocolate.  Return chocolate leaf to same sheet; discard green leaf.  (Can be made 3 days ahead.  Cover with plastic wrap and chill.)

Cake
Position rack in center of oven and preheat to 375ºF.  Line 15x10x1-inch baking sheet with parchment.  Coat paper with nonstick spray and dust with cocoa.

Sift ½ cup sugar, cake flour, ¼ cup coca, baking powder, and salt into small bowl.  Using electric mixer, beat egg yolks in large bowl until thick.  Beat in oil, 2 tablespoons water, and vanilla.  Gradually add dry ingredients, beating just until blended.  Using clean dry beaters, beat egg whites and cream of tartar in medium bowl until soft peaks form.  Gradually add remaining ½ cup sugar, beating until stiff but not dry.  Fold ¼ of whites into yolk mixture to lighten.  Fold in remaining whites in 2 additions.  Spread batter evenly in prepared pan.

Bake cake until puffed and tester inserted into center of cake comes out clean, about 12 minutes.  Cool cake in pan on rack 10 minutes.  Sift light layer of cocoa powder over large smooth kitchen towel (not terrycloth).  Cut around pan sides.  Turn cake out onto prepared towel, leaving 3-inch cloth border on 1 long side.  Peel off parchment.  Starting at 1 long side with cloth border and using cloth as aid, roll up cake in towel (towel will be rolled up inside).  Place cake, seam side down, on work surface; cool completely.

Microwave ice cream in 10-second intervals until barely softened.  Unroll cake on work surface but leave on cloth.  Dollop ice cream over cake by spoonfuls.  Gently spread ice cream in an even layer, leaving 1-inch plain border on long side opposite cloth border.  Sprinkle ice cream with crushed candy.  Using cloth as aide and starting at cloth order, roll up cake, enclosing ice cream in cake.  Place cake, seam side down, on long platter; cover with plastic wrap.  Freeze cake at least 8 hours or overnight.

Meringue
Using electric mixer, beat egg whites and cream of tartar in large bowl to soft peaks.  Gradually add sugar, beating until still but not dry.  Bean in vanilla.

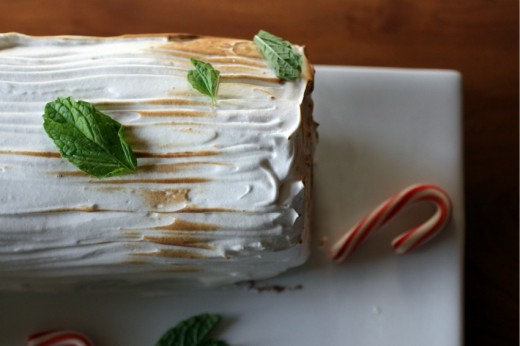
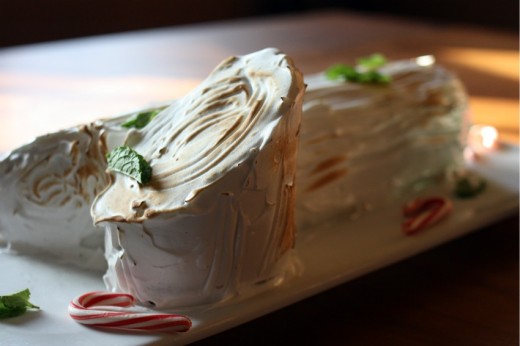
Cut off 1/8 of cake at angle at 1 end.  Press cut off part onto center of 1 side of log, cut side in.  Spread meringue all over top, sides and ends of cake.  Using fork, make long grooves in meringue down length of cake and in circles on ends to resemble tree bark.  Freeze cake until meringue is cold and firm, at least 3 hours.  Using torch, brown meringue in random spots.  Return cake to freezer.  (Can be made 2 days ahead.  Keep frozen.)  (DT:  I found I was not able to cover the cake because it stuck to the meringue so I just kept it in the freezer uncovered.)

Garnish cake with chocolate leaves, fresh mint, and small candy canes.  Cut cake crosswise into 1-inch wide slices.  Drizzle with warm chocolate sauce.


How to Win Fans

September 6, 2011

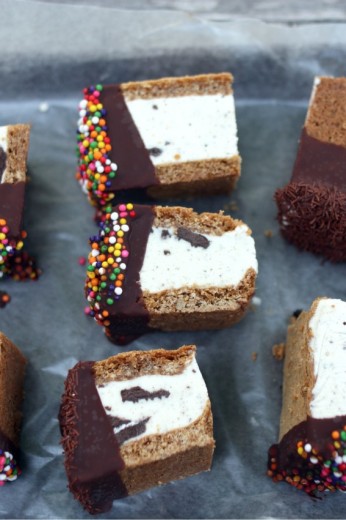
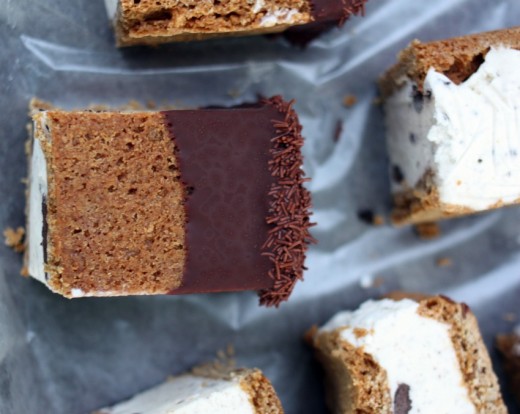
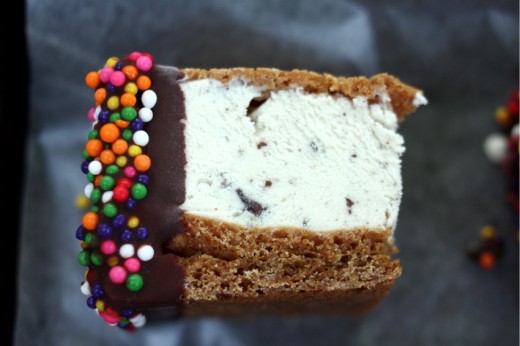
It’s simple really.  Homemade ice cream sandwiches.  Chocolate dipped.  Sprinkles.

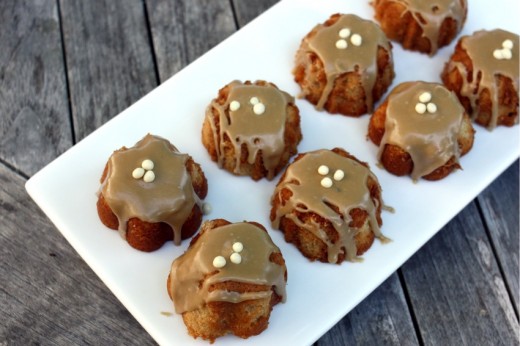
But first!  I have to tell you about a way that you can try one of my treats, if you live in the Seattle area.  Do you know about Savour?  It’s a fabulous specialty foods store in Ballard.  In addition to having a wide selection of carefully selected and very fine goods, they also have an incredible cheese counter (burrata!), and prepared foods.  They serve sandwiches and quiches all day and really the place could not be any lovelier.  My friend Julie (she of Julie’s Salad) works there and has started a new program called Savour September.  Each week, the store will feature a local food blogger and a treat of their choice.  I am the first!  So, if you would like to try my now-famous-and-much-requested Brown Sugar Pound Cake in mini form, head down to Savour.  And say hi to Julie!

We had some friends over for Labor Day.  We were 8 adults and 8 kids.  I needed to make a cake to thank our friend Brad for fixing my oven but I also wanted to make something special for the kids.  Few things are better than seeing a child’s entire face light up at mention of a special dessert.  Soon after photographing these treats, the kids descended on them.  Some asked that they be cut into slices because they couldn’t get their mouths around them.  Others (my Spencer included) just chowed right down on them.  I sat with the kids.  The girls all eyed me carefully.  “Did you make these?”,  they all asked, one and then another and then another.  Shock and awe.  What a great feeling.

These are huge sandwiches and one by one, the kids brought the remnants into the dining room so the adults could taste them (except Spencer, who was the 2nd youngest kid there and the only one to finish his sandwich).  I’m glad I got a taste because these are really good.  I mean, of course they are.  They are homemade ice sandwiches for crying out loud.  But I was surprised by how well they turned out and by how good the cookie part was.  This is a surefire way to win fans young, middle (ahem), and old.

One Year Ago:  Grilled Padrón Pepper Pizza
Two Years Ago:  Corn and Zucchini Timbale with Ancho Chile Sauce
Three Years Ago:  Chocolate Peanut Toffee

Chocolate-Dipped Ice Cream Sandwiches
Adapted from Bon Appétit
Makes 8 large sandwiches

Nonstick vegetable cooking spray
1 cup all-purpose flour
¼ tsp. baking soda
Pinch of salt
½ cup (1 stick) unsalted butter, cut into 4 pieces
½ cup packed brown sugar
2 tbsp. light corn syrup
2 large egg yolks
½ tsp. vanilla extract
3 cups premium ice cream (I used cookies and cream), softened
8 ounces bittersweet or semisweet chocolate, chopped
2½ tbsp. vegetable oil
Assorted decorations (I used colored and chocolate sprinkles, you can use nuts, toffee bits, whatever you want)

Preheat the oven to 325ºF.  Line a 13x9x2 metal baking pan with foil, leaving 1-inch overhang on long sides.  Lightly coat with nonstick spray.

Whisk flour, baking soda, and pinch of salt in medium bowl.  Melt butter in medium skillet over medium heat.  Cook until milk solids on bottom of pan turn deep golden brown, stirring often, about 5 minutes.  Transfer browned butter to small bowl.

Place sugar and corn syrup in large bowl.  Pour browned butter over.  Whisk to combine (mixture will not be smooth).  Whisk in egg yolks and vanilla.  Add flour mixture; stir just to blend.  Transfer soft dough to prepared pan; press into an even layer.

Bake cookie layer until golden brown around edges and sides are just beginning to pull away from pan edges, 15 to 17 minutes.  Cool completely in pan on rack.

Using foil overhang as aid, lift cookie layer from pan and place on work surface.  Place sheet of plastic wrap lengthwise in same pan, leaving overhang on both short sides of pan.  Place another sheet of plastic wrap in pan, leaving overhang on long sides of pan.  Cut cookie layer in half crosswise.  Return 1 cookie half, top side down, to pan, placing snugly in 2 short end of pan.  Slightly soften ice cream in microwave in 15-second intervals.  Spread ice cream evenly over cookie in pan.  Place second cookie half, top side up, atop ice cream, pressing slightly to adhere.  Fold plastic wrap up and over ice cream-filled cookie.  Freeze until firm, at least 4 hours.

Line baking sheet with parchment paper or wax paper.  Unwrap ice cream-filled cookie; place on work surface.  Using serrated knife, cut cookie lengthwise in half, then cut each strip crosswise into 4 sandwiches (8 in total).  Place on sheet; freeze.

Stir chocolate and oil in medium metal bowl set over saucepan of barely simmering water until melted and smooth; cool to lukewarm.  Arrange decorations on plates.  Working with 1 ice cream sandwich at a time, dip half of sandwich in melted chocolate, allowing excess chocolate to drip back into bowl.  Press sandwich gently into decorations on plate.  Return to sheet in freezer.  Freeze until chocolate sets and freezes, about 1 hour.  (Can be made 2 days ahead.  Wrap each sandwich individually in foil and keep frozen.)


Prediction: Ice Cream

July 5, 2011

I have a prediction and I can almost guarantee it will come true.  Guar – an – tee.  Like sure enough that if I was a betting woman and if they placed bets on things like ice cream or cookbooks or ice cream cookbooks, I would clean up in Vegas.

The internet is soon going to become overrun with recipes pulled from the Jeni’s Splendid Ice Creams at Home book.  For real.  It’s going to hit big and it’s going to hit hard, maybe not with the same strength as No-Knead Bread or the New York Times chocolate chip cookies, but strong all the same.  This time I am on the cutting edge, not joining in the club two years after it has formed.

“What is the big deal?”, you might ask.  Have you ever made ice cream?  Used lots of yolks, and had to strain out the scrambled bits?  Made a truly delicious treat but with just a bit more iciness than you would like in your ice cream?  This woman, Jeni, she has been making ice cream for years and she has nine ice cream shops (and counting) to prove that she knows her stuff.  She doesn’t use eggs.  At all.  What she does is use a bit of cream cheese and cornstarch and a couple of tablespoons of corn syrup.  The cooking method is streamlined – milk and cream get boiled together for exactly four minutes.  A cornstarch slurry is stirred in and then the mixture boils for exactly another minute.  Whisk the whole thing into cream cheese with a bit of salt, and you have the base for your ice cream.  I’ve always thought that making ice cream was so easy for how delicious it is – now I think it’s even easier.

In addition to coming up with and streamlining this process, Jeni has shared her treasure trove of recipes in a delightful book.  They are arranged seasonally – seasonal ice creams!  Who knew?  I’m a person who likes to chew when eating ice cream and I love that there are plenty of add-ins, mix-ins, and pairings that make even the most routine flavor exciting.

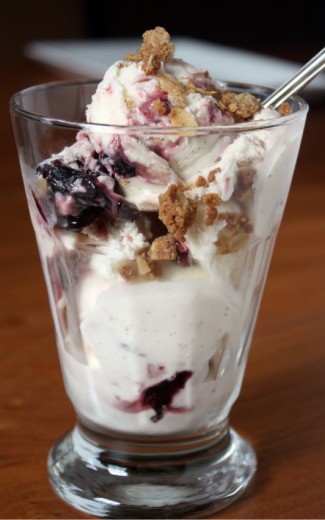
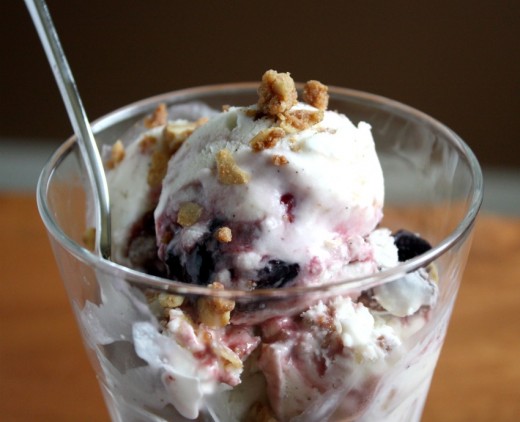
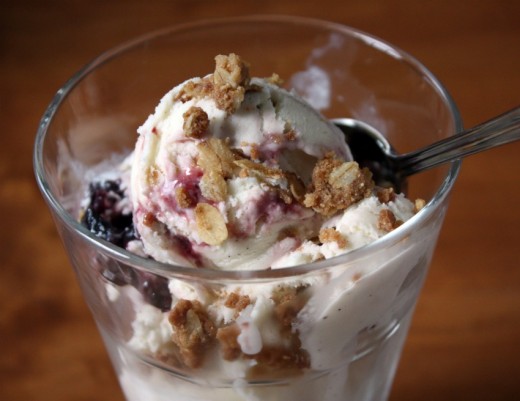
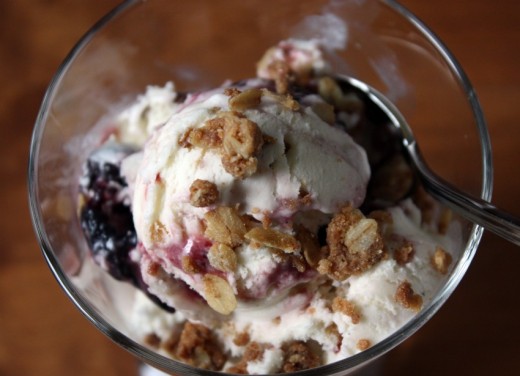
Graham’s eyes got really big when he saw the cover of the book.  He immediately pointed to the scoop that looked like it had cherries in it.  We made Cherry Crisp Ice Cream.  We roasted cherries, made the crispy bits (think a streusel on a cherry crisp), and used our new technique to make the ice cream.  We licked the paddle (swoon!), alternated the vanilla bean ice cream with the other goodies in the container, and put it away in the back of the freezer to firm up.  The result?  The boys did not like it.  I had a feeling they wouldn’t.  Their ice cream tastes are more simple.  They probably won’t like the Sweet Corn and Black Raspberry Ice Cream which intrigues me, or the Black Walnut Divinity Ice Cream which does not.  It might be that I have to use my other more traditional ice cream cookbook when making that special treat for them.

As for Randy and I…well.  Randy said it was the best ice cream I have ever made.  Most recently I made a strawberry version (from another book) and both of us were turned off by how icy it was.  This was the opposite.  So creamy, velvety, not a hint of an ice crystal.  This is totally Randy’s type of ice cream flavor and totally not mine.  But holy cow was this good.  I’m a little worried.  If a totally-not-my-type-of-flavor has me dipping my spoon directly into the container over and over again, what am I going to do when I make a totally-me flavor?

One Year Ago:  Big French Salad
Two Years Ago:
Coconut Bars
Three Years Ago:
Panzanella with Artichokes, Olives and Manchego

Cherry Crisp Ice Cream
Adapted from Jeni’s Splendid Ice Creams at Home
Makes about 1 quart

For the ice cream
2 cups whole milk
1 tbsp. plus 1 tsp. cornstarch
1½ ounces (3 tbsp.) cream cheese, softened
1/8 tsp. fine sea salt
1¼ cups heavy cream
2/3 cup sugar
2 tbsp. light corn syrup
1 vanilla bean, split, seeds scraped out, seeds and bean reserved
1 recipe roasted cherries (recipe follows)
About 1 cup Crisp Streusel (recipe follows)

Mix about 2 tbsp. of the milk with the cornstarch in a small bowl to make a smooth slurry.  Whisk the cream cheese and salt in a medium bowl until smooth.  Fill a large bowl with ice and water.

Combine the remaining milk, the cream, sugar, corn syrup, and vanilla seeds and bean in a 4-quart saucepan, bring to a rolling boil over medium-high heat, and boil for 4 minutes.  Remove from the heat and gradually whisk in the cornstarch slurry.  Bring the mixture back to a boil over medium-high heat and cook, stirring with a heatproof spatula, until slightly thickened, about 1 minute.  Remove from the heat.

Gradually whisk the hot milk mixture into the cream cheese until smooth.  Pour the mixture into a 1-gallon Ziploc freezer bag and submerge the sealed bag in the ice bath.  Let stand, adding more ice as necessary, until cold, about 30 minutes.

Remove the vanilla bean.  Pour the ice cream base into the frozen canister and spin until thick and creamy.

Spread about ½ of the cherries over the bottom of a freezer safe container.  Scoop out about 1/3 of the ice cream and sprinkle with 1/3 of the streusel.  Top with the other half of the cherries, another 1/3 of the ice cream, and another 1/3 of the streusel.  Repeat with the remaining ice cream and streusel.  (There will be quite a bit of streusel left over.  Use it for another ice cream or for a pie or crisp topping.)  Press a sheet of parchment directly against the surface and seal with an airtight lid.  Freeze in the coldest part of your freezer until firm, about 4 hours (if you can wait that long.)

Roasted Cherries
2 cups pitted fresh or frozen (not thawed) red or black cherries
2/3 cup sugar
2 tsp. cornstarch

Preheat the oven to 400ºF.

Combine the cherries, sugar, and cornstarch in a 9-inch square baking dish, tossing to mix.  Roast for 30 to 45 minutes, until the juices are thickened and bubbly, stirring every 15 minutes.  Let cool completely, then chill in the refrigerator.

Crisp Streusel
½ pound (2 sticks) unsalted butter, cut into ½-inch cubes and chilled
1½ cups all-purpose flour
1/8 tsp. ground cinnamon
¾ cup packed light brown sugar
½ tsp. salt
1½ cups old-fashioned oats

Preheat the oven to 350ºF.

Put all the ingredients except the oats in the bowl of a food processor and pulse until mixture looks like coarse sand.  By hand, add the oats and mix well.  Spread out on a baking sheet and break up any large clumps into crumbs about ½-inch in size.

Bake for 30 to 35 minutes, until toasted and browned, stirring occasionally to prevent burning, especially in the corners, and to turn over the unbaked portions.  Let cool completely, then freeze until ready to use.  The streusel can be frozen for up to 1 month.


« Older Posts