Category: Yoga Retreat Food

Spring Tartines

May 30, 2012

I’ve written a bit about Book Larder, the amazing cookbook store where I am lucky enough to work.  The shop opened in October and it has been gangbusters ever since.  I was hired with the idea that I would teach classes there and coordinate with other teachers around town to bring them in for classes as well.  As the months have passed, my job has morphed a bit and my official title is Culinary Director.

What does that mean exactly?  The easiest way to explain it is that I get to handle all things food related.  I teach classes and I also work as the assistant when we have other teachers or chefs in the kitchen.  If we have an author come to town for an appearance, I bake or cook from their books.  I do all the shopping for classes and events and any prep that needs to be done.  I love it.  LOVE IT.  Imagine cooking in a lovely kitchen surrounded by 3,000 beautiful cookbooks.  And then imagine getting to meet people like Christina Tosi, Alice Medrich, Paula Wolfert, Patricia Wells, Lynn Rosetto Kaspar.  Making their food from their books for them.  It is crazy-town cool.

A few months ago, we threw a party for Willi Galloway, an amazing gardener and cook.  She used to live in Seattle but now calls Portland home.  Her book, Grow Cook Eat, is a gorgeous example of how beautiful and delicious fresh garden produce can be.  I am about the furthest thing from a gardener, but the book makes me want to get out in the dirt.  (Except there are bugs there, right?)  We hosted a book release party for her and I was lucky enough to cater the event.  Willi chose four recipes from her book and I made enough food to feed an army.  Everything was so good, it was basically demolished by the end of the night.  I credit Willi’s recipes, not my cooking.

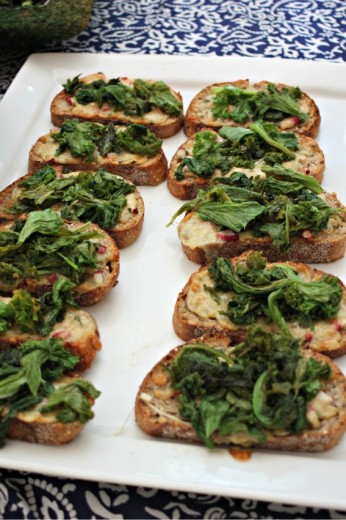
I loved everything I made but my favorite was the the Radish Tartines.  You mix a bit of butter with Gruyère cheese (one of my favorite cheeses), a healthy spoonful of mustard, chives, and diced radishes, spread that on a piece of hearty bread, then bake it in the oven until it puffs and browns.  Then you top that loveliness with the sautéed radish greens.  I love a recipe that uses all parts of a vegetable but I have to admit that, unless I am using über fresh farmers’ market radishes, I opt for mustard greens instead.  (I think any other “soft” green would work, including the extremely easy to find spinach.)

Side bar – what is a tartine?  Without looking anything up, this is my take.  Please be advised I could be totally wrong here.  I think of crostini as a thin slice of toasted bread with a topping.  I think of bruschetta as a thicker and heartier slice of bread, again – toasted, with a topping.  I think of a tartine as more of a open faced sandwich, the bread not toasted before the topping goes on.  A little easier to eat, no scraping the roof of your mouth.  Anyone else?

I’ve been making these beauties ever since that party and I love them more each time I eat them.  I made them for our last yoga retreat and they were at the top of the “Are you going to post this recipe on your blog?” list.

(Yes, this is the same photo as up above.  I only got one before they were snatched up!)
One Year Ago:  No-Knead Olive Bread
Two Years Ago:  Pull Apart Cheesy Onion Bread
Three Years Ago:  Individual Vegetable Tarts

Tartines with Gruyère and Greens

Adapted from Grow, Cook, Eat
Makes 6 large tartines

If you make them this way, they are kind of meal size.  Terrific with a bowl of pea soup or a hearty salad.  If you want more appetizer servings, use smaller slices of bread.  The topping can be made a day in advance and refrigerated, but definitely serve these just out of the oven.

2 cups grated Gruyere cheese (about 8 ounces)
3 tbsp. very soft unsalted butter
1 tsp. Dijon mustard
¼ cup finely chopped radishes
2 tbsp. fresh chives, chopped
Pinch of salt and few grinds of pepper
6 ½-inch thick slices good bread, such as pain de campagne
Olive oil
1 small bunch soft greens, such as mustard greens or spinach

Preheat the oven to 375F.  In a medium bowl, use a fork to really mash the butter.  Add in the cheese and mix well to combine the two.  Add the mustard, radishes, chives, and salt and pepper.  Divide the mixture between the bread slices, pressing down slightly.  Place the bread on a baking sheet and toast until the cheese puffs up and is lightly browned, 12 to 15 minutes.

Meanwhile, place a skillet over medium heat.  Drizzle in just enough olive oil to coat the bottom of the pan, then add the greens.  Cook, stirring frequently, until wilted, 5 to 10 minutes, depending on the green.  Spread the wilted greens on evenly over the cheesy toasts and serve immediately.


What Is In This Dip?

February 14, 2012

I used to make a dip that I called The Dip.  I made it often and I loved it.  Simple, nutritious, easy to scale up, healthy.  Tasty.  I brought it to multiple yoga retreats.  I made it for parties.  People would ask, “Is this The Dip?”, and then they would use whatever scooping utensil that was handy to bring it to their mouths.

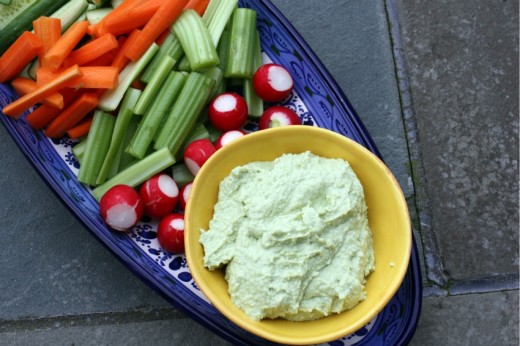
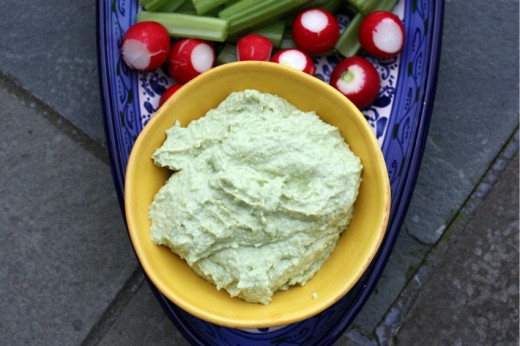
Then I saw Lisa talk about another Dip.  Similar to the one I made but with a few important differences.  Lisa doesn’t usually post the actual recipes for the food she makes, she just talks clearly about the ingredients.  So I bought the things I needed and made it to taste.  And got totally hooked.  Now this dip has become The Dip.  I always do it to taste but because I think it is really extraordinary, I decided to actually measure out what I add to it so I could share.  It is creamy (thank you silken tofu), a bit sweet (honey), a bit acidic (lime), and has a wonderful nose-clearing spice (wasabi).  All this things mix together to make an intriguing dip that people will ask you about endlessly.

The veggies and dip tray is the thing I tend to hover around at big parties.  This is partly so I don’t hover around the loaded potato skins tray but also because I really like veggies and dip.  Even the super gross pre-made-full-of-chemicals-and-fat dip.  So it is extra nice to be able to enjoy this dip knowing it is full of good stuff.

One Year Ago:  Somen Noodle Soup with Spring Vegetables and Baked Tofu
Two Years Ago:  Honey Roasted Pear Salad
Three Years Ago:  Tom Yum Soup with Mushrooms and Tofu

Wasabi Dip
Dana Treat Original
Makes about 2 cups

Silken tofu is not usually refrigerated.  It is in shelf stable packaging and can usually be found on the Asian food aisle.  It comes in bricks that weigh about 12 ounces but you will not use the whole thing.  I like this dip with quite a lot of heat but if you want less, add just 1 tablespoon of wasabi paste.

1 10-ounce bag frozen shelled edamame
8 ounces silken tofu
2 tbsp. honey
2 tbsp. wasabi paste
1 tsp. salt
Juice of 1 lime
2 tbsp. olive oil

Bring a medium pot of water to a boil.  Add a pinch of salt and then pour in the edamame.  Cook for 3 minutes, drain and cool.

Put the edamame in the bowl of a food processor fitted with the steel blade.  Add the tofu, honey, wasabi paste, salt, and lime juice.  Purée the mixture, stopping several times to scrape down the sides of the bowl, until it is more or less uniform.  It might still be a bit chunky.  With the machine running, pour in the olive oil.  You might use more or less than 2 tablespoons depending on how loose you want the dip to be.  Taste for seasoning and add more honey, salt, or wasabi to your liking.

Serve with crudité and/or pita chips.


Addictive

February 9, 2012

Short and sweet today.  You may recall that I promised lots of food this week.   There is lots of food waiting to be talked about but no time to talk about it in.  Next week!

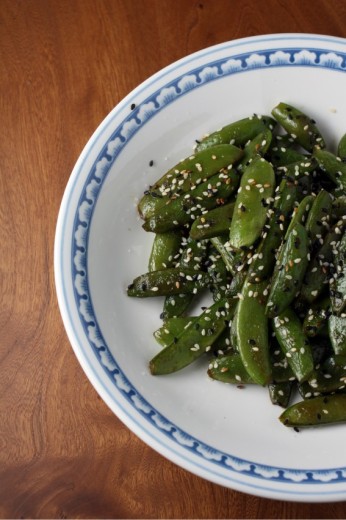
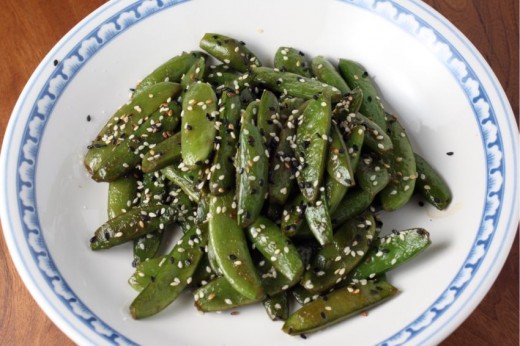
Do you have a thing that, no matter how much you make, it all gets eaten?  Up until last spring, I had that experience with only two things.  Popcorn and guacamole.  Then, in one of my cooking classes, I made these snap peas and was astounded to watch every last one of them get eaten.  Dinner parties – gone.  Last month’s yoga retreat – gone.  They are addictive, salty, nutty, crunchy.  They are also quick, healthy, and vegan.

I always de-string my snap peas and I have been surprised to hear that other people don’t do so.  I find if I don’t do that, this charming vegetable becomes less charming.  The fibrous string is hard for me to choke down so if you haven’t done this step, give it a try.  They don’t always come off.  In my experience, the fresher the pea, the more readily the string comes off but I don’t know if there is any scientific basis in that.  Using my fingers, I just “snap” one end and pull it towards the middle along the top of the pea and then “snap” the other end and pull it toward the middle along the bottom.

One Year Ago:  Dried Cranberry and Ginger Canoli
Two Years Ago:  Apple Torte
Three Years Ago:  Vegetarian Caesar Salad

Sesame Snap Peas
Dana Treat Original
Serves 4

Don’t let the simplicity of this recipe fool you into thinking these are nothing special.  They are special.  They can be made even more so by the addition of a bit of minced garlic and ginger, added about a minute before the snap peas, but they are equally delicious without.  I had some gomasio, a Japanese condiment made from white and black sesame seeds and salt, on hand and used that to garnish but plain old sesame seeds are good too.

1 tbsp. canola oil
10 ounces sugar snap peas, strings removed
1 tsp. kosher salt
2 tsp. toasted sesame oil
2 tbsp. soy sauce
Sesame seeds (for garnish)

Place a medium sauté pan over medium-high heat.  Drizzle in the canola oil and swirl around the pan.  Add the snap peas and salt and cook, tossing occasionally, for 3 minutes, or until starting to brown in places.  Drizzle in the sesame oil, give the peas a toss, then pour in the soy sauce.  Cook for one more minute, just until the sauce starts to get syrupy, then pour out onto a serving plate.  Garnish with sesame seeds.


Sweet Winter Slaw

January 31, 2012

There are certain things you can count on in life.  The sun will rise, the sun will set.  You will pay taxes.  Unless you have the stomach flu, you will be hungry at some point today.  You know how it goes.  There are also certain things you can count on here on the Dana Treat site.  There will be vegetarian food, there will be chocolate, and about every three months, there will be talk of a Bainbridge yoga retreat.

It is hard for both Jen and me to believe, but May will be our three year anniversary of doing these retreats together.  If you are new here, Bainbridge Island is a magical haven just across Puget Sound from Seattle.  There is a ferry that takes you from our downtown waterfront to the island in about 35 minutes.  My friend Jen, who I have known since 7th grade, lives there and teaches yoga in a studio on her property.  Over three years ago, she told me about her dream of quarterly day-long retreats.  She asked if I would want to partner with her four times a year.  She would provide the space, the yoga instruction, someone to guide meditation or other exercise, and I would make lunch for everyone.  I love Jen.  She is one of my closest friends.  I wanted to help and I also wanted to participate.

So in May of 2009, we launched.  It took me a few retreats to figure out how to get everything done the day before so I could actually participate in the morning yoga session.  Now it goes a little something like this.  I take a 7:55am ferry to the island, drive to Jen’s house, and then spend the time before the 9:30am start unloading my car and getting the kitchen set up.  I find a spot for my mat and towel in the studio and after a short intro of the retreat’s theme (this time it was nourishment), the hot yoga portion starts.  I don’t practice hot yoga at home but I really love doing it on occasion.  Jen is a dear friend of mine but believe me when I tell you that she is a most incredible instructor.  Her own practice is so strong and such a part of her that she teaches from a place of curiosity, experience, and joy.  She talks like a normal person and wherever she takes you, you want to go.  One of my favorite things she said this time was, “Starve the negativity.  If you don’t feed it, it can’t survive”.  Another, while we were in a challenging pose, “If you are talking to yourself in your head right now, make sure you are saying something nice”.

At the end of the hot yoga portion, people take a bathroom and water break before a meditation portion, and I book it up to the house for a quick shower and to set up the lunch.  People are starving by the time they get to me, so I have learned to have nibbles out and at the ready in case I am still putting the finishing touches on the food.  I’ve made a completely different lunch every retreat.  I’m proud of that.  People are incredibly grateful for the food and I love spending the time getting to know this amazing community better.

There is always a little downtime after lunch, so I usually chat or start on the clean up.  Some people take a walk, some find a nook and read a book.  Before we all know it, it’s time for the second yoga class of the day.  Our tummies are gurgling a bit and we are all sleepy so it is to Jen’s immense credit that she can get us back in the studio and back in downward dog.  Before we know it, we are back in the flow – just hard enough to make it exciting but not so hard that we regret taking a second cookie.  It is an invigorating end to an amazing day.  I have cried at almost every one of these retreats and I am not a crier.  It is so incredible to take a day to yourself, to spend it with a dear friend, to do the work in yoga, to immerse yourself in an amazing community, to be surrounded by breathtaking natural beauty, and to eat wonderful and healthy food (if I do say so myself).  At the end of it all, you wait for a ferry, book and flashlight in hand, and commute back home on the water.  Even the coming and going is magical.

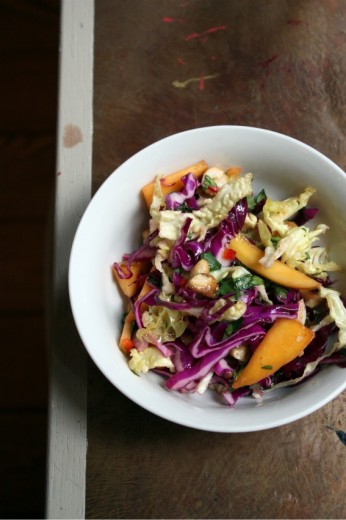
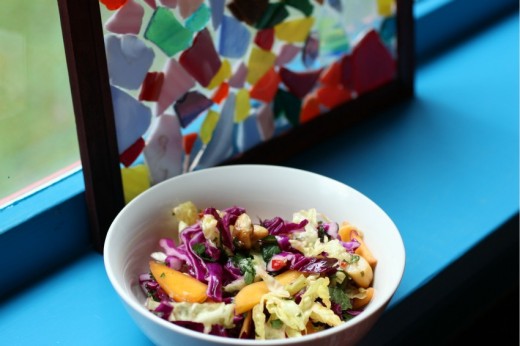
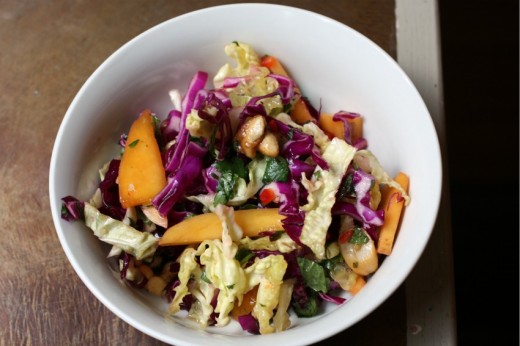
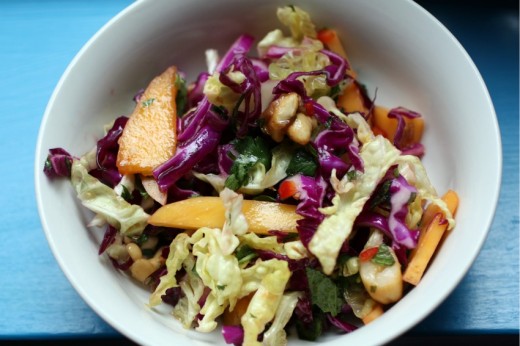
Now that most of these people know me and many read my blog, they always want to know which dishes I’ve made are either on my blog or will be posted there soon.  I got many questions about the chocolate chip cookies of course.  People were also crazy for this winter slaw.  I’m not surprised.  I taught this slaw twice last week in classes.  It comes from our good friend Plenty and it totally changed my opinion about slaws.  Like many, I’m not a coleslaw fan because mayo is not my friend, but I haven’t ever really liked any slaw I have made or tried.  I’m in love with this one.  Two different types of cabbage, some buttery sweet nuts, sweet mango, and a bit of kick from a red chiles make this an intoxicating slaw.  There are also lots of herbs and a dressing you will want to make a double batch of and use for many different things.  I tweaked.  Cashews instead of macadamia nuts, no papaya (those things freak me out), more green cabbage, more herbs.  My recipe below reflects those changes.

As if the flavors and the color were not enough to recommend this slaw, I will tell you this.  It keeps well.  I can’t think of another salad or salad type thing that I would want to eat a day after, or even an hour after, it has been dressed.  But we munched on this one happily two days after I made it.  Even the nuts were still crunchy!  Finally, this is not a slaw you want to underdress.  I am usually very sensitive about too much dressing on my salads or salad type things, but if you don’t use enough dressing on this one, it’s a little hard to choke down.  That red cabbage needs a good soaking.

One Year Ago:  Simply Sweet Diamints and Spicy Pasta with Broccoli and Cauliflower
Two Years Ago:  White Bean Dip and Caramel Cake
Three Years Ago:  Guacamole

Sweet Winter Slaw
Adapted from Plenty
Serves 6-8

Dressing
1/3 cup freshly squeezed lime juice
1 lemongrass stalk, chopped
3 tbsp. maple syrup
2 tbsp. roasted sesame oil
1 tbsp. soy sauce
½ tsp. red pepper flakes
4 tbsp. canola oil

Slaw
1 tbsp. butter
¾ cup raw cashews
2 tbsp. sugar
Pinch of kosher salt
½ a head Savoy cabbage, finely shredded
½ a head red cabbage, finely shredded
2 medium mangoes, peeled and cut into thin strips
1 fresh red chile, deseeded and finely chopped
½ cup fresh cilantro leaves, chopped
¼ cup fresh mint leaves, chopped

First, make the dressing.  Place all the ingredients, except the sesame oil and canola oil, in a small saucepan and reduce over medium-high heat for 5-10 minutes, or until thick and syrupy.  Remove from the heat.  Once cooled down, strain the sauce into a bowl and whisk in the oils.  Set aside.  (Dressing can be made up to one week in advance.  Store in the refrigerator.)

Melt the butter in a small saucepan or sauté pan over medium heat.  Add the cashews and toast them, shaking the pan frequently until they start to brown.  Sprinkle on the sugar and stir constantly until the sugar is melted and starting to turn brown.  Scrape the mixture out onto a sheet of parchment paper and allow to cool and harden.  Chop coarsely.

Place the shredded cabbage in a large mixing bowl with the rest of the salad ingredients, including the nuts.  Add the dressing and toss together.  Taste and add more salt if necessary.


Spice Crispies

January 27, 2012

Sometimes when I am at my cooking maximum, I somehow find the energy to add one more thing.  I’m tapped, I’m tired, I’m starting to make stupid mistakes, and then I see something that sparks me – makes me perk up.  I somehow find time to squeeze in this one more thing even though that bit of time could be of more value in other ways.  And sometimes there is pay off, even though it may not seem that way at first.

What am I talking about?  Well, this has been quite a week for me and it’s not over yet.  I taught classes Tuesday, Wednesday, and Thursday, and today I will be spending the entire day in the kitchen prepping lunch for tomorrow’s yoga retreat on Bainbridge Island.  Everything has to be done today because I take a 7:55am ferry over there tomorrow.  Normally, I spend a couple of days prepping but because of all the teaching, everything will be compressed into one day.  Did I mention that my husband has been out of town?  Yes, that too.  I’m getting through by literally taking one day at a time.  I can’t even think about the next project until I finish the current one.  Nothing that can’t be used that very day gets made or done.  Stay Focused Dana has been my mantra.

So yesterday, precisely 40 minutes before I had to leave to pick up my children, precisely 2 hours before my students started knocking on my door, with precisely 57 different dishes in the sink or scattered around the counter, I decided to make Spice Crispies.  The recipe caught my eye as I was making my favorite Chex Mix and suddenly, I was overtaken with the urge to create yet more dirty dishes and food.

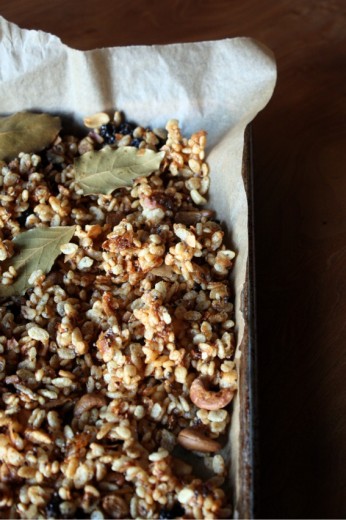
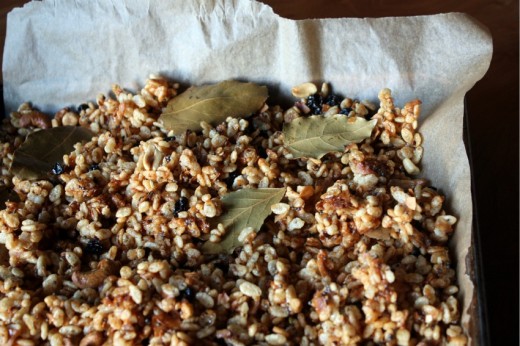
Fast as lightning, I preheated the oven, gathered ingredients, poured, sautéed, stirred, scraped, baked, washed, wiped, and as I was cursing myself because now I was even more behind than I had been before, a most amazing smell started wafting from my oven.  I pulled the tray out, whisked it off to the dining room for a quick photo in the fading light, and took a taste.  Weird.  Interesting.  Not sure.  Waste of time?  Maybe.  And then off to finish out my evening, the Spice Crispies all but forgotten.

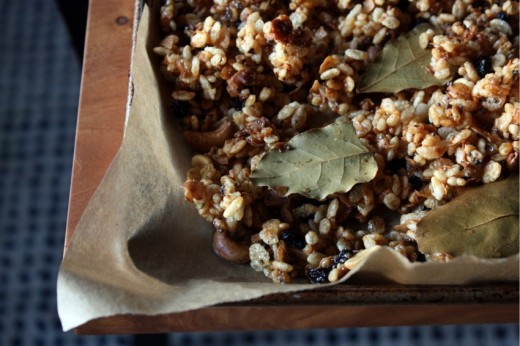
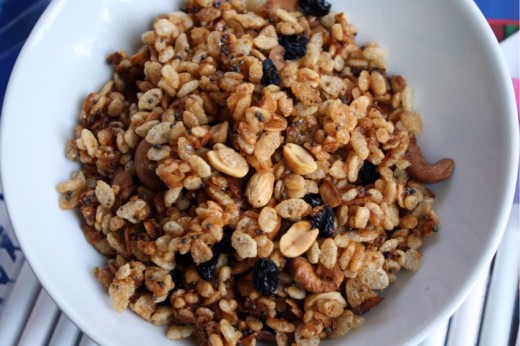
After the class and after the clean-up was over, I remembered that I had stashed the tray in our study and a miraculous thing happened while they cooled completely and set up.  These little clusters of cereal and spice had become something totally addictive and truly tasty.  Even the raisins, which had become hard little nuggets, kind of like what happens to them in oatmeal raisin cookies, had their own unique appeal.  I have a feeling that I am going to get a lot of questions about this little snack mix this weekend – it is intriguing.  I wish I had the time to come up with beautiful metaphors describing the unusual yet delicious flavors in this snack, but I have a task list a mile long for today.  Just trust me when I say that I really should be doing 100 other things rather than writing this post and yet, here I am doing just that.  Have a great weekend.

One Year AgoRoasted Tomato Salad with Croutons, Meyer Lemon Risotto Cakes
Two Years Ago:  Chickpea, Chard, and Couscous Soup, Soba Noodles with Crispy Tofu and Vegetables
Three Years Ago:  Orange Pound Cake

Spice Crispies
Adapted from Food & Wine
Makes about 4 cups

If you want to keep the raisins from getting totally crunchy, I imagine you could add them half way through the baking time. 

2 cups Rice Krispies or other puffed rice cereal (2 ounces)
¼ cup salted roasted cashews
¼ cup salted roasted peanuts
¼ cup wide coconut flakes
¼ cup raisins
3 tbsp. peanut oil
1 tsp. yellow mustard seeds (DT:  I used brown)
½ tsp. fennel seeds
½ tsp. cumin seeds
¼ tsp. crushed red pepper
4 large fresh bay leaves (DT:  I used dried)
3 tbsp. light corn syrup
Juice of half a lemon
½ tsp. kosher salt

Preheat the oven to 325ºF and line a baking sheet with parchment paper.  In a large bowl, toss the rice cereal with the cashews, peanuts, coconut flakes, and raisins.

In a small saucepan, heat the oil until shimmering.  Add the mustard seeds and cook over moderately high heat until they begin to pop, about 1 minute.  Add the fennel and cumin seeds, crushed red pepper, and bay leaves and toast, stirring, until fragrant, about 1 minutes.  Add the corn syrup, lemon juice, and salt and bring to a boil.  Drizzle the hot syrup over the cereal over the cereal and nuts and toss with a spoon until evenly coated.

Spread the mixture on the baking sheet and bake for 25 minutes, stirring once or twice, until the nuts are golden.  Let cool; discard the bay leaves.

(Can be stored in an airtight container at room temperature for up to 4 days.)


« Older Posts