Archive for December, 2011

Big Curry Noodle Pot

December 30, 2011

Randy and I used to get Thai food almost every Friday night for dinner.  Or at least every Friday night that wasn’t a date night.  It was our wind-down from a long week, a break from cooking for me, and something we both enjoyed.  Seattle has great Thai food and there are five or six places nearby that we like.  After a few years of this tradition, I started to feel like the food tasted great but I could just see how unhealthy it was.  The oil slick in the bottom of the noodles dish, the coating on my tongue from the curry.  Tasty but not healthy.  And so, we opted for other food on Friday nights, namely my cooking.

Earlier this week, Graham had surgery for a hernia.  It sounds bad but the truth is that children recover surprisingly quickly from this type of surgery.  He has had one other operation, an umbilical hernia repair.  This was an operation to repair his belly button which was sticking out more than normal – really a cosmetic procedure.  So now, at the grand old age of seven, he has had the same number of surgeries as his 41-year old mother.  (I’ve had 2 c-sections.)

Because the doctors and nurses were so blasé about the surgery and how quickly it would be over and how well he would do, I planned to make dinner.  But of course they did not start on time and the operation took an hour instead of a half, and they kept him in recovery longer because he was having pain.  (The recovery room nurse asked him how he was feeling and he said, “I would feel better if my penis didn’t hurt so much.”)  I got to go back in the OR with him to hold his hand while they put him under with strawberry scented gas and watching his little eyes flutter closed broke my heart.  It became clear, on the eventual drive home, that take-out was our dinner option.  It had been so long since our last Thai dinner that I thought it sounded good.  And it was good.  But after a few bites, I remembered why we stopped our regular practice.  I carefully picked my noodles out of the slick and decided that this was a once in a while treat.

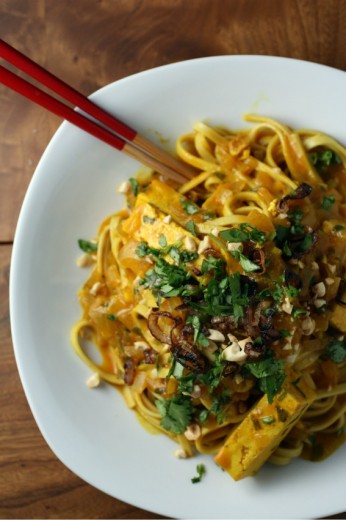
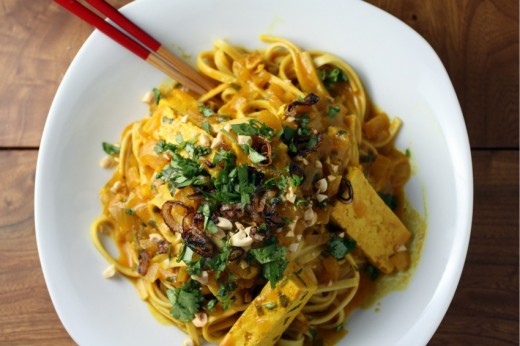
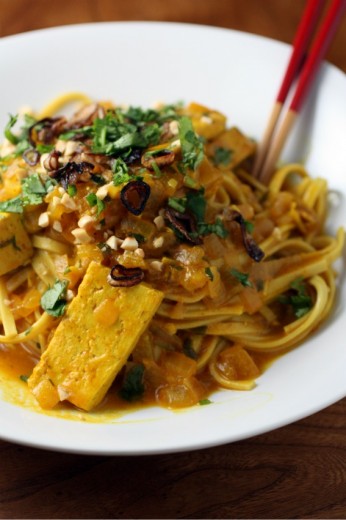
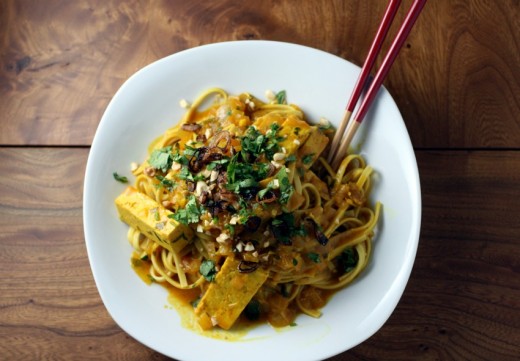
I love those flavors and I love that food, but I don’t love the grease or the stomach ache I often get after eating it.  I have an ever rotating line up of Asian noodle dishes that I love and I’m happy to add this Heidi Swanson recipe to the roster.  Normally I use rice noodles but I appreciated a bit more heft from the wheat based udon noodles in this dish and the sauce was drinkable.  Seriously.  I tweaked a bit.  I added cilantro to the cooked sauce, I sautéed the shallots to almost burnt for the garnish because I don’t like members of the onion family to be raw.  I added a bit less liquid and then second-guessed myself.  All the things you do with a good recipe to make it more to your taste.  Delicious.

 One Year Ago:  Hearty Beans and Rice and Butternut Squash and Cashew Curry
Two Years Ago:  EggNog Pound Cake with Crystal Rum Glaze and Chickpea, Lentil, and Vegetable Stew
Three Years Ago:  Penne with Greek-Style Vegetable Marinade

Big Curry Noodle Pot
Adapted from Super Natural Cooking
Serves 3-4

2 tbsp. coconut oil or vegetable oil, divided
2 medium shallots, sliced into thin rings
Kosher salt
8 ounces dried Asian style wide noodles, such as udon
1 onion, chopped
2 garlic cloves, minced
2 tsp. Thai red curry paste
12 ounces extra-firm tofu, cut into thumb-sized slices
1 14-ounce can coconut milk
1½ cups water
2 tsp. ground tumeric
2 tbsp. shoyu sauce, or other soy sauce
1 tbsp. light brown sugar
Juice of 1 lime
¼ cup peanuts, chopped
½ cup cilantro leaves, chopped, divided

Place a large saucepan over medium-high heat.  Add 1 tablespoon of the coconut or vegetable oil, then add the shallots.  Allow to cook undisturbed until golden brown on the underside, about 3 minutes.  Flip over and cook for another 1-2 minutes, until very brown.  Tip out onto a paper towel lined plate and season with salt.  Set aside.

Return saucepan to the burner and reduce heat to medium.  Add the other tablespoon of oil and then add the onions.  Cook for five minutes, then add the garlic and red curry paste.  Mash the paste around in the pan to distribute it evenly.  Cook until nice and fragrant, just a minute or two.  Add the tofu and gently stir until coated with the curry paste.  Stir in the coconut milk, water, tumeric, soy sauce, and sugar, bring to a simmer, and simmer gently until the sauce gets nice and thick, about 20 minutes.  Stir in half the cilantro leaves and the lime juice.

Meanwhile, cook the noodles in plenty of salted water according to the package directions.  When they are just shy of done, use tongs to transfer them directly to the saucepan with the curry sauce.  Stir in the lime juice.  To serve, heap big piles of noodles into individual bowls and top with a generous ladle of the sauce.  Top with peanuts, shallots and the remaining cilantro.


Soup for Later

December 23, 2011

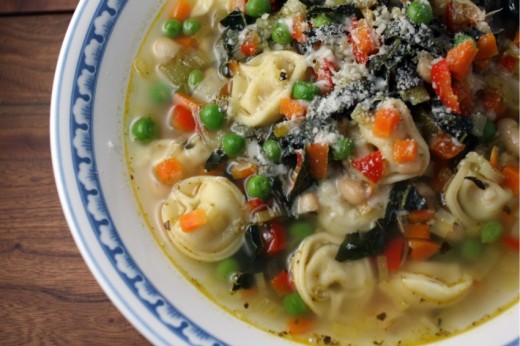
This soup recipe?  It’s not for now.  Now is roast and potatoes, or maybe ham or maybe duck.  It’s figgy pudding and sticky toffee pudding, and maybe a Bûche de Noël.  If you come to the house where we celebrate Christmas, it is exactly the same dinner as Thanksgiving, minus the pumpkin pie.  Or perhaps now is latkes and donuts in which case, can I come over?

Now is cookies and treats and presents and stockings and dreidels and gelt.  Now is wrapping and bows and lights and songs and menorahs.  Now is not soup.  But soon it will be soup.  Soon it will be over-full and clean-up and let-down and you will want some soup.  Soup that has nothing to do with ho ho ho or Hanukkah Harry.

I’m not being pessimistic.  I don’t want any of this to be over.  I just know how I feel on December 26th and I know I will want soup.  You might too.

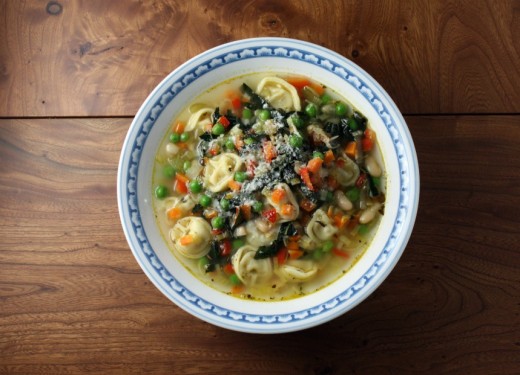
I’m a Jewish girl who grew up in a suburb of Seattle.  So I feel kind of funny calling a Minestrone Soup a Dana Treat original.  It started as a soup from a magazine whose font I don’t recognize (Sunset maybe?) and I have changed so many things about it that I call it mine now.

One Year Ago:  Chocolate Coffee Cake, Scalloped Chocolate Pecan Strip

Minestrone Genovese
Dana Treat Original
Serves 6-8

I’ve made this with all different vegetables (zucchini is nice in the summer) and different pastas.  To make a lighter soup, I use a small pasta, like an orzo or a ditalini.  If you do so, use about a cup of dried pasta and cook it directly in the soup.  About 10 minutes before you are going to serve it, bring the soup back up a boil and add the pasta.  Cook through and serve.

10 ounces cheese tortellini
Olive oil
2 large leeks, washed well, cut in quarters and thinly sliced
2 large carrots, peeled, cut in ¼-inch dice
2 large stalks celery, cut in ¼-inch dice
1 tsp. dried oregano
Kosher salt and freshly ground black pepper
1 15-ounce can white beans, drained
2 quarts (8 cups) vegetable stock
5 large leaves kale, leaves stripped off the vein, and finely chopped
1 cup frozen peas
2 tbsp. pesto, homemade or store-bought, plus more for serving
Parmesan cheese, for serving (optional)

Bring a large pot of salted water to a boil.  Add the tortellini and cook according to the package instructions.  Be sure to cook them just to al dente.  Drain and set aside.

Place the same pot over medium heat.  Drizzle in just enough olive oil to coat the bottom of the pot.  Add the leeks, carrots and celery.  Sauté, stirring occasionally, until vegetables are starting to soften, about 5 minutes.  Add the oregano, a large pinch of salt, and a few grinds of pepper.  Cook for another 5 minutes, taking care the the leeks don’t burn.

Add the white beans, give everything a good stir, then pour in the stock. bingo-game.org   Bring the soup to a boil, then reduce the heat to a simmer.  Cook stirring occasionally, until the vegetables are very tender.  Add the kale and cook until wilted, about 5 minutes.  Add the tortellini and peas and cook just until heated through.  Spoon in the pesto and give everything a good stir.  Taste and add more pesto, salt, and/or pepper to taste.

Serve in shallow bowls garnished with Parmesan cheese.  Pass more pesto and cheese at the table.


My First Buche de Noel

December 22, 2011

I’m going to keep this short and sweet because, chances are, if you are still looking for a dessert for your holiday table, you need it now and don’t have extra time to read a long post from me.  Am I right?

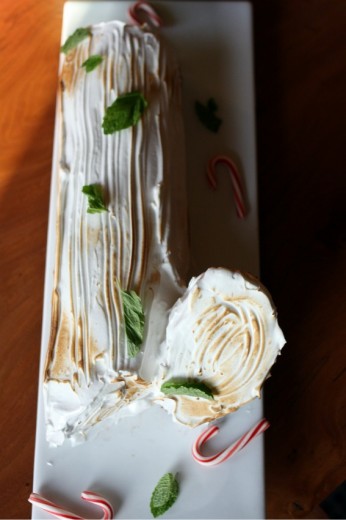
This is actually, technically, my second Bûche de Noël.  I made the first one, the exact same recipe, earlier this month for a party we hosted and I meant to take a photo of it then and post about it so you would have plenty of time to decide whether or not this was the dessert for you.  Alas, things don’t always happen as we plan.  And sometimes I write run-on sentences.  So I made it again for another party this past Saturday.  I meant to post about it on Sunday but then this bug hit our house and it seems to enjoy taking its time attacking us one by one.

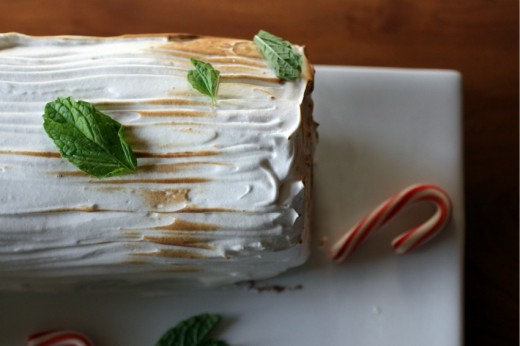
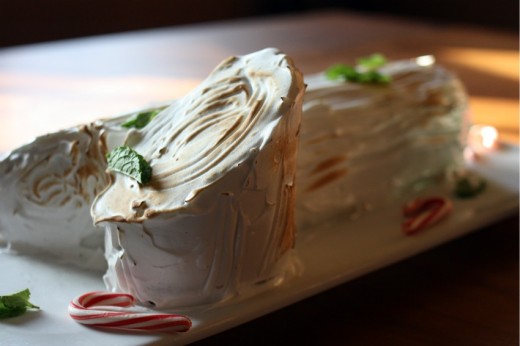
So here we are.  This is an easy cake – a very easy way to get lots of ooohs and aaaahs.  You will need a jelly roll pan and ideally a torch although the latter is not totally necessary.  If you have patience, you will be making chocolate leaves and if you don’t you will not.  (I chose not but I will include the how-to below).  Buy the best peppermint ice cream you can because that is the flavor that comes through most clearly.  The cake is very mild and the frosting is just sweet.  The chocolate sauce is divine though, of course.  Next year I will make a more involved Bûche, one with a chocolate ganache and homemade meringue mushrooms, and pistachio “moss”.  This was a good start though.

One Year Ago:  Holiday Biscotti with Pistachios and Cranberries
Two Years Ago:  Peanut Butter (or Caramel) Mini Candy Brownie Cups
Three Years Ago:  Ultimate Ginger Cookies (Ina calls them ultimate, I say not as my new favorites)

Frozen Chocolate-Peppermint Bûche de Noël
Bon Appétit
12 to 14 servings

Sauce
8 ounces bittersweet chocolate (do not exceed 61% cacao), chopped
¾ cup heavy cream

Chocolate leaves
3 ounces bittersweet chocolate (do not exceed 61% cacao), chopped
10 fresh camellia leaves or lemon leaves, wiped clean with a damp cloth

Cake
Nonstick vegetable spray
1 cup sugar, divided
¾ cup cake flour
¼ cup natural unsweetened cocoa powder
1 tsp. baking powder
¼ tsp. salt
4 large eggs, separated
2 tbsp. vegetable oil
2 tbsp. water
1 tsp. vanilla extract
1/8 tsp. cream of tartar
2 pints peppermint ice cream
1/3 cup coarsely crushed red-and-white peppermint candies or candy canes

Meringue and decorations
5 large egg whites
¼ tsp. cream of tartar
¾ cup sugar
½ tsp. vanilla extract
Fresh mint leaves
Small candy canes

Sauce
Place chocolate in medium microwave-safe bowl.  Bring cream to simmer in small saucepan.  Pour cream over chocolate.  Let stand 1 minutes, then whisk until melted and smooth.  (Can be made 1 week ahead.  Cool cover, and chill.  Rewarm, uncovered, in microwave in 15-second intervals and whisk before using.)

Chocolate leaves
Stir chocolate in small saucepan over low heat until melted and smooth.  Remove from heat.  Using pastry brush, brush chocolate on underside (veined side) of 1 leaf to coat completely (do not allow chocolate to drip over edge of leaf).  Place leaf, chocolate side up, on small foil-lined baking sheet.  Repeat with remaining leaves.  Chill, uncovered, until chocolate is cold and firm, at least 1 hour.  Working with 1 leaf at a time, carefully peel green leaf away from chocolate.  Return chocolate leaf to same sheet; discard green leaf.  (Can be made 3 days ahead.  Cover with plastic wrap and chill.)

Cake
Position rack in center of oven and preheat to 375ºF.  Line 15x10x1-inch baking sheet with parchment.  Coat paper with nonstick spray and dust with cocoa.

Sift ½ cup sugar, cake flour, ¼ cup coca, baking powder, and salt into small bowl.  Using electric mixer, beat egg yolks in large bowl until thick.  Beat in oil, 2 tablespoons water, and vanilla.  Gradually add dry ingredients, beating just until blended.  Using clean dry beaters, beat egg whites and cream of tartar in medium bowl until soft peaks form.  Gradually add remaining ½ cup sugar, beating until stiff but not dry.  Fold ¼ of whites into yolk mixture to lighten.  Fold in remaining whites in 2 additions.  Spread batter evenly in prepared pan.

Bake cake until puffed and tester inserted into center of cake comes out clean, about 12 minutes.  Cool cake in pan on rack 10 minutes.  Sift light layer of cocoa powder over large smooth kitchen towel (not terrycloth).  Cut around pan sides.  Turn cake out onto prepared towel, leaving 3-inch cloth border on 1 long side.  Peel off parchment.  Starting at 1 long side with cloth border and using cloth as aid, roll up cake in towel (towel will be rolled up inside).  Place cake, seam side down, on work surface; cool completely.

Microwave ice cream in 10-second intervals until barely softened.  Unroll cake on work surface but leave on cloth.  Dollop ice cream over cake by spoonfuls.  Gently spread ice cream in an even layer, leaving 1-inch plain border on long side opposite cloth border.  Sprinkle ice cream with crushed candy.  Using cloth as aide and starting at cloth order, roll up cake, enclosing ice cream in cake.  Place cake, seam side down, on long platter; cover with plastic wrap.  Freeze cake at least 8 hours or overnight.

Meringue
Using electric mixer, beat egg whites and cream of tartar in large bowl to soft peaks.  Gradually add sugar, beating until still but not dry.  Bean in vanilla.

Cut off 1/8 of cake at angle at 1 end.  Press cut off part onto center of 1 side of log, cut side in.  Spread meringue all over top, sides and ends of cake.  Using fork, make long grooves in meringue down length of cake and in circles on ends to resemble tree bark.  Freeze cake until meringue is cold and firm, at least 3 hours.  Using torch, brown meringue in random spots.  Return cake to freezer.  (Can be made 2 days ahead.  Keep frozen.)  (DT:  I found I was not able to cover the cake because it stuck to the meringue so I just kept it in the freezer uncovered.)

Garnish cake with chocolate leaves, fresh mint, and small candy canes.  Cut cake crosswise into 1-inch wide slices.  Drizzle with warm chocolate sauce.


My Favorite Gingerbread Cookies

December 20, 2011

Before I tell you about these very most favorite of cookies and before I tell you about the post I just deleted, I am happy to tell you that my January, February, and March classes have been announced!  In January’s class, we will be taking some of the most basic foods – pizza, salad, chocolate chip cookies – and making them the very best that we can.  In February, we will be celebrating the winter bounty (yes, I said bounty) that our Pacific Northwest soil brings to us with dishes like shepherd’s pie and beets in a lovely horseradish sauce.  And in March, we will be learning more about Indian food.  Space is very limited, so please let me know soon if you would like a spot.  More information can be found here.

So yes, I deleted a post on purpose.  I was composing a list of the Things You Can Do To Greatly Improve the Flavor of Your Food and I realized, when it was almost done, that I sounded awfully bossy.  At this time of year, when you are likely feeling a little pressure, a little stressed, that you probably didn’t need bossy me telling you what you should and should not be buying and eating.  So we will save that list for another time.

But.  I do have to very gently suggest that you think about your spice rack for a moment.  How old is your cinnamon?  Your ginger?  Your cloves?  If the answer is more than a year or two old, or certainly if you can’t remember when you bought them, I would very gently suggest that you throw away those spices and start over.  Here is the advice I give to students in my classes:  Keep the jars, dump out the contents, and replace with fresh (bulk) spices bought from a reputable place.  In Seattle, you can get terrific spices from World Spice Merchants (also available online), Market Spice and Penzey’s (also available online).  The cost is so low and the payoff is so big.  I can’t tell you what a difference new and fresh spices make in your cooking and baking, especially in a cookie as special as this one.

Every so often I post something here and marvel that I have never told you about it before.  How can this be my fourth Christmas season writing this blog and only the first time mentioning the best gingerbread cookie I have ever tasted?  Who knows.  Sometimes I just can’t make it all work.  Last year, when my baking list was a mile long and I had to be as efficient as possible, I left this cookie off the list.  For some reason, I got it in my head that they were too much work for a super busy season and off they went.  For shame.  They really aren’t any more work than anything else and they are the spiciest most perfectly textured gingerbread ever.  And they are pretty.

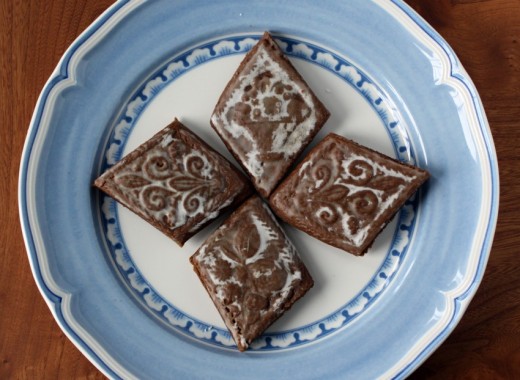
This is a recipe from Tartine.  To make the cookies look pretty, you will need a Springerle rolling pin or plaque.  The first year I made this cookie, I trekked down to the Pike Place Market to the original Sur la Table (did you know it started in Seattle?) with the intention to buy a pretty rolling pin.  I am totally one of those people who can’t seem to find time to fold the laundry but can somehow create time to go and purchase an item in an out of the way spot.  Amazon was not an option at that point or not one I knew about.  Anyway.  When I saw that the rolling pins were pricey, and really single use, I decided to go for more of a tile.  Now a quick search on Amazon (I don’t have an affiliate program with them – they just have the best online selection) will turn up all sorts of options.

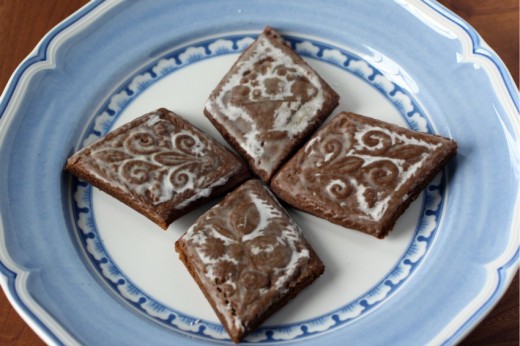
Of course you can just roll out the dough and use your favorite cookie cutters and dispense with pretty.  We made a couple of gingerbread men with the scraps of the dough and I assure you that they taste no worse than the pretty diamonds you see above.

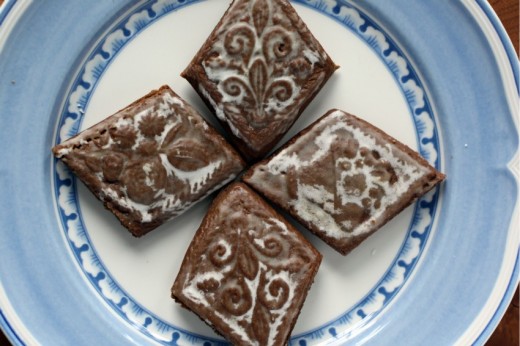
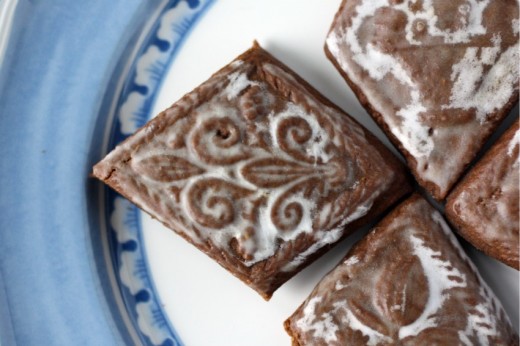
A few words of advice.  I’ve never made these with a textured rolling pin but if you own or buy a plaque like I have, I can tell you how best to work with this dough.  I roll out the refrigerated dough, press the mold very firmly into the dough, and then use a paring knife to cut around the mold.  Repeat until the dough is used up, re-roll scraps once.  I bake those large diamonds on a baking sheet and as soon as they are out of the oven, I use a larger knife to cut each big diamond into smaller ones.  You do this while the dough is still soft and it gives you a sharper edge then if you cut them separately before baking.  I would imagine that any mold you use will work well using this technique.  Some of my diamonds really held the imprint of the mold and others, not so much.  Don’t worry – they all taste the same.  I have made both the easy and the slightly less easy versions of the icing and I would stick with easy (powdered sugar and water and no candy thermometer).  Just be sure to sift your powdered sugar so you don’t get any lumps.

One Year Ago:  Cranberry Walnut Braid
Two Years Ago:  Smoked Tofu, Le Puy Lentil, and Spinach Salad
Three Years Ago:  Glazed Butter Cookies

Soft Glazed Gingerbread
Tartine
Makes 12 to 20 cookies depending on size of cutters

I’m keeping it simple by just copying the recipe as written in the book.  Feel free to use my tips above or not.  Also, I’m not including the more complicated icing because it’s truly not worth the effort.

Dough
3¾ cups all-purpose flour
1 tbsp. cocoa powder
4 tsp. ground ginger
1½ tsp. ground cloves
2 tsp. ground cinnamon
½ tsp. baking soda
1 tsp. salt
1¼ tsp. black pepper, freshly ground
1 cup (8 ounces) unsalted butter, at room temperature
¾ cup + 2 tbsp. granulated sugar
1 large egg
½ cup blackstrap or other dark molasses
2 tbsp. light corn syrup

Glaze
1 cup confectioners’ sugar
2 tbsp. water

To make the dough, stir together the flour, cocoa powder, ginger, cloves, cinnamon, baking soda, salt, and pepper in a mixing bowl.  Set aside.  Using a stand mixer fitted with the paddle attachment, beat the butter on medium-high speed until creamy.  Slowly add the granulated sugar and mix on medium speed until the mixture is completely smooth and soft.  Stop the mixer and scrape down the sides of the bowl with a rubber spatula as needed.  Add the egg and mix well.

Add the molasses and corn syrup and beat until incorporated.  Stop the mixer again and scrape down the sides of the bowl.  Add the flour mixture and beat on low speed until a dough forms that pulls away from the sides of the bowl and all the ingredients are well incorporated.  Remove the dough from the bowl,  flatten it on a large piece of plastic wrap into a rectangle about 1 inch thick, cover the dough with the plastic wrap, and refrigerate overnight.

Preheat the oven to 350ºF.  Line a baking sheet with parchment paper or a nonstick liner.

Unwrap the dough and place on a floured work surface.  If using a plaque with a design, roll our the dough 1/2-inch thick, lightly dust the op with flour, press your cookie molds over the dough, and then cut out the shapes with a small knife and place on the prepared baking sheet, spacing them about 1 inch apart.  Alternatively, using the mold as a guide, cut around it with a small knife, flip the mold over so the design is facing you, and place the dough over it, pressing it into the design.  Unmold the shapes onto the prepared baking sheet, leaving about 1 inch between them.

If using a patterned rolling pin, lightly dust the lined baking sheet with flour and transfer the dough to the pan.  Lightly dust the top of the dough with flour and roll it into a rectangle about 1/3 inch thick with a plain pin.  Then, using the patterned pin, roll over the dough with enough pressure to ensure a clear impression of the design.  Trim the sides with a small knife.  It is not necessary to cut into smaller sizes before baking.

Bake the cookies until lightly golden along the sides but still soft to the touch in the centers, 7 to 15 minutes.  the timing will depend on the size of the individual cookies, or if you have made a single large patterned piece that will be cut after baking.

While the cookies are baking, prepare the glaze.  In a small bowl, whisk together the confectioners’ sugar and water utnil smooth.

When the cookies are ready, remove from the oven and let cool on the pan on a wire rack for about 10 minutes.  Then, while the cookies are still warm, using even strokes, brush a light coat  of glaze on the top of each cookie, evenly coating it.  Let the cookies cool completely.  When the glaze dries, it should leave a shiny opaque finish.  If you have a used a patterned rolling pin to make a single large plaque, cut into the desired shapes with a small very sharp knife.  The cookies will keep in an airtight container in a cool place for about 2 weeks.


Spicy Squash and Feta Puff Pastry Tarts

December 17, 2011

For my December baking class, I taught my students how to work with store-bought filo dough and puff pastry.  We also made no-knead bread, a gorgeous beet tart, and that incredible brown sugar pound cake.  For the puff pastry, I was planning on doing some classic riff on butternut squash, leeks, and thyme.  Until I flipped through the appetizer section of a new-to-me cookbook and found a version using squash, spicy harissa, and feta cheese.  Hello?  Hello!

I tested the recipe for a party we threw for Randy’s work.  I tweaked it a bit.  I wondered if it would be too spicy or too out-there for a group of people I didn’t really know.  It was one of those times when I put the plate of mini-tarts out, turned my back for a moment or two to finish something at the stove, turned back around to find them gone.  Gone.  I got more comments on those little tarts than I did on anything else I made for that night (including a very cool Bûche de Noël – recipe coming soon).

When I made them for the party, I used my default favorite squash – the delicata.  I love those little guys for their ease of preparation (you don’t have to peel them) and for their subtle flavor.  But I didn’t like how the slices looked on the tart and I think the flavor got lost.  When I made them for the class (and the subsequent times after – yes, I’ve made them three times in two weeks), I used butternut.  I advise looking for a squash with a long neck since the slices you get from the neck are more uniform than the ones you get from the body.  Unless you are able to find a very small squash, you will likely have leftovers.  Personally, having a little stash of roasted squash in my refrigerator to add to all manner of things (risotto, pasta, soup, salad), makes me very happy.

Now permit me a paragraph of utter geekdom as I talk about store-bought puff pastry.  Having used it for years and now having taught how to work with it to several classes, I know a thing or two about it.  Let’s start with the fact that you don’t want to use Pepperidge Farm if you can possibly help it.  I know it is widely available and I know it is cheap, but I also know that puff pastry should only contain three ingredients (flour, butter, and salt), and possibly four (sugar).  Pepperidge Farm not only is not an all-butter puff, it is a no-butter puff.  There is a long list of ingredients on the side of the package, not one of them is butter and most of them I can’t pronounce.  So unless that is your only option, steer clear.  In Seattle, we are lucky to have two excellent sources of store-bought puff – DeLaurenti and Grand Central Bakery.  Both are affordable and terrific and only contain the three or four ingredients I mentioned.  Nationally, Trader Joe’s carries puff pastry seasonally, and that season is right now.  I tried it for the first time recently and found it to be fine.  Not terrific but good, four ingredients, affordable.  So stock up!  One other option if price is not an issue is DuFour, an exquisite puff that comes with the exquisite price tag of $16/pound.

Each type of store-bought puff (and yes, I am aware on into my second paragraph of geeking out) comes in a different amount, so be flexible when working with this recipe.  I call for 12 ounces because I tested it using the DeLaurenti brand and theirs comes in a 12-ounce sheet.  Yours might be different.  It’s all good – just roll with it.  No pun intended.  Also, remember you can make these lovely spicy pastries bite-size or larger for more of a substantial first course.  You could even serve them as a main course.

One Year Ago:  Sweet & Salty Brownie
Two Years Ago:  Caramel Chocolate Treasures
Three Years Ago:  Jalapeño Cheddar Cornbread

Spicy Squash and Feta Puff Pastry Tarts

Inspired by Vegetarian
Makes about 16-32 tarts (depending on how you cut them)

1 medium butternut squash, preferably one with a long neck
Olive oil
Kosher salt
7 ounces Fage 2% Greek yogurt
1-2 tbsp. harissa
7 ounces feta cheese, 2 ounces crumbled finely, 5 ounces cut into small cubes
12 ounces all-butter puff pastry
4 thyme sprigs, leaves stripped

Preheat the oven to 375F.  Peel and seed the squash.  Split the neck in half and thinly slice into semi-circles.  Slice the base into thin crescents.  Put all the squash onto a large baking sheet and drizzle with olive oil and a large pinch of salt.  Use your hands to mix together well.  Spread out on the sheet and bake for 25 minutes, or until tender.  Remove from the oven and allow to cool.

Mix together the Greek yogurt, 1 tablespoon of the harissa, and the 2 ounces of crumbled feta.  Taste it and add more harissa if you would like more heat. Set aside.

Unfold the puff pastry onto a lightly floured surface.  Roll it out with a rolling pin, just to even out the folds and to make an even rectangle.  Using a pizza cutter or a sharp knife, cut into 16 rectangles.  If you are making cocktail sized appetizers, cut each rectangle in half.

Transfer the rectangles to two baking sheets.  Spoon about a tablespoon of the yogurt mixture onto each rectangle and top with a slice of squash.  Add one or two cubes of feta to each pastry.  Repeat with the remaining rectangles.  Sprinkle them all with thyme and bake in the oven for 15-20 minutes until puffed and golden.  Serve warm or cool the tarts on a wire rack.


« Older Posts