Category: Party Food

Sweet and Salty Popcorn

March 7, 2011

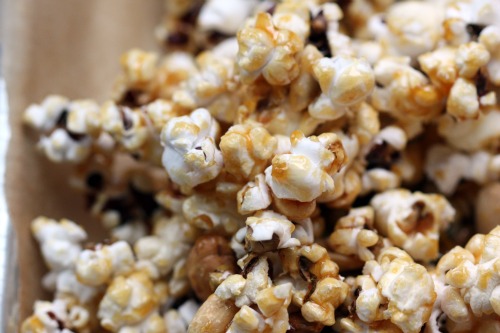
This is Sweet and Salty Popcorn with Orange Blossom Honey and I have three very good things to say about it.

1) It forced me to finally, finally, make real popcorn.  You know, like with kernels, oil, a pot, and a stove.  We eat a lot of popcorn in our house and I’m ashamed to say that it is of the microwave variety.  I know the real stuff is better and I can’t really explain why I never made it.  Let’s just say that I gave myself a giant palm to the forehead and move on.

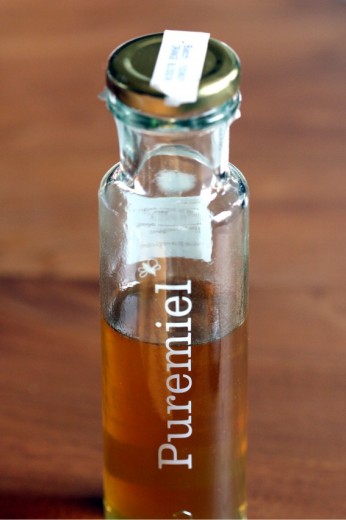
2) I discovered orange blossom honey.  I am a huge fan of honey and I buy all different kinds.  I didn’t expect to be able to find orange blossom honey here because we are far far away from the nearest orange tree.  There is a small cheese shop in the new-ish Melrose Building that carries some treasures and it was there that I unexpectedly found this beautiful bottle.   I’ve never met a honey I didn’t like but I might even venture to say this is my favorite.

3) This is one sweet and savory bowl of yum.  Like you eat several handfuls of it before you know what you are doing.  And then you eat some more.

Do you sense a “but” coming?  Not a “but”, maybe but an “I think you should know”.  This stuff is sticky.  Like really sticky.  Like it just wants to form itself into one giant popcorn ball which, come to think of it, wouldn’t be so bad.  After it cooled, I ran my hands through it  and separated it out into manageable pieces and put it in a bowl.  Then, about 10 minutes later, I had to do it again.  And again.  And again.  You might sense a pattern here.

Now, to be fair, I wasn’t super strict about the measurements.  I roughly 1½’ed the recipe and it could be that I actually used too much honey for the amount of popcorn.  Who knows.  I would just suggest you make this for people who you know – people who won’t mind you running your hands through their popcorn periodically.

This recipe comes from The Essential New York Times Cookbook.  Several months ago, Amanda Hesser was in Seattle promoting the book and I went to an event to hear her speak.  She is funny and self-deprecating and all in all delightful.  Afterward, she signed my book.  I told her that I have about 150 cookbooks and that her Cooking for Mr. Latte was on my high rotation shelf.  So she signed my copy “For Dana – hope this one finds a spot in your ‘high rotation’.  Enjoy!”  Cute, huh?

One Year Ago: Tofu Cauliflower Kahri
Two Years Ago: Butternut Squash and Apple Galette and Goat Cheese Ravioli with Roasted Red Pepper Sauce

Sweet and Salty Popcorn with Orange Blossom Honey
Adapted from The Essential New York Times Cookbook
Serves about 6

Hesser instructs you to keep your popcorn and nuts warm in a 250ºF oven which sounded weird to me, so I didn’t do it.  Maybe this is why mine was sticky.  She also instructs you to use the salt on the popcorn but in my experience, salt does not stick well to popcorn.  I added mine directly to the honey mixture and it came out great.

6 cups popped popcorn
1 cup salted roasted nuts (one kind, or a mixture; optional)
½ cup sugar
1/3 cup orange blossom honey
1 tsp. coarse salt

Place the popcorn and nuts in a large bowl.  Line a baking sheet with parchment paper.

Pour the sugar into a small heavy saucepan and place over medium-low heat.  When the sugar is melted and a light caramel color, add the honey and stir until smooth and liquid.  Stir in the salt and remove from the heat.

Pour the syrup over the popcorn mixture.  Using a rubber spatula and working quickly, stir the popcorn so the honey coats as much of it as possible.  Spread onto the prepared sheet and let cool.  Break into large or small pieces and store in an airtight tin.


Gingerbread with Maple Cream Cheese Frosting

January 11, 2011

On Saturday night, we had a little party.  It was to celebrate Randy’s birthday, the new year, and some fairly big news in our family (once again, I am not pregnant).  We have some friends who own a very cool art gallery.  Over dinner with them one evening, we threw out the idea of having a gathering there.  Being the lovely and accommodating people they are, not to mention the fact that they are both gorgeous and ridiculously talented, they thought it was a great idea.  We invited our nearest and dearest, I got some catering and organizational assistance from my good friend Julie, and a lovely time was had by all.  I hope.

The gallery has a kitchenette but does not have an oven or stove.  That means that all the food served has to be room temperature or cold.  Since we didn’t have seating, we wanted everything to be pick-up-and-eat food so that people did not have to worry about how to manage plate, fork, napkin, and drink.  Add to that, party time was 7pm.  People need to have dinner if it is 7pm.  5:30, appetizers are fine but by 7 folks are hungry.  I have to say I struggled with my menu.

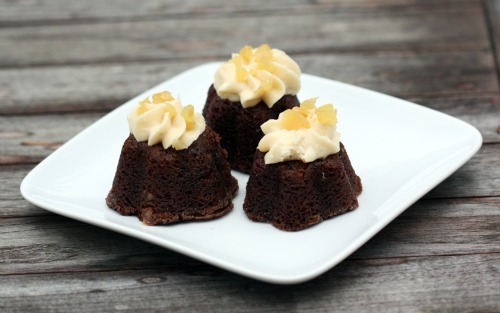
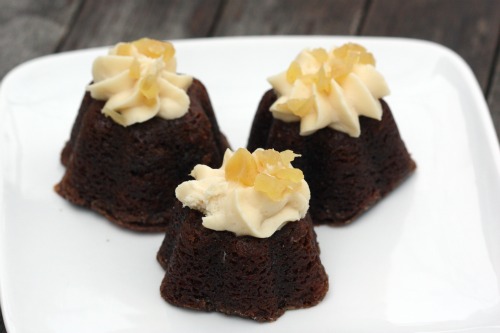
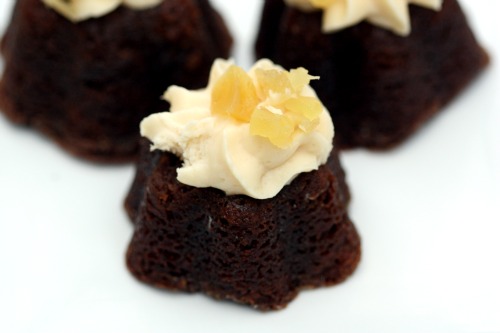
But!  There is always dessert.  I toyed with the idea of doing a big cake, but decided in the end to keep the easy to pick up food theme going.  I made small versions of those amazing chocolate chip cookies (and was told by more than one person that it was the best they had ever tasted), mini lemon tartlets, and these mini gingerbread bundt cakes.  One of Randy’s favorite things in the world is ginger.  He loves ginger cookies and his favorite cake is gingerbread.  I have a few mini bundt cake pans and a terrific recipe for gingerbread, so it seemed like a no-brainer to make these little guys.

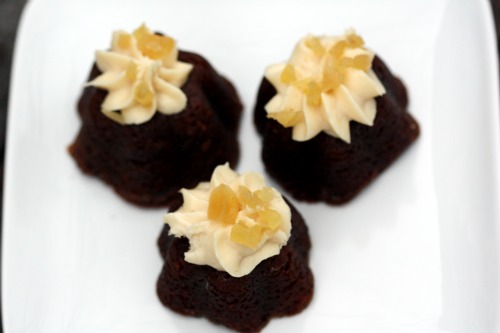
When I make the gingerbread in a standard bundt pan, I just dust the finished cake with powdered sugar.  For this party, I felt we needed something a little fancier.  I made a maple cream cheese frosting – super simple and a nice compliment to the ginger.  Each cake was garnished with some chopped candied ginger.  Now, this is some serious gingerbread.  There is a full cup of Guiness and a full cup of molasses in there, along with a very healthy amount of spices.  I would call it “grown-up” gingerbread if my six year old hadn’t inhaled a left over piece this evening.  Ahem.  If your eyes have glazed over at any point during this post, now would be the time to perk up.

Grease and flour your pan(s).  I know this.  I know the batter is thin and incredibly sticky and I know you can never trust a non-stick coating when it comes to bundt cakes.  I got lazy.  Everyone has their kitchen tasks that they hate and one of mine is greasing pans.  The idea of coating 24 mini-bundts with shortening and flour (my method of choice) was too much to contemplate so I crossed my fingers.  And guess what?  Prying completely stuck-on cake from 24 mini-bundts, washing each of them thoroughly to remove all traces of said cake, and remaking the entire recipe is much more time consuming than just greasing the pans to begin with.  Trust me.

Grammercy Tavern Gingerbread
Gourmet

Since most people probably do not have 24 mini bundt pans (it’s really just two pans with 12 slots each), I’m just giving the original recipe.  It says that the cake serves 8-10 but that can’t be right if I was able to get 24 individual servings (plus a mini-loaf pan) without even doubling the recipe.  And I apologize that the directions in this recipe are running together.  Not quite sure what is going on there.

1 cup oatmeal stout or Guinness Stout
1 cup dark molasses (not blackstrap)
1/2 teaspoon baking soda
2 cups all-purpose flour
1 1/2 teaspoons baking powder
2 tablespoons ground ginger
1 teaspoon ground cinnamon1/4 teaspoon ground cloves
1/4 teaspoon freshly grated nutmeg
Pinch of ground cardamom
3 large eggs
1 cup packed dark brown sugar
1 cup granulated sugar
3/4 cup vegetable oil
Powdered sugar or Maple Cream Cheese Frosting (recipe follows)

Preheat the oven to 350ºF.  Generously butter a 10-inch (10 to 12 cup) bundt pan and dust with flour, knocking out excess.
Bring stout and molasses to a boil in a large saucepan and remove from the heat.  Whisk in baking soda, then cool to room temperature.
Sift together flour, baking powder, and spices in a large bowl.  Whisk together eggs and sugars.  Whisk in oil, then molasses mixture.  Add to flour mixture and whisk until just combined.
Pour batter into bundt pan and rap pan sharply on counter to eliminate air bubbles.  Bake in middle of oven until a tester comes out with just a few moist crumbs adhering, about 50 minutes.  Cool cake in pan on rack for 5 minutes.  Turn out onto rack and cool completely.  Either serve dusted with powdered sugar or with Maple Cream Cheese Frosting.
Maple Cream Cheese Frosting
1 8-ounce package cream cheese, room temperature
¼ cup (½ stick) unsalted butter, room temperature
¾ cup powdered sugar
¼ cup maple syrup
¾ tsp. vanilla extract
Beat cream cheese and butter in large bowl until smooth.  Add powdered sugar, maple syrup, and vanilla extract; beat until smooth.


Herbed and Spiced Goat Cheese Balls

January 9, 2011

I’m really late in saying this but Happy New Year!!  I’m curious – what did you all do?  We were lucky enough to have a night out this year.

I spent my 20’s feeling like New Year’s Eve was Very Important.  I had to be doing just the right thing, otherwise it was disappointing.  The problem is, I never figured out what just the right thing was so I was always disappointed.  I spent Y2K in an uncomfortable skirt, heels that were too high, at a very expensive party where they ran out of wine by 9:30, wondering why I didn’t lower my expectations a little.

Once I did, New Year’s became just another fun night out.  Or in.  Some of the best that I have spent have been with close friends in someone’s home.  Since having kids, going out has become a little trickier.  Our babysitters all have social lives and often they include big plans for the big night.  Occasionally, Randy’s parents come to town right after Christmas and we have built in babysitters.  Such was the case this year.

My friend Julie rallied a small group of us and we had a 9:30 reservation at a local favorite Cantinetta.  I like to eat late but 9:30 is pretty extreme for Americans.  We decided to have everyone come over to our house for a nibble and a glass of champagne.  Knowing a big dinner was on the horizon, I wanted to make something relatively small and light but substantial enough to hold us until dinner was served.  I also had a lot of cooking in my future and didn’t want to spend a whole lot of time on a nibble.

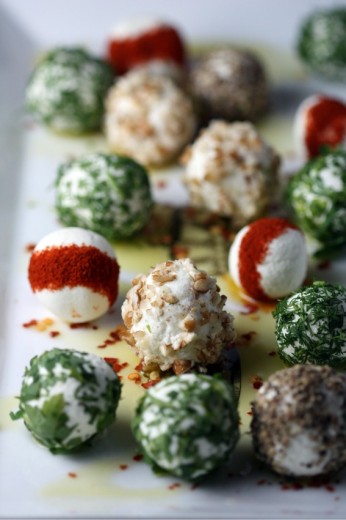
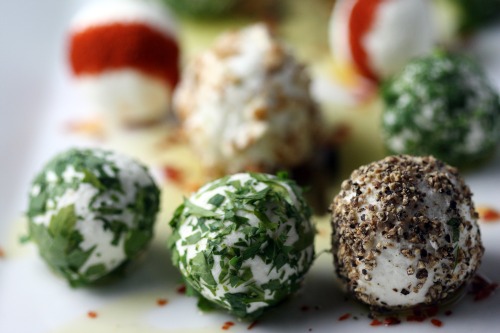
Because we entertain a lot and because I have catered several parties, I have a lot of appetizers in my back pocket.  But nothing seemed right.  In those cases, I turn to Martha Stewart and as usual, she had the perfect thing.  These little balls of goat cheese are about marble size and take no more than 10 minutes to prepare.  You can really roll them in anything.  I chose some things I had on hand – parsley, dill, pecans, black pepper, and took her advice for rolling them in paprika to get that stripe.

One Year Ago: Petites Pissladières
Two Years Ago: Poblano and Cheddar Stuffed Mushrooms

Herbed and Spiced Goat Cheese Balls
Adapted from Martha Stewart’s Hors d’Oeuvres Handbook
Makes about 3 dozen

1¼ pounds soft goat cheese
2 tbsp. finely chopped parsley
2 tbsp. finely chopped dill
2 tbsp. finely chopped pecans
1 tbsp. freshly cracked black pepper
2 tsp. paprika
2 tbsp. olive oil
1 tsp. red pepper flakes

Line a baking sheet with parchment paper.  Form 1 tablespoon of the goat cheese into a small ball.  Transfer to the baking sheet.  Continue with the remaining cheese.  Refrigerate the balls for 10 minutes to set slightly.

In separate bowls, place the parsley, dill, pecans, and pepper.  Roll several balls in each of the coatings and set aside.  To make the paprika band, sprinkle the paprika in a straight thin line on a cutting board.  Straighten the edges of the paprika with a knife.  Roll some of the balls down the line to form the paprika strip.

Pour the olive oil onto a serving platter.  Sprinkle the oil with the red pepper flakes.  Arrange the goat cheese balls on the platter and serve with toothpicks.


Healthier Macaroni and Cheese

December 5, 2010

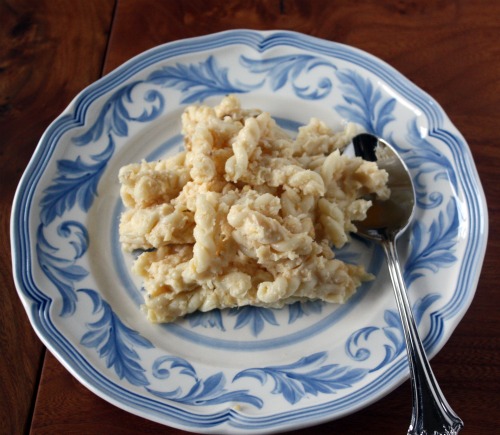
Sometimes you need to cook for a crowd.  Sometimes that crowd is very mixed – young and old, male and female, picky and not picky.  You catch my drift.  I find it best in those situations to turn to good old macaroni and cheese.

Graham turned six (!) on November 28th (more thoughts on that milestone when I can actually write the post without crying).  We decided to have a party for him the day after Thanksgiving.  I found a very cool activity for the kids to do which happened to be right near our house.  As I was planning this little party, I felt very strongly that I wanted to have everyone (parents included) back to our house for dinner afterward.  And I felt even more strongly that I did not want to serve everyone the pizza fall-back that seems to be inescapable at a kids’ birthday party.

There is nothing wrong with pizza.  In fact, I love pizza and it is a terrific thing to serve to a mixed crowd, but I just got it in my head that I wanted to cook for these friends and family members.  Yes, we had just hosted 16 adults and 4 kids for Thanksgiving.  What can I say?  I got help with the turkey feast and also I am insane.

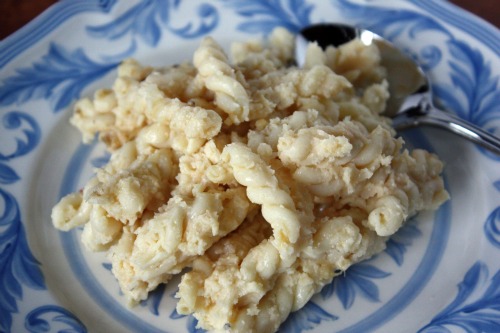
There was never really any doubt about what I wanted to make for the party but I wanted to change it up.  Since we all had just feasted on turkeys and stuffing and potatoes, I decided to lighten up the mac and cheese quite a bit.  A few years ago, I found a recipe for it using cauliflower in place of some of the milk and cheese.  I thought it turned out really well and I decided to re-visit that idea for Graham’s party.  I love mac and cheese as much as the next person but I always feel like it needs something else.  One note food tends to bore me after a few bites, no matter how delicious those bites are.  I decided to add some mustard for tang and heat, and some smoked paprika for some, well, smokiness.

Now, this is not spa food.  There is butter and there is milk (2% though!), and there is still a pound and a half of cheese here.  BUT.  There is also 2 pounds of pasta.  I made it to serve a large number of people.  Like 24 adults and 10 kids.  Not everyone ate it of course, but most did and I still had a bit left over.  Considering your standard mac and cheese has about a pound of cheese for 12 ounces of pasta, this is substantially lighter.  The cauliflower is virtually undetectable here.  I’m not a big fan of hiding vegetables in my kids’ food.  I want them to recognize vegetables for what they are and choose to eat them, not trick them into it.  But seeing as there is no way in hell that either of them would eat cauliflower willingly, I am glad that they got a little dose with their noodles.

I realize that you may not have many occasions to make such a large portion.  Nor may you have a pan to fit it all in.  I had a couple of large aluminum dishes that I bought for a long-ago catering job and that is what I used.  You can certainly fit all of this into two large baking dishes (like 13×9 or 15×10).  I’m also sure you can cut the recipe in half and just make a more normal sized (though still very generous) portion.  I did not test the recipe that way so I am giving it to you the way I made it.

Mac and Cheese Previously on Dana Treat: Gratinéed Macaroni and Cheese with Tomatoes, Three Cheese Mini-Macs
One Year Ago: Spicy Tomato Jam
Two Years Ago: Seitan Bourguingonne

Healthier Macaroni and Cheese
Dana Treat Original
Serves 20-25

In spite of the name of this dish, I almost never use macaroni when making mac and cheese.  It’s too small and boring for me.  Other short tubular shapes are more interesting.

1 large cauliflower (about 3 pounds), broken into florets
2 lbs. short tubular pasta (I used gemelli)
Olive oil
1 tbsp. Dijon Mustard
½ tsp. smoked paprika
3 cups 2% milk, divided
2 tsp. kosher salt
4 tbsp. (½ stick) unsalted butter
¼ cup flour
½ cup half-and-half
1 lb. extra-sharp Cheddar, grated
½ lb. Gruyère, grated
Panko or breadcrumbs

Preheat the oven to 375ºF with the rack in the middle.

Bring a large pot (at least 8 quart) of salted water to boil.  Add the cauliflower florets and cook until fork tender.  Using a slotted spoon, transfer the cauliflower to a food processor.  Add more water to the pot and then add the pasta.  Cook until al dente, according to package instructions, then drain.  Toss the pasta with a bit of olive oil to keep it from sticking and set aside.

Meanwhile, add the mustard, smoked paprika, and 2 teaspoons of salt, to the food processor.  Pulse until chunky.  Pour in 2 cups of the milk through the feed tube and process until you have a smooth and loose purée, adding a bit more milk if it seems too thick.  You want it like extremely thick cream.

Melt the butter in a large Dutch oven or similar type pot.  Sprinkle in the flour and cook, stirring constantly, until the flour darkens slightly in color and smells nutty, about 3 minutes.  Pour in the cauliflower purée and stir well.  Slowly pour in the remaining cup of milk and the half-and-half.  Cook for about 5 minutes, stirring often, until rich and thick.  Turn off the heat, add both cheeses, and stir until everything is nice and melted.

Place the cooked pasta in a very large bowl.  Pour the sauce over top and carefully mix until the noodles are completely coated with sauce.  Butter one extra large or two large baking dishes and then pour the coated noodles in.  Sprinkle with either panko or bread crumbs and cover with foil.  Bake for 30 minutes then remove the foil and bake for another 10.  The center of the pan should feel hot.


Mini Macs

November 15, 2010

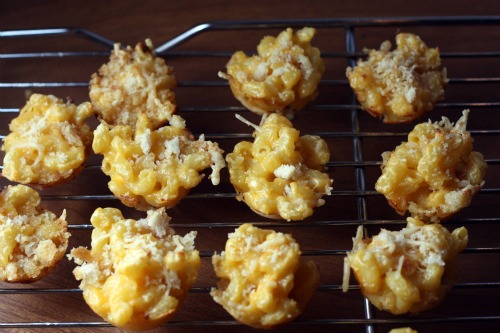
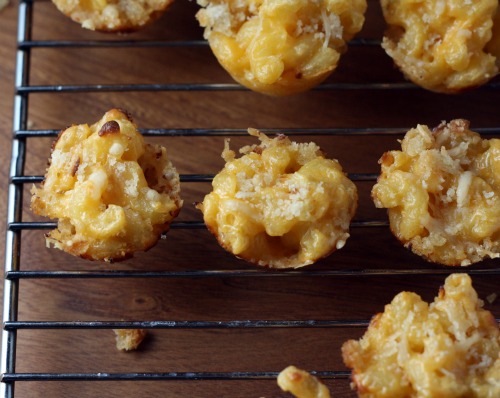
Let’s face it.  Macaroni and cheese makes most people happy.  It really doesn’t matter how old those people are.  It’s just a happy dish and it’s tasty.  Mac and cheese = tasty.  Small things also make people happy.  Mini cupcakes, muffins, petits fours.  People think they are cute.  Mini things = cute.  So what we have here is tasty and cute.  It could be worse.

If you want to have a guaranteed hit on your party menu, make these little guys.  The look on people’s faces as you pull them out of the oven (that combination of “that smells so good” “they are so cute!” and “mac and cheese!”) is priceless.  I would make these for every single event I do, but they really need oven time right before serving.  Sometimes I am catering a party where that is not an option, so they don’t appear on the menu.  I have made them a few hours in advance and then just reheated them right before party time.  It works but they really are best if you bake them off just as guests are arriving.

This recipe calls for good old American cheese slices presumably for their melt-ability.  This last time, I went for the more “natural” version – Horizon brand – and I have to tell you they were better with the cheap stuff.  Just like you want to bake with Jif rather than an all-natural brand of peanut butter, you want to make these with Kraft rather than the all-natural.

One Year Ago: Creamy Artichoke Dip
Two Years Ago: Bulghur and Green Lentil Salad with Chickpeas

Three-Cheese Mini Macs
Adapted from Food & Wine
Makes 48 Mini Macs

½ pound elbow macaroni
1½ tbsp. unsalted butter
¼ cup freshly grated Parmesan
2 tbsp. flour
¾ cup milk
4 ounces Cheddar cheese, shredded (1 packed cup)
4 ounces deli-sliced American cheese, chopped
1 large egg yolk
¼ tsp. smoked Spanish paprika

Preheat the oven to 425°F.  In a large saucepan of boiling salted water, cook the macaroni until al dente, about 5 minutes.  Drain, shaking off the excess water.

Spray four 12-cup nonstick mini muffin tins with cooking spray.  Sprinkle with 2 tbsp. Parmesan.

In a large saucepan, melt the 1½ tablespoons of butter.  Whisk in the flour over moderate heat for 2 minutes.  Whisk in teh milk and cook, whisking, until boiling, about 5 minutes.  Add the Cheddar and American cheeses and whisk until melted.  Off the heat, whisk in the egg yolk and paprika.  Fold in the macaroni.

Spoon slightly rounded tablespoons of the macaroni into the prepared muffin cups, packing them gently.  Sprinkle the remaining 2 tablespoons of Parmesan on top.

Bake the mini macs in the upper and middle thirds of the oven for about 10 minutes, until golden and sizzling.  Let cool for 5 minutes.  Using a small spoon, carefully loosen the mini macs, transfer to a platter and serve.


« Older Posts Newer Posts »