Category: Party Food

Super Simple Appetizer

July 2, 2011

I will admit that I’m not always the best about posting super simple recipes.  This might be the place you come for treats, tofu, and tasty vegetarian fare, but it’s probably not your first choice of blogs if your guests are coming in five minutes and you need a recipe.  I like super simple as much as the next person but I am, inexplicably, drawn to more tedious and complicated things in the kitchen.

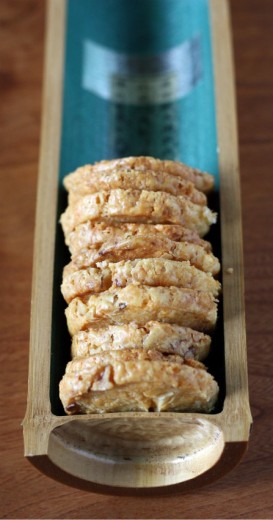
No more!  Give me :10 and you’ve got something pretty and delicious.  There is no effort here beyond slicing goat cheese and heating up some oil.  I always have these ingredients on hand and also always have crackers, so if you are coming to my house any time soon, you know what we are having as an appetizer.


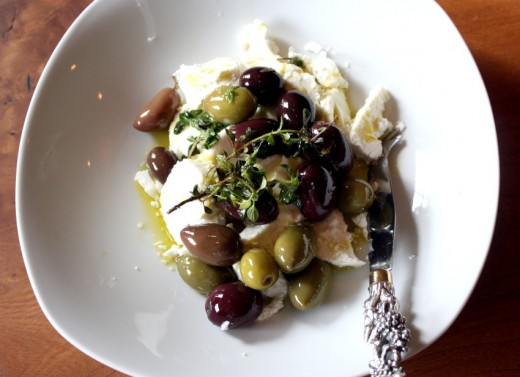
Goat Cheese with Olives, Lemon, and Thyme
Adapted from Gourmet
Serves 4-6

½ cup assorted olives
3 fresh thyme sprigs (use lemon thyme if possible)
3 tbsp. extra-virgin olive oil
Zest of 1 lemon
4-5 ounces soft goat cheese (such as Montrachet), sliced

Heat olives, thyme, oil, zest, and ¼ tsp. pepper in a small skillet or saucepan over low heat until fragrant (do not simmer).  Cool to room temperature.  Serve olive mixture over goat cheese.  (This dish can be prepared 2 hours ahead and kept, covered, at room temperature.)


A Need for Something Green

June 4, 2011

Friends – once again it has been a crazy week.  In a very good way.  We spent last weekend on Lopez Island (more on that with cute boy photos on the way), came home to a birthday party for my brother on Sunday, spent a relaxing Memorial Day doing not much of anything, and then Tuesday I flew to Scottsdale to talk about ovens and cooktops. Thermador, a brand I am now officially simultaneously in love with and coveting, has come out with an incredible new option for your stove/oven and I was lucky enough to get a first peek.  I have lots more to say and will do so in my next post.

I returned from Scottsdale on Thursday afternoon and, gulp, catered a party that night.  Recently I have been getting a lot of questions along the lines of “how do you get it all done?”  I think that is a good subject for – you guessed it – an upcoming post.  Within two paragraphs, I have promised you three new posts all having nothing to do with the food you probably come here for.  So, for now, let’s talk food, shall we?

For Thursday night’s party, I had to do most of the work in advance since I had a very short window between the time I landed and the time the party started.  As I was sitting on the plane going through the food I had planned, I realized that there would be a lot of brown and red.  I made those amazing peppers, Muhummara dip, gougères (which I forgot to bring – damn!), nuts, and a couple of other things.  I needed something green.  I’ve had this pea and ricotta tart in my head ever since seeing it on Stacey’s site a few weeks ago and I figured I could work out something with a similar feel.

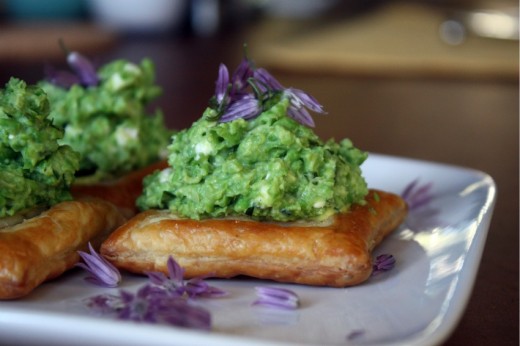
Alas, no ricotta in my refrigerator and no time to go to the store meant that I had to work with what I had.  I won’t bore you with what my original vision was vs. how it turned out.  I feel confident that my made-up appetizer turned out much better than the imaginary one I started off with.  In the end, I pulsed peas, a bit of cream cheese, olive oil, salt, and pepper in the food processor, stirred in some chopped tarragon and finely crumbled feta cheese, and spooned it into little pastry cups that, miraculously, were waiting for me in my pantry.  They were only about 1 inch across and were perfect for party food.  I got more questions about those little morsels than anything else I brought.  Sadly, the only other thing I forgot besides the gougères, was my camera.

So, I made them again.  This time I used a square biscuit cutter on puff pastry for a more fork and knife-type appetizer.  You could certainly make them even larger and serve them as more of a main course.  In this second go-around, I was out of feta and used a bit of Gorgonzola instead.  I really liked both cheeses and I know a very finely chopped Pecorino would taste terrific too.  I also swiped the bottom of each pastry square with the dreamiest French tarragon mustard.  That little spicy bite made all the difference.

One Year Ago: Pull-Apart Cheesy Onion Bread, Holly B’s Rhubarb Bette, Radishes with Butter and Chive-Sage Salt
Two Years Ago: Greek Pasta Casserole, Green Bean and Fennel Salad, Rosemary Raisin Pecan Crisps
Three Years Ago: Gazpacho (still the recipe I use)

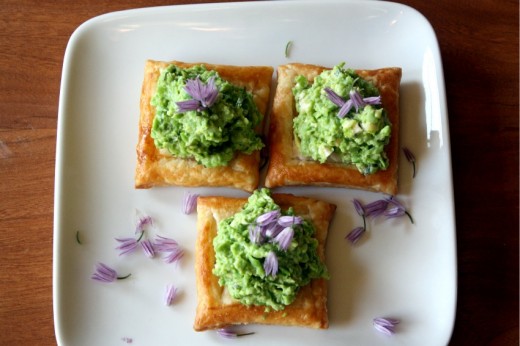
Puff Pastry Squares with Pea and Tarragon Purée
Dana Treat Original
Makes 12 appetizer portions

You could, of course, just put this purée on crostini  instead of the puff pastry to make it simpler.  Or serve it with pita chips as a dip.  If you choose the latter, I would thin it with more olive oil when you are making it in the food processor.

12 ounces puff pastry
1 egg beaten with 1 tbsp. water (for egg wash)
Tarragon mustard or other Dijon mustard (optional)
6 ounces frozen peas
2 tbsp. cream cheese
2 tbsp. olive oil
Kosher salt and freshly ground black pepper
2 stalks tarragon, leaves stripped and chopped
2 ounces feta or blue cheese, crumbled into small bits
Chive blossoms, for garnish (optional)

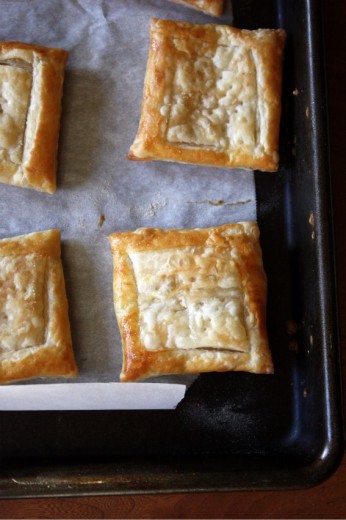
Preheat the oven to 400ºF.  Dust a work surface with flour and lay unfold the puff pastry onto the surface.  Using a floured rolling pin, gently roll the puff pastry just enough to flatten the seams.  Using a biscuit cutter, a cookie cutter, or a paring knife, cut out 12 squares and transfer each to a parchment paper lined baking sheet.  (You want about 3-inch squares.)  Brush each square with the egg wash.  Using a paring knife, score a border, about ½-inch wide without cutting all the way through the pastry.  Using a fork, dock holes in the bottom of each pastry, inside the border.  Place the baking sheet in the freezer for 15 minutes.

Place the baking sheet in the oven for 15 minutes, or until the pastry squares are nice and golden brown.  You might need to poke your fork back into the bottoms of the pastry to deflate them a bit as they bake.  Remove from the oven and allow to cool.

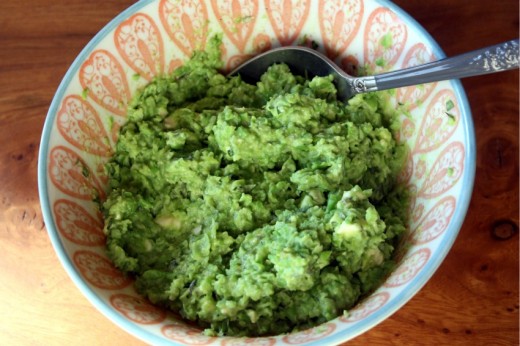
Bring a small saucepan of water to boil.  Add the peas and cook for 1 minute.  Drain and immediately rinse with very cold water.  Place the peas in a food processor fixed with the steel blade.  Add the cream cheese, olive oil, and pinch each of salt and pepper.  Keep in mind that the cheese you add will be pretty salty so use a light hand with the salt.  Pulse the mixture until it is combined but still chunky.

Place the mixture in a bowl and gently stir in the cheese and tarragon.  Taste for seasoning and add more salt and pepper if necessary.  Swipe just a bit of mustard across the bottom of each square.  Scoop the purée onto each and garnish with chive blossoms if you like.


One for the Weekend

May 20, 2011

Friends, it’s Friday.  This week I baked breakfast treats for an office of 55 people.  I taught a Thai cooking class to a super fun group of 10 and, the next night, taught a farmers’ market special class to another super fun group of 11.  I’m a little tired.  My kitchen is a little messy.

These are clean.

These are not.

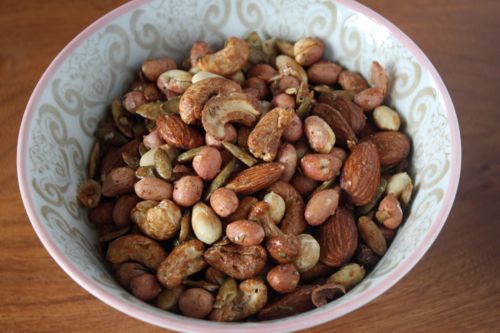
But who cares?  It’s Friday and the sun is shining and we have a party to go to tonight and another to go to tomorrow night and I imagine you might have plans as well.  Need some nuts?

I make all kinds of cocktail nuts.  I make them to give as gifts around the holidays, I make them for parties that I cater, I make them so that I always have a nibble on hand when unexpected dinner guests come by.  I do really love the smoky cashews and still make them often but truthfully, they can be a bit of a struggle.  The topping doesn’t stick as well to the nuts as I would like it to.  Which is why I am really digging this recipe.  These beauties get perfectly coated, perfect crisp.  Not too sweet, salty and quite spicy.  You should probably make some this weekend.

Winner of the Patricia Wells book will be announced on Monday along with one last giveaway.  Oh!  And many of you have asked about the three Indian cookbooks I mentioned in that post.  One is a gorgeous book from the Cinnamon Club – an amazing restaurant near Victoria Station in London.  The food is very fine and the recipes are a little intense.  Not really every night type of cooking but amazing nonetheless.  That one you can find on Amazon.  The other two are both from Rasa – a much more casual but, in my mind, even more delicious place where I first learned about the glory that is South Indian food.  I have cooked many times from both books and they are terrific.  The New Tastes of India and Fresh Flavors of India.  Also available on Amazon.  I don’t make any money by directing you to them – they are just the easiest source for books that might be hard to find in this country.

One Year Ago:  Lighter Fettucine Alfredo and Curried Tofu and Avocado Dip
Two Years Ago:  Peanut Butter Cup Brownies and Raspberry Almond Bars (I was just telling this Dave Matthews story last night.)

Spiced Cocktail Nuts
Tartine
Makes about 3 pounds

You can, of course, play around with the nuts you use in the mix and you can also halve the recipe.  If you don’t love spice, I would cut the amount of cayenne in half.  I may have thrown in a pinch of smoked paprika as well.

3 sprigs fresh thyme
2-inch sprig fresh rosemary
2 tbsp. light corn syrup
1 tbsp. + 2 tsp. cayenne pepper
1 tbsp. salt
1 tsp. freshly ground black pepper
2/3 cup raw almonds
2/3 cup raw cashews
2/3 cup pumpkin seeds
5 1/3 cups raw peanuts

Preheat the oven to 350ºF.  Line a baking sheet with parchment paper, a non-stick liner, or foil.

Pick the leaves from the thyme and rosemary sprigs, and chop the leaves coarsely.  In a mixing bowl, combine the thyme, rosemary, corn syrup, cayenne pepper, salt, and black pepper, and mix well.  Add all the nuts and mix thoroughly with your hands or a wooden spoon.

Spread the nuts evenly on the prepared baking sheet.  Roast, stirring a few times with a heatproof spatula or a wood spoon to ensure the nuts color evenly, until they are fragrant and a rich brown, about 15 minutes.  Let cool completely.  The nuts will keep in an airtight container in a cool, dry place for up to 2 weeks.


The New Favorite Cracker

May 3, 2011

Let’s take a little quiz.  In each of the following scenarios, which would you choose?

Store-bought cracker or store-bought cookie?
Store-bought cracker or homemade cookie?
Homemade cracker or store-bought cookie?
Homemade cracker or homemade cookie?

It might surprise (shock? repulse?) you to know that I would choose the cracker.  Yes, if the store-bought cracker was nice and salty, like maybe a Triscuit, I would choose it over a homemade cookie.  What can I say – I’m a savory girl.

Knowing that, it probably won’t surprise you to hear that I have fallen head over heels in love with these crackers.  I have been a big fan of making my own crackers and until recently, I had my two favorites.  But move over kids, there is a new cracker in town.  I just served these to my Vegetarian Basics class last week.  One of my attendees – a good friend – suggested I call them (Crack)ers.  Has someone else copyrighted that name yet?  It’s perfect.

This is about as easy as it gets.  Soften butter, toast nuts, grate cheese, and you are basically there.  Having made them several times now, I can give you some tips.
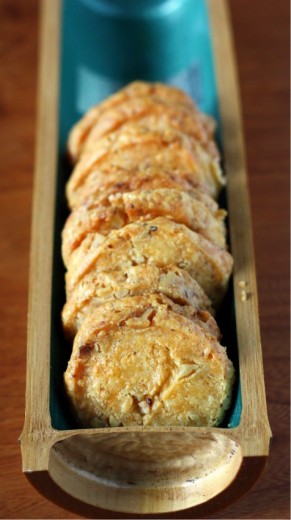
1)  This is the time for good Cheddar cheese.  We always have some mild stuff in the cheese drawer for kids quesadillas and you probably do too.  Don’t use that cheese.  Buy something special and yummy.  It will make a difference.

2)  Chop the walnuts nice and fine.

3)  Double the recipe.  Form the dough into two logs, bake one off and wrap and freeze the other.  Tiny bit more work for double the crackers and the dough freezes beautifully.

4)  If you follow tip #3 and you use a Beater Blade for your standing mixer, switch to the metal blade.  This is a very stiff dough and when I quadrupled the recipe (what?  2 sticks and butter and 2 pounds of cheese – I’m not scared), I broke my beater blade.  You have been warned.

5)  As you are mixing in the flour, you might think to yourself, “This needs some liquid, like milk perhaps.”  It doesn’t.  (Made that mistake!)  Be patient and the dough will come together.

6)  Make sure the walnuts are distributed well throughout the dough, otherwise it can be a little tricky to get to the dough to roll out into a snake without falling apart.  Totally do-able, just a little annoying.

7)  Finally, prepare yourself for the smell coming out of your oven.  Ah-mazing!
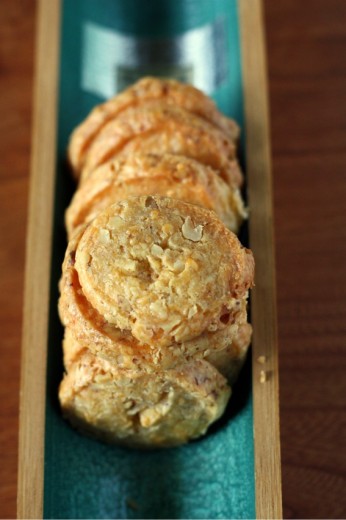
Crackers Previously on Dana Treat: Parmesan Thyme Crackers, Rosemary Raisin Pecan Crisps
One Year Ago: Chocolate Truffles
Two Years Ago: Classic Currant Scones, Rhubarb Struesel Tart, Bean Tostadas with Sofrito

Cheddar Crackers

Tartine

I’m not giving you a yield here because it totally depends on how small your dough logs are, how thin you slice your crackers, etc.  The original recipe said you can get fifty 1-inch round crackers, but honestly I don’t see how that is possible.

¾ cup all-purpose flour
1 tsp. salt
¼ tsp. cayenne pepper
¾ tsp. freshly ground black pepper
2 1/3 cups (8 ounces) grated sharp Cheddar cheese
¼ cup (½ stick) unsalted butter, at room temperature
2/3 cup walnuts, chopped fine

In a small mixing bowl, stir together the flour, salt, cayenne pepper, and black pepper.  Set aside.  In the bowl of a stand mixer fitted with the paddle attachment, combine the cheese and butter and beat on medium speed until combined.  Add the flour mixture and beat on low speed until incorporated.  Stop the mixer and scrape down the sides of the bowl with a rubber spatula.  Mix in the walnuts on low speed.  The dough should be fairly stiff with small chunks of cheese and walnut visible.

Transfer the dough to parchment paper, waxed paper, or plastic wrap and shape into a log about 1-inch in diameter.  (DT: I found it difficult to get the dough this small, so my crackers were bigger.  Darn.)  Wrap well and place in the refrigerator until hard, about 2 hours.

Preheat the oven to 400ºF.  Line a baking sheet with parchment paper or a non-stick liner.

Unwrap the log and cut crosswise into ¼-inch thick slices.  Arrange the crackers on the prepared pan, spacing them apart about 1 inch.

Bake the crackers until golden brown on the edges and lighter in the center, 7 to 10 minutes, depending on size and thickness.  Transfer to a wire rack and let cool completely.  The crackers will keep in an airtight container in cool dry place for up to 2 weeks.


Asparagus for a Party

May 1, 2011

Last weekend, we hosted a 30th birthday party for our babysitter Erika.  Babysitter is not really the right word.  To me, it implies someone doing their homework and watching TV while your kids sleep.  Nanny is not the right word either; she was with us too few hours and besides, “nanny” sounds condescending to me somehow.  Erika is a unique and special woman who has shared her love and her kind heart with our family for the past 4½ years.  What do you call that person?

As I told you here, we met Erika at the Boyer Clinic where Graham started on his speech therapy journey.  When Graham was diagnosed, I was five months pregnant with Spencer.  I could not imagine how I was going to bring a child to a twice weekly appointment with an infant in tow.  As with everything we moms do, I figured it out.  But it caused me a lot of stress.  I would often have to wake Spencer up so that we could get to the clinic on time.  I nursed him in the waiting room or in the classroom.  I put him in the Bjorn and did that crazy dance moms of infants do to try and lull him to sleep.  I suffered through those days and dreaded the evenings when colic turned Spencer into a demon who would not stop crying until he wore himself out around midnight.

Meeting Erika and learning that she needed some hours offered me hope.  I was able to let Spencer take his morning nap undisturbed.  I was able to focus on Graham who was now doing preschool at Boyer along with his speech therapy.  I was able to get some distance from my challenging infant which, if you have ever had an infant, you know is crucial to your sanity.  And because Erika is as amazing as she is, I was able to walk out of the house and not worry about that infant, trusting that he was in capable hands.  There is no price you can put on that security.

Time passed.  The boys grew.  Erika stayed.  She was getting a Master’s degree so her schedule was flexible and we moved her two mornings a week to one full day.  I love my children but I looked forward to Thursdays for two full years.  I could go to yoga and get my hair cut and go to the doctor and meet a friend for lunch if I wanted.  Erika sits for us at night as well and has taken the boys over weekends when we have gone away.  In all that time, all those years, all those days, all those nights, she has never called me with a problem.  Not once.  My boys are easy and she knows them well, but she is also extremely capable.  When we have been out of town and I call to check in, I feel like I am actually calling to make sure she is all right.  I know the boys are fine and having a blast.

So Erika turned 30 and she (sob!) got a job.  She is no longer here on Thursdays and just typing that makes me want to cry.  The main reason that I feel weird calling her a babysitter or a nanny is that she is truly family to us now.  She has been with us since Spencer was six months old and Graham was two.  She know my children better than anyone besides me and Randy.  She loves them and they love her.  We are lucky in that she will always be a part of our lives.  She will sit for us on weekend nights and when we leave town.  I like to tell her she will never be free of us!

To celebrate her 30th birthday, I thought it was only right to throw her a party.  Erika is a vegetarian and an enthusiastic eater of my food.  A night with 20 of her friends and lots of food and wine would be right up her alley.  In true Erika fashion, she thanked me 426 times before the party even started.  We all had a fun night.  Graham thought he had died and gone to pretty girl heaven with all the dresses and jewels and long hair and makeup.  It was wonderful to be able to celebrate her in a personal and relevant way.

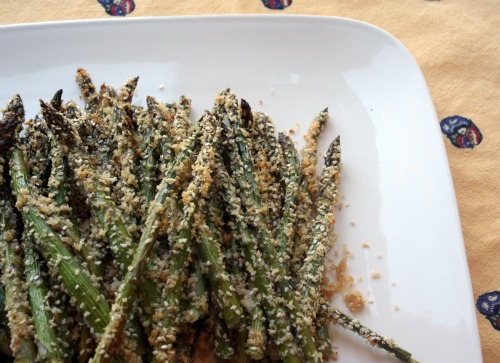
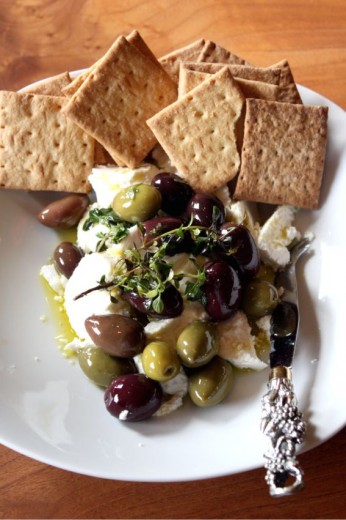
Among many other things, I made these asparagus.  I do a lot of party food, but often the party is not at my house.  I have been eying this dish for a long time, but have not been able to make it because I knew it would not travel well.  In my book, asparagus is best simply steamed or roasted, but I was intrigued by the crunchy coating.  Truthfully, these were not as crunchy as I wanted them to be and they wilted more than I wanted them to, but they were pretty and still tasted good, especially that drizzle of sauce.  If I made them again, I would be sure to use very thick asparagus so that they are just cooked by the time the breading browns.

One Year Ago: Tagine with Carrots, Potatoes, and Olives
Two Years Ago: Sushi Rice Salad

Roasted Sesame and Panko Coated Asparagus with Soy-Ginger Drizzle
Adapted from Bon Appétit
Serves 4-6

Because I used thinner asparagus, I didn’t bother to peel them.  But as I said above, I would use thicker ones next time and peel them as the recipe suggests.  The measurements here are very fussy (1/4 tsp. sesame oil?) so I just did it all by taste.  I’m keeping their notes as a guideline.

¼ cup mayonnaise
4 teaspoons unseasoned rice vinegar, divided
3 teaspoons soy sauce, divided
1¼ teaspoons finely grated peeled fresh ginger, divided
1 cup panko (Japanese breadcrumbs)
¼ cup sesame seeds
1 pound thick asparagus spears, trimmed, bottom 2/3 of each spear peeled
1 teaspoon golden brown sugar
½ teaspoon chili-garlic sauce

Preheat oven to 450°F. Oil large rimmed baking sheet. Whisk mayonnaise, 1 teaspoon rice vinegar, 1 teaspoon soy sauce, and 1 teaspoon grated ginger in pie dish. Mix panko and sesame seeds in another pie dish. Toss asparagus in mayonnaise mixture to coat, then roll in panko mixture. Transfer to prepared baking sheet. Drizzle with 2 teaspoons sesame oil. Roast until browned, turning once, about 16 minutes.

Meanwhile, whisk 1 teaspoon water, brown sugar, chili-garlic sauce, remaining 3 teaspoons vinegar, 2 teaspoons soy sauce, 1/4 teaspoon ginger, and 1/4 teaspoon sesame oil in small bowl for sauce.

Transfer asparagus to platter; sprinkle with salt. Drizzle with sauce.


« Older Posts Newer Posts »