Category: Chocolate

Birthday Cake for the Birthday Boy

February 7, 2012

By many peoples’ standards, we spoil our children.  We have a basement full of toys, bikes in the garage, an X-Box and other gaming things, and lots of movies to watch.  We go on nice vacations.  Both boys have plenty of clothes to wear and ski gear (though we rent skis and boots).  Their chores consist of bringing over their plate after dinner and cleaning up their rooms.  They get a lot of hugs and kisses and treats after dinner.

But.  We are sticklers about manners and being polite and respectful to adults and kids both older and younger.  We try to encourage awareness about how lucky they are without being morbid about it.  About once a year we go through our toys and clean out things they are not using to give to children who are less lucky.  They are old enough to understand that we can go look in a toy store but we are not going to buy anything.  (Unless they are with dad, who usually caves.)

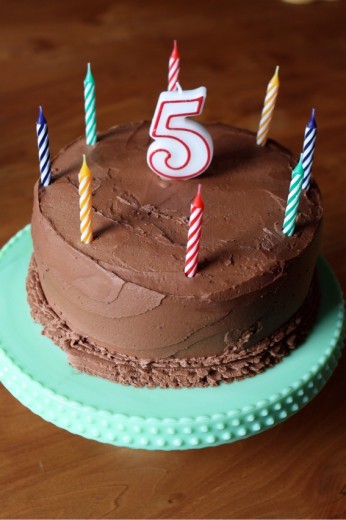
This year Spencer is getting two birthday cakes.  This is the first year that we are having a real true party for him.  I’m not the mom who treasures throwing themed birthday parties for my kids complete with perfect invitations and favors.  I try and farm the party part out.  Seeing as Spencer is the second child, we tried to get away with just doing family for as long as possible.  There have been years where we have been in Sun Valley over his birthday (spoiled!).  But this year we are home, he turned five, and we are doing a trampoline party (spoiled!).

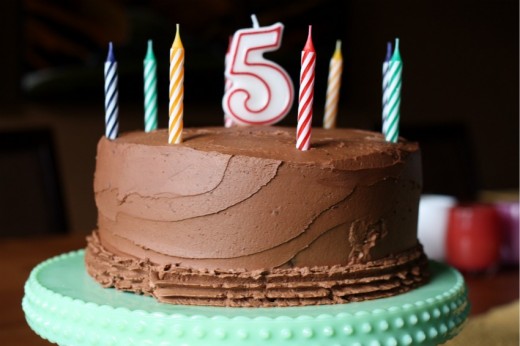
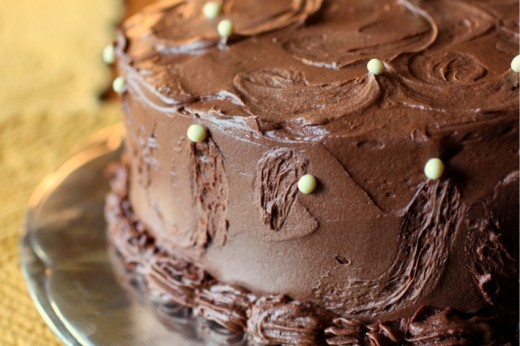
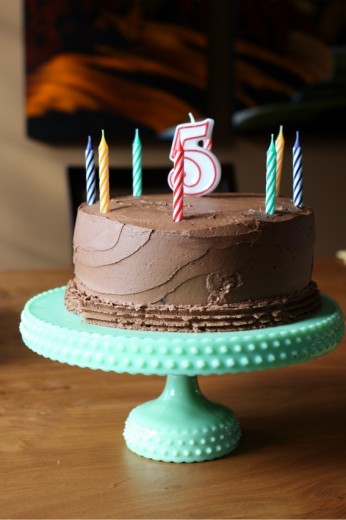
Spencer wants a Batman cake for the party which we will be getting from the same bakery as Graham’s cake.  Mommy doesn’t do Batman cakes.  Or she could, but it would end up looking like a gerbil cake or a blob cake which wouldn’t make him very happy.  For his “real” birthday cake, we sat down with several of my baking books and paged through options.  “I want that one!  Or wait, I want that one!  No, that one!”, is kind of how the conversation went.  I thought we were going with a lemon cake with a meringue frosting when he spied a cake in Flour that sealed the deal.  I guess to him it just looked like a birthday cake.  That may have been because there are birthday candles on the cake in the photo.  At any rate, I was glad to make a traditional cake that I knew he would like.

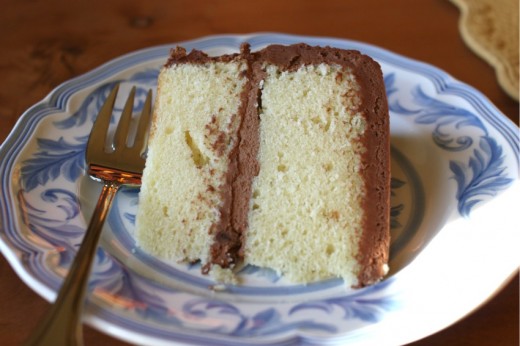
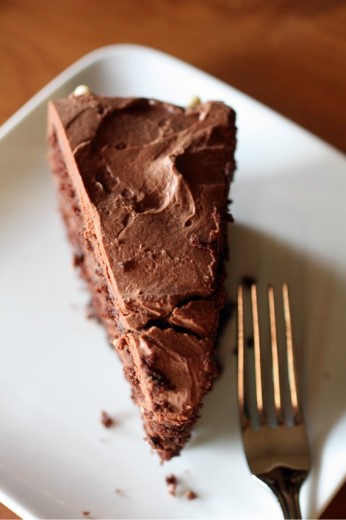
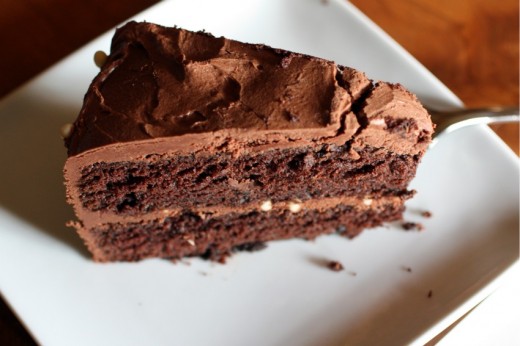
I feel like some of my cookbooks are kind of like the good guy friend in college who patiently listens to your love life failures, all the while secretly hoping you will actually notice him.  Flour has been sitting on my shelf for about a year now.  I made a couple ho hum things from it in the first few weeks after purchase and then moved on to brighter shinier things.  I knew it would house some good birthday cake ideas and this perfect birthday cake was in there waiting for me all this time.  Actually, not perfect, but pretty darn good.  The cakes themselves were very crummy and the frosting kind of set up too much after I put the cake in the refrigerator with the crumb coat, but the taste and the look was pretty close to perfect.  According to the birthday boy, that is.

One Year Ago:  Macaroon Brownie Bars, White Chocolate Tiramisu, Red, White, and Green Lasagne
Two Years Ago:  Olivetta Loaf, Spicy Smoky Chili
Three Years Ago:  Roasted Orange Pepper Soup, Mushroom Enchiladas, Broccoli and Red Pepper Pie, Chocolate Chip Cupcakes

Yellow Birthday Cake with Fluffy Chocolate Ganache Frosting
Flour
Makes one 8-inch layer cake (serves 8-12)

I’m giving you the (very wordy) recipe as written in the book.  A couple of tips.  The cake cools completely in the pans, presumably because it is large and thick, so be sure to grease them well and use a parchment round in the bottom of the pan.  I always refrigerate my cakes with a crumb coating for about 30-60 minutes, but I think the frosting hardened up too much during the waiting time.  So be sure to follow her advice and just frost the cake right after the crumb coating.  She recommends using non-fat buttermilk but I can never find that so I just used low fat.

1½ cups (3 sticks) unsalted butter, room temperature
2 cups granulated sugar
3 eggs
3 egg yolks
1 tsp. vanilla extract
3 cups cake flour
1 tsp. baking powder
½ tsp. baking soda
½ tsp. kosher salt
1 cup buttermilk

Fluffy Chocolate Ganache Frosting
12 ounces semisweet chocolate, finely chopped
1 cup heavy cream
1 cup (2 sticks) unsalted butter, at room temperature
1 cup confectioners’ sugar
¼ tsp. kosher salt
½ tsp. vanilla extract

Position a rack in the center of the oven and heat the oven to 350ºF.  Butter and flour two 8-inch round cake pans.  (DT:  Don’t forget the parchment here!)

Using a stand mixer fitted with the paddle attachment (or a handheld mixer), cream together the butter and granulated sugar on medium speed for 3 to 4 minutes, or until light and fluffy.  (This step will take 8 to 10 minutes if using a handheld mixer.)  Stop the mixer a few times  and use a rubber spatula to scrape the sides and bottom of the bowl and the paddle to release any clinging butter or sugar.

In a small bowl, whisk together the eggs, egg yolks, and vanilla just until combined.  On low speed, slowly pour the egg mixture into the butter mixture and mix just until incorporated.  Scrape the bowl and paddle again, then beat on medium speed for 20 to 30 seconds, or until the mixture is homogeneous.

In a medium bowl, sift together the flour, baking powder, baking soda, and salt.  On the lowest speed, add about one-third of the flour mixture to the egg-butter mixture and mix just until barely combined.  Immediately pour in about half of the buttermilk and continue to mix on the lowest speed until the buttermilk is almost thoroughly incorporated.  Stop the mixer and scrape the sides and bottom of the bowl well.  Again on the lowest speed, add about half of the remaining flour mixture and mix just until barely combined.  Add the rest of the butter milk and mix just until combined.  Be careful not to overmix.

At this point, it is best to finish the mixing by hand.  Remove the bowl from the  mixer stand and, using a rubber spatula, fold in the remaining flour mixture until the batter is just homogeneous.  As you fold, be sure to incorporate any batter clinging to the sides and bottom of the bowl.  Divide the batter evenly between the prepared cake pans.

Bake for 40 to 50 minutes, or until the ops are golden brown and the cakes spring back when pressed in the middle with a fingertip.  Let cool completely in the pans on wire racks.  (The cooled cakes can be tightly wrapped in plastic wrap and stored  in the freezer for up to 1 week.  Thaw at room temperature, still wrapped tightly in plastic wrap.)

To make the ganache frosting:  While the cake layers are cooling, put the chocolate in a medium heat-proof bowl.  In a small saucepan, scald the cream over medium-high heat (bubbles start to form around the edge of the pan, but the cream is not boiling).  Pour the hot cream over the chocolate and let sit for about 1 minute, then slowly whisk together the chocolate and cream until the chocolate is completely melted and mixture is smooth.  Let sit at room temperature for 1 to 2 hours, or until completely cool.  (Or refrigerate the ganache until cool, about 30 minutes, whisking every ten minutes.)

Fit the stand mixer with the paddle attachment (or use a handheld mixer) and beat the butter on medium-low speed for 10 to 15 seconds, or until smooth.  Add the confectioners’ sugar, salt, and vanilla and continue to beat on medium-low speed for about 2 minutes, or until the mixture is fluffy and smooth.  Stop the  mixer a few times and use a rubber spatula to scrape the bowl and paddle to release any clinging butter or sugar.  On medium speed, add the cooled ganache and beat for about 2 minutes, or until completely combined.  Stop to scrape the sides and bottom of the bowl.  Turn up the mixer speed to medium-high and beat for about 1 minute, or until the frosting lightens in color and thickens.  You should have about 4 cups.

Remove the cooled cakes from their pans.  (Be sure they are completely cool.  If they are even the slightest bit warm, the frosting will melt and you will have a mess.)  Using a long, serrated knife, trim the top of each cake to level it (the layers will have rounded a bit in the oven; the trimmed scraps make great nibbles).  Place one cake layer on a cake plate or cake pedestal (if you have a revolving cake stand, use it.)  Spoon about 1 cup of the frosting on top and use an offset spatula to spread it evenly to the edges.

Carefully place the second layer top-side down (so the even sharp edges will be on the top of the finished cake), on top.  Spoon about 1 cup of the frosting on top and spread it over the top and down the sides of the cake, smoothing the frosting as well as you can and covering the entire cake with a thin layer.  This the crumb coat which will keep any loose crumbs from migrating to the surface of the finished cake.  Spoon a heaping cup of frosting on top of the cake, an spread it evenly across the top and down the sides.  This is the finishing layer of frosting.  If desired, spoon any remaining frosting into a pastry bag fitted with a small round or star tip and pipe a decorative line along the top and/or bottom edge of the cake.

The cake can be stored in an airtight container at room temperature for up to 2 days.


Sleeplessness

January 15, 2012

Before having children, I would say I was a champion sleeper.  My head hit the pillow at night and off I went into dreamland, only to be awakened by my alarm clock (and a couple snooze buttons pushings) the next morning.  My freshman year of college, I lived at one end of campus and on the weekends, meals were only served at the other end.  Brunch stopped being served at 1pm and it was a struggle of superhuman proportions to get there before they pulled the food.  At 1pm.  And I did not drink in college.  It’s hard for me to even imagine (both of those things) now.

Because now, things are a little different.  First of all, I have these kids.  But I can’t really blame any sleeplessness on them.  My boys are great sleepers.  They go to sleep without a peep and, barring a bloody nose or a tummy ache, stay asleep until around 7 the next morning.  They even now will creep out of their rooms and go into the TV room for some PBS or Disney channel before I can rouse myself.

Maybe it’s the months of waking in the middle of the night to breastfeed, maybe it’s the worry that comes along with being a mother, maybe it’s getting older, but I’m not nearly as good a sleeper as I used to be.  Sometimes it takes me a good couple of hours to fall asleep.  Sometimes I fall asleep fine but then wake at 3am and feel wide awake even though I know exhaustion is waiting for me as soon as the day dawns.  Some people say that if you can’t sleep, you should change your environment – go to another room and read with a low light.  But usually I am too cold to leave my warm bed and so I just lay there awake, thinking about food and cooking.

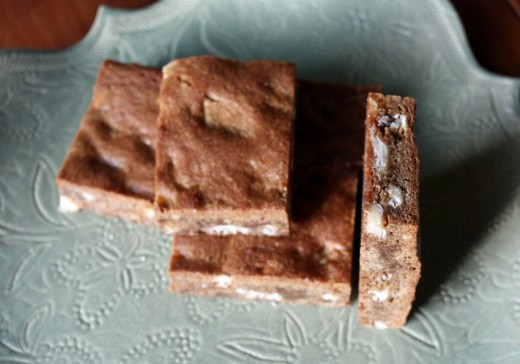
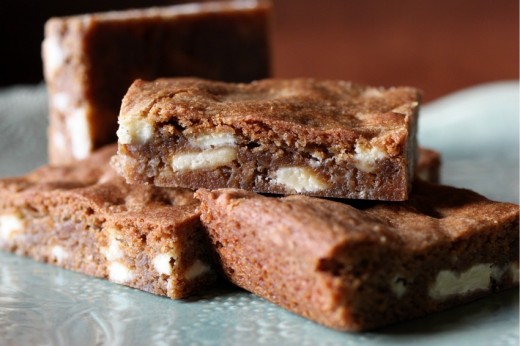
Some people count sheep, I go over recipes for my week.  I had one of those nights earlier this week, right before I had planned to make these bars.  Even though December has passed us by, I am not quite ready to give up gingerbread and I was intrigued by the combo of gingerbread and white chocolate.  In my sleepless state, I remembered reading that you were supposed to make these bars in a 17×12 baking sheet.  That seemed awfully large to me and so, because I had nothing better to do except, well, sleep, I thought about other options.  13×9 would be too small, the bars too thick.  How about a 15×10-inch pan traditional jelly roll pan?  What if I made them in cake pans and cut them into wedges instead of rectangles?  Yes, the boredom of thinking about pan sizes did eventually put me to sleep.

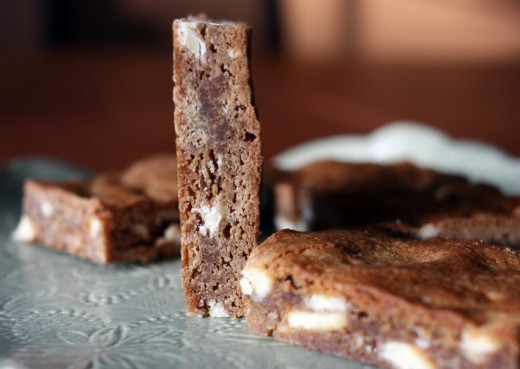
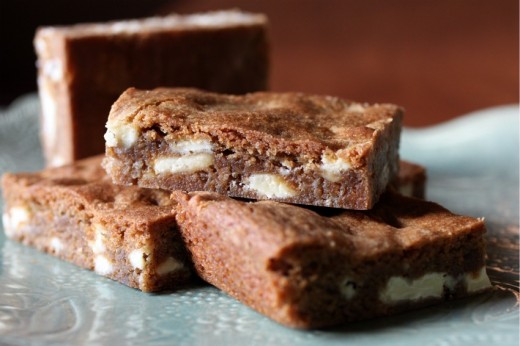
When I was ready to make the bars, I opted for the jelly roll pan.  And I am very glad I did.  I can’t imagine this amount of batter filling any larger pan and even if I was able to spread the batter to within an inch of its life, they would have been very thin, very sad little bars.  In the properly sized pan, they came out just the right thickness and the bars have a perfect soft bite, like a brownie, but with a lovely spice and a tiny bit of crunch from the white chocolate bits.  Say what you will about white chocolate, I think it’s really nice from time to time.  I find that, even more so than dark chocolate, quality plays a huge role in the taste and creaminess of white chocolate.  I used Lindt in these bars and I thought it was terrific.

One Year Ago:  Baked Tofu with Peppers and Olives
Two Years Ago:  Oatmeal Carmelitas

Gingerbread-White Chocolate Blondies
Adapted from Martha Stewart’s Cookies
Makes about 3 dozen, depending on how you cut them

2¾ cups plus 1 tbsp. all-purpose flour
1¼ tsp. baking soda
1¼ tsp. salt
1¼ tsp. ground cinnamon
1 tsp. ground ginger
¼ tsp. ground cloves
1¼ cups (2½ sticks) unsalted butter, room temperature
1¼ cups packed light brown sugar
½ cup plus 2 tbsp. granulated sugar
2 large eggs plus 1 egg yolk
1¼ tsp. pure vanilla extract
1/3 cup unsulfured molasses
1¾ cups coarsely chopped best-quality white chocolate (10 ounces)

Preheat oven to 350ºF.  Coat a 15 by 10-inch rimmed baking sheet with nonstick spray and line the bottom with parchment paper.  Allow a couple inch overhang of the parchement on each of the short sides.  (I used the wrappers from the butter to coat my pan.)

Whisk together the flour, soda, salt, and spices in a bowl.

In the bowl of an electric mixer fitted with the paddle attachment, beat butter and sugars on medium-high speed until creamy and pale, about 3 minutes.  Add eggs and yolk, scraping down the sides of the bowl as needed.  Add vanilla and molasses and mix on medium speed until combined.  Add flour mixture on low speed until combined.  Stir in the white chocolate.

Spread batter evenly into prepared pan and bake until golden on edges, about 25 minutes.  Let cool completely in pan.  Using the “handles” of the parchment, remove the bars from the pan and cut into even squares or rectangles.  Blondies can be stored in an airtight container at room temperature for up to one week.


A Different Chocolate Chip Cookie

December 5, 2011

Some food bloggers have props.  And by props I don’t mean theatre props, like plastic guns and fake mustaches.  I mean table linens and fabric napkins and special forks and pretty plates.  They use these props in photographs that look like mini works of art.  I admire those people who have props and envy those of them who have prop cupboards.  I don’t have props.  I have a few plates that I bought when I first started this blog (the white ones), I have random things I’ve picked up over the years, and I have my everyday plates.  Occasionally, I use my grandmother’s china, like in this post.  You’ve seen all my plates and such ad nauseum.  I do love tableware and in my next life, I will have a collection of lots of different patterns and my photos will be a lot more interesting.

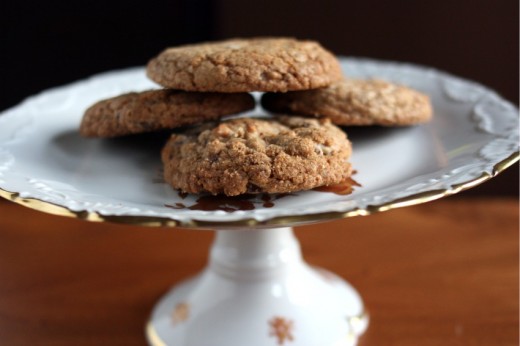
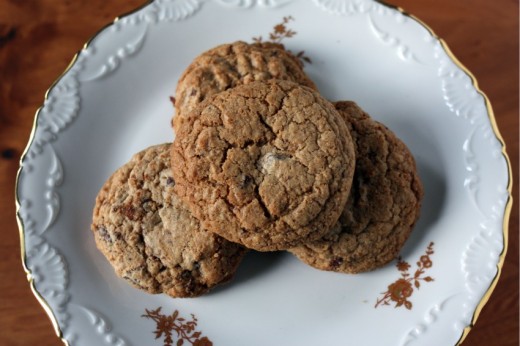
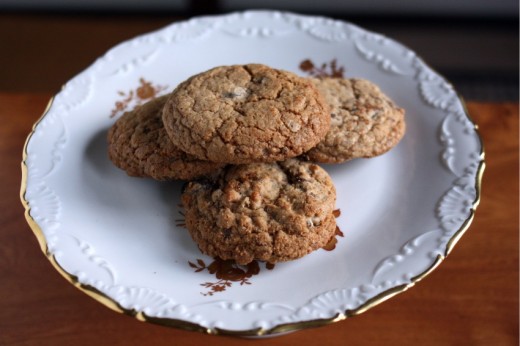
In this state of prop envy, you can probably imagine my delight when my mom brought over this little treat of a platter on Thanksgiving.  It was sitting in her armoire (where there are probably countless other treasures) and it is Limoges.  Old Limoges, mostly likely from my grandmother.  Why it was just sitting in there and why I have never seen it are questions I can’t answer.  No matter.  It’s mine now and I love it.  I find cookies a little hard to photograph – it’s kind of Here they are!  Three or four to a plate!  Round!  Bumpy!  Very similar looking to the ones I made last week!  But I think this little plate might help make them look more appetizing.

So, I have a favorite chocolate chip cookie recipe.  I link to it all the time.  This is not that recipe.  This is the chocolate chip cookie recipe from Kim Boyce’s book Good to the Grain.  It is a well-loved recipe.  Some people, who I respect immensely, have sung this cookie’s praises.  It was only a matter of time until I made it.  And I am here to tell you that I like this cookie very much.  The dough behaves well and you can use it right after mixing it – no 24-72 hour waiting period like the one you will see with the New York Times recipe.  There is a nice nuttiness that the whole wheat flour brings to this cookie but without those pesky nuts.  Plus, with 100% whole wheat flour and heart healthy bittersweet chocolate, why, this cookie is practically health food.

I would tell you about this cookie anyway – it’s a nice one.  But the real reason I am offering you yet another chocolate chip cookie recipe and the reason I am writing about a recipe that has been written about by better writers and bakers than myself, is because Randy asked me to make these again.  Randy.  My husband who says he does not like chocolate.  This was not a someday request, as in “someday after you’ve made 25 other cookie recipes, make this one again”.  This was a “the cookie jar is almost empty and I’m getting nervous and I want the very same cookies we are about to run out of” request.  November 26th marked the 11th anniversary of our first date and I knew that day that I would marry him.  I did not know that life would be full of surprises like moving to London, having two boys, and requests for unlikely (for him) cookies.

One Year Ago:  Snickerdoodle Cupcakes
Two Years Ago:  Spicy Tomato Jam
Three Years Ago:  Oatmeal Raisin Cookies

Chocolate Chip Cookies
With very slight changes from Good to the Grain
Makes about 32 cookies

The recipe was written to make huge cookies, I prefer to have plain old large ones instead.  I have three baking sheets, so I baked these on convection all at the same time.  If you only have two, either make the cookies larger, or make them in two batches.

Dry Mix
3 cups whole wheat flour
1½ tsp. baking powder
1 tsp. baking soda
1½ kosher salt

Wet Mix
8 ounces (2 sticks) unsalted butter, room temperature
1 cup dark brown sugar
1 cup sugar
2 eggs
2 tsp. vanilla extract
8 ounces bittersweet chocolate, roughly chopped into ¼-inch and ½-inch pieces

Place three racks in the oven and preheat to 350ºF.  Line three baking sheets with parchment paper.  (DT: I was out of parchment paper and my cookies released from the sheets just fine.)

Sift the dry ingredients into a large bowl, pouring back into the bowl any bits of grain or other ingredients that may remain in the sifter.

Add the butter and the sugars to the bowl of a standing mixer fitted with the paddle attachment.  With the mixer on low speed, mix just until the butter and sugars are blended, about 2 minutes.  Use a spatula to scrape down the sides of the bowl.  Add the eggs one at a time, mixing until each is combined.  Mix in the vanilla.  Add the flour mixture to the bowl and blend on low speed until the flour in barely combined, about 30 seconds.  Scrape down the sides and bottom of the bowl.  Remove the bowl from the standing mixer.

Add the chocolate all at once to the batter.  Using your rubber spatula, mix in the chocolate by hand.  Make sure it is evenly incorporated and there are no floury bits on the bottom of the bowl.  Using a large ice cream scoop, scoop out mounds of dough and place them, three to a row, on the prepared baking sheets.  These cookies spread significantly so be sure to leave enough room.

Bake the cookies for 16 to 20 minutes, rotating the sheets halfway through.  (Rotating is not necessary if you are using convection.)  You want the cookies to be evenly dark brown.  Remove the cookies from the oven and cool on a rack.  Boyce says the cookies will keep for 3 days in an airtight container, but they kept for over a week in my cookie jar.


Perfect Chocolate Birthday Cake and a Giveaway

October 19, 2011

I just took a quick look at the “Cake” section of my blog and counted no fewer than 17 chocolate cakes.  17!  I guess I should clarify – 17 cakes that have chocolate in them, but still, 17!  And there is always room for another.

Sometimes I like bells and whistles, sometimes I like straight chocolate.  Up until very recently, I had not found the perfect classic chocolate layer cake – the kind you bring out topped with candles and accompanied by on off-key rendition of “Happy Birthday”.  The cake from Holly B’s was pretty good, tasty and easy, but the frosting amount was off and I find very few things more annoying than setting out to make a layer cake and having some part of it not work.

These are the times when you turn to a trusted source.  I get really excited about super seasonal cookbooks or single subject ones (as long as that single subject is something I like to cook and eat), but a good cook needs a few no-nonsense, big, all-inclusive, tested-to-perfection cookbooks in her collection.   How many of those are out there?  In my mind, not many.  I have The Joy of Cooking, The Essential New York Times Cookbook, and Vegetarian Cooking for Everyone.  Oh, and my new baby.

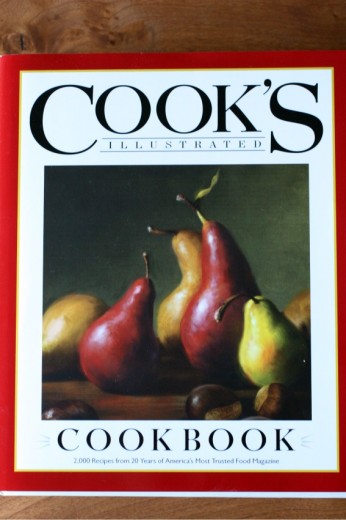
You know the folks at Cook’s Illustrated, right?  I have been getting their magazine for over ten years and have mentally thanked them countless times for coming up with perfect recipes and making mistakes in their testing process so that I don’t have to.  I’ve been using their book Baking Illustrated for years and it has the distinction of not a single note written in it because the recipes do exactly what they say they will.  Now those good people have come out with a single comprehensive volume called Cook’s Illustrated Cookbook, 2,000 Recipes from 20 Years of America’s Most Trusted Food Magazine.  (You can buy it here.)

For those of you who receive their magazine, you are used to reading the fascinating stories of how they come to the perfect recipes.  In this new very large book, they still include a bit of each story.  Each recipe is prefaced by a paragraph called “Why This Recipe Works”.  It’s not just recipes, the personality of the magazine still comes through.  You will still get to read tidbits about the testing process and also get valuable make-ahead tips for many of the recipes.  Oh yes, and the recipes.  If you have every made a Cook’s Illustrated recipe, you know that it turns out exactly as they say it will.  Every time.  Because this book is so comprehensive, you get everything from very basic (Foolproof Vinaigrette) to very fancy (Kahlúa Soufflé with Ground Espresso).  Am I gushing?  Is it clear that I love this book?

Good.  I, and the good people at Cook’s Illustrated, want you to have a copy.  All 2,000 recipes.  Just leave me a comment telling me if there is a perfect recipe you have been searching for.  I always love to get a sense of who my readers are and what you are cooking.  I will randomly pick a winner next Monday, October 24th.  You have until noon PDT that day to enter.  UPDATE:  Contest now closed.  Winner announced 10-25-11!

And now, back to cake.


Old-Fashioned Chocolate Layer Cake
Cook’s Illustrated Cookbook
Serves 10 to 12

I served this cake at a 50th birthday party after a large meal and along side an apple crisp.  I cut very small slices and served 12 with about half the cake left over.

Cake
4 ounces unsweetened chocolate, chopped coarse
¼ cup (¾ ounce) Dutch-processed cocoa
½ cup hot water
1¾ cups (12¼ ounces) sugar
1¾ cups (8¾ ounces) all-purpose flour
1½ teaspoons baking soda
1 teaspoon salt
1 cup buttermilk
2 teaspoons vanilla extract
4 large eggs plus 2 egg yolks, room temperature
12 tablespoons unsalted butter, cut into 12 pieces and softened

Frosting
1 pound semisweet chocolate, chopped fine
8 tablespoons unsalted butter
1/3 cup (2 1/3 ounces) sugar
2 tablespoons corn syrup
2 teaspoons vanilla extract
¼ teaspoon salt
1¼ cups heavy cream

1.  For the cake:  Adjust the oven rack to middle position and heat oven to 350 degrees.  Grease two 9-inch round cake pans, line with parchment paper, grease parchment, and flour pans.  Combine chocolate cocoa, and hot water in medium heatproof bowl set over saucepan filled with 1 inch of barely simmering water and stir with  heatproof rubber spatula until chocolate is melted, about 2 minutes.  Add ½ cup sugar to chocolate mixture and stir until thick and glossy, 1 to 2 minutes.  Remove  bowl from heat; set aside to cool.

2.  Whisk flour, baking soda, and salt together in medium bowl.  Combine buttermilk and vanilla in small bowl.  Using stand mixer fitted with whisk, whip eggs and egg yolks on medium-low speed until combined, about 10 seconds.  Add remaining 1¼ cups sugar, increase speed to high, and whip until light and fluffy, 2 to 3 minutes.  Replace whisk with paddle.  Add cooled chocolate mixture to egg mixture and mix on medium speed until thoroughly combined, 30 to 45 seconds, scraping down bowl as needed.  Add butter, 1 piece at a time, mixing about 10 seconds after each addition.  Add flour in 3 additions, alternating with 2 additions of buttermilk mixture, mixing until incorporated after each addition (abut 15 seconds), scraping down bowl as needed (batter may appear curdled).  Mix at medium-low speed until batter is thoroughly combined, about 15 seconds.  Remove bowl from mixer and give batter final stir by hand.

3.  Divide batter evenly between prepared pans and smooth tops with rubber spatula.  Bake cake until toothpick inserted in centers comes out with few crumbs attached, 25 to 30 minutes.  Let cakes cool in pans on wire rack for 10 minutes.  Remove cakes from pans, discard parchment, and let cool completely, about 2 hours, before frosting.  (Cooled cakes can be wrapped tightly in plastic wrap and kept at room temperature for up to 1 day.  Wrapped tightly in plastic, then aluminum foil, cakes can be frozen for up to 1 month.  Defrost cakes at room temperature before unwrapping and frosting.)

4.  For the frosting:  Melt chocolate in heatproof bowl set over saucepan containing 1 inch of barely simmering water, stirring occasionally until smooth.  Remove from heat and set aside.  Meanwhile, melt butter in small saucepan over medium-low heat.  Increase heat to medium, add sugar, corn syrup, vanilla, and salt and stir with heatproof rubber spatula until sugar is dissolved, 4 to 5 minutes.  In bowl of sand mixer, combine melted chocolate, butter mixture, and cream and stir until thoroughly combined.

5.  Place mixer bowl over ice bath and stir mixture constantly with rubber spatula until frosting is thick and just beginning to harden against bowl, 1 to 2 minutes (frosting should be 70 degrees).  Fit stand mixer with paddle and beat frosting on medium-high speed until frosting is light and fluffy, 1 to 2 minutes.  Using rubber spatula, stir until completely smooth.

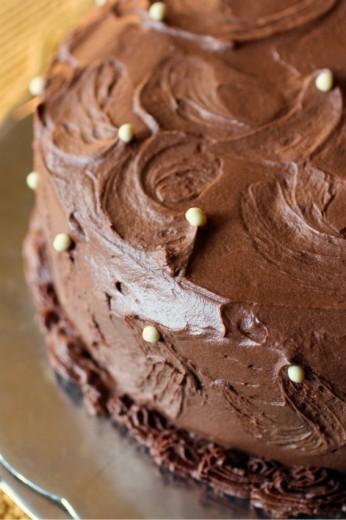
6.  To Assemble the Cake:  Line edges of cake platter with 4 strips of parchment paper to keep platter clean.  Place 1 cake layer on prepared platter.  Place about 1½ cups frosting in center of cake layer and, using large spatula, spread in even layer right to edge of cake.  Place second layer on top, making sure layers are aligned, then frost top in same manner as first layer, this time spreading frosting until slightly over edge.  Gather more frosting on tip of spatula and gently spread icing onto side of cake.  Smooth frosting by gently running edge of spatula around cake and leveling ridge that forms around top edge, or create billows by pressing back of spoon into frosting and twirling spoon as you lift away.  Carefully pull out pieces of parchment from beneath cake before serving.  (Assembled cake can be refrigerated for up to 1 day.  Bring to room temperature before serving.)


Brownies for the Adults

October 7, 2011

Let me get this out of the way.  These are not pot brownies.  I have not made or eaten pot brownies.  Not that there is anything wrong with pot brownies – they are just really not my thing.  I have to say that because I bet there is at least one person out there who sees “brownies for adults” and assumes they must have weed in them.

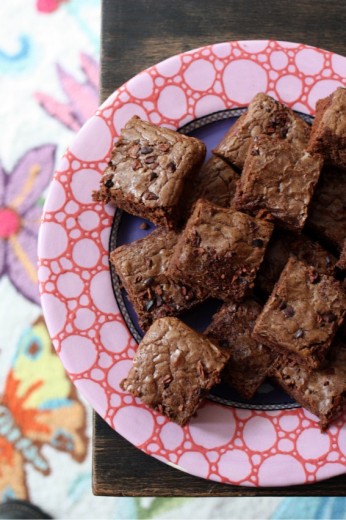
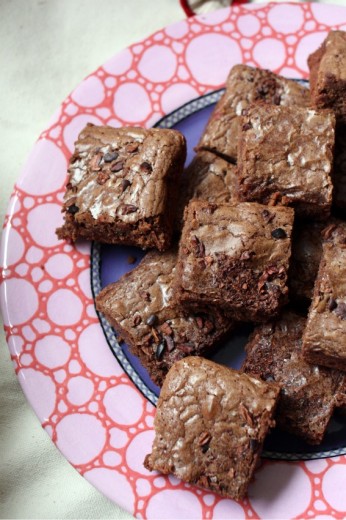
And here, rather than just tell you why I think these brownies are for adults (cocoa nibs!  but my kids loved them too!) and why I liked them very much although they are quite different from my favorite (cakier!  less intense!), and why I made them (yoga retreat!), I have to tell you about my dad.

My dad is a retired oncologist.  He spent 30-something years treating people with cancer and doing so with kindness and empathy.  The man who would famously tell his kids and wife, sort of jokingly, “Take 2 aspirin and call me in the morning” when one of us was sick, was the most compassionate kind of doctor.  I know because he really is a compassionate dad and I also know because every single person I have ever met who was either in his care or had a family member in his care, practically swoons at the mention of his name.  Nurses too.  And nurses know.

One Wednesday this past summer, I brought my parents to our neighborhood farmers’ market along with the boys.  It is something we like to do together when the timing is right.  Outside, a man was gathering signatures to introduce a measure to legalize medical marijuana in Washington state.  My dad stopped, broke away from us, and went over to sign the ballot.  He is not the ballot-signing type so I was surprised.  I know his views on drugs are more liberal than the average 68 year old but still.  I asked why he felt so strongly.  I asked if he thought that pot does actually help people who are nauseated by chemotherapy.  He said, “Not at all.  Medically, I don’t think it helps.  But if someone has cancer and is that ill, and their immune system is compromised and their hair is falling out and they can’t eat because everything nauseates them, and they think that the pot helps?  Then they should be able to smoke all they want.”  Go Dad.

So yes, I know that this is a bit of a stretch – brownies with cocoa nibs to pot to my dad and ballot measures, but sometimes stories just must be told.

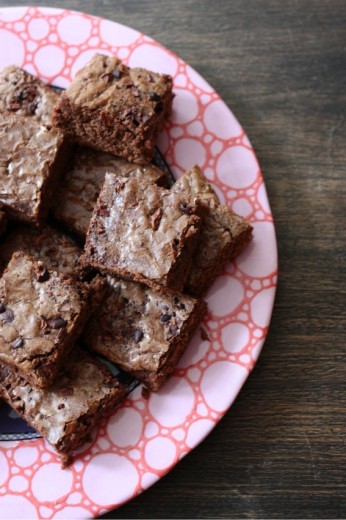
Onward!  I have a lot of brownie recipes here at Dana Treat.  As a chocoholic, I consider brownies a perfect treat.  And because I love chocolate, my perfect brownie is dark, dense, and intense.  But sometimes it is nice to have a brownie that is more like a little piece of cake than a piece of fudge and that is where this guy comes in.  It is not a wimpy brownie, I would say it’s very pleasant.  Well-behaved.  Slightly elegant but also quirky with a bit of crunch.  If you have not tasted cocoa nibs before, they can fool you a bit.  For me, in the first second, I taste chocolate, then coffee, then a bit of bitter.  I like chocolate chips in brownies because I like the break in texture from smooth and rich.  But sometimes some less sweet, less chocolate-y, is welcome.

One Year Ago:  Ratatouille and Mushroom and Herb Polenta
Two Years Ago:  Asian Coconut Noodle Soup and Pasta with Tomato Sauce and Arugula
Three Years Ago:  Mediterranean Five Lentil Soup

Cocoa Nib Brownies
The Modern Baker
Makes about 24 brownies

8 ounces (2 sticks) unsalted butter, cut into 12 pieces
9 ounces bittersweet (not unsweetened) chocolate, cut into ¼-inch pieces
1¼ cups dark brown sugar, firmly packed
4 large eggs
½ tsp. salt
¾ cups granulated sugar
1 tbsp. vanilla extract
1¼ cups flour
½ cup cocoa nibs

Line a 13x9x2-inch pan with foil.  Butter foil and set aside.  Set a rack in the middle level of the oven and preheat to 350ºF.

Put the cut-up butter into a medium saucepan and place over medium heat.  Let the butter melt, stirring 2 to 3 times, then allow it to bubble for about 10 seconds.  Remove the pan from the heat and add the chocolate.  Gently shake the pan to submerge the chocolate in the hot butter and set aside for a few minutes so that the chocolate melts.  Use a small whisk to mix smooth.

Place the brown sugar in the bowl of an electric mixer.  Beat in 1 egg on lowest speed using the paddle attachment.  Add the remaining eggs, one at a time, beating smooth after each.  Add the salt, sugar, and vanilla and beat smooth.

Remove the bowl from the mixer and use a large rubber spatula to mix in the chocolate and butter mixture.  Mix in the flour followed by ¼ cup of the cocoa nibs.

Scrape the batter into the prepared pan and smooth the top.  Scatter the remaining ¼ cup cocoa nibs on the batter.

Bake the brownies until they are firm, but still very moist in the center, about 30 minutes.

Cool the brownies in the pan on a rack.

Wrap the pan in plastic wrap and refrigerate the brownies for several hours or overnight before attempting to cut them – they are very moist.


« Older Posts Newer Posts »