I just took a quick look at the “Cake” section of my blog and counted no fewer than 17 chocolate cakes. 17! I guess I should clarify – 17 cakes that have chocolate in them, but still, 17! And there is always room for another.
Sometimes I like bells and whistles, sometimes I like straight chocolate. Up until very recently, I had not found the perfect classic chocolate layer cake – the kind you bring out topped with candles and accompanied by on off-key rendition of “Happy Birthday”. The cake from Holly B’s was pretty good, tasty and easy, but the frosting amount was off and I find very few things more annoying than setting out to make a layer cake and having some part of it not work.
These are the times when you turn to a trusted source. I get really excited about super seasonal cookbooks or single subject ones (as long as that single subject is something I like to cook and eat), but a good cook needs a few no-nonsense, big, all-inclusive, tested-to-perfection cookbooks in her collection. How many of those are out there? In my mind, not many. I have The Joy of Cooking, The Essential New York Times Cookbook, and Vegetarian Cooking for Everyone. Oh, and my new baby.
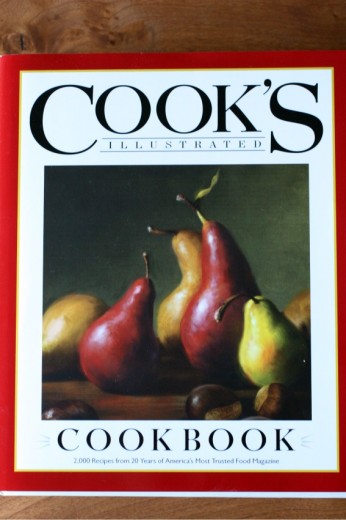
You know the folks at Cook’s Illustrated, right? I have been getting their magazine for over ten years and have mentally thanked them countless times for coming up with perfect recipes and making mistakes in their testing process so that I don’t have to. I’ve been using their book Baking Illustrated for years and it has the distinction of not a single note written in it because the recipes do exactly what they say they will. Now those good people have come out with a single comprehensive volume called Cook’s Illustrated Cookbook, 2,000 Recipes from 20 Years of America’s Most Trusted Food Magazine. (You can buy it here.)
For those of you who receive their magazine, you are used to reading the fascinating stories of how they come to the perfect recipes. In this new very large book, they still include a bit of each story. Each recipe is prefaced by a paragraph called “Why This Recipe Works”. It’s not just recipes, the personality of the magazine still comes through. You will still get to read tidbits about the testing process and also get valuable make-ahead tips for many of the recipes. Oh yes, and the recipes. If you have every made a Cook’s Illustrated recipe, you know that it turns out exactly as they say it will. Every time. Because this book is so comprehensive, you get everything from very basic (Foolproof Vinaigrette) to very fancy (Kahlúa Soufflé with Ground Espresso). Am I gushing? Is it clear that I love this book?
Good. I, and the good people at Cook’s Illustrated, want you to have a copy. All 2,000 recipes. Just leave me a comment telling me if there is a perfect recipe you have been searching for. I always love to get a sense of who my readers are and what you are cooking. I will randomly pick a winner next Monday, October 24th. You have until noon PDT that day to enter. UPDATE: Contest now closed. Winner announced 10-25-11!
And now, back to cake.
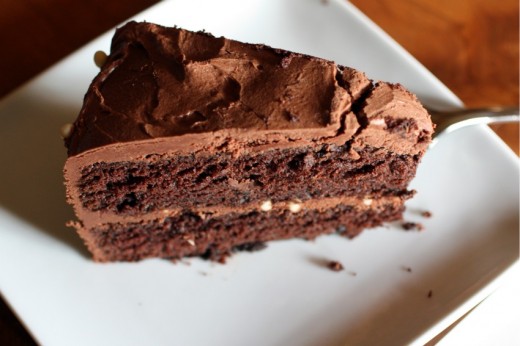
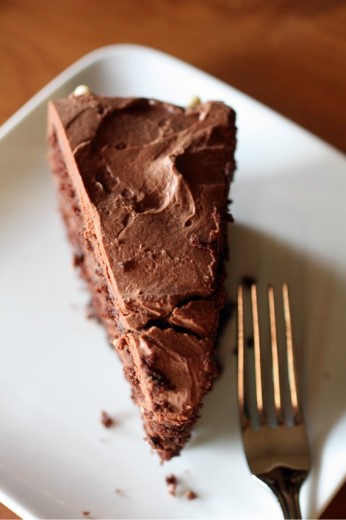
Old-Fashioned Chocolate Layer Cake
Cook’s Illustrated Cookbook
Serves 10 to 12
I served this cake at a 50th birthday party after a large meal and along side an apple crisp. I cut very small slices and served 12 with about half the cake left over.
Cake
4 ounces unsweetened chocolate, chopped coarse
¼ cup (¾ ounce) Dutch-processed cocoa
½ cup hot water
1¾ cups (12¼ ounces) sugar
1¾ cups (8¾ ounces) all-purpose flour
1½ teaspoons baking soda
1 teaspoon salt
1 cup buttermilk
2 teaspoons vanilla extract
4 large eggs plus 2 egg yolks, room temperature
12 tablespoons unsalted butter, cut into 12 pieces and softened
Frosting
1 pound semisweet chocolate, chopped fine
8 tablespoons unsalted butter
1/3 cup (2 1/3 ounces) sugar
2 tablespoons corn syrup
2 teaspoons vanilla extract
¼ teaspoon salt
1¼ cups heavy cream
1. For the cake: Adjust the oven rack to middle position and heat oven to 350 degrees. Grease two 9-inch round cake pans, line with parchment paper, grease parchment, and flour pans. Combine chocolate cocoa, and hot water in medium heatproof bowl set over saucepan filled with 1 inch of barely simmering water and stir with heatproof rubber spatula until chocolate is melted, about 2 minutes. Add ½ cup sugar to chocolate mixture and stir until thick and glossy, 1 to 2 minutes. Remove bowl from heat; set aside to cool.
2. Whisk flour, baking soda, and salt together in medium bowl. Combine buttermilk and vanilla in small bowl. Using stand mixer fitted with whisk, whip eggs and egg yolks on medium-low speed until combined, about 10 seconds. Add remaining 1¼ cups sugar, increase speed to high, and whip until light and fluffy, 2 to 3 minutes. Replace whisk with paddle. Add cooled chocolate mixture to egg mixture and mix on medium speed until thoroughly combined, 30 to 45 seconds, scraping down bowl as needed. Add butter, 1 piece at a time, mixing about 10 seconds after each addition. Add flour in 3 additions, alternating with 2 additions of buttermilk mixture, mixing until incorporated after each addition (abut 15 seconds), scraping down bowl as needed (batter may appear curdled). Mix at medium-low speed until batter is thoroughly combined, about 15 seconds. Remove bowl from mixer and give batter final stir by hand.
3. Divide batter evenly between prepared pans and smooth tops with rubber spatula. Bake cake until toothpick inserted in centers comes out with few crumbs attached, 25 to 30 minutes. Let cakes cool in pans on wire rack for 10 minutes. Remove cakes from pans, discard parchment, and let cool completely, about 2 hours, before frosting. (Cooled cakes can be wrapped tightly in plastic wrap and kept at room temperature for up to 1 day. Wrapped tightly in plastic, then aluminum foil, cakes can be frozen for up to 1 month. Defrost cakes at room temperature before unwrapping and frosting.)
4. For the frosting: Melt chocolate in heatproof bowl set over saucepan containing 1 inch of barely simmering water, stirring occasionally until smooth. Remove from heat and set aside. Meanwhile, melt butter in small saucepan over medium-low heat. Increase heat to medium, add sugar, corn syrup, vanilla, and salt and stir with heatproof rubber spatula until sugar is dissolved, 4 to 5 minutes. In bowl of sand mixer, combine melted chocolate, butter mixture, and cream and stir until thoroughly combined.
5. Place mixer bowl over ice bath and stir mixture constantly with rubber spatula until frosting is thick and just beginning to harden against bowl, 1 to 2 minutes (frosting should be 70 degrees). Fit stand mixer with paddle and beat frosting on medium-high speed until frosting is light and fluffy, 1 to 2 minutes. Using rubber spatula, stir until completely smooth.
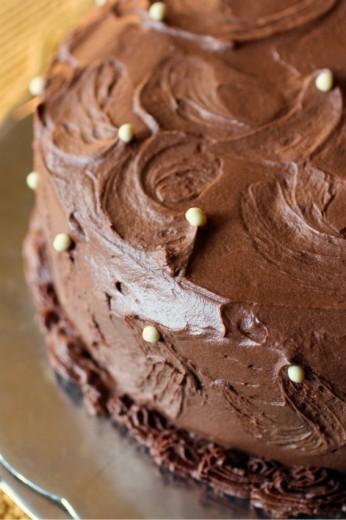
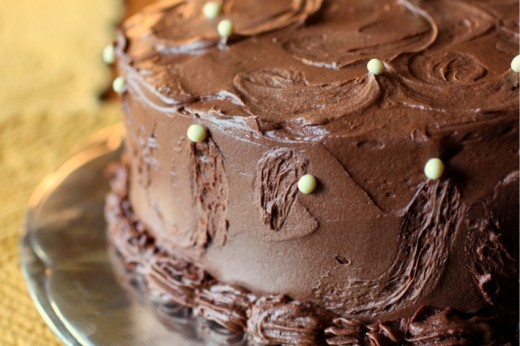
6. To Assemble the Cake: Line edges of cake platter with 4 strips of parchment paper to keep platter clean. Place 1 cake layer on prepared platter. Place about 1½ cups frosting in center of cake layer and, using large spatula, spread in even layer right to edge of cake. Place second layer on top, making sure layers are aligned, then frost top in same manner as first layer, this time spreading frosting until slightly over edge. Gather more frosting on tip of spatula and gently spread icing onto side of cake. Smooth frosting by gently running edge of spatula around cake and leveling ridge that forms around top edge, or create billows by pressing back of spoon into frosting and twirling spoon as you lift away. Carefully pull out pieces of parchment from beneath cake before serving. (Assembled cake can be refrigerated for up to 1 day. Bring to room temperature before serving.)

 Share
Share
[…] a few other bloggers have reviewed this recipe too — you can check out their recaps here, here, and here! Mine didn’t turn out quite as neat as theirs, but that’s because I did a […]
Pingback by HBD Anthony! | minutes per mile blog — January 6, 2015 @ 1:52 pm