Archive for October, 2010

Success and Failure

October 19, 2010

Here is a question.  Which is worse – enduring a recipe fail and having no idea why it failed, or enduring a recipe fail and knowing exactly what you did wrong?  Is it better to kick yourself or the cookbook?

This was supposed to be Enchiladas Verdes.  Corn tortillas filled with an intoxicating mixture of red onion, zucchini, and the season’s last corn – all sautéed with a bunch of cumin until just cooked.  Tomatillo sauce covers the bottom of the dish, the tops of the enchiladas and a handful of cheese is strewn over the top, and the whole dish is baked until melty and gooey.  Sounds good, right?  Where did I go wrong?

Actually, in this case, I know exactly where I went wrong.  Enchiladas typically use corn tortillas as opposed to burritos which use flour tortillas.  Flour tortillas are easy to wrap around filling but corn tend to split if they are not prepped.  The way most recipes instruct you to do this is to heat up some oil on the stove and dip the tortillas one by one in the hot oil.  It is kind of a time consuming process, messy, and not too healthy.

Now.  I don’t pretend to be Cooking Light here.  There are 73 dessert recipes on this site after all.  But in my savory cooking, I really do try to be mindful and keep things healthy.  I have done the tortilla dipping in oil thing before and it pained me to do so.  I figured I could maybe just brush the tortillas with a bit of oil, wrap them in foil, and warm them in the oven.  It did not work.  It was clear from the first enchilada that my tortillas were going to be splitsville.  I was undone by my own attempts at lightening up a dish.

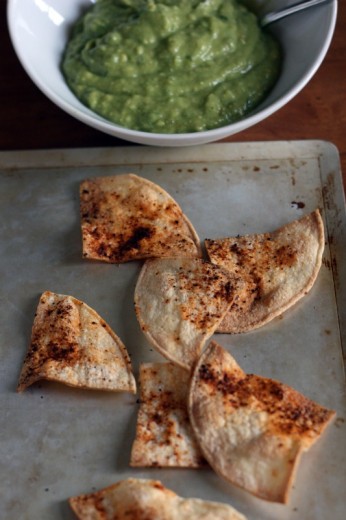
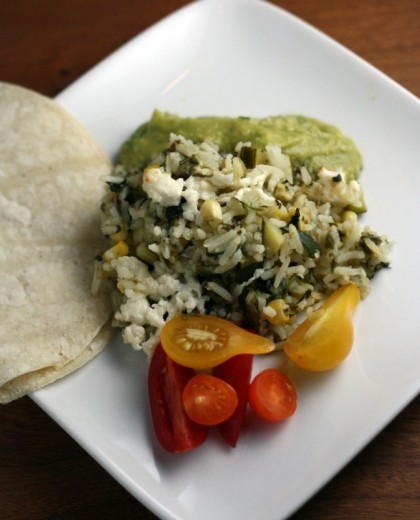
So, I had a double helping of an amazing tomatillo sauce, a terrific filling, lots of tortillas and avocados.  I also had a green rice that I had intended to serve alongside the enchiladas.  I mixed the rice and filling together with about one third of the tomatillo sauce, put it in a baking dish, sprinkled queso fresco on top, and baked it.  I mashed another third of the sauce into the avocados for a super tangy guacamole.  I served the remaining third in a dish to spoon over everything including the black beans I cooked down with lots of onions and cumin.  And with the tortillas, I made these.

I always tell people that my downfall is not brownies, cookies, or cakes (although I like all three), but salty crunchy things.  Like chips.  Specifically tortilla chips.  I can’t have them in the house.  I have a whole shelf of my pantry devoted to chocolate and it stays untouched until I go to bake something with it.  But if there are chips in the house, they do not last more than a day or two.  Sometimes I will buy the low fat ones but they are so unsatisfying – salty cardboard – that it isn’t really worth it.

Making your own chips is so easy and so much healthier than the store-bought version.  I would even argue that they taste better because you control the seasoning.  If you buy nice thick tortillas you get nice thick chips.  And thick chips are great for scooping up huge quantities of tomatillo guacamole.  So, I can’t share the enchilada recipe since I technically didn’t make it but I’ll tell you how I made the chips.  And as an added bonus, I’ll share the tomatillo sauce.

One Year Ago:  Petits Pains au Chocolat

Fresh Corn Tortilla Chips
Dana Treat Original
Makes 24 thick chips

I’m not super exact on measurements here because it so depends on your taste.  I like my chips really salty but if you don’t just use a pinch or two.

6 corn tortillas
Vegetable oil
Kosher salt
About 2 tsp. chile powder, or more (or less!) to taste
1 lime, cut in half

Preheat the oven to 375ºF.  Using a pastry brush, brush the top of each tortilla with the vegetable oil.  Sprinkle with a pinch of salt and a small pinch of chile powder.  Repeat with the remaining tortillas, stacking one on top of the other as you finish.  Using a large sharp knife, cut through the stack both lengthwise and width wise to end up with 24 pieces total.

Separate out the chips and place on a baking sheet.  Put in the oven and bake until the chips become fragrant and start to brown around the edges, 10 to 15 minutes.  Remove from the oven and immediately squeeze the juice from the lime over the chips.  Sprinkle with another pinch of salt and allow to cool.

Tomatillo Sauce
Adapted from Fields of Greens
Makes about 2 cups

As written, this recipe will make a loose sauce so don’t expect salsa consistency.  If you want it chunkier, just pulse it in the processor until you reach the desired texture.

1 small yellow onion, thinly sliced
Salt and cayenne pepper
½ green bell pepper, coarsely chopped
1 pound fresh tomatillos, husked
1 or 2 jalapeños, seeded and chopped
2 tbsp. chopped cilantro

Pour a little water into a medium-size saucepan; add the onion, a pinch of salt, and a small pinch of cayenne.  Cover and cook the onion without stirring, over medium heat until soft, about 5 minutes.  Add the bell pepper, tomatillos, and chiles.  Cover again and cook until the tomatillos are very soft and have released their juices, about 15 to 20 minutes.

Purée in a blender or food processor until the sauce is smooth, season with salt and more jalapeños or cayenne to taste.  Add the cilantro just before serving.


The $1 Olive

October 17, 2010

I recently had a very bad dining experience but fortunately something good came out of it.  A very close friend who is going through a rough patch needed a night out and she chose Dinette.  It is a restaurant that has been around for quite a while but it is a place that she had never tried.  Dinette is adorable and their focus is toasts.  They come in thick and chewy varieties and thin and crispy varieties.  Each type has about four different topping choices.  There are also some lovely salads and about five entrées on the menu.

The food we ate was very good.  There were plenty of interesting vegetarian choices.  The prices were very fair.  The vibe in the place was very sweet.  The service was, in a word, terrible.  I won’t go on and on about the multitude of ways our server was rude but I do have to tell you about the olive.

My friend ordered their martini and asked for extra olives which is something she always does and I would do too if I drank martinis.  The waitress snarkily told her that she would have to charge for extra olives because they were stuffed with blue cheese.  It was at that point, after several rude things had already happened, that I would have gotten up and walked out.  But my friend was fragile and getting back in the car in search of another place seemed like a bit much.  The waitress returned with the martini and, wait for it, two olives.  We checked the menu.  The cocktail description said the martini was served with Gorgonzola stuffed olives.  Plural.  How exactly is a total of two extra?

The evening went on.  She continued to be rude.  We did our best to ignore her and talk and enjoy our food.  When she brought the bill, I nearly fell out of my chair.  There was a $1 charge for the extra olive.  Now, I am a good tipper.  I start at 20% and will leave more for very good service.  I always tip on the full amount of the bill, regardless of whether I am using a coupon or some kind of discount.  I did not tip this woman.  I wrote on the back of the receipt (because she had disappeared) that by choosing to charge us $1 for one freaking olive, she had lost a $20 tip.  I came home, tweeted about it, put it up on Facebook, and am now telling you.  I sent the owner of the restaurant an email telling her not just about the olive, but about how rudely we were treated.  I never heard a word.  It is surprising to me, in this day and age not of “they told two friends and so on and so on” but “they told two friends who tweeted it and posted about it on Facebook and wrote a long blog post about it”, that there would be silence.

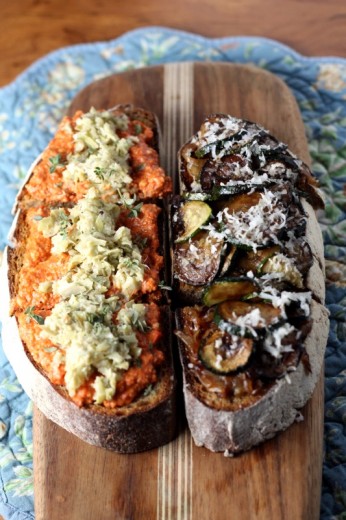
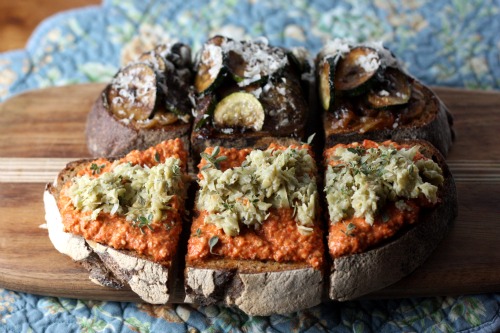
But!  The good news!  Toasts!  We ordered two.  Each was essentially a very large slice of bread cut into four manageable sized pieces.  One was topped with some kind of oozy cheese, frisée and an unfortunate amount of truffle oil which completely overpowered the toast.  The other was topped with carmelized onions, thin slices of sautéed zucchini and goat cheese.  This was the kind of thing which you finish and immediately want another piece.  Like forget the salad, entrée and dessert – just give me more of those toasts.

There were so many things right with this beauty starting with the bread.  It was a nice thick slice and toasted just enough to make it interesting without hurting your teeth or scratching the roof of your mouth.  The bread was very dense and hearty with just the slightest tang.  A few days later, I happened upon a bread in the grocery store that I thought might be the one they used.  It was made by the Essential Baking Company here in Seattle and I bought that loaf with the idea for our dinner that night now firmly decided.  I had zucchini and onions and I decided to swap out the goat cheese for a saltier Pecorino Romano.

I had some Roasted Red Pepper Pesto in my refrigerator from dinner the previous night and I also had some fresh baby artichokes because I can never resist them when I see them at the farmers’ market.  (We have two artichoke seasons here in the Northwest – spring and fall.)  I decided to braise the hearts in shallots and white wine and purée them a bit in my food processor.  Toast #1 was the zucchini rendition and toast #2 was slathered with the pesto and then the artichokes and sprinkled with fresh thyme.  Both were so good, I decided to make them as my sandwich offering at Saturday’s yoga retreat with my friend Jen.  People really loved them, especially the artichoke one.  Maybe I’ll sell my idea to Dinette and charge them a dollar.

Some tips.  Cut your bread about an inch thick – this is not a crostini.  Make sure you drizzle it with olive oil to coat the surface – you want to keep the bread relatively soft.  For this reason, you will also want to stay near the oven so they don’t overbake.  Because you are using a thick piece of bread, the toppings should be generous.  If you don’t have access to fresh artichokes or don’t want to spend the time breaking them down, you can certainly either use frozen ones, cooked the same way as described, or you can use jarred marinated hearts.  I would rinse them well (I don’t appreciate that pickle-y flavor here) and just purée them.

One Year Ago:  Holly B’s Cappucino Bars
Two Years Ago:  Soba Noodles with Tofu and Bok Choy

Toast with Caramelized Onions and Zucchini

Inspired by Dinette
Serves 2

Whenever I need to caramelize onions for something, I make extra.  It takes no extra effort, they keep well, and are delicious in so many things.

1 large 1-inch thick whole wheat sourdough bread
Olive oil
1 large yellow onion, thinly sliced
1 medium zucchini, ends trimmed and thinly sliced
1 tbsp. good quality balsamic vinegar
Kosher salt and freshly ground black pepper
¼ cup freshly grated Pecorino Romano cheese

Preheat the oven to 375ºF.  Place the slice of bread on a baking sheet and drizzle liberally with olive oil.  Put the sheet in the oven and bake until the surface is slightly crisp, but there is still quite a bit of give when you push down on it, about 10 minutes.

Meanwhile, heat a sauté pan over medium heat.  Drizzle in just enough olive oil to coat the bottom of the pan, then add the onions and a large pinch of salt.  Cook, stirring frequently, until soft and starting to become translucent, about 10 minutes.  Turn the heat down to medium-low and cook, stirring occasionally, until they are very fragrant and a deep golden brown, 20 to 25 minutes.  (If have a cast iron skillet, use it.  I love how evenly and quickly the onions caramelize in mine.  You can make these up to 5 days ahead.  Once cool, cover and refrigerate.)

Heat another sauté pan over medium heat.  Drizzle in just enough olive oil to coat the bottom, then add the zucchini slices and a pinch of salt and a few grinds of pepper.  Sauté, stirring occasionally, until the zucchini is cooked through and browning in places, about 7 to 10 minutes.  Turn off the heat, then pour in the balsamic vinegar, stirring to coat the zucchini slices.  Taste and adjust seasoning as necessary, keeping in mind that Pecorino Romano is a salty cheese.

To assemble, lay the caramelized onions over the toasted bread, then shingle the zucchini slices on top.  Sprinkle the whole toast with the cheese and return it to the oven to melt the cheese slightly, 5 to 7 minutes.  Cut into four pieces.

Toast with Roasted Red Pepper Pesto and Artichokes
Dana Treat Original
Serves 2

You will definitely have more pesto than you need for this recipe and might have more artichoke purée than you need – both of which are wonderful problems to have.

1 large 1-inch thick whole wheat sourdough bread
1 large shallot, diced
4 baby artichokes
1 lemon
½ cup of white wine
Kosher salt and freshly ground black pepper
Roasted Red Pepper Pesto (recipe follows)
1 tbsp. fresh thyme leaves

Make the pesto.  Prepare the bread as described in the recipe above.

Fill a small bowl with cold water.  Trim off the top ¼ of the artichokes.  Tear off and discard most of the outer leaves.  Trim the base and stem so that they are flush with the leaves and then slice each heart in half.  Since they are babies, there is no choke to remove.  Place the halves in the lemon water and repeat with the remaining artichokes.

Heat a sauté pan with a lid over medium heat.  Drizzle in just enough olive oil to coat the bottom, and add the shallots and a pinch of salt.  Cook until just starting to brown, about 5 minutes, then add the artichoke hearts.  Give them a good stir then pour in the wine.  Turn the heat down to medium-low and cover the pan.  Cook until the hearts are fork tender, about 7 minutes, adding more wine if the pan becomes too dry.  On the other hand, if there is a lot of liquid left after the hearts are tender, remove the lid and continue cooking until most of the wine has evaporated.  You don’t want them bone dry.

Scrape the mixture into a food processor, add a pinch of salt and a few grinds of pepper, and pulse about 7 times, just enough to create a speadable consistency, but not too uniform.  Chunks are fine.  If the mixture seems too dry, add a bit of olive oil.  Taste and adjust the seasoning as necessary.

To assemble, spread a generous portion of Roasted Red Pepper Pesto over the surface of the toast.  Dollop a 1-inch thick line of the artichokes down the center width-wise.  Sprinkle the whole toast with fresh thyme and cut into four pieces.

Roasted Red Pepper Pesto
Makes about 1 cup

1 7-ounce jar roasted red peppers, well drained
½ cup walnuts
1 large garlic clove, chopped
¼ tsp. salt
Freshly ground black pepper to taste
2 tbsp. olive oil
1/3 cup grated Pecorino Romano cheese (you can also use Parmesan)

Place the peppers, walnuts, garlic, salt and pepper in the bowl of a food processor fitted with the metal blade.  Pulse the mixture until chopped.  With the machine running, pour the olive oil through the feed tube and process until the mixture is fairly uniform but with some small chunks.  Transfer to a small bowl and stir in the cheese by hand.


Fall Salad Perfection

October 15, 2010

Back in May of 2008, I started this blog.  In the beginning I think I had three readers.  My husband, my brother Michael, and my friend Mara.  Mara is a co-op preschool friend and we have two major things in common.  She also has two boys who are about the same age as my boys and she is vegetarian.  She has been an enthusiastic reader from the start and I am happy to have been able to share so many recipes with a friend.

When our little group last got together, Mara brought a salad that she had spotted in Vegetarian Times.  I know we all have eaten our share of fall salads that star pears and goat cheese, but I have to tell you that I thought this salad was extraordinary.  All of us at the table went crazy over it and I kept insisting to Mara that she give me the recipe.  She told me she was flattered to be giving me a recipe (awww) but I think I will be permanently in her debt for passing this one along.

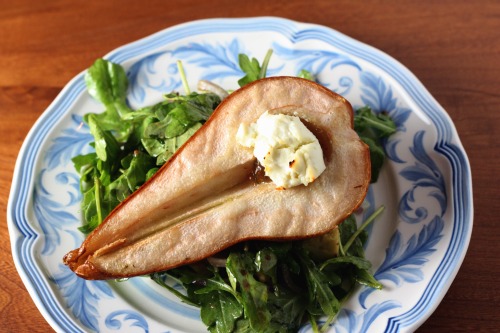
These pear halves get a dollop of fig jam in their hollowed out core and then a round of goat cheese.  Olive oil is drizzled over the top and into a 375º oven they go.  The pears bake long enough to warm through and soften up a bit and to let the cheese start to brown.  Meanwhile, arugula and slices of red onion get tossed with a mustard-y dressing that also stars fig jam.  Mara put walnuts and blue cheese in her salad (as the recipe instructs) but I was out of blue cheese so just opted to add avocado instead.  I really liked it both ways so feel free to add what you like.  I served the pears warm from the oven over the greens which wilted them a bit.  Both Randy and I loved the balance of warm and cool but you can always let your pears cool a bit more.  This is a dinner party worthy salad that is easy enough for any night.  Thank you Mara!

Pear Salad Previously on Dana Treat: Honey Roasted Pear Salad
One Year Ago: Blue Cheese Dressing

Roasted Pear Salad with Chèvre and Fig Vinaigrette
Adapted from Vegetarian Times
Serves 4

I made this just for two of us and I bet if I had made enough for four, we would have eaten it all.

2 Bosc, Comice, Concorde or Barlett pears (I used Bosc), halved and cored
4 tsp. plus 1 tbsp. fig jam, divided
2 oz. soft goat cheese, cut into 4 slices
2 tbsp. olive oil, plus more for drizzling
2 tbsp. lemon juice
1 tsp. Dijon mustard
Kosher salt and freshly ground black pepper
4 cups baby arugula
1/2 small red onion, thinly sliced (1/2 cup)
1 small avocado, cut into 1-inch chunks

Preheat over to 375ºF.  Place pear halves cut-side up on a baking sheet.  Spoon 1 tsp. jam in center of each pear half.  Top with goat cheese rounds, and lightly drizzle with oil.  Bake pears 30 minutes, or until cheese begins to brown.

Whisk together remaining 1 tablespoon fig jam, lemon juice, and mustard in bowl.  Add a good pinch of salt and a few grinds of pepper.  Whisk in 2 tablespoons olive oil.  Taste and adjust seasoning as necessary.

Place arugula, onion, and avocado in a mixing bowl.  Very lightly drizzle on dressing and toss to coat.  Divide among salad plates and top each with a pear half.  Drizzle with a bit more dressing to taste.


How Graham Got His Name

October 12, 2010

This is the story of how my older son, Graham, got his name.  My husband Randy is a third.  As in Emmett Randolph Wootton III.  It’s a big name.  Randy always imagined that he would have a fourth.  But then he met me – his Jewish Pacific Northwest almost-native wife.  I don’t pretend to be religious but no one in my extended family ever named a child after anyone living because it is seen as bad luck in the Jewish faith.  (My middle name is Lee, the “L” being for my grandfather Louis who died shortly before I was born.)  Also, growing up in Seattle, I never knew a Junior, let alone a third.  And certainly not a fourth.

When Randy and I met and were in the throes of first love, he would joke about having a fourth with me.  I would laugh and secretly wonder if he was serious.  As we got engaged and then married, the subject of a fourth would sometimes come up.  One night we were watching a movie and the main character’s name was Graham.  I immediately fell in love with the name.  I had certainly had heard it before but I had never known anyone with it as a first name.  I turned to Randy and said, “Don’t you love the name Graham?”  To which he replied, “Yeah, it’s a cool name.”  And that is where my full court press began.

I got pregnant while we lived in London (where we knew several Grahams) and the first weekend after we found out, we went to Cornwall for a few days.  We were both dazed and incredibly excited, but also careful about getting too excited.  We cautiously talked about this baby to be.  We walked for hours in the rain and talked mostly about names.  Randy seemed open to other names for boys besides Emmett Randolph and I kept pressing for Graham.

“What’s wrong with having a fourth?”
“He’ll get beat up on the playground if we live in Seattle.”
“Well, if his name is Graham, kids will call him Graham cracker.”
“Kids tease.  If that is the worst they can come up with, we are fine.  Graham crackers are good – everyone loves graham crackers!”

And so on.  The discussion continued.  As with most things, it looked like I was definitely going to get my way.  I think Randy held out some degree of hope that I would suddenly change my mind.  Then I went into labor and all decisions which had not been firmly made, became made in a hurry.  By me.  Could you argue with a woman in labor?  And so, Graham it was.  Graham Emmett to be exact.  I love his name.  I love the sound of it and I love the way it looks in print.  I love that it is not a common name in the U.S. but that everyone has heard it and knows how to pronounce it.  I love that it does not really have a nickname except for the loving family ones we have created (Graham’y, Graham-Graham).  I love that for a while he was introducing himself as Graham Cracker.  Because I do so love Graham crackers.

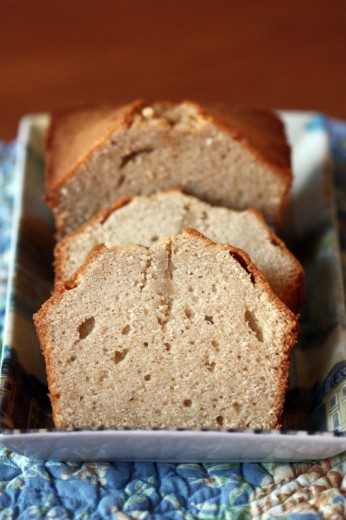
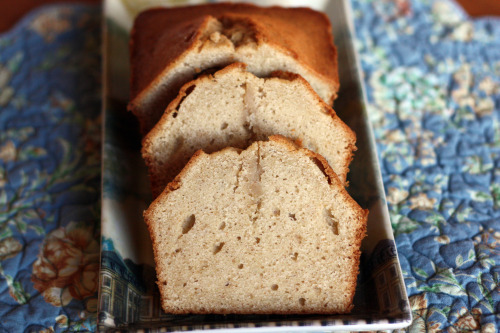
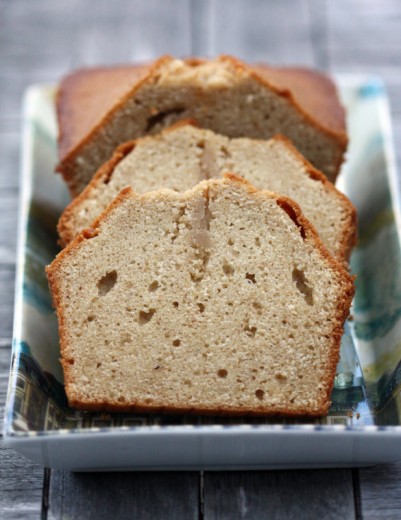
See this pound cake?  It’s a Graham Cracker Pound Cake.  It is proof that graham crackers make everything better.  Graham, true to his name, is fond of bring them to school in his lunch box and every time I open a sleeve to do so, I end up having to talk myself out of eating the remaining ones.  Tell me I am not the only one with this challenge.  One of my earliest food memories was getting graham crackers as a snack in preschool and breaking mine into lots of little pieces so that it would last longer.  Considering I was four at the time, possibly even three, and I still remember this – well, it might shed some light on how much I love graham crackers and why I might possibly write about food.  Clearly.

Anyway, cake.  After reading Hilary’s post about her pound cake smackdown I had a sudden and overwhelming need for a pound cake in my life.  Pound cake doesn’t excite me the way that chocolate does but there is a time and a place for something perfect, simple, and buttery and when you are in that place and the time comes, I recommend making this cake.  (No slight meant to Hilary who made two beauties.)  Normally, I would mascerte some strawberries to serve alongside or make a caramel or chocolate sauce to, you know, dress it up a little.  No need here.  The graham crackers provide just the perfect very subtle crunch and a little more caramel flavor.  Nothing earth shattering, just taking something very good and making it great.

By the way, I have a terrific pumpkin bread recipe on offer over at Amazon Fresh!  Check it out here.

One Year Ago: Almond Praline Scones
Two Years Ago: White Beans with Tomato and Sage

Graham Cracker Pound Cake
Food and Wine
Makes one 8-by-4 inch cake

I always double cakes like this because they freeze beautifully.  Just wrap the cake well in plastic wrap and then foil.  If you have non-stick loaf pans, you can use the butter wrappers to grease them instead of the spray.

Vegetable oil spray
1½ sticks unsalted butter, softened
½ cup granulated sugar
¼ cup dark brown sugar
1½ cups cake flour
½ cup finely ground graham crackers, from half a sleeve
¾ tsp. baking powder
¼ tsp. salt
3 tbsp. whole milk
2 tbsp. heavy cream
3 large eggs
1 tbsp. vanilla extract

Preheat oven to 325°F.  Spray an 8-by-4-inch loaf pan with vegetable oil spray.  In a large bowl, using an electric mixer, cream the butter with the granulated sugar and dark brown sugar.  In a medium bowl, whisk the cake flour with the graham cracker crumbs, baking powder, and salt.  In a small bowl, whisk together the whole milk, cream, eggs, and vanilla.  Beating at medium speed, add the dry and liquid ingredients to the butter mixture in 3 alternating batches.

Scrape the batter into the prepared loaf pan and bake in the lower third of the oven for about 55 minutes, until a toothpick inserted in the center comes out with a few moist crumbs attached.  Let cool in the pan for 15 minutes, then turn the pound cake out onto a rack to cool completely.  The pound cake can be kept at room temperature in an airtight container for 3 days.


Homecoming Soup

October 11, 2010

My husband Randy has traveled for work ever since I have known him.  When we first met, his trips were few and far between and I was grateful for that.  When we moved to London, work trips were much more common which I was also grateful for because I got to go along to places like Paris, Tallinn, Stockholm, Amsterdam, Brussels, and Tel Aviv.  These days he is traveling more than ever before and I’m not grateful at all.  Just in the last six months he has gone to New York 5 times, Dallas, Atlanta, London and Dublin, San Francisco 3 times, Cannes and Paris, Chicago, Cincinnati, and D.C.   Over the summer, he traveled for 9 weeks in a row.

Having him gone is hard on our family.  The boys don’t understand why Daddy is on an airplane again.  Running the household and caring for the boys falls squarely on my shoulders.  I miss him when he is gone.  I try to keep busy with friends and family but it does get lonely.  The travel is hard on him too.  I think in the very beginning it seemed exciting to him.  Going to interesting cities, meeting interesting people, sleeping in a different hotel room each time – 10 years ago that was all cool.  Now it’s a lot of jet lag, sleepless nights in strange beds, delays in airports, and unhealthy food.

Randy is lucky in that he is going to dynamic cities with terrific restaurants.  But the fact remains that eating out all the time is not very healthy.  Just as I crave steamed broccoli and salad whenever I come home from vacation, Randy craves my food.  Clean, healthy, low in fat, and seasonal.  I am always happy to cook for him but never more so than when we are reunited after a long trip.  I usually don’t put that much effort into cooking when he is gone and I am happy to get back to the dinners we enjoy together and the time spent in front of the stove.

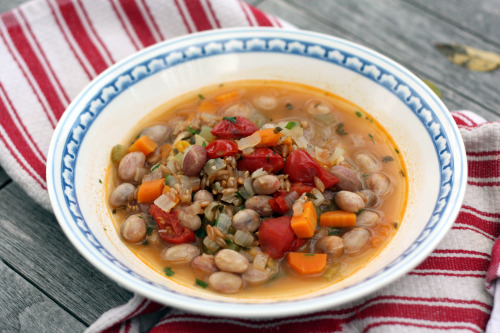
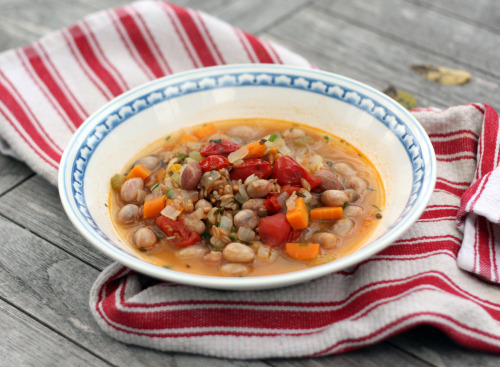
I came up with this soup after a trip the farmers market revealed that we are once again in fresh bean season.  I treasure this very fleeting time in the produce world.  There are several farmers that have beans in their pods at their stalls, but my very favorite one sells boxes of fresh beans already shelled.  What are they?  These are the beans that most of the year we all buy dried – or even canned.  Here they are fresh.  Actually, the ones that I like best, the cranberry bean, is very hard to find dried and basically impossible to find canned.  The fresh ones still need to be cooked, but there is not pre-soak required and they cook up in about 20 minutes instead of the 1-2 hours required by most dried beans.

In addition to the convenience and less time on the stove, the flavor and texture is unlike any dried bean you will ever encounter.  They are incredibly plump with a delectable creaminess and a subtle earthy flavor.  I often find beans to just be starchy but that word doesn’t even come to mind with the fresh beauties.  We only have them in our markets for a month or so, but each year I buy a lot of them and store them in my freezer.  They can be added to things like soup or stew without even being thawed which makes them incredibly useful.  If you aren’t able to get your hands on some of these beauties, feel free to your favorite canned or dried bean for this simple, rustic, and hearty homecoming soup.

One Year Ago:  Pasta with Tomato Sauce and Arugula
Two Years Ago:  Quick Olive and Cheese Bread

Cranberry Bean Soup with Farro and Fresh Tomatoes
Dana Treat Original
Serves 4

If you are going to use dried beans, I would cook them first and add them as directed in the recipe below.  If you are going to use canned beans, I would add them about 10 minutes before you are going to serve the soup so they don’t get too mushy.  A cannelini or other white bean would make a fine substitute.  I like my soup very thick but if you like yours brothier, add another cup or so of water.

Olive oil
1 onion, diced
2 garlic cloves, minced
2 medium carrots, cut in half lengthwise and sliced
1 large celery stalk, diced
12 fresh sage leaves, chopped
1 tbsp. fresh thyme leaves
½ tsp. smoked paprika
½ pint of cherry tomates, halved if large
1 bay leaf
1 cup farro
10 ounces fresh cranberry beans
5 cups water
Kosher salt and freshly ground black pepper
¼ cup chopped parsley

Place a large soup pot over medium heat.  Add just enough olive oil to coat the bottom of the pan, then add the onions and a large pinch of salt.  Sauté until slightly softened, about 5 minutes, then add the garlic, carrots, and celery.  Sauté for about 6 minutes, until the carrots have lost their crunch, then sprinkle in the sage, thyme, and smoked paprika.  Stir for two minutes, then stir in the tomatoes.  Add the farro and cranberry beans.  Give it a good stir, then pour in the water.  Add another pinch of salt, a few grinds of pepper, and the bay leaf and turn up the heat to high until the mixture boils.

Turn the heat down to a simmer and cook, uncovered, until the beans are soft and the farro is cooked through but still retains a bite, about 20 minutes.  Stir in the parsley.  Taste for seasoning and add more salt and pepper to taste.


« Older Posts Newer Posts »